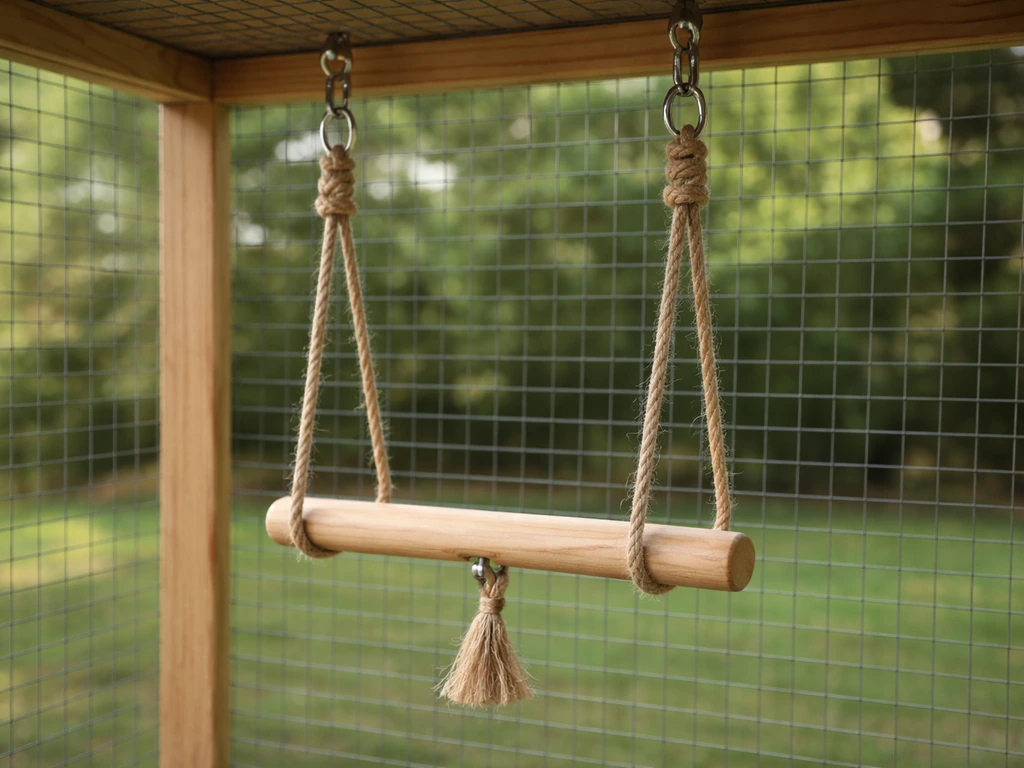
You can make a safe, functional bird swing in about 20 to 30 minutes using a wooden dowel or natural branch, some cotton rope, and a couple of quick-links or S-hooks. The basic formula is simple: tie rope through or around each end of a perch, join the two ropes at the top, and hang the whole thing from a cage bar or overhead hook. The details, though, are what keep your bird comfortable and safe, so let me walk you through the whole process from picking the right design to getting your bird to actually use the thing.
How to Make a Bird Swing: DIY Steps, Sizing, and Safety

Marcus Thornton
17 May 2026
When and where a bird swing makes sense
A swing is one of the best enrichment additions you can give a caged or aviary bird. It provides gentle motion, a new perching surface, and a spot that feels distinctly different from the rest of the cage, which matters a lot for mental stimulation. That said, it is not the right fit for every setup or every bird.
Swings work best in cages and aviaries where there is enough vertical and horizontal clearance for the swing to move without the bird hitting cage walls, feeders, or other perches. A good rule of thumb: the swing should be able to arc forward and back at least 3 to 4 inches on each side without touching anything. If your cage is too cramped for that, a stationary bench or a corner perch will serve your bird better.
Swings are appropriate for most common pet bird species, including budgies, cockatiels, conures, lovebirds, small parrots, and even larger parrots in a roomy cage or aviary. Because this bird-swing guidance can intersect with dog-training material, it is best to rely on bird-specific veterinary sources rather than Best Friends’ dog training manual blank" rel="noopener noreferrer">Swings are appropriate for most common pet bird species, including budgies, cockatiels, conures. They also work well mounted to freestanding play stands. What you want to avoid is putting a swing in a cage that is too small to allow safe movement, or placing one so high that a fall could injure your bird.
Choosing the right design and size for your bird
The most important dimension to get right is the perch diameter. A perch that is too thin or too thick forces the bird's toes into an uncomfortable grip, which over time causes foot problems. The general guideline is that when your bird grips the perch, its front toes should wrap about two-thirds of the way around, leaving a small gap rather than fully encircling the dowel.
| Bird size / species | Recommended perch diameter | Swing perch length | Rope/suspension length |
|---|---|---|---|
| Small (budgie, parrotlet, canary, finch) | 3/8 inch to 1/2 inch (10–13 mm) | 4 to 6 inches | 4 to 6 inches each side |
| Medium-small (lovebird, small conure, cockatiel) | 1/2 inch to 3/4 inch (13–19 mm) | 6 to 8 inches | 5 to 7 inches each side |
| Medium (green cheek conure, caique, ringneck) | 3/4 inch to 1 inch (19–25 mm) | 8 to 10 inches | 6 to 8 inches each side |
| Large (African grey, Amazon, eclectus, large conure) | 1 inch to 1.5 inches (25–38 mm) | 10 to 14 inches | 8 to 12 inches each side |
| Extra-large (macaw, cockatoo) | 1.5 to 2 inches (38–50 mm) | 14 to 18 inches | 10 to 14 inches each side |
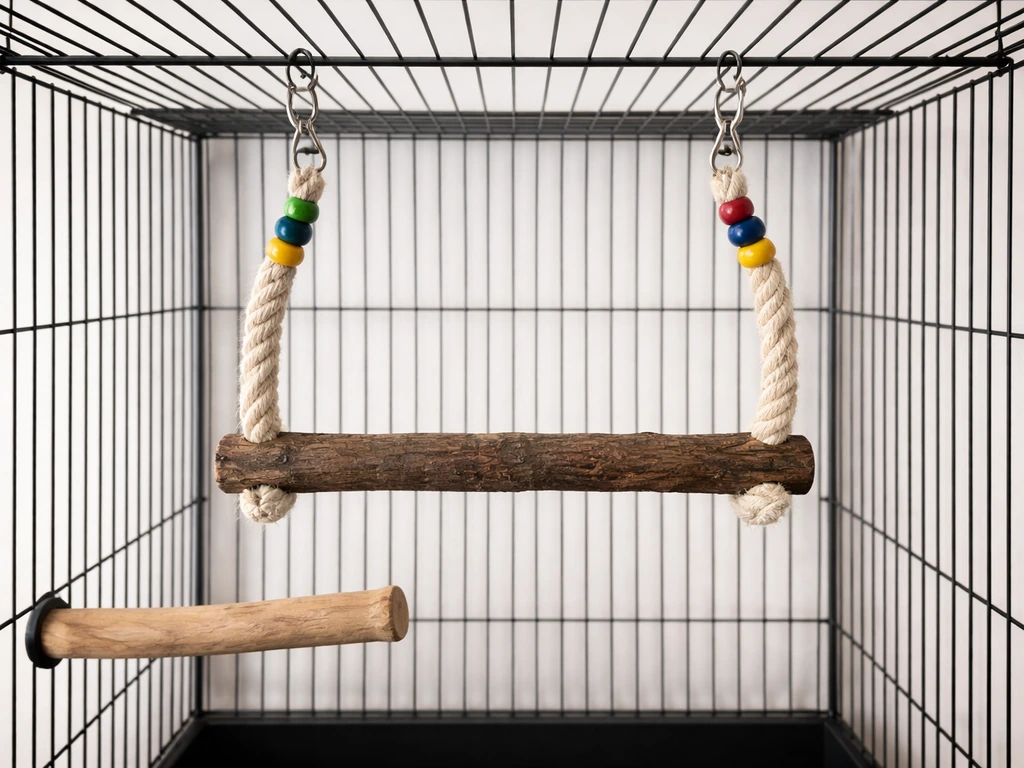
The simplest design for beginners is the single-perch swing: one horizontal dowel or branch suspended by two equal-length ropes or cords that meet at a central hanging point above. This is stable, easy to build, and easy to clean. A more advanced version adds a second perch below the first, creating a ladder-style swing, or incorporates wooden beads and natural fiber knots for extra stimulation. Start with the single-perch version and upgrade from there once you see how your bird interacts with it.
Materials you will need
Keep the materials list short and bird-safe. Birds chew on everything they touch, and many common hardware-store materials are genuinely toxic to them. Here is what works well and why.
Safe perch materials
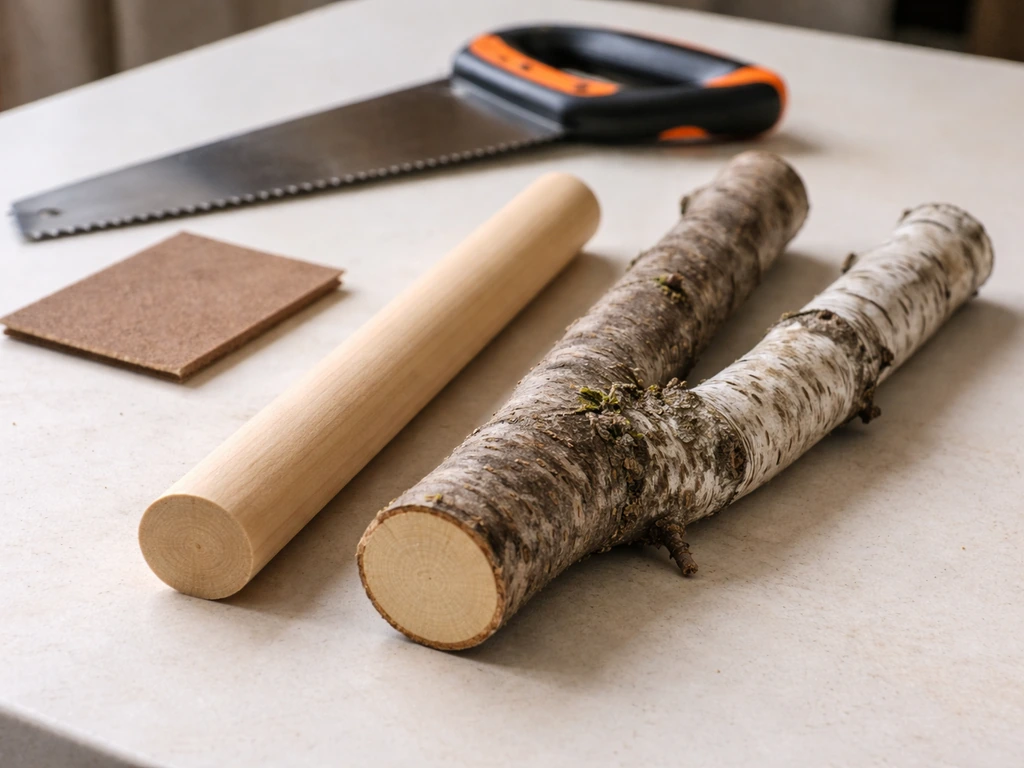
- Untreated wooden dowel (birch, beech, or poplar): widely available, easy to cut, and safe if unfinished and uncoated.
- Natural branch from a safe wood species: apple, willow, birch, manzanita, and eucalyptus are all good choices. Scrub with plain water, let it dry completely, and optionally bake at 250°F (120°C) for 30 minutes to kill surface bacteria before use.
- Java wood or dragonwood perch pieces: sold at most pet stores, already bird-safe, and naturally textured which is great for feet.
- Avoid: pine (resinous and can contain aromatic compounds), cedar, plywood or MDF (adhesives and chemicals), and any wood painted, stained, or treated with preservatives.
Safe rope and cord materials
- 100% cotton rope (unbleached, undyed): the most commonly recommended option for small to medium birds. It is soft on feet, easy to knot, and widely available.
- Natural sisal rope: slightly rougher texture, good for larger birds that need grip. Make sure it is undyed.
- Natural jute twine: suitable for small birds and good for decorative knots.
- Heavy natural-fiber nautical rope: excellent for larger birds and aviary setups where you need durability.
- Avoid: nylon rope or cord (does not fray cleanly and strands are very fine and entangling), synthetic twine, fishing line, wire, and any dyed or treated cord where the dye source is unknown.
Hardware and tools
- Quick-link connectors (stainless steel or nickel-plated): these screw shut and are far more secure than open S-hooks for the main hanging point.
- Stainless steel S-hooks (if budget is a concern): acceptable for lighter swings if you crimp or close the hook tightly with pliers so it cannot open.
- Small eye screws or cup hooks (for wooden play stands): pre-drill a pilot hole slightly smaller than the screw diameter to avoid splitting the wood.
- Drill with a bit matching your rope diameter plus 1/16 inch clearance (for drilling holes through dowel ends).
- Hand saw or miter box (for cutting dowel to length).
- Sandpaper, 80-grit and 120-grit, to smooth all cut ends.
- Scissors or a sharp knife for trimming rope ends.
- Lighter or candle (optional, only for sealing the ends of cotton rope to prevent unraveling at cut points, used briefly and carefully).
Step-by-step build instructions
These instructions cover the standard single-perch swing. Once you have made one, the process becomes fast enough that you can build a replacement in under 15 minutes, which matters because birds will chew the rope and you will be making new ones regularly. Think of it as planned maintenance rather than a failure.
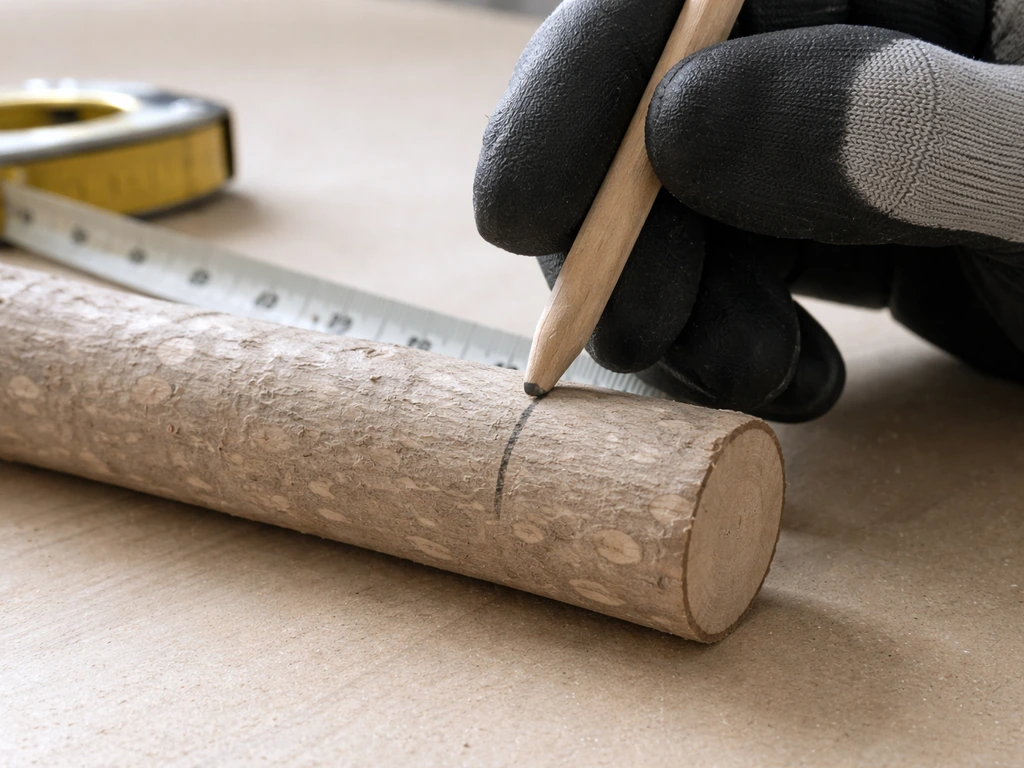
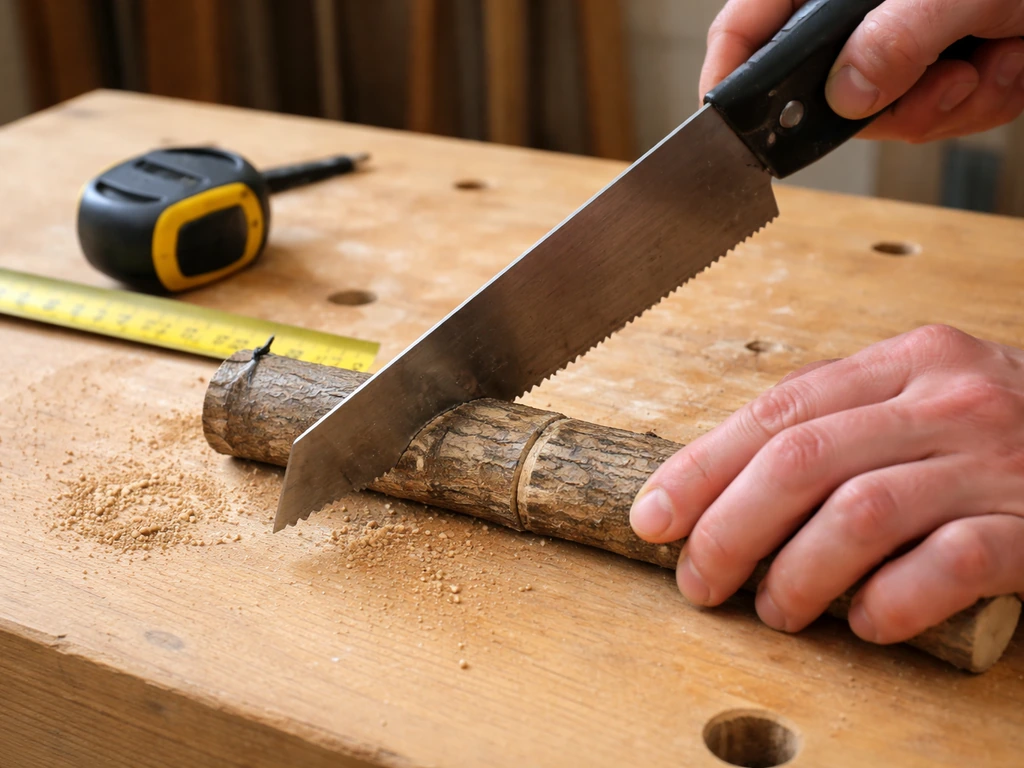
- Cut your perch to length. Use a hand saw or miter box to cut the dowel or branch to your target length from the sizing table above. Cut it square (not at an angle) so it hangs level.
- Sand all cut ends. Start with 80-grit to knock off any splinters, then finish with 120-grit until the ends are smooth to the touch. Run a finger across every edge. If it snags your skin even slightly, sand more. Sharp edges can injure toes and feet.
- Drill a hole through each end of the perch. Position each hole about 1/2 inch to 3/4 inch in from the end. Drill straight through the diameter of the perch so the rope will pass cleanly through. The hole diameter should be just large enough for a doubled-over strand of your rope to pass through with a little resistance.
- Cut two equal lengths of rope. For a standard cage swing, cut each piece to your target suspension length (from the sizing table) plus an extra 6 inches for knots. Equal length is important or the swing will hang at an angle.
- Thread rope through the perch holes and tie a stopper knot. Pass one end of each rope piece through its respective perch hole from the bottom. Tie an overhand knot (or a figure-eight knot for extra bulk) on the underside of the perch so the rope cannot pull back through the hole. Give it a firm tug to make sure it holds.
- Bring the two rope ends together above the perch and join them. Hold the perch level and let the ropes hang upward. Tie both rope ends together with an overhand knot at the same height so the perch hangs flat. Leave about 1 to 2 inches of rope above this knot as a tail for attaching hardware.
- Attach a quick-link or S-hook through the loop or knot at the top. Thread the quick-link through the rope above the joining knot. This is your hanging attachment point.
- Trim any excess rope ends and optionally seal them. Cut tails to about 1/2 inch. If you want to prevent early unraveling at the cut point, briefly touch the cut end of cotton rope to a flame for one second, just enough to fuse the outermost fibers. Do not let the rope catch fire or char significantly. Allow it to cool before letting your bird near it.
- Inspect the finished swing. Check that both holes are smooth, both knots are snug and symmetrical, and the quick-link screws closed completely. Shake the swing firmly to test that nothing moves unexpectedly.
If you want to add wooden beads, small natural-fiber knots, or additional perch elements, thread them onto the rope before tying the final knots above the perch. Just make sure any beads are large enough that your bird cannot swallow them whole, and that they are made from untreated wood or food-safe materials.
How to mount and secure the swing
How you hang the swing matters as much as how you build it. A poorly secured swing that shifts, spins unpredictably, or drops is a real injury risk.
In a cage
Most wire cages have horizontal bars at the top or along the top third of the cage. Hook your quick-link directly through one of these bars and screw it closed. If the quick-link sits on a horizontal bar and can slide side to side, position it against a vertical bar intersection to lock it in place. Avoid hooking the swing to cage door latches, feeder ports, or any part of the cage that opens or moves. If your cage has a hanging hook or ring at the top center, that is the cleanest attachment point and gives the swing room to move in all directions.
On a freestanding play stand
For a wooden play stand, use an eye screw rated for at least 3 to 4 times the expected load. Pre-drill a pilot hole slightly narrower than the screw's thread diameter, then hand-turn the eye screw until it is fully seated and tight. Do not over-drive it with a tool or you risk splitting the wood. Hook the swing's quick-link through the eye screw ring. For metal or PVC play stands, check the manufacturer's hanging points, many have built-in hooks or drilled holes for exactly this purpose.
In an aviary or outdoor enclosure
In a larger aviary, you can suspend a swing from the ceiling frame using a stainless steel chain and a quick-link at each end. Use at least 18-gauge chain for smaller birds and heavier chain (10 to 14 gauge) for medium or large birds. Keep the chain length short enough that the swing perch is at least 8 to 10 inches below any cage top or overhead structure, giving the bird room to land without hitting its head. Avoid placing swings near aviary walls where a bird could be pinned against the mesh while the swing moves.
Where to put the swing and how to get your bird to use it
Position the swing in the upper third of the cage, but not so high that the bird cannot comfortably step off the swing onto a fixed perch. A bird that feels trapped on a moving surface will panic rather than enjoy it. Make sure the swing hangs at least 2 to 3 inches away from cage walls and other perches so it can move freely.
Orientation matters too. If you have a rectangular cage, hang the swing so it swings along the longer axis of the cage. This gives it more room to arc and feels less confining to the bird.
Many birds, especially those that have never encountered a swing before, will be cautious at first. Do not force your bird onto the swing. Instead, try placing a favorite treat (a small piece of millet, a nut sliver, or a piece of fruit your bird loves) directly on the perch of the swing and let the bird discover it on its own. Most birds will approach it within a day or two once they see it is a stable thing that holds their weight. If your bird is still ignoring it after a week, try moving the swing to a different height or a different position in the cage.
If you enjoy building a range of enrichment structures, a swing pairs really well with other hanging and platform-style additions. If you want more than a single swing, use these same principles to design a complete bird playground with multiple safe perches and hanging toys how to make a bird playground. If you want to add another cozy option, you can learn how to make a bird hammock too.
If you want to expand beyond a swing, learning how to make a bird bench is another great way to add comfortable perching space enrichment structures. A bird bench at a lower height, a hammock in a sheltered corner, or a full playground structure outside the cage can all complement the swing by giving your bird a varied, interesting environment rather than a single novelty item.
Keeping it safe: maintenance, inspection, and troubleshooting
Birds will chew on rope, and that is fine right up until the point where it becomes a hazard. The risk is not the chewing itself but the loose strands it creates. blank" rel="noopener noreferrer">Unraveled rope strands can wrap around toes, cut off circulation, and cause serious injury before you even notice anything is wrong. Check the rope at least twice a week, more often for active chewers.
Clip back any fraying with scissors as soon as you see it. A few loose fibers can be trimmed quickly and the swing is fine to leave in place. If the rope has unraveled significantly, that is a fraying at the stopper knot or along a long section of rope, remove the swing immediately and replace the rope. It takes about five minutes and costs almost nothing, so do not wait.
When trimming frays, the goal is to cut the fiber back to a point where only compact, tightly-bound rope remains. Cotton rope that has been cleanly trimmed tends to produce a compact end rather than a bundle of thin threads, which is exactly what you want. Thin, floss-like fibers are the dangerous ones because they are long enough to wrap multiple times around a toe.
Regular inspection checklist
- Check all rope segments for fraying, thinning, or significant chew damage.
- Check both stopper knots below the perch to confirm they are still tight and have not loosened from use.
- Check the joining knot above the perch for the same.
- Check the quick-link or S-hook to make sure it is still closed and has not worked loose from the cage bar.
- Check the perch surface for splinters, cracks, or rough spots that may have developed from chewing.
- Check that the swing still moves freely without catching on cage walls or other perches (the cage layout may have changed if you moved things around).
- For play stand swings, check that the eye screw has not loosened in the wood.
Common problems and fixes
| Problem | Likely cause | Fix |
|---|---|---|
| Swing hangs at an angle | Ropes are unequal lengths or one knot is lower than the other | Re-tie the joining knot above the perch with both rope ends at the same height |
| Swing spins instead of swinging | Hanging point allows free rotation | Use a quick-link clipped to a cage bar intersection rather than a single bar; or add a short chain above the swing to reduce spin |
| Perch feels wobbly on the rope | Stopper knot has slipped or rope hole is too large | Re-tie stopper knot with a thicker knot (figure-eight or double overhand); use a wider rope if the hole is too large |
| Bird won't use it | Unfamiliar object, wrong height, or too much swing motion | Place treats on the perch, adjust height, or temporarily wedge the swing against a fixed perch to reduce motion until the bird gets comfortable |
| Rope smells bad or looks discolored | Droppings, food debris, or moisture buildup | Soak rope in plain warm water, let it dry fully before returning, or replace the rope if buildup is significant |
| Quick-link keeps opening | Wrong size or style for the load | Upgrade to a larger, rated stainless steel quick-link and make sure the gate is fully screwed closed after installation |
One last thing worth saying: even a well-built swing has a lifespan. Plan on replacing the rope every few months for active chewers, and inspect the perch itself for deep cracks or splinters every time you do a rope replacement. Building a second swing while the first is still good means you always have a clean replacement ready to swap in without leaving your bird without enrichment while you build. Once you have made one, the second one takes about ten minutes. Go make it.
FAQ
What rope should I use for a bird swing if my bird is a heavy chewer?
Stick with cotton rope as the baseline, but if your bird is especially determined, plan for more frequent rope swaps (for many birds this means every few months, sometimes sooner). Choose thicker rope over thin, floss-like strands, and inspect the stopper knot and any area near the perch ends first, because unraveled fibers there are the most likely to wrap around toes.
How do I know the perch diameter is right for my bird?
After your bird grips it, look for a partial wrap rather than a full encirclement. If the front toes close completely around the dowel, the grip is likely too tight and can stress foot joints over time. If the toes barely touch or the bird has to crawl its grip, the perch is too large, and switching to a slightly thinner dowel usually fixes it.
Can I hang the swing from a cage door or feeder port if there is a convenient spot?
Avoid it. Door latches, feeder ports, and any part that shifts when opened can change tension or alignment suddenly, which can lead to pinching or dropping. Use only fixed, non-moving structure like a top horizontal bar, a top-center hanging ring, or a properly installed eye screw on a stand.
What is the safest rope length, and how high should I hang the swing?
Aim for the upper third of the cage, but keep the perch at least about 8 to 10 inches below any cage top or overhead structure (especially in aviaries) so a bird cannot strike their head when landing. Also ensure the bird can step off onto a stable perch without jumping or falling, and keep the swing a couple inches away from walls and other perches to prevent trapping.
My swing spins or twists instead of moving back and forth, what should I check?
Check the top connection points and ensure the two rope lengths are truly equal. If one side is longer, the swing will twist and can hit cage elements. Also confirm the quick-link is oriented so it cannot slide along a bar, if your attachment point is a horizontal bar that allows side-to-side movement.
How much clearance do I need so the swing does not hit other cage items?
Use the arc test described in the sizing guidance, then add a safety buffer. If you can, simulate motion by gently nudging the perch and confirming the bird could swing forward and back at least 3 to 4 inches on each side without contacting feeders, walls, or nearby perches. If anything is even close at full swing, lower or reposition it rather than waiting for a collision.
Can I add wooden beads or knots, and what should I watch out for?
Yes, but limit bead size so your bird cannot swallow them whole, and use untreated wood or food-safe materials. Thread beads and any natural-fiber knots onto the rope before you tie the final knots, then check that nothing creates tight loops or dangling pieces where toes could get caught if the rope frays.
How do I introduce the swing if my bird is scared of it?
Do not place the bird on it directly. Put a favorite treat on the swing perch (like millet or a small fruit piece), and let the bird decide at their own pace. If it is still ignored after about a week, adjust height or relocate the swing within the cage, since some birds prefer slightly lower or more open areas for safety.
How often should I inspect and replace the rope?
At minimum, check the rope at least twice a week, and more often if your bird chews actively. Trim small frays promptly when the rope still looks tightly bound, but remove the swing immediately and replace the rope if there is significant unraveling near the stopper knot or along long sections. Also plan routine replacement every few months for active chewers.
Is a ladder-style or multi-perch swing safe to build right away?
Start with the single-perch swing first. A ladder design can be fine later, but the main extra risk is that additional elements can reduce clearance or create pinch points near the perch ends. Once you upgrade, re-check wall and feeder clearance during the full arc, and confirm the bird can dismount safely onto a fixed perch without slipping.
Next Articles

How to Build a Chimney Swift Bird House DIY Guide
Step-by-step DIY plans to build a chimney swift bird house, with correct dimensions, placement, and weatherproofing for

How to Build an Oriole Bird House: Step-by-Step DIY
Step-by-step DIY for building an oriole bird house with right dimensions, weatherproofing, predator-safe placement, and

How to Build a Chickadee Bird House Step by Step
Step-by-step DIY chickadee bird house with cut list, chickadee entry sizing, ventilation, drainage, and mounting tips.