You can make a working wooden bird whistle in an afternoon with a small wood blank, a drill, a chisel, and some sandpaper. The core trick is cutting a narrow windway (a flat channel) that aims a thin ribbon of air at a sharp blade edge, that's what makes the whistle actually speak. Get that geometry right and you'll have a reliable little instrument that produces a clear, bird-like tone. Miss it and you'll get a lot of frustrated blowing with no sound. This guide walks you through the whole process, from picking your wood to troubleshooting a stubborn whistle that won't sing.
How to Make a Wooden Bird Whistle Step by Step

Marcus Thornton
28 Apr 2026
What a wooden bird whistle actually is (and what it isn't)
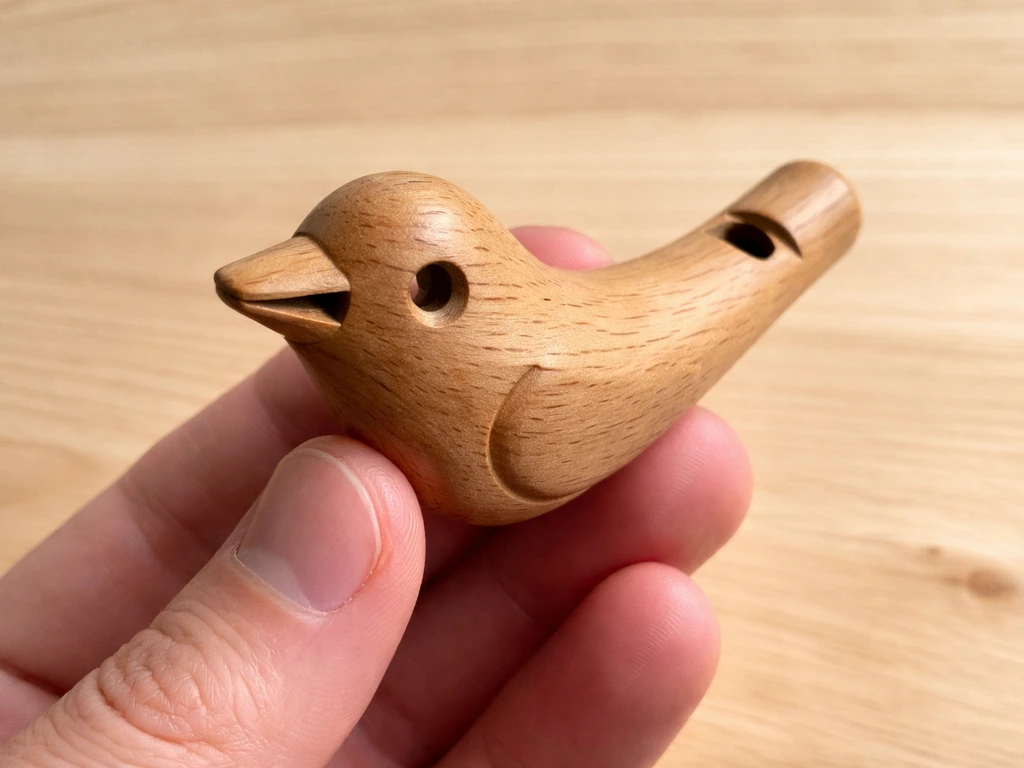
A wooden bird whistle is a small handheld duct whistle, sometimes called a fipple flute or penny-whistle style instrument, that you blow into to produce a high, bird-like tone. The sound comes from a very specific mechanism: a narrow air channel (the windway) directs a flat ribbon of air against a sharp edge (the blade or lip), which splits the airstream and sets up a self-sustaining oscillation inside the tube. A fipple is a ducted or constricted mouthpiece found on end-blown flute-type instruments like recorders and tin whistles, where the windway directs airflow toward an edge-bounded opening or window a narrow air channel (the windway) directs a flat ribbon of air against a sharp edge (the blade or lip). That's it. That edge-splitting action is the whole trick, and everything in this build is aimed at creating it reliably.
What it isn't: a birdhouse, a nest box, or any kind of habitat structure. It also isn't a guaranteed bird-attracting device in a scientific sense. A wooden bird whistle is primarily a sound-making tool, it can mimic the general tone of small birds, and some people use similar calls to pique a bird's curiosity or locate birds in the field. But it's not a trained lure and not a replacement for learning actual bird calls. If you want to attract specific species to your yard, putting up the right birdhouse or nesting box is a far more reliable approach. The whistle is a fun, craft-forward project that makes genuinely bird-like sounds, and that's a completely worthwhile reason to build one.
One more thing worth mentioning: using recorded or artificial bird calls to attract birds during breeding season is regulated in some regions, particularly for protected species. A handmade wooden whistle used casually in a backyard is generally fine, but if you're near a wildlife area or planning to use calls for hunting or trapping purposes, check your local regulations first. For the vast majority of backyard birders and crafters reading this, you have nothing to worry about.
Materials and tools: what you actually need

The good news is you don't need a full woodworking shop for a basic bird whistle. A beginner single-note whistle can be made with hand tools alone. Here's what to gather before you start.
Choosing your wood
Wood choice matters more here than it does for, say, a birdhouse. You need something stable, close-grained, and smooth enough to cut clean edges. Soft, open-grained woods like pine can work in a pinch, but they're prone to tear-out when you're cutting fine windway geometry, and they absorb moisture unevenly outdoors.
Historically, boxwood was the gold standard for early woodwind makers, it's incredibly dense and takes sharp edges beautifully. Maple is a great modern beginner choice: it's widely available, machines cleanly, holds detail well, and is stable. Cherry and pear are also excellent. If you want to use a repurposed piece, hardwood dowels (maple or birch), furniture offcuts, or old tool handles can all work well. Aim for stock that's been indoors and is close to equilibrium moisture content, around 8% is ideal for indoor-seasoned hardwood. Wet or freshly cut wood will warp and crack as it dries, and your carefully tuned windway will shift with it.
Stock dimensions

For a simple beginner whistle, start with a blank roughly 15 cm (6 inches) long and around 12–15 mm (about 1/2 inch) in diameter. A round hardwood dowel works perfectly. If you're using square stock, you'll shape it into a round or rectangular tube, either works. The internal bore for a small bird whistle is typically around 8–10 mm in diameter, which gives a nice high pitch in the bird-call range.
Tools checklist
- Drill with a long bit matching your bore size (8–10 mm), plus a small bit (2–3 mm) for the windway
- Sharp chisel or craft knife for cutting the windway flat and the tone window
- Small flat file or sandpaper (120 and 220 grit) for smoothing the blade edge
- Ruler and pencil for layout
- Clamps or a vise to hold the blank
- Wood glue (PVA works fine) for assembling the fipple block
- Optional: small block plane or spoke shave for shaping the mouthpiece
Safe finishes for a mouth-contact project
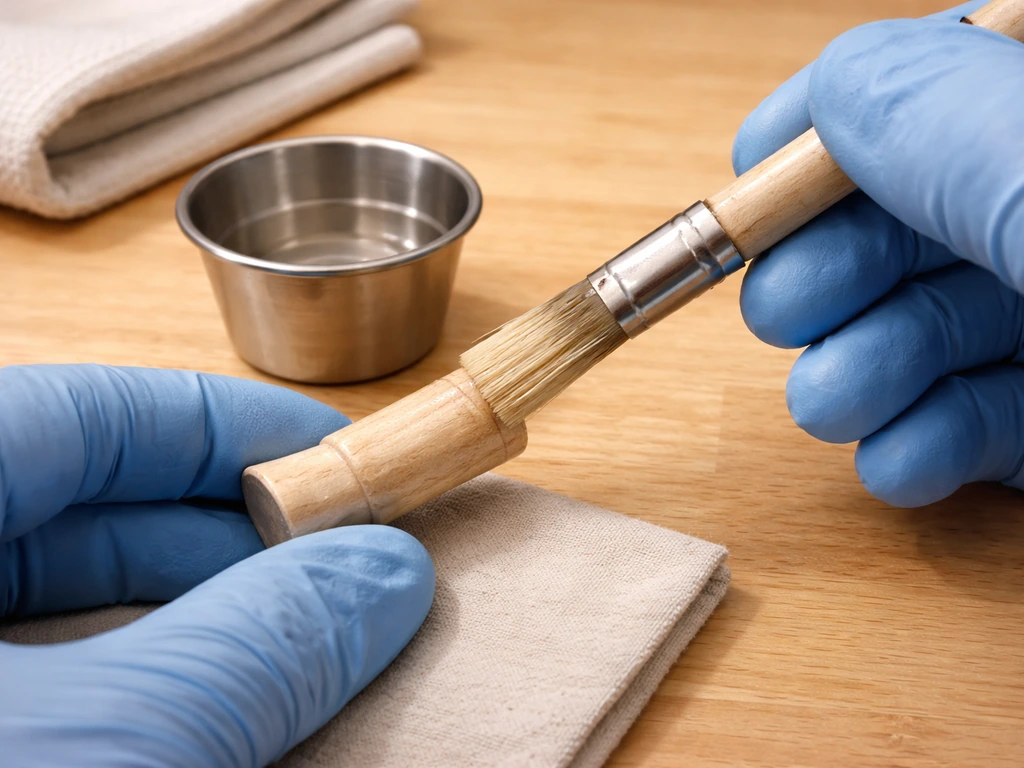
Because your lips touch the mouthpiece and you're blowing air through this thing, finish choice genuinely matters. Skip lacquers, shellac with denatured alcohol solvents, or any oil-based finish that isn't fully cured. The safest options are pure tung oil, raw linseed oil, walnut oil, beeswax, or food-grade mineral oil, all of these are non-toxic once fully absorbed or cured. The key word is 'cured': even a nominally safe finish can off-gas solvents while it's still wet. Let any oil finish soak in and cure for at least 48–72 hours in a ventilated space before putting the whistle near your mouth. Beeswax rubbed into the bore and mouthpiece is my personal favorite for a bird whistle, it seals the wood, conditions it against moisture, and requires zero waiting time.
Pick your design before you start cutting
There are two main paths here, and choosing one upfront saves you a lot of frustration. They produce very different results and suit different skill levels.
| Design | Skill Level | Tools Needed | Notes You Can Play | Build Time |
|---|---|---|---|---|
| Single-note fipple whistle | Beginner | Drill, chisel, sandpaper | 1 (plus overblown octave) | 1–2 hours |
| Multi-hole tuned whistle | Intermediate | Drill, chisel, files, tuner app | 6–8 (full scale) | Half day to full day |
If this is your first whistle, start with the single-note design. Getting the windway and blade edge speaking cleanly is the core skill, and you want to nail it on a simple build before adding the complexity of tuned tone holes. Once you can make a single-note whistle that speaks reliably every time you blow it, the multi-hole version is just adding more holes in measured positions, the foundational geometry is identical.
How to build it: layout, drilling, and cutting the windway
I'll walk through the single-note whistle here in full, then cover the multi-hole additions afterward. Follow these steps in order, the sequence matters because you want to verify sound before gluing anything permanently.
Step 1: Drill the bore
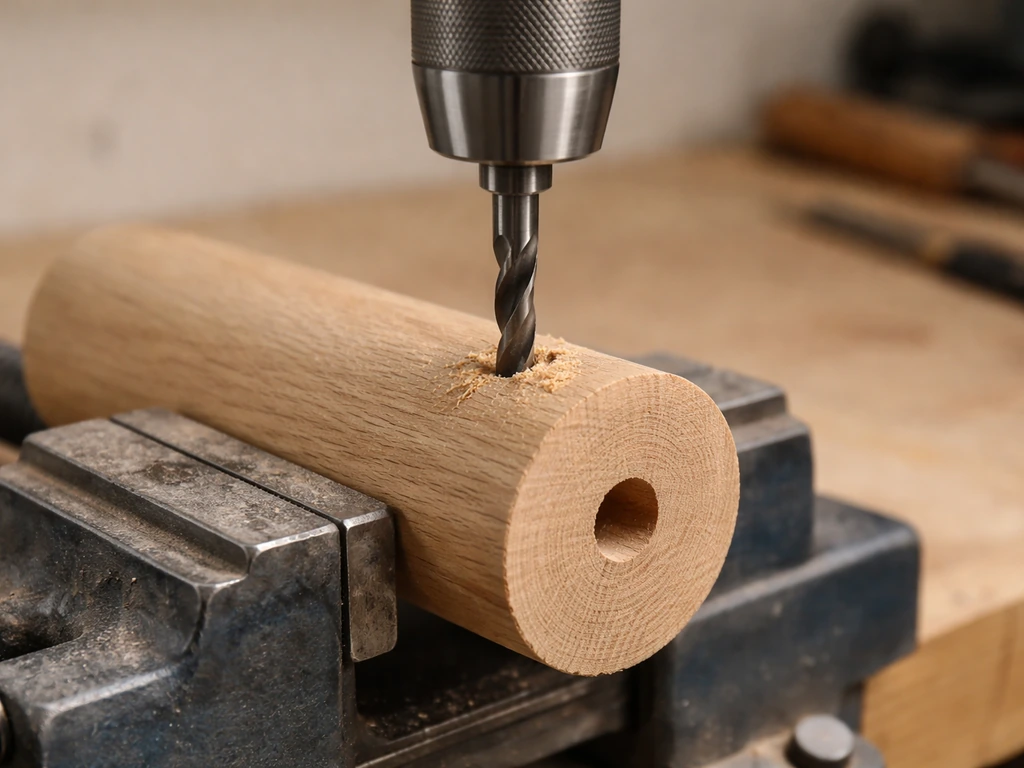
Start with your blank held firmly in a vise. Drill the main bore down the center of the blank from the bottom (bell) end, leaving about 10–12 mm undrilled at the mouthpiece end. For a 15 cm blank with an 8 mm bore, you're drilling roughly 11–12 cm deep. Go slow, clear chips often, and keep the drill aligned, a wobbly bore means a wobbly windway, and that kills your sound. A drill press makes this much easier, but a hand drill with a steady arm works fine.
Step 2: Cut the windway flat
About 10–15 mm back from the mouthpiece end, use a chisel or craft knife to cut a flat surface (a 'flat') into the top of the blank. This flat creates the windway, the narrow gap that will channel your air toward the blade. The flat should run from the very tip of the mouthpiece end toward the bore opening, creating a channel roughly 1.5–2 mm deep and the full width of the top surface. Keep it clean and consistent. A rough, uneven flat is one of the most common reasons a whistle won't speak.
Step 3: Cut the tone window
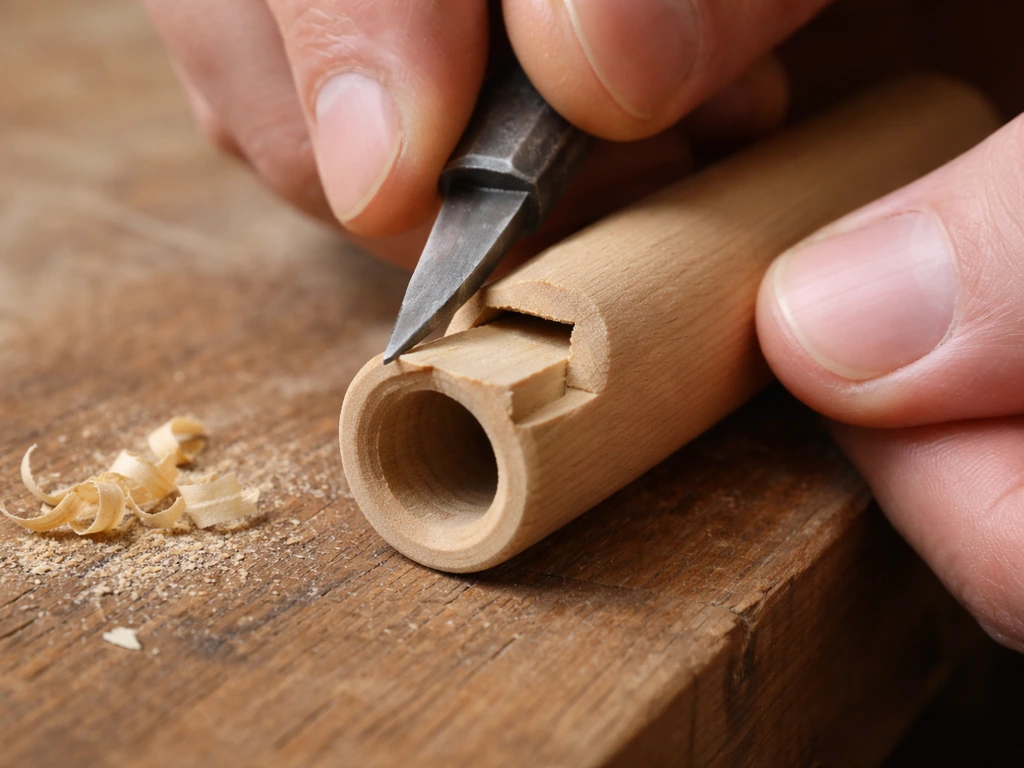
Where the windway meets the bore, you need to cut an opening called the tone window (or voicing window). This is a rectangular slot cut through the top wall of the tube, right at the point where the windway ends and the bore begins. A practical working size is around 8 mm long by 4 mm wide. The downstream edge of this window is your blade, the sharp edge the air ribbon splits against. Use a sharp chisel and take your time cutting this edge. It should be as crisp and clean as you can make it. Smooth it lightly with 220-grit sandpaper but don't round it over, a sharp blade edge is critical. The wall thickness at this point should be at least 3 mm (about 1/8 inch) to maintain structural integrity and resonance.
Step 4: Make and fit the fipple block
The fipple block is a small plug of wood that you insert into the bore at the mouthpiece end to define the windway height. Cut a short cylinder or rectangular plug from scrap wood, it should fit snugly into the bore opening at the mouthpiece end, filling the bore except for a thin gap at the top (your windway). The windway height is the gap between the top of the fipple block and the flat surface you cut in step 2. Aim for roughly 1–1.5 mm. Too tall and the sound is breathy and weak; too narrow and it's hard to blow and sounds thin or doesn't speak at all.
Here's the most important part of this whole build: do not glue the fipple block yet. Slide it in dry, blow gently into the mouthpiece, and listen. If the whistle speaks, even weakly, you're in the right zone. If it doesn't, slide the block forward or backward a few millimeters and try again. Moving the fipple block changes the relationship between the windway and the blade edge, which directly affects whether the whistle speaks and how loud or breathy it sounds. Keep adjusting until you get a clear, consistent tone with a comfortable amount of breath. Only then mark its position and glue it in place.
Step 5: Shape the mouthpiece
Once the fipple block is glued and set, shape the mouthpiece end to be comfortable on the lips. Round off the very tip slightly with sandpaper and chamfer any sharp corners. You're not trying to make it ornate, just smooth and comfortable enough that you can hold it to your lips for a few minutes without discomfort.
Adding tone holes for a multi-note whistle
If you're building the multi-hole version, add tone holes after the whistle is speaking cleanly as a single note. The positions are calculated from the voicing window. A useful layout rule of thumb: the distance from the center of the voicing window to the center of the first (top) tone hole should be approximately 10 times the internal bore diameter. So with an 8 mm bore, that's about 80 mm from the window center to the first hole. Space subsequent holes from there based on the pitch intervals you're targeting, using a chromatic tuner app to check each note as you drill. Start holes smaller than the final size (3 mm pilot holes), test the pitch, and enlarge gradually toward the target, you can always make a hole bigger, never smaller.
Finishing the whistle safely for outdoor use
Wood moves with moisture, and that's the enemy of a well-tuned whistle used outdoors. A dry day can cause tone holes to effectively enlarge slightly as the wood shrinks, raising pitch, wet days do the opposite. The best defense is sealing the wood so moisture changes happen slowly and evenly. For the bore and windway interior, use beeswax or food-grade mineral oil applied with a cotton swab or small brush. Work it into the grain and wipe out the excess. For the exterior, two light coats of pure tung oil rubbed in and buffed dry works beautifully. Let it cure fully, at least 48 hours per coat in a ventilated space, before use.
Avoid varnish, lacquer, or polyurethane on any mouth-contact surfaces, even if the label says 'non-toxic when dry.' The inside of the windway and bore should never be coated with anything film-forming, it changes the geometry. Stick to penetrating oils and waxes inside the instrument, and keep any exterior coatings away from the windway area and mouthpiece tip.
For long-term outdoor storage, keep the whistle in a small bag or case when not in use. A quick wipe of mineral oil on the bore every few months if you're using it outdoors regularly will keep the wood stable and prevent cracking.
Tuning and troubleshooting: when it doesn't sound right
Most whistle problems come down to the windway-to-blade relationship. Here are the most common failure modes and exactly how to fix them.
No sound at all
This almost always means the air ribbon isn't reaching the blade edge, or it's missing entirely. Check that your windway flat is actually creating a channel, hold the mouthpiece up to a light and look down the windway. You should see a thin gap opening onto the tone window. If the fipple block is sitting too deep or too shallow, the air stream isn't being aimed at the blade. Slide the block (if not glued) or carefully trim a tiny amount from one face if it is glued. Also check that the blade edge itself is sharp and clean, not rounded over or clogged with finish or wood dust.
Weak or breathy sound
A whistle that speaks but sounds airy and quiet usually has too much windway height, the air ribbon is too thick and diffuse to split cleanly at the blade. Try inserting a thin shim of card or wood under the fipple block to reduce the windway gap by 0.5 mm and re-test. Alternatively, the windway flat might be too rough, sand it smooth with 220 grit for a cleaner airstream.
Raspy, shrill, or harsh tone
A raspy or over-bright tone often means the windway height is too small, the blade edge is too thick, or turbulence is entering the windway. Check the windway flat for bumps or ridges, it needs to be as smooth and flat as possible. If the blade edge has any roughness or a double-angle, clean it up with a sharp chisel and a light pass of fine sandpaper. Moving the fipple block slightly away from the blade (increasing the distance the air travels before hitting the edge) can also smooth out a harsh tone.
Pitch is wrong or inconsistent
For a single-note whistle, pitch is controlled primarily by the length of the air column, shorter bore means higher pitch. If your note is too low, you can shorten the body slightly from the bell end. If it's too high, the bore may be too short. For multi-hole whistles, each note is controlled by the position and size of the highest uncovered tone hole, so work from the top hole downward when tuning. Enlarging a hole raises pitch; you can't reverse that, so drill conservatively and test often. Also remember that pitch will shift with ambient humidity outdoors, tune and test in conditions similar to where you'll use it.
Cracking or warping after the build
This is almost always a moisture issue in the wood blank. If you used wood that wasn't well-seasoned, it will continue moving as it dries. Prevention is better than cure here, seal the bore and exterior as described above, and don't leave the whistle in direct sun or near a heat source. Minor surface cracks can be stabilized with a thin application of CA (cyanoacrylate) glue wicked into the crack, but if the bore has cracked through, the whistle is unfortunately a write-off and a good lesson about starting with dry, stable stock.
Customization: more notes, better feel, and matching sets
Once you have a reliable single-note bird whistle, there are some fun directions to take it. These aren't necessary for a functional whistle, but they're satisfying projects in their own right.
Adding more notes
Stepping up to 4–6 tone holes gives you a pentatonic or diatonic scale in the bird-call range, you can actually play simple melodic phrases, which is great for mimicking varied bird songs. The process is exactly as described in the multi-hole section above: drill conservatively, check pitch with a tuner, and enlarge gradually. One honest caveat: changing one hole's size or position affects the relative intonation of other notes, so plan the full layout before you start drilling rather than guessing hole by hole. A tuner app (a free chromatic tuner on your phone works perfectly) is your best friend here. There's no way to compensate for a bore that's the wrong length by adjusting holes alone, if your fundamental pitch is significantly off, the whole layout is off.
Making a decorative or more comfortable mouthpiece
The mouthpiece end is the natural place to add character. You can carve a subtle beak shape into the tip, add a gentle concave curve to cradle the lower lip, or turn the mouthpiece to a slightly flared shape on a lathe. If you're making a whistle as a gift, a contrasting wood insert at the mouthpiece tip (a small piece of darker wood glued in before final shaping) looks beautiful and adds grip. Keep any decorative carving away from the windway channel, nothing should disrupt the flat, clean surface that guides the airstream.
Building a set of pitched whistles
Making a matched set of single-note whistles tuned to different pitches, say, five notes covering a bird's natural call range, is one of my favorite versions of this project. Each whistle is built identically except for bore length (and corresponding body length). Because you're adjusting overall length rather than hole position, the builds stay simple. Display them on a small wooden rack or bundle them with twine for a handsome gift set. The bore-to-length ratio should stay consistent across the set: aim for a bore diameter-to-body-length ratio in the range of 1:25 to 1:30 for good acoustic behavior.
Carving and surface decoration
Shallow relief carving of feathers, leaf patterns, or bird silhouettes on the body is completely compatible with a working whistle, just keep the bore and windway areas free of finish buildup. Wood burning (pyrography) is another easy way to add detail without any raised surfaces that could interfere with function. If you're building this as a toy or enrichment item for pet birds (parrots love wooden sound toys), skip all finishes and carving entirely, plain, smooth, food-safe hardwood with no additives is the safest option. You might also be interested in bird bells or other wooden sound toys as companion projects alongside the whistle. If what you really want is a launcher instead of a whistle, you can use similar wood-working basics, but you will need a different build and safety-focused design how to make a bird launcher. If you want a different kind of wooden sound project, you can also follow this guide on how to make bird bells. If you just want to make birds leave an area alone, you can also try simple deterrents like learning how to make a bird scarer from a plastic bottle.
Your starter materials checklist
Before you head to the workshop, here's everything you need for a beginner single-note bird whistle build:
- One hardwood blank or dowel (maple, cherry, or birch): 15 cm long, 12–15 mm diameter
- Drill bits: one matching your bore diameter (8–10 mm), one small (2–3 mm) for layout
- Sharp chisel or heavy craft knife
- Flat file and sandpaper in 120 and 220 grit
- PVA wood glue
- Ruler, pencil, and masking tape for depth marking on drill bits
- Beeswax or food-grade mineral oil for finishing
- Optional: chromatic tuner app on your phone for multi-hole versions
- Optional: small scrap of contrasting hardwood for decorative mouthpiece insert
That's genuinely all you need for a first build. The whole project costs almost nothing if you have basic tools on hand, and the skills you develop, cutting clean windway geometry, fitting the fipple block, tuning by ear, carry directly into more ambitious sound projects like multi-note bird calls and other wooden acoustic instruments. Start simple, get it speaking, and the rest follows naturally.
FAQ
Can I make a wooden bird whistle with green or freshly cut wood?
Yes, but only if you can keep the windway-to-blade geometry sharp and stable. Dryness is still important, so use kiln-dried or well-seasoned wood rather than fresh stock. If you have to use green wood, expect shrinking as it dries, so plan on rechecking pitch after it fully equalizes indoors, then re-seal the bore and interior surfaces.
My whistle won’t speak consistently, how do I know if the windway flat is the problem?
Roughness on the windway flat is one of the fastest ways to kill sound quality. If the whistle is quiet or inconsistent, lightly sand the flat smooth with 220 grit, then re-check that the windway still has the same depth and reaches the tone window cleanly. Do not round the blade edge during this cleanup, keep it crisp.
I glued the fipple block too early, can I still fix tuning without rebuilding?
Avoid that for two reasons, glued seams near the tone window are hard to adjust and wood movement can crack the glue over time. The build is designed to verify tone by sliding the fipple block before gluing. If you glued it already and tuning is off, the safer route is to carefully rework only the fipple fit (trim or sand the block faces) rather than changing hole positions first.
What blowing technique should I use if my whistle sounds weak or breathy?
Start with technique changes first. Use gentle, steady breath and keep the mouthpiece sealed with your lips, if you blow too hard you can add turbulence that makes the tone airy or raspy. If the pitch is fine but the volume is weak, that usually points to windway height or blade edge cleanliness, if volume is fine but pitch is unstable, it is often moisture or sealing issues.
My single-note whistle is too low, what is the correct adjustment order?
If the pitch is too low for a single-note whistle, shorten the body from the bell end, since bore length controls the fundamental. Do not try to fix low pitch by enlarging the tone window or changing the windway, those affect voicing and tone quality more than pitch. For multi-hole whistles, adjust by starting from the top hole down, enlarge gradually, test often.
I used a finish on the inside, can I still make the whistle work?
Film-forming finishes inside the bore or over the windway can shift the air channel dimensions and ruin the blade edge effect. If you already used varnish or lacquer on the interior and it now fails, the practical fix is removing the coating from the bore and windway completely, then sealing again with penetrating oil or wax that does not build a film inside.
How should I use a phone tuner to check pitch on a bird whistle?
For the first tune check, use a tuner app on your phone with stable breathing from the same distance each time. If the reading jumps, record a short burst of sound and watch for the steadier part. Also test in similar humidity to where you will use it, since changes in moisture can shift pitch.
What is the best way to seal a whistle for outdoor use without ruining tone?
A good rule is to use penetrating wax or oil on the bore and windway interior, and keep any exterior coatings away from mouth-contact and the windway. If you seal the outside but not the inside, you can still get pitch drift as moisture equilibrates. For long-term outdoor use, periodically reapply oil or wax to the bore (every few months for regular use).
How can I tell whether a crack will ruin the whistle or just be cosmetic?
Small cracks on the exterior are usually survivable, but cracks that reach through the bore wall are a write-off for reliable sound because the duct and resonance path change. A crack that starts after storage usually indicates the wood was not well-seasoned or the whistle was stored in harsh heat or direct sun.
Can I make a bird-whistle style toy for pet birds, and what safety changes should I make?
Yes, but design choices matter. For pet bird enrichment, the safest approach is plain, smooth, food-safe hardwood with no finish or additives, and skip carving near the windway. Also avoid any parts that can flake or separate, since bonded or painted surfaces can become chew hazards.
Are decorative carvings or wood burning compatible with a working whistle?
You may add small decorative carving or a contrasting mouthpiece insert, but anything that creates raised ridges near the windway flat or tone window will disrupt airflow. Keep decorations on the body or mouthpiece tip, and do not carve or burn into the top wall where the windway and blade edge need to stay crisp.
If I make a set of whistles for different notes, how do I keep them consistent?
For a matched set of whistles, you want the bore and body-length relationship to scale consistently, so you can change pitch mainly by length rather than redesigning hole layouts. Build each whistle with the same materials and similar wood moisture content, then tune each one by final body length rather than moving the windway geometry.
Next Articles

How to Build a Chimney Swift Bird House DIY Guide
Step-by-step DIY plans to build a chimney swift bird house, with correct dimensions, placement, and weatherproofing for

How to Build an Oriole Bird House: Step-by-Step DIY
Step-by-step DIY for building an oriole bird house with right dimensions, weatherproofing, predator-safe placement, and

How to Build a Chickadee Bird House Step by Step
Step-by-step DIY chickadee bird house with cut list, chickadee entry sizing, ventilation, drainage, and mounting tips.