You can build a bird pond this weekend using a shallow basin, a handful of rocks, and a garden hose. The key numbers to keep in mind: water no deeper than 1 inch at the edges and no more than 2 inches in the center, gentle sloping sides so birds can wade in safely, and a location with partial shade to slow algae and keep the water cooler. Whether you go with a repurposed terracotta saucer, a preformed plastic basin, or a dug-in liner pond, the build itself is straightforward. The ongoing work, mainly keeping the water fresh and mosquito-free, is where most people get caught off guard, so this guide covers that just as thoroughly as the construction.
How to Make a Bird Pond: Simple DIY Guide for Beginners

Marcus Thornton
5 May 2026
Choosing the right type and location for your bird pond
Before you buy a single piece of material, nail down the location. A bad spot makes the pond harder to maintain and less attractive to birds. Partial shade is your friend here: direct sunlight all day heats the water fast, kicks algae growth into overdrive, and makes the pond less inviting. Aim for a spot that gets morning sun and afternoon shade, or dappled light through a tree canopy.
Window collision is a real risk you need to account for. Place the pond either closer than 3 feet (0.9 m) from your windows or farther than 15 feet (4.6 m) away. That sounds counterintuitive, but anything in between gives birds enough speed to seriously injure themselves on the glass if they flush from the water. If cats or other predators are a concern in your yard, make sure there's open ground around the pond with clear sightlines, so birds can see trouble coming and escape without diving straight into a bush where a cat might be waiting.
Now pick your pond type. There are three practical options for most backyards:
| Type | Best For | Approximate Size | Effort Level | Cost Range |
|---|---|---|---|---|
| Shallow bowl or saucer (terracotta, concrete, or ceramic) | Beginners, small yards, renters | 12–24 inches across | Low (no digging) | $10–$40 |
| Preformed rigid basin (plastic or resin) | Slightly larger feature, portability | 18–36 inches across | Low to moderate (minimal digging) | $25–$80 |
| Dug-in liner pond | Natural look, larger water volume, best for multiple species | 3–6 feet across | Moderate (digging required) | $50–$150+ |
For most people reading this, a preformed basin or a simple liner pond in the 3-foot range is the sweet spot. It looks more like a real pond than a birdbath, holds enough water to create gentle movement if you want it, and still fits comfortably in a small to medium backyard. If you're renting or just want to test the idea first, start with a wide terracotta saucer. You can always scale up later.
Materials and bird-safe design features
The main rule for any material that touches the water: it has to be non-toxic and free of sharp edges. Birds don't just drink from these ponds, they wade in, splash around, and sometimes land hard on the edges. Smooth, textured surfaces that give grip are ideal. Avoid galvanized metal (the zinc coating can leach into water over time), treated lumber, or any container that previously held chemicals.
What you'll need for a liner pond
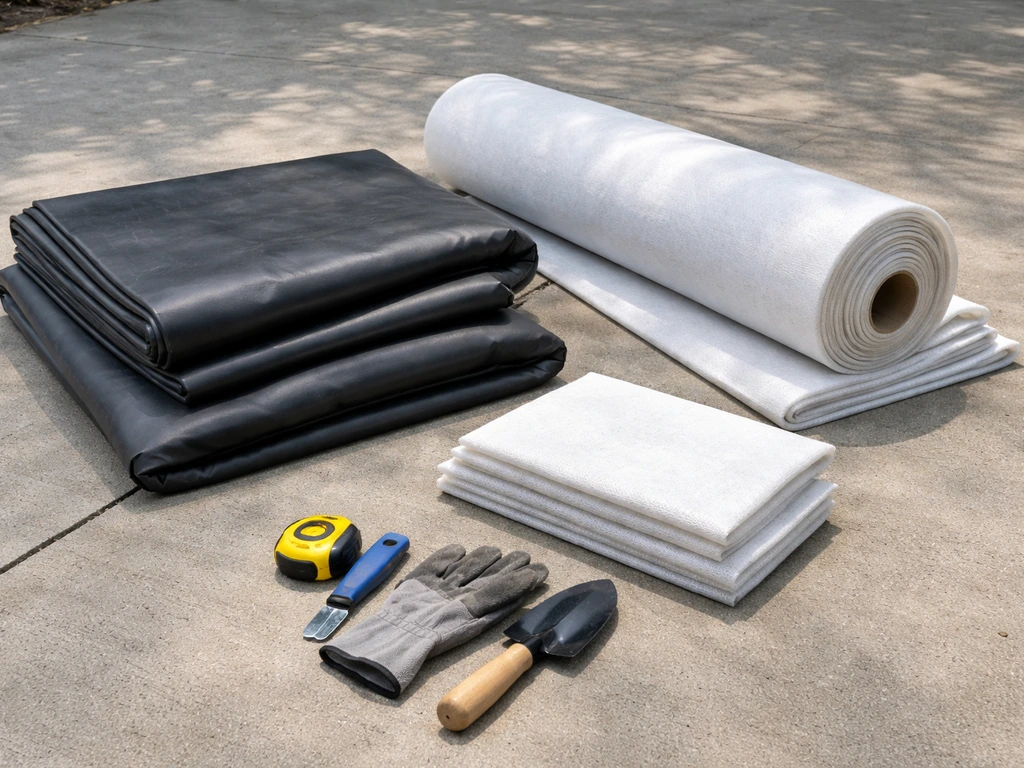
- EPDM rubber liner (45-mil thickness is the standard for small ponds): EPDM is flexible, UV-resistant, and fish/bird safe once cured
- Geotextile underlayment (non-woven fabric, around 5 oz weight): this goes between the ground and the liner to protect against puncture from rocks or roots
- River rocks or smooth fieldstone for edges and shallow zones
- Sand or fine gravel for the bottom of the shallow end (optional, gives a natural look)
- A small submersible pump or solar-powered dripper if you want water movement (optional but recommended)
- A level and a tape measure
- A shovel
A quick note on underlayment: some people skip it and use sand, but sand shifts and sifts away over time, which leaves the liner exposed and vulnerable. Non-woven geotextile fabric stays in place, cushions the liner, and dramatically reduces puncture risk. It's inexpensive and worth using every time.
For the basin or saucer option, you're looking at far fewer materials. A wide ceramic, terracotta, or concrete bowl works well. Avoid smooth-sided glazed bowls unless you add texture, because birds need grip to land safely. You can rough up a glazed surface with coarse sandpaper, or add a layer of mortar-painted texture. River rocks placed inside the basin also solve the grip problem immediately.
One thing to double-check before building a bigger pond that ties into broader backyard plans: if you're also thinking about shelter structures, nesting boxes, or a fuller bird habitat setup, the pond's position matters relative to those features too. A pond near nesting areas can work well, but you want some separation so activity at the water doesn't disturb nesting birds.
Step-by-step construction plans
Option A: Simple basin or saucer pond (no digging)
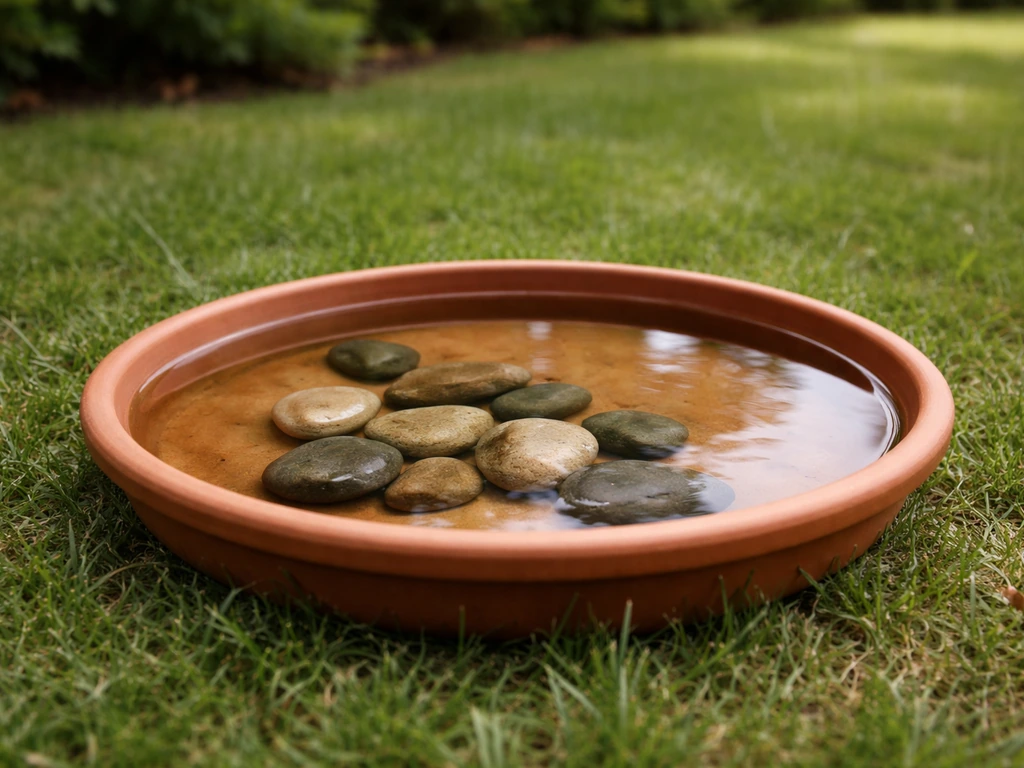
- Choose a wide, shallow basin: at least 18–24 inches across and no deeper than 3 inches total. Terracotta pot saucers, large ceramic mixing bowls, or purpose-made concrete birdbath bowls all work.
- Set the basin on a stable, level surface. A flat paving stone, a tree stump, or a low pedestal all work. Ground level is fine and actually preferred by many species including robins, mourning doves, and thrushes.
- Add 1–2 inches of clean river rocks to the bottom for texture and grip, and to create a very shallow wading zone at one side.
- Fill with fresh water to the top of the shallow rock layer on one side, no more than 1 inch deep at the edge and 2 inches at most in the center.
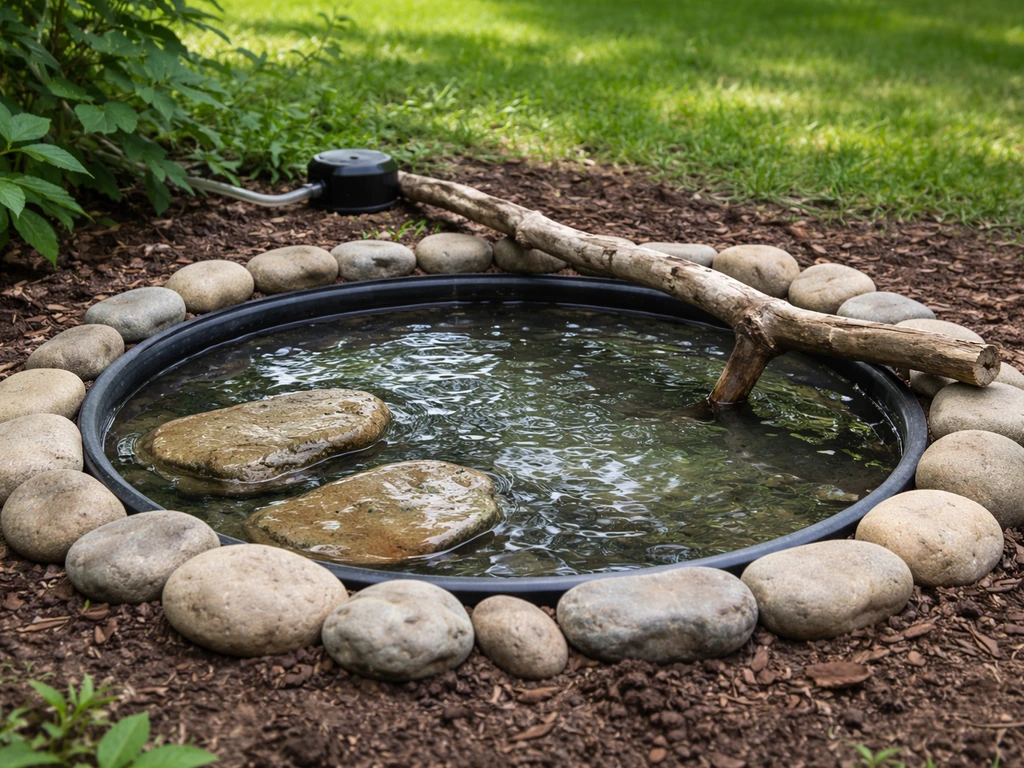
- Optional: set a large flat rock or half-submerged branch across the basin as a perch and landing spot.
- Done. Refill as needed and clean weekly.
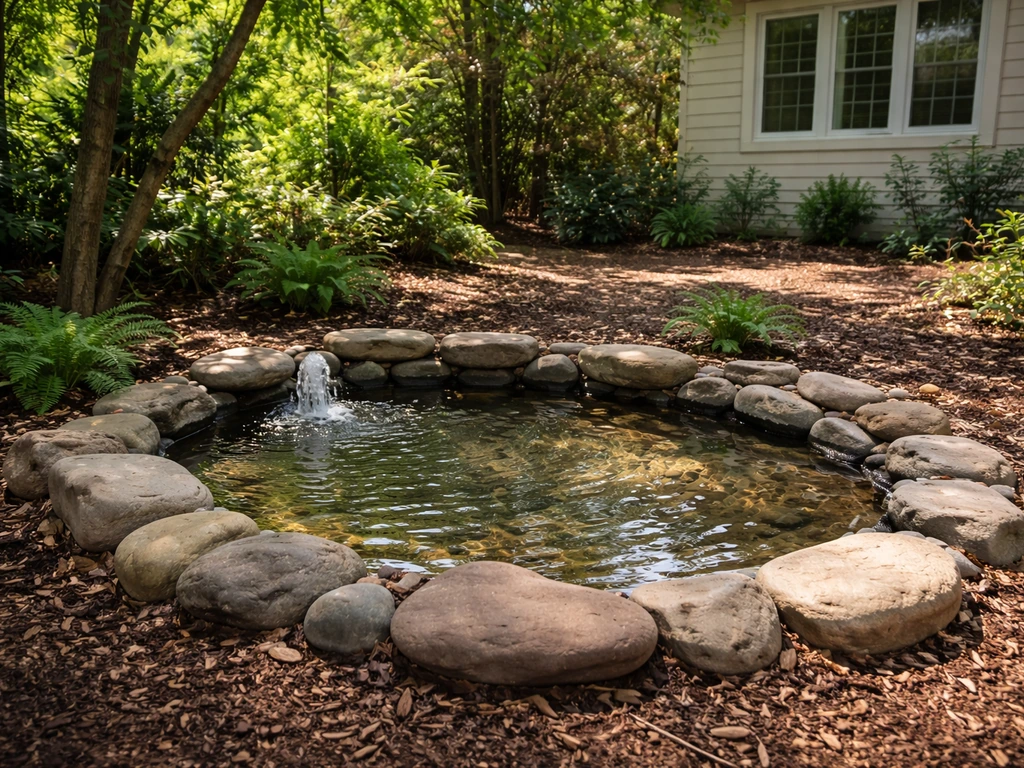
Option B: Dug-in liner pond (3–4 feet across)
- Mark out your pond shape with a garden hose or string. An irregular kidney or oval shape looks more natural than a perfect circle.
- Dig to a maximum depth of about 6 inches in the center, with the sides sloping very gradually from ground level down. You want at least 12–18 inches of the pond to be 1 inch deep or less at the edge, creating a wide, safe wading shelf.
- Check the rim is level all the way around using a long board and a level. This matters more than it seems: an unlevel rim means water will overflow on one side and expose liner on the other.
- Lay your geotextile underlayment into the hole, pressing it into all the contours. Overlap seams by at least 6 inches if you need multiple pieces.
- Lay the EPDM liner over the underlayment. Push it gently into the shape without stretching it tight. Leave several inches of excess over the rim on all sides.
- Begin filling slowly with water. As the water weight settles the liner in, smooth out large folds by hand. Smaller wrinkles are fine and will be hidden.
- Once full, trim the liner edge to leave about 6 inches around the perimeter. Fold this under and pin it with edging stones or soil.
- Place smooth river rocks along the shallow edges and across the bottom of the wading zone. These serve as grip surfaces, perches, and visual anchors.
- Plant low groundcover plants (like creeping thyme or sedge) right at the pond edge to soften the look and give birds a natural approach path.
The most common mistake I see with liner ponds is digging too deep in the center, and then realizing the water is way too deep for birds to use safely. Stick to 6 inches maximum total depth, with most of the surface area being far shallower than that. Think of a large, shallow puddle more than a pond.
Water depth, edges, perches, and optional circulation
The depth rules are non-negotiable from a safety standpoint. Birds need to be able to feel the bottom under their feet, because they don't swim the way ducks do. The edge of your pond should be 1 inch (2.5 cm) deep or less, sloping gradually to a maximum of 2 inches (5 cm) in the deepest part. Some songbirds actually prefer water that's only a quarter inch to half an inch deep for bathing. The more of your pond surface you can keep in that shallow zone, the more species you'll attract.
Edges need to be rough enough to grip. Smooth, steeply sloping sides are the main reason birds avoid a pond or struggle to get out. River rocks, textured concrete, or rough-cut stone all solve this. Place rocks so they create a gradual ramp from the rim into the water rather than a wall or a sudden drop.
Perches matter more than most people expect. Birds like to sit and observe before entering water, and they want a place to preen after bathing. A large flat rock half-submerged at the edge, a thick branch laid across the basin, or smooth stepping stones set just above the water line all work perfectly. If you have a liner pond, you can arrange a cluster of rocks so one sits just at the surface and another is raised an inch or two above it.
Moving water is a major bird attractor. The sight and sound of dripping or trickling water draws in species that might never visit a still birdbath, including warblers, vireos, and other shy songbirds. You have a few options: a solar-powered fountain head (typically $15–$35) that sits in the water and creates a gentle bubble, a gravity dripper made from a hanging plastic bottle with a pinhole in the bottom, or a small submersible pump ($20–$50) connected to a simple spitter or waterfall rock. If you add a pump, check that the flow is gentle, not a strong jet that would churn up the shallow zones where birds bathe.
That said, skip the pump entirely if your pond is very small (under 12 inches across) or if you're not able to maintain it regularly. Moving water increases evaporation and can create a false sense of freshness when the water actually needs changing. A still, clean pond beats a moving, dirty one every time.
Maintenance schedule, algae control, and mosquito prevention
Here's the honest truth: bird ponds become maintenance ponds fast. Bird droppings, feathers, leaf debris, and algae all accumulate quickly, especially in warm weather. But the maintenance routine is genuinely simple if you stay on top of it. The problem comes when people let it go for two weeks and then face a green, slimy mess.
Weekly routine (minimum)
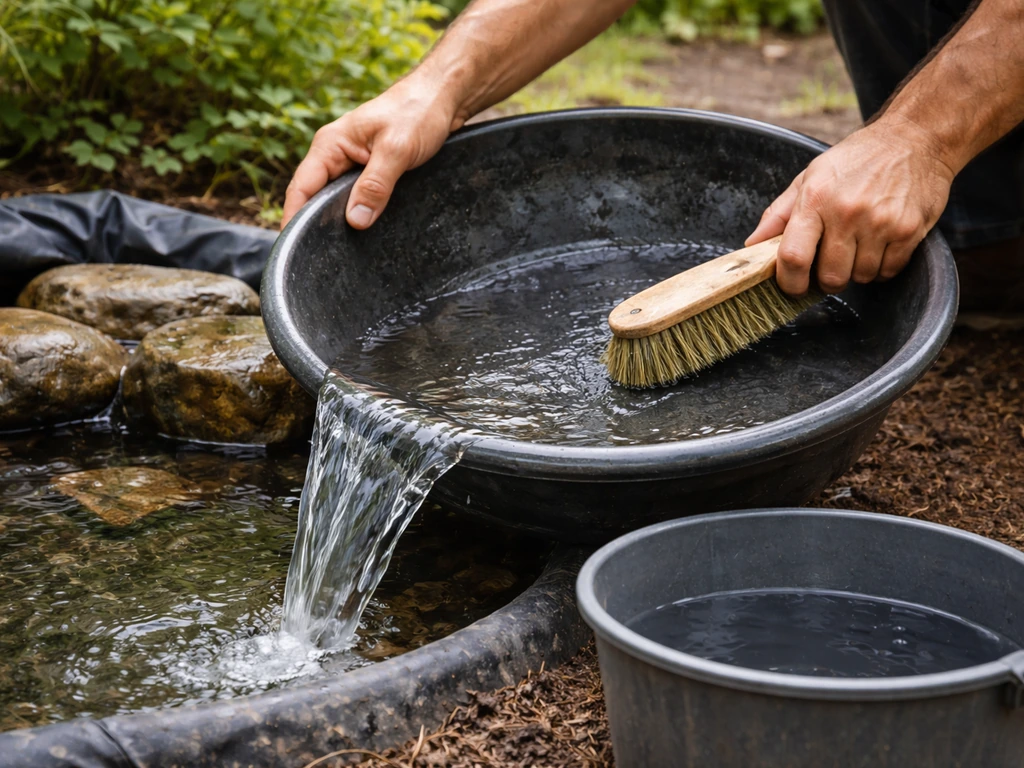
- Empty the pond completely. Tip out basin ponds or use a small hand pump for liner ponds.
- Scrub the basin or rocks with a stiff brush. No soap needed most of the time, just water and elbow grease.
- Rinse thoroughly and refill with fresh water.
- Remove any leaf litter or debris that's accumulated around the edges.
In hot weather, change the water every 1 to 2 days rather than waiting a full week. Mosquitoes can lay eggs in standing water and the larvae can develop to adulthood in less than a week in warm conditions. Birdbaths and small ponds are specifically called out by both the CDC and USGS as common mosquito breeding sites, including species that carry West Nile virus. The single best prevention is simply regular water changes and scrubbing to disrupt the breeding cycle.
If you have a larger liner pond where draining completely every week isn't practical, Bacillus thuringiensis israelensis (Bti) mosquito dunks are your best tool. They're safe for birds, fish, and wildlife, and they kill mosquito larvae without harming anything else. One dunk lasts about 30 days and handles a pond up to 100 square feet. This is a well-established method for small garden ponds and is explicitly recognized as a safe larvicide option for areas with permanent standing water.
Controlling algae without harming birds
Green water and algae are almost inevitable in a bird pond, especially in summer. Never use copper sulfate, chlorine bleach, or most commercial algaecides in a bird water feature. Even diluted concentrations that seem harmless can be toxic to birds drinking or bathing. Here's what actually works safely:
- Partial shade: the single most effective passive algae reducer. Direct sun fuels algae growth; shade slows it significantly.
- Regular cleaning: scrub the basin weekly so algae can't establish thick colonies.
- Barley straw: a small bundle of barley straw placed in the water releases compounds that inhibit algae growth as it decomposes. It works best as a preventive measure (applied in early spring) rather than a cure for an existing bloom. In water above 70°F it can take effect in 1 to 2 weeks; in cooler water below 50°F it may take 6 to 8 weeks. A rough dosing guideline is about 10 grams of straw per square meter of pond surface area, and one treatment can remain effective for up to 6 months.
- Reduce nutrient load: rinse away bird droppings promptly, since they fuel algae growth. Keep the area clean of fallen leaves and other organic debris.
If you see a sudden algae bloom, drain and scrub before adding barley straw. The straw prevents new growth but won't clear an existing bloom quickly. Get the pond clean first, then use the straw to keep it that way. Penn State Extension notes that barley straw can be successful for algae control in Pennsylvania ponds when applied at the proper time and rate, and that it typically remains effective for about six months after application.
Keeping it working through winter and hot weather
Hot weather
In summer heat, water evaporates fast and what's left gets warm and stagnant quickly. Top up the water level daily during heat waves. Add a few large smooth rocks that extend above the water surface so birds can perch and cool down without being fully submerged. Shade cloth rigged over part of the pond on the hottest days can make a real difference in water temperature. If the water feels warm to your hand, the birds are probably skipping it, so drain and refill with cool fresh water.
Cold weather and freezing
Birds can often find water from snow or dripping ice in winter, so a frozen pond isn't necessarily an emergency. That said, liquid water in winter is genuinely valuable to them and will attract birds to your yard even during cold snaps. A pond de-icer or immersion heater (designed for birdbaths, typically $20–$40) keeps a small area of water ice-free without heating the whole pond. These are safe, low-wattage devices designed exactly for this purpose.
Two things to never do in winter: add antifreeze (it's poisonous to birds and other wildlife, full stop) and don't add glycerin to the water either. Glycerin can mat and saturate feathers, which strips their insulating ability and increases hypothermia risk for any bird that bathes in it.
For liner ponds in hard-freeze climates, the ice expansion can stress the liner if the pond is completely full. You can float a tennis ball or a piece of foam on the surface before a freeze. As ice forms, the ball absorbs some of the expansion pressure. If the pond does freeze solid, don't try to chip or hammer the ice out, since this can crack a preformed basin or damage the liner. Let it thaw naturally or use warm (not boiling) water poured carefully on top.
Troubleshooting common problems
| Problem | Likely Cause | Fix |
|---|---|---|
| Birds not visiting | Water too deep, no perch, no shade, or pond too exposed | Add rocks for shallow zone and perch, reposition to partial shade, ensure open sightlines around pond |
| Water going green fast | Too much direct sun, infrequent cleaning, nutrient-rich water | Relocate or add shade, clean weekly, apply barley straw preventively |
| Liner leaking | Puncture from sharp rock or root, or liner not fully settled before trimming | Drain, find puncture (look for wet spot on underlayment), patch with EPDM repair tape or patch kit |
| Mosquito larvae visible | Water not changed frequently enough | Drain and scrub immediately, add Bti dunk for larger ponds, change water every 1–2 days in warm weather |
| Debris and leaf buildup | Pond near trees or garden beds | Use a small pond net or skimmer tool weekly, consider a leaf net over the pond in fall |
| Water level dropping fast (no leak) | Evaporation, especially in heat or wind | Top up daily, add shade, position away from strong wind exposure |
Your quick-start checklist and next steps
Here's a practical checklist to pull together before you start building. This covers everything you need for the simplest version (a basin pond), with notes for upgrading to a liner pond.
- Location chosen: partial shade, more than 15 feet or less than 3 feet from windows, open sightlines for bird safety
- Pond type decided: basin/saucer (no digging) or liner pond (digging required)
- Basin or liner purchased: wide, shallow basin OR EPDM liner cut to size plus geotextile underlayment
- River rocks or smooth stones for wading texture and perching
- One large flat rock or branch for a landing/preching spot
- Optional: small solar fountain or gravity dripper for water movement
- Optional: Bti mosquito dunks if you're building a liner pond
- Optional: barley straw bundle for algae prevention (add in early spring)
- Optional: birdbath de-icer for winter use in cold climates
- Cleaning brush reserved specifically for the pond (no soap needed most of the time)
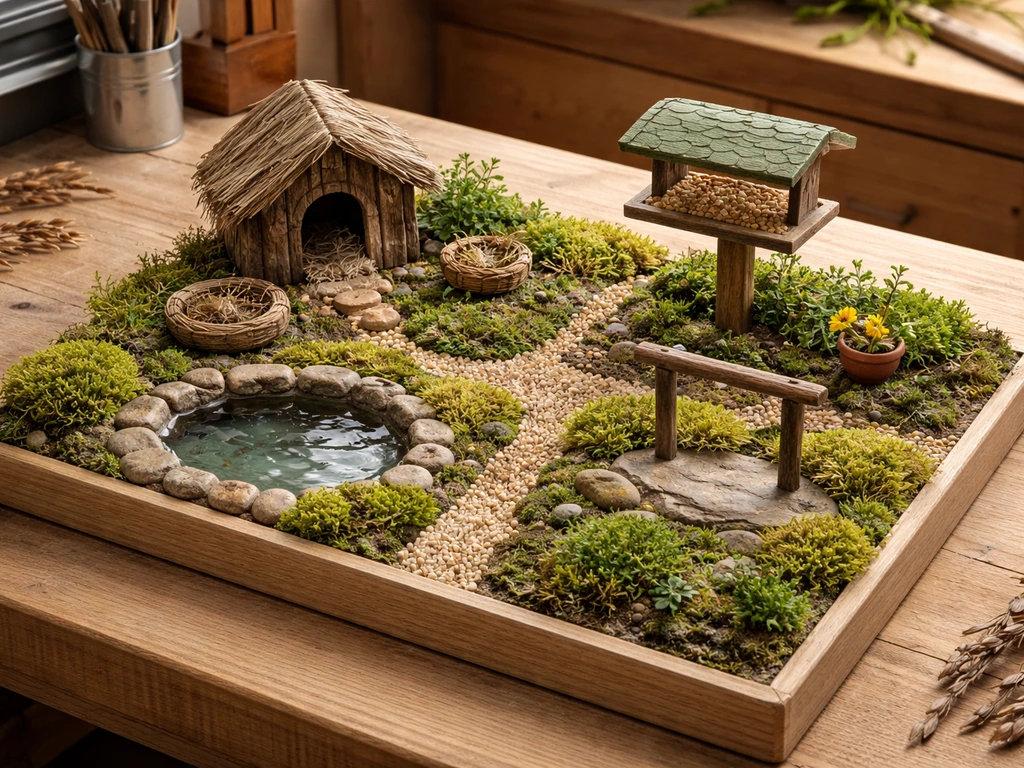
If you're tackling this as part of a bigger backyard project, a bird pond pairs really well with shelters, nesting boxes, and plantings that create a fuller habitat. If you want more than just a pond, this guide will walk you through how to make a bird habitat with simple additions like nesting areas and safe shelter fuller habitat. Once you have the water feature set up, you can keep expanding your yard in other bird-friendly ways, like offering safe shelter and nesting spots bird-friendly yard. If you also want to support birds year-round, learn how to make a wild bird shelter near your water source so they have safe cover too. A water source close to cover but with clear sightlines between them is the ideal setup for most species. Once you've got the pond dialed in, it becomes the anchor of a bird-friendly yard that runs itself with minimal effort beyond that weekly water change.
Start simple. A terracotta saucer with rocks and fresh water will have birds visiting within days in most areas. Once you see what species are using it and how much traffic it gets, you'll have a much better sense of whether to scale up to a liner pond or add a dripper. The core build is genuinely a weekend project, and the birds will tell you pretty quickly whether your setup is working.
FAQ
Can I add fish to my bird pond to keep it cleaner?
Yes, but treat it like a separate project, avoid fish entirely, and use only water depth and materials designed for wading. Fish can stir up bottom muck, increase ammonia, and make the water less safe for birds to drink or bathe in.
What’s the best setup if I want moving water but my bird pond is very small?
Use the smallest container you can, keep water moving gently, and run short maintenance cycles. For example, if you install a dripper, clean the nozzle and tubing every 1 to 2 weeks, because mineral buildup can clog and suddenly stop flow.
How do I keep cats away without making it hard for birds to escape?
Cover the ground with smooth, non-toxic materials and maintain clear escape routes. Options include a ring of gravel-free bare soil or mulch arranged so birds can see open space, and avoiding dense plantings right next to the pond rim.
Can I place the bird pond near my flower beds or vegetable garden?
No, not if you want to avoid chemical residues. If you add soil, fertilizer, or compost near the pond, rain runoff can carry nutrients that fuel algae blooms, so keep garden amendments away from the pond edge and rinse debris after gardening.
What should I do if my pond turns green again quickly after cleaning?
If algae is widespread, don’t try to spot-treat. Drain and scrub first, then add barley straw to prevent regrowth. Also remove dead leaves and switch from full sun to partial shade where possible, since light is a major algae driver.
How often should I top up versus fully change the water?
It depends on your local climate, but start with a simple rule. If the pond sits in warm sun or birds use it heavily, change more often (every 1 to 2 days in hot weather), and top up daily when evaporation drops the water level.
What winter tools are safe for a bird pond, and what should I avoid?
Skip antifreeze and deicers made for plumbing. For winter, the safer approach is an immersion heater or a purpose-built birdbath de-icer to keep a small opening liquid, and use a floating object like a tennis ball to reduce liner stress when freezing.
Can I use water conditioners or algae treatments to reduce maintenance?
Don’t use additives meant to “clear” or “condition” water. Instead, prevent buildup by keeping debris out with a simple leaf screen or by netting leaves off daily, and scrub the basin when you do water changes.
Can I make the pond deeper to attract more species?
Yes, but plan for it to be a transition zone. Add rocks that form ramps so birds can walk in, and keep at least a quarter inch of shallow bathing area across most of the surface, not just a single deep pocket.
What perch options work best if the pond edges are made from a smooth basin or liner?
Choose perches that do not tilt or wobble, and avoid sharp or splintering wood. Position one perch slightly above the water line and one at or near the edge so birds can preen after bathing without jumping onto slippery surfaces.
If I install a pump or fountain head, how can I tell the flow is too strong?
Use a gentle flow rate and shield the water output. If bubbles or spray reach the edge with force, it will churn up shallow zones, so aim for a quiet trickle, and test the sound and splash level before leaving it unattended long-term.
Is it okay to use a hose and pour fresh water over the top to save time?
Avoid it, because repeated puddling and chemical runoff are hard to reverse. If you want to refresh water, drain, scrub, and refill with clean hose water, and only use approved mosquito control like Bti dunks if you cannot drain frequently.
Next Articles
How to Make a Bird Sanctuary Model Step by Step
Step by step DIY guide to build a safe scaled bird sanctuary model with shelters, nesting, feeders, water, and maintenan

How to Build a Chimney Swift Bird House DIY Guide
Step-by-step DIY plans to build a chimney swift bird house, with correct dimensions, placement, and weatherproofing for

How to Build an Oriole Bird House: Step-by-Step DIY
Step-by-step DIY for building an oriole bird house with right dimensions, weatherproofing, predator-safe placement, and