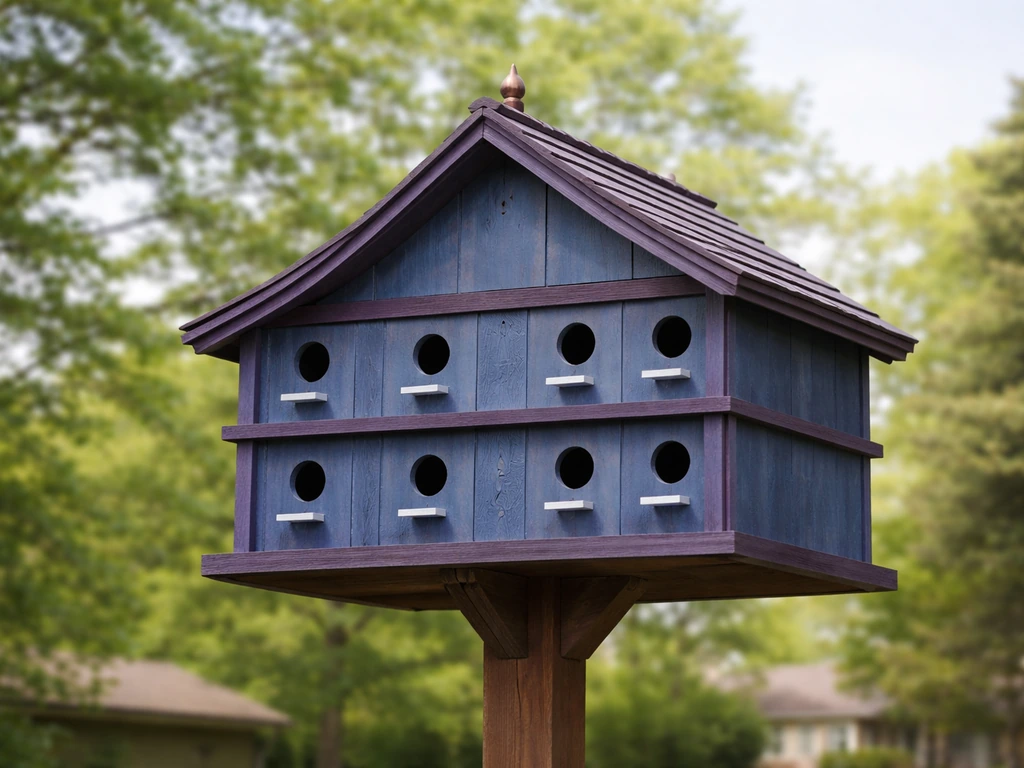
You can absolutely build a martin bird house yourself, and it's one of the most rewarding backyard projects you can take on. Before you cut a single board, though, there's one thing worth clearing up: when people search for a "blue martin bird house," they almost always mean a purple martin house. Purple martins have a glossy, dark plumage that can look blue in certain light, so the two names get mixed up constantly. The bird you're building for is the purple martin (Progne subis), and the design matters quite a bit because these birds are specific about their housing. Get it right, and you'll have a colony of aerial insect hunters moving in. Get it wrong, and you'll spend the season watching house sparrows claim squatter's rights.
How to Build a Martin Bird House for Blue Martins

Marcus Thornton
6 Apr 2026
Why martins need special housing (and why generic birdhouses won't cut it)
Purple martins are cavity nesters, which means they depend on enclosed spaces to build nests, lay eggs, and raise their young. In the eastern United States, they've become almost entirely dependent on man-made housing because they lost most of their natural cavities to development and competition. That's actually good news for DIY builders: your project directly supports a wild bird population in a meaningful way. But it also means the design needs to meet their real requirements, not just look like a cute house on a post.
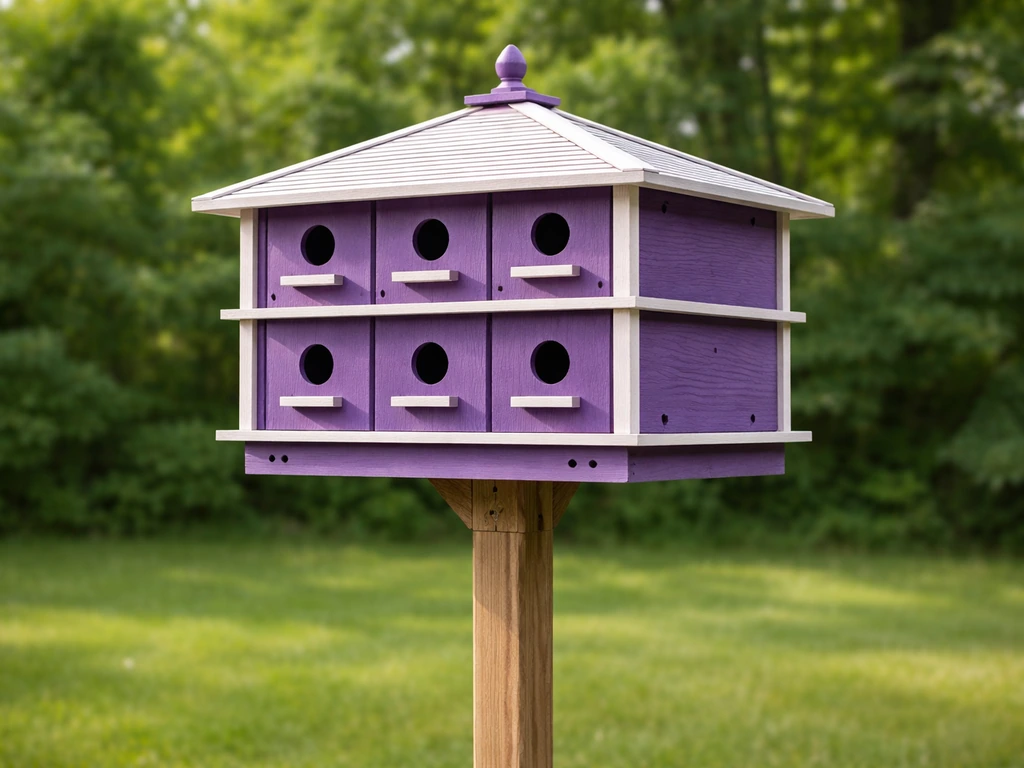
Martins nest in colonies, so you're not building a single-compartment box the way you would for a bluebird or wren. A proper martin house has at least four to six compartments, and many successful setups have twelve or more. They also use gourd-style housing (both natural and plastic), and some landlords run a combination of both styles. For this guide, we're focusing on a classic compartment-style martin house that you can build from standard lumber, because it's the easiest format to DIY and the one most beginners ask about. If you want to go the gourd route after reading this, that's a great option too, and the placement and management principles here apply to both.
One more thing before we get into the build: you'll need to actively manage this housing. Purple martins face serious competition from European starlings and house sparrows, both non-native species that will take over martin cavities if you let them. A good martin house design helps you fight back, but so does showing up and checking the housing regularly. Think of yourself as a martin landlord, not just a birdhouse builder.
Pick your materials and gather your tools
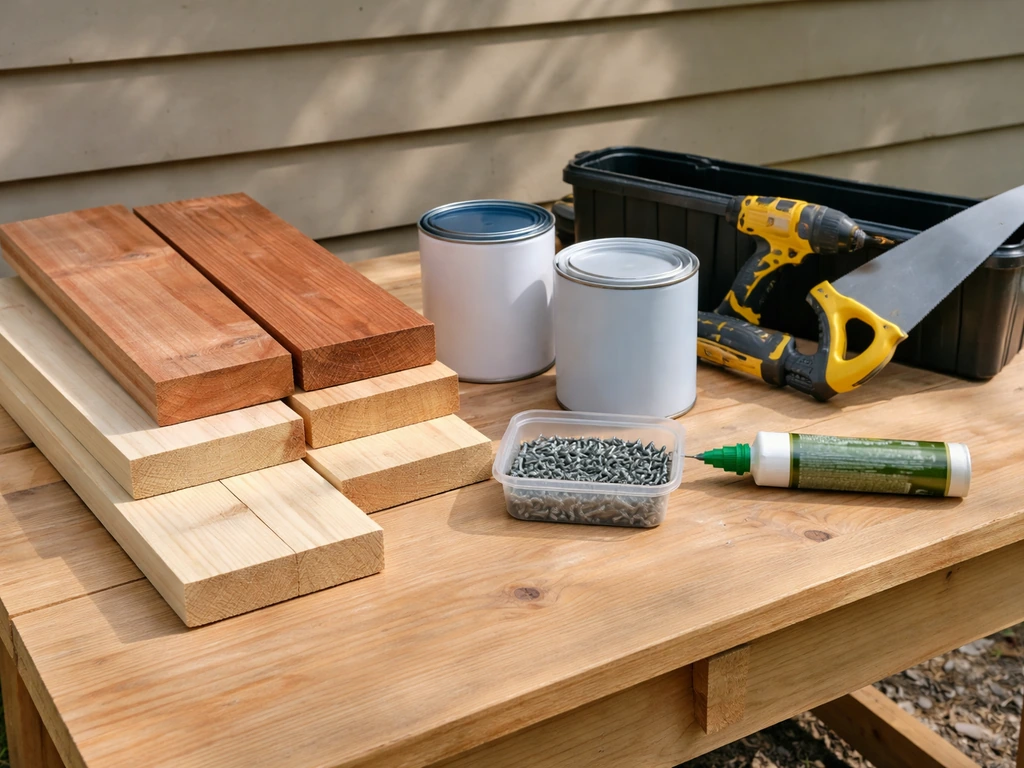
For a DIY compartment martin house, you want wood that can handle outdoor exposure season after season. White pine and cedar are the two most common choices. Cedar is naturally rot-resistant and will last longer without painting, but it costs more. White pine is cheaper, more widely available at home centers, and perfectly fine if you paint and seal it properly (which you should do anyway). Avoid treated lumber for any interior surfaces where birds will nest, since the chemicals can be harmful. Exterior-grade plywood works well for the roof panels and base.
White or light-colored paint is the standard finish for martin houses, and it's not just aesthetic. Light colors reflect heat, which helps keep the compartments cooler during hot summer days when eggs and chicks are vulnerable to overheating. More on that when we get to finishing.
Here's what you'll need to build a basic 8-compartment martin house (two floors, four compartments per floor):
- 1x8 lumber (white pine or cedar): approximately 30 linear feet for compartment walls, floors, and ceilings
- 1/2" exterior-grade plywood: one 4x4 sheet for the roof
- 1-1/4" and 2" exterior wood screws
- Wood glue (exterior-rated)
- White exterior latex paint and primer
- Exterior-grade wood filler or caulk
- 2-1/8" hole saw or spade bit (for standard round entrance holes)
- Drill and drill bits (including a 3/8" bit for ventilation holes)
- Circular saw or table saw
- Jigsaw (useful for half-moon entrance holes)
- Tape measure, pencil, square
- Sandpaper (80- and 120-grit)
If you don't have a hole saw, a 2-1/8" spade bit will work, though the hole edges come out rougher and you'll want to sand them smooth. Martins don't need a perfectly finished hole, but you don't want sharp splinters near the entry point. A jigsaw is helpful if you decide to cut half-moon shaped entrance holes, which we'll discuss in the next section.
Get the dimensions right before you cut anything
This is the section most DIY guides skip over or get wrong, so pay attention here. Each individual compartment in your martin house must be at least 6 inches wide, 6 inches deep, and 6 inches tall. That's the minimum, and bigger is genuinely better, especially in warmer climates where heat buildup is a real problem. I'd recommend building each compartment at 7" x 7" x 6" if you have the lumber to spare. The extra inch of width and depth gives martins more room to maneuver and helps with airflow.
The entrance hole diameter should be 2-1/8 inches for a standard round hole. That's specific for a reason: it's large enough for martins to enter comfortably, but it helps limit access for starlings, which are a major problem. Even better than a round hole is a half-moon (crescent) shaped entrance, which measures roughly 3" wide by 1-3/4" tall. The half-moon shape makes it significantly harder for starlings to enter because of the way their bodies are shaped. Connecticut wildlife managers specifically recommend this design to reduce starling problems, and it works.
The position of the entrance hole on the compartment front panel is just as important as the size. The bottom of the entrance hole should sit 1 inch to 1-1/2 inches above the floor of the compartment. Too low and the nest material can fall out or chicks can tumble through. Too high and the birds struggle to exit. That 1-to-1.5-inch measurement is consistent across every credible purple martin housing standard, so don't eyeball it.
| Dimension | Minimum Spec | Recommended |
|---|---|---|
| Compartment width | 6 inches | 7 inches |
| Compartment depth | 6 inches | 7 inches |
| Compartment height | 6 inches | 6–7 inches |
| Entrance hole (round) | 2-1/8 inches diameter | 2-1/8 inches diameter |
| Entrance hole (half-moon) | N/A | 3" wide x 1-3/4" tall |
| Bottom of hole to floor | 1 inch | 1 to 1-1/2 inches |
| Number of compartments | 4–6 minimum | 8–12 or more |
| Mounted height above ground | 12 feet | 15–20 feet |
Plan to add ventilation holes near the top of each compartment (a few 3/8" holes drilled along the upper sides) and drainage holes in the floor (four 1/4" holes in each corner). These are small details that make a huge difference in summer, when compartments can get dangerously hot without airflow. You'll also want to plan your roof with an overhang of at least 3 to 4 inches on each side to shed rain and shade the entrances.
Step-by-step build instructions
Step 1: Cut all your pieces first
For an 8-compartment house (two floors, four compartments per floor), cut the following from your 1x8 lumber. All compartments share walls between them, so you're building a grid, not eight individual boxes. Cut two full-length floor/ceiling panels that span all four compartments per floor (roughly 28" long if your compartments are 7" wide with 1/2" dividers). Cut your vertical dividers and end panels. Cut your front panels with entrance holes and back panels for each floor. Take your time measuring and use a square on every cut. Measure twice, cut once is genuinely good advice and not just a cliche.
Step 2: Drill entrance and ventilation holes
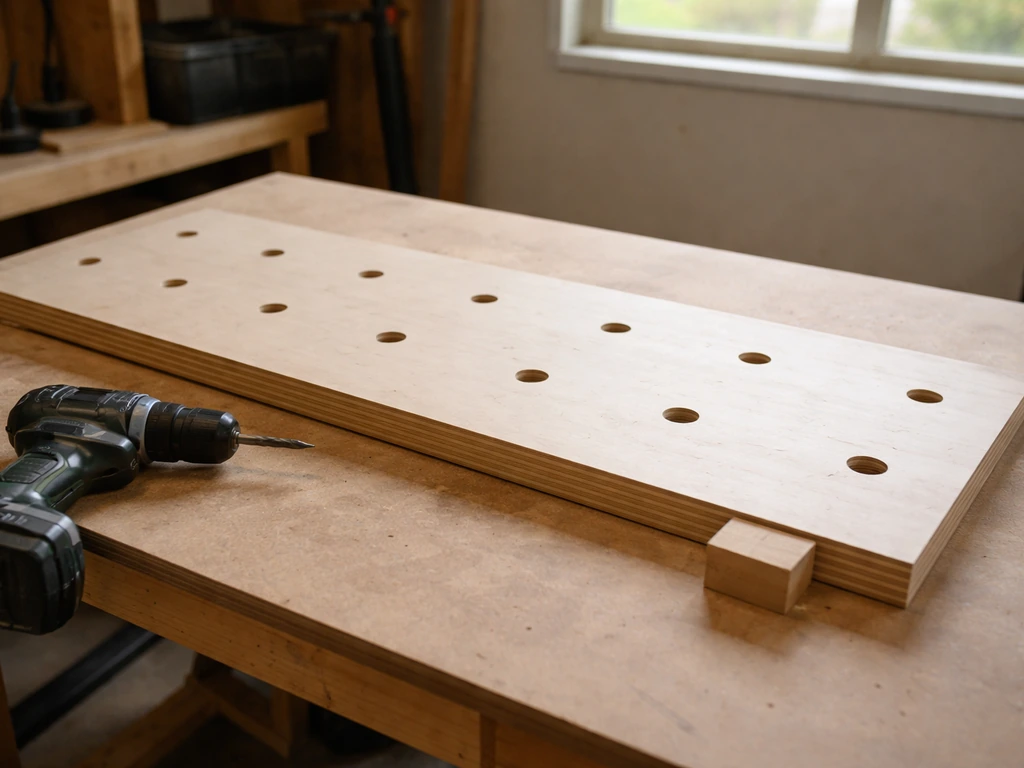
Drill all your entrance holes before assembly, while the front panels are still flat on your workbench. Mark the center of each hole with a pencil, making sure the bottom of the hole will land 1 to 1-1/2 inches above the floor line when the front panel is in position. If you're cutting half-moon shapes, use a jigsaw after marking the crescent outline with a template. Sand the edges smooth after drilling. While you have the drill out, add your ventilation holes (3/8" diameter) along the upper portion of the side and back panels, and your drainage holes (1/4") in the floor panels.
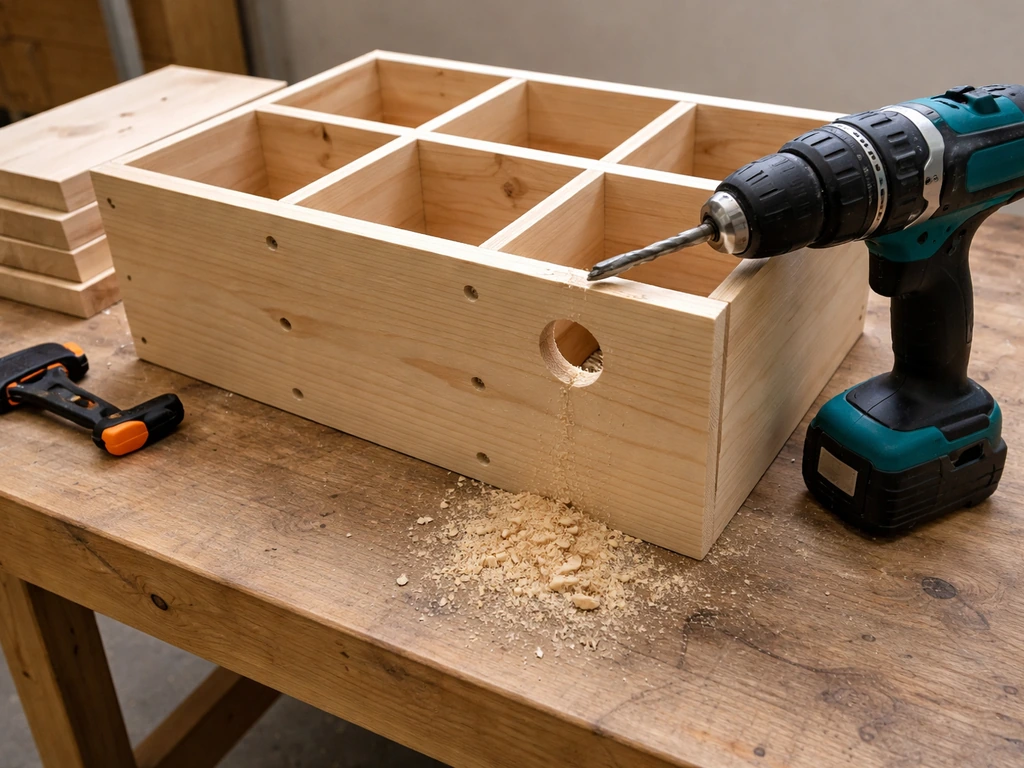
Step 3: Assemble the compartment grid
Start with the bottom floor. Attach the floor panel to the back panel using wood glue and screws. Add the two end panels, then the interior dividers. Make sure everything is square before the glue sets. Attach the front panel last. Then build the second floor on top of the first using the same process, with the ceiling of floor one serving as the floor of floor two. Use 1-1/4" screws for joining panels and 2" screws where you need extra holding power at structural joints. Don't rush the assembly, and check for square at every stage.
Step 4: Build and attach the roof
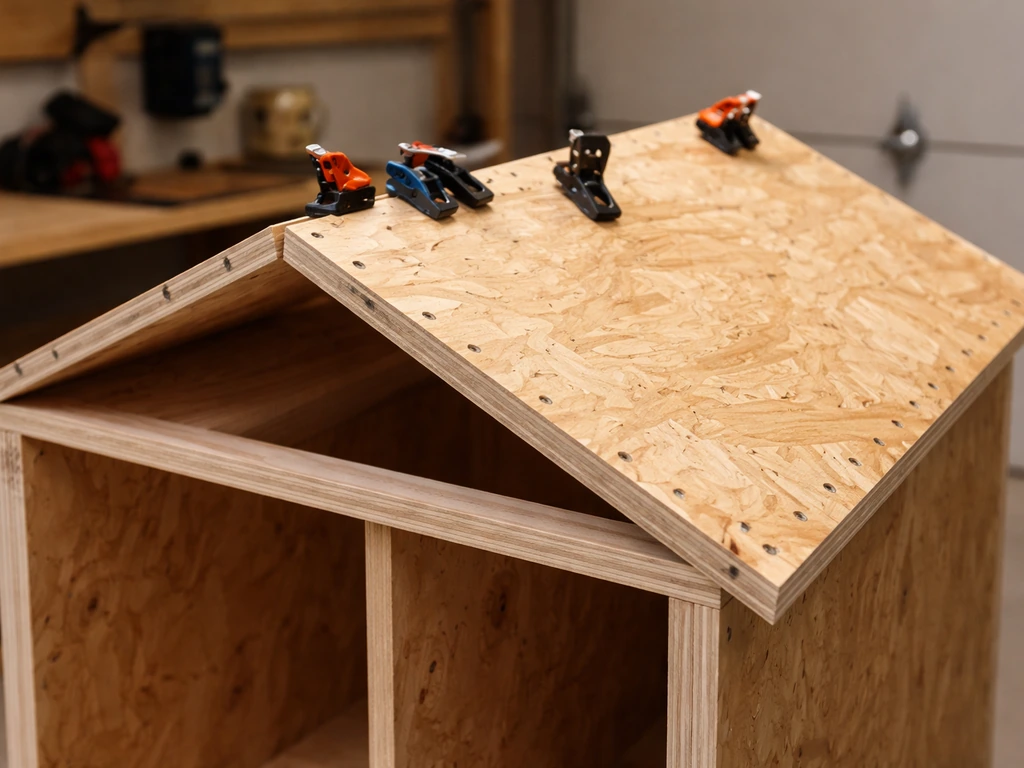
Cut your roof panels from 1/2" exterior plywood. A simple peaked roof (two panels meeting at a ridge) sheds water better than a flat roof and looks more traditional. The peak doesn't need to be steep, a 20 to 30 degree pitch is fine. Attach the roof panels to a central ridge board, then secure the whole assembly to the top of the compartment stack. Make sure the overhang is consistent on all sides (3 to 4 inches). Fill any gaps at the peak with exterior caulk to prevent water infiltration.
Step 5: Add a central mounting channel
This is the part most first-timers skip, and then regret. Your martin house needs to attach to a pole that can be raised and lowered. The standard approach is to run a length of 1-1/2" or 2" square stock through the center of the house vertically, from the base through the roof, as a mounting column. This central pole mounts onto your exterior pole system. Build this channel into the house during assembly, not as an afterthought. It's what allows you to lower the house for cleaning, inspections, and competitor management, which the Purple Martin Conservation Association considers essential to responsible martin housing.
Finishing, weatherproofing, and keeping birds safe
Paint is not optional for a martin house. Before you apply any color, prime all exterior surfaces with a quality exterior primer, including the roof. Then apply two coats of white or off-white exterior latex paint. The white finish isn't just traditional, it actively reflects solar heat and helps keep the interior compartments cooler during summer heat waves. Avoid dark colors entirely. Some martin landlords use light tan or cream, which also works. Just stay away from anything that absorbs heat.
Do not paint the interior of the compartments. Leave the inside surfaces raw wood. Martins and other cavity nesters do better with natural interior surfaces, and some paints or primers can off-gas chemicals that are harmful to eggs and chicks in an enclosed space.
Seal any exterior joints with exterior caulk, especially where the roof meets the walls and around any seams that could channel water into the compartments. Check your drainage holes are clear before mounting. One thing I learned the hard way: drill your drainage holes slightly larger than you think you need (1/4" minimum), because sawdust and debris will clog smaller holes over the first season.
Once the paint is dry, think about access. Ideally, your front panels should be designed to open or swing out for cleaning. You can accomplish this with a simple hook-and-eye latch on each front panel. Being able to open each compartment means you can remove old nesting material at the end of the season and check for parasites or competitor nests during the season. A martin house you can't inspect is a martin house that's harder to manage responsibly.
If you want to go deeper on how this same process applies to a specific species variant, building a purple martin bird house walks through some additional design considerations specific to that species that are worth reviewing alongside these instructions.
Where to mount it and how to set it up for success
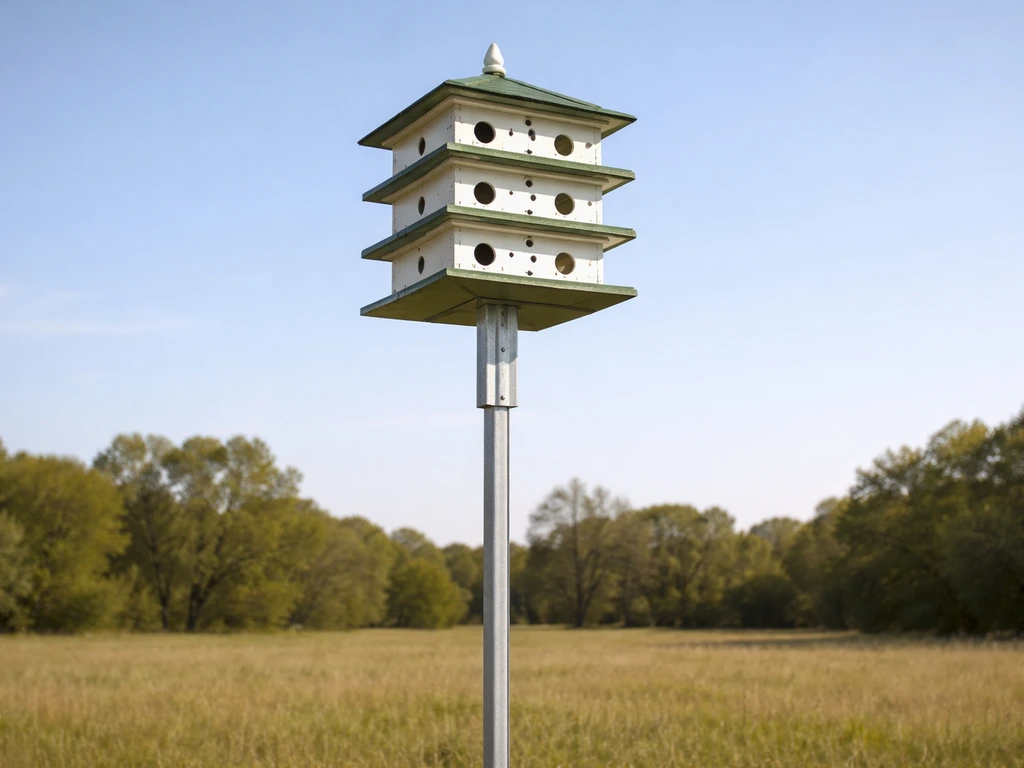
The finished house is only half the equation. Placement makes or breaks your chances of attracting martins, and there are some firm rules here that aren't suggestions.
Height: mount your martin house between 12 and 20 feet above the ground. Fifteen to eighteen feet is the sweet spot for most yards. Too low and predators can reach it more easily; too high and you make management difficult. The house should be on a pole with a raising and lowering mechanism, either a telescoping pole, a pulley system, or a hand winch. Fixed mounting is a mistake because you'll eventually need to lower it, and doing that safely without a proper system is nearly impossible. Inspect your rope or cable system every season before raising the house, because weathering degrades the lines over time.
Open space: purple martins need open flyways. Place the house at least 40 feet from any tree line or tall structure, and ideally in a spot with open sky on at least two to three sides. Yards that are ringed by trees on all sides rarely attract martins successfully, because these birds want to see open air from the entrance hole before they commit to a site. A house near a large open lawn, a pond, or a meadow is ideal.
Predator guards: install a predator guard on the pole below the house. A metal stovepipe guard (at least 24 inches tall, mounted at least 4 feet below the housing) is the standard approach. Without a guard, snakes and raccoons will raid the house at night, and that's a fast way to lose an entire nesting season. Some martin landlords add snake netting or a secondary barrier above the main guard for extra protection. The NC Purple Martin Society considers predator guards non-negotiable on every active martin house and gourd rack, and I agree completely.
Competing birds: house sparrows and European starlings will try to claim compartments. Monitor the house weekly during nesting season and remove competitor nests promptly. If you want to reduce the pressure, consider placing an alternative nesting box 30 to 50 feet away from the martin house to give house sparrows somewhere else to go, though you'll still need to actively manage that box too. The half-moon entrance holes help reduce starling access, but they're not a complete solution on their own.
Timing: have the house up and open by late February or early March if you're in the southern US, or by mid-March to early April if you're in the mid-Atlantic or Midwest. Martins are scouts first, meaning a small group of early arrivals checks sites before the main flock follows. If the house isn't up when the scouts arrive, you miss the season.
Round holes vs. half-moon holes: which should you use?
This comes up in almost every conversation about martin housing, so here's a direct comparison.
| Feature | Round Entrance (2-1/8") | Half-Moon Entrance |
|---|---|---|
| Ease of cutting | Simple hole saw or spade bit | Requires jigsaw and template |
| Starling resistance | Moderate (size helps but not foolproof) | High (shape deters starlings effectively) |
| Martin comfort | Excellent, widely accepted | Very good once martins learn the shape |
| Best for beginners? | Yes | Slightly more work, but worth it |
| Recommendation | Fine as a starting point | Best long-term choice for problem areas |
If you're building your first martin house and you're not sure whether starlings are a major problem in your area, starting with round holes is a reasonable approach. Some landlords begin with round holes and switch to half-moon entrances if starlings become a consistent issue. If you already know starlings are aggressive in your neighborhood, cut half-moon entrances from the start and save yourself the retrofit.
Once the house is up, your job isn't done
The best martin landlords treat the housing as a living project. Check it every week or two during nesting season (April through July in most of North America). Lower the house using your pulley or winch system, open the compartment panels, remove any house sparrow or starling nests before they get established, and look for signs of parasites like mites. Martins tolerate nest checks by landlords remarkably well, much better than most bird species, and regular monitoring is one of the main reasons well-managed martin houses thrive while neglected ones fail.
At the end of the season (after the martins depart in late summer), lower the house, clean out all the old nesting material, check the structure for any damage from weather or woodpeckers, touch up the paint where needed, and store or cover the house until the following spring. A well-built and well-maintained martin house will last ten years or more.
If you're curious about building housing for other backyard species while you're in a building groove, it's worth knowing that different birds have very different requirements. For example, making a blue jay bird house involves a completely different approach to compartment size and placement. Similarly, if you have northern cardinals visiting your yard, you might want to look at how to make a cardinal bird house since cardinals actually prefer open-front nest shelves rather than enclosed boxes with entrance holes. And if a neighbor or family member wants something a little different for their yard, a guide on how to build a red bird house covers a popular color-specific design approach that works for several species.
For now, focus on getting your martin house built and mounted correctly. The dimensions are non-negotiable, the white paint matters, the predator guard is essential, and the raise/lower system is what separates a well-managed colony from a frustrating season of watching sparrows move in. Build it right, put it in the right spot, and show up to manage it, and you've got a real shot at hosting purple martins for years to come.
FAQ
Can I build a “blue martin” house instead of a purple martin house?
Most “blue martin” requests refer to purple martins (glossy dark plumage can look blue in light). Build for purple martins, using multi-compartment enclosed housing and the correct entrance sizes, because bluebird-style or single-box designs will not fit how martins nest or enter their compartments.
What size should the entrance hole be if I’m building a different number of compartments?
Keep the entrance diameter the same per compartment, 2-1/8 inches for round holes or about 3 inches wide by 1-3/4 inches tall for half-moon entrances. Changing the number of compartments changes the layout, not the entry dimensions that affect both martin comfort and starling access.
Is bigger always better for the compartment dimensions?
Larger is generally better for heat and airflow, but avoid going dramatically out of proportion because extremely large openings can change how the front panel fits and how martins position nest materials. A practical step is to follow the guide’s minimums and modestly increase to around 7 by 7 by 6 inches when possible.
Do I need to paint the roof, or can I leave it bare?
Paint the roof as well. Light exterior paint reduces heat buildup that can over-stress eggs and chicks, and painting also adds protection against moisture cycling. Use exterior primer first, then two coats of exterior latex.
Should I use treated lumber anywhere in the house?
Avoid treated lumber on any interior nesting surfaces. If you must use it for structural parts, keep those pieces outside the compartments and do not allow treated boards to contact the interior where birds will build nests.
What happens if my compartment floor drainage holes are too small or get clogged?
If drainage is undersized, sawdust, insect debris, and nesting material can clog the holes, and water can pool inside. Water pooling increases mold risk and can chill chicks during storms. The fix is to drill your drainage openings at least 1/4 inch, keep them clear during setup, and inspect them during your regular checks.
Can I skip ventilation holes since the entrance is open?
Don’t skip them. Entrances alone don’t guarantee internal airflow, especially when martins occupy compartments and block parts of the openings with nest materials. Vent holes near the top help reduce heat and humidity, which matters most during mid-summer incubation and brooding.
How can I prevent splintering and rough edges around the entry holes?
Sand entrance edges smooth after drilling or cutting, especially when you use a spade bit that leaves rough edges. Even if martins will use imperfect holes, sharp splinters can irritate or injure birds and can also complicate cleaning if nesting material catches on rough wood.
Should I plan to open the front panels, or is cleaning optional?
Plan for opening or swinging front panels. Regular access lets you remove competitor nests before they establish, check for parasites such as mites, and clean out old material at season end. A fixed front means you will eventually miss early problems that are easiest to solve when caught quickly.
Do martins mind if I inspect the house frequently?
They generally tolerate landlord checks better than many songbirds, as long as you keep handling time brief and avoid disturbing nestlings repeatedly. Focus your monitoring on short sessions, especially during the main nesting window (roughly April through July), and lower the house using your system before opening compartments.
Is a predator guard enough, or do I need additional protection?
A properly mounted stovepipe guard is the core protection, but additional barriers can help in high-predation areas. If you add secondary barriers, ensure they do not interfere with lowering access or create gaps predators can exploit between the guard and the pole.
What’s the most common reason martins don’t move in?
The most frequent issues are placement (not enough open flyway space), incorrect height, and lack of active management for competitors. Even with perfect construction, a house in a tree-ringed yard or mounted too low, without a raise and lower system and regular checks, often fails to attract or retain martins.
How far should the house be from trees and buildings?
Aim for at least 40 feet from tree lines or tall obstructions, and ideally keep open sky on multiple sides. Martins use visual cues from the entrance area to commit to a site, so “almost open” yards often underperform if one side is blocked.
When should I raise and lower the house during the season?
Have it mounted and open by late February to early March in the southern US, and by mid-March to early April farther north. During nesting season, lower it for inspections, competitor nest removal, and end-of-season cleanup, rather than trying to reach in while it is elevated.
Can I start with round holes and switch later to half-moon entrances?
Yes, many builders begin with round holes if starling pressure is uncertain, then retrofit if starlings become consistent. Switching later is easiest when you build entrance panels as separate removable parts, so consider designing your front panels to be replaced or modified without rebuilding the entire house.
How long should my martin house last, and how do I extend its lifespan?
A well-built, properly painted house can last a decade or more. Extend life by inspecting annually for water leaks at roof seams, keeping drainage clear, touching up paint where damage exposes raw wood, and checking that the mounting pole system stays solid and functional.
Next Articles
How to Build a Purple Martin Bird House Step by Step
Step-by-step DIY guide to build a purple martin bird house with correct holes, spacing, ventilation, drainage, and place
How to Build a Chimney Swift Bird House DIY Guide
Step-by-step DIY plans to build a chimney swift bird house, with correct dimensions, placement, and weatherproofing for
How to Build an Oriole Bird House: Step-by-Step DIY
Step-by-step DIY for building an oriole bird house with right dimensions, weatherproofing, predator-safe placement, and