You can absolutely build a purple martin bird house that actually attracts birds, and it's more doable than most people think. The key is getting a handful of specific details right: compartment size, entry hole diameter, pole height, and open-sky placement. Nail those, and you've got a real shot at hosting a colony. Miss them, and you'll end up with a fancy sparrow apartment. This guide walks you through the whole process, from choosing a design to troubleshooting an empty house.
How to Build a Purple Martin Bird House Step by Step

Marcus Thornton
3 Apr 2026
Choosing the right Purple Martin house design
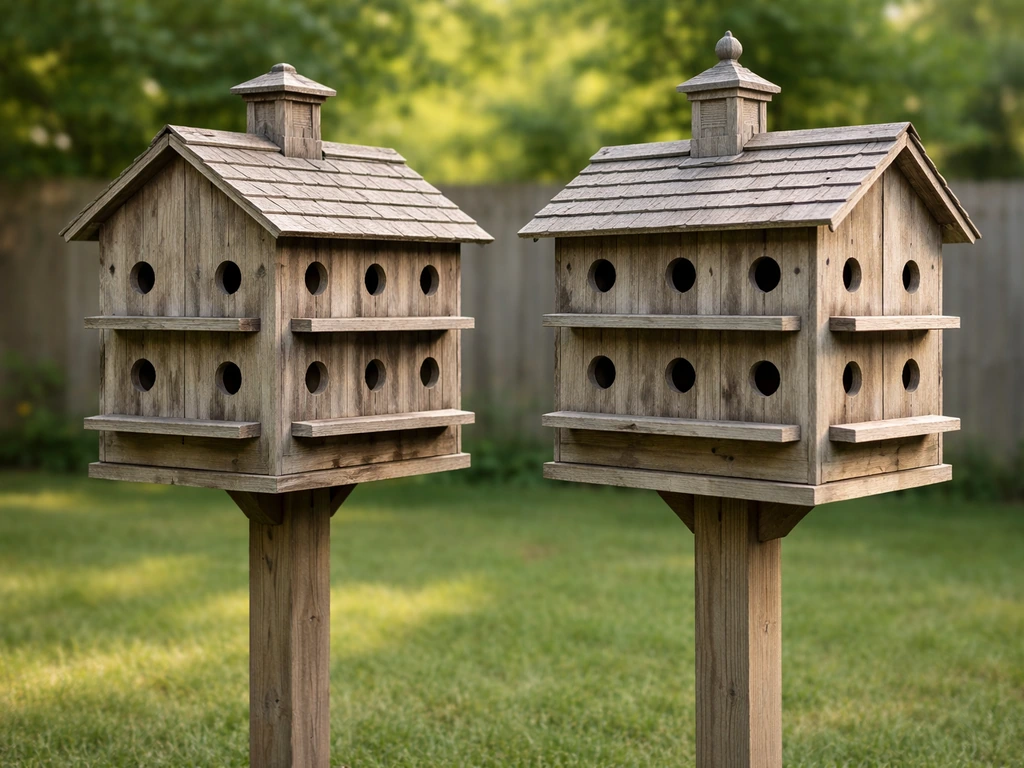
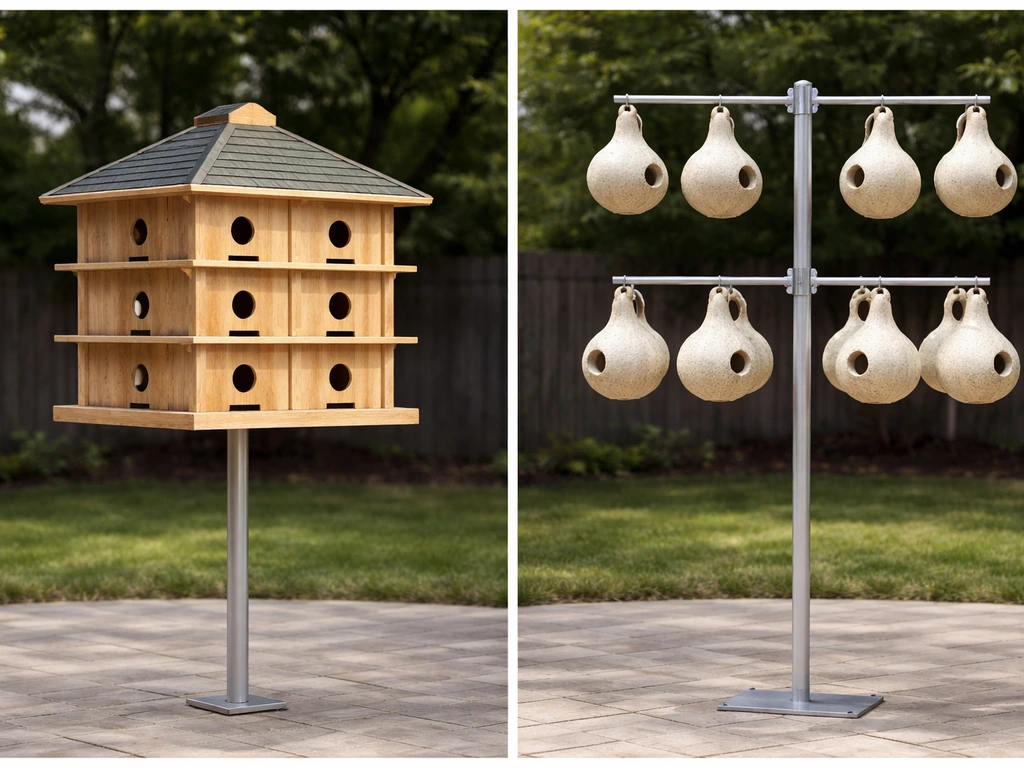
Purple martins are colonial nesters, which means they want neighbors. A single-cavity box won't cut it. You need a multi-compartment design with at least four to six cavities to mimic the kind of housing they naturally seek out. The two most common approaches are a multi-unit wooden "apartment" house and a gourd rack system. Both work well. The choice comes down to your skill level and how much time you want to invest.
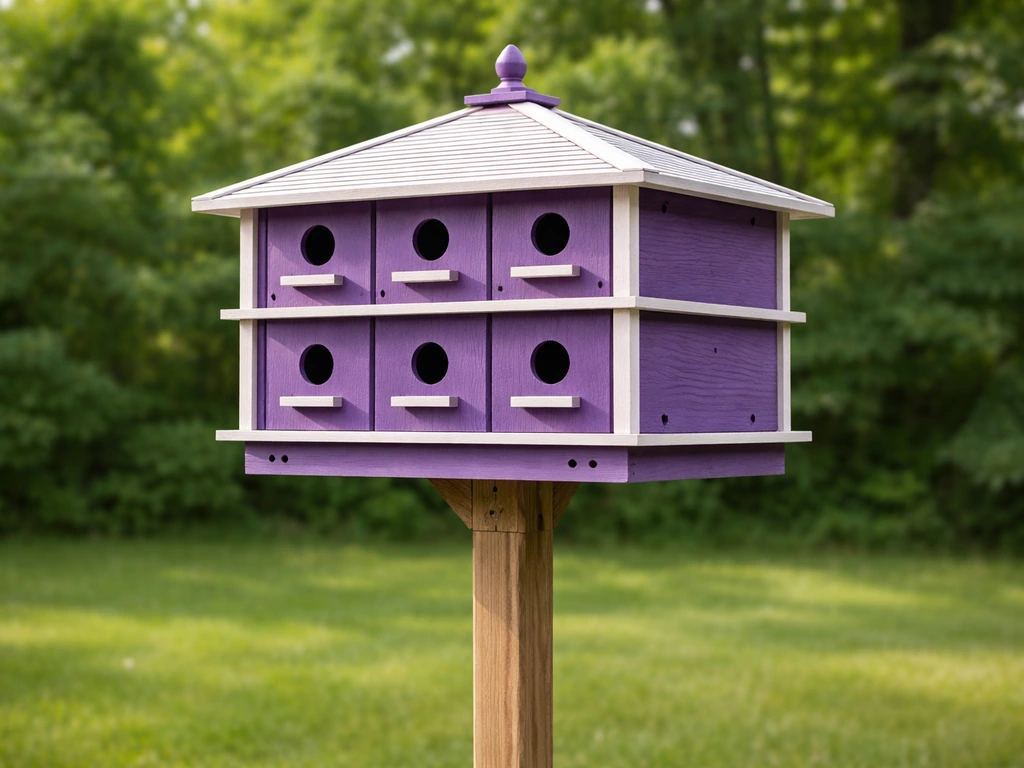
The wooden multi-compartment house is the classic DIY approach. It looks like a small apartment building on a pole, with individual rooms arranged in a grid. It's satisfying to build, easy to customize, and very sturdy. The gourd rack system uses hollow gourds (natural or plastic) hanging from a horizontal rack on a pole. Gourds are a traditional martin housing option and, frankly, martins often prefer them. You can combine both on a single pole system if you want to go all in.
One design detail that matters enormously: avoid continuous porches that wrap around the outside of the house. Research from the Purple Martin Conservation Association shows that houses without continuous porches are better at discouraging European starlings and house sparrows, which are aggressive competitors for cavity space. Starling-resistant entrance holes (SREH) are also strongly recommended. The Purple Martin Conservation Association (PMCA) defines SREH as a key concept in starling-resistant martin housing and describes different types, including crescent and Excluder varieties Starling-resistant entrance holes (SREH). These crescent-shaped or elongated oval holes are sized and shaped so martins can enter easily but starlings have a much harder time. If you're building from scratch, it's worth incorporating SREH from the start rather than retrofitting later. I learned that the hard way after losing two compartments to starlings my first season.
If you want to understand how a simpler single-unit martin house goes together before scaling up to a full colony setup, reading about how to build a martin bird house from scratch is a good starting point for getting comfortable with the basic construction concepts.
Materials and tools list for DIY construction
You don't need exotic materials for this. The goal is wood that resists moisture, hardware that won't rust, and a finish that reflects heat. Here's what I recommend for a six-compartment wooden martin house.
- Exterior-grade plywood (1/2 inch or 3/4 inch) or cedar boards: enough to cut six compartment boxes plus a roof
- One sheet of 1/4 inch exterior plywood for floors and internal dividers if you want to save weight
- White exterior paint or white primer plus topcoat (white reflects heat and martins are attracted to it)
- Galvanized or stainless screws, 1 5/8 inch and 2 inch lengths
- Waterproof wood glue
- Heavy-duty metal pipe flange and a 2-inch galvanized steel pipe (10 to 15 feet long) for the pole, or a telescoping aluminum martin pole if your budget allows
- A pipe anchor, ground socket, or concrete for securing the pole base
- 1/4 inch drill bit for drainage and ventilation holes
- 2 1/8 inch hole saw or spade bit for standard round entry holes (or a SREH template and jigsaw for crescent-shaped openings)
- Rope and pulley hardware if you want a lowering system (highly recommended)
- Sandpaper, 80 and 120 grit
- Exterior caulk for sealing roof seams
For tools, you need a circular saw or table saw to rip your panels, a drill, the hole saw mentioned above, a square, clamps, and a tape measure. If you don't own a jigsaw and want to do SREH, a local makerspace or lumber yard can often cut those shapes for you. Don't let tool gaps stop you. I've seen perfectly functional martin houses built with nothing more than a handsaw, a drill, and borrowed clamps.
On repurposed materials: cedar fence boards are fantastic here. They're cheap, weather-resistant, and often available in good condition from demolition or remodel scraps. Avoid pressure-treated lumber inside the compartments since the chemicals can off-gas in an enclosed space where birds are nesting. Outside structural elements are fine.
Step-by-step build instructions for a multi-compartment bird house
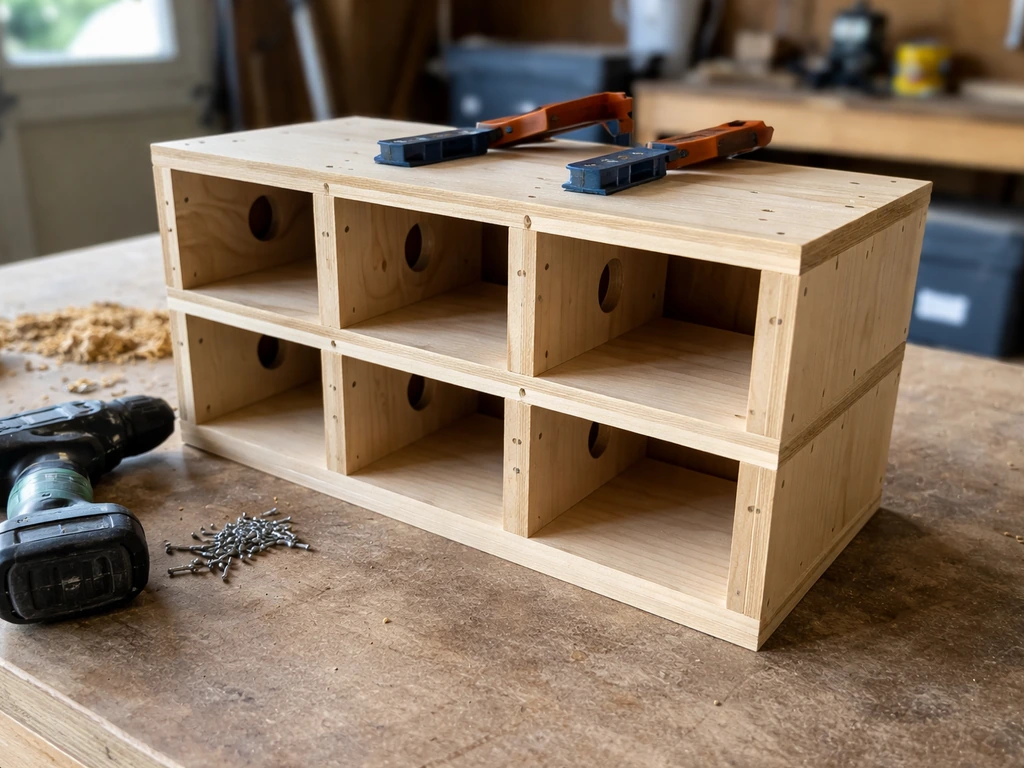
This guide builds a two-story, six-compartment wooden martin house: three rooms per floor, stacked. Each compartment is its own enclosed box with a shared wall between neighbors. Total build time is a weekend for a first-timer.
- Cut your compartment panels. Each compartment box needs: two side panels (6 inches wide by 6 inches tall), a back panel (6 inches wide by 6 inches tall), a front panel (6 inches wide by 6 inches tall, with the entry hole cut into it), a floor panel (6 inches by 6 inches), and a ceiling/top panel shared with the floor of the story above. Six-by-six-by-six inches is the minimum interior dimension recommended in wildlife structure guidelines. I personally go to 6 by 6 by 7 inches deep (front to back) for a bit more nest room.
- Drill the entry holes before assembling the front panels. Use a 2 1/8 inch hole saw centered about 1 inch from the top of the front panel. This is the preferred diameter from martin housing standards, and it sits in the accepted range of 1 3/4 to 2 1/4 inches. If you're doing SREH instead, cut the crescent shape with your jigsaw using a printed template, centered in the same position.
- Drill drainage and ventilation holes in each floor panel. Put four to six holes of 1/4 inch diameter around the perimeter of each floor. These let rainwater drain out before it soaks the nest, and they also let warm air circulate up from below. Don't skip this step: a wet nest is a dead nest.
- Drill small ventilation holes near the top of each side panel, just under where the ceiling will sit. Four holes of 1/4 inch each per side panel is plenty. Hot air rises; these give it somewhere to go.
- Assemble each compartment box with glue and screws. Pre-drill to avoid splitting. The floor sits inside the walls (not underneath), so water that enters has a path to drain out those floor holes rather than pooling at a joint.
- Build the two-story structure by stacking three compartment boxes side by side on each floor. The top of the first-floor boxes becomes the floor of the second story. Screw and glue everything together as you go. Add a full-width back panel spanning both stories for rigidity.
- Build the roof with a 2- to 3-inch overhang on all sides. A simple gabled or shed roof works fine. The overhang keeps driving rain out of the entry holes. Seal all roof seams with exterior caulk.
- Paint the entire exterior with two coats of white exterior paint. White isn't just aesthetic: it reflects summer heat and keeps interior temperatures from spiking, which is critical for nestling survival.
- Attach a mounting flange or bracket to the back panel so the house can be secured to your pole with bolts. If you're building a lowering system, run your rope and pulley hardware now before the house goes up.
Proper dimensions, entry hole placement, and ventilation and drainage details
Getting the specs right is where a lot of DIY martin houses fall apart. Here's a quick reference table so you can check your build before it goes up the pole.
| Spec | Recommended Value | Why It Matters |
|---|---|---|
| Interior compartment size | 6 in x 6 in x 6 in (minimum) | Enough room for a full nest and nestlings without being so large that starlings dominate |
| Entry hole diameter (round) | 2 1/8 in (range: 1 3/4 to 2 1/4 in) | Sized for adult martins; too large invites starlings |
| Entry hole center height | ~1 in from top of front panel | Keeps rain out while giving birds easy access |
| Floor drainage holes | 4 to 6 holes, 1/4 in diameter each | Prevents wet nest buildup; also aids ventilation |
| Side ventilation holes | 4 holes per side panel, 1/4 in each, near ceiling | Releases hot air buildup in summer |
| Roof overhang | 2 to 3 inches on all sides | Deflects wind-driven rain from entry holes |
| Floor construction | Floor sits inside walls, not below joints | Ensures drainage holes are the lowest point so water exits freely |
One thing worth emphasizing: the floor of each compartment must not retain moisture. That means no recessed floor designs where the walls form a lip that traps water above the drain holes. When I built my first house, I made the floor sit below the bottom edge of the walls and had standing water after every rain despite the drain holes. Moving the floor inside the wall frame fixed it immediately.
Compartment spacing between units matters too. Each entry hole should be at least 6 to 8 inches away from adjacent entry holes horizontally to reduce territorial squabbles during the early nesting period. On a three-unit-wide house, that spacing works naturally if your compartments are 6 inches wide and you don't crowd them.
Installing and locating the house for successful nesting
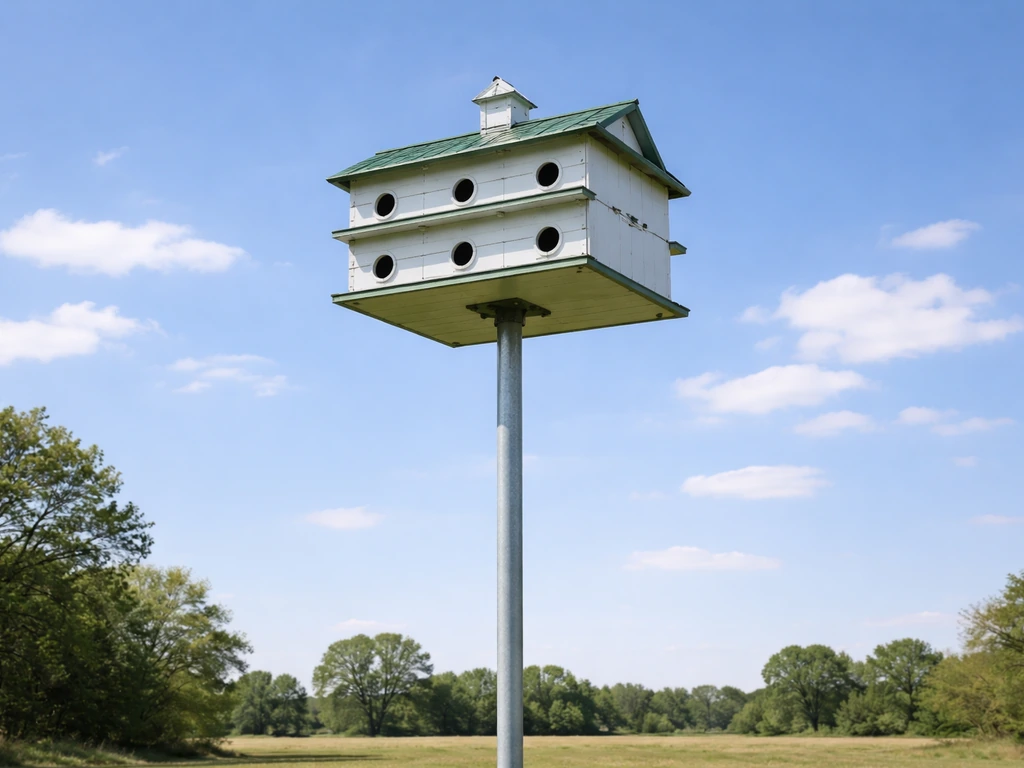
This is the step most DIY guides gloss over, but location is arguably more important than the build itself. You could have the most beautifully crafted martin house on the block, and if it's in the wrong spot, it will sit empty for years. Purple martins are not like most backyard birds. They're aerial insectivores that need wide-open airspace to hunt, and they're extremely selective about nesting locations.
- Mount the house on a pole 12 to 20 feet high. Most successful colonies use 15 to 18 feet as the sweet spot.
- Place the pole in the most open area of your yard, at least 40 to 60 feet from trees, buildings, or tall shrubs in all directions. Martins need clear flight paths on approach.
- Site the house near water if possible. A pond, lake, or even a large open lawn holds the insects martins eat. Open water within a few hundred yards is a strong attractant.
- Orient the house so entry holes face south or southeast where possible to get morning sun on the openings, which martins seem to prefer.
- Install a predator guard (a metal baffle) on the pole below the house to stop raccoons, snakes, and cats from reaching the nests.
- If you're in a region with tree coverage expanding into your yard, stay ahead of it. Tree encroachment is one of the documented reasons martin colonies abandon a site.
A pulley-and-rope lowering system on your pole is not optional in my opinion. It lets you lower the house for nest checks, cleaning, and seasonal maintenance without climbing a ladder or hiring anyone. Buy or build a telescoping system, or rig a cleat and rope on a fixed pole. You'll thank yourself every single season.
Martins are migratory and return to the same sites each spring. In the eastern US, scouts typically arrive between late February and April depending on latitude. Have your house up and open at least two weeks before expected arrival in your area. First-year birds (called subadults) are your most likely recruits, and they're actively scouting new sites in April and May.
Maintenance, cleaning, and troubleshooting if Martins don't move in
Routine maintenance and nest checks
Once martins are nesting, lower the house every week or two for a quick nest check. Look inside each compartment for blowfly larvae (small white maggots in the nest material), signs of water damage, or parasites. If you find a heavily infested nest, you can replace it: remove the old nest material, wipe the compartment with a damp cloth, and replace with fresh pine needles or dry grass. The adults will return to the compartment and continue incubating or brooding even after a nest change. I was nervous the first time I did this, but it works, and it makes a real difference in nestling survival.
At the end of the season (typically late August after the birds have migrated), close the house up or lower it completely. Do a full clean in late winter before scouts arrive: remove all nest debris, scrub compartments with a 10% bleach solution, rinse well, let dry completely, and repaint any worn exterior surfaces. Don't open the house for the season until you're a week or two out from expected arrival, to prevent house sparrows from squatting in the off-season.
What to do when martins don't show up
If your house sits empty the first season, don't panic and don't give up. Colony establishment can take two to four years at a new site. That said, there are things you can do to speed it up. The biggest one is using a dawnsong or purple martin attraction call. Playing a recorded martin call from a small speaker near the house during morning hours in April and May genuinely works to draw in scouts. Several landowners I know went from zero birds to a small colony within a season by adding this one technique.
Competition from house sparrows and European starlings is the other main culprit when a site doesn't attract martins. These non-native birds actively evict martins and occupy cavities. Controlling them is not optional if you want a real colony. Monitor the house during the day, remove sparrow nests immediately (they're legal to remove), and consider installing SREH if you haven't already. The PMCA is explicit that sparrow and starling competition is one of the primary reasons colonies fail or never establish.
Tree encroachment is another documented colony killer. If trees have grown to within 40 feet of your pole since you installed it, trim them back or relocate the pole. Martins will stop using a site that no longer has clear approach lanes, and they won't come back until the issue is fixed.
Finally, double-check your entry hole size and compartment dimensions. The PMCA’s Helpful Hints for Martin Landlords (PDF) recommends compartment floor dimensions of at least 6 by 6 inches, with 7 by 12 inches offering better protection against predators and weather, and it also provides housing height guidance of about 10 to 20 feet double-check your entry hole size and compartment dimensions. A hole that's too small (under 1 3/4 inches) will physically prevent martins from entering. A hole that's too large (over 2 1/4 inches) will attract starlings, which will then block martins. Get a caliper or a hole-size gauge and verify your openings are in the 1 3/4 to 2 1/4 inch range, with 2 1/8 inches being the ideal target.
Comparing martin house styles: wood vs gourd rack
If you're deciding between building a wooden multi-unit house or setting up a gourd rack system, here's a quick side-by-side. Both are legitimate and both attract birds, but they have different strengths.
| Factor | Wooden Multi-Unit House | Gourd Rack System |
|---|---|---|
| Build complexity | Moderate (carpentry skills needed) | Low to moderate (gourd prep or purchased plastic gourds) |
| Cost | Lower if using reclaimed wood | Lower with natural gourds; higher with commercial plastic ones |
| Heat management | Good with white paint and proper ventilation | Natural gourds insulate well; plastic gourds vary |
| Martin preference | Accepted readily | Often preferred, especially by experienced birds |
| Starling resistance | Easier to add SREH directly | SREH inserts available but require gourd modification |
| Maintenance access | Easy if house lowers on pole | Each gourd opens individually; very thorough inspection possible |
| Durability | 10 to 20 years with good wood and paint | Natural gourds: 2 to 5 years; plastic gourds: 15 to 20 years |
My recommendation: if you're a first-time builder who enjoys woodworking, go with the wooden multi-unit house. It's a project with a clear outcome and it will last for years. If you want to attract birds faster and are open to buying materials, a mixed pole with three or four plastic gourds plus two or three wooden units gives you the best of both worlds. Martins that are already using your site will recruit others regardless of housing type, so the goal is just getting that first pair to commit.
Building for other cavity-nesting species can sharpen your general birdhouse construction skills before you tackle a martin colony. If you've been thinking about branching out, learning how to make a blue jay bird house is a useful exercise in working with slightly different hole sizes and compartment depths, which builds your confidence for adapting plans to spec. Similarly, projects like building a red bird house or understanding how to make a cardinal bird house will deepen your feel for how ventilation, drainage, and entry placement work across species, and a lot of those lessons carry directly into martin house construction.
The bottom line: build the house, get the pole up in an open spot before spring migration, control your competitors, do your nest checks, and give it a few seasons. Purple martin colony work is one of the most rewarding backyard bird projects there is, and once you get your first pair of birds swooping into a house you built yourself, you'll understand why people get obsessed with it.
FAQ
How do I know if my entry hole size is correct before I mount the house?
Before you drill entry holes, confirm your local dimensions match the “1 3/4 to 2 1/4 inch” window, and use SREH if you are also fighting starlings. If you are unsure about the hole saw size, test on scrap first, because rounding up by even a small amount can make the opening starling-friendly.
Can I use foam board or other modern materials to build a purple martin house?
Yes, but treat it like an exterior structural material, not nesting-area insulation. If you use foam, make sure it is fully sealed inside a wood compartment so birds are not exposed to it, and always keep the compartment surfaces dry and drainable. Improper insulation can trap moisture, which can lead to blowfly issues.
Is it better to make a larger house with more compartments?
Don’t increase the number of cavities as a substitute for spacing and clear lanes. If you go bigger, keep entry holes spaced laterally (about 6 to 8 inches between adjacent entrances) and ensure the pole still allows open approach air. Overcrowding can increase aggression and slow colony establishment even if the house is “bigger.”
Should I add a liner, tray, or removable floor to keep the inside cleaner?
In most cases, no. Martins typically prefer relatively dry nesting surfaces, so avoid anything that can hold water or slow drainage, such as recessed platforms with lips or liners that act like a sponge. Use a smooth, sloped, and properly drained floor area, then rely on clean nest material the birds add.
What if my purple martin house gets partial shade, is that okay?
If your house is raised but still partially shaded for much of the day, that can reduce insect activity near the pole and affect nesting success. Try to place it where martins can hunt in open air and where the compartments can dry after rain. A house that is shaded by trees is often a “looks fine” situation that still fails.
How often should I lower the house and inspect nests without harming the birds?
A weekly check is good once nesting is underway, but do not keep the house open for long. Also, only intervene to replace heavily infested nests, and avoid repeated disturbances to healthy nests. Quick inspections reduce stress and helps prevent accidental cooling of eggs or nestlings.
What are common mistakes with pulley-and-rope lowering systems?
Yes. If you lower the house for maintenance, make sure you can do it reliably and safely and that the pulley system does not jam in wind or after rain. Add a simple stop or limit so the house can’t swing into the pole, which can scrape the compartments and create entry gaps.
How do I prevent house sparrows from using the house before martins arrive?
Plan for off-season sparrow occupation by keeping the house inaccessible or lowered after martins leave, then only open it shortly before expected arrival. If you leave it sitting open, house sparrows and starlings often move in immediately. The timing matters, especially if your area has early scouts.
Can I clean and repaint the house in the same weekend before spring?
Do it, but only after the compartments have fully dried. After scrubbing with the bleach solution, rinse well, let everything dry completely, then repaint worn exterior surfaces. Trapped moisture or leftover chemical residue inside can interfere with nests and increase odor attraction for competitors.
What should I do if martins start in one compartment but not the others?
If only one compartment is active, the colony may still expand later, because martins recruit gradually. But if multiple compartments are empty across the season, focus on competitors and location before altering construction. First check that entrances are correct, SREH is installed, and the pole has clear approach lanes.
Will trimming nearby trees fix a poor location, or do I need to move the pole?
If trees have grown closer than your target clear approach distance, trimming can help, but it must restore open lanes consistently, not just cut branches that later regrow into the path. If you have ongoing growth or frequent obstructions, relocating the pole can outperform continued pruning every year.
Next Articles

How to Build a Chimney Swift Bird House DIY Guide
Step-by-step DIY plans to build a chimney swift bird house, with correct dimensions, placement, and weatherproofing for

How to Build an Oriole Bird House: Step-by-Step DIY
Step-by-step DIY for building an oriole bird house with right dimensions, weatherproofing, predator-safe placement, and

How to Build a Chickadee Bird House Step by Step
Step-by-step DIY chickadee bird house with cut list, chickadee entry sizing, ventilation, drainage, and mounting tips.