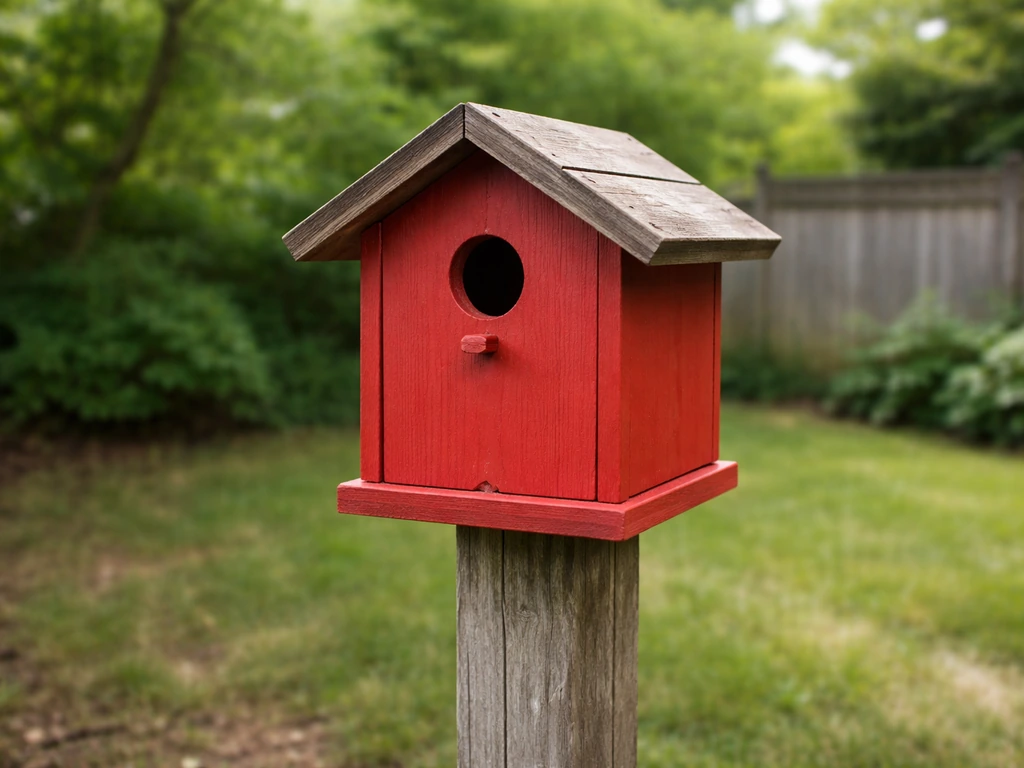
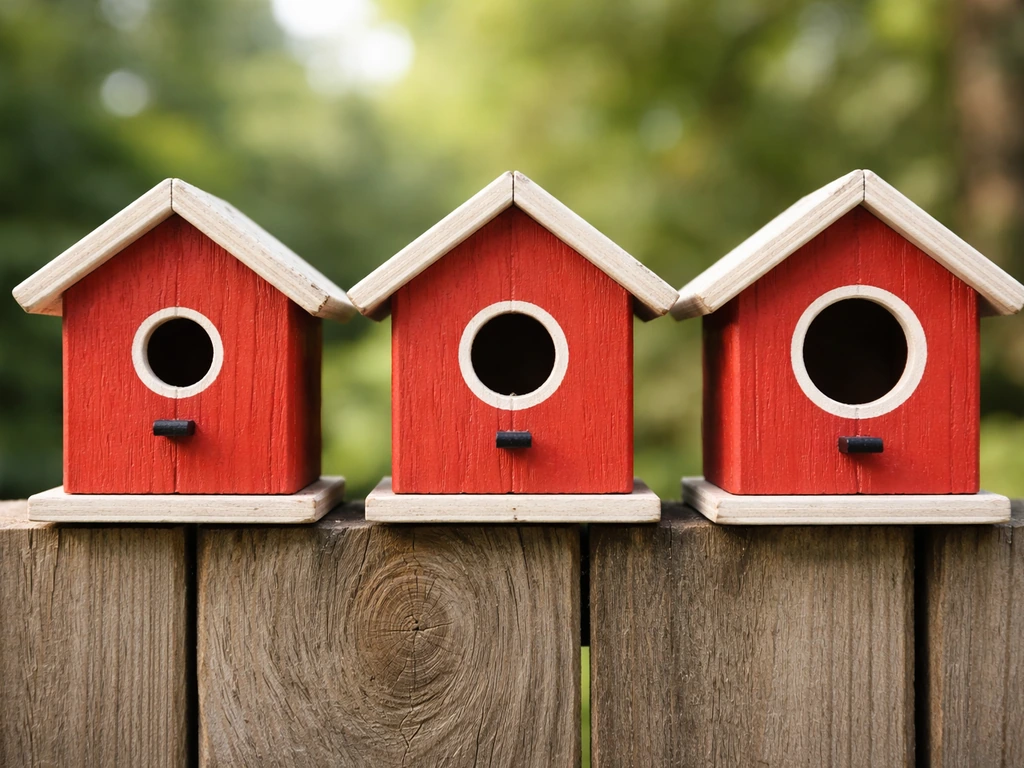
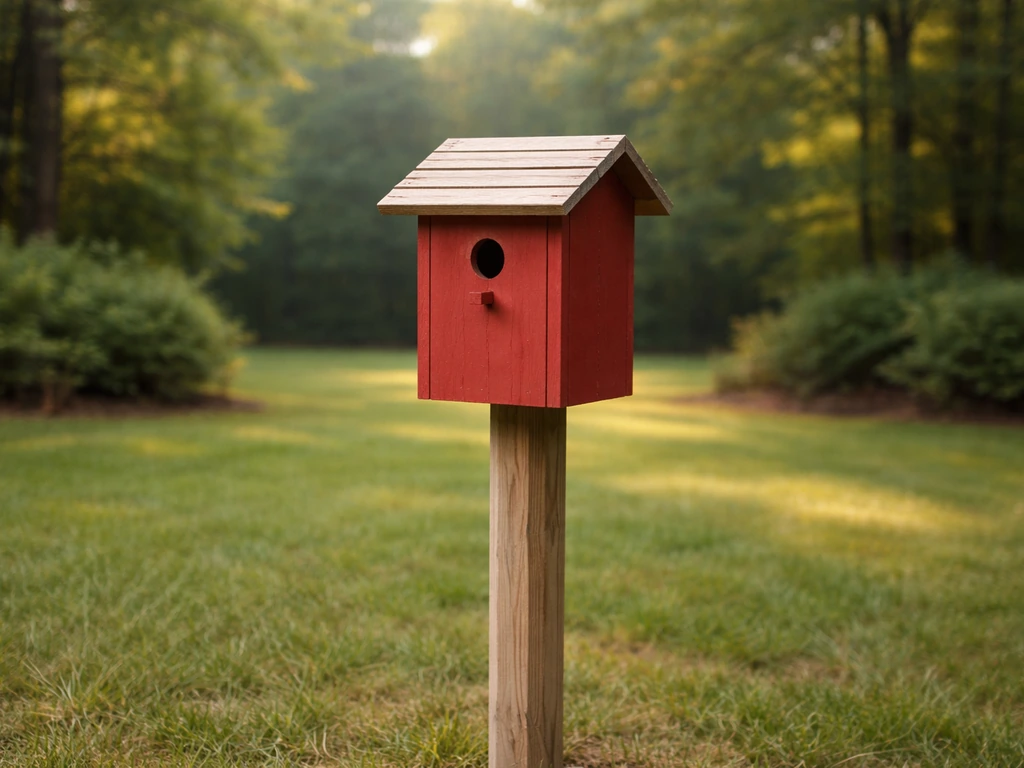
You can absolutely build a red bird house that looks great AND gets used by real backyard birds. The key is knowing which species you're targeting, sizing the entrance hole correctly, using bird-safe finishes for the red color, and adding a few simple features that keep the box dry, cool, and predator-resistant. I've built a lot of these boxes, including some early ones that sat empty all season because I got the details wrong. This guide walks you through everything so you don't repeat my mistakes.
How to Build a Red Bird House: Step-by-Step DIY Guide

Marcus Thornton
19 Apr 2026
Choosing the right design for your target birds
The single most important decision you'll make is the entrance hole size. Get it right and you attract the bird you want while keeping bigger, more aggressive species out. Get it wrong and you end up with house sparrows or European starlings moving in. Before you cut a single board, decide which cavity nester you're designing for. If you want to focus on another specific cavity nester next, see how to make a blue jay bird house for a similar “species-first” build approach.
The most popular backyard candidates are Eastern Bluebirds, Carolina Wrens, chickadees, and House Wrens. Each one has a specific hole size it prefers, and those specs exist for a real reason: a box built for bluebirds with a 1.5-inch hole will exclude starlings (which need at least 1.75 inches), but a box with a 2-inch hole is basically an open invitation to every pest bird in the neighborhood.
| Species | Entrance Hole Diameter | Floor Size | Box Height | Mounting Height |
|---|---|---|---|---|
| House Wren | 1 inch | 4x4 in | 6–8 in | 5–10 ft |
| Chickadee / Nuthatch | 1 1/8 inch | 4x4 in | ~7 in | 5–15 ft |
| Carolina Wren | 1 3/8–1 1/2 inch | 5x5 in | 6–8 in | 5–10 ft |
| Eastern Bluebird | 1 1/2 inch | 5x5 in | 8–10 in | 3–6 ft |
If you're building your first red bird house and want the best shot at occupancy, I'd recommend targeting Eastern Bluebirds or Carolina Wrens. Both are common, active box users across much of North America, and their specs are well-documented. The bluebird design in particular has decades of field-tested plans behind it from organizations like the North American Bluebird Society, so you're not guessing. One important note: bluebird boxes should NOT have a perch below the entrance hole. Perches help predators and house sparrows, not bluebirds. Skip it entirely.
If cardinal-style nesting is on your mind, keep in mind that Northern Cardinals are not cavity nesters. They use open cup nests in dense shrubs, not enclosed boxes. So a "cardinal bird house" in the traditional birdhouse sense won't attract them. Cardinals do not use enclosed cavity bird houses, so a “cardinal bird house” works only if you build it for their preferred open-cup nesting. If you want to attract cardinals to your yard, that's a different project. For a standard enclosed red bird house, stick with the cavity-nesting species listed above.
Bird-safe "red" materials and finishes
Here's the part that trips people up: most birds don't care about the color of a birdhouse, but the color you choose affects interior temperature and your ability to keep the box safe for nesting. Dark colors absorb more heat. In hot climates, a dark red box can overheat a nest, which is genuinely dangerous for eggs and chicks. The good news is you have options.
For the wood itself, use untreated lumber. Pressure-treated wood contains toxic compounds that the North American Bluebird Society explicitly warns against. Cedar, redwood, and pine are all good choices. Cedar and redwood are naturally rot-resistant and age beautifully without any finish at all. A 3/4-inch thick board is the minimum; thicker walls help insulate the interior against heat and cold.
For the red color, use exterior-grade latex paint on the outside surfaces only. Never paint the interior of the box, the entrance hole edges, or the floor. Connecticut DEEP bluebird box plans also advise not to stain or paint nest boxes blank" rel="noopener noreferrer">Never paint the interior of the box. Oil-based and latex exterior paints are both considered acceptable for the outside of nest boxes, but water-based latex is easier to work with and dries faster. Choose a lighter barn red or brick red rather than a deep, almost-black crimson. Lighter reds reflect more heat and keep the interior cooler, which matters a lot from May through July when most birds are actively brooding.
If you want to skip paint entirely and still get that red look, cedar has natural reddish tones that deepen as it weathers. You can also use an exterior stain in a red-toned color, which soaks into the wood grain rather than sitting on top. Stains tend to last longer than paint on rough-sawn lumber because they don't peel. Whatever finish you use, let it cure fully, ideally for at least 48 to 72 hours before installing the box, so any off-gassing is done before birds move in.
- Use untreated cedar, redwood, or pine. Never pressure-treated wood.
- Paint the exterior surfaces only. Leave interior walls, floor, and entrance hole edges bare.
- Choose exterior-grade latex paint in a lighter barn red or brick red shade.
- Exterior stain in a red tone is a great low-maintenance alternative to paint.
- Let any finish cure for at least 48–72 hours before mounting the box.
- In hot climates, consider a lighter red or adding a shade-side orientation to reduce interior heat.
Cut list and measurements for a DIY red bird house
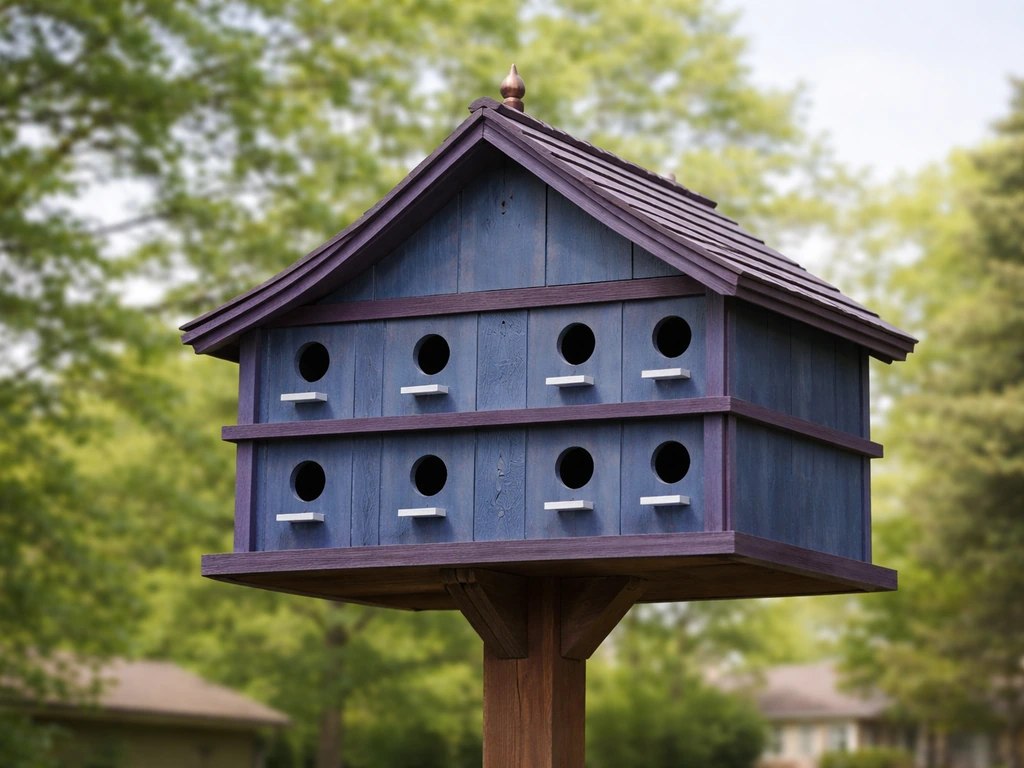
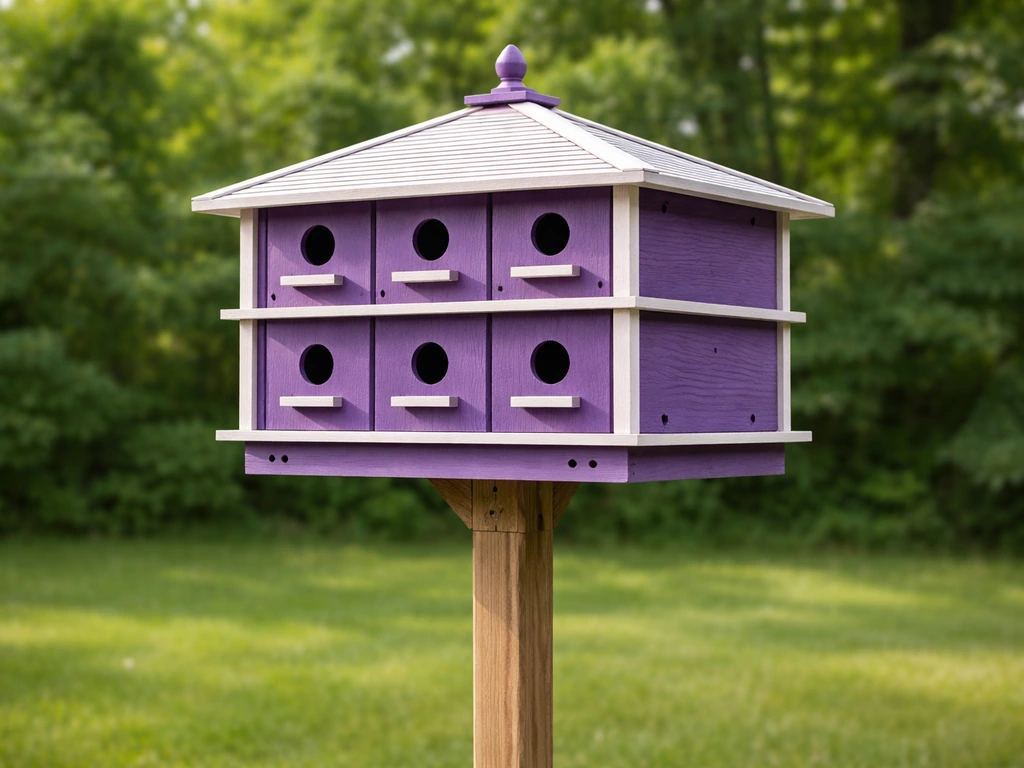
The plan below is based on a bluebird-style box with a 1.5-inch entrance hole, which works for both Eastern Bluebirds and Carolina Wrens depending on your region. If you want to build a purple martin bird house, you’ll need to adjust the design to suit their larger colony-breeding habits and entrance requirements. All measurements assume standard 3/4-inch thick untreated lumber (like a 1x6 or 1x8 pine board). You can scale this up or down for other species by adjusting the floor size and hole diameter using the table above.
| Part | Dimensions | Quantity | Notes |
|---|---|---|---|
| Front | 5.5 in wide x 10 in tall | 1 | Drill 1.5-in hole, center, 7–8 in from floor bottom |
| Back | 5.5 in wide x 14 in tall | 1 | Extra length for mounting; drill two pilot holes top and bottom |
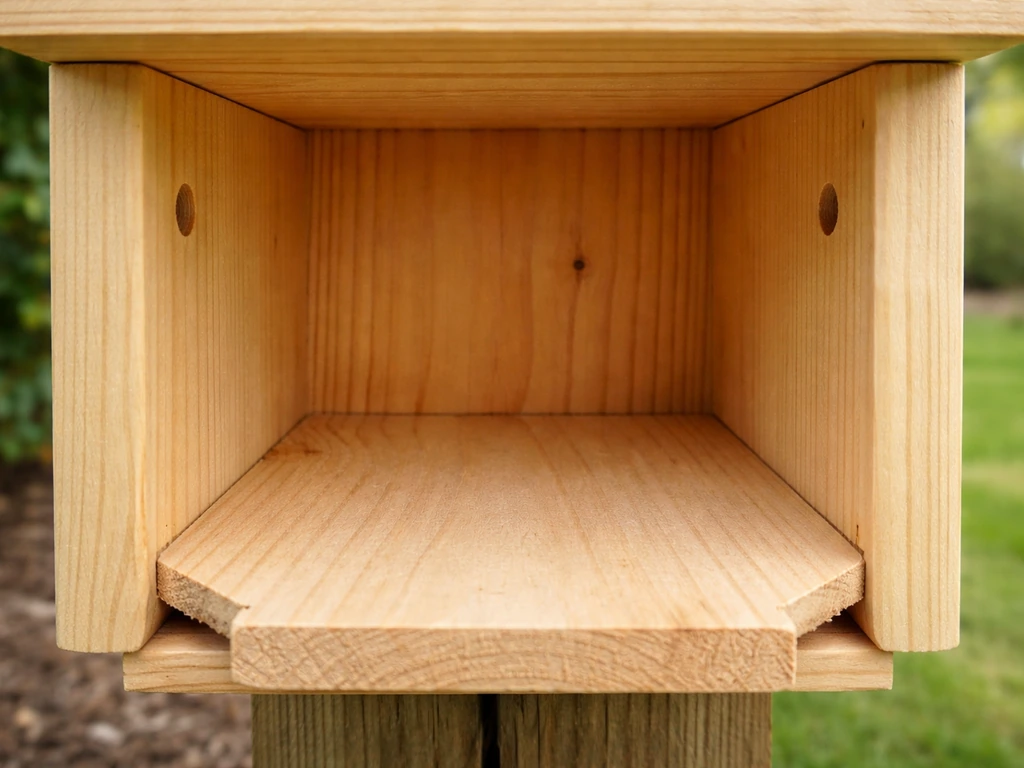
| Floor | 5 in x 5 in | 1 | Clip or round corners for drainage; fits inside front/back/sides |
| Side panels | 5 in wide x 10 in tall | 2 | Taper top edge to match roof pitch if desired |
| Roof | 7–8 in wide x 8 in long | 1 | Wider than box to create 1–2 in overhang on sides and front |
| Pivot screw block (optional) | Small wood block | 1 | Used to hinge one side panel for clean-out access |
The entrance hole center should sit about 7 to 8 inches above the floor of the box. The Massachusetts Bluebird Association notes that NABS recently recommended using a one and nine-sixteenth inch entrance hole for all three bluebird species, and it also discusses the minimum distance from the bottom of the entrance hole to the floor. This gives nesting birds enough depth to feel secure. For the hole itself, a 1.5-inch spade bit or Forstner bit gives a clean, round edge. Rough up the interior front panel below the entrance hole with a chisel or saw kerfs so fledglings can grip the wood and exit easily. That's one of those small details that actually matters for nesting success.
If you're building for chickadees or nuthatches instead, swap the floor to 4x4 inches, reduce the box height to about 7 inches, and use a 1 1/8-inch bit for the entrance. For House Wrens, go even smaller: 1-inch hole, 4x4 floor, 6 to 8 inches tall. Everything else in the build process stays the same.
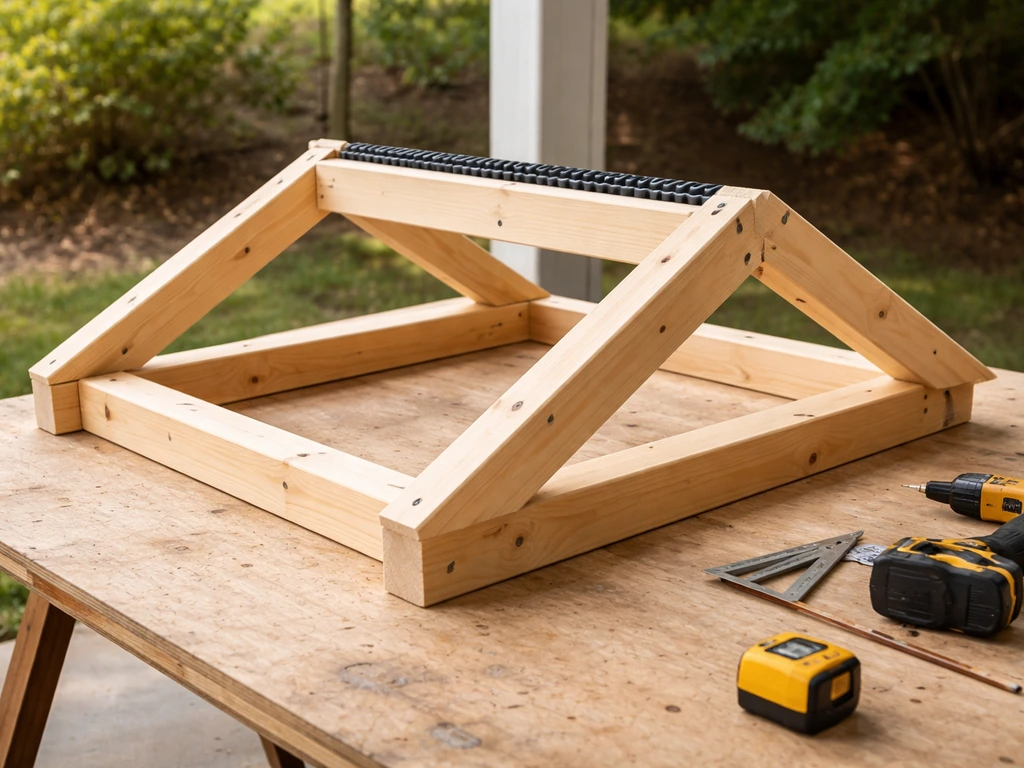
Assembly details: roof pitch, ventilation, drainage, and clean-out
Once your pieces are cut, assembly goes fast. Use exterior-grade screws rather than nails. Screws hold better over years of freeze-thaw cycles, and they let you disassemble the box for repairs without destroying the wood. A #8 x 1.5-inch coarse-thread screw works well for 3/4-inch lumber. Pre-drill everything to avoid splitting, especially near the edges.
Roof pitch and overhang
A sloped roof sheds rain and helps keep the interior dry. Even a slight pitch, just a few degrees, is enough to move water off the top. The overhang matters just as much: aim for at least 1 to 2 inches on the sides and front. For bluebird boxes, a 5-inch total overhang above the entrance hole is the NABS-aligned recommendation, and it genuinely reduces the ability of cats and raccoons to reach in. Cut a 1/4-inch deep kerf (shallow groove) along the underside of the roof on all three exposed edges. This acts as a drip edge, breaking the surface tension of water so it drips off rather than running back toward the box walls.
Ventilation
Ventilation is non-negotiable. Without it, the interior can hit temperatures that kill eggs and chicks during a warm May afternoon. Drill at least two 1/4-inch holes in each side panel near the top of the box, just below the roof line. You can also leave a small gap between the top of the side panels and the underside of the roof if your design allows for it. The goal is cross-ventilation so hot air can escape. I've opened boxes in July that were like mini ovens because someone skipped this step. Don't skip it.
Drainage
The floor of the box needs to drain. The easiest approach is to clip or round each corner of the floor panel at a 45-degree angle before assembly, leaving small triangular gaps at each corner where water can escape. Alternatively, drill four 1/4-inch holes through the floor, one near each corner. Both methods work. The clipped-corner approach is slightly better because it also improves airflow from below.
Clean-out panel
Build in a way to open the box easily at the end of the season. The simplest method is to make one side panel a hinged or pivot-screw panel. Drive a single screw through the top of one side panel into the front and back boards just enough to allow it to pivot outward when the bottom retaining screw is removed. This gives you full access to the interior for cleaning without any disassembly. Front-opening and top-opening designs also work. The point is: if cleaning is easy, you'll actually do it, and that matters more than the specific hinge style you choose.
Mounting and placement for best nesting success
Where you put the box matters almost as much as how you build it. I've had boxes ignored for two full seasons, moved them 30 feet to a better spot, and had birds move in within two weeks. Placement is not an afterthought.
For Eastern Bluebirds, mount the box 3 to 6 feet off the ground on a smooth metal pole in an open area with short grass nearby. Bluebirds are aerial hunters and need open sightlines. Face the entrance hole toward open field, away from prevailing winds and afternoon sun. If you're setting up multiple boxes on a bluebird trail, space them at least 300 feet apart to reduce territorial competition. For Carolina Wrens, mount 5 to 10 feet up, in or near shrubby cover. Wrens are less fussy about orientation but prefer some vegetation nearby.
For both species, avoid south-facing entrance holes in hot climates. An east or southeast facing entrance gets gentle morning sun, which helps warm the box early in the day, but avoids the intense afternoon heat that can stress nesting birds. In cooler northern regions, a southeast to south facing orientation is generally fine year-round.
- Mount bluebird boxes 3–6 ft high on a metal pole in open grassland or lawn.
- Mount wren and chickadee boxes 5–10 ft high, near shrubs or woodland edges.
- Face the entrance hole east or southeast in most regions to avoid afternoon heat.
- Space bluebird boxes at least 300 ft apart on the same trail.
- Keep the box away from bird feeders and busy foot traffic during nesting season.
- Avoid trees directly over the box where squirrels can drop down onto it.
Safety, durability, and predator/insect protection
A box that isn't predator-protected is basically a trap for nesting birds. Raccoons, cats, snakes, and squirrels are all real threats, and they're more common in suburban backyards than most people realize. The good news is that a couple of simple additions make a big difference.
If you're mounting on a pole (which I strongly recommend for bluebird boxes), add a stovepipe or cone baffle below the box. A stovepipe baffle is a length of 8-inch diameter metal pipe, about 24 inches long, centered on the pole. Climbing predators like raccoons and snakes cannot get past it. The baffle needs to be mounted low enough that an animal can't jump over it, typically 4 to 5 feet off the ground with the box above it.
For the entrance hole itself, consider adding a Noel predator guard. This is a simple wire cage that extends out from the entrance hole, making it very difficult for a raccoon to reach inside and pull out eggs or chicks. Plans for Noel guards are freely available and they're easy to build from hardware cloth. Even a wooden entrance hole extender (a block of 3/4-inch wood with the same hole diameter, glued or screwed to the front) adds enough depth to make reaching inside more difficult for most predators.
For insect protection, the best defense is a well-ventilated, dry box. Blowflies and ants are the most common pest insects in nest boxes. Blowfly larvae live in nesting material and parasitize chicks. You can't eliminate them entirely, but cleaning the box between broods (during the active nesting season, only when the nest is empty between clutches) removes larvae before they develop. Some builders add a false floor (a second floor panel with holes, sitting above the real floor) so larvae drop through and can't reach the chicks above.
On durability: the biggest killer of wooden nest boxes is water intrusion and rot. The ventilation and drainage features you built in help enormously. Beyond that, the roof overhang, the drip-edge kerf cuts, and painting or staining the exterior all extend the life of the box significantly. A well-built cedar or pine box with proper drainage and a good exterior finish should last 10 to 15 years with basic annual maintenance.
Maintenance, troubleshooting, and when to install
When to install
Put your box up before nesting season begins. For most of North America, bluebirds start scouting nest sites in late February or March. Wrens and chickadees follow a few weeks later. Getting the box up in January or February gives birds plenty of time to find and claim it before the rush. If you're installing in the fall, that's fine too: some birds roost in boxes over winter, which gets them familiar with the location before breeding season.
Cleaning schedule
Clean the box at the end of the nesting season, between September and February, when no active nesting is happening. Remove all old nesting material completely. Scrub the interior with a mild detergent and rinse it well. For heavily soiled boxes or boxes with a lot of fecal matter, use a diluted bleach solution of 1 part bleach to 10 parts water, then let the box air dry completely before closing it back up. Never clean a box while eggs or chicks are present. This is also a good time to check for rot, loose screws, and any damage to the roof or seams.
Why birds might not be using your box
If the box sits unused through a full nesting season, go through this checklist before giving up. Location is the most common culprit: a bluebird box placed under a tree canopy or too close to a feeder will often be ignored. The second most common issue is the entrance hole size: too large and house sparrows move in, discouraging target species. Third is the interior: if you painted the inside or left rough, splintery edges around the hole, birds may avoid it. Finally, check for wasp nests. Wasps frequently colonize empty nest boxes and block cavity nesters from moving in. Rubbing the interior ceiling with bar soap before the season discourages wasps without harming birds.
Final checklist before you call it done
- Entrance hole is the correct diameter for your target species (use a ruler or calipers to verify).
- Interior walls, floor, and entrance hole edges are bare wood, no paint or stain.
- Exterior surfaces are painted or stained with bird-safe, fully cured exterior finish in your chosen red tone.
- Roof has a slope and at least 1–2 inches of overhang on the front and sides.
- Drip-edge kerf cuts are made on the underside of the roof edges.
- At least two 1/4-inch ventilation holes are drilled in each side panel near the top.
- Floor has clipped corners or drainage holes for water escape.
- One side or front panel opens easily for seasonal cleaning.
- Box is mounted on a metal pole with a baffle, or on a smooth post at the correct height.
- Entrance hole faces the right direction for your climate and species.
- No perch is attached below the entrance hole.
- Box is installed before late February for bluebirds, or before April for wrens and chickadees.
Building a red bird house is a genuinely satisfying project, and when you see a bluebird or wren claim a box you built yourself, that feeling is hard to beat. If this build gets you interested in going bigger or designing for other species, purple martin houses are a fascinating next challenge since they require multi-compartment colony designs and very different placement rules.
Whichever direction you go, the fundamentals you've learned here, correct hole size, safe finishes, ventilation, drainage, and predator protection, apply to every cavity nester box you'll ever build. Whichever direction you go, the fundamentals you've learned here, correct hole size, safe finishes, ventilation, drainage, and predator protection, apply to every cavity nester box you'll ever build. If you're curious about a different style of nesting setup, consider this related guide on how to build martin bird house.
FAQ
Can I use pressure-treated lumber if I still use bird-safe paint outside?
No, pressure-treated wood is a common failure point because treated chemicals can off-gas and leach into the nesting area over time. If you cannot source untreated boards, choose another wood option like cedar or redwood, or use a barrier strategy such as lining the interior surfaces with untreated, sealed panels that are fully cured. The goal is to keep any treated material isolated from the interior cavity.
What if I already painted the interior, the hole edges, or the floor by accident?
Remove or fully replace the contaminated interior pieces if possible, especially the floor and entrance-hole rim. If you cannot replace them, avoid restarting the season with the box occupied, because residue and odor can linger even after paint cures. In practice, most builders treat interior paint as a reason to clean thoroughly and wait through another full off-season before offering it for nesting.
How precise do I need to be with the entrance hole diameter?
Be strict, within about 1/16 inch. A hole that is too large is the bigger risk because it can allow house sparrows or starlings to enter, and those competitors can also discourage target species from settling later. Also make sure the hole is clean and round, not oval or jagged from a rough bit, since irregular edges can reduce acceptance.
Is it okay to add a perch above or below the entrance hole for better access?
Avoid any perch below the entrance for cavity nesters like bluebirds. For some species, perches increase predator success and can also attract unwanted competitors. If you want a “look” perch for humans, put it away from the entrance opening so it does not create a stepping surface into the cavity.
Can I attach the red bird house to a tree instead of using a pole?
You can, but pole mounting with a baffle is much easier to secure against raccoons and cats. If mounting on a tree, use a predator guard designed for that specific setup and ensure the box is not reachable from nearby branches. Also watch sightlines for bluebirds, trees nearby can reduce use if the entrance faces blocked cover.
How do I handle wasps if I find a nest after the box is already up?
Remove wasp nests only when there are no active eggs or chicks in the box (typically between late season and before the next nesting window). After removal, scrub and dry the interior, then consider preventative measures like a barrier on the entrance rim. Wasps are often the reason a box remains empty, even when hole size and placement look correct.
Do I need to mount the box at the same height every year, or can I move it?
You can move it, but moving timing matters. If you change location, do it before the birds begin scouting so they can re-evaluate the site. Mid-season moves can cause abandonment. If you move only slightly, still remove the box early enough and clean it so birds do not interpret the change as a new or unsafe site.
What is the best schedule for cleaning if multiple broods happen in one season?
Clean after nesting is finished for the season, between September and February, when there are no active nestlings. During the breeding period, only consider between-brood cleaning if the box is confirmed empty between clutches, because cleaning while eggs or chicks are present can be fatal. When cleaning, remove all nesting debris rather than scraping lightly, since larvae and parasites can remain in residue.
Should I drill ventilation holes even if the box is shaded and the weather is mild?
Yes, ventilation is still worthwhile because indoor temperature spikes can happen on sunny days even in mild regions. The non-negotiable part is cross-ventilation near the top so warm air can escape. Vent holes that are too low can vent poorly, so place them near the roof line as designed.
How often should I check the box for rot or loose screws?
At least once per year, when you do seasonal cleaning, and after any unusually wet storms. Cedar and redwood resist rot, but joints still loosen over freeze-thaw cycles. If you notice soft wood near the floor or entrance rim, correct drainage and replace any compromised panels early rather than waiting for a full collapse.
Can I skip paint and just let cedar weather naturally to the red look?
Yes, cedar can develop a reddish tone over time, but it is not uniform and can darken quickly depending on sun exposure. If you want more predictable color, use an exterior red-toned stain instead of paint so the wood grain remains visible and peeling is less likely. Regardless of finish, still allow full cure and odor-off time before mounting.
What should I do if the box stays empty for a full season?
Do a quick root-cause check in a specific order: verify entrance hole diameter matches the target species, confirm ventilation and drainage vents are not blocked, and ensure predator deterrence is in place. Then reassess placement, too much shade or the box being near food sources can reduce visits. Finally check for wasp activity, interior splinters, or painted interior residues that make birds avoid the cavity.
Next Articles
How to Build a Martin Bird House for Blue Martins
Step-by-step guide to build a blue or purple martin house with correct dimensions, entry slots, mounting, and setup for
How to Build a Purple Martin Bird House Step by Step
Step-by-step DIY guide to build a purple martin bird house with correct holes, spacing, ventilation, drainage, and place

How to Build a Chimney Swift Bird House DIY Guide
Step-by-step DIY plans to build a chimney swift bird house, with correct dimensions, placement, and weatherproofing for