You can build a homemade incubator for bird eggs that actually works, and you do not need a lot of money or fancy equipment to do it. The core job of any incubator is straightforward: hold temperature steady around 99–100°F for forced-air designs (or 101–102°F for still-air), keep relative humidity in the 58–60% range during most of incubation, and turn the eggs regularly so the embryo does not stick to the shell membrane.
How to Make a Homemade Incubator for Bird Eggs

Marcus Thornton
12 Apr 2026
Get those three things right and you have a real shot at a successful hatch. Get them wrong and even expensive commercial incubators fail. This guide walks you through building a reliable setup from scratch using mostly repurposed parts, then helps you calibrate, troubleshoot, and carry eggs all the way through to hatch day.
Choosing the right type of homemade egg incubator setup
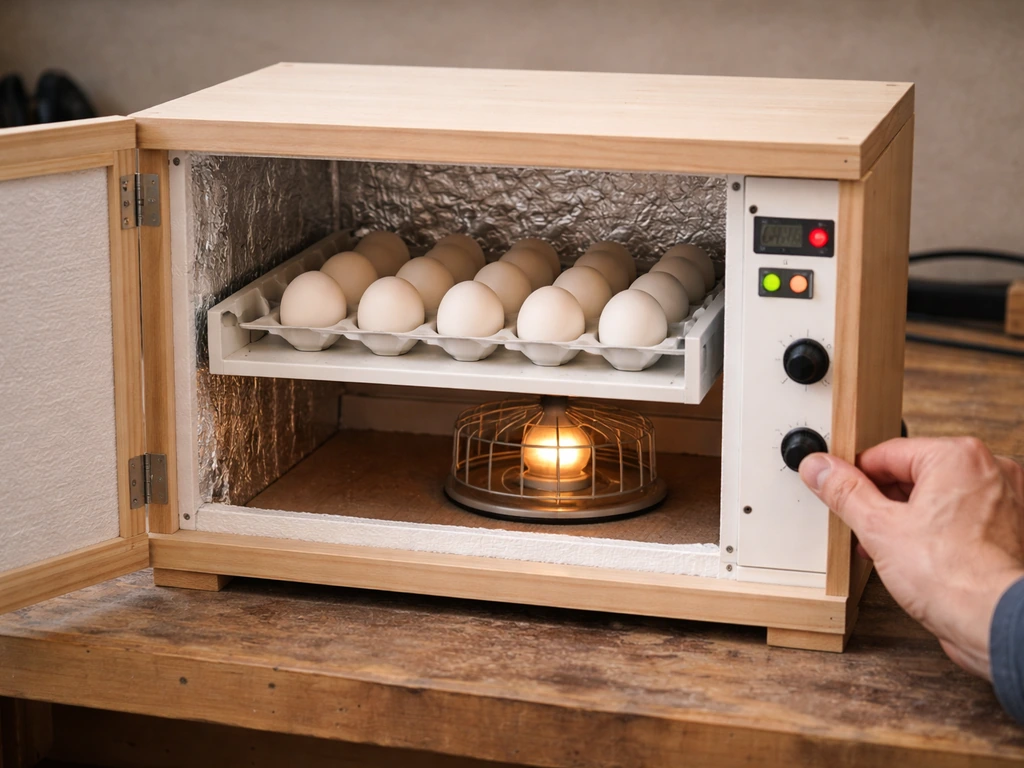
There are two main designs worth considering: still-air and forced-air. A still-air incubator has no fan, which makes it simpler to build but harder to control. Heat stratifies inside the box, meaning the top of the chamber is warmer than the bottom, and small temperature swings hit the eggs directly. A forced-air incubator adds a small computer fan (a 12V PC case fan works perfectly) to circulate warm air throughout the chamber.
This evens out hot and cold spots and, as Mississippi State Extension points out, short temperature fluctuations in forced-air setups have less impact on hatchability because egg temperature changes more slowly than incubator air temperature. For a first build, forced-air is the smarter choice even though it adds one more component.
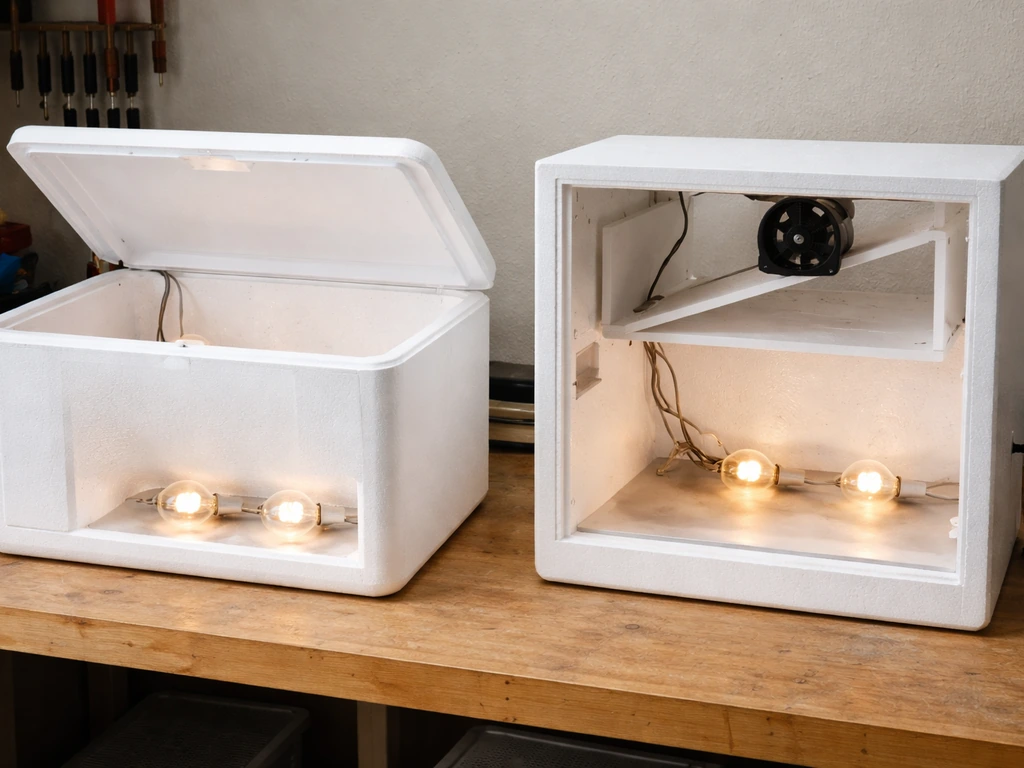
For the cabinet itself, you have a few good options. A styrofoam cooler is the classic beginner choice because it insulates well, is easy to cut, and costs almost nothing. A small wooden box or repurposed wine crate works too and holds temperature more consistently once it warms up. For a more polished build, some people use a mini-fridge with the compressor removed, which gives you excellent insulation and a built-in shelf.
The size depends on what you are hatching. A single batch of quail eggs fits comfortably in a large styrofoam cooler. A dozen chicken or duck eggs needs something bigger, closer to a medium wooden box measuring roughly 12 by 18 inches internally. The goal is a volume small enough that your heat source can maintain temperature without working too hard, but large enough that the temperature does not spike the moment you open the lid.
Materials and tools list (repurposed vs purpose-built parts)
One thing I love about this build is how much you can pull from around the house or find cheaply at a hardware store. Here is what you need, split between the parts you can repurpose and the few items worth buying new.
Repurposed or budget materials
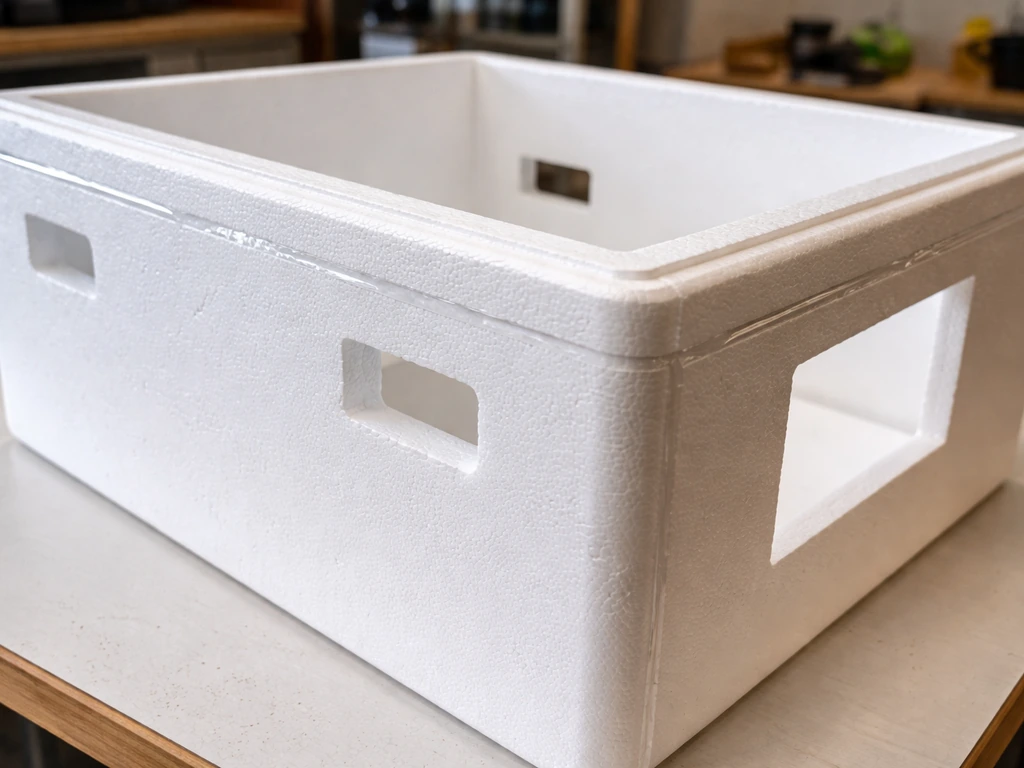
- Large styrofoam cooler or wooden box (cabinet/shell of the incubator)
- Old computer power supply or a cheap 12V DC adapter (to run the fan)
- Small deli containers or jar lids (water reservoirs for humidity)
- Wire cooling rack or hardware cloth cut to size (egg tray/turning surface)
- Foam weatherstripping (to seal the lid and reduce heat loss)
- Rubber grommets or electrical tape (for sealing wire/probe pass-throughs)
Purpose-built parts worth buying
- Digital thermostat/temperature controller with a probe (STC-1000 or equivalent, around $15–25)
- Ceramic reptile heat bulb or a small incandescent bulb (25–40W depending on box size)
- 12V computer fan (40mm or 80mm)
- Digital hygrometer/thermometer combo unit with a remote probe
- Second independent thermometer for calibration cross-checks
- Light dimmer or inline variable resistor (optional, for fine-tuning heat output)
Tools
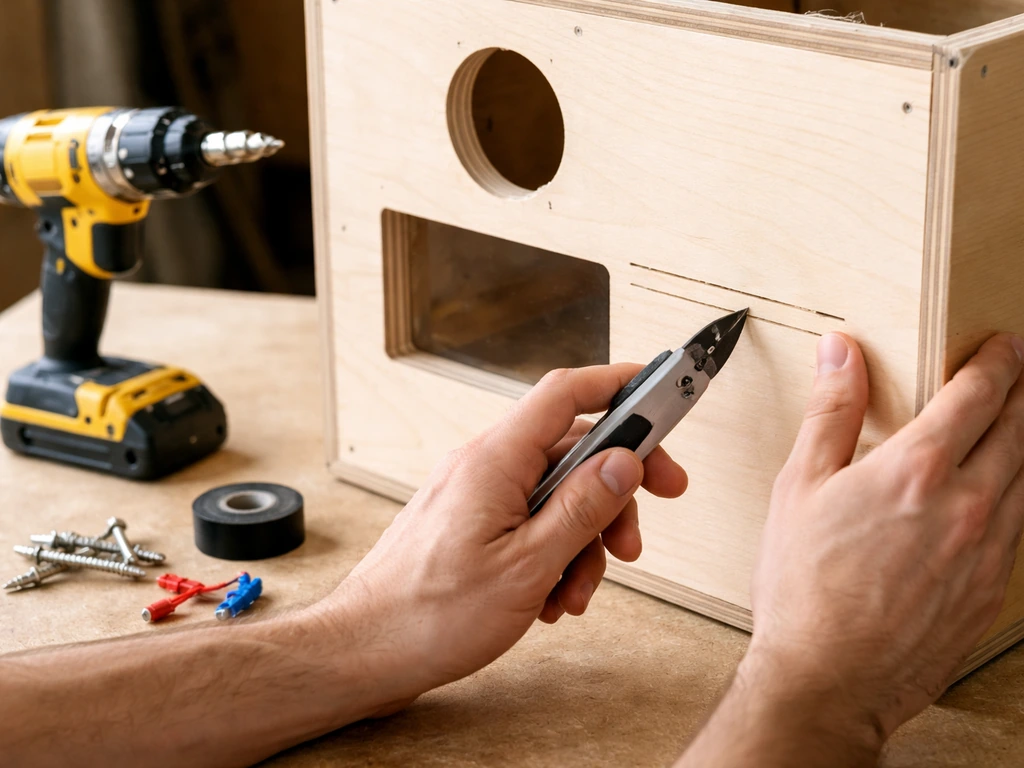
- Box cutter or jigsaw (for cutting ventilation holes and viewing windows)
- Drill with a step bit (for round holes)
- Screwdriver, basic wiring connectors, and electrical tape
- Small level (to make sure the egg tray sits flat)
- Zip ties or small screws for mounting the fan
If you are also thinking ahead to after the hatch, you will eventually need a brooder setup too. Knowing how to make a bird brooder before hatch day means you are not scrambling when the chicks arrive. Building both at the same time makes a lot of sense.
Step-by-step build process for a stable temperature incubator
- Prepare the cabinet: If using a styrofoam cooler, check that the lid fits snugly and seal any gaps with weatherstripping. Cut a small viewing window in the lid (about 3 by 4 inches) and cover it with a piece of clear plastic or acrylic taped securely on the inside. This lets you check on eggs without opening the lid and losing heat.
- Install the heat source: Cut a hole in one end or the side of the box just large enough for your bulb socket or ceramic heat emitter fixture. Mount it so the bulb hangs inside the chamber without touching the walls or the egg tray. Keep at least 4–5 inches of clearance between the bulb and the nearest egg.
- Mount the fan: Attach your 12V fan to the inside wall opposite the heat source using zip ties or small screws. Orient the fan to push air across the heating element and around the chamber in a circular pattern. Wire it to your 12V adapter; the fan should run continuously.
- Wire in the thermostat controller: The thermostat probe goes inside the chamber, positioned at egg level (not directly in front of the heat source or the fan). Wire the thermostat so it controls power to the heat bulb only, while the fan runs independently on its own power supply.
- Build the egg tray: Cut a piece of hardware cloth or a wire cooling rack to fit the inside floor of the box with about an inch of clearance below it. This space underneath holds your water containers. The eggs sit on top of the mesh so air circulates around them.
- Add water reservoirs: Place one or two small deli containers or jar lids filled with warm water under the egg tray. If using a deli cup, poke a small hole in the lid so evaporation can escape into the chamber (a technique described well in NEHERP's DIY incubator guidance). More surface area means more humidity; less means drier air.
- Cut ventilation holes: Drill or cut two or three small holes (roughly 1/4 inch diameter) near the top of the chamber and one or two near the bottom for fresh air exchange. Embryos need oxygen and produce carbon dioxide. Do not skip this step.
- Do a dry run: Plug everything in without any eggs. Run the incubator for 24–48 hours and watch the temperature and humidity readings. Adjust the thermostat set point, bulb wattage, or water reservoir size until readings are stable.
Adding and calibrating heat control, humidity, and egg turning
Temperature calibration
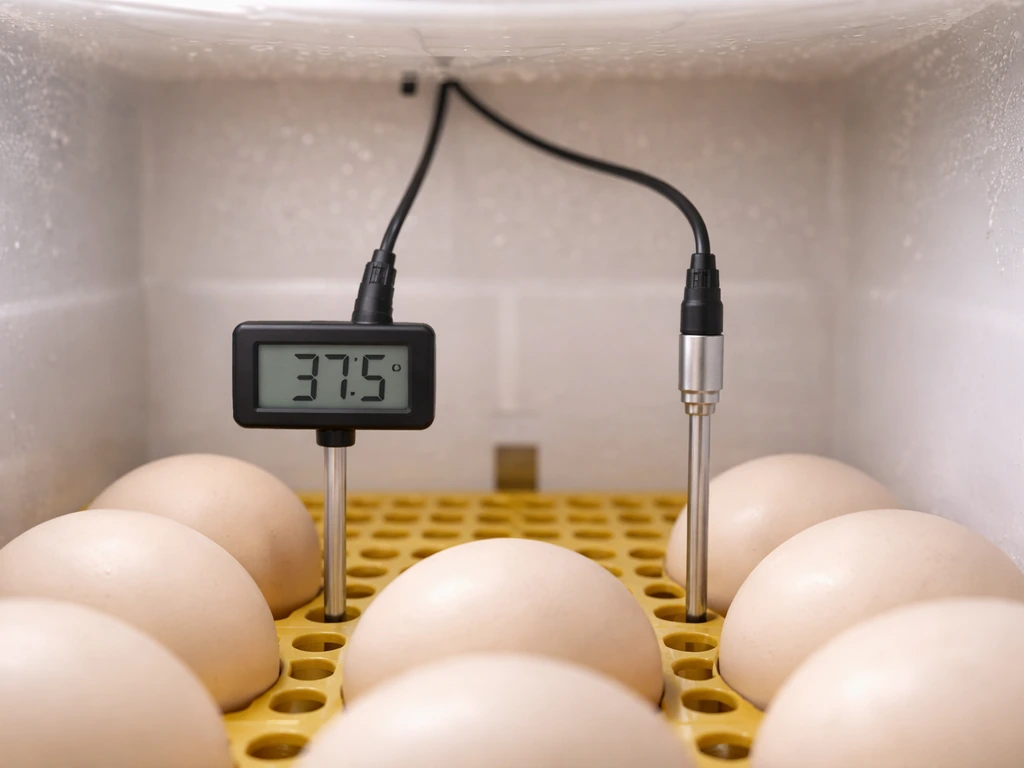
The thermostat controller's built-in probe gives you a reading, but you should never trust a single sensor. Put an independent digital thermometer inside the chamber at the same height as the eggs and compare the two readings. If they disagree by more than 0.5°F, use the independent thermometer as your reference and offset the controller's set point to compensate. Some digital controllers have a calibration offset function built in, which makes this easy. Oklahoma State Extension makes a point worth repeating: incubation period and outcome vary with actual temperature and humidity inside the incubator, not the nominal dial setting. What the controller says and what the eggs experience can be different things.
For target temperature, aim for 99–100°F at egg level in a forced-air setup. For still-air builds, measure at the top of the eggs and aim for 101–102°F. For species-specific targets, a reference table is your friend. Here are common incubation set points as a baseline:
| Bird Species | Incubation Period | Forced-Air Temp (°F) | Humidity (RH%) | Stop Turning |
|---|---|---|---|---|
| Chicken | 21 days | 99–100°F | 58–60% | Day 18 |
| Duck (mallard type) | 28 days | 99–100°F | 55–65% | Day 25 |
| Goose | 28–35 days | 99–100°F | 55–65% | Day 26–28 |
| Quail (coturnix) | 17–18 days | 99–100°F | 45–55% | Day 14–15 |
| Turkey | 28 days | 99–100°F | 55–60% | Day 25 |
Humidity calibration
Hygrometers are notoriously inaccurate out of the box, so calibrate yours before you trust it. The easiest method is the salt test: seal your hygrometer in a zip-lock bag with a small cup of saturated salt solution (dissolve as much table salt in water as will dissolve, leaving some undissolved salt at the bottom).
After 8–12 hours in the sealed bag, the hygrometer should read approximately 75% relative humidity, which is the equilibrium humidity that saturated sodium chloride solution reliably produces. If it reads higher or lower, note the offset and apply it to all your readings going forward. For chicken eggs, [target 58–60% RH during incubation](https://extension. umd.
edu/ensp. umd. edu/sites/extension. umd.
edu/files/publications/HatchingEggsAtHomeFS-1114ada. pdf) (days 1 through 18). Adjust your water reservoir surface area up or down to hit that range.
Egg turning
Turning prevents the embryo from adhering to the shell membrane. If you are turning by hand, the University of Maryland Extension recommends a minimum of 5–6 turns per day, and research published in peer-reviewed incubation studies confirms that turning frequency and angle both affect outcomes, with a 45-degree tilt being the effective working angle.
A good habit is to mark one side of each egg with an X and the other with an O using a pencil, so you can see at a glance whether every egg has been turned. Turn in odd numbers of turns per day (5 or 7) so the egg spends alternate nights on opposite sides.
If you want to automate turning, a cheap egg turner motor (meant for commercial tabletop incubators) can be adapted to fit your DIY box and handles turning every 2 hours, which matches rates used in incubation research.
Safety, reliability checks, and troubleshooting common failures
Before you load any eggs, spend two full days running the incubator and watching it. Temperature should hold within plus or minus 0.5°F of your set point. Humidity should stay in range without you touching anything. If it does not, here is how to fix the most common problems.
| Problem | Likely Cause | Fix |
|---|---|---|
| Temperature swings of more than 1°F | Thermostat hysteresis too wide, or bulb wattage too high | Switch to a lower-wattage bulb, or adjust the thermostat hysteresis setting if it has one |
| Temperature too high near the bulb | Bulb is too close to egg tray or fan not circulating properly | Increase clearance between bulb and eggs; reposition fan |
| Humidity too low (below 50%) | Not enough water surface area | Add a second reservoir or use a shallow tray with more surface area |
| Humidity too high (above 70%) | Too much water evaporation or ventilation holes blocked | Remove one reservoir or open an additional ventilation hole |
| Condensation on the lid or walls | High humidity and cold surface; usually a sealing issue | Add more ventilation; slightly reduce water surface area |
| Temperature drops when lid is opened | Lid seal is poor or box is too small for the heat source | Improve weatherstripping; minimize lid-opening time; use a viewing window |
On the electrical side, make sure all wiring connections are properly insulated and that there is no exposed wire near the water reservoirs. Use a surge protector to protect your thermostat controller from power spikes. If you are hatching eggs from birds you have bred yourself, it is worth understanding the broader setup your breeding pair needs, too. Knowing how to make a bird breeding box will help you collect clean, fertile eggs from the start, which makes everything downstream easier.
Incubation schedule basics and when to stop turning and prepare to hatch
The incubation period varies by species (see the table above), but the structure of the schedule is the same: active incubation with regular turning, then a lockdown period before hatch. For chickens, stop turning on day 18, three days before the expected hatch on day 21. University of Maryland Extension notes that you should stop turning eggs on day 18 so the chicks can orient themselves before hatch [stop turning on day 18](https://extension. umd.
edu/sites/extension. umd. edu/files/publications/HatchingEggsAtHomeFS-1114ada. pdf).
Utah State Extension recommends moving eggs to a hatcher tray (or just laying them on their sides on a clean non-slip surface) at this point so the chick can orient itself for pipping. The same three-day rule applies proportionally to other species: stop turning three days before the expected hatch date.
At lockdown (the last three days), do two things: stop turning and raise humidity. Mississippi State Extension specifically recommends adding another pan of water or a wet sponge at hatching time to prevent the membranes inside the egg from drying out and trapping the chick. Bump humidity up to around 65–70% for the lockdown period. Do not open the incubator once you see the first pip (the small crack or hole the chick makes in the shell). Every time you open the lid during lockdown, you drop humidity and potentially chill the eggs.
Care during hatch and how to evaluate hatch success
What to expect during hatch
After pipping, most chicks take 12–24 hours to fully emerge. This is normal and the temptation to help is strong, but resist it unless a chick has been pipping for more than 24–36 hours with no progress. Humidity is your most important variable right now. If the membrane dries out and shrink-wraps around the chick, it cannot push out. That is why you raised humidity during lockdown. Keep it at 65–70% and maintain temperature at 99°F until all chicks have hatched.
Chick quality after hatch can tell you a lot about how the incubation went. Strong, alert chicks that dry off quickly and stand within a few hours indicate good temperature and humidity control throughout. Weak or small chicks, slow drying, or a longer-than-expected hatching window can point to a hatcher temperature that was too cool during lockdown, an issue that Cobb Genetics' hatcher management research specifically links to chick quality problems. If you saw large temperature swings in your log, that is your culprit.
Moving chicks out and evaluating your results
Leave chicks in the incubator until they are fully fluffed and dry, usually 12–24 hours after they hatch. They absorb the yolk sac just before hatching and can survive without food or water for up to 48 hours, so there is no need to rush. Once they are dry and active, move them to a brooder set to 90–95°F at the warm end. If chicks huddle tightly under the heat source, they are cold and the brooder needs to be warmer. If they spread to the far corners and pant, it is too hot. Utah State Extension's brooding guidance describes this exact behavior as the practical test for getting brooder temperature right.
Hatch rate is the honest score for how your incubator performed. A rate of 80% or higher from fertile eggs is a solid result for a DIY build. Below 60% means something went wrong, and the most common culprits are temperature instability, humidity that was too low (causing the air cell to grow too large), or insufficient turning early in incubation. Candle your unhatched eggs to check for development. Eggs that are clear with no development were likely infertile. Eggs that show early development but stopped likely point to a temperature problem in the first week. Late quitters (development nearly complete) almost always point to a humidity or turning issue in the final third of incubation.
If you plan to transport eggs or chicks as part of a broader bird-keeping setup, it is worth knowing how to make a bird carrier that keeps birds safe and at the right temperature during short trips. And if you are raising birds with a particular focus on supporting their health during the breeding season, learning how to make a bird breaster can also be a useful addition to your setup. Every piece of the system works better when you have thought through the whole chain from incubation to brooding to housing.
Building a homemade incubator is genuinely one of the more satisfying DIY projects you can do if you are into birds. The first time you see a pip in an egg you set three weeks ago in a box you built yourself, it is a pretty great feeling. The key is not perfection on the first build. It is understanding what the eggs actually need, building something that delivers those conditions as consistently as possible, and then keeping notes so you can improve the next batch. You have everything you need right here to get started today.
FAQ
What should I do if the power goes out during incubation?
Yes, but only with a careful plan. If the power goes out, your heat source will cool quickly, so use a UPS (battery backup) for at least the thermostat controller and a separate heating source that can keep temperature stable. Test worst-case runtime by turning the system off for 30 to 60 minutes before you load valuable eggs, and have a backup heat method ready (for example, a hot-water bottle inside a secondary insulated container).
How often do I need to check humidity, and what changes it the most?
You should not treat “equilibrium” humidity as fixed. When you change room temperature, swap water pans, or open the lid for turning, humidity usually drifts. Recheck RH after each intervention and keep a log of when you added or refilled water, then adjust water surface area only after the system settles (often 30 to 60 minutes).
Is it okay to open the incubator often to check eggs and turn them?
Open the incubator as little as possible, and time openings. During most of incubation, you can do turning with the lid open briefly, but try to keep openings under about 10 minutes and avoid doing it right after refilling water. Use a separate room light or dim red light if you need to see markings without warming the chamber.
How do I choose the right incubator size for the number and type of eggs I’m incubating?
In general, bigger eggs or higher egg counts require more heating and humidity stability, so set your cabinet size based on what your heat source can maintain at egg level. A practical rule is to start small enough that your temperature does not overshoot when the lid is closed, but not so small that opening the lid causes the temperature to swing beyond your allowed range.
What are common turning mistakes, and what should I do if I miss a turning session?
Marking helps, but also control turning direction consistency. If you turn by hand, keep the same “from side to side” routine every day, and aim for the effective angle you plan to use (commonly around 45 degrees if you rotate eggs). If you miss a day, resume with the target turning schedule rather than trying to “catch up” with extra turns.
When transferring to the hatcher tray, how do I minimize temperature and humidity shock?
You should only move eggs when your schedule says to, and during transfer keep temperature and humidity changes minimal. Prepare the hatcher tray in advance, dim the lights if you candle, and avoid leaving eggs out on a cool surface. If you lay eggs down as a temporary measure, keep them on a clean non-slip surface and return them quickly to the warm chamber.
Can I calibrate my hygrometer once and leave it alone for every batch?
Salt-test calibration only covers the hygrometer’s RH accuracy, not temperature accuracy. If your controller probe and the independent thermometer show a consistent temperature offset, correct temperature first, then calibrate RH again if needed. Also, let the hygrometer stabilize after you place it in the chamber, readings often change for the first 10 to 30 minutes.
Where exactly should I place the independent thermometer for best calibration?
Yes, but be consistent about where the thermometer measures. Place the independent digital thermometer at the same height and orientation as the egg level, and keep its position fixed throughout the run. Temperature at the top, middle, and bottom can differ, and using the wrong location is a common reason people chase “phantom” temperature problems.
How can I tell whether my incubation issue was turning-related versus humidity-related?
It depends on timing, temperature drift, and your turning log. If you stop turning too early, you often see late quitters or chicks that struggle to align properly. If humidity was low in the final third, you may see shrink-wrapped membranes, dry internal surfaces, or delayed emergence even when pips happen.
How should I candle eggs without ruining incubation conditions?
For most DIY setups, chicken eggs are commonly checked around the mid-incubation point and again later, but the exact days depend on species. Candle only briefly, and return eggs immediately to the incubator to avoid chilling. Use the candle results to decide whether the embryo is developing normally, then rely on temperature and humidity logs to adjust future runs.
Can I help chicks out if I think they are stuck after pipping?
You should not. As soon as the first pip appears, keep humidity and temperature steady, and do not open the lid to “check on progress.” If a chick has been pipping or cracking for an extended time with no progress, the safer approach is to focus on maintaining 65 to 70% RH and stable temperature, then consider help only from someone experienced or by following a veterinary or breeder-appropriate protocol.
What’s the best way to review hatch results and decide what to change next?
Fertile eggs are not all “equal,” but you can still predict hatch outcomes. Track hatch rate relative to fertile egg count, and examine unhatched eggs at intervals: clears usually indicate fertility problems, early quitters often point to early temperature issues, and late quitters often align with humidity and turning in the last third. Use those patterns to adjust only one variable at a time in the next batch.
Next Articles

How to Build a Chimney Swift Bird House DIY Guide
Step-by-step DIY plans to build a chimney swift bird house, with correct dimensions, placement, and weatherproofing for

How to Build an Oriole Bird House: Step-by-Step DIY
Step-by-step DIY for building an oriole bird house with right dimensions, weatherproofing, predator-safe placement, and

How to Build a Chickadee Bird House Step by Step
Step-by-step DIY chickadee bird house with cut list, chickadee entry sizing, ventilation, drainage, and mounting tips.