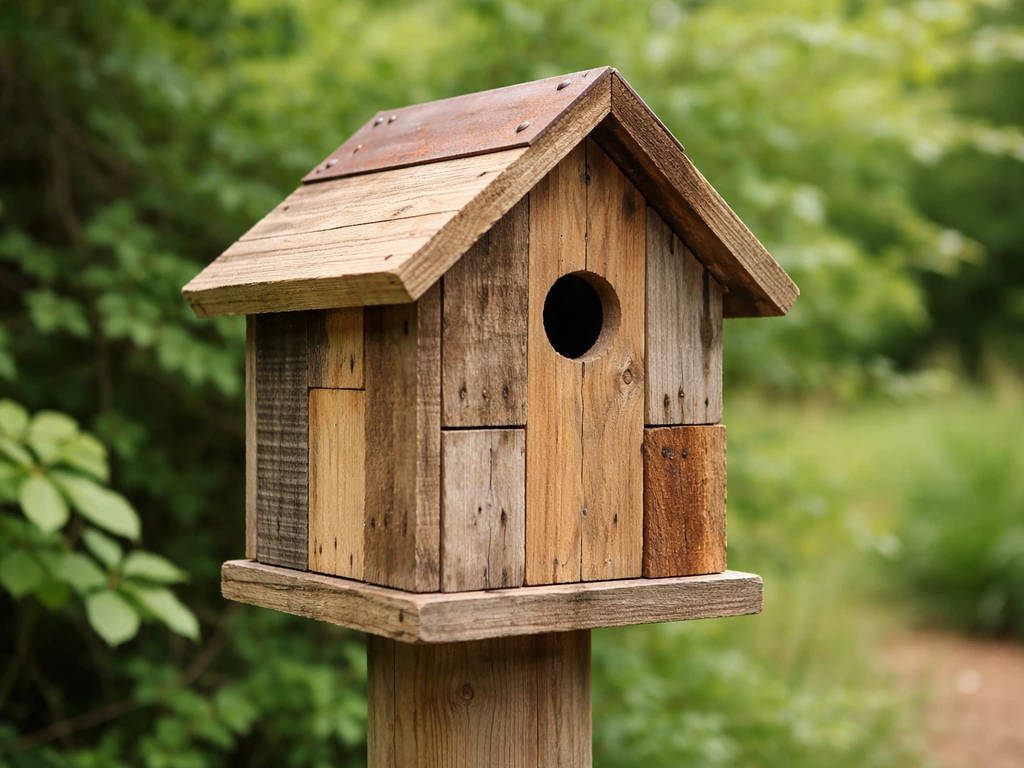
You can absolutely make a functional, bird-attracting birdhouse from materials you'd normally throw away or recycle. Old fence boards, wine crates, scrap lumber, wooden pallets, even thick cardboard tubes and tin cans can all work. The key is knowing which materials are safe for birds, picking the right entry hole size for the species you want to attract, and building something that meets a few non-negotiable requirements: ventilation, drainage, and easy access for annual cleaning. Get those things right and you'll have birds nesting in your backyard this season.
How to Make a Bird House With Waste Material

Marcus Thornton
9 Apr 2026
Choose the right waste materials safely
Not every scrap is safe to use. This is the part people skip over, and it's genuinely important. Birds spend weeks inside the nest box breathing the air inside it, so any chemical off-gassing from the materials you use is a real concern.
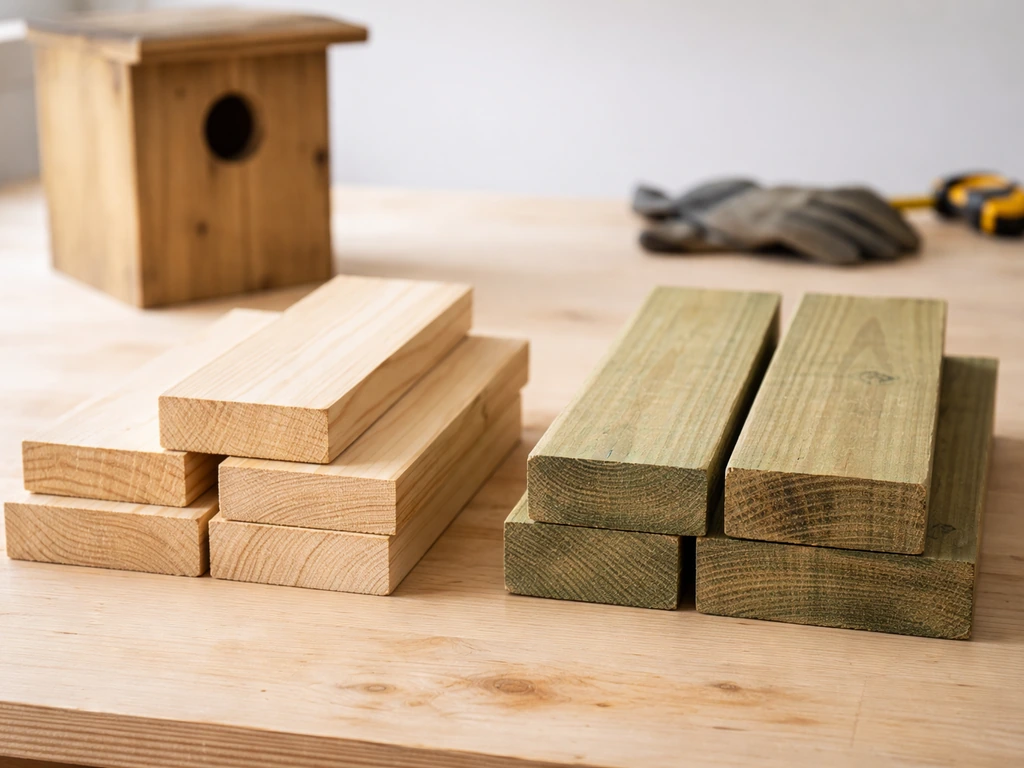
Pressure-treated wood is the biggest one to avoid. It's treated with pesticide-based preservatives specifically designed to kill insects and fungi, and those same compounds can be toxic to birds. NestWatch is pretty direct about this: they advise against pressure-treated wood in nest boxes because the treatment contains pesticides and fungicides. You can usually spot it by the greenish or brownish tint and the stamp on the wood. If you're pulling boards from an old deck or a fence that was built before the 2000s, assume it's treated and set it aside.
Painted wood is a gray area. There are no conclusive studies proving paint fumes harm nesting birds, but the smart move is to keep paint on exterior surfaces only and leave the inside of the box bare. The same goes for stains and sealants. If you're using old painted lumber, sand the interior surfaces back to raw wood before you build.
Here's what actually works well as waste material for birdhouses:
- Untreated pine, cedar, or fir scraps from old furniture, shelving, or crates (cedar is ideal because it naturally resists rot)
- Wooden wine or fruit crates (check that the interior is uncoated and unpainted)
- Pallet wood, as long as it's stamped HT (heat-treated) rather than MB (methyl bromide fumigated)
- Thick wooden logs with natural cavities, hollowed out slightly to the right dimensions
- Old wooden toolboxes or small storage crates
- Tin cans or metal containers for experimental open-front designs (not suitable for hot climates without shade)
Avoid MDF and particle board entirely. They absorb moisture, swell, fall apart, and often contain formaldehyde-based glues. Plywood is fine if it's exterior-grade, but interior plywood uses adhesives that break down quickly outdoors. If you want to go deeper on making this a genuinely low-impact build, check out this guide on how to make an eco friendly bird house for a broader look at sustainable material choices.
Pick a birdhouse design for the species you want
One of the most common mistakes I see is building a generic birdhouse with no particular bird in mind. The result is usually a decorative box that sits empty all season. The entry hole size is the single most important dimension because it determines which species can enter (and which predators cannot). Get it wrong by even a quarter inch and you've either locked out the birds you want or invited the wrong ones in.
Here's a quick reference table for common backyard cavity-nesting species. These dimensions come from extension service and wildlife agency recommendations and represent proven measurements:
| Species | Entrance Hole Diameter | Floor Size | Interior Depth | Hole Above Floor | Mounting Height |
|---|---|---|---|---|---|
| Eastern Bluebird | 1½ inches (round) | 4 × 4 inches | 11–12 inches | 6–7 inches | 3–6 feet |
| Tree Swallow | 1½ inches | 5 × 5 inches | 10–12 inches | 6–7 inches | 4–8 feet |
| House Wren | 1 inch | 4 × 4 inches | 8–10 inches | 6 inches | 5–10 feet |
| Chickadee | 1⅛ inches | 4 × 4 inches | 8–10 inches | 6–8 inches | 4–15 feet |
| Downy Woodpecker | 1¼ inches | 4 × 4 inches | 10–12 inches | 6–8 inches | 5–15 feet |
| American Kestrel | 3 inches | 8 × 8 inches | 16 inches | 12–14 inches | 10–30 feet |
For most first-time builders using waste materials, I recommend targeting Eastern Bluebirds or Tree Swallows. They're common across North America, they're enthusiastic nest box adopters, and their dimensions are forgiving enough that small variations in your repurposed lumber thickness won't ruin the build. The 1½-inch entrance hole is the sweet spot for these species. If your boxes overlap with Mountain Bluebird range, bump that hole to 1 9/16 inches.
If you want to explore more design variations built specifically around reused materials, this article on how to make a recycled bird house covers some creative approaches worth considering before you finalize your plan.
Tools and prep steps for DIY from scraps

You don't need a workshop. I've built functional nest boxes with nothing more than a jigsaw, a cordless drill, a measuring tape, and a pencil. That said, here's a realistic tools list organized by what you actually need versus what just makes things easier:
| Tool | Purpose | Substitute if Needed |
|---|---|---|
| Tape measure and pencil | Marking cut lines and hole centers | Ruler and marker |
| Hand saw or jigsaw | Cutting boards to length | Circular saw, reciprocating saw |
| Drill with spade or Forstner bit | Drilling the entrance hole cleanly | Hole saw attachment |
| Hammer and nails, or screwdriver and screws | Assembly | Exterior wood glue plus clamps for jointless builds |
| Sandpaper (80 and 120 grit) | Smoothing interior surfaces | Sanding block |
| Safety glasses and dust mask | Eye and lung protection during cutting | Non-negotiable — always wear these |
Before you cut anything, prep your reclaimed materials. Remove all nails, staples, and screws from salvaged wood. Check for rot by pressing your thumb firmly into the wood grain, if it compresses and stays dented, that board won't hold a fastener reliably. Sand any painted interior surfaces back to bare wood. If your pallet wood has the MB stamp, set it aside and find a different piece. Lay all your cleaned boards out and measure twice before cutting anything.
For a standard bluebird-style box from scrap wood, you'll need boards that together yield these cut pieces: a front, a back, two sides, a floor, and a roof. A single 6-foot length of 1×6 untreated pine is enough for the whole box. If you're working with a recycled crate or wine box, the crate itself often forms the main body and you're just adding a proper entrance hole and a few modifications.
Step-by-step build instructions
These steps follow a simple bluebird-style box with a 4×4-inch floor, 11-inch interior height, and 1½-inch entrance hole. Adjust measurements for your target species using the table above.
Cut your pieces
- Cut the floor: 4 inches × 4 inches. Clip or sand the four corners at 45-degree angles about ¼ inch in from each corner — this creates drainage gaps without weakening the board.
- Cut the front panel: 4 inches wide × 11 inches tall. This will have the entrance hole.
- Cut the back panel: 4 inches wide × 14 inches tall (the extra length gives you a flange for mounting).
- Cut two side panels: each 4 inches wide × 11 inches tall on the front edge, angled down to about 10 inches on the back edge for roof pitch.
- Cut the roof: 6 inches wide × 7 inches deep. The overhang sheds rain away from the entrance hole.
Drill the entrance hole and ventilation
Mark the center of your entrance hole on the front panel, 6 to 7 inches up from the bottom edge. Use a 1½-inch spade bit or Forstner bit and drill slowly. Go from the front face inward, if you drill from the back face, the wood often tears out on the front. If your bit wanders, clamp a scrap piece behind the panel to back it up. Don't add a perch below the entrance hole. Perches don't help the birds you want and they do give predatory birds and cats a grip point.
blank" rel="noopener noreferrer">For ventilation, drill two or three ⅜-inch holes in the upper section of each side panel, or leave a deliberate ½-inch gap between the front panel and the roof when you assemble. Audubon's bluebird box plan specifically calls out a ½-inch ventilation gap at the top of the front panel, and it works well. The interior of a nest box can overheat on summer afternoons and kill nestlings, so don't skip this.
Assemble the box
- Attach the floor to the back panel first using two 1¾-inch exterior screws. Position it so the floor sits inside the box rather than flush with the bottom edge.
- Attach the two side panels to the back panel using screws or nails. Pre-drill pilot holes in salvaged wood to prevent splitting.
- Fit the front panel. If you want an easy-open monitoring door (which you want for cleaning), attach only the top of the front panel with two screws through the sides, then use a single pivot screw on each side near the bottom so the front swings outward. Alternatively, hinge one side panel for side-opening access.
- Add the roof last. Attach it to the back panel and sides with screws. Leave the front edge of the roof slightly proud of the front panel to create that ventilation gap if you didn't drill side vents.
- Glue all joints with exterior wood glue in addition to your fasteners. This is especially useful with reclaimed wood that may be slightly irregular — glue fills small gaps and dramatically extends the life of the box.
Finishing the box
Leave the interior completely bare. Do not paint, stain, varnish, or line it. On the exterior, untreated cedar and redwood can be left natural, they weather beautifully. NABS’s nest box recommendations also specify that the roof should extend beyond the entrance hole and beyond any ventilation holes on the sides [roof should extend beyond the entrance hole and beyond any side ventilation holes](https://www.
nabluebirdsociety. org/PDF/NABS%20factsheet%20-%20Nestbox%20Recs. pdf). For pine or other less rot-resistant woods, you can apply a single coat of exterior latex paint (light or earth tones only) to the outside faces.
Never paint the inside. Rough up the interior front panel below the entrance hole with a few horizontal saw cuts or coarse sandpaper so fledglings can grip it when climbing out. If you want to see how this same approach applies to a bird box specifically, the guide on how to make a bird box out of recycled materials walks through a slightly different format with some useful variations.
Door/entry size, ventilation, drainage, and placement
These four factors are what separate a box birds actually use from one that sits empty. Let's be specific about each.
Entry hole size
Stick to the species table above. For Eastern Bluebirds, 1½ inches round is the standard. A hole any larger than this invites European Starlings, which will take over the box and often destroy bluebird eggs. A hole that's too small and the bird physically can't enter. Use a proper drill bit, not a chisel or knife. The hole needs clean, smooth edges, rough edges can injure birds as they enter and exit repeatedly.
Ventilation
Aim for a total ventilation area of about 1 to 2 square inches per box. The ½-inch gap at the top of the front panel, or three ⅜-inch holes per side panel, both achieve this. Place vents near the top of the box so rising heat can escape, not at the bottom where cold drafts could chill eggs and nestlings.
Drainage
Four clipped corners on the floor panel, or four ¼-inch holes drilled in the corners of the floor, give water somewhere to go if moisture gets in. Without drainage, wet nesting material becomes a petri dish for bacteria and fungal growth. Clipping the floor corners is my preferred method because it doesn't weaken the board the way drilling does.
Placement
For Eastern Bluebirds, mount the box 3 to 6 feet above the ground, facing away from prevailing winds (generally facing east or southeast in North America). Space multiple boxes at least 300 feet apart to reduce territorial competition. A height of 4 to 5 feet is also convenient for monitoring because you can check nest progress without a ladder. Mount on a metal conduit pole rather than a tree if you can, trees give predators a direct climbing route.
If you must mount on a wood post, add a conical or cylindrical predator baffle below the box. Wildlife agencies are consistent on this point: a box without a predator guard is far more likely to suffer nest predation from raccoons, cats, and snakes.
For wrens and chickadees who prefer brushy edges and woodland borders, mount boxes 5 to 10 feet up on a post or fence near shrubs. For kestrels, you're looking at 10 to 30 feet up on a post in open country with perches nearby. Match placement to habitat as much as you match it to species dimensions.
Mounting, cleaning, and long-term maintenance
A birdhouse you never maintain stops being used within a season or two. Old nesting material compacts, harbors parasites like mites and blowfly larvae, and physically reduces the interior space available for new nests. The good news is that maintenance takes about 10 minutes per box per year.
When and how to clean
Clean nest boxes at the end of each breeding season, typically in late summer or early autumn. Open the access panel, remove all old nesting material, and dispose of it away from the box. Then scald the interior with boiling water, pour it in, let it sit briefly, then tip the box to drain. Boiling water kills parasites, bacteria, and mold without leaving any toxic residue. Do not use insecticide sprays, flea powders, or household cleaners inside the box. Even "safe" household cleaners can leave residue that irritates the respiratory systems of small birds. Let the box dry completely in the sun before closing it back up.
If you're cleaning in spring before the new season starts, work before February in warmer climates and before April in colder ones. Some species scout nest sites weeks before they're ready to breed, so an early clean means an empty, appealing box when they come looking.
Checking for wear and damage
- Check that the entrance hole hasn't been enlarged by woodpeckers. If it has, tack a metal hole restrictor plate over it (available cheaply at birding stores or cut from an old tin can).
- Look for loose fasteners and re-drive or replace any screws that have worked free during winter frost-thaw cycles.
- Check that the roof still sheds water cleanly — if reclaimed wood has warped, you may need to add a strip of weatherproofing along the seam.
- Look inside for evidence of wasp or hornet nests built during the off-season and remove them before birds return.
- Inspect the predator baffle every season. Metal baffles can rust through; plastic ones can crack in UV over several years.
With a solid waste-material build and this maintenance routine, a well-made box can last 10 years or more. The joy of knowing a pair of bluebirds or wrens chose your scrap-wood box over a store-bought one never really gets old. And if you end up making a few of these and want to try a creative sculptural variation, this article on how to make a bird from recycled materials explores some fun ways to incorporate that same repurposing spirit into decorative bird art you can put in the same garden space.
Your next steps are simple: sort your scrap pile for safe untreated wood, decide on a species (bluebird is the easiest starting point), cut and drill this weekend, and get it mounted before the breeding season hits its peak. That's it. You don't need to spend a cent on new materials to give local birds a genuinely useful home.
FAQ
How can I tell if my reclaimed wood has a hidden finish or chemical residue that might harm birds?
If your reclaimed boards smell strongly of chemicals, feel oily, or show a dark, sealed coating on the inside surfaces, do not use that section for the interior of the box. For unknown finishes, the safest approach is to sand the inside back to raw wood completely, then inspect again for any remaining odor or residue before building.
Can I keep a perch or add a perch to my waste-material bird house?
For most cavity nesters, it is better to leave the entrance as a single clean opening, with no added roost-perch. If a perch is already part of a reclaimed design, remove it or block it so it does not create an easy gripping point for predators and cats.
Is it okay to paint the outside of a reclaimed-material bird house, and how long should I let it air out?
Yes, but only if the box is fully dry and the inside stays bare. Painted exteriors are fine, but avoid painting the interior, and use a breathable, exterior-rated paint rather than a thick coating that seals moisture in. After painting, let the box air out outdoors for several days before mounting.
If I use rot-resistant scrap wood like cedar, do I still need ventilation and drainage holes?
No. Cedar or redwood can help slow rot, but not eliminate it, especially if the interior ever stays wet. Reclaimed wood can also vary in quality, so rely on ventilation and drainage, and plan on annual cleaning and inspection of vents and floor corners.
What should I do if I find nails or staples in reclaimed boards and I cannot remove them?
If you cannot remove nails and the hardware is near the interior, leave the fastener in place only if it is flush and will not be chewed or contacted by birds. Otherwise, remove it, patch the spot with matching untreated wood, and sand smooth so there are no sharp points inside.
What are the best ways to assemble and mount a bird house from scrap so it stays secure and maintainable?
Prefer metal or solidly mounted hardware. Avoid using thin wire or easily flexing fasteners that could work loose as the wood swells and contracts. Also, check that the access panel can be opened annually without breaking the box, and avoid hinges that rust quickly.
Can I use a whole wine crate or pallet section as-is, or do I need to reshape it?
A box that is too tall or too open can overheat or become difficult for birds to enter comfortably. If you are reusing a crate or wine box, confirm the interior height and entrance diameter match your chosen species, then add a properly fitted roof and ventilation gap rather than relying on the crate’s original shape.
What should I troubleshoot first if my bird house stays empty all season?
If you notice repeated failed nesting, check three things first: entrance size accuracy, placement height and predator protection, and whether old material is being cleaned at the correct time. Minor wood thickness changes matter less than the entrance diameter, vent placement near the top, and the availability of dry bedding.
Is it safe to use leftover glue, sealant, or construction adhesive when building from waste materials?
Do not use glue lines or sealants inside the nest cavity. If you must join scrap pieces, use exterior-appropriate construction methods and keep any adhesives fully outside the interior surfaces. For laminated or composite scraps, skip them if you cannot guarantee the inside will be bare and free of off-gassing.
How can I confirm a nest box is fully dry after seasonal cleaning before returning it to service?
After cleaning with boiling water, ensure there is no lingering moisture in corners and around ventilation openings. Let it dry in direct sun until the interior is fully dry to the touch, then close it before birds begin scouting, typically weeks before the local breeding window.
What is the safest way to design an access panel for annual cleaning when using reclaimed materials?
For most species, you want easy, safe access for you but no easy access for predators. Make the access panel face down or include screws that cannot be loosened by hand, then confirm the panel seals tightly when closed so there are no gaps.
Do I really need a predator guard if my box is high up and has correct entrance size?
If you are using a metal conduit pole or a wood post, add a predator baffle at the bottom of the box or on the mounting hardware when predators are common in your area. Even a well-built box without a baffle can be raided quickly, so treat predator protection as part of the build, not an optional add-on.
Next Articles

How to Build a Chimney Swift Bird House DIY Guide
Step-by-step DIY plans to build a chimney swift bird house, with correct dimensions, placement, and weatherproofing for

How to Build an Oriole Bird House: Step-by-Step DIY
Step-by-step DIY for building an oriole bird house with right dimensions, weatherproofing, predator-safe placement, and

How to Build a Chickadee Bird House Step by Step
Step-by-step DIY chickadee bird house with cut list, chickadee entry sizing, ventilation, drainage, and mounting tips.