You can build a solid, bird-friendly PVC pipe perch in an afternoon with less than $15 in materials. Cut 3/4" or 1" PVC pipe to length, connect it with tees and elbows, sand the perch bars smooth, wrap them with sisal rope for grip, and mount the finished stand near your feeder or birdbath. That's the whole project. The details below just make sure yours is stable, safe, and sized right for the birds you're actually trying to attract.
How to Make a Bird Perch Out of PVC Pipe

Marcus Thornton
28 Apr 2026

Best PVC perch design for backyard birds
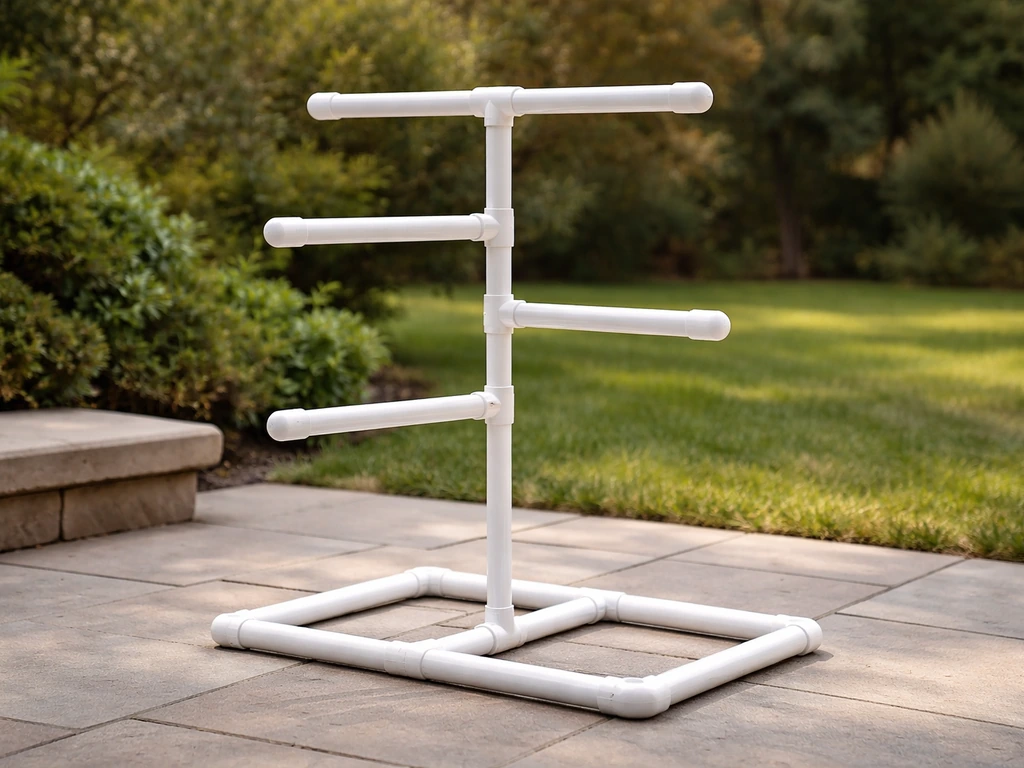
The most practical design for a backyard PVC perch is a multi-level T-frame stand: a flat base for stability, two or three upright sections, and horizontal perch bars at different heights. It's freestanding, easy to move, and gives birds options. Smaller birds like finches and sparrows will use the lower bars while larger birds like jays or doves take the top. That layered layout keeps the perch busy.
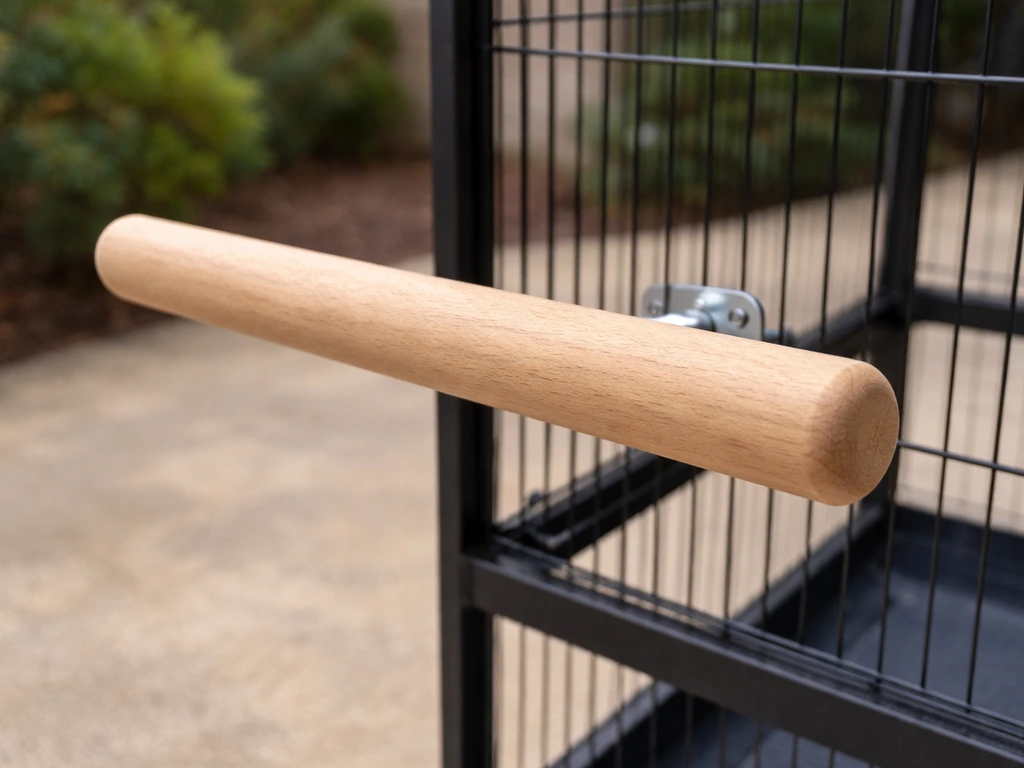
Perch bar diameter matters more than most people expect. Research from SRUC recommends a perch diameter between 3 and 5 cm (roughly 1" to 2" in pipe terms) for good foot grip and posture. For most backyard songbirds, 3/4" to 1" schedule 40 PVC pipe hits that sweet spot. If you're building for larger birds like pigeons or doves, go with 1" pipe. For smaller species like wrens or chickadees, 1/2" works well, and you can always wrap with sisal rope to build the diameter up a bit.
You can scale the whole design up or down depending on the birds you see in your yard. The original cut list from PVC Fittings Online calls for 6", 15", and 18" sections for standard-sized birds. For smaller birds, they recommend scaling down to 4", 11", and 14" sections respectively. That's a useful rule of thumb: shrink every cut by about one-third for small songbirds.
Materials and tools list
Everything you need is available at any hardware store, and the PVC components usually run under $10 total. Here's what to grab:
- 3/4" or 1" schedule 40 PVC pipe (one 10-foot length covers the whole project)
- PVC tee fittings (3 to 4, depending on your design)
- PVC elbow fittings, 90-degree (2 to 4)
- PVC end caps (optional, for base feet and open pipe ends)
- PVC primer and solvent cement (for permanent joints)
- Sisal rope, 1/4" thickness (one 50-foot spool is plenty)
- Sandpaper, 40 or 50 grit (for deburring cut ends and roughing the surface)
- Tape measure and pencil
- PVC pipe cutter, hand saw, or miter saw
- Drill with a 1/4" bit (for rope anchor holes)
- Strong outdoor adhesive or hot glue gun (to secure rope ends)
- Optional: pipe stand base plate or flange fitting for wall/railing mounting
A ratcheting PVC pipe cutter is the easiest tool for clean straight cuts and costs around $10. A regular hacksaw works fine too, just takes a bit more cleanup with sandpaper afterward. You don't need power tools for this project unless you want to.
Step-by-step: cutting, sizing, and dry-fitting
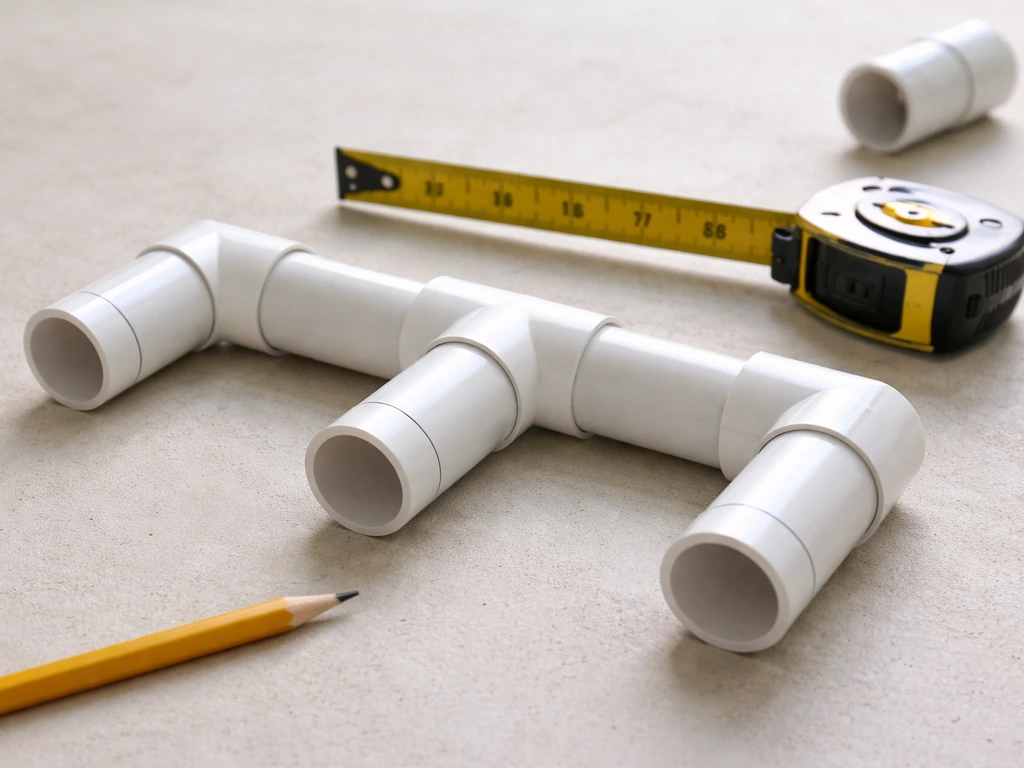
Take your time on the cutting and dry-fit stage. Once you glue PVC it's permanent, so this is your chance to catch any alignment or sizing mistakes before they're locked in.
- Mark your cut lines on the pipe with a pencil and tape measure. For a standard multi-level perch sized for medium songbirds, cut four 6" sections (base and connector pieces), three 15" sections (upright and perch bars), and two 18" sections (tall uprights or wide base spans). Scale down to 4", 11", and 14" for smaller birds like finches or wrens.
- Cut all your pieces before you start assembling anything. Lay them out on a flat surface in the order they'll go together.
- Use 40 or 50 grit sandpaper to deburr every cut end. Run the sandpaper around the inside and outside edge of each cut until there are no sharp burrs or rough ridges. This takes about 30 seconds per end and protects bird feet.
- Dry-fit the entire assembly without glue. Push each pipe section into tees and elbows, check that the base sits flat, and confirm the perch bars are level and where you want them. Adjust any cut lengths now.
- Mark each joint with a pencil line across the fitting and pipe so you can realign them quickly when you apply cement.
- Disassemble in reverse order once you're happy with the layout, keeping the pieces grouped by assembly stage.
If the base feels wobbly during the dry-fit, the fix is usually adding one more 6" cross brace between the two base legs. I've made the mistake of skipping the dry-fit before and ended up with a base that leaned about 10 degrees. Not fun to undo. Dry-fit first, always.
Building and securing the perch
Once the dry-fit looks good, glue everything up in stages. Start with the base, then add the vertical uprights, and finish with the perch bars last. Working in stages gives you time to check alignment before each section cures. Oatey’s solvent cement guide provides set/handling and cure-time guidance by pipe diameter and temperature, which can help you plan how long to wait before checking alignment or stressing a joint.
- Apply PVC primer to the outside of the pipe end and the inside of the fitting socket. Let it flash off for about 10 seconds.
- Apply solvent cement to both surfaces immediately after the primer dries, then push the pipe firmly into the fitting with a slight quarter-turn to spread the cement evenly.
- Hold each joint for 15 to 30 seconds while it sets. For 3/4" to 1" pipe, Oatey's cure guidance puts handling time at about 15 minutes and recommends waiting 20 to 30 minutes before putting any stress on the joint.
- Assemble the base first and set it on a flat surface to cure while you prep the uprights.
- Attach the uprights to the base tees, then add the horizontal perch bars. Check everything is level before the cement sets.
- Cap any open pipe ends with PVC end caps. Open ends collect rainwater and debris, which creates a maintenance problem and a mosquito habitat.
For a perch that will live outdoors year-round, the stability of the base is the main thing to engineer. A wide base (at least 12" to 18" across) prevents tipping when larger birds land hard. If you're placing it on a deck or patio, you can also drill through the base pipes and use a zip tie or small bolt to anchor it to a railing or deck slat.
Safety details: drilling, sanding, weatherproofing, and grip surface
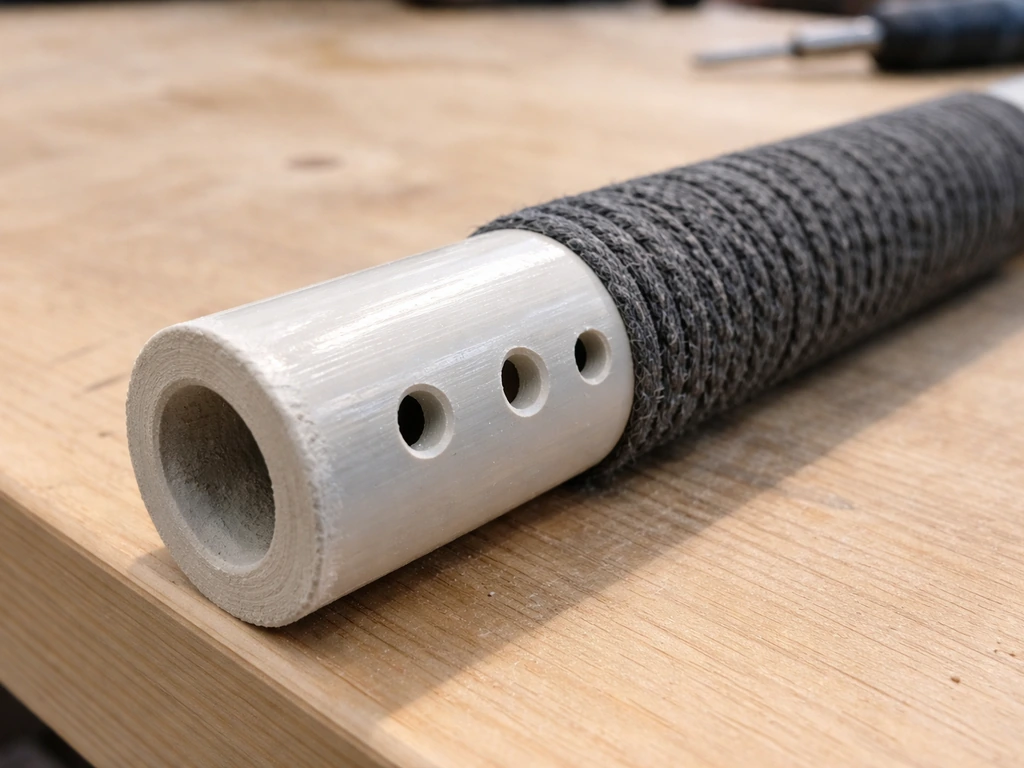
This is the step most people skip, and it's the reason their birds ignore the perch. Plain PVC is slippery. BirdTricksStore specifically calls this out: raw PVC pipe is too smooth for birds to grip comfortably, and research backs it up, noting that PVC surface material directly affects bird behavior and perch acceptance. A perch a bird can't grip confidently is a perch it won't use.
The best solution for a backyard perch is the drill-and-wrap method. Drill a 1/4" hole about 1" from each fitting or elbow on every horizontal perch bar. Thread the end of your sisal rope through the hole and tie a stopper knot on the inside. Then wrap the rope tightly and evenly along the full length of the bar, finishing by threading the end through another hole at the far end and securing it with a knot and a dab of outdoor adhesive or a zip tie. The sisal gives birds something natural and grippy to hold onto, and it also builds up the bar diameter a little, which is a plus for smaller species.
For weatherproofing, the PVC itself doesn't need sealing, but a couple of safety details matter. Don't use oil-based stains, paints, or chemical sealants on any part of the perch a bird might touch. If you want to color the frame for aesthetics, use a bird-safe water-based exterior paint on the base and uprights only, keeping the perch bars wrapped in natural sisal. Avoid pressure-treated lumber if you're adding any wood components, and skip any rust-prone hardware where possible since those can leach chemicals over time.
Rounded edges matter too. After sanding every cut end smooth, run your finger along the inside of the pipe opening. If it still feels sharp, fold the sandpaper and work the inside edge a little more. Birds occasionally perch right at the end of a pipe section near a fitting, and a burr there can injure a foot.
Mounting options and ideal placement by bird type
How you mount the perch and where you put it matters almost as much as how you build it. Audubon notes that most birds prefer to stage on a nearby perch before flying to a feeder, so placing your PVC perch within a few feet of a feeding station is one of the best ways to get it used quickly.
| Mounting style | Best for | Notes |
|---|---|---|
| Freestanding base (PVC T-frame) | Open yard or garden bed | Most flexible, easy to relocate, needs wide base for stability |
| Railing clamp mount (pipe flange bolted to railing) | Deck or balcony setups | Saves floor space, great for apartment birders, use stainless bolts |
| Post mount (perch frame screwed to existing fence post) | Fence lines or garden edges | Very stable, permanent, position to face open space |
| Wall bracket mount (flange fitting on exterior wall) | Near window feeders | Good for close-up bird watching, keep at least 6 feet from windows to reduce collision risk |
Placement by bird type makes a real difference. Sparrows and finches prefer perches set 3 to 5 feet off the ground with shrub or bush cover within 6 to 10 feet for quick escape from predators. Cardinals like a perch slightly higher, around 5 to 7 feet, near dense plantings. Mourning doves prefer open, elevated spots and will use a perch placed in a sunny, exposed area. Jays and woodpeckers tend to show up on taller perches (6 feet or more) with clear sightlines.
Research and birding guidance both suggest a safety zone of roughly 6 to 10 feet between a perch or birdbath and the nearest dense cover, so birds have time to spot predators but cover is still reachable. This also reduces the risk of cats ambushing from nearby shrubs. Near a birdbath, a staging perch about 5 to 8 feet away gives birds a spot to wait their turn and preen after bathing, which is a combo birds really use.
Maintenance, cleaning, and troubleshooting
PVC is low-maintenance but not zero-maintenance. Wipe down the bars with a damp cloth or stiff brush every few weeks during heavy use periods to remove droppings and debris. For a deeper clean, a diluted white vinegar solution (1 part vinegar to 9 parts water) scrubbed on and rinsed off works well and is completely safe for birds once dry. Avoid bleach directly on the sisal rope sections since it degrades the fibers quickly.
Sisal rope will break down over time outdoors, especially in wet climates. Expect to replace the rope wrap on perch bars every one to two seasons. It's a 20-minute job: snip the old rope, sand the bar lightly, and re-wrap with fresh sisal. The PVC frame itself should last years without any attention.
If birds are ignoring your perch, here are the most common reasons and fixes:
- Location is too exposed or too close to dense cover: move the perch to the 6-to-10-foot safety zone sweet spot near shrubs or your feeder
- Perch bars are still too slippery: add or replace the sisal rope wrap, or rough up the surface with 40-grit sandpaper before wrapping
- The perch wobbles when birds land: widen the base span or anchor the base to the ground with tent stakes through the base pipes
- No nearby food or water source: position the perch within a few feet of your feeder or birdbath to give birds a reason to approach
- Birds need time to find it: new structures can take days to weeks to get adopted, especially if your yard doesn't have regular visitors yet
- The perch smells like solvent cement: leave it outdoors for a week or two before expecting use, the smell dissipates quickly with air and sun exposure
This same multi-level frame approach can be adapted for other enrichment structures too. If you want a Minecraft-style build, check our guide on how to make a bird perch in Minecraft so you can recreate the same idea in-game. If you also want an in-game housing build, follow this guide on how to make a bird house in Minecraft. If you're interested in other perch styles, a rope-based version using sisal or cotton rope instead of a rigid frame offers different grip characteristics and movement that some birds prefer. How to make a rope bird perch is similar to building this sisal-wrapped style, but you will focus more on rope diameter, tension, and secure mounting points rope-based version using sisal or cotton rope. And if you're working on a more complete backyard setup, a training perch designed for handling birds up close uses slightly different sizing and weight considerations than a freestanding yard perch. A training perch has different sizing and stability needs so you can handle birds safely and comfortably up close training perch designed for handling birds. The PVC T-frame you just built is a great starting point, and the core skills transfer directly. You can also use the same core ideas from how to make a bird perch to help you plan a sturdy DIY build before you cut and assemble materials. You can apply the same thinking to learn how to make a bird rope ladder, using rope ladder construction principles and secure mounting points.
FAQ
Can I use glue, or should I tie only when wrapping the PVC perch with sisal rope?
Yes, but avoid any “hot glue” or cyanoacrylate (super glue) near where birds grip. Use exterior-rated, bird-safe adhesive only as a small reinforcement after the sisal wrap is tied and seated, and keep all adhesive off the rope where possible so it does not stiffen or flake.
What if I’m building for mixed birds (small and larger species) and don’t know the exact sizes yet?
Use the rope-wrap method, not a larger pipe alone. A thicker diameter can reduce grip for some small species, while sisal changes surface friction. If you are unsure, start with the 3/4" to 1" frame and adjust grip with rope thickness before you rebuild.
How can I tell if my PVC perch is stable enough before it’s fully glued and installed?
Do a quick “land test” during dry-fit. Put the perch where you plan to use it and gently apply body weight to each bar location (carefully, from a seated height) to check for flex or tipping. If it moves noticeably, increase base cross-bracing or widen the base rather than adding more rope.
Is it okay to add wood parts to the PVC base (for weight or aesthetics)?
Skip pressure-treated lumber entirely, even if it would only be on the base, because its chemicals can leach in wet conditions. If you want wood accents, use untreated exterior-rated lumber and still keep anything birds touch separated from treated or chemically treated materials.
What cleaners are safe to use on a PVC-and-sisal bird perch?
Don’t use bleach, ammonia cleaners, or harsh solvents on or near the sisal. For routine cleanup, wipe and let dry, and only use the diluted vinegar scrub on areas you can fully rinse off, then allow complete drying before birds access it.
Can I mount this perch to a balcony railing or wall instead of keeping it freestanding?
Yes, but only if the perch stays freestanding or securely anchored. If you mount it to a railing, drill and fasten the frame through the base pipes or add a stable bracket so the unit cannot rotate or swing when a bird lands.
Can I substitute a different rope material instead of sisal, like cotton, jute, or twine?
Do not use rope that sheds fibers (some cheap jute blends) as the primary wrap. Sisal holds up better outdoors and provides consistent grip, and you should inspect for fraying every one to two seasons, replacing the wrap when it looks flattened or slick.
How do I prevent injuries from sharp spots near the ends or fittings?
If the bar tips are near a fitting, double-check sanding and also test the pipe-end interior edge for burrs by running a fingertip slowly around the inner circumference. Birds often perch on the very end, so sharp edges there matter even if the straight sections are smooth.
If birds ignore the perch, what should I adjust first, location, height, or the rope wrap?
Start with the safe placement logic: within a few feet of a feeder or birdbath, and maintain roughly 6 to 10 feet between the perch/bath and dense cover. If birds still ignore it, first adjust height within the 3 to 7 foot range for perching species, then confirm the bars feel grippy (rope wrap tight and not glossy).
How often should I re-wrap the sisal rope, and what signs mean it’s time to replace it?
Expect the rope to degrade faster than the PVC frame. In wet climates or shaded yards, plan to re-wrap closer to the 12-month mark, and replace sooner if you see loosened turns, dark mildew spots on the sisal, or reduced friction when you rub a gloved hand along the surface.
If I mess up one cut length during assembly, can I replace just that section without rebuilding everything?
Yes, and it’s often safer than gluing in a new piece mid-project. Dry-fit, confirm alignment, then re-glue after corrections, because once solvent glue cures it can create misalignment that makes the perch uneven and harder for birds to use.
Next Articles
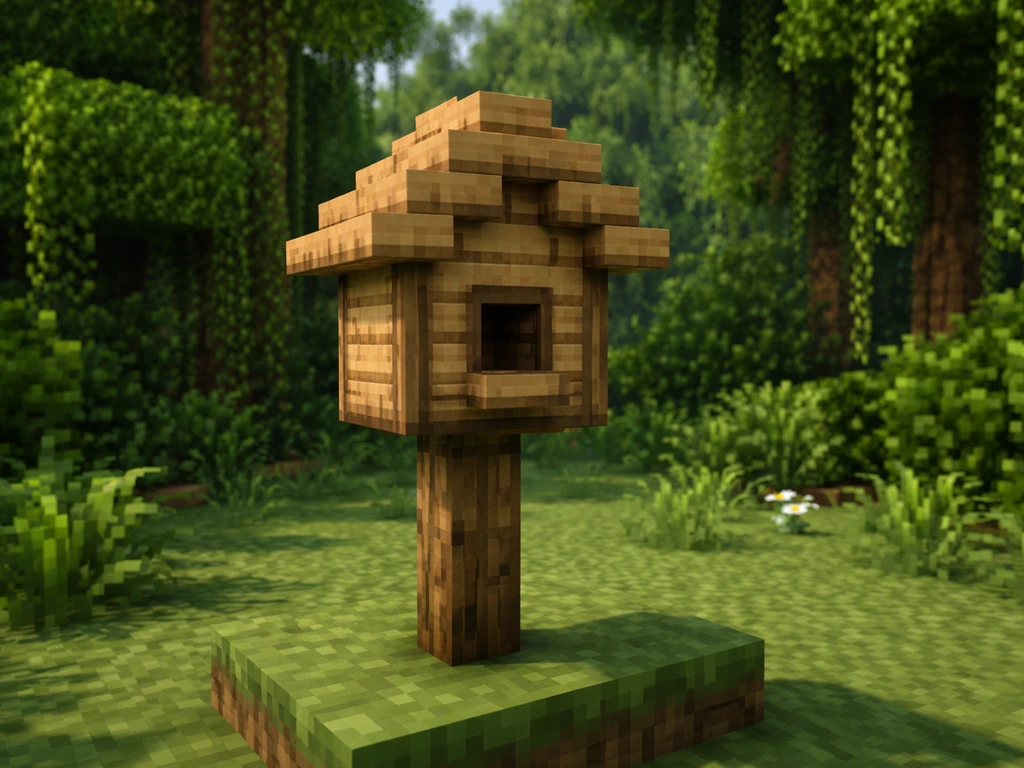
How to Make a Bird House in Minecraft: Step-by-Step
Step-by-step Minecraft bird house build with exact blocks, placement tips, and upgrades to help birds spawn and use it.
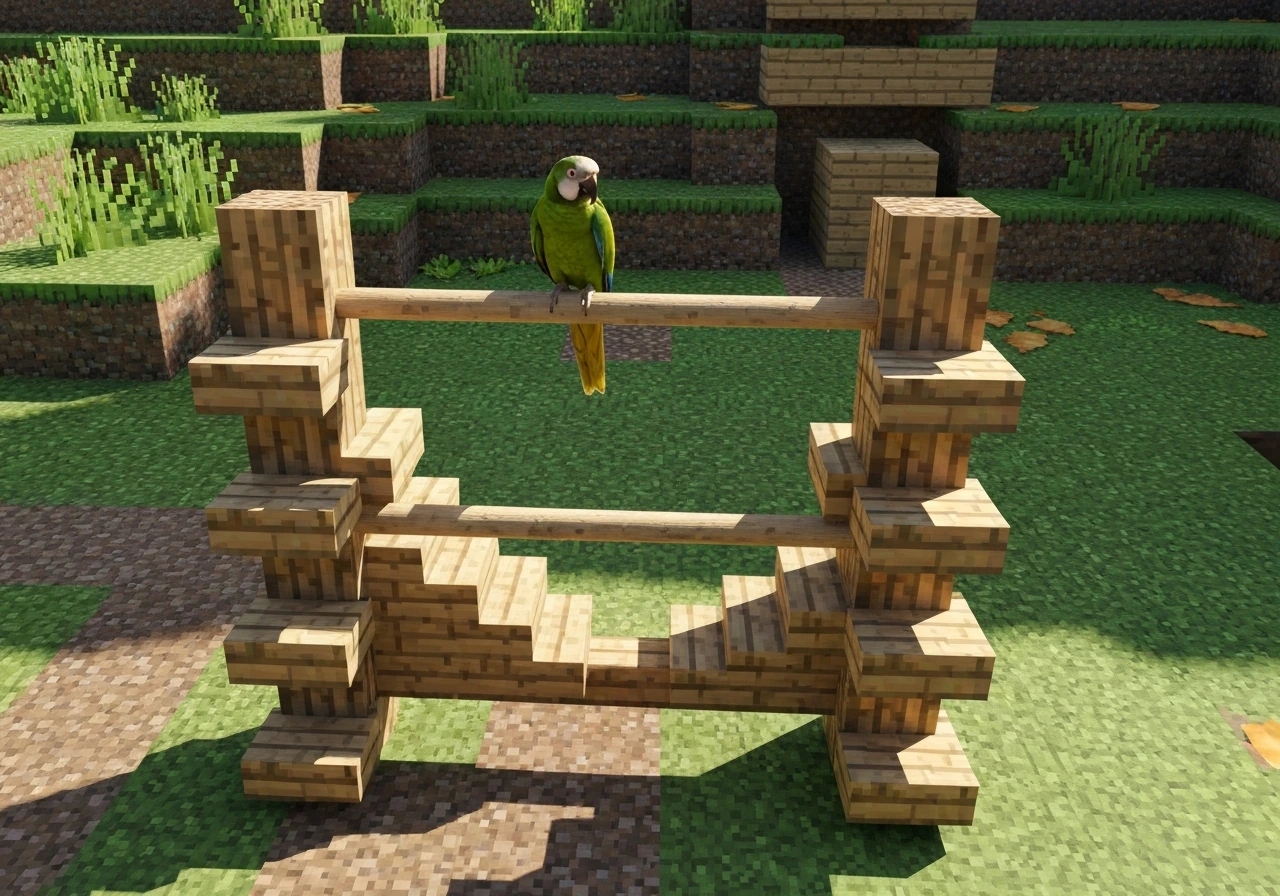
How to Make a Bird Perch in Minecraft: Step-by-Step
Build a Minecraft bird perch with fence and stairs steps, placement tips, and upgrades for wall or tree aviaries.
How to Make a Bird Perch: DIY Wood Steps and Sizes
Step-by-step DIY wood bird perch with sizes for common birds, secure mounting, and safe smoothing weatherproofing.