Pick a branch from a safe wood species, cut it to fit your setup, bake or scrub it to kill off any hidden hitchhikers, smooth out the sharp bits, and bolt or wire it securely in place. That's the whole process in one sentence. The details matter a lot, though, because the wrong wood can poison a bird, the wrong diameter can damage their feet over time, and a wobbly perch is a fall risk. This guide walks you through every step so you can build one today with branches you probably already have access to.
How to Make Bird Perches Out of Branches Step by Step

Marcus Thornton
19 May 2026
Picking the right branches and sizing them for your birds
Wood species is the first thing to get right, because some common backyard trees are genuinely toxic to birds. Safe choices include apple, pear, cherry (fruit trees in general are reliable picks), willow, elm, birch, maple, and untreated pine. Woods to avoid include cedar, eucalyptus, and anything treated with pesticides, preservatives, or paint. If you're not sure what tree you're pulling branches from, don't use it. It's not worth guessing.
Diameter matters just as much as species. A bird's toes should wrap about three-quarters of the way around the perch, not grip it fully like a fist and not barely touch it. For cockatiels, that lands you in the half-inch to one-inch range. Smaller finches and canaries want something closer to a quarter-inch to half-inch. Larger parrots like amazons or macaws need one-and-a-half to two inches or more. The key insight from avian vets is that birds develop pressure sores on their feet when every perch in their cage is the same diameter, because the same spots on their feet take all the weight every time. A veterinary review on pododermatitis (bumblefoot) also recommends using perches of different shapes and varying diameters so birds can alternate where they place plantar pressure blank" rel="noopener noreferrer">varying perch diameters so birds can alternate where they place plantar pressure. A variety of diameters, at least four different sizes if you're setting up a full aviary, keeps their feet healthy by distributing pressure across different areas. STAR Avian Rescue recommends using a blank" rel="noopener noreferrer">4-3-2-1 style variety of perch diameters with at least four different diameter perches to help support foot health.
| Bird Type | Recommended Perch Diameter | Notes |
|---|---|---|
| Finches / Canaries | 1/4 inch to 1/2 inch | Thinner branches from shrubs work well |
| Budgies / Parakeets | 3/8 inch to 3/4 inch | Vary sizes for foot health |
| Cockatiels | 1/2 inch to 1 inch | Most-cited range from avian care sources |
| Conures / Caiques | 3/4 inch to 1.25 inches | Mix with thicker branches |
| African Greys / Amazons | 1 inch to 1.75 inches | Natural hardwood branches ideal |
| Macaws / Large Cockatoos | 1.5 inches to 2+ inches | Needs solid hardwood for durability |
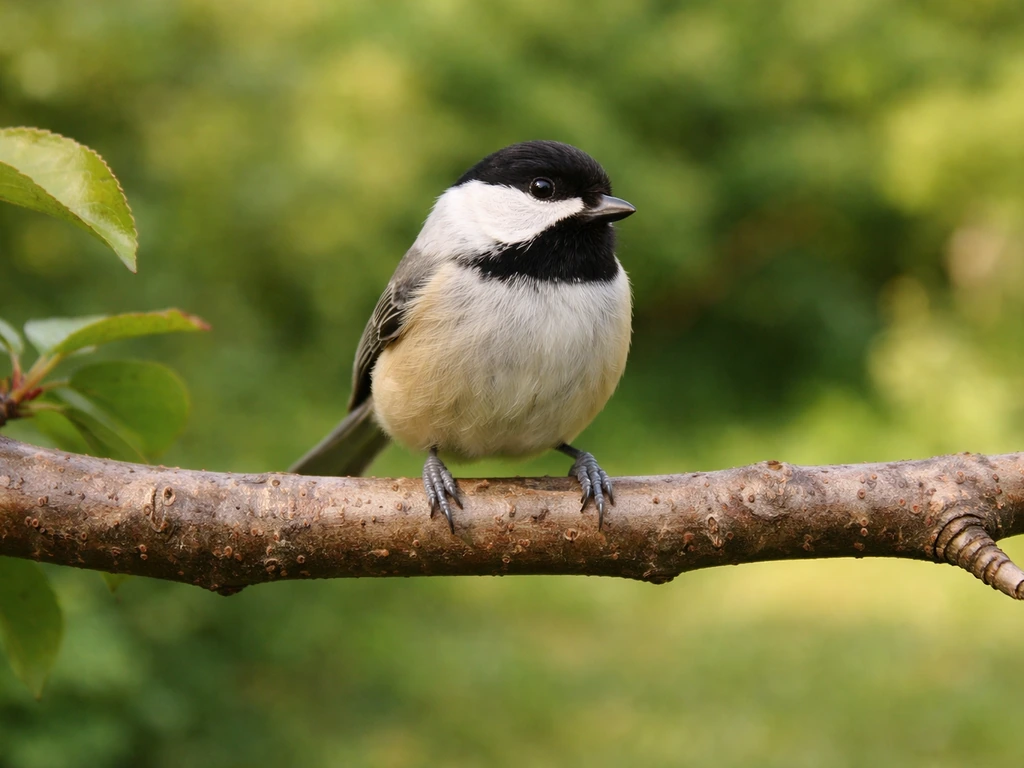
When you're collecting branches, look for ones that are naturally irregular, meaning they have bends, varying thickness along their length, and maybe a few knobby spots. That unevenness is a feature, not a flaw. It mimics what birds land on in the wild, exercises their feet differently along the branch, and gives them something to explore. Avoid branches that are dead and brittle, or that show signs of heavy fungal growth, insect boring, or hollow sections.
What you'll need and where these perches actually go
Tools and materials
- A handsaw or pruning saw for cutting branches to length
- Sandpaper in 80-grit and 150-grit
- A wire brush for scrubbing bark
- Dish soap and a bucket, or a diluted bleach solution (1 part bleach to 9 parts water)
- An oven for heat-sanitizing (or access to direct sunlight for outdoor perches)
- Small bolts, washers, and wing nuts for cage attachment (or stainless steel wire)
- A drill with bits slightly smaller than your bolt diameter
- Clamp-style bird perch brackets if you want a cleaner finished look
- Rope or sisal twine as an optional wrapping or hanging material
Cage perches vs. aviary perches vs. outdoor perches
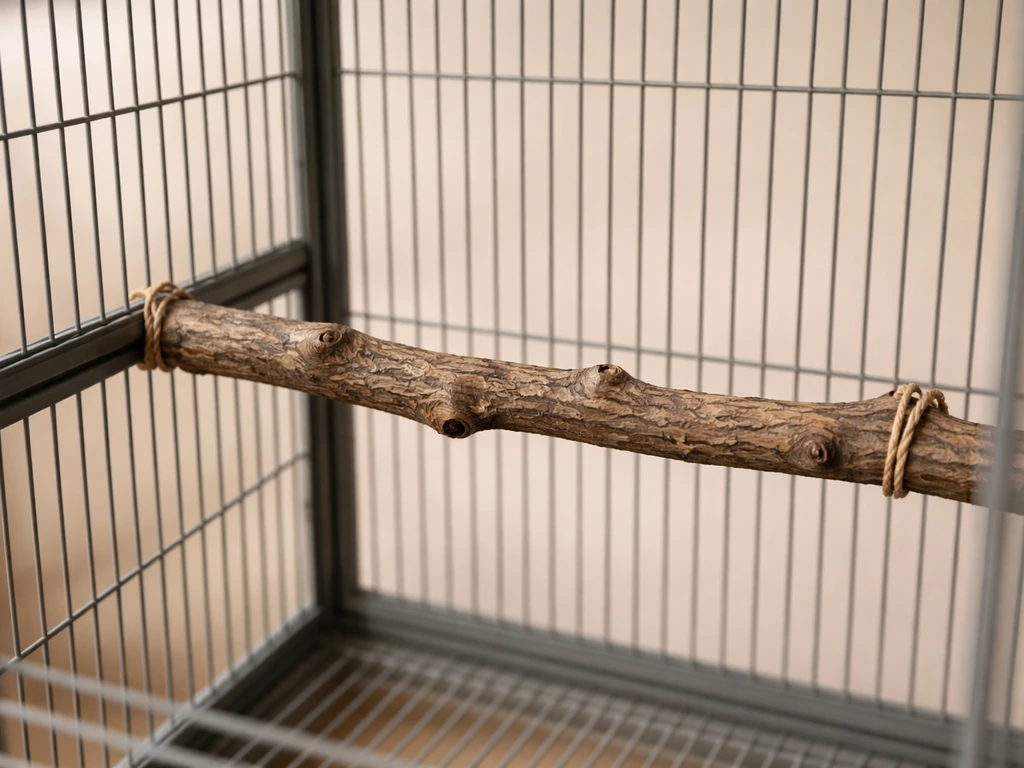
For a cage perch, you're working within a fixed frame, usually attaching both ends of the branch to cage bars with bolts or stainless wire. The branch needs to be long enough to span the interior with a little extra on each side for mounting. For an aviary, you have more freedom: branches can be mounted horizontally between walls, angled diagonally, or even set up as a freestanding perch stand with a weighted base. Outdoor perches for wild birds visiting your yard are the most forgiving setup since they're not enclosed. A simple Y-shaped branch wedged into the fork of a fence post or screwed to a flat board works perfectly. The cleaning and safety steps still apply for outdoor perches, but you're not managing the same confined-space contamination risks as you are with caged birds.
Step-by-step prep: cutting, cleaning, and drying
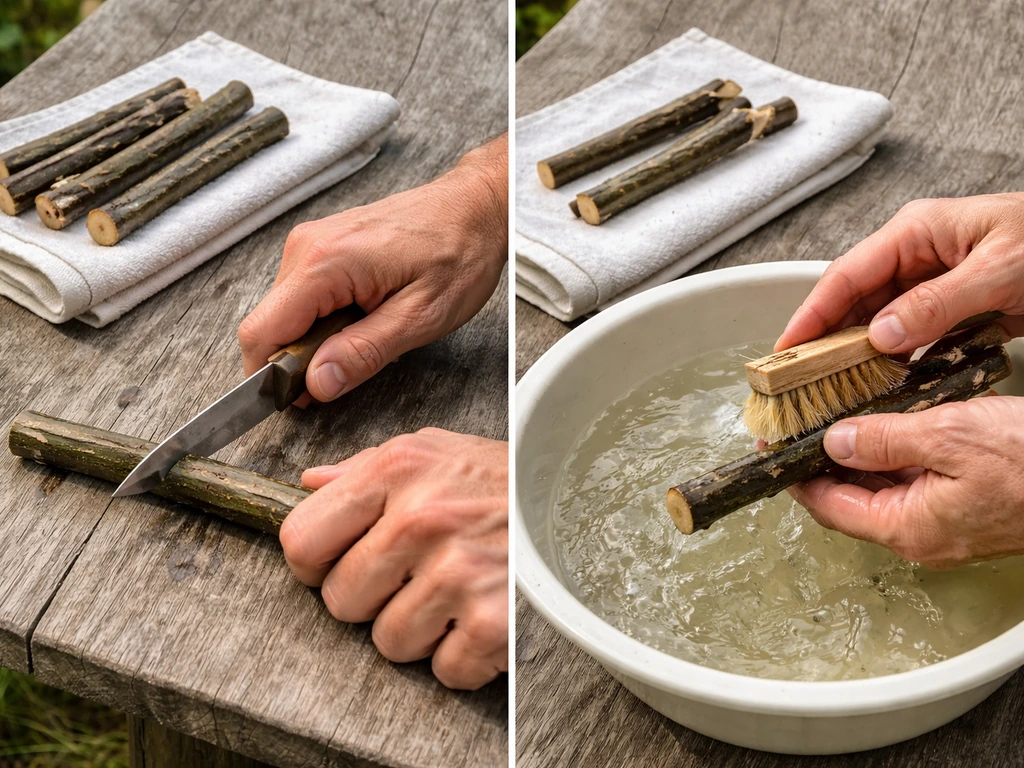
- Cut the branch to length. For cage perches, measure the interior width of the cage and add about two inches on each side for mounting. Use a clean pruning saw or handsaw. Make your cuts as flat and perpendicular as possible so the ends sit flush against the cage bars.
- Scrub the branch thoroughly. Use warm water and dish soap with a stiff brush or wire brush. Work into the bark crevices and any rough spots. This removes surface dirt, droppings, and loose material that could harbor bacteria or mold.
- Disinfect the branch. You have two good options here. First option: bake it in your oven at 200 degrees Fahrenheit (93 degrees Celsius) for 30 minutes. This kills microscopic fungi, bacteria, and insects that can be living inside the wood. Let it cool completely before handling. Second option for branches too large for your oven: soak in a diluted bleach solution (1 part bleach to 9 parts water) for 20 minutes, then rinse very thoroughly and let it air dry completely. Any bleach residue is harmful to birds, so rinse twice if you're unsure.
- Dry and cure the branch. After cleaning, let the branch dry somewhere warm and well-ventilated for at least 24 to 48 hours before use. Freshly cut or wet branches can harbor mold once installed in an enclosed cage. If you have time, a few days of drying is even better for thicker branches.
- Decide on bark removal now (see the finishing section below), and handle any bark stripping before the branch goes into service.
Making it safe: splinters, sharp edges, and hazard checks
Run your bare hand along the entire branch before it goes anywhere near your birds. You're feeling for sharp ridges, cracked sections that could splinter under load, or raised bark edges with jagged points. Any spot that snags your skin will absolutely catch a bird's foot, toenail, or tongue. Sand those spots down with 80-grit first, then follow up with 150-grit for a smoother finish in the problem areas. You don't need to sand the whole branch, just the hazard zones.
Check the ends of the branch especially carefully. Saw cuts can leave thin wood fibers sticking up like tiny needles. A few passes with sandpaper across the cut face fixes that. If a branch has a split or crack running lengthwise, either cut it shorter to remove the cracked section or discard it. Splinters inside a bird's foot cause inflammation and infection fast, and they're genuinely difficult to treat.
Also look at the overall structural integrity. Bend the branch slightly with both hands. If it flexes more than a small amount or makes cracking sounds, it's too weak. A perch that breaks mid-use sends a bird falling, which is a real injury risk. Solid, firm wood only.
How to actually mount and attach the perch
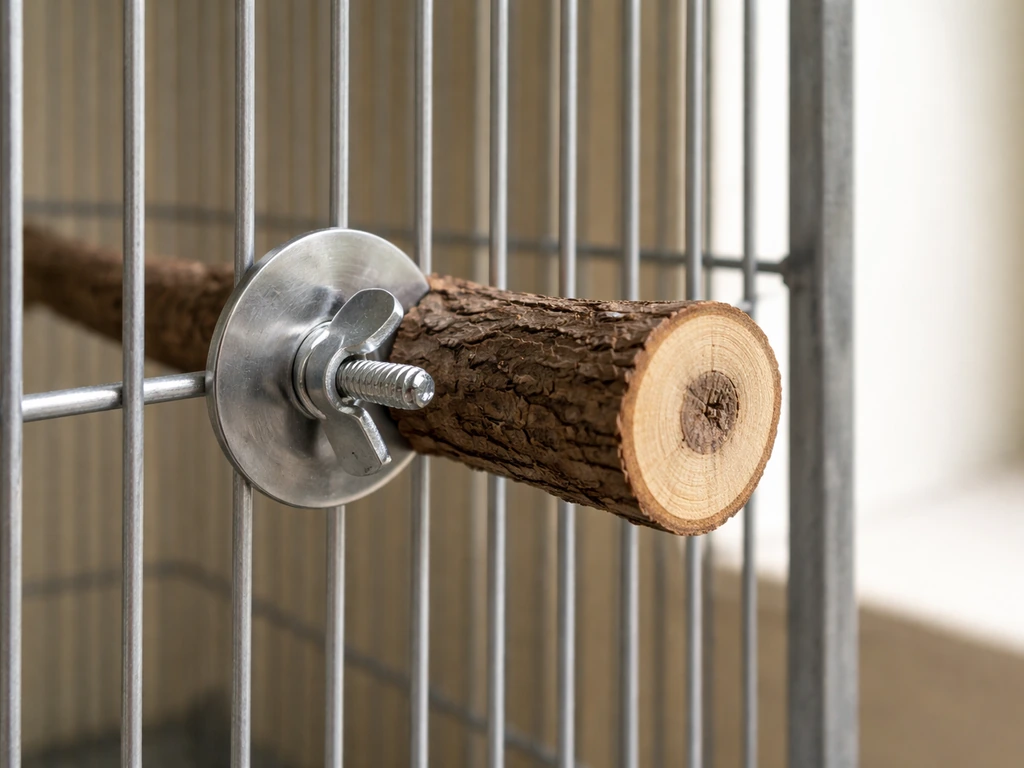
For a cage perch, the most reliable method uses a small bolt through the end of the branch, passed through the cage bar spacing, and secured with a washer and wing nut on the outside. Drill a pilot hole through the branch end slightly smaller than your bolt diameter so the bolt grips the wood without splitting it. This setup lets you tighten and loosen the perch without tools, which is handy for cleaning. Use stainless steel hardware to avoid rust and zinc toxicity, which is a real risk with galvanized hardware near birds.
If your branch is too wide to pass a bolt through cleanly, clamp-style perch brackets work well. These are metal brackets with a screw that bites into the branch and a bolt/wing nut mechanism that grips the cage bar. They're available from bird supply stores and online. Screw the bracket into the branch end, then clamp it to the bar. Much easier than drilling through thick hardwood.
For a freestanding perch stand, cut a flat base from scrap wood, at least 12 by 12 inches for stability. Drill a hole the same diameter as your main perch branch into the center of the base, add a small amount of wood glue, and seat the branch vertically. You can add a horizontal crosspiece near the top by drilling a hole through the vertical branch and bolting a shorter branch through it. This T-shape or Y-shape is stable and gives birds two perching levels. For very tall stands, screw an additional support piece diagonally from the vertical branch to the base.
For outdoor or aviary placement, wrap stainless steel wire around the branch ends and twist it tightly around support posts or aviary framing. If you're mounting to a wooden fence or post, a simple metal bracket screwed into the post and cradling the branch underneath works fine. The goal is zero wobble. Test every perch by pressing down firmly on it with your hand before any bird touches it.
Bark on or bark off, and other finishing choices
Leaving the bark on is generally the better choice for most setups. Bark provides natural grip, which is exactly what birds need to stay balanced. It also gives parrots and other chewing birds something to strip and explore, which is genuinely enriching for them. The caveat is that bark holds more moisture and debris than bare wood, so it needs to be cleaned more often. If you notice the bark starting to peel in large loose sheets after a few weeks, either strip those loose sections off or replace the perch.
Bark-off perches are easier to clean and inspect, and they look a bit neater. If you're removing bark, do it before disinfecting. Use a draw knife or a pocket knife to peel sections, then sand the exposed wood smooth enough that there are no sharp ridges but still textured enough for grip. Very smooth, polished wood can actually be slippery and make a bird work harder to stay balanced, which is tiring over a long day.
Never apply any sealant, varnish, paint, or wood stain to a bird perch. Birds chew their perches constantly, and ingesting finish chemicals causes serious harm. Bare, clean, natural wood is the only safe surface. If you want extra grip on a smooth section, a light sanding with 80-grit rather than 150-grit leaves a slightly rougher texture that works well.
Ongoing care: when to clean, repair, or replace
Regular cleaning
Wipe down perches every few days with a damp cloth, and do a full scrub with soap and water at least once a week for caged birds. Natural wood is porous, so droppings and food residue soak in quickly. Rinse thoroughly and let the perch dry completely before putting it back. A wet perch is a mold perch within a day or two in an enclosed cage.
Spotting and fixing problems
- Wobble: Tighten the wing nuts on bolted perches first. If the branch has shrunk or dried out and the bolt hole is now loose, remove the perch, fill the hole with a small piece of matchstick and wood glue, let it dry, and re-drill. If the branch is just too thin for the load, replace it.
- Mold or odd smell: A musty smell means moisture is trapped in the wood. Remove the perch, scrub it with diluted bleach solution (1:9 ratio), rinse extremely well, and dry fully for 48 hours before reinstalling. If the mold is deep into the grain or covers a large area, discard and replace.
- Peeling bark: Loose, flaking bark is a choking hazard and a hiding spot for mites. Strip the loose sections completely or replace the perch. Do not leave it in service with large hanging pieces.
- Visible insect damage or boring holes: Discard immediately. Insects living inside wood can be toxic to birds or carry pathogens.
- Surface roughness increasing over time: Normal, especially with chewing birds. Re-sand rough spots as they develop. Once a branch is chewed down to a diameter that's too small for the bird's foot size, replace it.
- Cracks or splits forming: Remove from service right away. A cracked perch will eventually splinter.
When to replace entirely
Most natural branch perches for caged birds last anywhere from a few weeks to several months depending on how heavily the bird chews. Build a small stock of prepped, dried branches so you always have a replacement ready. If you smell anything musty, see any soft spots in the wood, or notice your bird avoiding a perch they used to like, that's a signal to swap it out. Birds are often the first to notice when something is off.
A few variations worth knowing about
Once you're comfortable making basic branch perches, there are some natural next steps worth exploring. Manzanita is one of the most popular materials for bird perches because it's extremely hard, naturally textured, and looks beautiful. It's a bit harder to source than backyard branches, but it lasts much longer and holds up to serious chewing. If you have birds that demolish softer wood fast, it's worth looking into.
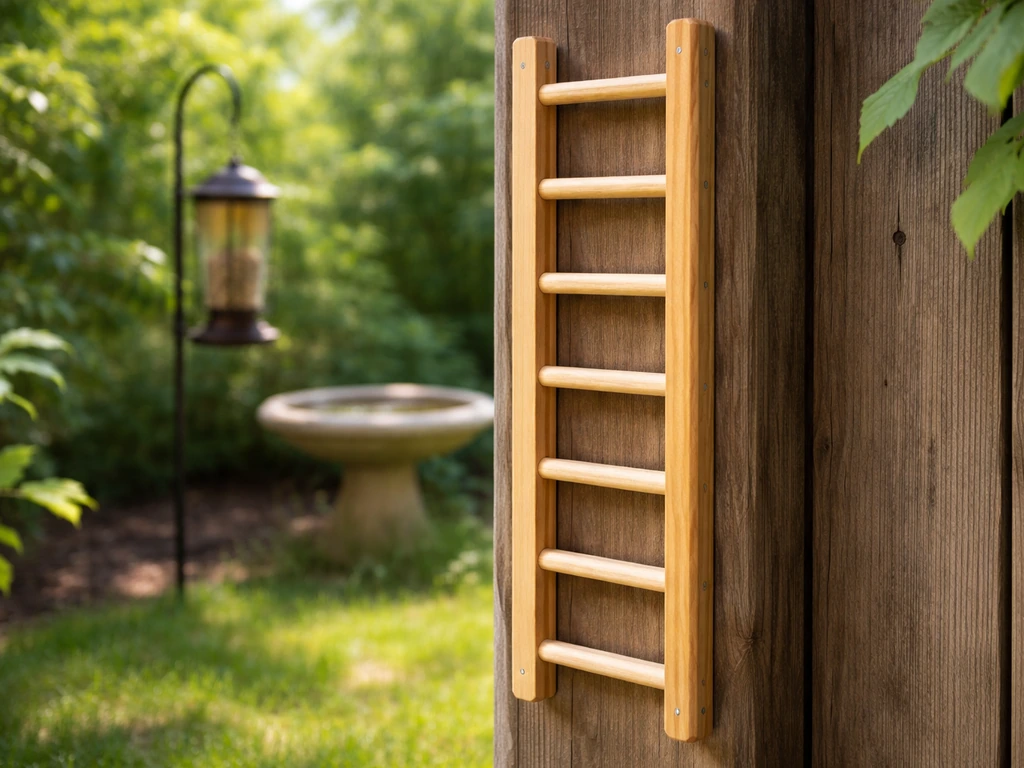
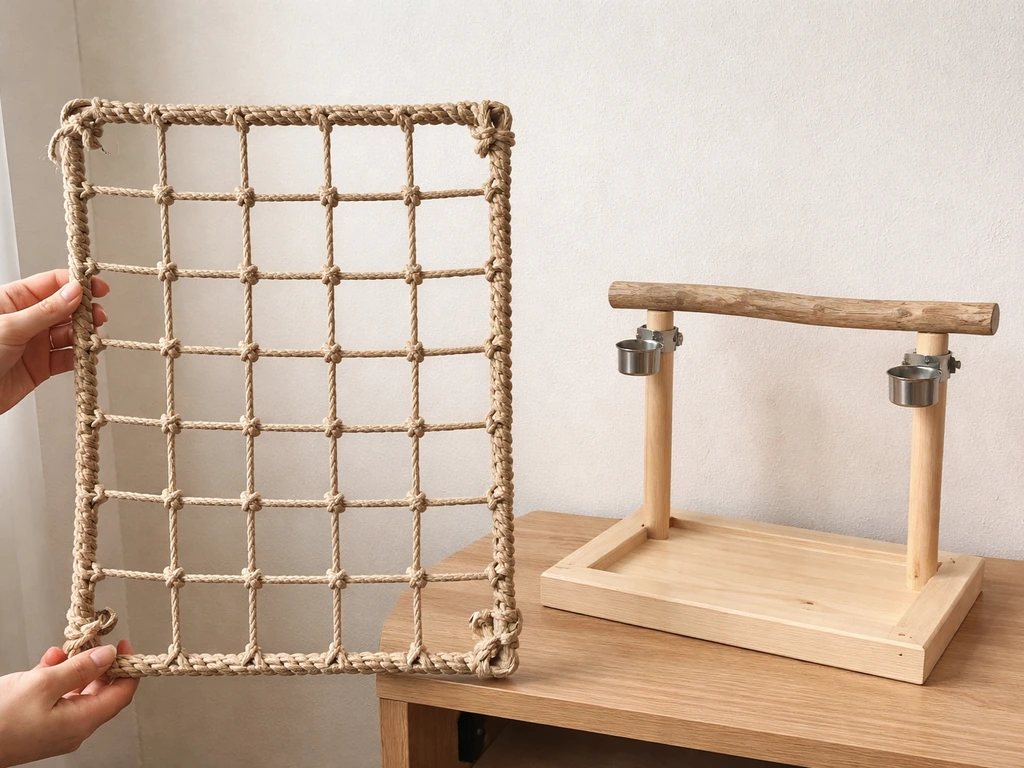
For birds that love water, the same branch-prep principles apply to shower perches, which mount in the shower for bird bath time. If you want a shower perch, the same species and sizing rules apply, just mount the branch securely so it stays stable on wet surfaces shower perches. Aviary ladders using a series of dowels or branches tied or bolted between two side rails are another great project that uses exactly the same skills you develop building basic perches. If you’re specifically trying to make a bird ladder, the same branch-prep and hardware choices apply, just spaced for climbing instead of perching how to make a bird ladder. And if you want to add real movement and texture variety, a climbing net of natural rope with branch segments woven through it gives birds something to scramble over rather than just stand on, which is fantastic enrichment for active species. If you want that same enrichment in a different format, follow the steps for how to make a bird climbing net with safe rope and branch segments.
FAQ
Can I reuse a branch perch after it gets stained or slightly discolored from droppings and cleaning?
Yes, but only after you remove all residue and inspect it closely for hidden damage. Discoloration alone is not a problem, however, if the wood feels rougher, soft, or you see bark lifting, deep grooves, or small cracks, replace it, since those spots trap moisture and can splinter under chewing and foot pressure.
What’s the safest way to disinfect a branch perch if I do not want to use harsh chemicals?
Use soap and water scrub plus thorough rinsing and drying, since natural wood pores hold onto disinfectants. If you need extra control for a specific problem (for example, visible grime that won’t come off), clean mechanically first, then use only bird-safe cleaning approaches, and always let the perch dry completely before returning it to the cage.
How do I know whether my branch is treated or from a tree that had pesticides?
Treat any uncertain source as unsafe and do not guess. If you cannot confirm it is untreated and from an appropriate tree, use a different branch, or buy pre-certified perch wood. Even “natural looking” branches can be contaminated if the tree or wood was processed with preservatives.
Should I remove powdery bark, lichen, or fungus spots before mounting?
Remove any loose, flaking material and discard branches with heavy fungal growth. Lichen can be harmless in some outdoor contexts, but in an enclosure it can hold moisture and debris, increasing the chance of continued growth, so scrape it off and keep only branches that are clean, firm, and dry.
Is it okay to use branches with natural holes, knots, or a hollow center?
Knots are generally fine if the wood is solid and not cracked, but hollow sections are a red flag because splinters and pest activity are more likely. If you see a hollow with any soft edges, insect boring, or internal cracks, shorten the branch to remove the affected area or discard it.
How often should I rotate or replace different perch diameters in a cage?
Rotation helps prevent one set of pressure points from becoming dominant. If you are using a mix of diameters, keep at least two different sizes available and swap positions during cleaning cycles. Replace the perch as soon as you notice pressure-sore related behavior (favoring one foot, reluctance to step up), or when the wood surface becomes soft, musty, or heavily chewed.
What should I do if my bird keeps slipping, especially on smooth wood?
First check that the diameter matches the species guidance and that the perch has no polished, glassy areas from over-sanding. If a section is too smooth, lightly sand with coarser grit to restore micro-texture, and consider keeping or reattaching bark on that section if it is stable and not peeling in large sheets.
Are outdoor branch perches safe for caged birds?
They can be, but outdoor wood increases exposure risk (pests, plant chemicals, and mold). You must still follow the same safety steps: confirm species safety, remove any loose bark or residue, scrub thoroughly, check for hollows and soft spots, then dry completely before bringing it indoors.
How do I prevent a cage perch from loosening over time?
Use the hardware method that matches your branch size, and tighten with a pilot hole approach to reduce splitting. Recheck tightness during each cleaning, especially after the first week, because wood can compress slightly and cause bolts or wire to shift.
Can I mount a perch on the top of the cage bars, not just the side bars?
Yes in many cages, but stability is the priority. Make sure the perch spans the supports firmly and cannot rock when pressed at the ends. Also confirm clearance so droppings do not fall directly onto the perch, which speeds up bacterial buildup and makes cleaning harder.
Is it safe to use deadwood if it feels solid?
No. Dead and brittle branches can fail suddenly, even if they seem intact when you initially install them. Stick to branches that bend only slightly, do not crack when flexed gently, and show no signs of insect boring, soft interior sections, or heavy fungal growth.
Next Articles
How to Make a Bird Ladder: Wooden DIY Step by Step
Step-by-step plan to build a safe wooden bird ladder, with sizing, spacing, tools, anchoring, and bird-safe finishing.
How to Make a Bird Climbing Net Step by Step DIY
Step-by-step DIY guide to build a safe bird climbing net with size, knotting, mounting, tension, and care tips.

How to Build a Chimney Swift Bird House DIY Guide
Step-by-step DIY plans to build a chimney swift bird house, with correct dimensions, placement, and weatherproofing for