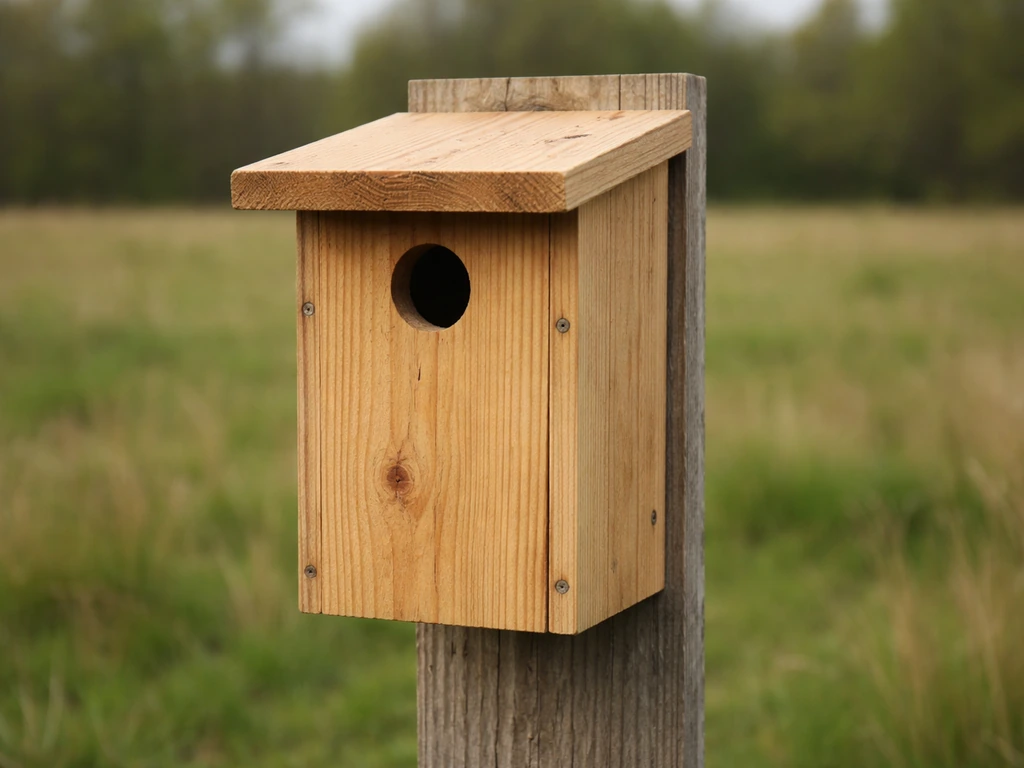
Here's something most people get wrong: doves don't use the classic enclosed birdhouse with a round hole in the front. Mourning doves and most other backyard doves are open-platform nesters, meaning they want a shallow, open shelf or basket where they can settle in and see their surroundings, not a dark cavity. Build the wrong style and you'll get sparrows or starlings moving in while your target doves nest in a bush two feet away. Build the right style and you can have a pair raising multiple broods a season right on your back porch or fence line.
How to Build a Dove Bird House Step by Step

Marcus Thornton
9 Apr 2026

This guide walks you through every step: picking the right design, cutting and assembling the platform, weatherproofing it, and placing it so doves actually find and use it. I've built plenty of these, and I'll tell you where I went wrong early on so you don't have to repeat my mistakes.
Choose the right dove style and size

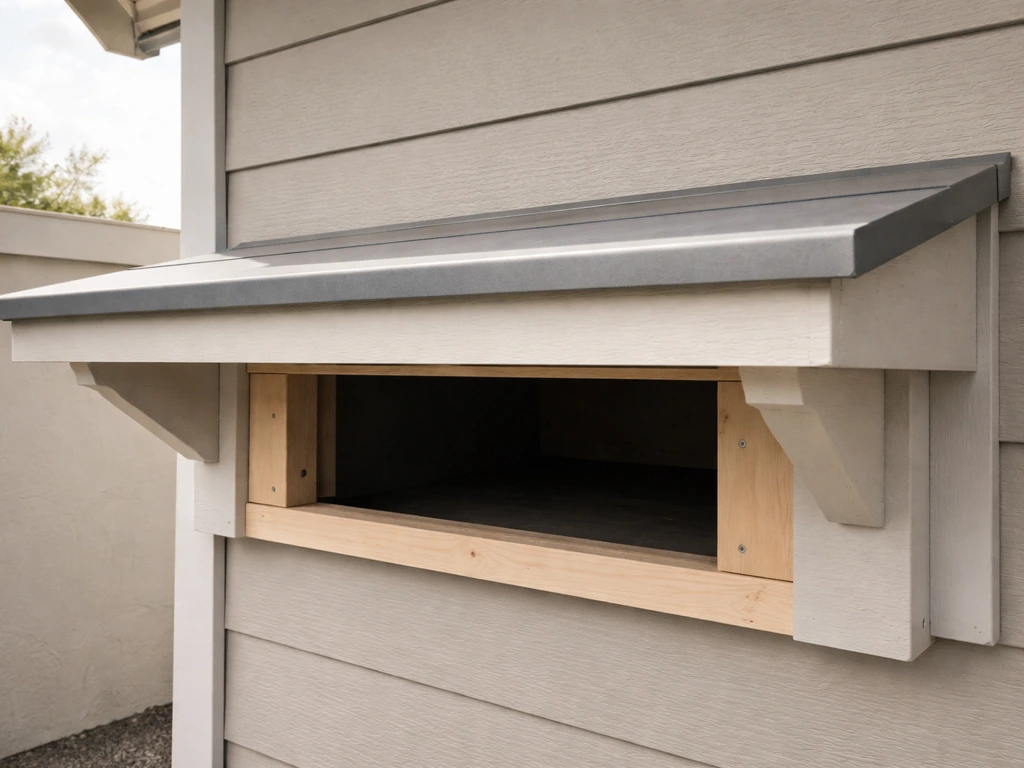
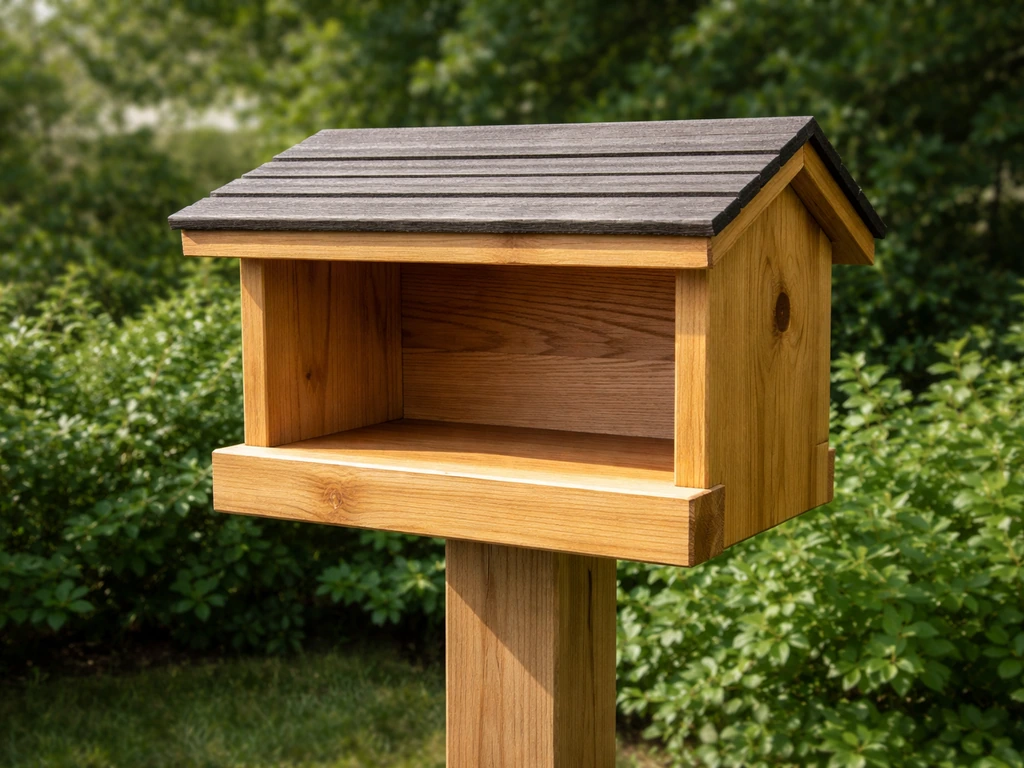
The most important thing to understand before you cut a single board is that mourning doves are platform nesters. They build a loose, shallow nest from sticks, twigs, grass, and pine needles, typically out in the open or at the edge of a field or tree line where they have a clear view. They're not looking for a cozy enclosed box. What attracts them is an open nesting shelf: a flat or slightly cupped platform with a partial roof or back panel for weather protection, raised sides of just a few inches, and a clear flight path in and out.
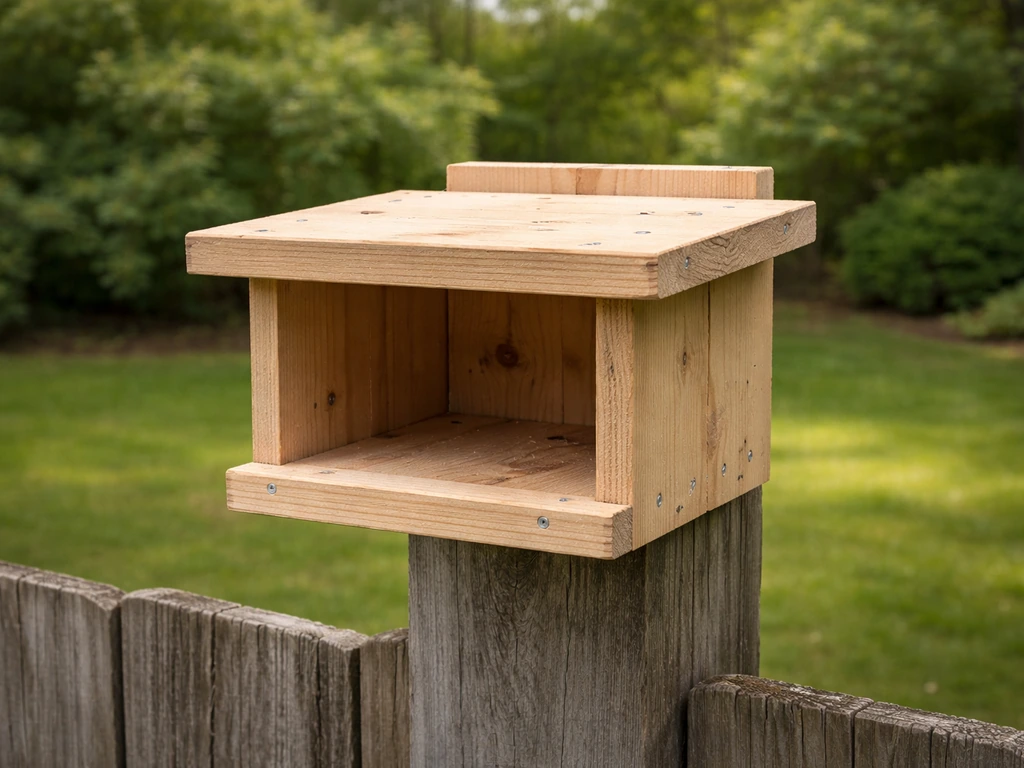
There are two practical formats for a dove nesting structure. The first is a simple flat nesting shelf: a floor panel with a low front lip, two side pieces, and a sloped roof. The second is a cone or basket style, which mimics the natural cup shape doves prefer in tree crotches. For a first build, the flat shelf is far easier to construct and works excellently. The cone/basket approach is great once you're comfortable with the basics.
For floor dimensions, aim for a platform roughly 8 inches by 8 inches. That gives a mourning dove enough room to settle comfortably without feeling cramped. Keep the front lip low, around 1.5 to 2 inches, so the birds can land easily. The overall box height (from floor to roof peak) should be around 8 inches. These proportions are derived from the same species-specific framework used for other cavity nesters, adapted for the open platform format doves actually need.
One thing I learned early: doves tolerate a bit of shade but they don't want a fully enclosed, dark space. If you look at where they naturally nest, it's usually in a tree crotch or on a fence rail with open sightlines. Keep that image in mind as you design. The front of your shelf should be fully open or have only a very low lip.
Materials and tools (plus safe repurposed options)
The best wood for a dove shelf is untreated cedar, pine, or cypress. Cedar is my first choice because it's naturally rot-resistant, handles outdoor weather for years without much maintenance, and it's widely available at most lumber yards. Pine works fine and costs a bit less. Cypress is excellent but harder to find in some regions. Whatever you use, never use pressure-treated lumber. Pressure-treated wood contains pesticides and fungicides that can leach into the nesting material and harm eggs, nestlings, and the adults themselves. It's not worth the cheap price.
You don't need to buy new lumber either. Reclaimed fence boards, old pallet wood (untreated), and salvaged barn siding are all great options as long as the wood is structurally sound and hasn't been treated with any chemicals. I've built several shelves from old cedar fence boards and they've outlasted my store-bought ones. Just check for rot, nails, and staples before you start cutting.
For hardware, use galvanized or stainless steel screws rather than standard wood screws. They won't rust and split the wood over time. Wood Magazine notes that stainless steel is a good choice for outdoor projects because it helps avoid rust and staining They won't rust and split the wood over time.. Grab a tube of exterior wood glue (non-toxic, water-based) too. Gluing joints before you screw them adds real structural strength and extends the life of the shelf significantly.
Here's your basic materials and tools list:
- One 6-foot length of 1x8 untreated cedar, pine, or cypress (a single board covers the full cut list)
- 1.5-inch galvanized exterior screws (about 20)
- Exterior wood glue (water-based, non-toxic)
- Sandpaper (80 and 120 grit)
- A saw (circular saw, jigsaw, or handsaw all work)
- Drill with a screwdriver bit and a small drill bit for pilot holes
- Tape measure and pencil
- Speed square for marking right angles
- Optional: a jigsaw for trimming corner notches in the floor panel for drainage
You don't need a workshop full of power tools. I've built these with nothing but a handsaw, a cordless drill, and a workbench made of two sawhorses and a scrap door. If you're newer to building and want to compare techniques, the approach for a dove shelf shares a lot of DNA with how to build a sparrow bird house, though the open platform format is the key difference.
Design plan: cut list, layout, and entrance specs
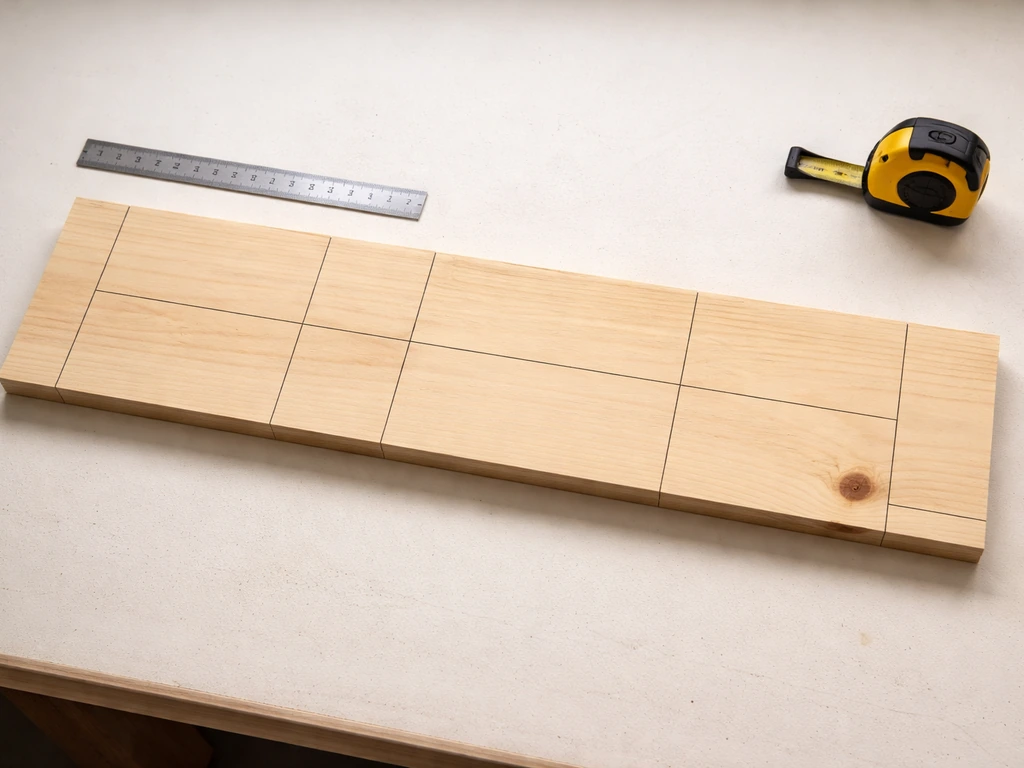
This plan is for a standard open nesting shelf sized for mourning doves. All pieces come from a single 1x8 board (actual width is 7.25 inches, which works perfectly). Here's the full cut list:
| Piece | Dimensions (cut size) | Quantity | Notes |
|---|---|---|---|
| Floor | 8 in. x 8 in. | 1 | Notch corners 3/4 in. square for drainage |
| Roof | 8 in. x 10 in. | 1 | Extends 2 in. over front for weather protection |
| Back panel | 8 in. x 9 in. | 1 | Mounting surface; attach to wall/post |
| Side panels | 7.25 in. x 8 in. (angled top cut) | 2 | Angle top edge to match roof slope |
| Front lip | 8 in. x 1.5 in. | 1 | Low front retainer; keeps eggs from rolling off |
A quick note on the angled top cut for the side panels: you only need a slight slope, about 10 to 15 degrees, to let the roof shed water. You can skip the angle entirely and use a flat top if you want to keep cutting simple, just make sure your roof piece overhangs the front by at least 2 inches so rain doesn't drive straight in.
Because doves use an open platform rather than an enclosed box, there's no entrance hole diameter to spec out the way you would for a chickadee or swallow. But the front lip height is your equivalent design lever: keep it at 1.5 to 2 inches maximum. Any higher and you're blocking a dove's view and making it harder to land cleanly. Any lower and eggs can roll off during windy conditions. I ruined my first batch of eggs on an early build because I used a 1-inch lip on a slightly angled platform. A 1.5-inch lip with a level floor fixed the problem immediately.
Drill four small drainage holes (about 3/8 inch diameter) in the floor panel, or cut the notched corners instead. Both approaches work. The notched corners are faster and allow better airflow along with drainage. Either way, water needs a path out so nesting material doesn't stay wet and rot.
Step-by-step build process (assembly to finish)
- Cut all pieces according to the cut list. Mark each piece with a pencil so you don't mix them up. Double-check measurements before cutting (yes, measure twice, it actually matters).
- Sand all surfaces lightly with 80-grit sandpaper, then smooth with 120-grit. Pay extra attention to the floor panel since that's where nesting material will sit. Rough splinters can snag and irritate birds.
- Cut the drainage notches in the four corners of the floor panel using a jigsaw. Each notch should be about 3/4 inch square. If you don't have a jigsaw, drill four 3/8-inch holes near the corners with a standard drill bit.
- Attach the back panel to the floor first. Apply a thin bead of exterior wood glue along the bottom edge of the back panel, press it flush to the back edge of the floor, and drive two 1.5-inch screws through the back panel down into the floor edge. Pre-drill pilot holes to prevent splitting.
- Attach the two side panels. Glue and screw each side panel to the floor and back panel. Two screws per joint is enough. Make sure the sides sit flush with the floor bottom and back panel.
- Attach the front lip. Glue and screw the 1.5-inch lip across the front edge of the floor, flush with the bottom. This is a lightweight piece so one screw at each end is sufficient.
- Attach the roof panel. Rest it on top of the side panels and back panel so it overhangs the front by at least 2 inches and overhangs the sides slightly. Glue the top edges of the back and side panels, press the roof down, and drive screws through the roof into the back and side panels.
- Add a mounting cleat or pre-drill two holes through the back panel for screwing directly to a post, fence, or tree. Use 3/8-inch holes and make sure they're at least 2 inches from the edges to avoid splitting.
- Finish the exterior only. Apply one or two thin coats of exterior latex paint in a neutral earth tone (tan, gray, bark brown) or leave it natural if you're using cedar. Never paint the floor interior or front lip where birds land and pick at surfaces. Oil-based paints are off the table entirely for bird structures.
- Let paint or any finish dry completely (at least 48 hours) before mounting. Fresh paint fumes in an enclosed or semi-enclosed space can harm birds.
That's really it for assembly. The build is straightforward enough that most people finish it in a couple of hours on a weekend morning. The glue-before-screwing step is the one most beginners skip, and it's the reason many shelves start falling apart after the first winter. Don't skip it.
Weatherproofing, ventilation, and clean-out for longevity
The roof overhang is your primary weatherproofing tool. A 2-inch overhang at the front keeps direct rain off the platform. If you're mounting in an exposed area without a fence or tree canopy overhead, extend the overhang to 3 inches. For the joints between the roof and the side and back panels, run a thin bead of exterior silicone caulk along the outside of each seam after assembly. This is optional but it adds real longevity in wet climates.
Ventilation is less of a concern for an open platform than for an enclosed cavity box, but the drainage notches you cut in the floor corners do double duty: they let water out and let air circulate under the nesting material. If you're building in a very humid area, you can add a small gap (about 1/4 inch) between the roof and the top of the back panel to allow warm air to escape and prevent moisture buildup under the roof.
For clean-out, the beauty of an open platform is simplicity. After each brood fledges, the old nest material just needs to be scraped off and the platform brushed clean. Don't do this while a nest is active. Wait until you're sure the young have left, then clear everything off so it's fresh for the next brood. Doves can raise two to three broods per season from roughly February or March through late summer, so you may be cleaning the platform a couple of times a year.
If the platform is mounted with screws through the back panel, you can actually remove it from its mount for a more thorough cleaning. I do this once at the end of the season: pull the shelf off, scrub it with a stiff brush and a diluted bleach solution (one part bleach to nine parts water), rinse it well, and let it dry in the sun before remounting. This eliminates parasites and old nest debris that can carry disease into the next season's clutch.
Best placement and setup for dove attraction
Height matters more than most people realize. Mount your dove shelf between 6 and 15 feet off the ground. Mourning doves naturally nest in tree crotches in that height range, and mounting at that level mimics what they're already comfortable with. Lower than 6 feet and you're in predator territory. Higher than 15 feet and you're into the zone where the shelf becomes hard to monitor and clean.
The best mounting spot is in the crotch of a horizontal branch or against a fence post or eave where the shelf is partially sheltered from above. Doves like a clear flight approach, so avoid thick shrubs directly in front. They want to see the shelf from a distance, land, and have an unobstructed view from the nest. A spot at the edge of a yard with some open lawn or garden in front and a tree or shrub behind works well.
Orientation is worth thinking about. Avoid mounting the shelf facing west in hot climates. Afternoon western sun can overheat the platform and stress eggs and chicks. A north- or east-facing orientation keeps the platform cooler during the hottest part of the day. In cooler northern climates, a south or southeast orientation can be beneficial for warmth in early spring when doves start nesting.
Add a predator guard if you're mounting on a smooth round post. A cone-style metal baffle below the mount point makes it very hard for raccoons and cats to climb up. This one step makes a real difference in nest success, especially in suburban areas. The same logic applies to other open-platform nesters: protecting eggs and nestlings from predators is one of the most important things you can do once the structure is in place.
Placement near a water source (birdbath or shallow dish) and a seed feeder stocked with millet or cracked corn doesn't hurt either. Doves are ground foragers by nature but they'll quickly learn a food source is nearby. Getting them to associate your yard with reliable food and water makes them far more likely to trust your nesting shelf too.
Troubleshooting and maintenance for active seasons
If doves aren't using the shelf after a few weeks, run through this checklist before assuming there's a problem with the build itself. First, check whether it's been mounted long enough. Doves are cautious birds and may take a full season to discover a new structure. Second, confirm the front is fully open with no obstructions. If you added a front panel that's too high or mounted the shelf too close to dense vegetation, that's your likely culprit.
Third, check for wasps. Before opening or inspecting a shelf you haven't checked in a while, watch it from a few feet away for a minute or two. Wasps love to build small nests on the underside of the roof or in the corners. If you see wasp activity, deal with that before a dove pair moves in, as wasps will drive them off. Knocking down a small wasp nest in the off-season takes thirty seconds and saves you from losing a breeding attempt.
If another species is using the shelf, that's not necessarily a failure. Robins, for instance, also use open platforms and will take advantage of a well-placed shelf. You can add a second shelf nearby to give doves a separate option. Just space them at least 30 feet apart since doves are loosely territorial during nesting.
For ongoing seasonal maintenance, check the shelf at least once before breeding season starts each year, typically late January or early February. Look for any joint separation, wood rot, or hardware corrosion. Re-glue any loose joints and replace any rusted screws. Tighten the mounting hardware. A five-minute inspection before the season saves a nest from falling mid-brood.
When you do inspect an active nest, keep it brief and calm. NestWatch also emphasizes providing nesting birds space and minimizing disturbance during nest monitoring. Doves can be sensitive to disturbance and may abandon a nest if they feel threatened repeatedly. A quick look once every several days is plenty to track progress without stressing the birds. Once eggs hatch and chicks are feathered (usually around two weeks), the pair will have gone through the most vulnerable period and disturbance risk drops.
Never clean a shelf while a clutch is active or eggs are present. Wait until you're certain that brood has fully fledged, then clean promptly so the next brood has a fresh start. Doves can and will re-nest on a recently cleaned platform within days.
How this compares to other backyard bird shelters
It's worth noting how a dove shelf differs from the cavity-box designs you'd build for most other backyard species. The enclosed cavity format, with a specific entrance hole diameter and deep interior, is what species like swallows, chickadees, and bluebirds need. For example, if you're curious how the construction approach shifts for a cavity nester, how to build a swallow bird house walks through that process with the entrance hole specs and interior depth those birds require.
Similarly, how to build a chickadee bird house illustrates how a much smaller interior and tighter entrance hole serves a tiny cavity nester, which is almost the opposite design philosophy from the open dove platform. The contrast makes it clear why species-specific dimensions and formats matter so much: one style genuinely doesn't work for another species.
If you want to attract a wider range of backyard birds and are considering building multiple structures, pairing a dove shelf with an enclosed box for a cavity nester is a great approach. How to make a finch bird house covers the design for another popular backyard species, and the construction techniques are similar enough that once you've built your dove shelf, a finch box is an easy next project.
For anyone interested in supporting a broader range of birds on their property, how to build an oriole bird house and how to build a chimney swift bird house represent two very different but equally rewarding projects that complement a dove platform nicely in a well-planned backyard habitat.
Even how to build a starling bird house is a useful reference for understanding the fully enclosed cavity format, since starlings are one species you may actively want to exclude from a dove shelf by keeping the design truly open (starlings don't prefer open platforms the way doves do).
The dove shelf is genuinely one of the easiest backyard bird projects to build, and it's often the most rewarding because doves are visible nesters. You can watch the whole process from egg to fledgling without ever opening the structure. Get the platform up before late February or early March in most regions, and you've got a real chance at a nesting pair within the first season.
FAQ
Can I convert a regular enclosed birdhouse into a dove house?
Not reliably. Doves need an open platform with a low front lip so they can land and keep an open sightline. If you start with an enclosed design, you would have to remove the front panel and interior cavity and effectively recreate a shallow shelf, otherwise you risk attracting other species that prefer cavities.
What should I use for the nest material on the shelf, do doves bring it themselves?
Doves typically collect and build their own loose nest, so you usually should not pre-fill the platform with sticks. If you want to encourage building, keep it simple by leaving the shelf clean and letting the birds gather twigs, grass, and pine needles nearby.
How close can I place a dove shelf next to another bird house?
Doves can be loosely territorial during nesting. If you add a second shelf for a different pair or to reduce competition, keep at least 30 feet between the dove nesting platforms. If the other house is for a cavity nester, position it so the entrances are not directly facing the dove landing area.
Will doves use the shelf if it faces the wrong direction for my climate?
They might, but overheating is a common issue. Avoid a west-facing mount in hot climates because afternoon sun can stress eggs and chicks. If you only have a west spot, increase the roof overhang and consider partial shade from a nearby tree or building eave.
How long should I wait before concluding doves will not use my shelf?
Give them time, a new shelf can take a full season. After a few weeks, first verify it is mounted at an appropriate height and that the front remains fully open or only has a low lip. Also confirm there are no obstructions or predator-friendly cover directly in front of the landing approach.
Is it okay to add a thicker front lip to stop eggs from rolling?
Usually no. Eggs roll less on a level platform with the correct low lip, and a lip that is too tall blocks the dove’s view and makes landing harder. Stick to about 1.5 to 2 inches and ensure the floor panel is level.
Do I need drainage holes in the floor, what if I use notched corners instead?
Either approach works, you do not need both. The key is that water must have an exit path and airflow under the nesting material helps prevent rot. Choose drainage holes if you prefer a simpler build, or notched corners if you want faster airflow.
What is the best way to place the shelf to reduce predator risk?
Use a predator guard when mounting on smooth round posts, a baffle-style barrier can prevent climbing. Also avoid placing the shelf in areas with dense shrubs directly in front, doves need a clear view and a clean flight approach to spot threats.
Should I seal the wood or paint the shelf?
Avoid sealing the interior surfaces that doves will contact, especially with coatings that can off-gas or trap moisture. If you paint, keep the shelf interior natural or use an exterior paint intended for bird-safe outdoor use, and let it fully cure before birds arrive.
How do I clean the shelf if doves re-nest quickly?
Do not clean while a clutch is active. Wait until the brood has fledged, then scrape and brush promptly so the next nesting attempt has a fresh surface. If a new nest appears soon after cleaning, stop again and wait until the new brood has fully left.
Can I remove and scrub the shelf during the season, or only at the end?
You can remove it for deeper cleaning once the season’s birds have finished and no eggs or active nestlings are present. For in-season maintenance, basic brushing and light debris removal are safer, while aggressive scrubbing and disinfecting are best saved for after nesting activity ends.
What if wasps start using the underside of the roof?
Watch from a distance before opening the shelf. If you notice wasp activity, address it before a dove pair commits, since wasps can drive them off. Handle wasp nests in the off-season when possible, so you do not disrupt a nesting attempt.
Do doves need a water source near the shelf to use it?
Not strictly, but it helps. A nearby birdbath or shallow dish plus a consistent food source can encourage doves to spend time in your yard, which increases the odds they will discover and trust the nesting platform.
Is untreated cedar really necessary, can I use any scrap wood if it looks clean?
Use wood you are confident has never been pressure-treated or chemically treated. Visually clean scrap wood can still be unsafe if it was treated with preservatives, so check for stamps or coatings. Never use pressure-treated lumber, even if it seems dry and intact.
Next Articles
How to Build a Swallow Bird House for Barn and Tree Swallows
Step-by-step DIY plans to build barn and tree swallow bird houses, with entry size, mounting, and care tips.
How to Make a Blue Jay Bird House Step by Step
Step-by-step DIY blue jay bird house build with exact hole size, dimensions, materials, assembly, and placement tips.
How to Make a Cardinal Bird House Step by Step
Step-by-step plans, measurements, and placement tips to build a weatherproof cardinal bird house that attracts red cardi