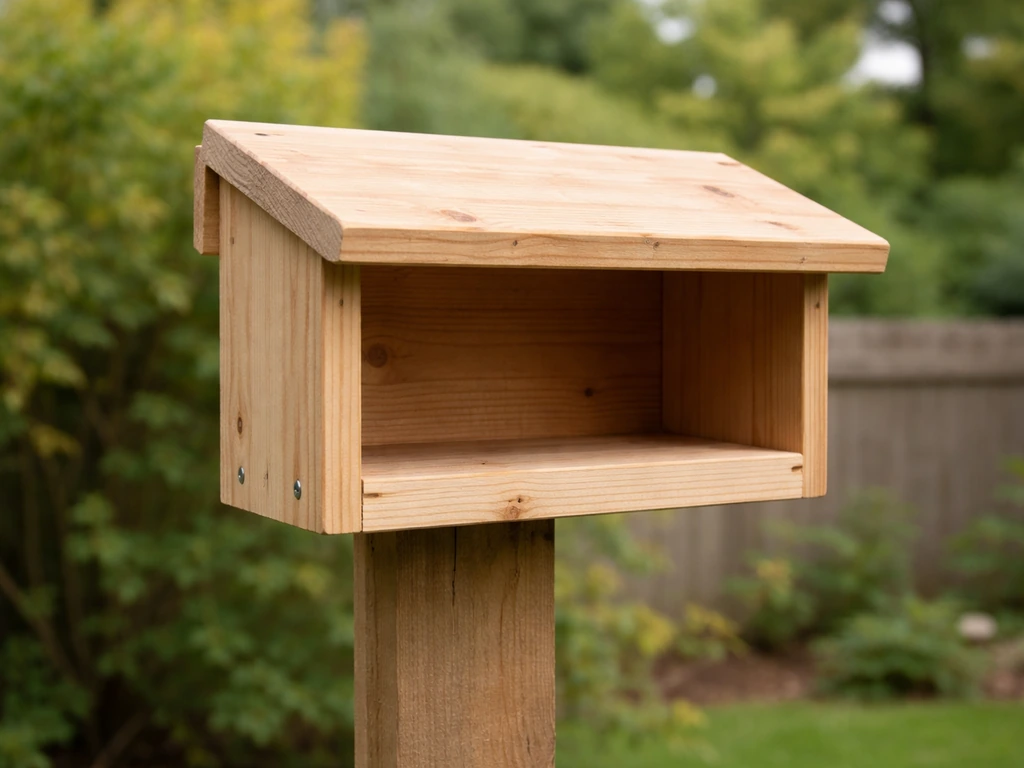
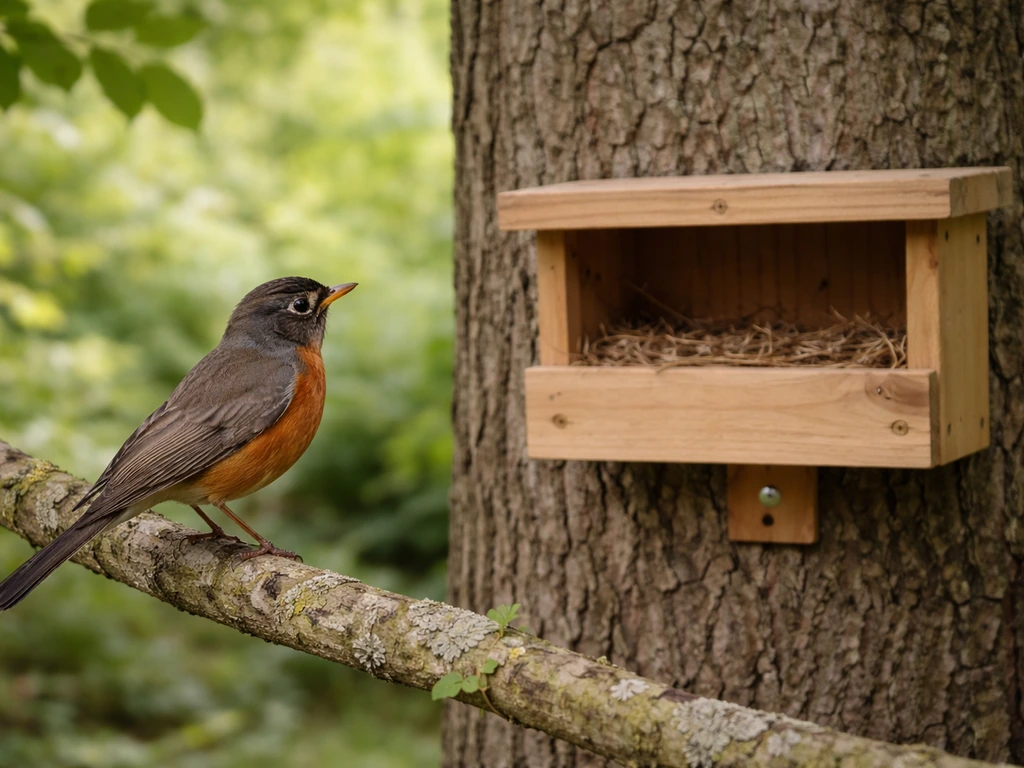
Robins do not use the classic enclosed birdhouse with a small round entrance hole. If you build one of those, robins will ignore it completely. What robins actually want is an open-fronted shelf or platform box, sometimes called a nesting ledge, where they can see their surroundings while sitting on the nest. If you are building your own window bird house, this robin-focused shelf-box design can help you choose the right size, placement, and openings so robins are willing to use it how to make a window bird house. Once you understand that one key fact, the whole build gets simpler, faster, and more beginner-friendly than almost any other nest box project you can take on.
How to Make a Robin Bird House: Step-by-Step DIY

Marcus Thornton
22 Apr 2026
What robins actually need from a nest box
American robins are open-nesters by nature. In the wild they build cup nests on branches, ledges, gutters, and window sills. They are not cavity nesters, so the standard hole-in-the-front box that works for bluebirds or wrens will sit empty all season. What attracts a robin is a three-sided or open-front shelter that gives them a stable platform with a partial roof overhead for rain protection and a back and two sides for wind protection.
The correct floor size for an American robin nesting shelf is 7 to 8 inches wide by 7 to 8 inches deep. A 7x8-inch or 8x8-inch floor are both well-documented dimensions from wildlife extension guidelines. The box height (the back board and side boards) should be around 8 inches tall to give enough shelter without boxing the bird in. The front stays fully open or is left with just a low lip, maybe 1 to 1.5 inches, to keep the nest material from spilling out. That open front is not a design compromise: it is the whole point.
Robins also strongly prefer sheltered placement. They want the box tucked under an eave, a soffit, or the overhang of a porch rather than out in the open on a post. That sheltered position gives them the rain cover and partial concealment they would get from a tree branch with leaf canopy above. Keep that in mind before you even pick up a saw, because it affects where you mount this thing as much as how you build it. To hang a Williamsburg bird bottle successfully, choose a stable spot, use the right hardware, and make sure it sits at a safe height and angle for the birds to approach how to hang a williamsburg bird bottle.
Materials and tools (beginner-friendly options)
Cedar is the go-to wood for any outdoor nest box because it resists rot naturally without any chemical treatment. Rough-cut cedar is even better because the textured surface gives the birds grip on the inside walls. That said, untreated pine or exterior-grade plywood will work if cedar is not available or is over budget. What you must avoid is pressure-treated or chemically treated lumber and any metal sheeting for the structure itself. Both can off-gas compounds that harm eggs and nestlings. If you are repurposing old fence boards or pallet wood, just confirm it is untreated before you start cutting.
For hardware, use galvanized or stainless steel screws rather than nails or standard wood screws. Nails work loose over time as the wood swells and contracts through seasons, and standard screws rust and stain the wood. Deck screws in 1-5/8 inch or 2-inch lengths are ideal for a 3/4-inch board build. If you want a different style of backyard project after you choose your screws and spacing, you can also look at how to make a willow bird house as a related option.
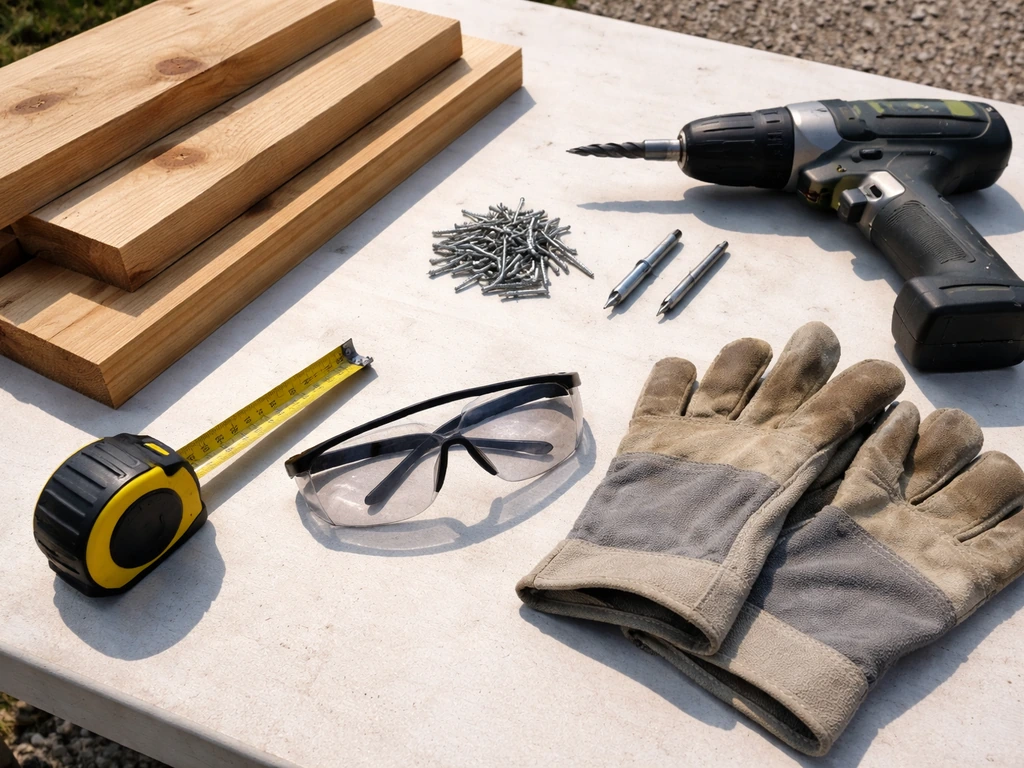
You do not need a workshop full of tools for this project. A circular saw or handsaw for cuts, a power drill for holes and driving screws, a tape measure, a carpenter's square, and sandpaper are all you need. A drill press makes the drainage holes cleaner but a handheld drill works perfectly fine. If you are a complete beginner, many lumber yards will rip boards to width for you at low or no cost, which means your only cuts at home are cross-cuts to length.
- One piece of 1x8 cedar or pine, 6 feet long (enough for all panels with some waste)
- Galvanized or stainless deck screws, 1-5/8 inch
- Exterior wood glue (optional but adds longevity at joints)
- 3/8-inch drill bit for drainage holes
- 5/8-inch drill bit for ventilation holes
- Circular saw or handsaw
- Power drill and driver bit
- Tape measure and carpenter's square
- 80-grit sandpaper for edges
- Mounting hardware: L-brackets or a French cleat cut from scrap wood
Cut list and step-by-step build
The dimensions below produce a shelf box with a 7x8-inch floor, 8-inch back, and a sloped roof that overhangs the front and sides for drainage. All measurements assume 3/4-inch nominal lumber (actual thickness of a 1x8 board is 3/4 inch).
| Panel | Width | Length | Quantity |
|---|---|---|---|
| Back | 7.5 inches | 14 inches | 1 |
| Floor | 7 inches | 8 inches | 1 |
| Sides (left and right) | 7 inches | 8 inches | 2 |
| Roof | 9 inches | 10 inches | 1 |
The back board is taller than the side boards because the roof attaches to it at the top and the board extends below the floor to give you a flush mounting surface against a wall or post. Cut the top of the back board at a 10-degree angle so the roof sheds water forward rather than pooling against the wall. If cutting angles feels intimidating, a flat cut works too: just make sure your roof overhangs the front edge by at least an inch.
- Cut all panels to size using the cut list above. Sand any rough or splintered edges with 80-grit sandpaper, especially on the floor where the birds will stand.
- Drill four 3/8-inch drainage holes through the floor panel, one near each corner about half an inch in from the edges. These prevent standing water from rotting the floor and drowning nestlings after heavy rain.
- Drill two 5/8-inch ventilation holes near the top of each side panel, about half an inch down from the top edge. This keeps airflow moving through the box on hot days without creating drafts at nest level.
- Attach the two side panels to the back panel using two screws per side. Run a thin bead of exterior wood glue along the joint before driving screws for extra hold. Make sure the top edges of the sides are flush with the angled top of the back.
- Slide the floor panel into the bottom and attach it to both sides and the back with two screws per joint. The floor should sit flush with the bottom edges of the sides and back, or you can recess it a quarter inch if you want a small lip to hold nesting material in place.
- Attach the roof panel to the top of the back board using two screws. The roof should overhang the front opening by at least 1 inch and overhang each side by at least half an inch. This overhang is what keeps rain from blowing into the open front.
- Do a quick shake test: hold the box and give it a firm shake. Nothing should rattle or flex. If joints feel loose, add a screw or two before moving on.
- Drill two mounting holes through the back panel, one near the top and one near the bottom, sized for whatever screws or lag bolts you will use to attach it to a wall or soffit.
Ventilation, drainage, and keeping predators out
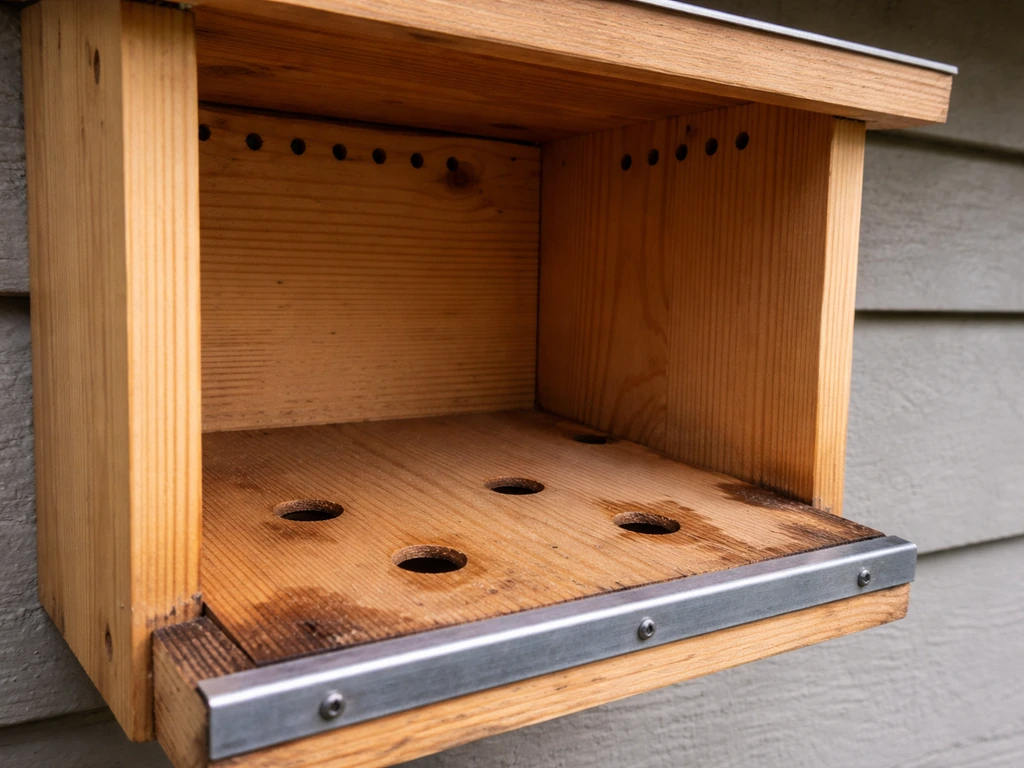
The four drainage holes in the floor and the blank" rel="noopener noreferrer">ventilation holes near the top of the sides are not optional extras: they are critical for the birds' survival. Nestlings in a waterlogged or overheated box do not thrive. blank" rel="noopener noreferrer">The 3/8-inch floor holes let rain drain before it pools, and the 5/8-inch side holes near the top let heat escape on summer afternoons. If you want to add a little more airflow without drilling extra holes, you can leave a small gap (about 1/4 inch) between the roof panel and the top of the side boards when you attach the roof.
Because this is an open-front design, predator protection is a real concern. Cats, raccoons, and snakes can reach a nest that is accessible from below or the side. The best defense is mounting height combined with a predator baffle. Aim for 6 to 10 feet above ground, with 8 feet being a solid middle-ground target. If you are mounting on a post rather than under an eave, attach a cone or cylinder predator baffle below the shelf. Do not skip this step if cats roam your yard. One recommendation worth taking seriously: only mount the shelf where you can actually add a predator guard. A shelf screwed to a fence rail with cats nearby is an invitation to tragedy, not a birdhouse success story.
Avoid adding a perch below the open front. It sounds helpful but it actually gives predators and nuisance birds a foothold to harass the nesting robin. Robins do not need a perch: they fly directly to the shelf and land inside. Leave the front clean and open.
Roof style, mounting, and placement for best results
The sloped roof does double duty: it sheds water away from the nest and it blends the shelter into the look of a building overhang, which is exactly the kind of spot robins seek out naturally. If you have the option to mount this under an existing eave or porch soffit, take it. That location gives you a second roof for free, dramatically reduces weather exposure, and matches the sheltered-site preference that robins show consistently in study after study.
Mount the shelf with the open front facing away from prevailing winds and ideally facing toward open lawn or garden space where robins forage for worms. East-facing or north-facing orientations tend to avoid the worst afternoon heat in most parts of the US. The recommended height range is 6 to 10 feet above ground. Higher than 10 feet makes cleaning and monitoring difficult. Lower than 6 feet leaves the nest too accessible to ground predators.
Robins are territorial and will not typically nest within a few dozen feet of another robin nest, so you only need one shelf per yard. If you are interested in also attracting smaller cavity nesters to your space, a separate enclosed box for species like wrens or Carolina wrens can coexist nearby without competing, since those birds use an entirely different box style with a small entrance hole. If you want to build for Carolina wrens too, you will need a separate enclosed birdhouse design with the right entrance size and ventilation for that species. For wrens, you will need a separate enclosed birdhouse design with a small entrance hole, since their nesting needs are different from robins wrens or Carolina wrens. The two project types complement each other well in the same backyard.
Timing matters too. American robins typically begin nesting from late April into May in most of the US, so get the shelf up before mid-April if you can. Robins scout locations before committing, so the earlier you have it in place, the better the odds they will claim it before nesting begins.
Finishing the box and painting (what to do and what to skip)
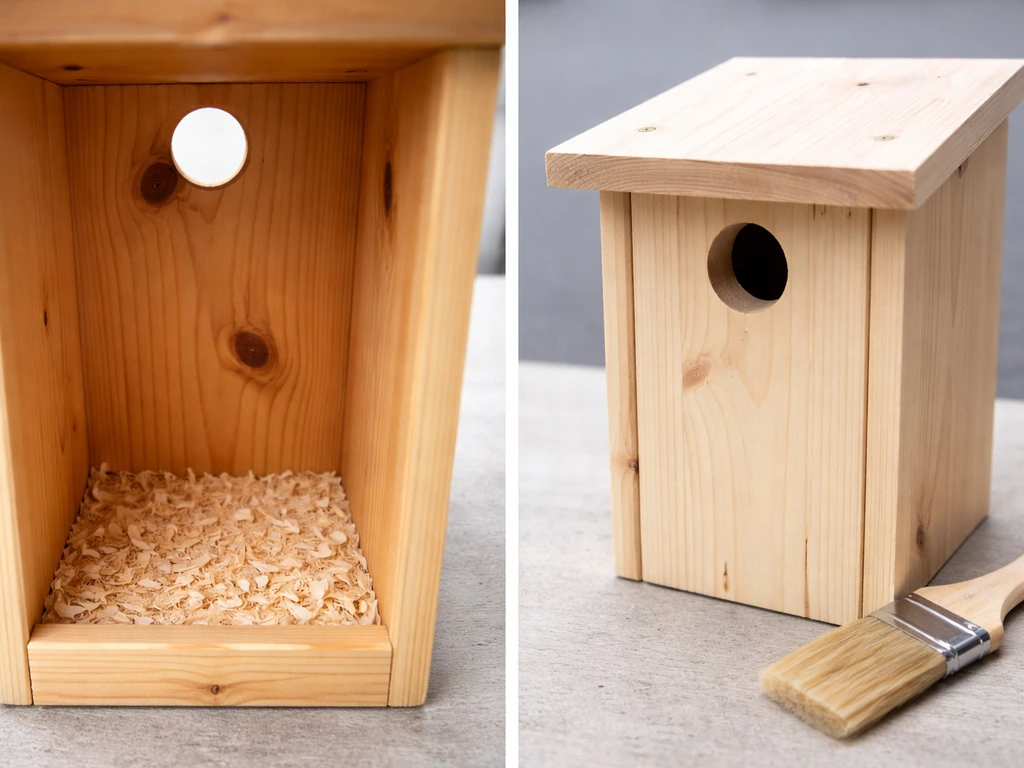
Do not paint or stain the inside of the box. The interior should stay bare wood. Paint fumes from freshly applied or aging paint can harm nestlings in a confined space, and coatings on the floor can make it slippery. The exterior is a different story: painting or staining the outside of the box extends its life significantly, especially the roof and the outside faces of the side boards. An exterior latex paint in a muted earth tone or a weathered grey works well and will not alarm the birds. Let any paint fully cure for at least a week before mounting the box.
Cedar naturally weathers to a silver-grey and needs no finish to last many seasons, which is one of the main reasons it is the first choice for nest box builds. If you used pine or plywood, a coat of exterior paint or spar varnish on the outside surfaces will add several years to the box's life.
Maintenance and seasonal cleaning
After each nesting season ends, take the shelf down or open it up and remove all the old nesting material. Robins build fresh nests each time and may raise two or three broods in a season, sometimes reusing the same shelf. Old nesting material harbors parasites, mites, and bacteria that can affect the next brood, and it also attracts mice and insects over winter. Cleaning it out is a simple five-minute job that makes a real difference.
The recommended cleaning approach is a 1:10 bleach-to-water solution, scrubbed onto the interior surfaces and then rinsed and allowed to dry completely before birds could return. Do this cleaning only when you are certain there is no active nesting happening: no eggs, no nestlings, no adult bird sitting. If you are not sure, wait another day and check again. Disturbing an active nest is not just stressful for the birds: it can cause nest abandonment.
The best time for a thorough annual clean is fall, after the nesting season has clearly ended and before winter. This is also a good time to check the box for structural issues: loose screws, cracked wood, or a warped floor. Tighten what needs tightening, replace any cracked boards, and the shelf will be ready to mount again the following spring. A well-built cedar shelf can last ten years or more with this kind of basic attention.
If you designed the roof so it can be removed (by attaching it with a single screw that swings aside), cleaning between broods mid-season becomes much easier. It is worth the extra two minutes of planning during the build. A hinged or swing-open roof panel is a feature I now include on every shelf box I make, and it is one of those small decisions that you will thank yourself for later when you are standing on a stepladder in July.
What to watch for after you mount it
Give the shelf a week or two after mounting before you expect any activity. Robins explore and assess sites before committing. If you see a robin perching nearby, investigating the ledge, or carrying grass and mud (the main building materials for their cup nests), you are on track. Once nest building starts, keep your distance and watch from a window rather than from a few feet away. Robins are not especially shy birds, but repeated close disturbance during nest building can cause them to abandon the site and start over elsewhere.
If robins skip the shelf the first season, do not give up. Reposition it, try a different wall or eave, or move it a little higher. Sometimes the issue is as simple as a sight line: the robin wants to be able to see open foraging ground from the nest. A shelf facing a solid fence or a dense shrub wall may get passed over in favor of one facing a lawn. Adjust and try again the next spring. Most people who build a well-made robin shelf and put it in a reasonable spot see occupancy within one or two seasons.
FAQ
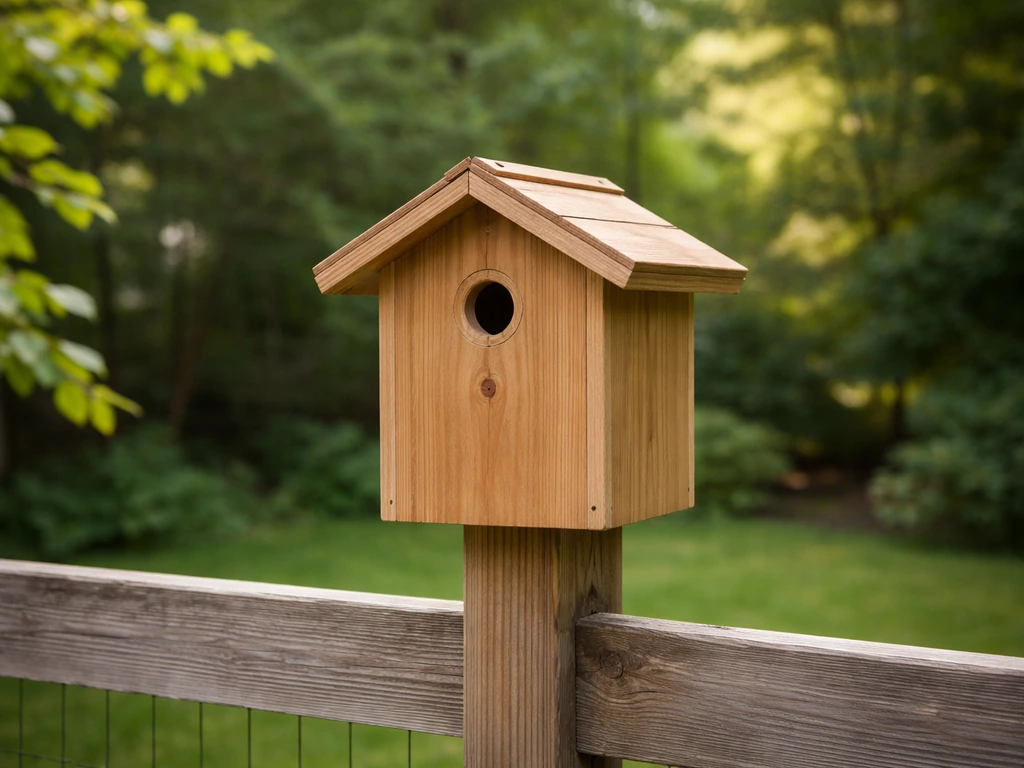
I already have a standard birdhouse, can robins use it if I adjust the entrance hole?
Robins typically do not use a classic enclosed house with a round entrance hole. If you already built one, convert it to a robin-style nesting ledge by removing the front and adding an open-front platform with partial roof cover, using the same floor size and sheltered placement you would use for a purpose-built shelf box.
What if I cannot mount the robin shelf under an eave or porch soffit?
If you do not have a sheltered overhang, choose the most protected microclimate you can find. Position the shelf so it blocks direct rain (near a building corner, under a porch edge, or near dense shrubs that still allow airflow), and keep it mounted high enough that predators cannot access from below.
Can I paint or seal the entire birdhouse to make it last longer?
Avoid treating the inside surfaces and floor, but exterior protection is usually fine. Paint or seal only the exterior faces and the roof, using weatherproof products meant for outdoor use, and let everything fully cure before mounting (roughly a week is a good buffer so fumes are gone).
Should I add a liner or bedding to help keep the nest dry and comfortable?
You generally should not. The build relies on drainage holes and ventilation, and adding extra materials like a thick liner can trap moisture or reduce airflow. If you want to improve grip, use rough-cut wood on the interior, or lightly sand only the exterior surfaces, leaving the inside bare.
How do I handle predator protection if my mounting location does not allow a baffle?
If you cannot guarantee you can add a predator baffle, do not mount the shelf on an accessible fence rail or low post. Reposition to a wall or under-eave location where you can install a cone or cylinder guard, because open-front nests are reachable from the side and from below.
Why shouldn’t I add a small landing perch under the open front?
Robins do not need a perch, and a perch can make it easier for predators and nuisance birds to linger close to the nest. Keep the front clean and open, and if you see the birds approaching, they should land directly onto the shelf area.
My box seems to get wet or hot in summer, what adjustments actually matter?
Do not use a nest box that stays wet, overheats, or lacks airflow. Ensure the floor drainage holes are clear, keep the roof overhang adequate, and if summers are very hot where you live, orient the opening to reduce afternoon sun exposure (east or north orientations often help).
What should I do if robins ignore the shelf in the first nesting season?
If no robins use it the first year, do not keep rebuilding right away. First check sight lines from the robin’s perspective, then adjust mounting height (within 6 to 10 feet) and orientation toward open foraging space like a lawn or garden, and give it another season. Many shelves are accepted within 1 to 2 years when the location is correct.
When is the safest time to clean, and how do I know it is not too early?
Clean only when there is no active nesting activity. If you are not 100% sure, wait a day and recheck, because disturbing eggs or nestlings can cause abandonment.
Is it worth making the roof removable, and what should I watch for in the hinge design?
Yes, but keep it practical. A roof that swings open or removes helps you remove old nest material quickly and reduces the time you keep the birds disturbed. If you use a hinged design, make sure it stays secure against wind and does not rattle near nesting.
Can I place a robin shelf and a wren house close together?
If you want multiple species in the same yard, separate the designs rather than trying to combine features. Robins require the open-front shelf style, while wrens need an enclosed box with a small entrance hole; placing them too close with mismatched designs can reduce acceptance for one or both species.
How many robin birdhouses should I install in one yard?
Robins are commonly territorial, and they usually do not nest near other robin nests. Plan for one robin shelf per yard, and if you already have one active nest nearby, avoid adding another shelf too close since it may not be used.
Next Articles
How to Build a Wren Bird House Step by Step
Step-by-step DIY wren nest box with cut list, entry size, ventilation, placement, and seasonal maintenance tips.

How to Build a Chimney Swift Bird House DIY Guide
Step-by-step DIY plans to build a chimney swift bird house, with correct dimensions, placement, and weatherproofing for

How to Build an Oriole Bird House: Step-by-Step DIY
Step-by-step DIY for building an oriole bird house with right dimensions, weatherproofing, predator-safe placement, and