You can build a functional window bird house in an afternoon with a single cedar board, a few basic tools, and no prior woodworking experience. The key is getting three things right: the entrance hole size (which depends on which bird you want to attract), drainage and ventilation so the nest stays dry and cool, and placement near your window that lets you watch birds without putting them in danger of glass collisions. Get those right, and small cavity-nesting birds like house wrens, chickadees, and nuthatches will genuinely use it.
How to Make a Window Bird House Step by Step DIY

Marcus Thornton
24 Apr 2026
What a window bird house actually needs to do
A window bird house is a nest box mounted close enough to a window that you can observe nesting birds up close, without disturbing them. That's the fun part. But from the bird's perspective, it's just a cavity nest site, and it needs to perform like one. That means keeping rain and heat out, letting stale air escape, draining any moisture that gets in, and keeping predators away from the entrance. A decorative birdhouse from a gift shop often fails on all four counts. A functional one you build yourself doesn't have to.
The window part adds one extra consideration that purely standalone nest boxes don't have: you need to make sure birds aren't confused or harmed by the glass itself. Reflective or unbroken window surfaces can look like open sky to a bird, which causes collisions. Building and mounting the box correctly eliminates that risk, and we'll cover exactly how to do that.
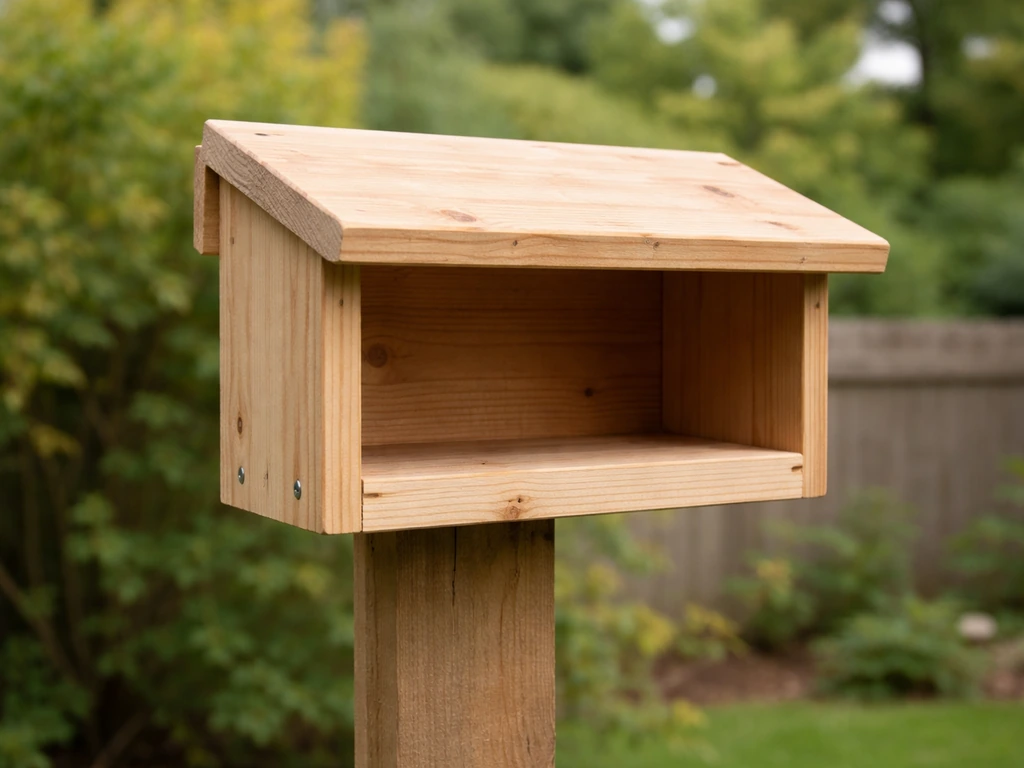
Choose the right design and size for the bird you want
This is the step most beginners skip, and it's the reason their birdhouse never gets used. Entrance hole size is not a stylistic choice. It's the single most important dimension in the entire box, because it determines which species can get in and which predators can't. There is no universal 'standard' hole that works for everyone. You need to pick a target species first. Once you know which robin you want to attract, you can choose the right dimensions and placement for a robin-specific bird house pick a target species first.
For a window bird house, you're best served by targeting small cavity nesters that are genuinely comfortable near human activity. House wrens and Carolina wrens are ideal candidates, both accepting a 1-inch to 1. Once you know the window bird house basics, you can apply the same process to build a Carolina wren bird house with the right entrance size and placement Carolina wrens. 25-inch entrance hole. Chickadees work beautifully too and need about a 1.125-inch hole. If you want to try for Eastern Bluebirds, bump up to a 1.5-inch round hole and a larger interior floor of roughly 4 by 4 inches up to 5 by 5 inches. Trying to attract a species you don't have in your area is a setup for disappointment, so check what cavity nesters live nearby before you cut anything.
| Species | Entrance Hole Diameter | Interior Floor Size | Mounting Height |
|---|---|---|---|
| House Wren | 1 inch | 4 in x 4 in | 5–10 feet |
| Carolina Wren | 1.25 inches | 4 in x 4 in | 5–10 feet |
| Black-capped / Carolina Chickadee | 1.125 inches | 4 in x 4 in | 5–15 feet |
| Eastern Bluebird | 1.5 inches | 5 in x 5 in | 3–6 feet |
| White-breasted Nuthatch | 1.25 inches | 4 in x 4 in | 5–15 feet |
One important design note: do not add a perch below the entrance hole. Perches are marketed as a feature but they actually help predators and nest usurpers like House Sparrows gain a foothold. Leave it off entirely.
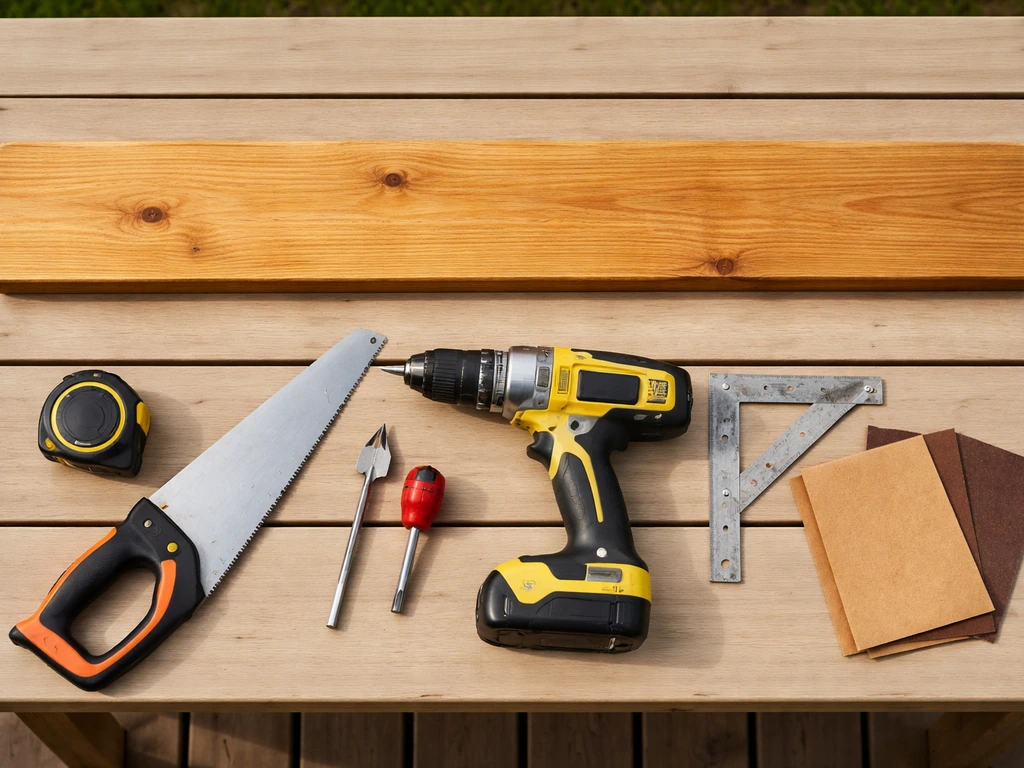
Materials and tools you'll actually need
Cedar is the best choice for a beginner build. It's naturally rot-resistant, relatively easy to cut, and holds up to years of outdoor weathering without any chemical treatment. White pine and yellow pine are also solid options and usually cheaper at the lumber yard. Whatever you pick, go untreated and unfinished on the interior. Never paint the inside of a birdhouse. Fumes from paint, stain, and especially pressure-treated lumber can harm nesting birds and chicks. If you want to add a coat of linseed oil or exterior paint on the outside surfaces only, that's fine, but the inside walls and floor stay bare wood.
One 1x6 cedar board at 6 feet long is enough material for most small birdhouse designs. At a big-box hardware store you can usually get this cut to rough lengths at the lumber counter, which makes the home project even simpler. Reclaimed wood works great if you know it was never pressure-treated or painted with lead-based products.
- One 1x6 cedar, pine, or fir board (6 feet long covers most small box designs)
- 1.5-inch or 2-inch exterior-grade screws (galvanized or stainless steel to resist rust)
- Wood glue (optional, for extra joint strength)
- A drill with a spade bit or hole saw sized to your target entrance diameter
- A 3/8-inch or 1/2-inch drill bit for drainage and ventilation holes
- A hand saw or jigsaw (a miter saw makes it faster but is not required)
- Sandpaper (80-grit for rough edges, 120-grit for the entrance hole interior)
- A measuring tape, pencil, and square
- A hinge or piano hinge if you want a hinged side panel for easy cleaning (recommended)
- Exterior wood screws or a hook-and-eye latch to keep the clean-out panel closed
You don't need a workshop. I've built perfectly functional boxes on a folding table with a cordless drill and a handsaw. If your cuts aren't perfectly square, that's fine. Small gaps actually help with ventilation. The birds genuinely do not care about your joinery.
Step-by-step build plan
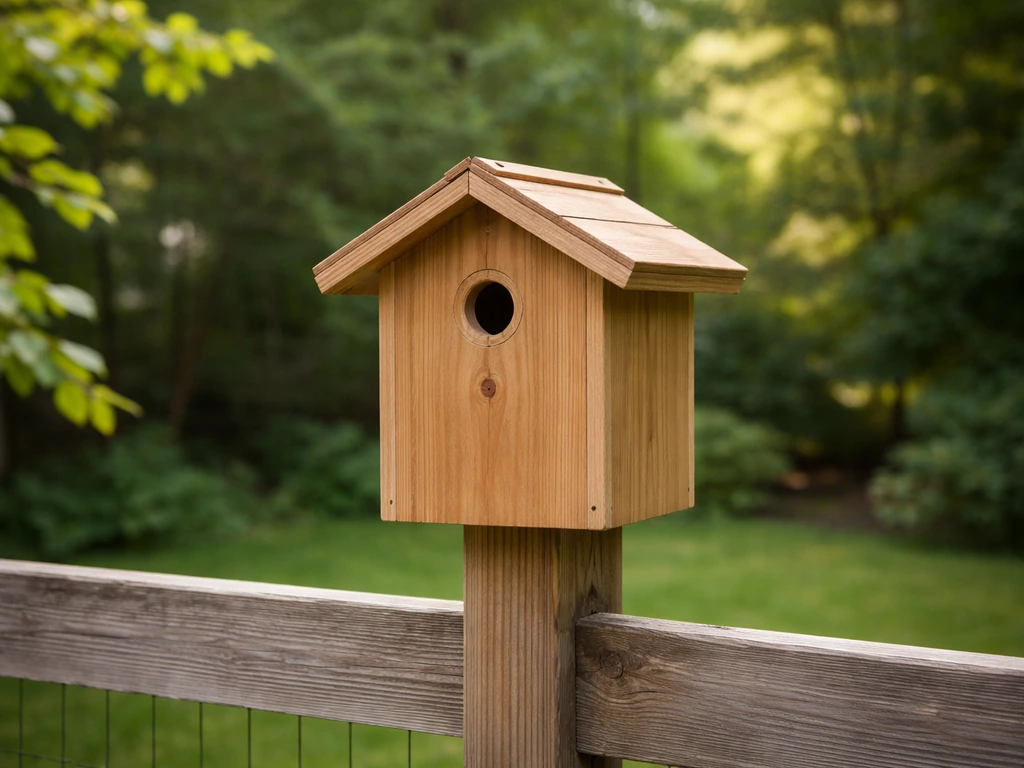
Cut list for a wren or chickadee box
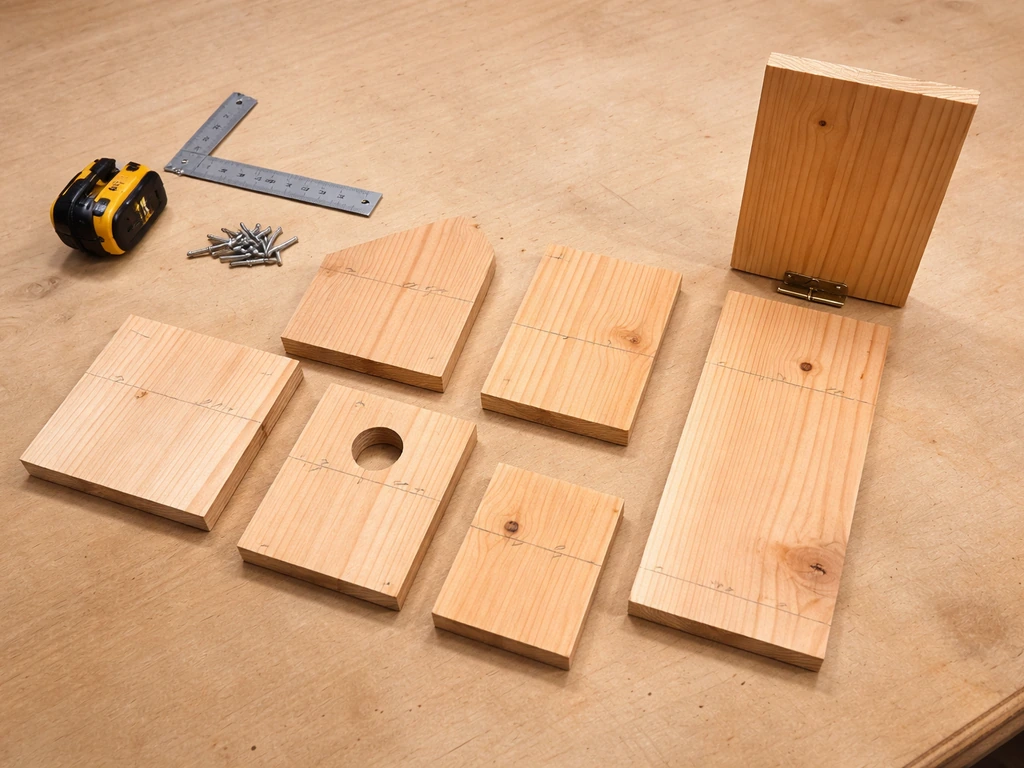
These dimensions work for house wrens, Carolina wrens, and chickadees. For bluebirds, increase the floor panel to 5 inches wide and scale the sides to match.
| Panel | Dimensions | Notes |
|---|---|---|
| Floor | 4 in x 4 in | Recessed 1/4 inch from sides to allow drainage |
| Front | 4 in wide x 8 in tall | Entrance hole centered 6 inches from the bottom |
| Back | 4 in wide x 10 in tall | Taller than front to allow sloped roof; mounting holes here |
| Two Side Panels | 4 in wide x 8 in tall (front edge) / 9 in tall (back edge) | Angled top cut creates roof slope |
| Roof | 6 in wide x 7 in deep | Overhangs front by 3–4 inches, sides by 1–2 inches |
Assembly order
- Cut all panels to size. Label each piece with a pencil so you don't mix them up.
- Drill the entrance hole in the front panel. Use a spade bit or hole saw. The hole center should sit about 6 inches above the floor panel, which gives nesting birds enough depth below the hole to feel secure. Sand the hole edges smooth inside and out so there are no splinters.
- Drill drainage holes in the floor panel: three to four holes, 3/8 to 1/2 inch in diameter, positioned toward the back half of the floor so they don't interfere with the recessed floor fit.
- Drill ventilation holes in both side panels: two holes per side, 3/8 inch in diameter, positioned near the top of each side panel. These let hot air escape in summer, which is critical for chick survival.
- Assemble the floor and back panel first using two screws. Pre-drill pilot holes to avoid splitting the wood.
- Attach the side panels to the back and floor. If you want a hinged side panel for cleaning access, attach one side with a small hinge at the top and a hook latch at the bottom instead of screwing it permanently.
- Attach the front panel. Make sure the entrance hole ends up at the right height relative to the floor.
- Attach the roof last. The overhang protects the entrance from rain. Aim for 3 to 4 inches of overhang in front and at least 1 to 2 inches on each side.
- Rough up the interior wall below the entrance hole with a chisel, saw kerf cuts, or coarse sandpaper. This gives fledglings something to grip when they're ready to leave the nest.
- Sand all exterior sharp edges and check that no screw tips poke through to the interior.
Weatherproofing, mounting, and window placement
If you're using cedar or pine, the exterior can be left natural and it will weather to a silvery gray that birds actually seem to prefer. If you want extra protection, one coat of exterior linseed oil or a water-based exterior stain on outside surfaces only is fine. Let it cure for several days before mounting so there are no residual fumes near the entry hole. Again, nothing on the interior.
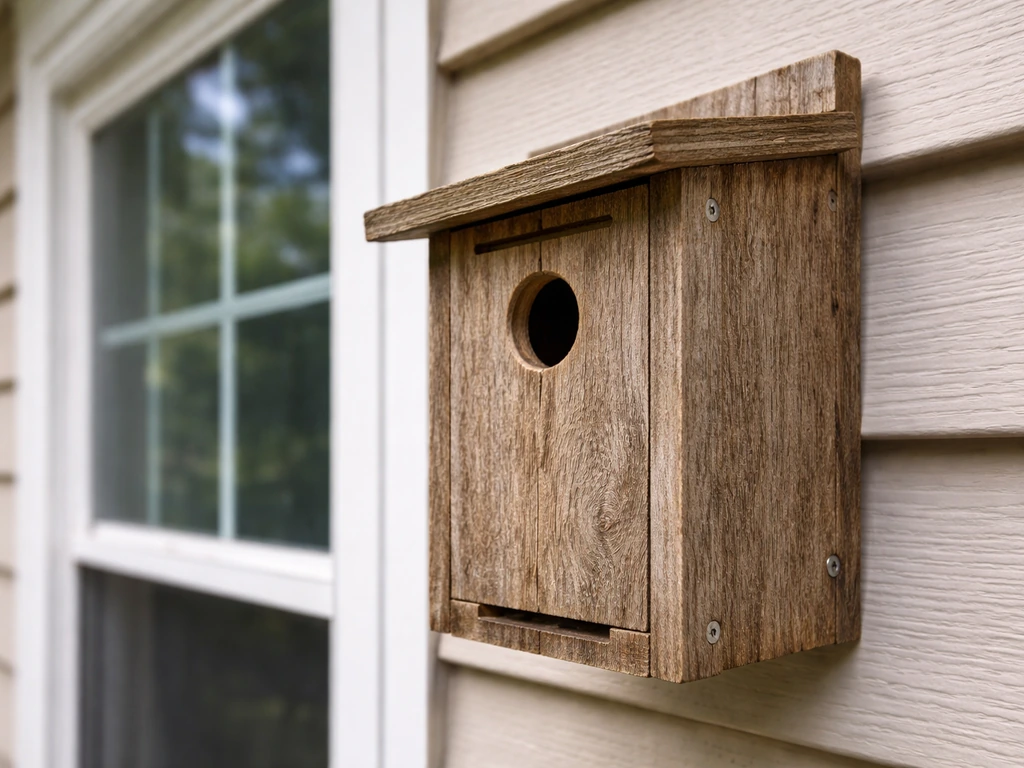
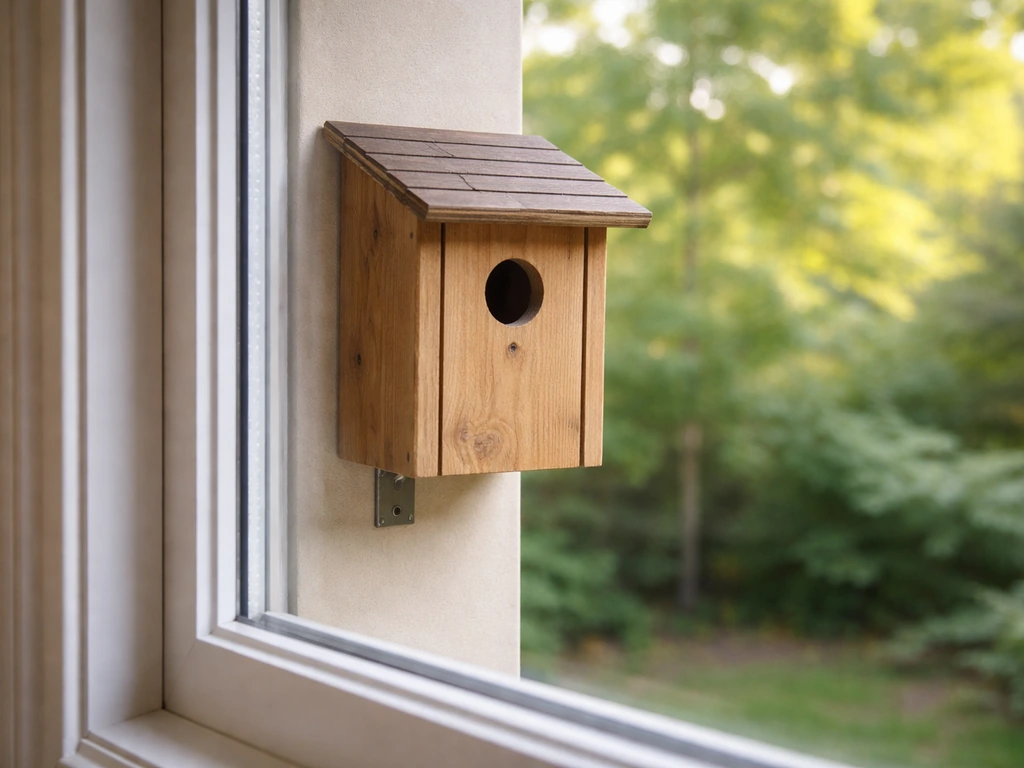
For mounting near a window, you have a few solid options. A wood mounting block screwed into window trim or an exterior wall bracket works well and lets you adjust the box's position easily. You can also use a mounting board attached to the back panel of the box and screw that directly to the house siding or a fence post nearby. Whatever method you use, make sure the box won't swing or tip in wind, because an unstable box stresses nesting birds and can dislodge eggs or chicks.
Orientation and height matter. Face the entrance hole away from prevailing winds and away from afternoon direct sun. East or north-facing entrances work well in most climates. Mount the box at the height appropriate for your target species (see the table earlier), and position it close enough to your window that you can watch comfortably, but not so close that human movement inside the house constantly alarms the birds. Three to six feet from the window is a reasonable starting point. When you hang a Williamsburg bird bottle, treat it like a small bird shelter by ensuring it’s securely mounted, weatherproof, and positioned so birds can approach without distraction or risk Three to six feet from the window is a reasonable starting point..
Keeping the window itself safe for birds
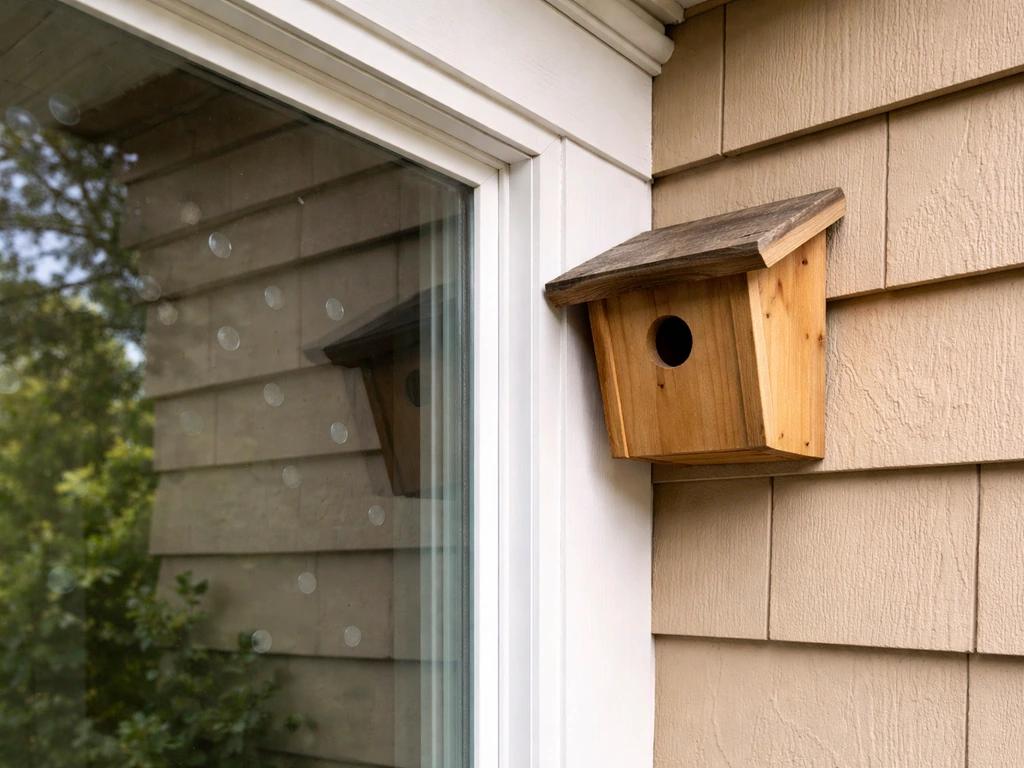
Here's the part people often overlook. A nearby window can be a collision hazard if birds perceive it as open sky or a continuation of the landscape. The safest approach is to apply external visual markers directly on the glass so birds can see the barrier. The U.S. Fish and Wildlife Service also notes that window visual deterrents should be placed on the outside of windows and spaced in a 2-inch by 2-inch grid pattern to help prevent bird-window collisions blank" rel="noopener noreferrer">apply external visual markers directly on the glass so birds can see the barrier. The U.S. Fish and Wildlife Service recommends a grid pattern with markers blank" rel="noopener noreferrer">no more than 2 inches apart horizontally and 2 inches apart vertically. Dot patterns, tape strips, or window films all work. You can also place the birdhouse itself within 3 feet of the glass: at that distance, birds flushed from the nest don't build enough speed to injure themselves if they do contact the glass.
Avoid mounting the box so the entrance hole faces directly into a highly reflective window pane. Mirrored or heavily reflective glass poses the highest collision risk among window types. If your window has that kind of surface, move the box to the side so birds approach from an angle rather than flying directly toward their own reflection.
Safety, cleaning, and keeping predators out
Predator protection
The entrance hole is your first line of defense. Getting the diameter right keeps larger predators out by default. For wrens and chickadees, a 1-inch to 1.125-inch hole is too small for starlings to enter. You can add a hardwood or metal entrance hole guard (a simple plate with a matching hole drilled through it) to prevent squirrels and raccoons from chewing the opening larger. These are cheap and genuinely worth adding if you have mammalian predators around.
If your box is on a post rather than wall-mounted, add a predator baffle below the box. A stovepipe baffle or a cone baffle around the post makes it very hard for raccoons and cats to climb up. Wall-mounted boxes have a natural advantage here since climbing access is more limited, but you should still make sure there's no easy path from a nearby tree branch, fence, or trellis directly to the entrance.
Cleaning the box
Clean out the box at the end of each nesting season, typically in September or early October in most of North America, or right before the season begins again in late winter around February. Remove the old nest entirely: old nesting material can harbor parasites and mites, and a clean box is more attractive to returning birds. Use a stiff brush, a dilute bleach solution (one part bleach to nine parts water), rinse thoroughly, and let it dry completely before closing it back up. Never clean an active nest. If you see eggs or chicks, leave it alone and wait.
This is exactly why the hinged side panel is worth the extra five minutes during construction. Reaching in through the entrance hole to clean is awkward and risks damaging the box. A side panel that swings open makes the whole job take about two minutes.
Other safety considerations
- Never use pesticides or herbicides near the box. Nesting birds forage close to home, and contaminated insects fed to chicks can be lethal.
- Don't use adhesive foam, silicone caulk, or spray insulation inside the box. Fumes and sticky surfaces can trap or harm birds.
- Check that no screw points are exposed inside the box interior.
- If mites appear, replacing the nest material during a clean-out is usually enough. Birds have evolved natural defenses against mite infestations and generally manage well when boxes are kept clean.
What to do if birds aren't using it (and next steps once they do)
Give the box at least one full season before you decide it's not working. Birds scope out potential sites for weeks before committing, and they often 'roost' in a box during winter before actually nesting in spring. If after a full season nothing has happened, run through this checklist.
- Check the entrance hole size against the species table. A hole that's even slightly too large will attract House Sparrows instead of your target species.
- Reassess the location. Is the box in full afternoon sun? Too close to a busy door or window with a lot of human traffic? Too far from shrubs and trees that give birds a staging perch nearby?
- Look for signs of takeover by House Sparrows or European Starlings. Both are invasive species in North America that aggressively displace native cavity nesters. If you find a House Sparrow nest (a messy pile of grass, feathers, and debris), remove it and consider a sparrow spooker or entrance hole reducer.
- Make sure the box isn't swinging or vibrating in wind. A loosely mounted box feels unsafe to nesting birds.
- Try moving the box a few feet in a different direction, or rotating the entrance hole to face a different orientation.
- Check that the interior isn't retaining moisture. If water is pooling, enlarge the drainage holes or check that the roof overhang is adequate.
Once birds do move in, your job is mostly to stay back and enjoy it. Resist the urge to check on the nest too frequently. Occasional quiet observation is fine. Frequent disturbance near the entrance can cause adults to abandon the nest or attract predators to the location. Keep a simple log of when nest building starts, when you first hear chicks, and when fledglings leave. That data is genuinely useful, and NestWatch through Cornell Lab of Ornithology lets you contribute your observations to citizen science if you want to.
Your post-build checklist
- Mount the box at the correct species-appropriate height and orient the entrance away from prevailing wind and harsh afternoon sun.
- Apply window markers or move the box within 3 feet of the glass to prevent collision risk.
- Check the mounting hardware after the first storm to make sure nothing shifted.
- Monitor from a distance weekly during nesting season. Note activity without approaching the box.
- Clean out the box in September or in February before the next breeding season.
- Inspect for wood damage, loose screws, or enlarged entrance holes each spring before birds return.
Building this kind of project connects you to the birds in your yard in a way that buying a feeder just doesn't. Once you've built one box and watched a pair of wrens raise a clutch through your window, you'll want to build another. If you enjoy the wren and chickadee builds, the same core techniques apply to designing for robins and bluebirds, though those species need open-fronted or larger entrance designs and different mounting setups entirely. It's a genuinely satisfying rabbit hole to go down.
FAQ
What if birds keep checking the box but never move in after the first season?
Wait a full breeding cycle, then adjust only one variable at a time. Common fixes are moving the box a few feet to reduce disturbance, changing the entrance orientation away from prevailing wind, or relocating farther from heavy window traffic. Also verify your target species is present locally, since a correctly built box still won’t draw absent species.
How can I tell if the entrance hole is the wrong size without damaging anything?
Watch from a distance. If you see larger birds repeatedly landing at the entrance but failing to enter, the hole is likely too small for them, which is good for safety but may also indicate the box is not matching your desired species. Avoid enlarging the hole mid-season, because changes can cause repeated nest abandonment.
Is it safe to put bird seed or a feeder near the window bird house to bring birds closer?
It can backfire. Food near the entrance can increase competition and attract more predators and aggressive species that spend time around the site. If you use feeders nearby, place them farther away from the box entrance, and keep your window area calm, so birds feel secure approaching the nest.
Should I add a nest lining or soft material inside the box?
No. Leave the interior as bare wood. Cavity nesters generally select their own nesting material, and adding lining can create moisture retention pockets or increase parasite load. If you want a specific look, do it on the exterior only.
When is the best time to mount or reposition a window bird house?
Install before the breeding season so birds can scout the site. If you must move it, do it late fall through winter when there is no active nesting, then give it time to be recognized. Mid-season moves often reset the birds’ site selection and can lead to abandonment.
How do I prevent rain from running into the entrance even with drainage holes?
Use a roof overhang or a tight-fitting top that sheds water away from the entrance, and ensure the box has proper ventilation and an exit path for moist air. Also confirm the mount is level or slightly angled to drain, and keep any seams from facing directly upward toward the entrance.
Can I paint or stain the windowbird house to match my home style?
Paint and stain on the inside is the main no-go. If you want color, apply exterior-only, and only after choosing a low-fume option that cures fully before mounting. Plan for several dry days so residual odors do not reach the entrance area.
What do I do if a predator or larger bird starts investigating or trying to enter?
Leave the box in place and focus on exclusion. A properly sized hole and an entrance guard help immediately, and a predator baffle is especially important for post-mounted boxes. If a pathway exists from a branch or fence, trim or rearrange the approach so there is no easy climb to the entrance.
Is it okay to check the nest for eggs or chicks whenever I’m curious?
No, frequent checks can cause adults to abandon the nest or increase risk to chicks. If you need to confirm activity, do it quickly and quietly, and only from a distance when possible. If you see eggs or chicks, avoid touching the box unless there is an emergency.
Do I need to clean the box even if it looks clean?
Yes, clean it every season, removing all old nesting material and letting the box dry completely before closing. Parasites and mites can persist in old debris even if the interior appears tidy, and a clean box is also more likely to be reused by incoming birds.
How close should the birdhouse be to the window for viewing without increasing collision risk?
Start with about 3 to 6 feet from the glass. If the birds are already showing strong collisions or near-misses, move slightly farther back and use external window markers on the glass. Markers help regardless of distance, but very reflective panes still deserve extra caution.
Next Articles
How to Make a Robin Bird House: Step-by-Step DIY
Step-by-step DIY guide to build a robin bird house with right dimensions, entrance, roof drainage, mounting, and safe ma
How to Build a Wren Bird House Step by Step
Step-by-step DIY wren nest box with cut list, entry size, ventilation, placement, and seasonal maintenance tips.

How to Build a Chimney Swift Bird House DIY Guide
Step-by-step DIY plans to build a chimney swift bird house, with correct dimensions, placement, and weatherproofing for