You can build a basic stick bird trap with nothing more than a handful of sturdy twigs, some cordage, and a bait item, and the build itself takes under an hour. But before you start snapping branches, there are some things you absolutely need to know about legality, timing, and how to keep any bird you capture safe. This guide walks you through everything: choosing the right design, sourcing and prepping your sticks, building a trigger mechanism that actually works, setting the trap correctly, and handling or releasing the bird humanely afterward.
How to Make a Bird Trap With Sticks Safely and Humanely

Marcus Thornton
12 Apr 2026
First: Is This Legal Where You Are?
This is the part most people skip, and it's the most important part of the whole article. In the United States, most wild birds are protected under the Migratory Bird Treaty Act (MBTA). That means trapping, possessing, or relocating them without a federal or state permit is illegal, full stop. Oklahoma Wildlife Authority, for example, explicitly states that possessing wildlife without a license is illegal, and MBTA-related prohibitions apply to harming migratory birds. Florida's Fish and Wildlife Conservation Commission (FWC) only allows bird traps to be used by people with a valid state permit or captive wildlife permit, and even then, FWC law enforcement must be notified before the trap is placed. Washington State's WDFW makes it unlawful to possess or transport live wild birds without a permit, and warns that moving released wildlife to a new location may itself be prohibited.
So what's the legitimate use case here? On a site dedicated to bird housing and enrichment, a stick trap is best understood as a last-resort tool for specific situations: catching an injured bird that needs emergency care, humanely relocating a bird that's trapped itself inside a structure, or a permitted wildlife management scenario. If you're doing this for any other reason, check with your state wildlife agency before you build anything. That's not a legal disclaimer for show; it's genuinely how you stay out of trouble and keep birds safe.
Choosing the Right Kind of Stick Trap
There are a few different stick-based trap designs floating around, and they are not all equal. For a beginner doing a humane capture or rescue scenario, the prop-and-drop (also called a figure-4 or prop-stick deadfall-style trigger) is the best choice. It's a simple design: a box or platform is propped up by an interlocked stick trigger system, and when a bird disturbs the bait or trigger, the prop collapses and the enclosure drops over the bird. No springs, no snares, no contact with the bird during the capture event, which is exactly what you want.
Snare-based stick traps are a harder no. They make contact with the bird's body, risk injury to legs and wings, and are much more likely to cause serious harm. Glue-based approaches are even worse. If you're curious about the options, you can read more about how to make a bird glue trap and why most wildlife rehabilitators advise against them, but for this guide we're focusing on the stick prop-and-drop because it's the safest beginner design by a wide margin.
You should also think about size before you start building. A trap that's too small will injure a bird when it triggers. A trap that's too large won't trigger reliably for smaller species. For most songbirds, you're looking at an enclosure of roughly 12 inches wide by 12 inches deep by 10 inches tall as a minimum. Larger birds like pigeons or starlings need something closer to 18 by 18 by 14 inches.
Materials, Tools, and Stick Selection
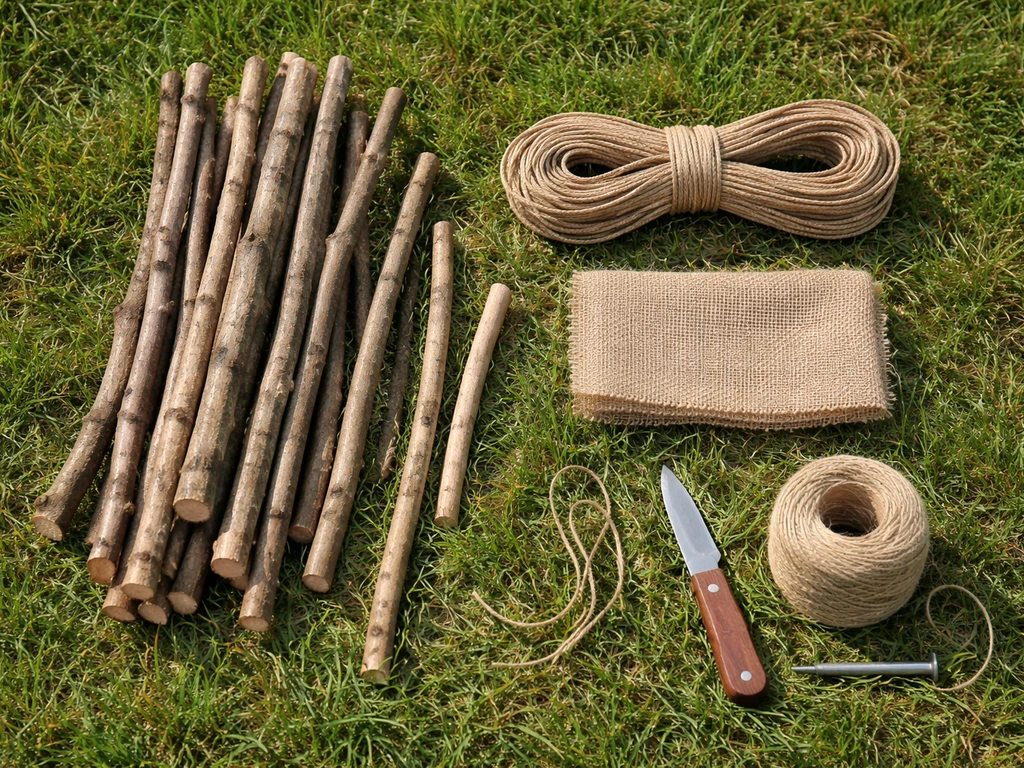
The beauty of a stick trap is that most of the materials are free if you have any outdoor space. Here's what you need to gather before you start.
- Main frame sticks: 8 to 12 straight sticks, each roughly 12 to 18 inches long and at least half an inch in diameter. Hardwood species like oak, hickory, ash, or maple work best because they won't flex or crack under tension. Avoid green (freshly cut) wood if possible; it's heavier and may warp as it dries.
- Trigger sticks: 3 sticks for the figure-4 mechanism, slightly thinner (around a quarter inch diameter), roughly 6 to 8 inches each. These need to be strong enough not to snap accidentally but light enough to collapse on a light disturbance.
- Cordage: Natural jute twine, paracord, or even strips of cotton fabric. You'll use this to lash frame joints. Avoid synthetic fishing line; it's too slick and won't hold friction knots reliably.
- Knife or small pruning shears: For notching the trigger sticks. This is the only real tool you need.
- Bait: Seeds, bread crumbs, mealworms, or fruit depending on target species (more on this in the baiting section).
- Optional: A lightweight mesh or wire grid for the top of the enclosure to prevent escape without using solid material that traps heat.
When you're selecting sticks from the yard or a nearby trail, look for ones with no cracks running along the grain. Flex each stick slightly before using it; if it bends more than about 15 degrees without snapping back, it's too green or too weak for a trigger. The trigger sticks especially need to be consistent and rigid. A wobbly trigger is the number one reason beginner traps fail. Dry, seasoned wood is almost always better than freshly cut, so if you have time, collect your sticks a few days ahead and let them sit in a dry spot.
Building the Basic Stick Trap: Step-by-Step
Step 1: Build the Frame
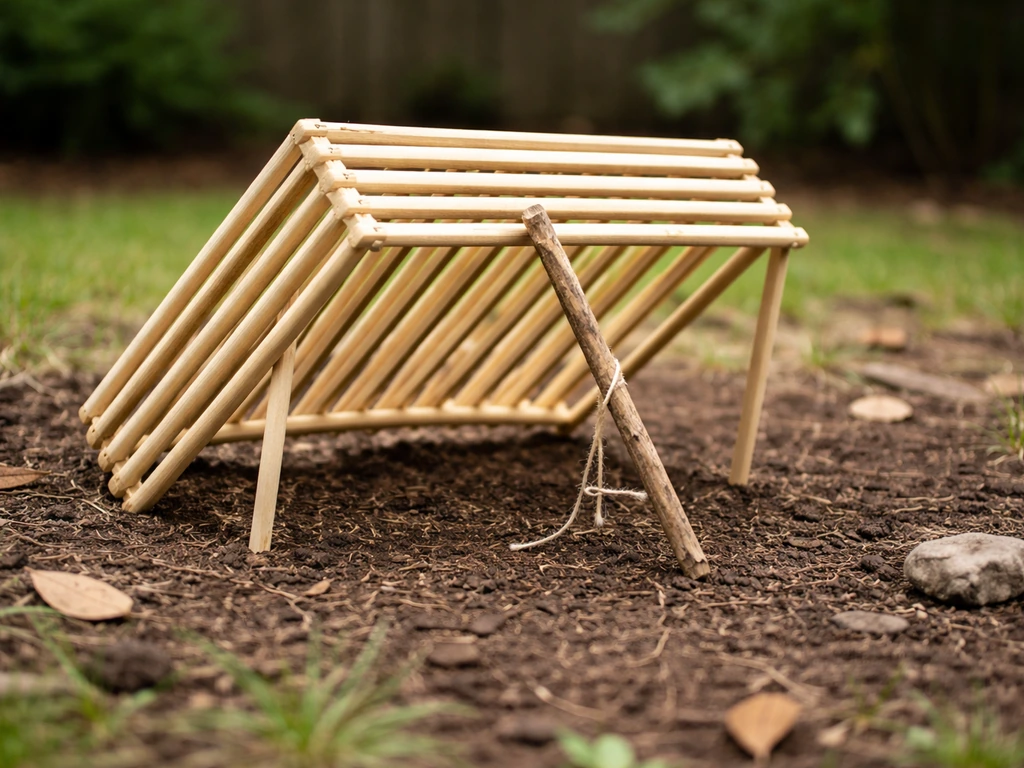
Lay four of your longest sticks in a rectangle on the ground to form the base. This is your footprint. Lash each corner with three tight wraps of cordage and finish with two diagonal wraps, then a square knot. Pull it firm. The base needs to be rigid because any flex here will cause the whole structure to shift when the trigger drops. Once the base is solid, build the side walls by lashing vertical sticks at each corner and then connecting horizontal sticks across the top to form the roof frame. Think of it as building a simple rectangular box skeleton. Leave the bottom open; that's where the bird will be standing when the trap drops.
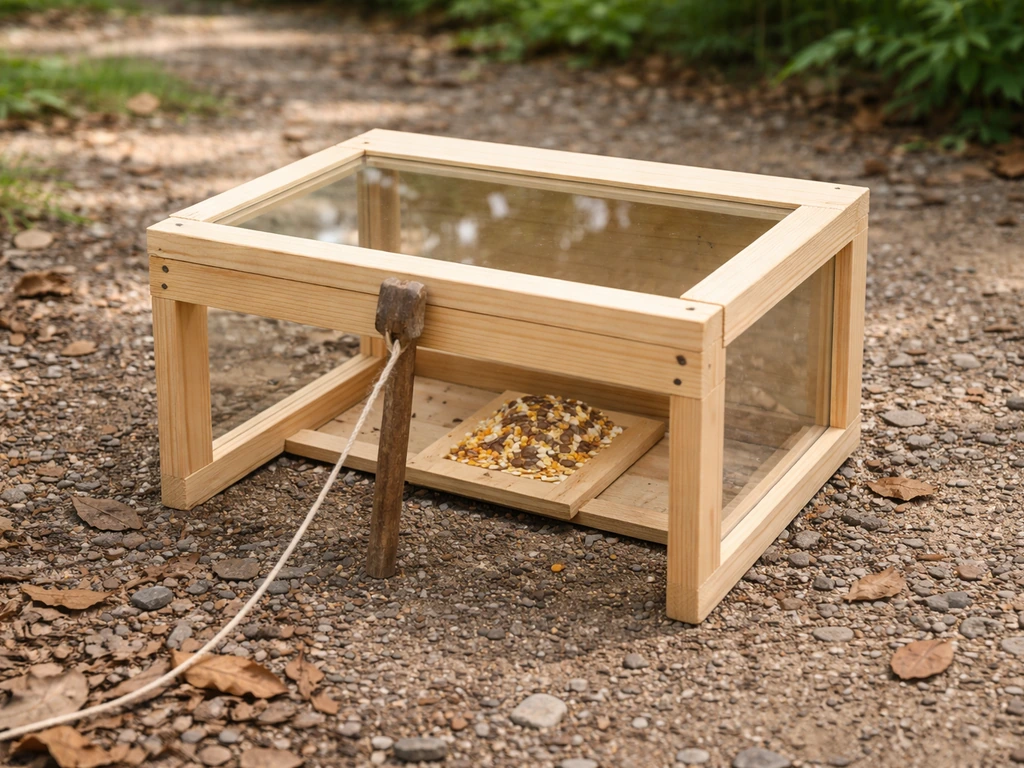
Step 2: Cut the Figure-4 Trigger
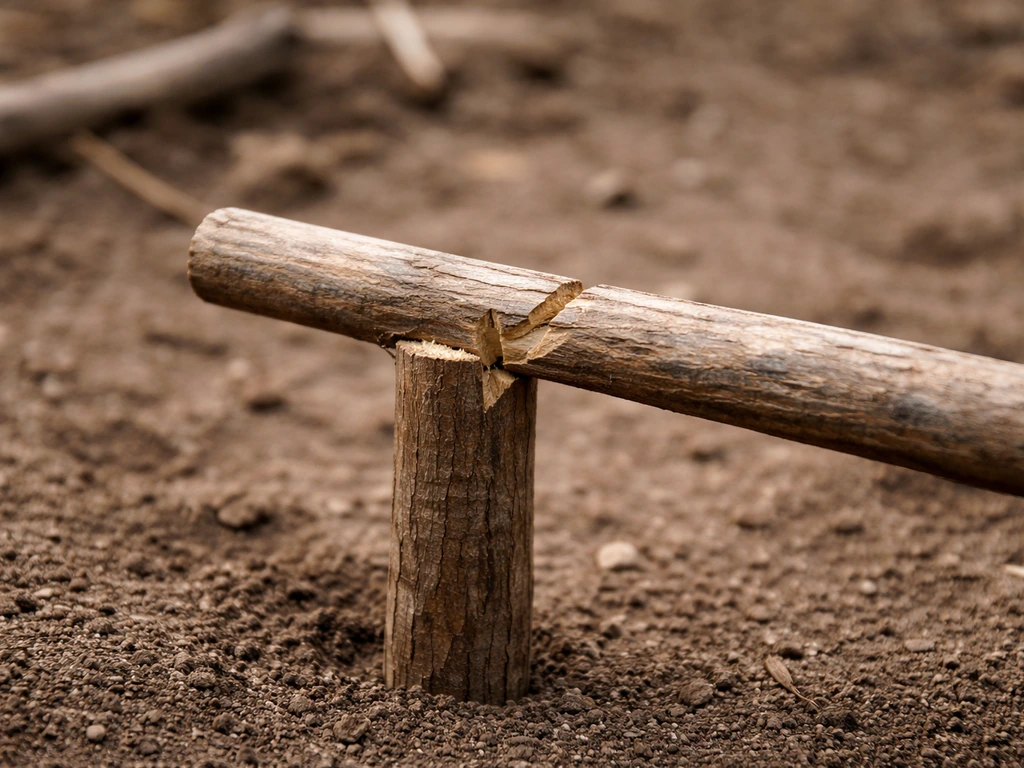
This is the part that trips up most beginners, so take your time. You need three notched sticks. The first is the upright: it stands vertically and has a notch cut horizontally into its upper section and a small diagonal notch near the bottom. The second is the diagonal brace: it leans at roughly 45 degrees between the upright and the underside of your trap frame, with a notch at each end to catch the other two sticks. The third is the bait stick: it runs horizontally and has a notch at one end that hooks onto the upright, with your bait tied or skewered to its far end. When a bird disturbs the bait stick, the interlocked notches release in sequence and the whole trap frame drops. The key is tension: the notches should hold under the weight of the trap but release with a light sideways or downward pull of maybe 2 to 4 ounces of force. Test it with your finger before setting it with a live bait.
Step 3: Connect the Trap Frame to the Trigger
The upright stick sits on the ground and holds the diagonal brace, which in turn supports one corner of the trap frame. You are not lashing these pieces together; they sit in their notches under friction and the weight of the frame. The trap frame should be propped up about 6 to 8 inches off the ground on the trigger side, giving the bird enough room to walk underneath toward the bait. Do a few test drops before you add bait. The frame should fall flat and fast with no bouncing or tilting. If it tilts sideways, your upright isn't centered under the frame. If it drops too slowly, reduce the weight of the frame or increase the notch depth on the diagonal brace slightly.
Step 4: Cover the Frame
Cover the top and sides of the frame with lightweight mesh, additional sticks lashed horizontally (leaving half-inch gaps), or a piece of burlap. The goal is to create a contained space that prevents escape but doesn't create a dangerous impact surface. Avoid solid wood panels on the drop side; if the frame falls hard onto a bird with a solid edge, it can cause injury. A mesh or lattice top absorbs the drop energy better and provides ventilation, which matters a lot if you're not checking the trap frequently.
Setting the Trap: Location, Bait, and Timing
Where you place the trap matters more than most people think. Birds are cautious creatures, and a trap sitting in the open on bare concrete is going to go untriggered for days. Place the trap at the edge of a known feeding area, near a brush pile, or along a fence line where birds already move. Camouflage the frame lightly with leaves, grass, or natural debris from the surrounding area so it blends in. Don't bury it or pack debris tightly against the trigger; you want the frame to drop cleanly.
For bait, match the species you're targeting. Millet and sunflower seeds work well for sparrows and finches. Mealworms attract robins and bluebirds. Bread or cracked corn brings in pigeons and doves. Fruit pieces (apple, grape) can attract thrushes and waxwings. Place the primary bait on or around the bait stick, and scatter a small trail of the same bait leading into the trap entrance to draw birds in gradually. Don't overload the bait; a few pieces on the stick and a light scatter trail is plenty.
Timing is also worth thinking about. Early morning (within an hour of sunrise) is when most songbirds are most actively foraging and least cautious. Setting the trap before dawn and checking it at first light gives you the best chance of a capture and minimizes the time a bird spends confined. Avoid setting traps in direct midday sun or in extreme heat; a confined bird can overheat within minutes in those conditions, which is a serious welfare concern.
If a stick trap feels like more complexity than you want to manage for a specific situation, it's worth knowing that other simple DIY designs exist. A box-style bird trap uses similar prop-and-drop mechanics but with a more enclosed structure that some birds find less threatening.
After the Trap Drops: Checking, Handling, and Release
Check the trap frequently. Every 30 to 60 minutes is the right interval if you're present. The Ornithological Council’s regulatory guidance emphasizes humane trapping and monitoring frequency considerations, including checking at least once per hour (and as often as every 30 minutes) depending on circumstances Every 30 to 60 minutes is the right interval if you're present.. Never leave a set trap unattended for more than two hours. A bird caught in a trap and left in heat, cold, or direct sun can die quickly from stress, exposure, or dehydration. This is not an exaggeration; it's a documented welfare risk, and it's one of the main reasons official U.S. guidance on humane capture of migratory birds places so much emphasis on trap monitoring and operational conditions.
Approaching and Containing the Bird
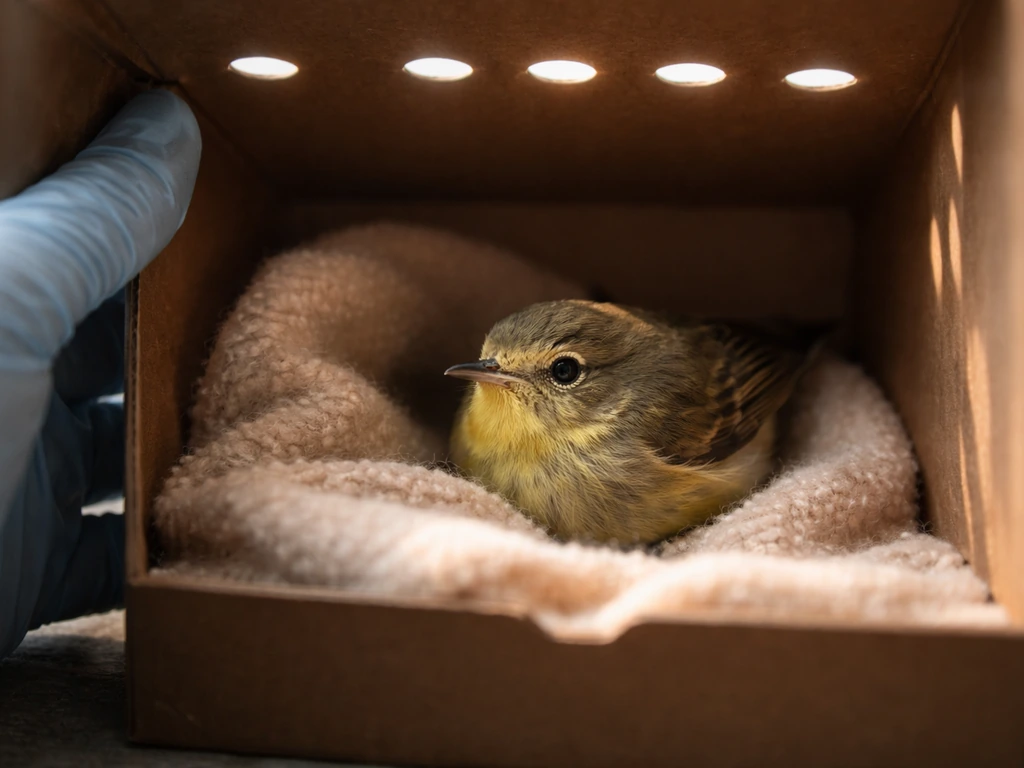
When you approach a triggered trap, move slowly and stay low. Sudden movement or loud sounds will cause the bird to panic and thrash, which is how wing injuries happen. Drape a light cloth or dark towel over the trap before you lift it. Darkness calms birds quickly and significantly reduces stress. Slide a cardboard box or small container under the trap opening, then lift the cloth corner slowly to allow the bird to move into the box. Don't reach in with your bare hands unless you have experience handling birds; even small songbirds can peck hard enough to break skin, and large birds like pigeons can cause real bruising.
Morris Animal Refuge advises keeping a captured bird in a small, warm, dark box and in quiet conditions. Do not offer water by dropper or force-feed the bird; both can cause aspiration. Keep the box in a warm indoor space away from pets, children, and noise.
Release or Rehabilitation
If the bird appears healthy and uninjured, release it at the same location within a few minutes of capture. Releasing elsewhere may be prohibited without a permit, as WDFW specifically notes. If the bird appears injured, lethargic, or unable to fly, do not attempt to treat it yourself. Contact a licensed wildlife rehabilitator. Columbus Audubon recommends using Animal Help Now to locate qualified local help quickly, and cautions against attempting to capture or handle large birds like hawks yourself under any circumstances. Native Songbird Care and Conservation echoes this for certain trap scenarios, noting that delicate songbirds especially should not be handled beyond what's needed to contain them safely.
Resetting the Trap
If you need to reset for another capture, inspect all three trigger sticks for cracks or chips before reassembling. A trigger stick that's been fully compressed once may have microfractures that make it unreliable on the next set. Replace any that feel even slightly spongy. Re-scatter fresh bait; a used bait site smells of stress hormones from the previous bird and some species will avoid it for several hours.
Common Mistakes and How to Fix Them
| Mistake | Why It Happens | Fix |
|---|---|---|
| Trigger collapses before bird arrives | Notches are too shallow or sticks are too light | Deepen notches by 1 to 2mm, use heavier diagonal brace stick |
| Trap doesn't trigger when bird is present | Trigger tension is too stiff, bait is not on the bait stick | Reduce notch depth slightly, reposition bait directly on bait stick |
| Frame tilts or doesn't drop flat | Upright is off-center, base frame isn't level | Re-center upright under frame's center of gravity, level base on flat ground |
| Bird escapes after trigger fires | Gap at bottom of frame when it lands on uneven ground | Clear and flatten the trap site, add a low border stick around the base perimeter |
| Bird injured on impact | Frame is too heavy or has sharp contact edges | Reduce frame weight, smooth all stick ends, add mesh layer to drop face |
| No activity after hours of setting | Location is wrong, bait is wrong, trap looks unnatural | Move to active feeding area, change bait type, add natural camouflage |
When to Ditch the Stick Trap and Try Something Else
A stick trap is a great introductory build, but it's not always the right tool. If you've set it correctly for two or three sessions and gotten zero activity, the problem is probably not the trap; it's the context. Some scenarios genuinely call for a different approach.
If you're dealing with a bird that's entered a building or enclosed space, a trap may not be the best approach at all. Darkening the space and opening a single exit point is often more effective and less stressful for the bird. If you're trying to humanely manage a specific nuisance bird situation (pigeons on a roof, starlings in a vent), you may want to look at the best homemade bird trap designs that are purpose-built for those scenarios with better containment and species-specific features.
If sticks feel too fiddly or you want something more reliably repeatable, there are easier starting points. An easy bird trap design using simpler materials might be a better fit if this is your first build. Alternatively, rope-based trigger systems offer a different mechanical approach: you can learn more about how to make a bird trap with rope if you want a trigger that gives you a longer pull distance and more control over sensitivity. And if you have a plastic bottle on hand, it's worth knowing that a bottle-based bird trap can be an effective ultralight option for small songbirds without any notching or lashing at all.
Whatever method you choose, keep the core principle in mind: the goal is a quick, low-stress capture followed by either immediate release or handoff to qualified care. A trap that works slowly or unpredictably is more harmful than no trap at all. Build it right, check it constantly, and when in doubt, call a wildlife rehabilitator before you do anything else.
FAQ
Is it legal to use a stick bird trap in my area if I plan to release the bird right away?
Yes, even a “humanely designed” prop-and-drop can still be illegal to use on many birds without the right permits, especially if the species is protected as migratory or you are in a jurisdiction that requires notification. If you cannot confirm (by phone or online) that your exact scenario is allowed, do not build or set the trap.
How do I know the trigger will fire reliably before catching a real bird?
For the first test, place a dummy inside the enclosure (for example, a rolled sock or similar weight) and watch whether the frame drops flat within a second or so. If it bounces, tilts, or the trigger sticks hang up, adjust notch alignment or brace length before adding bait.
What should I do if birds trigger the trap but still escape during or right after the drop?
If the trap fires but the bird can climb out, increase containment rather than adding speed. Use finer mesh or add a lightweight side barrier so there are no large gaps, and ensure the top covers the full drop surface, leaving ventilation but preventing escape.
What are the most common design mistakes that cause injury or stress during capture?
Avoid placing the trap where birds must jump onto hard edges, and avoid solid panels on the drop side. Also keep any coverings soft and ventilated, because a trapped bird can overheat quickly and a poorly ventilated enclosure can worsen stress.
How can I tell the difference between a stressed bird and one that is actually injured?
If you see any signs the bird is injured (twisted footing, bleeding, inability to maintain balance, or obvious wing drooping), do not try to “fix” it with more handling. Put up the shelter box method (quiet, warm, dark) and contact a licensed wildlife rehabilitator immediately.
I set the trap a few times but caught nothing, what should I change first?
Do not assume “no birds for a day” means the trap is working poorly, because weather and activity matter. If you have no captures after two or three short sessions, change placement (edge of brush or known path), refine camouflage, and adjust bait type rather than repeatedly resetting the same set in the same spot.
Where should I release a bird after a successful capture, and can I release it somewhere else?
If the bird is released at the capture site, it should be able to move away from the trap immediately. Releasing somewhere else can violate local or state rules and may be restricted under wildlife laws, so only relocate if you have explicit permission or a permit.
How much bait should I use, and does too much bait reduce humane outcomes?
Use bait that matches the target species and start with a light scatter trail plus a small amount on the bait stick. Over-baiting often pulls birds too close to or encourages longer lingering, increasing the time they spend near the trigger.
Can I adapt the stick trap to include a snare or stronger restraint to improve catch rate?
No. The guidance in the article assumes the enclosure will drop over the bird without contact from snares or adhesives. A non-prop design (like a true snare) increases the chance of leg or wing damage, and it also changes the legal and welfare risk profile.
Does the recommended monitoring time change with weather like hot, cold, or rain?
Yes, especially in colder or hotter conditions. In cold weather, the bird can become chilled faster while confined, and in heat it can overheat quickly, so shorten your maximum unattended window and increase monitoring to the 30 to 60 minute range when conditions are extreme.
Do I need to replace trigger sticks after one set, even if they look fine?
After a capture attempt, treat the trigger sticks as single-use for reliability. Look for cracks, chips, and any softness, then replace at least the most compressed stick, because microfractures can cause failure or partial releases.
Next Articles
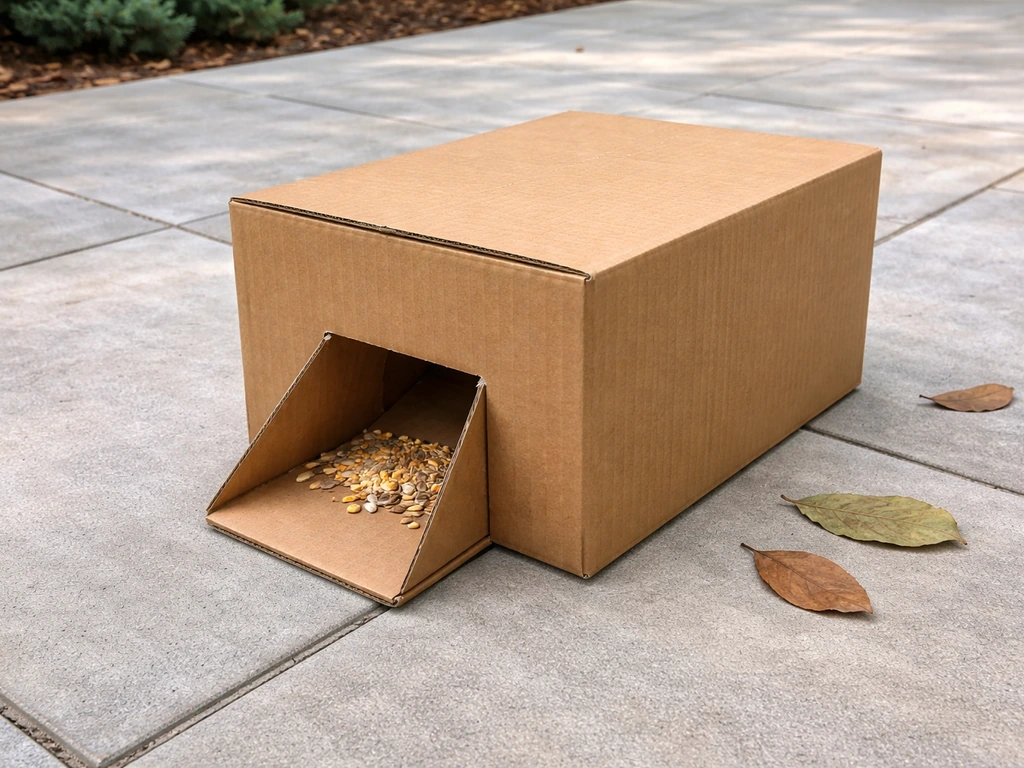
How to Make a Bird Trap With a Box: DIY Steps
Step-by-step DIY guide to build a humane cardboard box bird trap, with door, bait, escape-proofing, and release tips.
How to Make a Bird Trap Easy: Simple DIY Steps
Step by step DIY guide to make an easy small bird trap, choose humane type, place it safely, and troubleshoot.

How to Build a Chimney Swift Bird House DIY Guide
Step-by-step DIY plans to build a chimney swift bird house, with correct dimensions, placement, and weatherproofing for