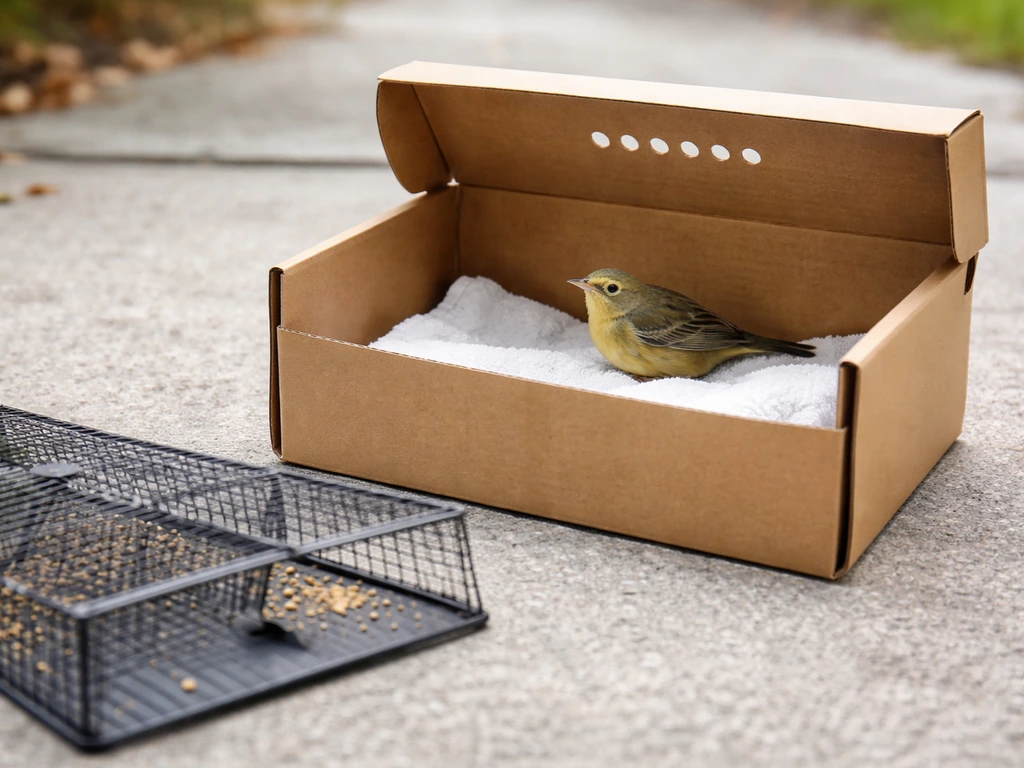
Yes, you can build a functional, humane bird trap using nothing more than a cardboard box, a few sticks or dowels, some string, and a handful of bait. I've done it with a leftover shipping box on my back porch, and with a little care for the design it works reliably. The key is getting three things right: the box size, the entry mechanism, and the bait placement. Get those dialed in and you'll have a trap that birds walk into willingly and can't back out of. This guide walks you through the whole build from start to finish.
How to Make a Bird Trap With a Box: DIY Steps

Marcus Thornton
10 Apr 2026
Choosing the right box and sizing it properly
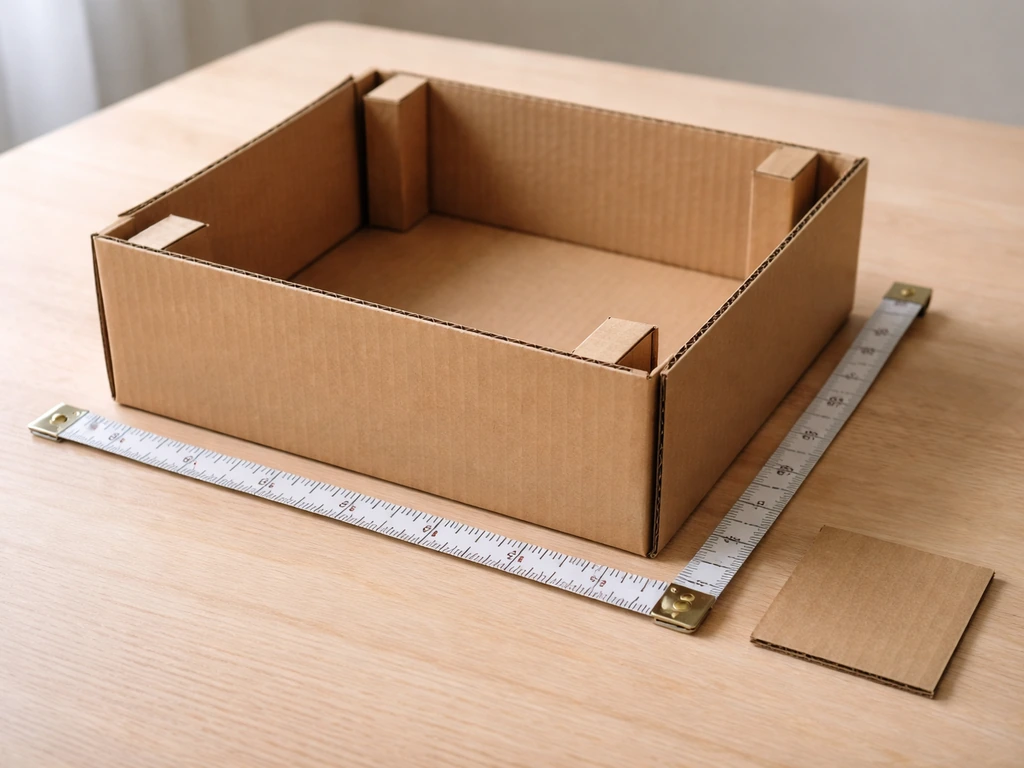
Box size is the single biggest variable that beginners get wrong. Too small and the bird panics on entry and won't go in at all. Too large and the one-way door mechanism loses its effectiveness because the bird has too much room to maneuver and back out. As a general rule, the interior of the box should be roughly 3 to 4 times the wingspan of your target bird. For small songbirds like sparrows or finches, a box in the 12" x 10" x 8" range works well. For pigeons or doves, you want something closer to 20" x 16" x 12".
For the cardboard itself, not all boxes are equal. A thin cereal box will collapse the moment a bird pushes against the walls. You want corrugated cardboard, specifically the kind used in shipping boxes. Corrugated board comes in single-wall, double-wall, and triple-wall constructions, and its stiffness is rated using something called the Edge Crush Test (ECT). Single-wall corrugated typically runs from about 23 to 55 ECT, while double-wall corrugated ranges from roughly 42 to 82 ECT. For a bird trap, a double-wall corrugated box is ideal: stiff enough to hold its shape, but still easy to cut with a utility knife. Look for boxes rated 44 ECT or higher if you can find the label.
Avoid boxes that are already damp, creased along the flat panels, or delaminating at the edges. Those will lose structural integrity quickly once you start cutting the entry hole and adding any moisture from outdoor use. A clean, intact double-wall box from an appliance or online retailer is honestly the perfect starting point.
Materials and tools you need
One of the best things about this build is that almost everything on the list can be sourced from around the house or bought for a couple of dollars. Here's what you'll need to gather before you start cutting.
- One double-wall corrugated cardboard box in the right size for your target bird (see sizing guidance above)
- A sharp utility knife or box cutter (a dull blade tears rather than cuts and ruins the flap edges)
- A metal ruler or straightedge for guiding cuts
- A pencil or marker for laying out the entry hole and flap dimensions
- One wooden dowel, pencil, or sturdy stick approximately 6–8 inches long (to prop the trap open during setup)
- String or paracord, about 6–10 feet, for the trigger line
- Strong packing tape or duct tape for reinforcing seams and hinge lines
- Bait: birdseed, cracked corn, millet, or breadcrumbs depending on your target species
- Optional: a piece of thin plastic sheet or a resealable plastic bag for weatherproofing
- Optional: a staple gun for securing flap hinges more firmly than tape alone
You don't need power tools. A sharp utility knife handles every cut in this build. If you want to go a step further and compare this design to other homemade bird trap options before you commit, that's worth a few minutes of reading before you start cutting. But honestly, the box trap is the most accessible of all the designs for a first build.
Building the trap body and entry door
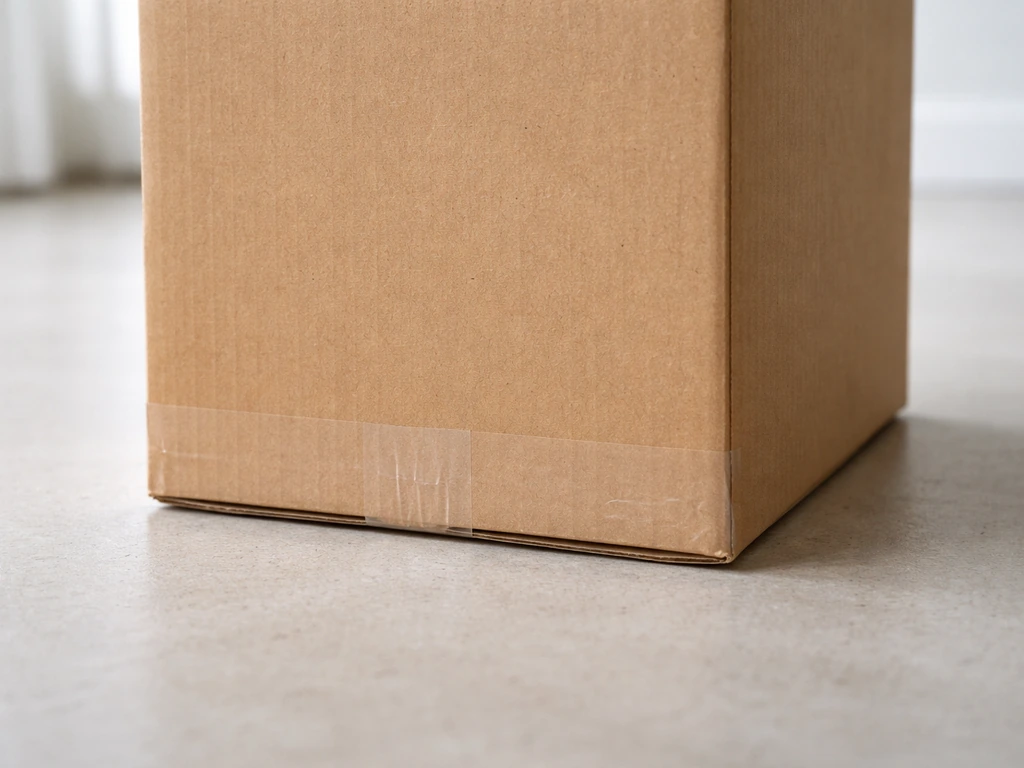
Setting up the box body
Close and tape all the bottom flaps of your box securely so the floor is solid. This is important: a weak floor means the box shifts when a bird lands on the bait, which can spook it out before the trap closes. Run two strips of duct tape across the bottom seam in an X pattern, then a third strip along the center seam lengthwise. Flip the box upright so the open top faces up, and set it on a flat surface. This is your working position for the next few steps.
Cutting and hanging the one-way entry flap
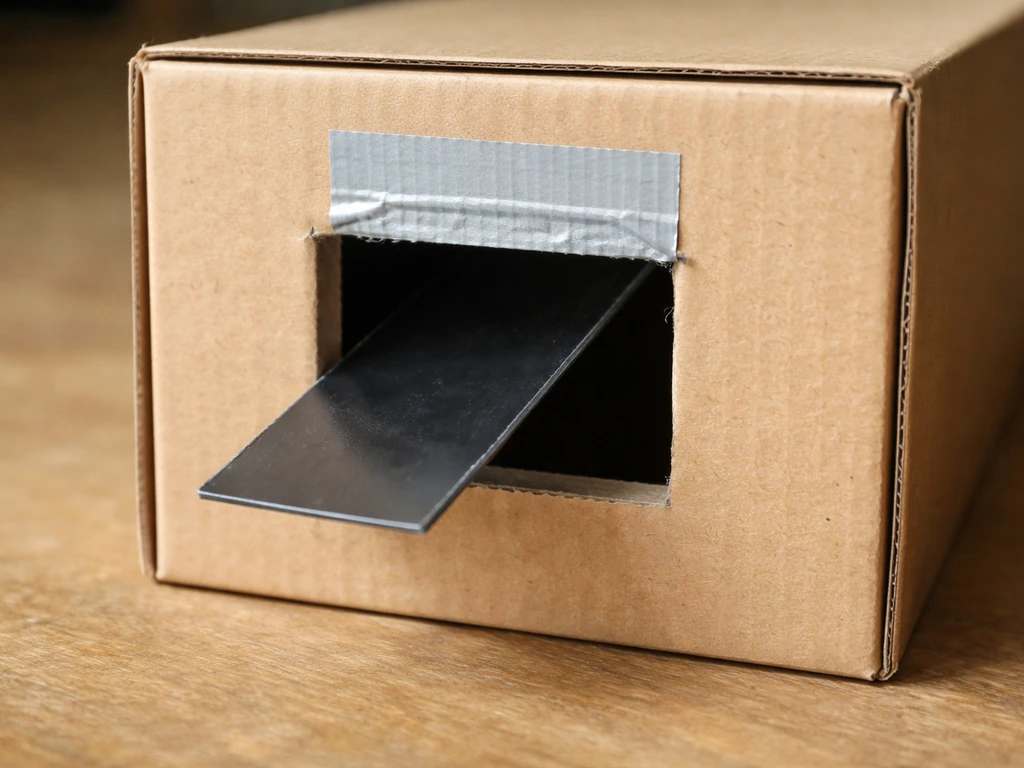
The entry mechanism is the heart of the whole trap. The goal is a one-way door: a flap that swings inward freely when the bird pushes through it, but then falls back into place so the bird can't push it back out. This is the same mechanical principle used in commercial exclusion products, where a directional flap or chute allows entry but resists exit because the bird can't find the hinge edge to push against from inside.
- On one of the short side panels of your box, mark a rectangular entry hole. For sparrow-sized birds, make it 2.5" wide by 3" tall. For pigeon-sized birds, use 4" wide by 5" tall. Position the hole 1" up from the floor of the box so there's a small lip that keeps bait from rolling out.
- Using your utility knife and straightedge, cut three sides of the rectangle: the left side, the right side, and the bottom. Do NOT cut the top edge. This uncut top edge becomes the hinge.
- Score the top edge lightly with the back of your knife blade (not a full cut, just a crease) to help the flap swing inward cleanly.
- Fold the flap inward gently several times to loosen the hinge crease. The flap should swing inward with minimal resistance and fall back to a closed position under its own weight.
- Reinforce the hinge line with a 2" strip of packing tape applied to the outside of the box along the top edge of the hole. This prevents tearing at the hinge when birds push through repeatedly.
- Test the flap by pushing it inward from outside with a finger. It should open easily and spring back to vertical when released. If it stays open, the cardboard isn't heavy enough at the flap — add a small strip of duct tape to the bottom of the flap to add a little weight.
- Leave the top of the box open (or loosely closed with one flap) so you can monitor the inside and retrieve any captured bird quickly.
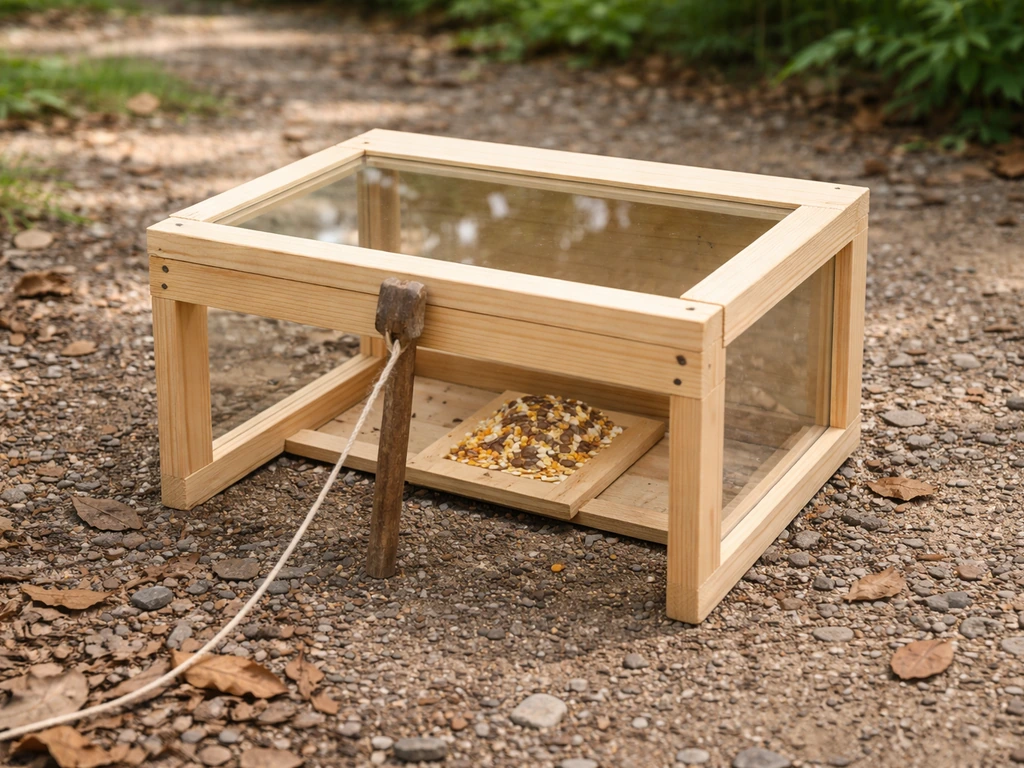
If you want to experiment with an alternative entry style, the stick-and-string propped-box method is a classic variation where you prop the open box with a stick and pull a trigger string to drop it. That approach is covered in detail in this guide on how to make a bird trap with sticks, and it pairs well with the cardboard box as your main enclosure. The flap-door design described above, though, tends to be more reliable for unattended use because you don't have to hold a string.
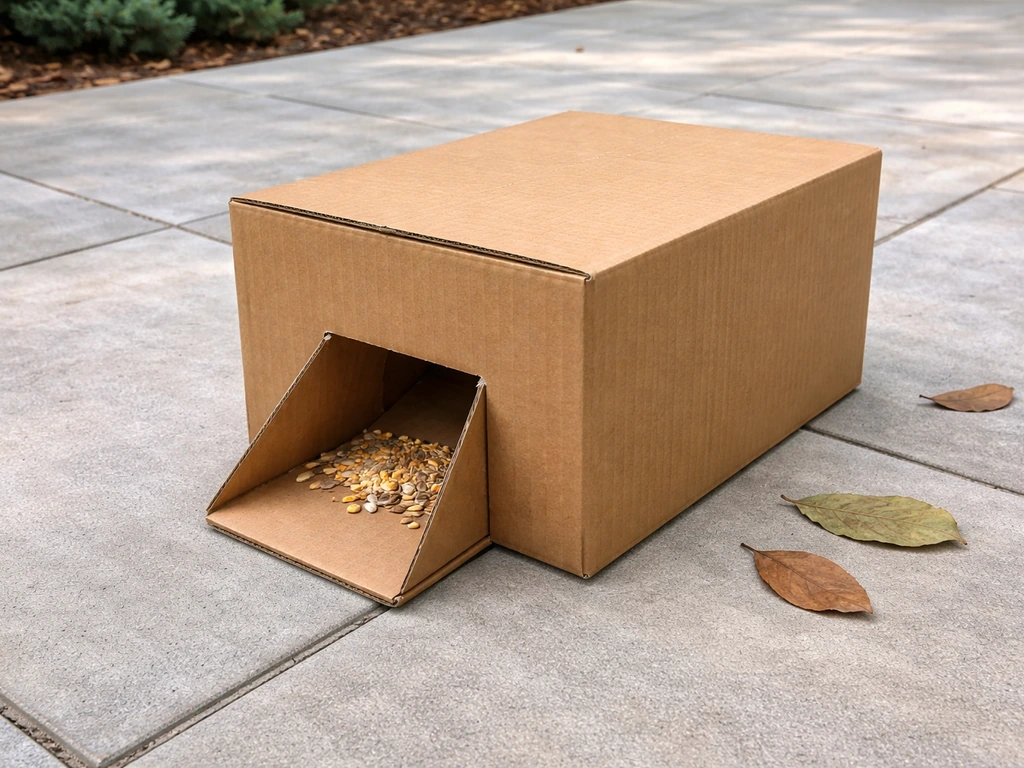
Baiting, placement, and getting birds to actually enter
A perfectly built trap catches nothing if it's in the wrong spot or baited wrong. Here's what actually works in the field.
Bait selection
Match your bait to the species you're targeting. Millet and sunflower seeds work for sparrows and finches. Cracked corn or whole corn is excellent for pigeons and doves. Breadcrumbs attract a wide range, which is useful if you're not targeting a specific species. Place a small trail of bait leading up to the entry hole from outside, then a larger amount inside the box about 3–4 inches from the back wall. The trail pulls the bird toward the entry; the pile inside gives them a reason to push through the flap.
Placement tips
Place the trap in an area where you've already seen the target birds feeding or resting. Flat ground works better than grass because a box sitting unevenly on vegetation will wobble and spook birds. Position the entry hole facing away from the main human traffic direction but still visible from your observation point. If birds are cautious about the box itself, leave it out with bait around it but the flap propped open for a day or two so they get comfortable approaching it before the trap goes live.
Check the trap frequently. In warm weather, check every 30 to 45 minutes at a minimum. A bird trapped in a closed cardboard box in direct sun can overheat quickly. I learned this the hard way with my first build: I set the trap and walked inside, and came back to find a very stressed bird that needed a few minutes in shade to recover before I released it. Don't make that mistake.
If you've been experimenting with other entry designs and want to see how baiting strategies compare across methods, this guide on making a bird trap the easy way covers some solid general baiting principles that apply across multiple trap types.
Humane handling, release, and what to do if trapping isn't legal
This is the section a lot of DIY trap guides skip, and it shouldn't be skipped. Trapping birds responsibly matters both for the bird's welfare and to keep you on the right side of the law.
Know the regulations before you set the trap
In the United States, most wild birds are protected under the Migratory Bird Treaty Act, which means trapping them without proper federal authorization is illegal. The U. S. Fish and Wildlife Service (USFWS) has specific permits for capture and rehabilitation, and if you're in a state that requires its own permit, you need both the state and federal permits for either to be valid.
States have their own layers of regulation on top of that: in Maine, for example, it's unlawful to trap wild birds during a closed trapping season or to keep a trapped bird alive without a captive wildlife permit. In Michigan, a DNR wildlife rehabilitation permit is required any time you possess, transport, or hold a native wild bird, and federally protected species may need federal authorization as well.
Florida's regulations allow bird traps on permitted properties with landowner permission and required notification to law enforcement, but only for authorized individuals. Before you set any trap, take 20 minutes to look up your state's wildlife agency rules. This isn't me being overly cautious: it's genuinely the step that protects both you and the bird.
Handling and release
If you do capture a bird, keep handling time as short as possible. The USFWS's guidance on humane capture of migratory birds is clear that methods and handling should not cause unnecessary stress or impede the bird's recovery and rehabilitation potential. When you open the trap to retrieve the bird, do it in a calm, enclosed space rather than outdoors where it might bolt and injure itself. Use both hands to cup the bird gently, with one hand over its back and wings and your thumb and forefinger loosely holding the base of its neck (not squeezing). Release it in the same area where you captured it unless you have a specific reason to relocate it.
If the bird appears injured or too stressed to fly, place it in a dark, warm, quiet container (a shoebox with holes works fine) until you can contact a licensed wildlife rehabilitator. The Ohio Wildlife Center recommends placing a contained bird in a dark, warm, quiet room to minimize stress while it recovers or waits for a rehabilitator pickup. Also from their guidance: if you're trying to capture a bird of prey, limit your attempts to no more than 30 minutes total to avoid causing harm through prolonged stress.
Under Florida FWC rules, if you've captured a nuisance bird, it must be released legally or euthanized humanely within 24 hours of capture or trap inspection. That 24-hour window applies broadly in spirit across many states, so treat it as a universal minimum standard even if your state isn't explicit about the timeframe.
If trapping isn't an option for you
If your actual goal is to attract birds and observe them rather than capture them, skip the trap entirely and build enrichment structures instead. Feeders, nesting boxes, and bird baths accomplish the same goal of drawing birds close without the regulatory complexity or welfare risks. If you're trying to relocate a bird that's gotten into an enclosed space, a bird glue trap is another option some people consider, though it requires very careful application to avoid harming feathers, and isn't appropriate for most situations. A one-way door excluder installed over the entry point is often a cleaner, lower-stress solution for removal scenarios.
Troubleshooting and quick upgrades
Birds won't enter
The most common reason birds don't enter is that the entry flap requires too much force to push open. Test yours with the tip of a finger: it should open with almost no resistance. If it's stiff, re-score the hinge crease and flex the flap back and forth more times. A second common issue is that the box itself smells wrong to the bird.
New cardboard sometimes has a faint chemical smell from the ink or coating. Leave it outdoors for a day before setting it as a trap, and rub a little bait around the entry hole to layer in a familiar scent. If you've tried the flap design and it's still not working, the propped-stick variation is worth trying as a backup since it eliminates the flap stiffness issue entirely.
You might also find helpful insight in this article about using rope in a bird trap design, which covers some alternative trigger setups.
Bird escapes after entry
If a bird is getting back out, the flap isn't returning to a fully closed position after entry. Add a small weight to the bottom of the flap (a piece of duct tape folded over several times works) to make it fall shut faster. Also check that the flap sits flush against the box face when closed and isn't catching on a rough edge. Trim any uneven cuts along the side edges of the flap so it seats cleanly.
Weatherproofing for outdoor use
Cardboard absorbs moisture quickly, which weakens the walls and can cause the flap hinge to soften and stop returning to position. For short-term outdoor use (a few hours), wrapping the exterior in plastic sheeting or large resealable plastic bags slows moisture absorption significantly. For a more durable setup, apply a water-resistant barrier coating to the exterior. Products in the EcoShield barrier coating category are designed specifically to provide moisture-barrier performance on paper and corrugated board surfaces. If you're using a fire-retardant treatment like Paper Safe (which is formulated for corrugated board and is odorless, colorless, and non-toxic), note that it requires at least 24 hours away from moisture after application before the box is ready for outdoor placement.
Upgrading to a sturdier build
If you want to reuse the trap over multiple days or in variable weather, a few upgrades make a big difference. Lining the interior floor with a thin piece of scrap wood or a cut piece of plastic container lid prevents the floor from softening when birds scratch around. Reinforcing all four corners of the box with extra duct tape prevents the walls from bowing outward. And replacing the cardboard flap with a thin piece of plastic cut from a plastic folder or report cover gives you a flap that doesn't absorb moisture and maintains consistent weight and spring. That one change alone extended the useful life of my own trap from one day to well over a week.
If you want to see how the cardboard box approach stacks up against other repurposed material designs, here's a quick comparison of the most common DIY bird trap builds.
| Trap Type | Best For | Difficulty | Durability | Weather Resistance |
|---|---|---|---|---|
| Cardboard box (this build) | Beginners, quick builds, small to mid-size birds | Very easy | Low (1–3 days outdoors) | Poor without coating |
| Stick-and-string propped box | All skill levels, attended use | Easy | Low to moderate | Poor without coating |
| Plastic bottle trap | Small birds, long-term outdoor use | Easy to moderate | High | Good |
| Wire mesh cage trap | Repeated use, larger birds | Moderate | Very high | Excellent |
| Rope/snare-style trap | Experienced builders only | Hard | Variable | Moderate |
For most people reading this, the cardboard box build is the right starting point. It's fast, it uses materials you probably already have, and it teaches you the core mechanics of a one-way entry system that you can carry into more durable builds later. Build it once, understand why each step works, and you'll find it much easier to upgrade or adapt the design for whatever situation you're dealing with.
FAQ
My bird keeps getting out right after entry, what should I check first?
Use a box door flap that closes faster than the bird’s stride. After cutting, press the flap into the closed position and confirm it fully seats flush against the box face. If it hangs up, trim high spots on the flap edges and hinge crease so the flap falls by gravity without catching on cardboard fibers.
Why does the same bait work one day and not the next?
Trap success depends heavily on seasonal behavior. If birds are nesting or feeding elsewhere, the same bait can stop working for days. Place the box only after you’ve observed consistent feeding at that exact spot, and keep baiting nearby for a day or two before activating the trap so the birds learn the route.
What’s the best way to position the box if the ground is uneven or grassy?
Do not place the trap where it can tip or slide when a bird lands. Set it on a firm, level surface, ideally on bare ground or a flat board. If you must use grass, place a rigid base (like a scrap piece of plywood) under the trap so the box sits evenly.
Birds approach the box but refuse to go inside. How do I troubleshoot?
If you are seeing birds approach but not enter, the entry force is usually too high or the bait trail is too short. Re-test the flap with a fingertip before setting the trap, then extend the outside bait trail to reach the flap opening so the bird steps fully into the entrance zone instead of stopping at the threshold.
How should I adjust bait when I do not know the species yet?
Assume you need more than one bait attempt. If you’ve used millet or sunflower and nothing happens, swap to cracked corn for pigeons and doves or breadcrumbs for mixed flocks. Keep the bait trail small outside and the bulk inside about 3 to 4 inches from the back wall, then wait for a consistent repeat visit before changing other parts.
The flap seems to slow down or stop closing in hot or humid weather, what can I do?
If the box stays in place but the flap stays open, warm, damp conditions can soften cardboard and reduce spring action. Move the build to shade, shorten exposure time, and consider upgrading the flap to a thin plastic piece as described in the reuse section so it maintains consistent closing weight across weather changes.
How do I minimize the chance of catching non-target birds?
Safety and legality also apply to non-target captures. Reduce risk by setting the trap specifically for the likely species size, using appropriately sized bait and an entrance hole that matches the target birds, and checking more frequently in warm weather so non-target birds do not remain stressed longer than necessary.
What’s the safest way to release a trapped bird if it seems stressed?
If you catch a bird, keep handling time short and avoid releasing it far from the capture point unless you have a specific reason. Open the trap in a calm enclosed space, cup the bird gently, and if it looks unable to fly, place it in a dark, warm container until you can contact a licensed wildlife rehabilitator.
I only want to attract birds, do I need to build a trap at all?
If your goal is observation or feeding rather than capture, switch to attract-and-watch alternatives. In that case, use feeders, nesting boxes, or bird baths, and skip traps entirely because you avoid permit requirements and the welfare risks that come with capture devices.
How can I tell if a cardboard box is strong enough before I start cutting?
Not every cardboard box is appropriate. Avoid damp, creased, or delaminating boxes, and prioritize double-wall corrugated with a high Edge Crush Test rating for stiffness. If you cannot find ECT labeling, choose a shipping-style box that feels rigid when squeezed and holds shape at the corners after cutting.
Next Articles
How to Make a Bird Trap Easy: Simple DIY Steps
Step by step DIY guide to make an easy small bird trap, choose humane type, place it safely, and troubleshoot.

How to Build a Chimney Swift Bird House DIY Guide
Step-by-step DIY plans to build a chimney swift bird house, with correct dimensions, placement, and weatherproofing for

How to Build an Oriole Bird House: Step-by-Step DIY
Step-by-step DIY for building an oriole bird house with right dimensions, weatherproofing, predator-safe placement, and