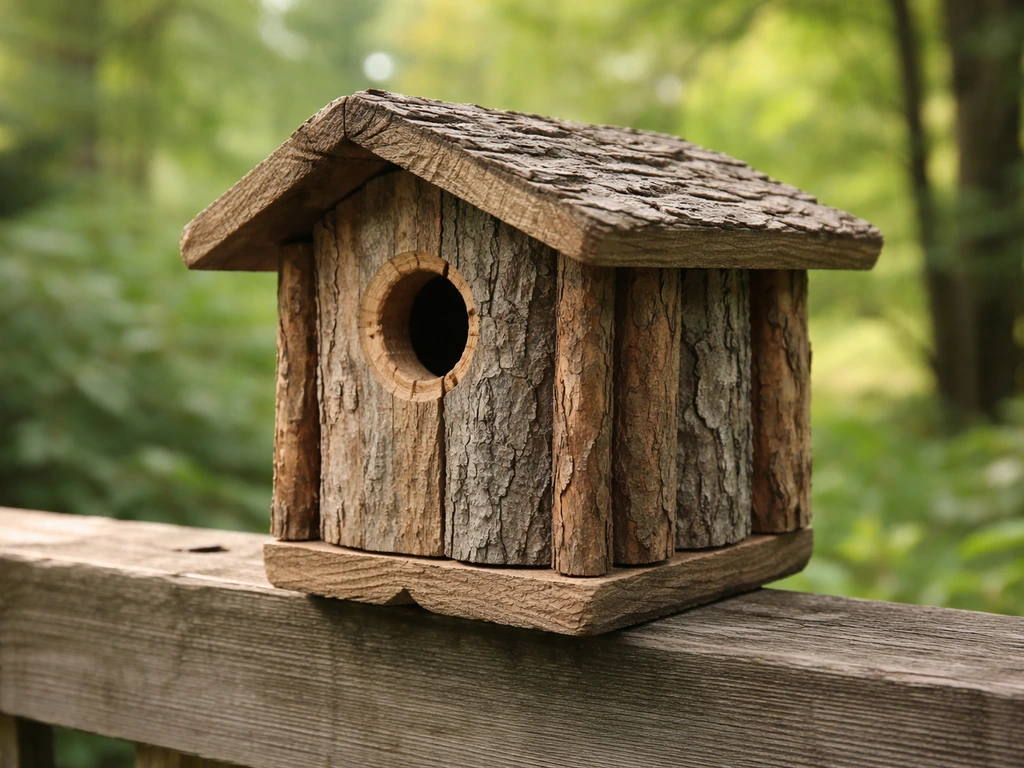
Yes, you can absolutely build a bird box out of recycled materials today, and it will work just as well as anything from a garden centre. Whether you have an old fence board in the shed, a chunky offcut from a timber yard, or a weathered log sitting in the garden, all of it can become a functional, safe nest box. This guide covers both approaches: hollowing out a log section and building a flat-pack box from reclaimed wood planks. Pick whichever matches what you have on hand.
How to Make a Bird Box From Recycled Materials

Marcus Thornton
22 Apr 2026
Choosing the right recycled material: log vs reclaimed wood

The first decision is whether you're working with a log or flat timber. Both are brilliant when done right, and both have real trade-offs worth knowing before you start.
Working with a log
A log box is probably the most natural-looking option and birds genuinely seem comfortable with it. You're looking for a section of branch or trunk that is at least 10 to 12 inches long and 5 to 7 inches in diameter. The wood should be firm enough to hold a drill or chisel but not so green that it will split badly as it dries out. Partially seasoned hardwood (oak, apple, cherry, birch) works really well. Avoid logs that are already soft and punky, because the walls will crumble before the season is out. One honest mistake I made early on: using a log that looked solid but was wet through the middle. It grew mould inside within a few weeks. Tap the log with a mallet and listen for a hollow sound that suggests rot. If it sounds solid all the way through, you're good.
Working with reclaimed wood planks
For a plank-style box, reclaimed fence boards, pallet wood (solid pallet wood, not the thin compressed kind), old floorboards, or offcuts from a timber yard all do the job well. You need wood that is at least 3/4 inch (18-20mm) thick. Thinner than that and the box won't insulate well, and the screws won't hold. Avoid any plywood that isn't exterior-grade, because standard plywood delaminates fast when wet. Most critically: never use pressure-treated wood. It has been impregnated with pesticides and fungicides, and while research isn't completely conclusive on harm to nesting birds, the Cornell Lab of Ornithology's NestWatch programme recommends avoiding it altogether for exactly that reason. Stick to raw, untreated reclaimed timber.
| Feature | Log Box | Reclaimed Wood Box |
|---|---|---|
| Look & feel | Natural, rustic, very bird-friendly aesthetic | Clean or rustic depending on finish |
| Tools needed | Drill, chisel or spade bit, saw | Saw, drill, hammer or screwdriver |
| Skill level | Moderate (hollowing takes patience) | Beginner-friendly |
| Insulation | Excellent (thick walls) | Good if timber is 3/4 inch+ |
| Durability | Very long-lasting in hardwood | Long-lasting if joints are glued and nailed |
| Best recycled source | Garden log pile, fallen branch | Old fence boards, pallet timber, offcuts |
| Avoid | Rotten, punky, or very wet logs | Pressure-treated wood, thin plywood |
My honest recommendation: if you have a decent log, use it. If you have a stack of old fence boards, go the flat-pack route. Both will attract birds. The log just takes a bit more time to prepare.
Planning the build: dimensions, entrance size, and where to put it
Getting the dimensions right is the most important part of this whole project, and it's the thing most first-timers skip over. The entrance hole diameter is not decorative. It is literally a filter for which species can get in. Too big, and you'll attract the wrong birds or allow predators easier access. Too small, and your target species can't enter. Here's a quick reference based on the Mass Audubon and USDA Wildlife Habitat Management Institute charts, covering the most common garden and backyard cavity nesters: The USDA Wildlife Habitat Management Institute provides species-specific cavity nest box dimensions, such as House Wren and Black-capped chickadee measurements, in its Nesting Structures guidance blank" rel="noopener noreferrer">Mass Audubon and USDA Wildlife Habitat Management Institute charts.
| Species | Floor Size | Cavity Depth | Entrance Hole Diameter | Entrance Height Above Floor |
|---|---|---|---|---|
| House Wren | 4 x 4 inches | 6 to 8 inches | 1 to 1 1/8 inches | 4 to 6 inches |
| Black-capped Chickadee | 4 x 4 inches | 9 inches | 1 1/8 inches | 7 inches |
| Bluebird / Great Crested Flycatcher | 4 x 5.5 inches | 8 to 10 inches | 1 3/8 to 1.5 inches | 6 to 8 inches |
| House Finch | 6 x 6 inches | 6 inches | 2 inches | 4 inches |
If you're aiming for chickadees or wrens, the 4x4 inch floor plan is your go-to. These are the most common small cavity nesters in North American backyards, and a 4x4 box with a 1 to 1 1/8-inch hole will suit both species well. For bluebirds, go slightly bigger all around. Those dimensions scale directly to a log build too: you're just creating the equivalent internal cavity by drilling and chiselling rather than cutting panels.
Where to place the box
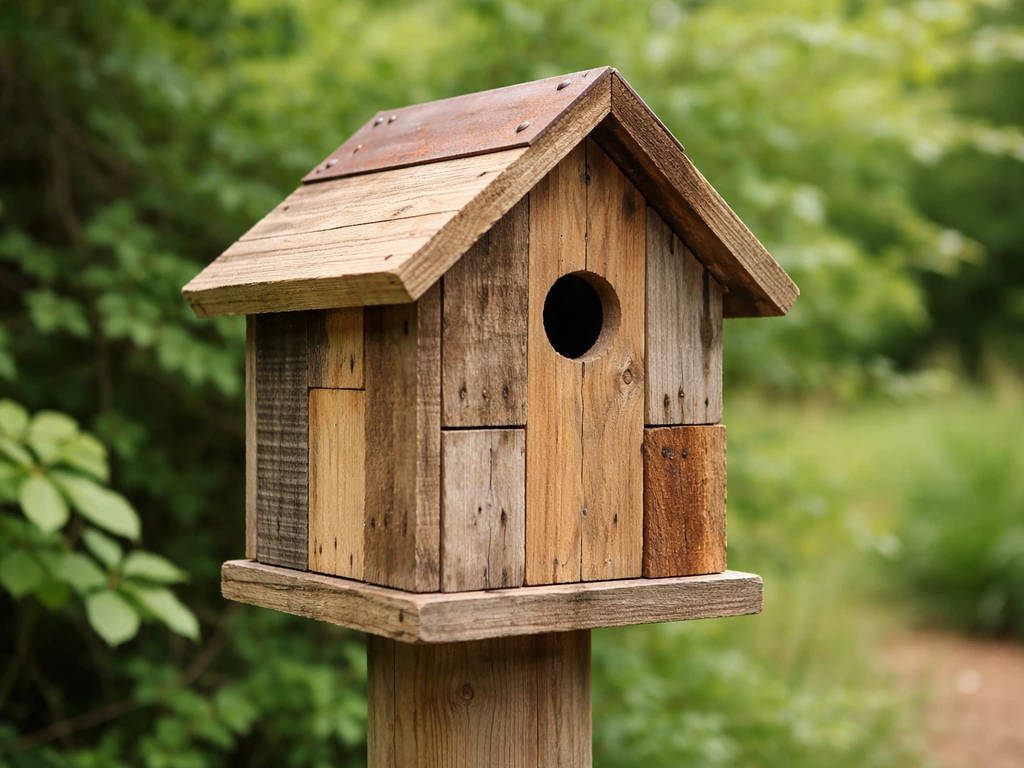
Placement matters nearly as much as dimensions. Face the entrance hole away from prevailing winds, ideally towards the east or southeast so the box gets gentle morning sun but avoids the harshest afternoon heat. Partial shade is better than full sun. Mount the box so birds have a clear flight path to the entrance, ideally with a nearby tree or shrub where they can perch briefly and scan for predators before committing to entering. The ideal height varies by species, so check NestWatch's species pages once you've settled on your target bird. As a general rule, most small songbird boxes do well at 5 to 10 feet above the ground, mounted on a smooth metal pole rather than a tree or fence post (more on why in the predator section below).
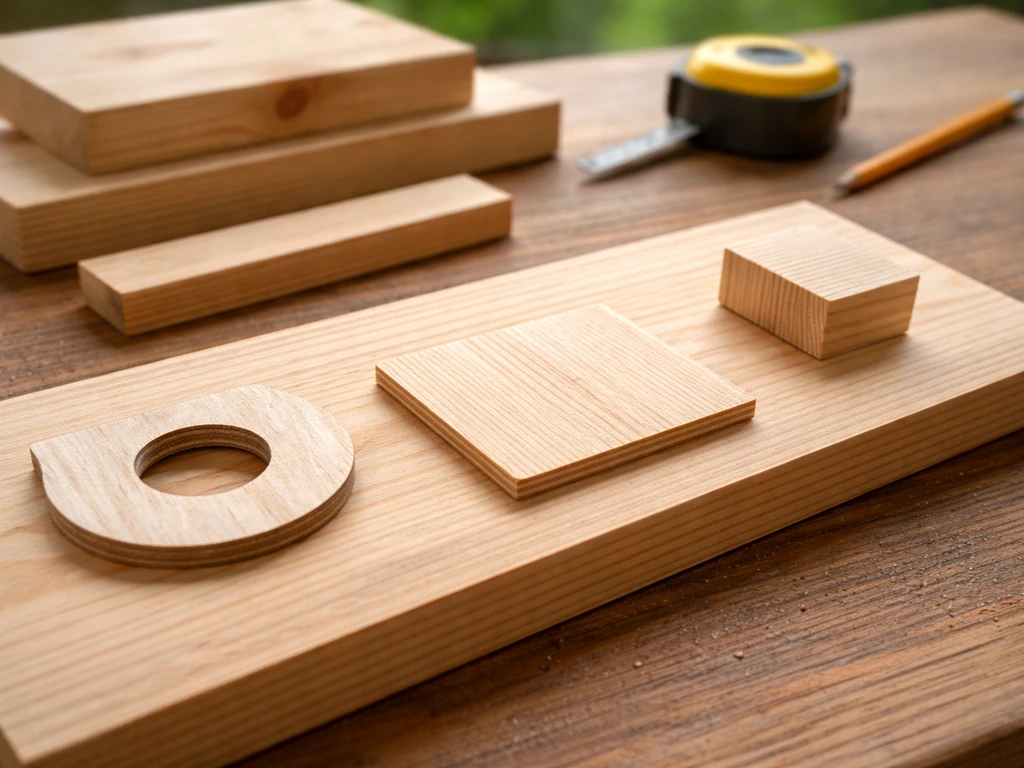
Tools and supplies you'll need
You don't need a workshop full of equipment. Here's what actually gets the job done for either approach:
- A hand saw or jigsaw (for cutting planks to size)
- A drill with a standard set of bits, plus a spade bit or hole saw sized to your target entrance hole diameter
- A hammer and galvanised nails, or exterior-grade screws (screws are more durable and easier to adjust)
- Wood glue (exterior-grade PVA or similar) for sealing joints before nailing
- A chisel (for log cavity work, or cleaning up rough edges)
- Sandpaper (medium grit, 80 to 120, for smoothing the entrance hole so birds don't snag their feathers)
- A pencil, tape measure, and square for marking cuts
- A metal hole guard (a pre-drilled metal plate that goes over the entrance hole, available cheaply at hardware stores)
- Galvanised wire or exterior wood screws for mounting
- Optional: a Noel predator guard for the mounting pole
If you don't have a hole saw or spade bit at the right size, most hardware stores sell them individually for a few dollars and they're worth buying properly. Cutting an entrance hole with a jigsaw freehand is possible but rarely gives a clean, safe edge for birds to pass through.
Step-by-step build instructions
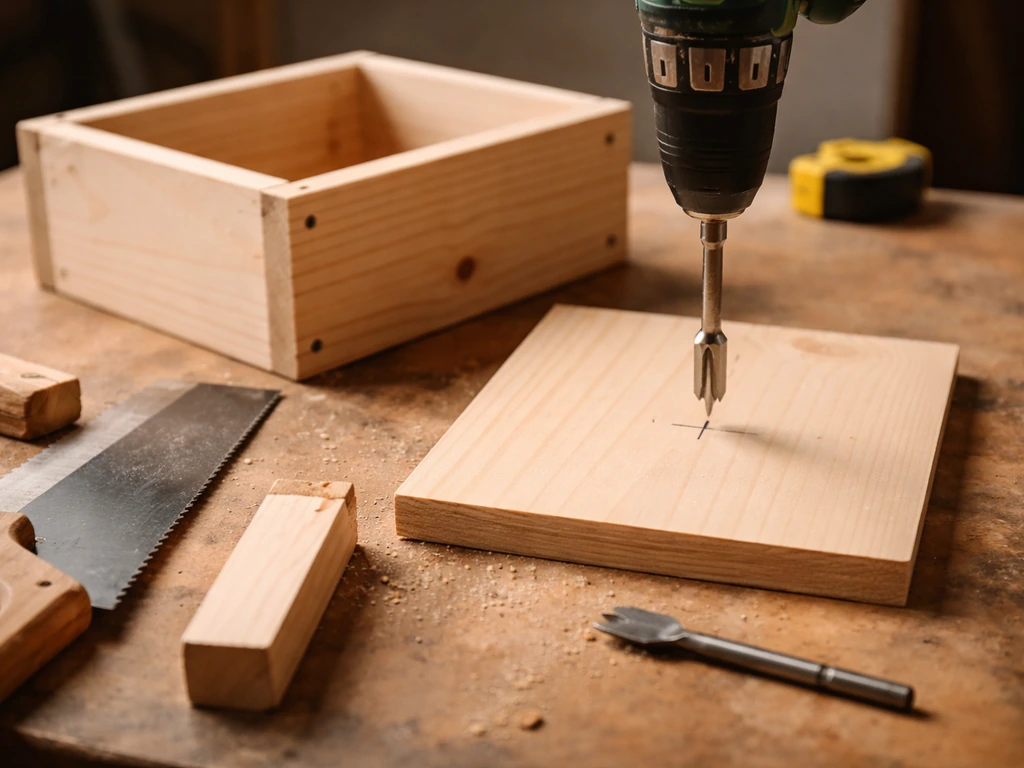
Building a plank-style wooden bird box
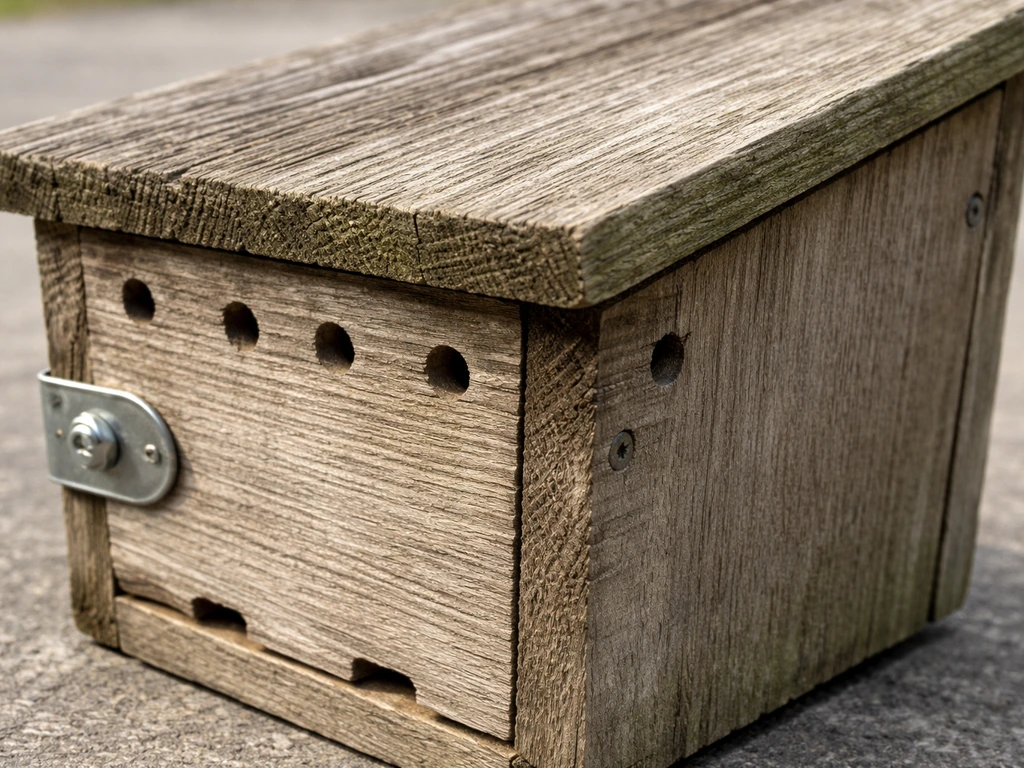
- Cut your timber to size. Using a 4x4 inch floor as your starting point, you'll need: two side panels (cut to your target cavity depth, usually 9 inches tall, 4 inches wide), a front panel (same height as the sides, 4 inches wide), a back panel (taller than the front to allow for mounting, roughly 14 to 16 inches is useful), a floor panel (4x4 inches), and a roof panel cut slightly larger to overhang on all sides by at least an inch.
- Drill the entrance hole in the front panel. Use your spade bit or hole saw at the correct diameter for your target species. Position the centre of the hole at the correct height above where the floor will sit (e.g., 7 inches for a chickadee box). Sand the inside edge smooth with 80-grit paper.
- Drill ventilation holes. In the upper third of each side panel, drill two or three holes at about 1/4 inch diameter. These aren't decorative: they prevent the box from overheating in summer and reduce condensation build-up that can harm nestlings.
- Prepare drainage on the floor panel. Either drill four small holes near the corners of the floor, or cut the corners off the floor board at a 45-degree angle, removing about 1/4 inch from each corner. Both approaches let any rainwater that gets in drain out rather than pooling under the nest.
- Glue all joints before nailing or screwing them. Apply exterior-grade wood glue to every mating surface before you fasten them. This is the single best thing you can do for the long-term durability of the box without using any chemical treatments. NestWatch specifically flags this tip: good joinery beats treated wood every time.
- Assemble the box. Attach the side panels to the floor panel first, then attach the front and back panels to the sides. Leave the roof either hinged (a leather hinge or a simple pivot screw works) or attached with a single screw at the front so it can be opened for annual cleaning.
- Attach the metal entrance guard. Screw the metal hole guard over the entrance hole so it sits flush. This prevents squirrels and woodpeckers from enlarging the hole and letting in larger predators or competitor species.
- Do not add a perch. It feels intuitive to add one, but research from NC State Extension is clear: a perch below the entrance hole gives predators and competitor birds like House Sparrows something to grab onto. Leave it off entirely.
Building a log cavity bird box
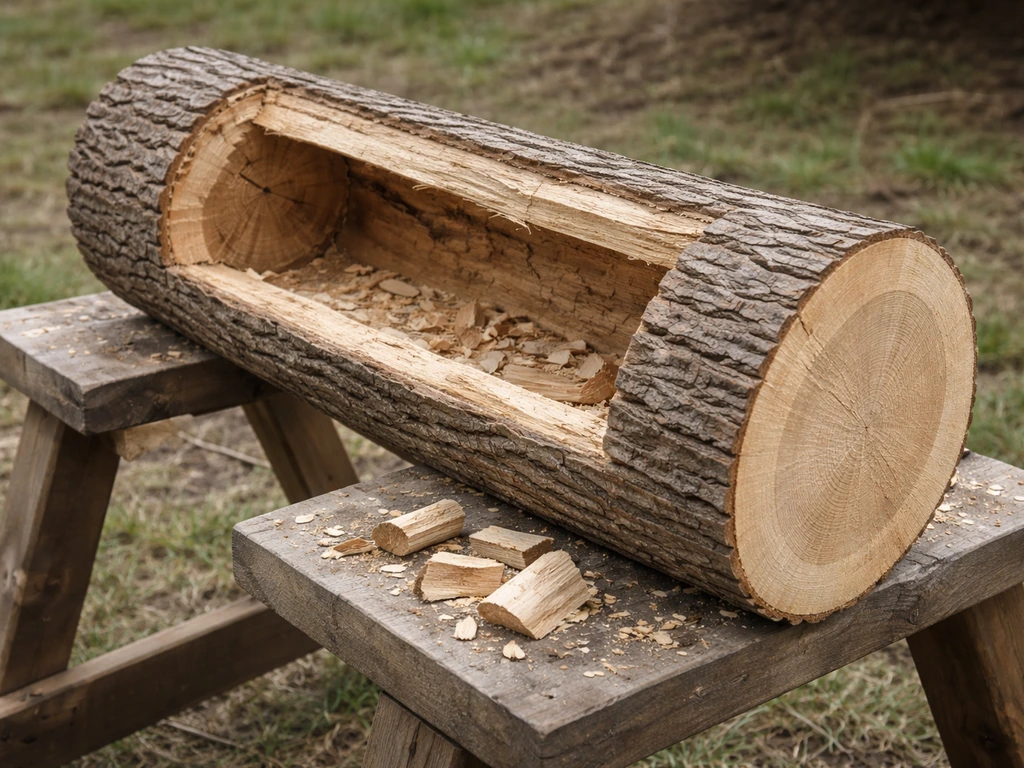
- Cut your log to length. Aim for at least 10 to 12 inches. Use a hand saw or chainsaw to cut clean, flat ends so the log can stand and be mounted straight.
- Split and hollow the interior. The cleanest method is to split the log lengthways with a chisel and mallet, hollow out the interior to your target dimensions (roughly 4 inches in diameter for small songbirds), then glue and nail the two halves back together. Alternatively, use a long spade bit or forstner bit to drill down from the top if the log diameter allows it.
- Drill the entrance hole in the front face at the correct height and diameter for your species.
- Cut or drill ventilation gaps near the top of the log sides, and cut the bottom of the cavity at a slight angle or drill drainage holes through the base so water can escape.
- Cap the top. Fit a flat offcut of wood or a natural bark slab as a roof, angled slightly forward so rain runs off away from the entrance. Glue and screw it securely.
- Sand the entrance hole smooth and fit a metal entrance guard if squirrels are common in your area.
Weatherproofing, ventilation, drainage, and keeping predators out
This is where a lot of homemade boxes fall short. The temptation is to slap some paint on it and call it done, but that's exactly what you should not do. NC State Extension's guidance is direct: avoid painting the box or treating the wood with a preservative. The reasoning is sound. Even if the chemical harm to birds isn't fully proven in every case, there's zero benefit to the bird, and the risk isn't worth it. Untreated seasoned wood weathers naturally, and that's fine. The roof can be treated on the outside only, away from any surface birds contact, but even that's optional.
Instead of paint or preservative, use good joinery as your weatherproofing strategy. Glued and screwed joints, a well-fitted overhanging roof, and a tight entrance hole are all the protection the box needs from moisture. If the roof overhangs by an inch on all sides, very little rain will actually reach the body of the box.
Ventilation and drainage
NC State Extension states it plainly: all boxes need ventilation and drainage. The 1/4-inch ventilation holes in the upper side panels keep the interior temperature manageable on hot days and prevent moisture from building up. Don't skip these. For drainage, the corner-cut floor method (trimming about 1/4 inch off each corner of the floor board before assembly) is neat and effective. Drilling four small holes near the floor corners works just as well. Either approach keeps the nest material dry, which is critical for healthy chicks.
Predator resistance
Mounting location is your first line of defence. Sialis.org's nest box guidance is clear: avoid mounting boxes on trees or fence lines because these give climbing predators (cats, raccoons, squirrels, snakes) a direct highway to the entrance. A smooth metal conduit pole or a wooden post wrapped in a metal baffle is much harder to climb. The Klamath Bird Observatory recommends installing a Noel predator guard, which is a wire cage fitted around the entrance hole that allows small birds in but stops larger animals reaching in with their paws. These can be made from hardware cloth in about ten minutes. The metal entrance hole guard handles the other angle: squirrels and woodpeckers enlarging the hole over time. Screw it on and check it each season.
Finishing, curing, and getting the box ready to mount
Once the box is assembled, give it a couple of days to cure before mounting, especially if you've used wood glue. This isn't a long wait but it lets joints fully bond. If you built the box during winter, you can mount it right away since birds won't be nesting yet and the extra time in the elements actually helps the wood acclimatise and lose any fresh-cut smell.
What to check before the box goes up
- Run your finger around the inside of the entrance hole. It should feel smooth, with no splinters or sharp edges.
- Look inside the cavity. There should be no exposed nail tips, no pooling areas that water could sit in, and no gaps at the base that would let draughts in from below.
- Check the roof sits flat and overhangs on all sides. Lift the roof if it's hinged and make sure the hinge is sturdy enough to hold closed against wind.
- Confirm the ventilation holes are open and positioned in the upper third of the side panels.
- Confirm drainage is in place at the floor.
- Check that no perch is attached.
- Verify the entrance hole diameter one more time against your target species dimensions before mounting.
Mounting it safely
Mount the box on a smooth pole or post, not directly on a tree trunk. Use galvanised exterior screws or wire that won't rust and weaken over a season. Angle the box very slightly forward (just a degree or two) so the entrance tilts down marginally, which helps rain shed away from the hole rather than running in. Face the entrance away from the prevailing wind and towards partial shade, ideally with a clear flight path from a nearby shrub or tree. Once it's up, leave it alone. Resist the urge to check on it constantly during nesting season. A quick look every week or two to check for predator damage is enough.
Annual maintenance
After each nesting season ends (usually late summer or early autumn), open the box, remove the old nest material, and scrub the interior with boiling water. No soap, no bleach, nothing that leaves a residue. Let it dry completely before closing it back up. This removes parasites and gives next year's occupants a clean start. If you notice the entrance hole has been gnawed wider, screw a fresh metal entrance guard over it before spring. This whole routine takes about ten minutes and makes a real difference to whether birds return year after year.
If you enjoy the recycled materials approach here, the same mindset applies to a range of related projects: building a full birdhouse from waste wood, creating an eco-friendly birdhouse using entirely natural or upcycled components, or even constructing decorative bird sculptures from reclaimed bits and pieces. build a full birdhouse from waste wood, creating an eco-friendly birdhouse using entirely natural or upcycled components, or even constructing decorative bird sculptures from reclaimed bits and pieces how to make a bird from recycled materials. For a deeper walk-through on eco-friendly options, you can also follow our guide on how to make an eco friendly bird house how to make eco friendly bird house. A lot of these reclaimed-material tips also apply to how to make a bird house with waste material, so you can adapt plans to whatever scraps you have birdhouse from waste wood. The skills and material knowledge carry across all of them. But for pure function, getting a bird box up with the right dimensions and placement is the thing that will actually bring birds to your garden, and you can do it today with what you already have.
FAQ
Can I use plastic, metal, or cardboard when making a bird box from recycled materials?
It’s best to stick to wood for the main nesting cavity. Plastic, scrap metal, or cardboard often insulate poorly or trap heat, and cardboard can wick moisture and collapse. If you reuse metal, use it only for non-contact parts like a predator guard, entrance plate, or mounting bracket.
How can I tell the right entrance hole size if I’m not targeting chickadees or wrens?
Use the bird you want as the guide, but also account for how much the entrance might get enlarged over time. Smaller-target species can be pushed out if the hole is oversized, so if you’re unsure, choose the tighter end of a recommended range and focus on predator protection rather than widening the hole.
What should I do if my recycled wood is warped or has gaps between boards?
Gaps let drafts and predators in and can drive moisture into the box. Re-fit warped boards by sanding high spots, using shims to keep alignment tight, and pre-drilling to prevent splitting. If the wood is too badly twisted to assemble firmly, it’s safer to choose different scraps than to rely on filler.
Is there any situation where I can use varnish or sealant on a recycled bird box?
Avoid products that form a film on bird-contact surfaces. If you want extra weather protection, keep it strictly on the exterior roof surfaces only, and choose something that cures fully and does not remain tacky or odorous. When in doubt, skip finishes and rely on a tight roof overhang and proper drainage.
How do I clean a bird box if I find mites or a heavy parasite load?
A boiling-water scrub helps for routine maintenance, but if the infestation looks extreme, repeat the cleaning after fully drying, and replace any interior parts that are porous or heavily stained. Do not use bleach or soap residue, because residue can irritate chicks or deter future nesting.
Can I place multiple bird boxes near each other?
Yes, but spacing matters. Keep boxes far enough apart that the entrances do not overlap in each bird’s flight route, and avoid clustering them on the same small tree or fence line, since that can make predator access easier. If you mount on separate poles, you have more control over spacing.
Do I need to drill additional ventilation holes beyond the recommended upper vents?
More holes are not always better. Use the vent openings as designed, and only add small ventilation if your build is especially drafty in winter climates. Too many openings can create cold drafts, which can reduce nesting success, especially for small cavity nesters.
Can I mount the bird box on a fence post if that’s all I have?
Try not to. Fence and rough posts are easier for climbing predators to use as a route to the entrance. If you must, add a metal baffle around the post and keep the box positioned so there’s no nearby horizontal surface that predators can use to reach the opening.
What if the box keeps attracting wasps, bees, or other non-birds?
Check the entrance area during the off-season and remove any nests promptly. Ensure the entrance hole and guard fit tightly, and do not paint or scent the box. For persistent insects, reduce exposed gaps, confirm the box drains well, and consider relocating the box to a spot with less direct disturbance.
How long should I wait before assuming the box is a failure after mounting it?
Give it at least one full breeding season, and in some areas two seasons if the birds have not established nesting nearby. Avoid frequent checks during nesting, since disturbance can cause abandonment even if the box is otherwise correctly built.
Next Articles
How to Make a Bird House With Waste Material
Step-by-step DIY birdhouse from safe waste materials, with size rules, assembly tips, and placement and maintenance chec

How to Build a Chimney Swift Bird House DIY Guide
Step-by-step DIY plans to build a chimney swift bird house, with correct dimensions, placement, and weatherproofing for

How to Build an Oriole Bird House: Step-by-Step DIY
Step-by-step DIY for building an oriole bird house with right dimensions, weatherproofing, predator-safe placement, and