Quick clarification: what 'bird breaster' means in DIY bird housing
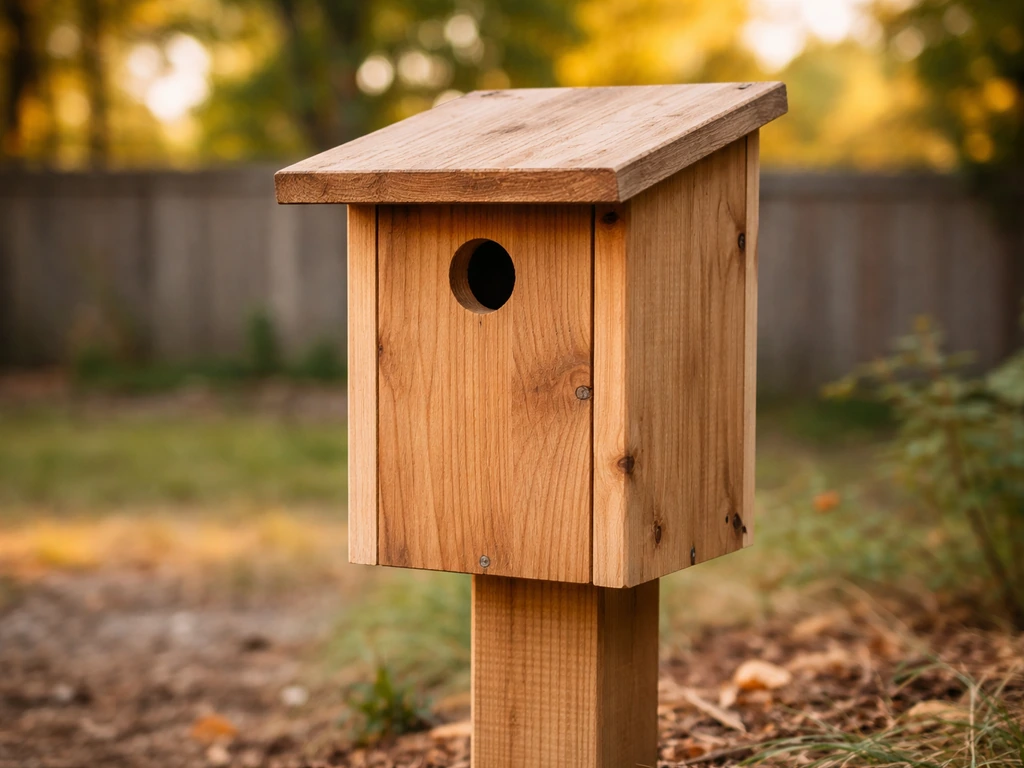
If you searched 'how to make a bird breaster,' you are almost certainly looking for one of two things: a nest box (a sheltered cavity where birds raise their young) or a roosting box (a shelter birds huddle in for warmth during cold nights). The term 'breaster' is not a standard birdhouse term, but it is a phonetic match for structures built specifically to face into, or shelter against, the prevailing weather, which is exactly the design logic behind a quality nest box or roost box. Either way, you are in the right place. This guide covers the full build from material selection to maintenance, and everything here is practical enough to complete in a weekend with basic tools.
One important thing to pin down before you start cutting wood: what is the structure actually for? A nesting box is designed to attract cavity-nesting species like bluebirds, chickadees, or wrens during breeding season, and it needs a precisely sized entrance hole, good drainage, and easy-open access for cleaning. If you want a breeding-focused setup, the steps for a nest box will show you how to size the entrance and build a safe, easy-to-clean box nest box build for breeding. A roosting box has fewer openings (to trap warmth), perches inside, and is most useful from late fall through early spring. A feeding shelter or enrichment platform is more like an open-sided lean-to that protects food from rain and gives birds a safe staging area. All three are worth building. This guide focuses primarily on the nest box because it is the most requested, the most beneficial to birds, and the most satisfying to build.
Choose the right design for the species and purpose
Before you cut a single board, decide which birds you are trying to help and what you want the structure to do. The entrance hole size alone is the single biggest variable that determines which species will move in. Too large and starlings or house sparrows take over. Too small and your target species cannot get through. Here is a quick reference for common backyard cavity nesters.
| Species | Entrance Hole Diameter | Recommended Box Height (from ground) | Spacing Between Boxes |
|---|
| Eastern Bluebird | 1.5 inches | 3 to 6 feet | 100+ yards apart |
| Tree Swallow | 1.5 inches | 4 to 6 feet | Pair boxes 15 to 25 feet apart |
| Black-capped Chickadee | 1.125 inches | 4 to 8 feet | Several hundred feet apart |
| House Wren | 1 to 1.25 inches | 5 to 10 feet | 100+ feet apart |
| Downy Woodpecker | 1.25 inches | 8 to 20 feet | Several hundred feet apart |
| Wood Duck | 4 x 3 inch oval | 6 to 20 feet (3+ ft above high water) | Several hundred yards apart |
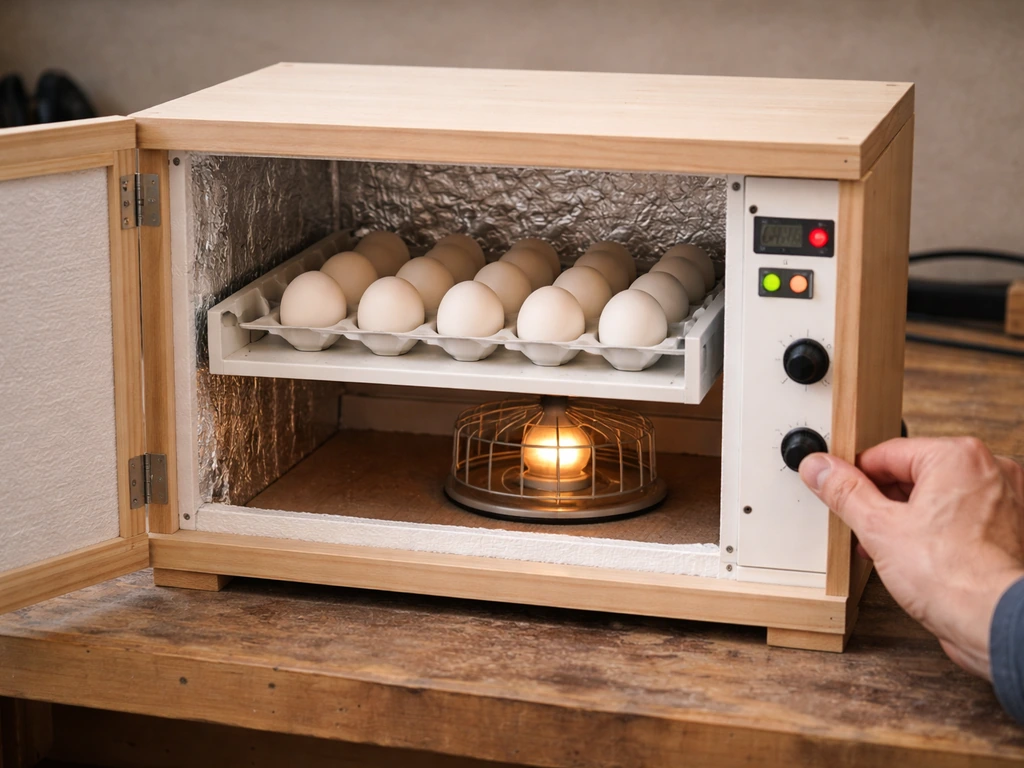
For a nesting box, the goal is a warm, dry, predator-resistant cavity that mimics a natural tree hollow. For a roosting box, flip the ventilation logic: you want minimal openings to conserve heat, and you install the entrance hole near the bottom so warm air stays trapped inside. For an enrichment or feeding shelter, you are basically building a rain-proof platform with a roof overhang and open sides. If you are also thinking about incubating eggs or raising chicks, that is a separate project with its own requirements around temperature control. If you move beyond nest boxes and want to handle eggs indoors, see how to make a homemade incubator for bird eggs as the temperature-control next step.
Wood: the right choice matters more than you think
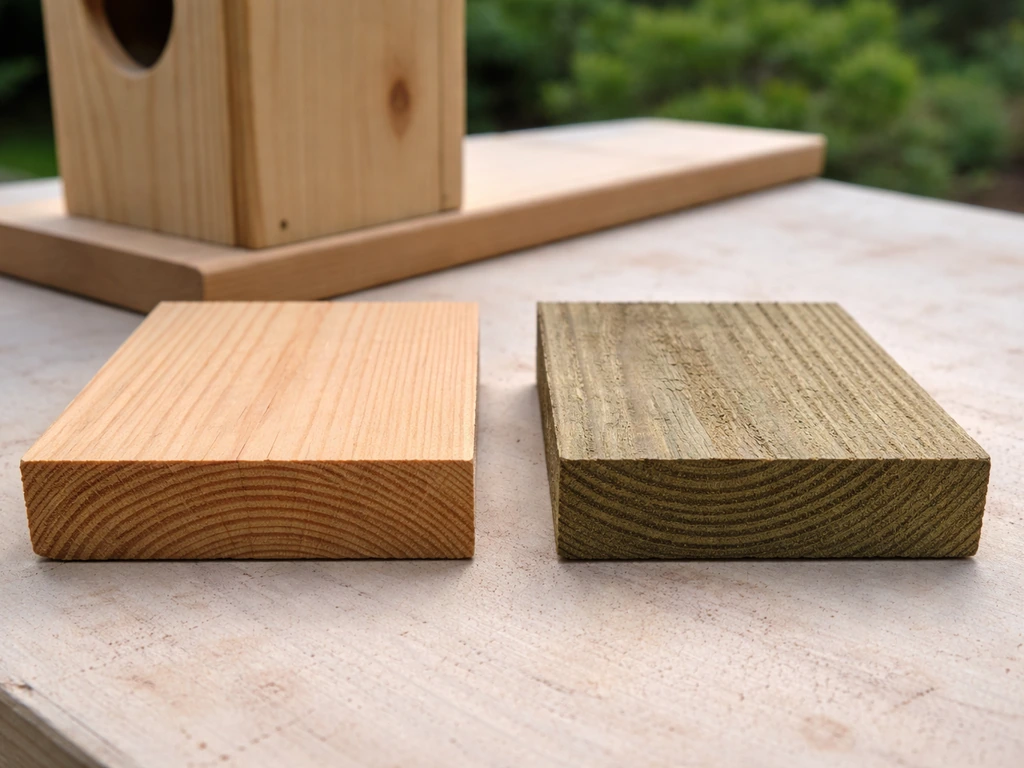
The single most important material rule: never use pressure-treated lumber for any part of a nest box. Pressure-treated wood contains pesticide and fungicide compounds that can leach into the interior and harm eggs, chicks, and adult birds. The same goes for creosote-treated timber or any salvaged wood that was used in a chemical context. Stick to naturally weather-resistant species or standard untreated lumber that you can weatherproof yourself.
- Cedar: the gold standard for outdoor bird boxes. Naturally rot-resistant, light, and easy to work with. Western red cedar is widely available and holds up well without any finish.
- Redwood: similar properties to cedar and equally safe. Can be harder to find in some regions.
- Pine or Douglas fir (untreated): perfectly fine and much cheaper. Use boards at least 3/4 inch thick for insulation. You will need to weatherproof the outside.
- Repurposed barn wood or fence boards: a great budget option as long as you confirm they were never treated with preservatives. Rougher texture on the interior actually helps chicks grip the walls when climbing out.
- Plywood: avoid it for the main box body. It delaminates when wet and the glues can off-gas. Use solid boards instead.
Finishes, coatings, and what not to use
Never paint or stain the inside of a nest box, full stop. Fumes and residue from any finish, even water-based latex, can irritate or harm nestlings in a confined space. The outside of the box is a different story: a few coats of a non-toxic, water-based exterior paint in a neutral earthy tone (tan, gray, olive) will extend the life of the box significantly. Avoid dark colors on the roof since they absorb heat and can cook eggs or chicks on hot days. If you are using cedar or redwood, you can leave the exterior completely unfinished and it will still last many years. Lead-based paints and alkyd (oil-based) paints should never be used on any bird structure.
Hardware, mesh, and fasteners
Use galvanized or stainless steel screws and hardware cloth wherever possible. Galvanized hardware resists rust and will not create sharp corroded edges that can injure birds. For any wire mesh (used in predator guards or feeders), galvanized hardware cloth in 1/2-inch or 1/4-inch mesh is the right choice. Avoid chicken wire: the openings are too large and the wire is too flimsy to stop a raccoon or snake. Smooth, rust-resistant materials at every joint and seam reduce injury risk for birds and extend the life of the structure.
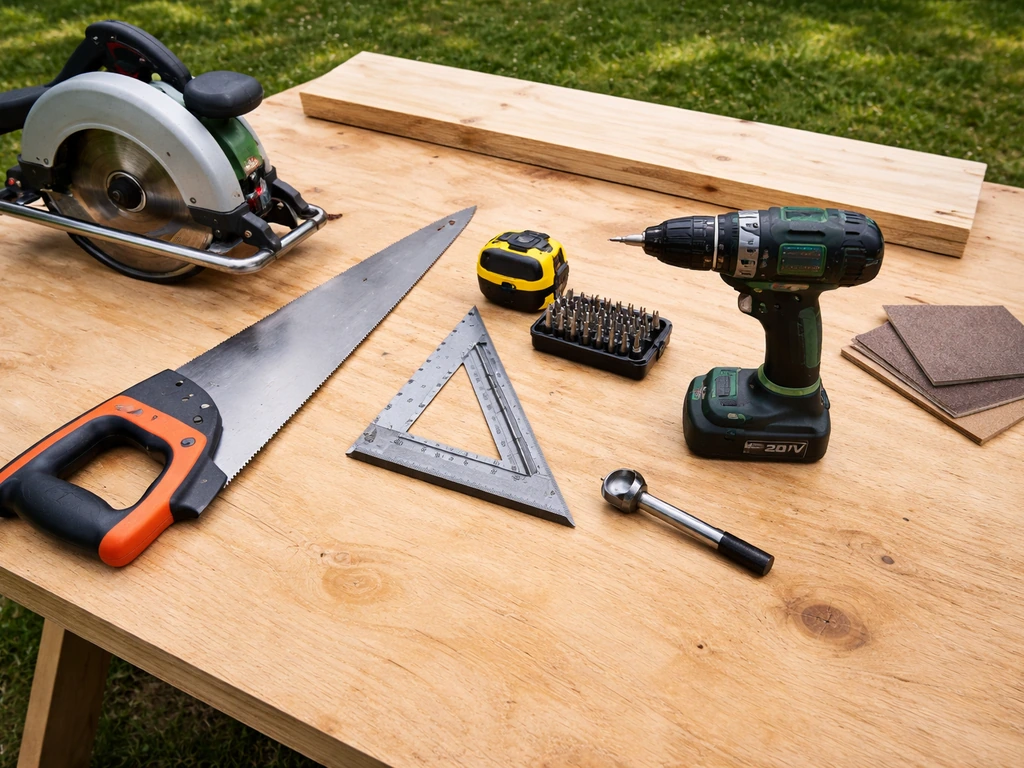
- Circular saw or hand saw for cutting boards to length
- Drill with a standard bit set plus a spade or Forstner bit for the entrance hole (sized to your target species)
- Sandpaper (80 and 120 grit) to smooth the entrance hole and rough up interior walls below the hole
- Exterior wood glue for joint reinforcement
- Galvanized wood screws (1.5 to 2 inch) for assembly
- Tape measure, pencil, and a square
- Optional: a jigsaw if you are cutting a slot vent or shaped roof
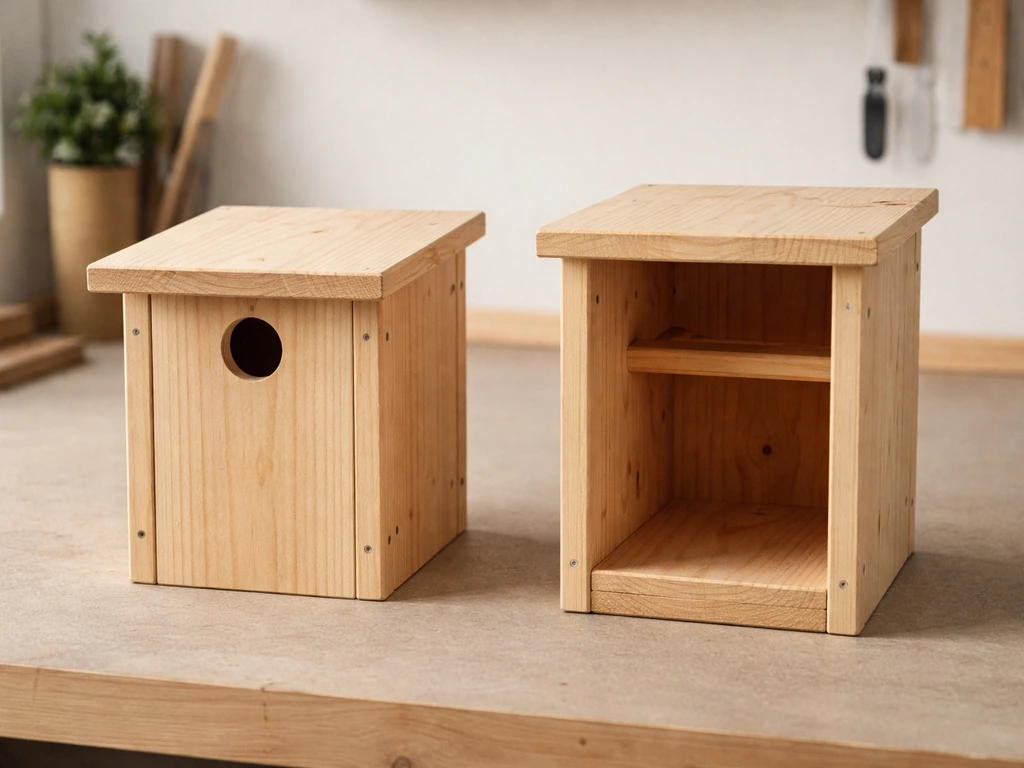
Step-by-step construction plan
The plan below is based on an Eastern Bluebird nest box, which is one of the most well-documented and beginner-friendly builds out there. The dimensions work for tree swallows too (same entrance hole size), and you can adapt by adjusting hole diameter and overall box depth for other species.
Cut list (from a single 1x6 cedar or pine board, 5 to 6 feet long)
| Part | Dimensions | Notes |
|---|
| Front panel | 5.5 inches wide x 10 inches tall | Drill 1.5-inch entrance hole centered, 7 inches from bottom |
| Back panel | 5.5 inches wide x 14 inches tall | Extra length for mounting holes top and bottom |
| Two side panels | 5.5 inches wide x 10 inches tall | Bevel top edge at 15 degrees to match roof slope |
| Floor | 4 inches x 4 inches | Clip corners at 45 degrees for drainage (creates four drainage gaps) |
| Roof | 7 inches wide x 8 inches long | Wider than box body for overhang on all sides |
Assembly steps
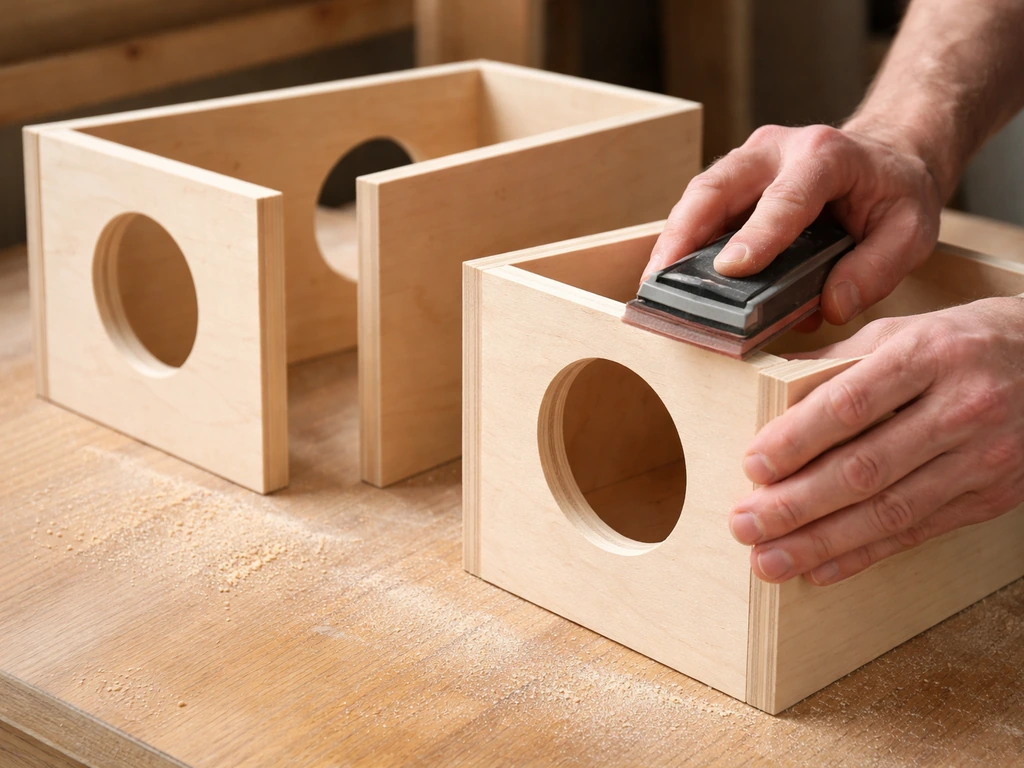
- Cut all pieces according to the cut list. Sand the entrance hole smooth on both faces so there are no splinters. The interior face below the entrance hole should be roughed up with 80-grit sandpaper or scored with a knife in horizontal lines to give fledglings grip when climbing out.
- Attach the floor to the back panel first using two galvanized screws and a bead of exterior wood glue. The floor sits flush at the bottom of the back panel.
- Attach the two side panels to the back panel, flush at the bottom, using screws and glue. The beveled top edges of the sides should angle toward the front to create the roof slope.
- Attach the front panel so it overlaps the side panels. If you want the front to swing open for cleaning, use a single screw at the top and a single screw or pivot pin at the bottom side, with a hook-and-eye latch to hold it closed.
- Drill four drainage holes in the floor, about 3/8 to 1/2 inch in diameter, or clip all four corners of the floor panel at 45 degrees. Both methods keep water from pooling inside after rain.
- Drill two ventilation holes near the top of each side panel, about 1/4 inch in diameter, or leave a 3/8-inch gap between the top of the front panel and the underside of the roof. This gap should be covered by the roof overhang so rain cannot enter, but air can circulate freely.
- Attach the roof last, centered side-to-side, with enough overhang at the front (at least 2 inches) to shade the entrance hole and shed rain away from the opening. Screw through the roof into the beveled tops of the side panels.
- For added thermal protection in hot climates, the North American Bluebird Society recommends a double-roof design: attach a second thin board on top of the main roof with a 3/8-inch spacer creating an air gap between the two layers. This keeps the interior significantly cooler on hot summer days.
- If using pine or untreated wood, apply two coats of water-based exterior paint or a tung oil finish to the outside only. Let it cure fully (at least 48 hours) before installation. Leave the interior bare.
Mounting, placement, and spacing
How you mount the box matters as much as how you build it. The most common mistake I see is nailing a box to a tree or fence post and calling it done. Trees and wooden posts give predators like raccoons, cats, and snakes a direct climbing route straight to the entrance hole. Mount your box on a smooth metal conduit pole (3/4 inch electrical conduit works great) or a PVC pipe, and fit a torpedo-style or stovepipe baffle below the box. A baffle is the single most effective predator deterrent you can add, and it is far more humane than anything involving spikes or sharp materials on the pole.
Height depends on species. For Eastern Bluebirds and Tree Swallows, mount the box 3 to 6 feet off the ground in an open area near a grassy field or lawn, with the entrance hole facing away from prevailing winds (typically facing east or southeast). For chickadees, 4 to 8 feet in a woodland edge works well. Wood Duck boxes should be at least 3 feet above the high water mark of a nearby pond or wetland, mounted on a pole in or near the water to keep terrestrial predators at bay.
Spacing between boxes is critical for territorial species. Bluebirds will not tolerate another bluebird nest within 100 yards. The one exception is pairing a bluebird box and a tree swallow box about 15 to 25 feet apart: the two species tolerate each other and this 'paired box' method actually increases bluebird success by keeping house sparrows from monopolizing a lone box.
- Face the entrance hole away from prevailing wind and heavy afternoon sun to prevent overheating and rain intrusion
- Place boxes in habitat that matches the species: open grassy areas for bluebirds, woodland edges for chickadees, near water for wood ducks
- Keep boxes at least 50 to 100 feet away from feeders to reduce predator traffic and bird congestion near the nest
- Use a smooth pole with a baffle rather than a tree, fence post, or wooden stake
- Check that the entrance hole is not obstructed by branches or foliage that give predators a launch point
Keeping birds safe: cleaning, maintenance, and troubleshooting
When and how to clean
blank" rel="noopener noreferrer">Clean the box after each brood fledges, not just once a year at the end of the season. Many cavity nesters raise two or even three broods per season, and a box stuffed with old nest material from the first brood is far less attractive for a second nesting attempt. It also harbors mites, blowfly larvae, and other parasites that can harm the next clutch. To clean, open the access panel, remove all old nesting material, and scrape any debris from the walls and floor. A Reddit discussion about bluebirds specifically advises blank" rel="noopener noreferrer">removing old nest material and asks whether to leave the nest behind so the box can be reused. NestWatch notes that whether you remove old nesting material can be a species-specific choice, and that Eastern Bluebirds may reuse nesting material when suitable alternatives are not available blank" rel="noopener noreferrer">To Clean Or Not To Clean Your Nest Box?. A stiff brush and a dilute bleach solution (one part bleach to nine parts water) can be used on the interior if you suspect heavy parasite load, but rinse thoroughly and let it air dry completely before closing the box.
At the end of the breeding season (September through February is the safe window in most of North America), do a thorough clean and inspection. Check for rot, loose screws, gaps in joints, and any cracks that let in water or predators. This off-season check is also when you can add or replace a baffle if the existing one is damaged.
Troubleshooting: why birds are not using the box
If the box sits empty through a full breeding season, run through this checklist before giving up on the location.
- Wrong entrance hole size: double-check the diameter matches your target species. Even a 1/8-inch difference can exclude the bird you want or invite the wrong one.
- Wrong habitat: bluebirds will not nest in a box hanging in a dense forest, and chickadees avoid wide-open fields. Make sure the box is in the right habitat for the species.
- Too close to human activity or feeders: some species are more sensitive to disturbance than others. Try moving the box 20 to 30 feet farther from foot traffic.
- Predator pressure: if you see evidence of predator attempts (scratch marks around the hole, disturbed nest material), add or upgrade the baffle immediately.
- Paint fumes or treated wood: if the box is new and you used any interior coating or pressure-treated material, the off-gassing may be driving birds away. Strip the interior and let it weather for a few weeks.
- Competition from invasive species: house sparrows and European starlings are aggressive cavity competitors. Use hole reducers sized to exclude starlings (1.5 inches blocks starlings but passes bluebirds), and monitor frequently during the early season.
Preventing mold, rot, and overheating
Mold inside a nest box is a sign of moisture getting in and not escaping. Check that your drainage holes are clear and not plugged with debris. Make sure the roof overhang is shedding water away from the entrance hole and any ventilation gaps. If you are in a very wet climate, a second roof layer with an air gap (the double-roof design mentioned earlier) helps enormously by keeping the roof surface cooler and drier. For overheating, the same double-roof setup works as insulation in summer, and mounting the box with the entrance facing away from afternoon sun is your first line of defense. Interior temperatures can reach dangerous levels in a dark, poorly ventilated box on a hot day, so do not skip the ventilation gaps near the roof peak.
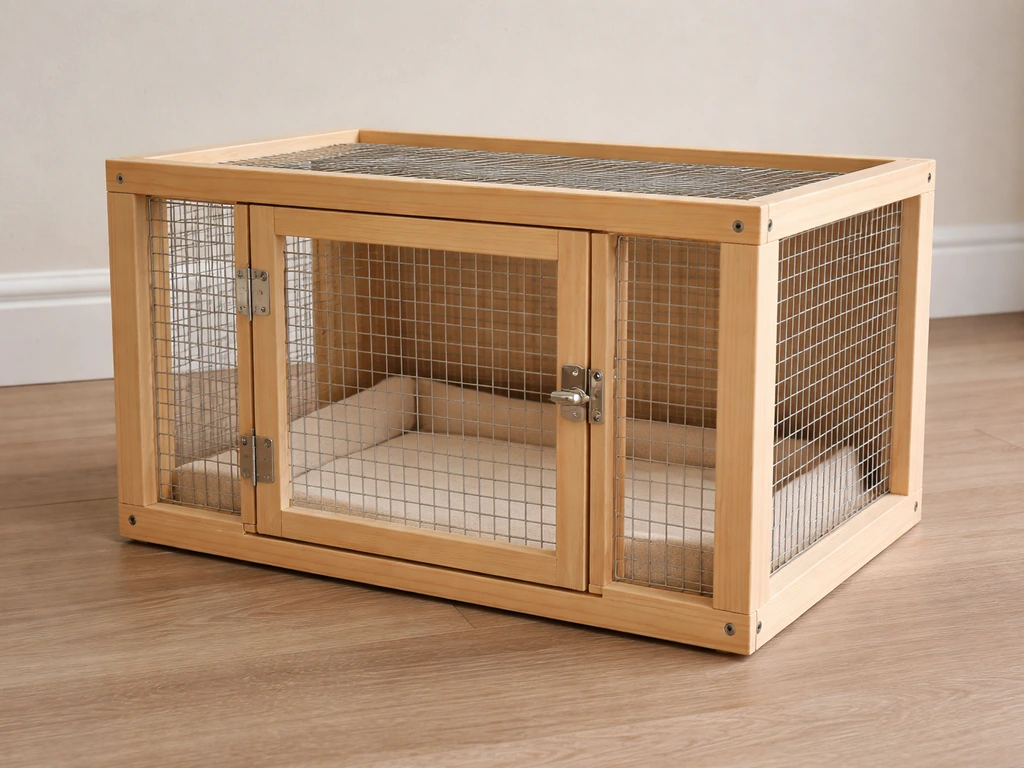
If you are building multiple structures and want to expand your setup, a brooder box for raising chicks indoors and a breeding box for encouraging nesting are natural next projects once your basic nest box is up and active. If you already have the basics down, follow the steps above to make a bird carrier that keeps the birds safe and comfortable during travel or short-term transport how to make a bird brooder. If you want the full indoor side of chick-raising, our guide on how to make a bird brooder covers the setup, heat, and brooder safety basics brooder box. The skills you build here translate directly to those more specialized builds.
Your build checklist before you hang the box
- Wood is untreated, unpainted on the interior, and at least 3/4 inch thick
- Entrance hole is the correct diameter for your target species (see species table above)
- Interior below the entrance hole is roughed up or scored for fledgling grip
- Four drainage holes or clipped floor corners are present and clear
- Ventilation gaps or holes are near the top of the side panels or below the roof
- Roof overhangs the entrance hole by at least 2 inches
- Access panel opens easily for cleaning and closes securely with a latch
- Box is mounted on a smooth metal pole with a predator baffle installed below the box
- Entrance hole faces away from prevailing wind and afternoon sun
- Box is spaced correctly from other boxes and from feeders
- No chemical finishes, treated lumber, or sharp hardware edges are present anywhere on the structure