You can absolutely build a safe, functional bird carrier yourself using basic tools and materials you probably already have. The key is knowing exactly what type of carrier you need before you cut a single piece of wood or wire, because the build requirements shift quite a bit depending on whether you're moving a pet parrot across town, transporting a rescued songbird to a wildlife rehabber, or just containing a backyard bird briefly for a health check. Get that part right first, and the rest of the build is straightforward.
How to Make a Bird Carrier DIY for Safe Transport

Marcus Thornton
21 Apr 2026
First: Figure Out What Kind of Carrier You Actually Need
"Bird carrier" covers a lot of ground, so let's narrow it down. There are three common use cases that DIYers build for, and each one has slightly different requirements.
- Pet travel carrier: This is for moving your own pet bird, like a parakeet, cockatiel, conure, or parrot, to the vet or on a trip. It needs to be species-sized, comfortable, secure, easy to clean, and calm enough to reduce stress. This is the most common DIY project and the main focus of this guide.
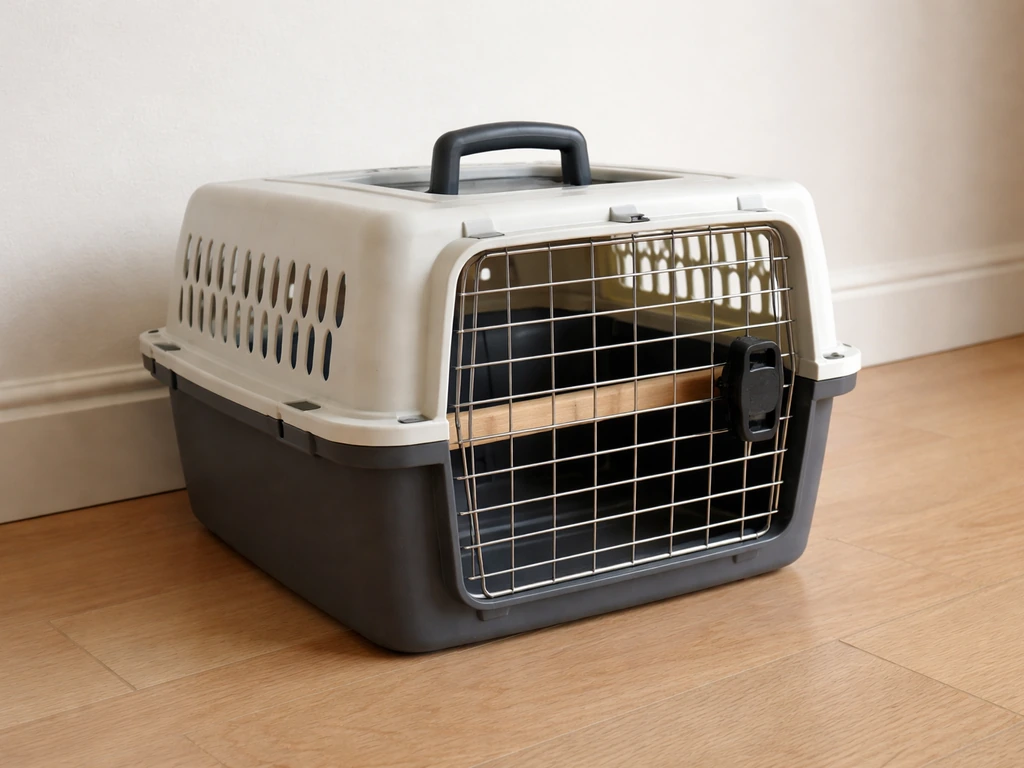
- Temporary transport cage for rescue: If you've found an injured wild bird, you need a quick, dark, ventilated box to move it to a wildlife rehabilitator. The goal here is containment and calm, not comfort. A shoebox with holes works in a pinch, but a purpose-built rescue transport box is better and reusable.
- Short-term handling container: Sometimes you just need to safely hold a bird briefly for a wing check, banding, or moving between enclosures. This is less of a carrier and more of a secure grab-and-go box.
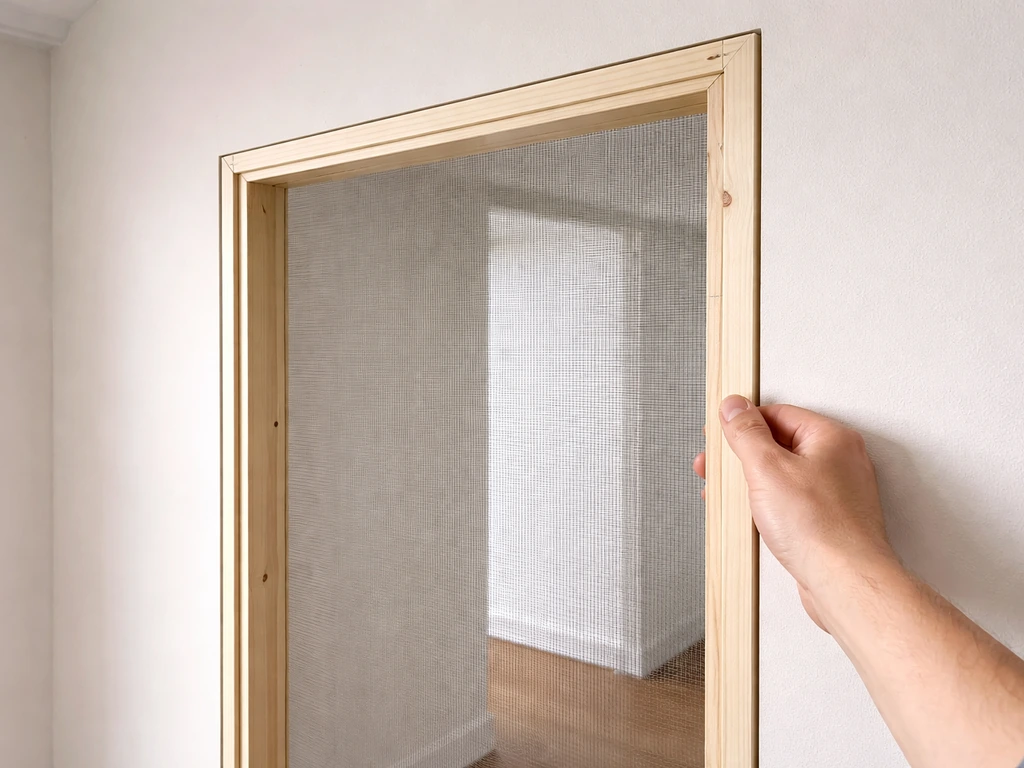
This guide focuses primarily on the pet travel carrier build, since that's the most involved and most useful project. Where the rescue transport box differs meaningfully, I'll call it out. If you're also working on a long-term housing project, a breeding setup, or a brooder for young birds, those are separate builds with their own requirements. If you’re instead trying to incubate bird eggs at home, you’ll want a purpose-built setup for temperature, humidity, and turning schedules homemade incubator for bird eggs.
What a Safe Carrier Actually Has to Do
Before you start building, you need to understand the design goals. A bird carrier isn't just a box with holes. It has to contain the bird completely (including wingtips, tail feathers, and feet), allow the bird to turn around and move a little, provide enough airflow to keep air fresh without creating a cold draft, stay structurally secure so the bird can't push or chew its way out, and be easy enough to clean that you'll actually do it between uses.
Size: Match the Carrier to the Bird
The interior dimensions need to be at least 1.5 times the bird's body length in every direction, so the bird can turn freely without dragging tail feathers on the floor or hitting its head on the ceiling. Restriction of movement in small containers genuinely increases stress responses in birds, so don't go too small thinking it'll feel cozy. Here are practical minimums by species type:
| Species Type | Approximate Body Length | Minimum Interior (L x W x H) |
|---|---|---|
| Small finch / canary | 4–5 inches | 8" x 6" x 8" |
| Parakeet / budgie | 7 inches | 10" x 8" x 10" |
| Cockatiel / lovebird | 12 inches | 14" x 10" x 14" |
| Conure / small parrot | 10–14 inches | 16" x 12" x 16" |
| African grey / Amazon parrot | 12–16 inches | 20" x 16" x 20" |
| Macaw / large cockatoo | 20–36 inches | 30" x 24" x 30" (minimum) |
These are minimums for short transport, not permanent housing. Going a little larger is fine. Going smaller is not.
Ventilation: Airflow Without Drafts
Ventilation holes or mesh panels should cover at least 20 to 25 percent of the total wall area, and they should be positioned on at least two sides of the carrier, ideally all four. Fresh air needs to move through, but direct drafts (especially cold ones) are a real welfare risk. Cold drafts in winter and heat buildup in summer are two of the biggest dangers during transport. Position vent openings toward the upper half of the walls so they promote airflow near the bird's head level while keeping the floor area relatively sheltered from wind.
Security: Escape-Proof by Design
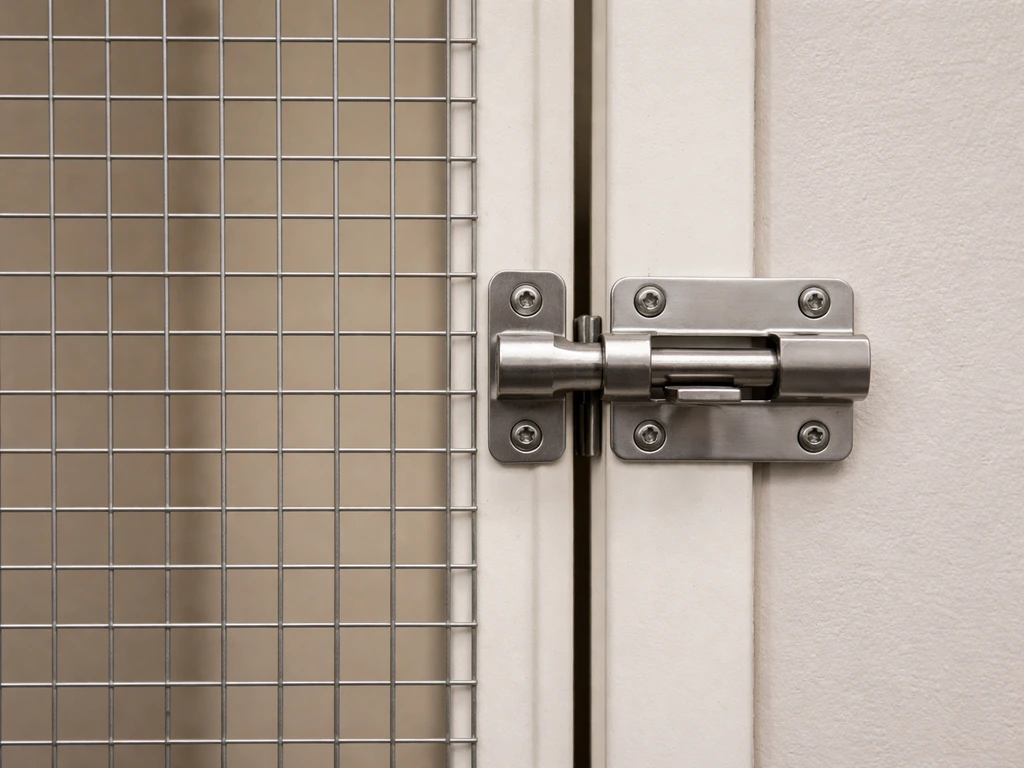
Birds are surprisingly good at finding weak points. Any gap wider than the bird's head is a potential escape route. blank" rel="noopener noreferrer">Wire mesh spacing should be no larger than half an inch for small birds and no larger than one inch for medium birds. Latches need to be the kind the bird cannot nudge open with its beak, which rules out simple hook-and-eye catches for parrots. Use barrel bolts, carabiner clips, or two-stage latches. If you're building for a parrot known to figure out hardware, layer your latch system.
Materials Safety: Avoid Zinc and Lead
This is where a lot of well-meaning DIY builds go wrong. Galvanized wire and hardware are everywhere at hardware stores, and they're cheap, but [the galvanized coating contains zinc, which is toxic to birds. ](https://www. mmhimages.
com/production/Creative/1OldBackup/fetchBackup/CVCKC2015proceedingsproof/data/PDFs/Avian%20Medicine/LightfootTeresaAviantox. pdf) Heavy-metal toxicity from zinc ingestion can affect multiple organ systems and has been documented repeatedly in captive birds that chew on galvanized cage hardware. If your bird is going to have any contact with wire mesh or hardware components, use stainless steel mesh, powder-coated steel (with a coating confirmed non-toxic and fully cured), or untreated hardwood framing.
Avoid any plastic coatings over wire unless you can confirm they're lead-free, since some vinyl coatings have been found to contain lead. When in doubt, stainless steel mesh is the safest wire option, full stop. In a related discussion on r/parrots, users also caution that chicken wire or galvanized wire can be risky for cage safety and recommend using only stainless steel for safer materials [stainless steel mesh](https://www. reddit.
com/r/parrots/comments/fezd2l/questions-about-materials-when-constructing-an-aviary/).
Tools and Materials Checklist
You don't need a fully equipped workshop for this. I've built functional carriers on a folding table in a garage. Here's what you actually need:
Tools
- Tape measure and pencil
- Hand saw or circular saw (for wood framing)
- Drill with bits (1/4" and 3/8" at minimum)
- Wire cutters or aviation snips (for mesh)
- Staple gun with 1/2" staples (for attaching mesh to wood frames)
- Sandpaper, 80 and 120 grit (to smooth all edges the bird can contact)
- Screwdriver (Phillips and flathead)
- Square or ruler for checking right angles
- Optional: jigsaw for door cutouts, which makes this much easier than a hand saw
Primary Materials
- 1/2" or 3/4" untreated pine or poplar boards for the frame (avoid pressure-treated wood, which contains chemical preservatives)
- Stainless steel wire mesh (1/2" x 1/2" spacing for small birds, 1" x 1" for larger birds)
- Small barrel bolts or carabiner-style latches for the door
- Stainless steel or brass screws and hinges (avoid zinc-plated hardware that the bird can reach)
- Non-toxic, water-based sealant or paint for any exterior wood surfaces (interior wood should stay bare or have only food-safe finishes)
- Sturdy carry handle: a hardware store cabinet handle or repurposed luggage strap works well
Repurposed and Budget Options
- Old wooden crates or wine boxes can be repurposed into carrier frames if the wood is untreated and unfinished on the inside
- Corrugated plastic panels (the kind used for yard signs) work as lightweight, cleanable side panels for rescue transport boxes
- An old pillowcase or thick cloth can temporarily line the interior and provide grip underfoot
- Binder clips can temporarily reinforce a door latch during an emergency build, though they're not a permanent solution for parrots
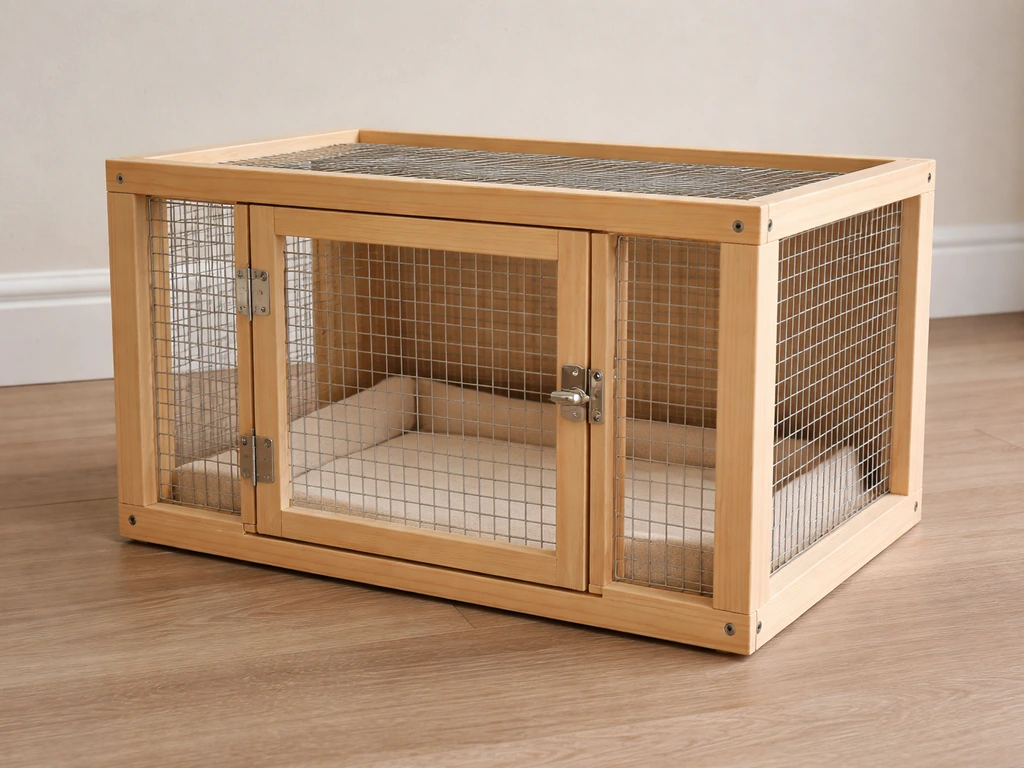
How to Build It: Step-by-Step
I'll walk through a medium-sized carrier suitable for a cockatiel or conure (interior dimensions roughly 16" x 12" x 16"). Scale the measurements up or down for your bird using the size table above. The basic construction approach is the same for any size.
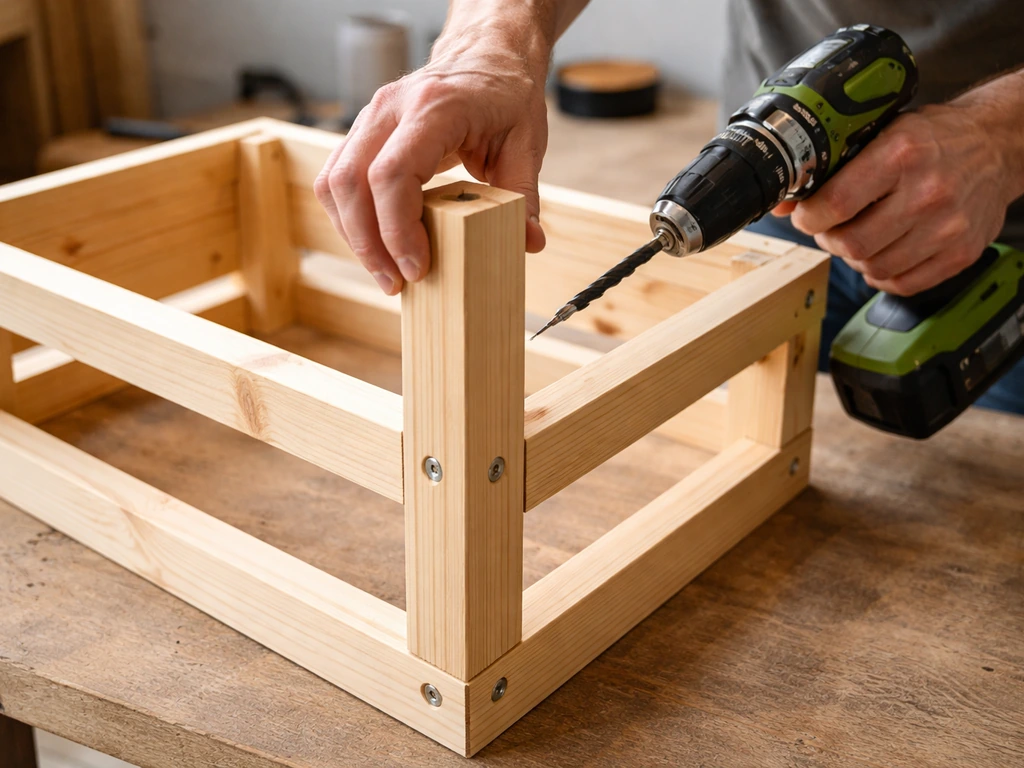
Step 1: Cut and Build the Frame
- Cut your boards to create four corner uprights and the top and bottom frame rails. For a 16" x 12" x 16" interior, you'll need four corner uprights at 16" tall, four rails at 16" long, and four rails at 12" long.
- Assemble the bottom rectangle frame first, screwing corner joints together and checking for square. This becomes your floor frame.
- Stand up the four corner uprights and attach the top rectangle frame the same way. You now have a box skeleton.
- Sand all interior edges and corners smooth at this point, before mesh goes on. Any rough spot the bird can reach is a hazard.
Step 2: Attach the Base
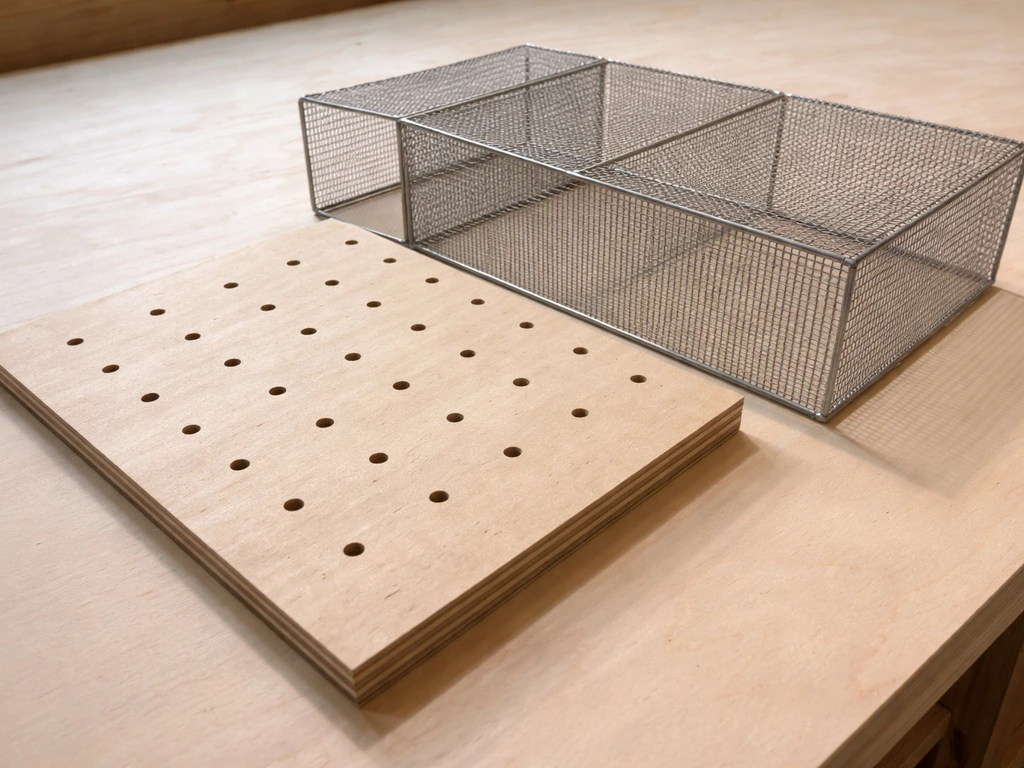
- Cut a solid plywood or hardboard panel to fit the interior bottom dimension (12" x 16" in our example). This is the floor.
- Drill 4 to 6 small drainage holes (1/4" diameter) through the floor panel in case of water spills or droppings. This keeps the floor from pooling.
- Screw the floor panel into the bottom frame from underneath so no screw heads are exposed inside the carrier.
- Optionally, line the floor with a removable tray cut from thin corrugated plastic sheet or a sheet of HDPE (cutting board material). This makes cleanup dramatically easier and is worth the extra step.
Step 3: Attach Mesh to Three Sides and the Top
- Cut stainless steel mesh panels to cover three walls and the top, sized to fit flush against the outside of each frame face.
- Staple the mesh to the wood frame using a staple gun, placing staples every 2 to 3 inches around the perimeter of each panel. Don't skip staples at corners.
- Check every staple to confirm it's fully seated. Any raised staple that a bird can pry up is a finger-shredder and an escape opportunity.
- The fourth wall (one of the long sides) will become your door panel, so leave that open for now.
- For a solid back wall option (useful for rescue transport or stress reduction): use a solid plywood or corrugated plastic panel on one wall instead of mesh, giving the bird a sense of security on at least one side.
Step 4: Build and Hang the Door
- Build a door frame from the same board material, sized to fit the open wall with about 1/8" clearance on all sides.
- Attach mesh to the door frame the same way you did the walls.
- Mount the door to the carrier using two stainless steel or brass hinges on one vertical edge. Test that it swings freely without binding.
- Install a barrel bolt latch at the top of the door and a second latch at the bottom. Two latches prevent the door from bowing open if the carrier is jostled, and they're much harder for a parrot to manipulate than a single latch.
- For parrots or clever birds, add a carabiner clip through both latches as a third security layer. It takes you two seconds to open and the bird zero seconds if you leave it unclipped.
Step 5: Add Ventilation Cutouts
If you used solid panels on any walls, cut ventilation openings now using a jigsaw or drill-and-file method. Openings should be in the upper half of each solid wall, sized at least 2" x 4" and covered with stapled-on mesh patches on the interior side. Mesh on the inside (rather than outside) means there's no exposed edge the bird can grab from inside. Aim for vent openings on at least two opposing walls so air can actually move through.
Step 6: Install a Perch
For any transport longer than a few minutes, a perch matters. Birds naturally grip a perch to stabilize themselves, and having nothing to grip increases stress and physical effort during a moving vehicle ride. Use an untreated hardwood dowel (3/8" diameter for small birds, 3/4" to 1" for medium parrots) mounted at about one-third the carrier height. Drill holes through opposite walls, insert the dowel, and secure it with a small screw through the wall into the dowel end on each side. Position it far enough from walls that the bird's tail won't drag. Don't install it directly above the floor center, or droppings will land right under the bird's feet constantly.
Step 7: Attach a Handle
Mount a sturdy carry handle centered on the top panel. A simple cabinet handle from the hardware store works perfectly. Use bolts that go all the way through the top frame (not just wood screws into the top rail) so the handle can actually bear the carrier's weight safely. Nothing is worse than a handle pulling free mid-transport.
Lining the Carrier for Comfort and Safety
The interior of the carrier needs to give the bird grip underfoot, absorb any droppings or spills, and avoid introducing toxic materials. Plain white paper towels are genuinely one of the best liner options: they're non-toxic, absorbent, easy to replace, and let you see droppings clearly (which matters for health monitoring). Lay two or three layers on the floor tray. Avoid cedar shavings, which release aromatic oils that are harmful to birds' respiratory systems. Also avoid newspaper printed with solvent-based ink if the bird will be walking on it, though most modern newsprint uses soy-based ink and is fine.
For drip control during longer trips, a removable floor tray (the corrugated plastic insert mentioned in Step 2) is your best tool. It contains any wet mess and slides out for cleaning without disassembling the whole carrier. If you're transporting a water container inside the carrier, use a small clip-on water tube or a heavy ceramic coop cup that won't tip. Open water dishes in a moving vehicle are basically a soaking machine for your bird and the bedding.
For cleaning between uses, the carrier should be washable with warm water and a mild, unscented dish soap. Rinse thoroughly and let it dry completely before the next use. Never use bleach-based cleaners inside any surface the bird will contact without a very long drying time and thorough rinse. A dilute white vinegar solution (1 part vinegar to 10 parts water) is effective and bird-safe for regular cleaning.
Customizing Your Carrier
Partial Cover for Stress Reduction
Covering a portion of the carrier with a light breathable cloth (like a thin cotton pillowcase or a cotton tea towel) can significantly calm many birds during transport. Darkness mimics the security of a roosting spot and reduces visual stimulation from passing scenery. Cover the top and two or three sides, leaving the front open for airflow. The critical rule here is that the cover must not restrict airflow. A tightly wrapped cover that seals off ventilation openings defeats the purpose entirely and creates a dangerous heat buildup.
Divider for Transporting Multiple Birds
If you need to move two birds in one carrier, build a removable center divider from the same mesh-and-frame approach you used for the walls. The divider slots into a pair of shallow grooves cut into the floor tray and top frame, so it holds securely but can be removed for cleaning. Even birds that live together can squabble under the stress of transport, so separating them is worth the extra build effort. Make sure each compartment still meets the minimum size requirements for its occupant.
Feeding and Water Setup for Longer Trips
For trips under two hours, most healthy birds don't need food or water access during transport. For longer trips, clip a small water tube or a heavy clip-on dish to the door mesh at a height the bird can comfortably reach from its perch. A small amount of soft food (apple slice, leafy greens) is less messy than seed during transport and provides some hydration. Avoid loose seed in an enclosed carrier during a moving vehicle ride, since it shifts and creates an uneven, unstable floor surface.
Portability Upgrades
- Add rubber furniture feet to the bottom corners so the carrier doesn't slide on smooth vehicle seats
- Use a car seat belt run through the carry handle to secure the carrier during vehicle transport
- For very small builds (finch or parakeet size), a shoulder strap attachment on both sides of the top makes walking transport much easier
- Label the carrier with the bird's species and your contact info if you're building for rescue transport use
Using the Carrier Safely: Before, During, and After the Trip
Introducing the Bird to the Carrier
A bird that has never seen the carrier before will likely resist going in on the day you actually need to travel, which is frustrating for everyone. Introduce the carrier at least a week in advance by leaving it open in the bird's room with a treat inside. Let the bird explore it voluntarily. Some birds will walk right in after a couple of days; others take longer. The goal is that the carrier doesn't become associated exclusively with stressful events like vet visits. You can also do short practice sessions where you close the carrier for five minutes, then open it, to get the bird comfortable with confinement before a real trip.
During Transport
Keep the carrier stable and out of direct sunlight. In a vehicle, placing it on the floor behind the front seat is often more stable than a seat, and it's further from dashboard vents that blast hot or cold air. In warm weather, watch for signs of heat stress: panting, open-beak breathing, or wing lifting away from the body. In cold weather, avoid placing the carrier near open windows or air conditioning vents. If you're moving from a cold environment to a warmer vehicle, allow the bird to acclimate gradually rather than going from cold to full heat immediately. Maintain contact with the bird during handling and transport rather than leaving it unattended for extended periods.
After Arrival
Give the bird time to settle before you try to move it from the carrier. Open the door and let it come out on its own when possible. If you're at the vet or a new location, reduce additional stressors by keeping the environment quiet. After any trip, remove and replace all liner material, wipe down the interior surfaces, and check the mesh and latches for any wear before the next use.
When to Call a Vet Immediately
If at any point during or after transport your bird shows any of the following, stop and get to an avian-experienced vet as quickly as possible:
- Open-mouth or open-beak breathing that doesn't stop after the bird has rested and cooled down
- Labored breathing with visible tail bobbing on each breath
- Coughing, clicking, or discharge from the nostrils or mouth
- Bleeding that cannot be controlled
- Complete inability to grip or stand (distinct from normal transport unsteadiness)
- Loss of consciousness or extreme unresponsiveness
These are not wait-and-see symptoms. Birds are good at masking illness and by the time symptoms are this visible, the situation is genuinely urgent. Keep the carrier warm, keep the bird quiet, and get to a vet. APHIS guidance for transported animals is clear that physical distress observed during transport should trigger veterinary care as soon as possible, and that applies equally to your pet bird in a DIY carrier.
A Few Honest Notes From Experience
My first DIY carrier had a single hook-and-eye latch on the door. My cockatiel had it open in under a minute. The second version had two barrel bolts and a carabiner. Lesson learned the easy way, fortunately while I was still in the room. The other thing I got wrong early on was mesh spacing: I used 1" mesh for a small parakeet, and the bird pushed its head through repeatedly trying to get out, which is both stressful for the bird and hard to watch. Go smaller on mesh spacing than you think you need.
The materials safety piece is genuinely worth taking seriously. The galvanized hardware issue isn't paranoia; it's a documented toxicity risk that avian vets see in practice. The extra cost of stainless steel mesh is real but modest for a carrier-sized project, and it's a one-time build you'll use for years. That's where I'd spend the money if I had to choose.
If your project interest goes beyond just transport, there's a lot more to explore on this site around housing, breeding setups, and brooder builds for young birds. The construction principles overlap more than you'd think, and the material safety rules are the same across all of them. Once you've built a solid carrier, you'll have a good feel for the techniques that apply to everything else. If you’re specifically wondering how to make a bird breaster, the same carrier safety principles and material choices will help you design a setup that keeps birds secure and comfortable. If you're looking for instructions, this guide also shows the key steps for building a bird breeding box safely and effectively.
FAQ
How do I choose the right size so my DIY bird carrier is safe without being too roomy?
Use the bird’s full body length plus a working “turning margin” of about 50% in each direction, then confirm clearance by doing a fit test with a soft measuring tape (not just the bird at rest). Avoid relying on wing span measurements alone, since the bird can extend tail and feet during stress. If your bird sits low or tucks, size up rather than down because stress often changes posture and increases space needs.
What should the perch be made of, and can I use dowel material from outside?
Stick to untreated hardwood for the perch, since treated or varnished wood can off-gas or be chewed. If you source wood from outdoors, assume it may have residues or pesticides, sand it thoroughly, and rinse, then air out until there is no odor. Avoid dowels with knots near the gripping area, birds can grip awkwardly and create pressure sores during transport.
Can I use a plastic bottom instead of paper towels and still keep the carrier hygienic?
You can, but only if the surface is non-slip and easy to remove and disinfect. Paper towels are recommended because they absorb and let you detect droppings quickly, but a removable plastic insert works well for wet-mess containment if it stays dry and has traction. If you notice pooling water or slick footing, switch to liners that absorb and provide grip.
How do I prevent the carrier from getting overheated when I cover it with cloth?
Leave vents fully unobstructed on at least two sides, and do not wrap the cloth so tightly that it seals air holes. Check temperature by placing your hand near (not on) the mesh and front opening after 5 to 10 minutes, if the area feels hot and muggy, uncover and improve airflow. In warm weather, use lighter cloth and limit the duration the cover stays on.
Is it safe to reuse the same liner material or cleaning supplies between trips?
Replace absorbent liners completely between uses, do not “top off” soiled paper towels. For cleaning, use warm water plus mild unscented dish soap, then rinse thoroughly and dry completely to prevent residue buildup. Keep separate tools for the carrier if you also clean food or water items, cross contamination is a common sanitation mistake.
What’s the safest way to attach and route water for longer trips?
Use a clip-on water source that cannot tip, and secure tubing or a cup so the bird cannot chew through it. Mount the water access point at perch height, so the bird can drink without stretching upward toward the ceiling. If you see wet bedding or liner saturation, switch to a heavier cup or reduce access, open water inside the carrier turns quickly into a soaking hazard.
How far apart should vent openings be, and can I use only one side for airflow?
Aim for ventilation on at least two opposing sides so air actually moves through the carrier, one-sided vents often create stagnant air. Place openings toward the upper half of the walls to reduce direct drafts at the floor level while still bringing fresh air near the head. If you must vent only two sides, make sure they are not blocked during transport (for example, by your body, seat, or car door).
What if my bird is a strong chewer and keeps testing the door mesh or latches?
Use a latch style that requires a two-step action or is difficult to nudge, and double-check that all exposed hardware cannot be reached from inside. Add a second barrier layer if needed, for example mesh that is set in a frame rather than loose edges. During the first trip, inspect the latch and mesh immediately after unloading, chew marks can indicate early failure points before a full escape attempt.
Can I transport two birds in the same DIY carrier during travel?
It can be done safely only if each bird has its own space that meets the minimum turning and movement requirements and the divider is secure enough to prevent contact during squabbling. Build the divider so it is removable for full cleaning, because droppings and feather dust accumulate quickly between trips. If either bird is visibly aggressive, separate them even if it means using two carriers, injury risk rises sharply during vehicle movement.
What are common DIY mistakes that lead to escape or injury during transport?
The most common issues are oversized mesh spacing, weak latches, and placement of hardware that birds can reach and pry. Another frequent mistake is installing ventilation that accidentally creates drafts or is blocked by how the carrier sits in the car. Finally, using toxic wire or coatings (especially galvanized hardware) is a serious material error, replace those components rather than “hoping the bird won’t chew.”
How should I acclimate a bird to the carrier if it panics when the door closes?
Start with voluntary exploration, then do very short confinement sessions where the bird can calm before you extend the time. If panic spikes when the door is closed, focus on building a routine that closes the door briefly, then immediately reopens while the bird is still coping, not after it escalates. Use gentle covering for visual calm only if airflow remains unrestricted, and avoid practicing in the exact same conditions as the real trip until the bird is reliably calmer.
When should I stop DIY transport and seek urgent veterinary help?
Seek an avian-experienced vet immediately if you observe labored breathing, open-mouth gasping, persistent wing lifting away from the body, repeated attempts to vomit, seizures, severe lethargy, or any inability to maintain normal posture. Do not assume “it will pass,” birds often mask illness until it becomes emergency-level. Keep the bird warm and quiet while traveling, but prioritize getting seen quickly over additional at-home troubleshooting.
Next Articles
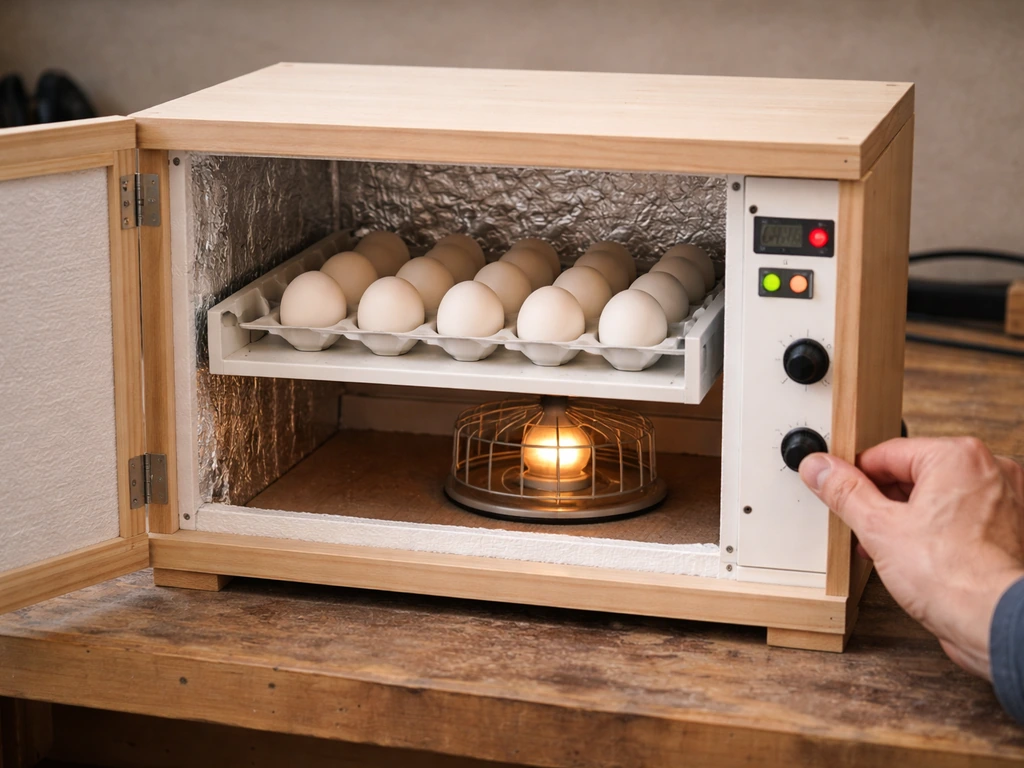
How to Make a Homemade Incubator for Bird Eggs
Step-by-step DIY guide to build a bird egg incubator with stable heat, humidity control, egg turning, calibration, and t

How to Build a Chimney Swift Bird House DIY Guide
Step-by-step DIY plans to build a chimney swift bird house, with correct dimensions, placement, and weatherproofing for

How to Build an Oriole Bird House: Step-by-Step DIY
Step-by-step DIY for building an oriole bird house with right dimensions, weatherproofing, predator-safe placement, and