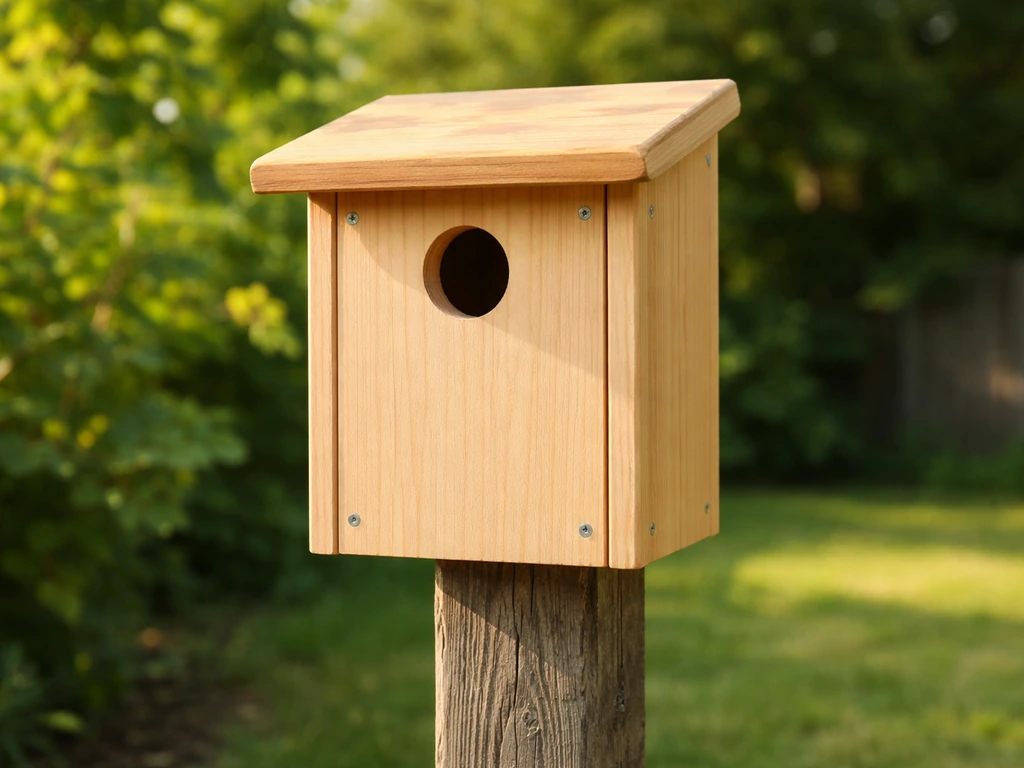
You can build a functional bird breeding box in an afternoon with basic tools, a few dollars of lumber, and the right dimensions for your target species. The single most important thing is getting the entrance hole size exactly right, too small and the bird can't get in, too large and predators or bully species will take over. Everything else: wood choice, ventilation, drainage, placement, and a way to open the box for cleaning, follows from there, and none of it is complicated once you know what you're doing. If you are also planning an incubation or brooding setup, you can follow guides on how to make a bird breaster to support the next stage safely.
How to Make a Bird Breeding Box DIY Guide for Beginners

Marcus Thornton
13 May 2026
Choose the right species and box type first
Before you cut a single board, decide which bird you want to attract. Every species has its own preferred entrance hole size, interior floor area, and cavity depth, and those numbers aren't suggestions, they're the difference between a box that gets used and one that sits empty for years. The four most popular backyard breeding boxes are for Eastern Bluebirds, Black-capped Chickadees, House Wrens, and Wood Ducks. If you live near open fields or farmland, American Kestrels are also a fantastic option.
Here's a quick comparison of the critical specs for each species so you can pick your build before buying materials:
| Species | Entrance Hole | Floor Size | Box Depth | Notes |
|---|---|---|---|---|
| Eastern Bluebird | 1-1/2" round | 4"x4" to 5"x5" | 5-1/2" to 8" | Entrance to floor: 5–6" |
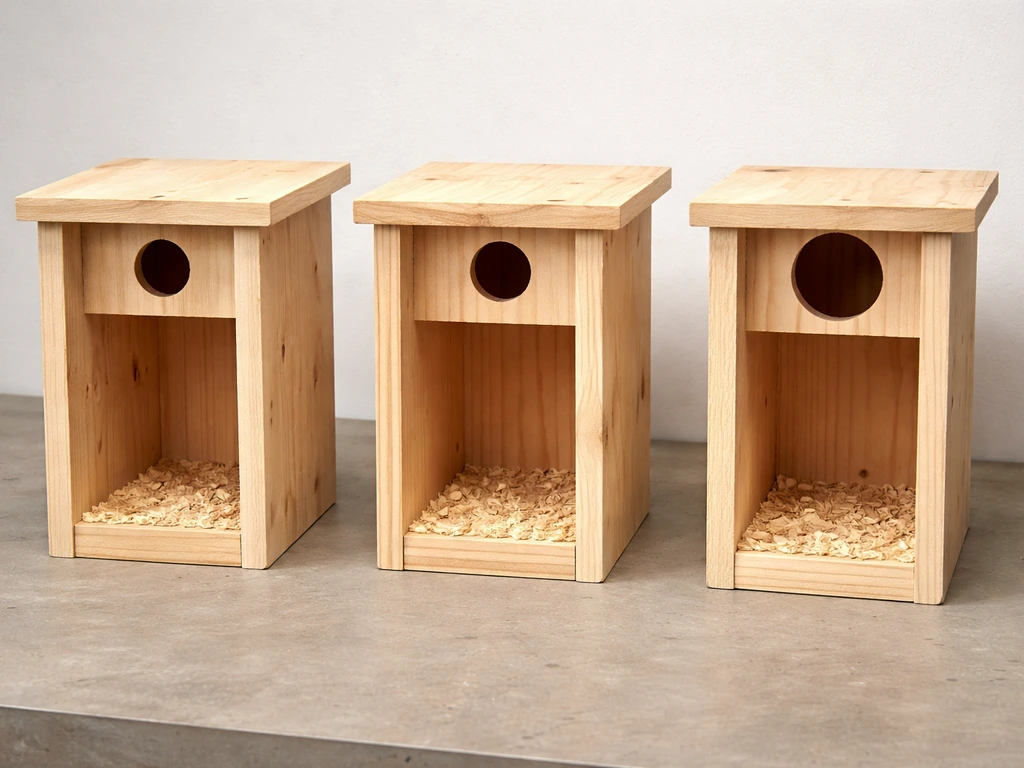
| Black-capped Chickadee | 1-1/8" round | 4"x4" | 8–10" | Fill with wood shavings to start |
| House Wren | 1-1/8" to 1-1/4" round | 4"x4" | 6–8" | Smaller hole keeps House Sparrows out |
| Wood Duck | 3" high x 4" wide (ellipse) | 12"x12" | 22–24" | Hardware cloth ladder inside is essential |
| American Kestrel | 3" round | 8"x8" to 9"x9" | 12–15" | Drainage + wood shavings on floor |
If you're a first-time builder, I'd honestly start with an Eastern Bluebird or Chickadee box. They're forgiving to build, the dimensions are well-documented, and both species are widespread enough that you'll likely have some success. Wood Duck boxes are also very rewarding, but they're larger and require a water or wetland setting nearby. Kestrel boxes are worth it if you're in more rural or open-country habitat, these birds are in serious decline and a good box genuinely helps.
Materials, tools, and safe wood choices
The best wood for a breeding box is untreated cedar. It's naturally rot-resistant, doesn't warp badly after a few seasons of rain and sun, and it's safe for birds. Cypress and redwood are equally good. Pine works fine too and is usually the cheapest option at a hardware store, just know it won't last quite as long outdoors. For larger boxes like Wood Duck or Kestrel, exterior-grade CDX plywood (non-pressure-treated) is a practical and affordable choice.
One rule that's non-negotiable: never use pressure-treated lumber. It can leach chemicals that are genuinely toxic to wildlife. I've seen people reach for it because it's sitting in the scrap pile, but it's not worth the risk. Stick to 3/4-inch rough-cut boards if you can find them, the rough texture on the inside makes it easier for fledglings to climb out, especially in deeper boxes. Smooth interior walls can trap chicks.
Don't paint or stain the inside of the box, and avoid glossy finishes anywhere. If you want to protect the exterior, a single coat of raw linseed oil or an exterior water-based stain in a neutral earth tone is fine. Leave the inside completely bare.
What you'll need
- One 6-foot length of 1x6 or 1x8 cedar, pine, or redwood (for smaller boxes like bluebird or chickadee)
- Exterior-grade screws (1-1/4" to 1-5/8" deck screws work great — they won't rust and split the wood less than nails)
- A drill with a spade bit or hole saw in the correct size for your species
- A jigsaw or handsaw for cutting panels
- A measuring tape, pencil, and square
- Sandpaper (80-grit, just for any rough exterior edges — not the inside)
- One eye hook or small barrel bolt for the cleanout door latch
- Optional: a predator guard baffle (more on this below)
If you don't have a drill press, a hand drill works perfectly. For the entrance hole, a sharp spade bit or a hole saw attachment gives you a clean cut. If you're cutting an elliptical hole for a Wood Duck box, a jigsaw is the easiest tool for the job. Most of these builds are genuinely achievable with a drill, a handsaw, and an afternoon.
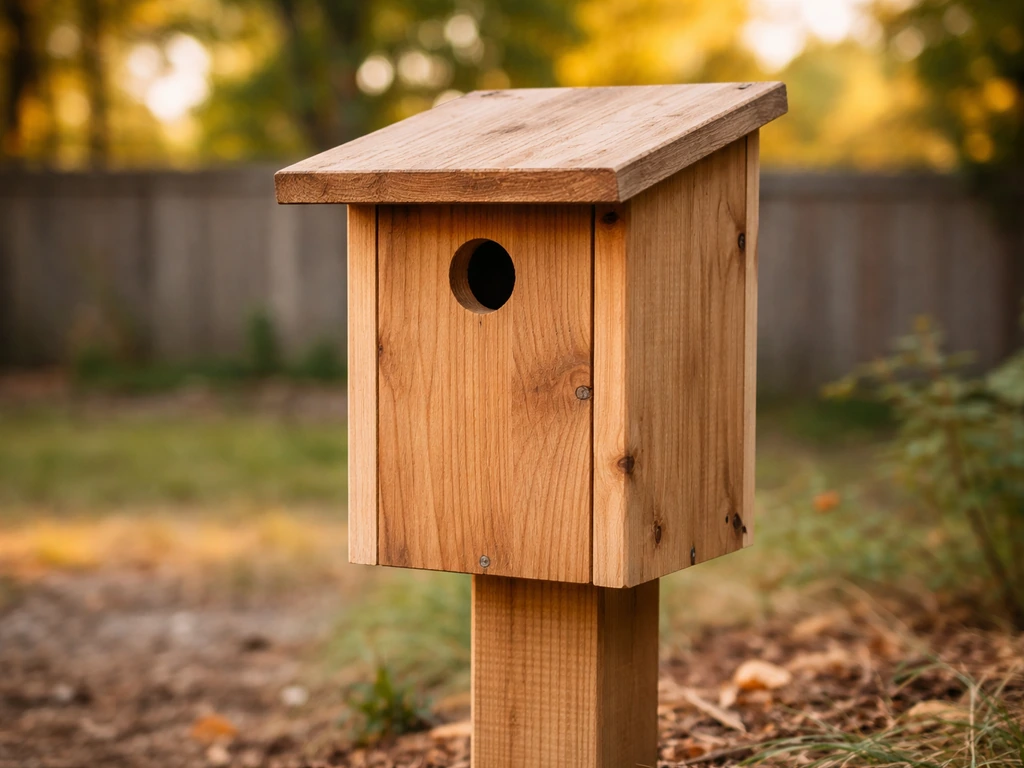
Step-by-step build: the Eastern Bluebird box
I'm using the Eastern Bluebird box as the walkthrough example because it's the most versatile starting point and the dimensions are extremely well-tested. Once you understand this build, swapping dimensions for another species is straightforward.
Cut your panels
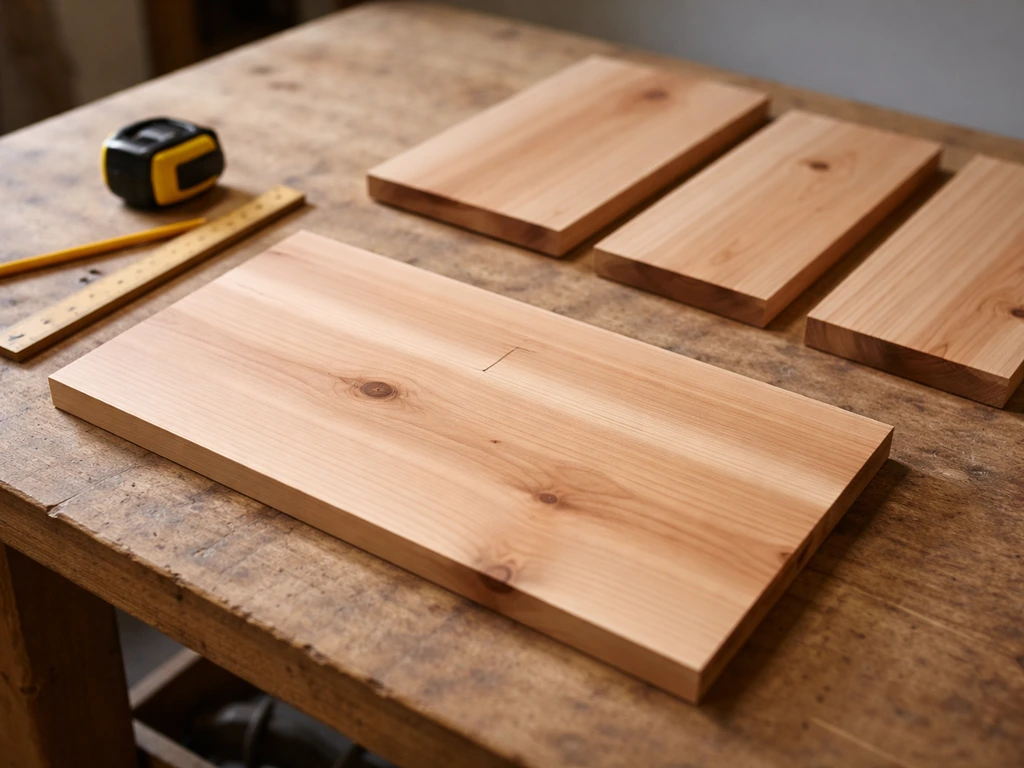
From a 1x6 cedar board (actual width is about 5-1/2"), cut the following pieces: a front and back panel each at 9" tall, two side panels at 9" tall x 5-1/4" wide (this allows a snug fit inside the front and back), a floor panel at 4" x 4", and a roof panel at 7" x 8" (the extra width gives you that critical overhang on all sides). For the floor, clip the four corners at a 45-degree angle or drill four 1/4" drainage holes, either approach keeps rainwater from pooling inside the box.
Drill the entrance hole
On the front panel, measure down 1-1/2" from the top edge and mark the center. Drill your 1-1/2" diameter entrance hole centered on that mark. The distance from the bottom of the entrance hole to the floor of the box should be between 5 and 6 inches, this depth is intentional and keeps the nest out of reach of a predator's arm. Use wood that's at least 3/4" thick for the front panel; thicker wood also gives more protection at the entrance hole. Do not add a landing perch below the hole, perches help predators and competitors more than they help bluebirds.
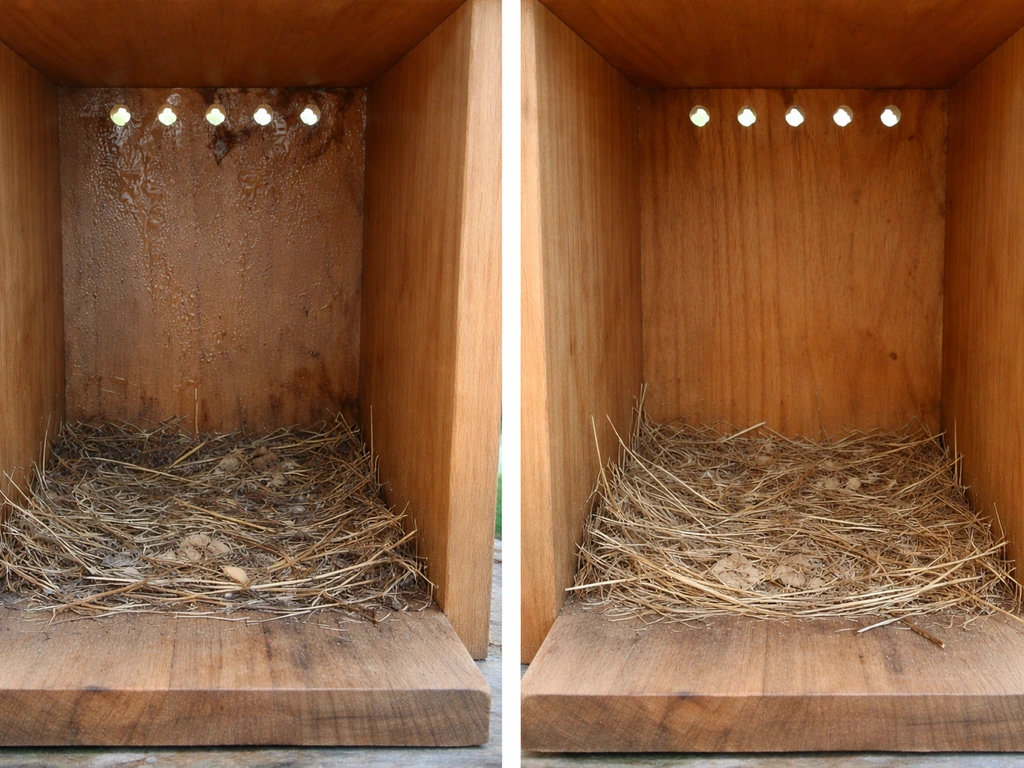
Add ventilation and drainage
Drill two or three 1/4" ventilation holes near the top of each side panel, just below where the roof will sit. These give cross-ventilation without letting rain in, especially if your roof has a good overhang. The drainage holes in the floor corners do double duty: they drain water and allow a little airflow from below. Moisture inside a nest box is one of the biggest killers of eggs and chicks, so don't skip this step.
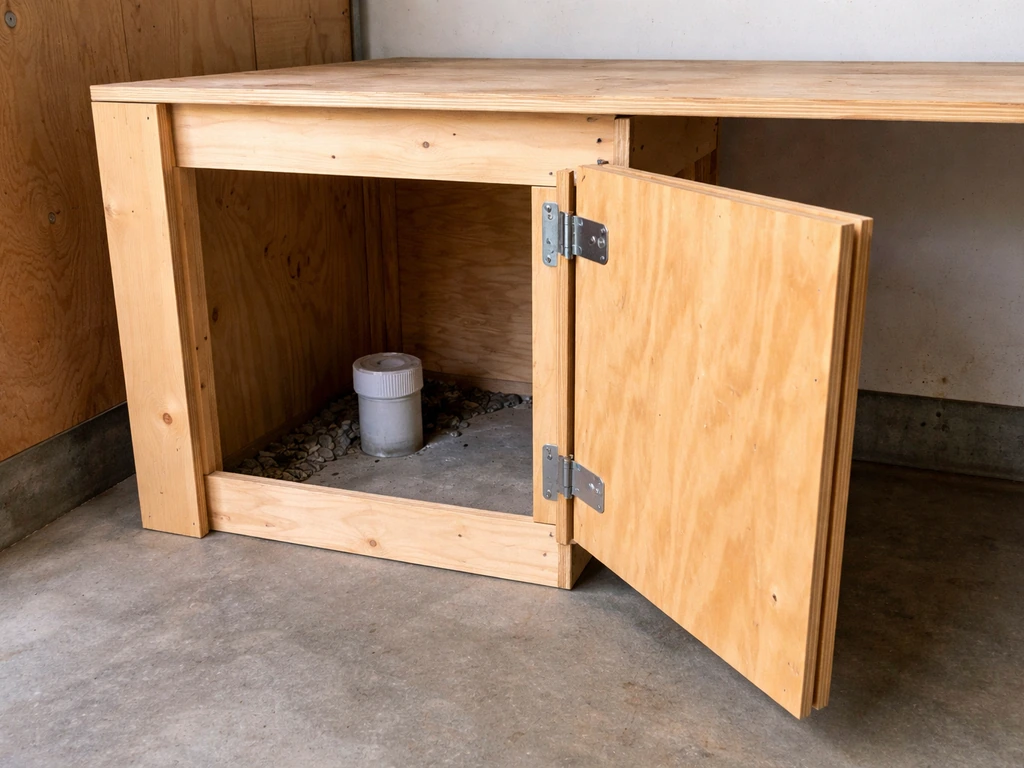
Build in a cleanout door
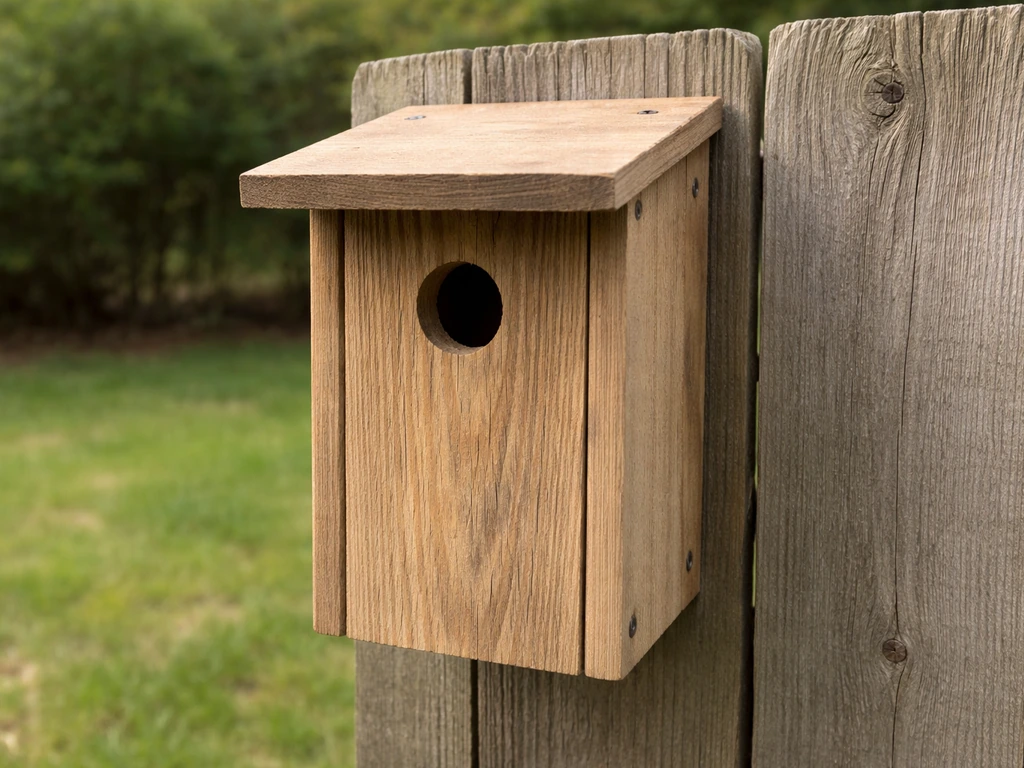
Make one side panel pivot open for cleaning. Instead of screwing the side panel in at the bottom, put a single screw through the top of the side panel into the front panel so it pivots, and secure the bottom with a small barrel bolt or eye hook. When you need to clean the box after a brood fledges, you just unlock the latch and swing the panel open. I've tried designs with removable roofs and hinged fronts, and an opening side panel is the simplest and most reliable, it stays sealed during storms and opens easily for nest checks.
Assemble and finish
Assemble with exterior screws rather than nails. Pre-drill your pilot holes to avoid splitting the boards, especially near edges. Attach the floor to the sides first, then add the front and back. Attach the roof last, making sure it overhangs the front by at least 2" and the sides by at least 1", this keeps rain off the entrance hole and shades the interior. Do not caulk or seal any of the gaps around the ventilation holes or drainage holes. Those gaps are features, not mistakes.
Optional upgrades worth doing
- Predator guard: a Noel guard is a rectangular tube of hardware cloth stapled over the entrance hole, extending 4–6" outward — it stops raccoon arms from reaching in
- Extended roof: a roof that extends 5" or more beyond the front face makes it much harder for animals to reach in from above
- Roughened interior front wall: score horizontal grooves with a saw or chisel below the entrance hole to help fledglings climb out
- Mounting hole: pre-drill a hole through the back panel so you can attach the box to a post with a single long screw or bolt — makes remounting much easier
Quick dimension guide for other species
For a Chickadee box, use the same basic design but reduce the floor to 4"x4", set the box depth to about 8", and drill the entrance hole to exactly 1-1/8", no bigger, or House Sparrows will move in. For a Wood Duck box, scale everything up: 12"x12" floor, 22" of depth, an [elliptical entrance cut to 3" high x 4" wide](https://www. audubon.
org/news/how-build-wood-duck-nest-box), and staple a 10"x12" piece of hardware cloth to the inside front wall below the entrance hole so ducklings can climb out. For a Kestrel box, use an 8"x8" floor, 12–15" depth, a 3" round entrance hole drilled about 3" from the top, and four 1/4" drainage holes in the floor.
For Kestrels, the entrance should be a 3-inch round hole centered via the cut pattern, and the floor should include four 1/4-inch drainage holes 3-inch entrance hole and four 1/4-inch drainage holes.
Where to put it, how to mount it, and when to do it
Placement is almost as important as the build itself. A perfectly built box in the wrong spot will sit empty. Here's what actually matters for each common species:
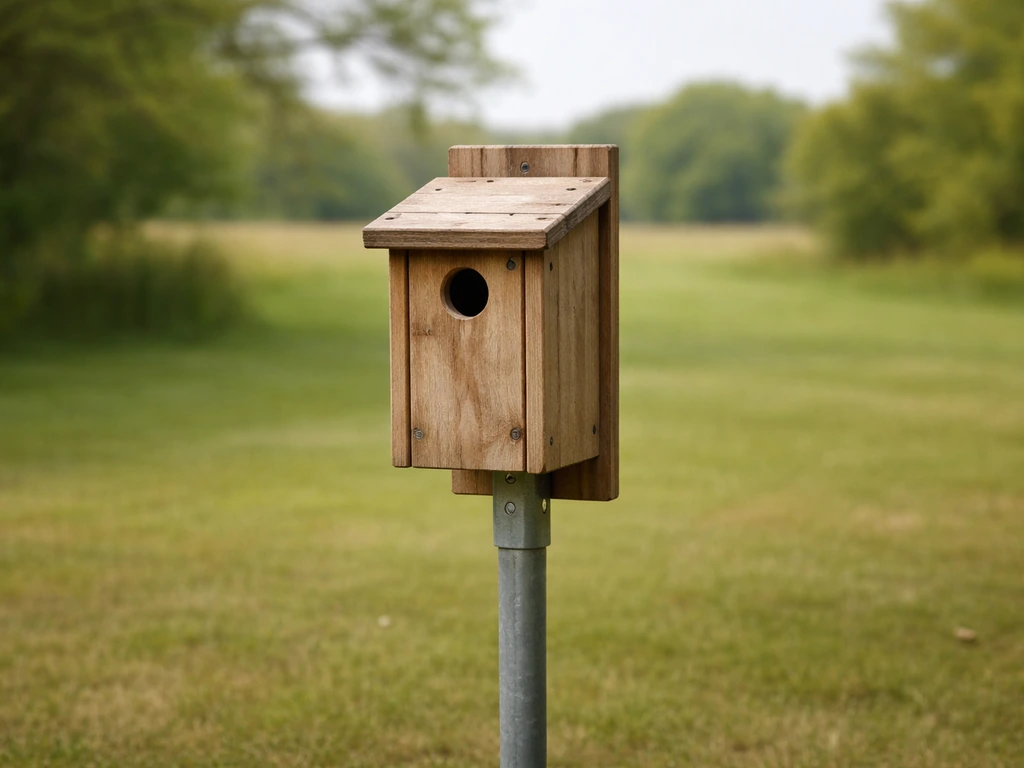
- Eastern Bluebird: mount 4–6 feet high on a metal fence post in an open area with short grass, facing east or southeast, away from dense trees — bluebirds hunt from a perch and need clear sight lines
- Chickadee: mount 5–15 feet high on a tree or post in or near wooded edges, with the entrance facing away from prevailing winds
- House Wren: hang 5–10 feet high in a partially shaded spot near shrubs or brush piles — wrens like a bit of cover nearby
- Wood Duck: mount 5–20 feet high on a metal pole over or near water (lake, pond, slow stream), tilted slightly forward so ducklings can launch out safely
- American Kestrel: mount 10–30 feet high on a post or dead tree in open farmland or meadow, entrance facing away from prevailing winds and toward open hunting habitat
Always mount the box on a smooth metal pole if you can. This alone eliminates most predator access problems. If you must mount on a wooden post or tree, attach a predator baffle below the box, a stovepipe baffle or PVC wobble baffle on the pole makes it extremely difficult for raccoons, snakes, and cats to climb up. The critical thing: install the baffle on the pole before you attach the box to it, not after.
On timing: get your boxes up early. For chickadees, aim to have boxes installed by late February so birds can scout them before nesting season. Bluebirds start scouting nest sites in late winter too. For Wood Ducks and Kestrels in most of North America, having boxes up by early March gives birds time to find them before the first eggs are laid. Honestly, putting boxes up in the fall isn't a bad idea either, some birds will roost in them over winter and then be first in line to breed there in spring.
Orient the entrance hole away from prevailing winds and, where possible, face it somewhere between north and east. This avoids overheating in the afternoon sun and keeps rain from blowing directly into the cavity. In hot climates, some shade on the box during peak afternoon heat is genuinely helpful.
Cleaning, maintenance, and fixing common problems
Cleaning between broods and seasons
After fledglings leave, open the cleanout door and remove the old nest material completely. Many cavity-nesting birds will build a fresh nest on top of an old one if you leave it in there, which raises the nest cup closer to the entrance hole and makes chicks more vulnerable to predation. Once the old material is out, rinse the interior with boiling water to kill mites and other parasites, it works better than any insecticide and won't leave chemical residues. Don't use flea powder or pesticide sprays inside the box. Let it dry completely before closing it up.
At the end of the breeding season (late summer or early fall), do the same thing: remove all nesting material, scald with boiling water, let it dry, and optionally leave the cleanout door propped slightly open over winter to air out and deter mice from nesting in it. Close it back up before late winter so it's ready for early scouts.
Check on occupied boxes about once or twice a week, that's enough to monitor progress without causing excessive disturbance. If you see eggs or chicks, keep visits brief, stay calm, and never check during bad weather or at night.
Troubleshooting common problems
If your box sits empty all season, the most likely culprits are: wrong location (too close to trees or buildings for species like bluebirds), an entrance hole that's been chewed or enlarged by squirrels (fix it with a metal hole-reinforcement plate), competition from House Sparrows or European Starlings (reduce hole size or switch to a species-specific design), or simply bad luck in the first year. New boxes often take a full season before birds discover them.
Condensation and moisture inside the box usually means the ventilation holes are blocked or the box is in a low-lying spot with no air movement. Recheck that your drainage holes are clear and your ventilation holes near the top of the side panels are open. If you used sawdust or wood chips inside a Kestrel box, those can clog drainage holes when wet and hold moisture, switch to a thin layer of dry wood shavings or leave the floor bare.
If predators are getting into the box, the fix is almost always the mounting setup rather than the box itself. A smooth metal pole with a properly installed stovepipe or wobble baffle below the box stops climbing predators reliably. If you're seeing damage to the entrance hole from woodpeckers or squirrels trying to enlarge it, add a metal predator guard plate around the hole, these are cheap and easy to find at bird supply stores, or you can cut one from sheet metal.
If the wrong species moves in (House Sparrows are the most common problem in North America), you're within your rights to remove their nest and eggs repeatedly, House Sparrows are an invasive species and are not protected by the Migratory Bird Treaty Act. Reducing the entrance hole size to 1-1/8" will exclude sparrows while still allowing chickadees and wrens. If Starlings are a problem, they can't fit through any hole smaller than 1-1/2", so a chickadee-sized hole keeps them out entirely.
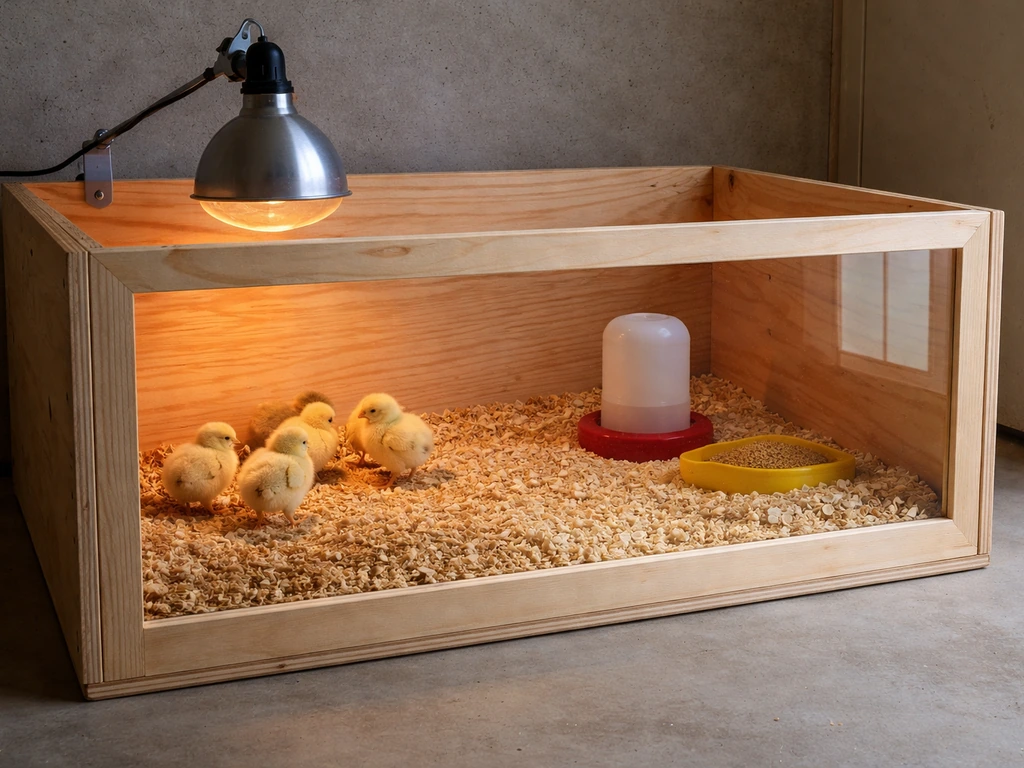
Once you've got the basics down on a breeding box, it's a natural step to think about what happens after the eggs are laid. If you need to hatch bird eggs with supplemental warmth, use a homemade incubator for bird eggs that maintains stable temperature and humidity homemade incubator for eggs. If you're interested in supporting birds through the full cycle, topics like building a bird brooder for hand-raised chicks or assembling a homemade incubator for eggs that need supplemental warmth are practical next projects that fit naturally alongside this one.
FAQ
How do I know which bird species will actually use my box in my yard?
Start by matching habitat, not just dimensions. Bluebirds typically avoid boxes near dense trees and prefer open lawns, chickadees do better near mixed woods, and wood ducks need nearby water and shoreline cover. Put the box in the right micro-site first, then fine-tune the entrance size only after you observe what shows up.
What happens if my entrance hole ends up slightly larger or smaller than the recommended size?
Being too small can prevent the target species from entering, often leading to an empty box even if placement is good. Being too large usually increases takeovers by aggressive competitors or predators, such as House Sparrows. If you suspect you overshot, the best quick fix is adding a metal hole-reinforcement plate or replacing the front panel rather than trying to patch with wood putty.
Should I drill a “breathing hole” higher up the box or rely only on side ventilation near the roof?
For most species, the effective approach is multiple small ventilation holes near the top so warm, moist air can escape. Higher holes can work, but they also increase the chance rainwater can blow in if the overhang is marginal. Keep ventilation holes on the side panels just below the roof edge, then confirm they are not blocked after assembly.
Can I add a landing perch for my species if other boxes online show one?
Avoid it unless you are building specifically for a species that benefits from a perch. For cavity nesters like bluebirds, perches tend to make it easier for predators and competitors to access the entrance. If you want to provide something for viewing or maintenance, use a separate external mounting method instead of a perch inside the safety zone.
Is it safe to varnish the exterior if I also seal seams and gaps?
You can protect the exterior with raw linseed oil or a neutral exterior water-based stain, but do not seal or caulk gaps around ventilation and drainage features. Exterior coatings are for the outer shell, not the airflow and drainage paths. If you accidentally glue over ventilation holes, condensation risk rises and the box becomes less successful.
How long can I leave old nesting material in the box between broods?
For many species, removing old material after fledglings is important because fresh nest cups built on top of old ones end up closer to the entrance. That increases vulnerability. If you find an active nest, do not disturb it, wait until the brood has fully fledged, then clean and dry it properly before the next attempt.
What if I see condensation even when drainage holes are present?
Condensation usually means insufficient airflow or a low, draft-blocking placement. Recheck that drainage holes are clear, that ventilation holes near the top are unobstructed, and that the entrance faces away from wind-driven rain. Also confirm your box is not sitting where water can pool at the base or where airflow is blocked by nearby vegetation.
Do I need a clean-out door, or is a removable roof easier?
A side panel that pivots open is often easier to keep sealed during storms while still allowing quick cleaning. Removable roofs can work, but they more easily loosen or misalign, and they can allow more rain intrusion when opened. If you do use a removable roof, add a positive latch and ensure a tight fit so gaps stay minimal.
How should I mount the box to reduce predation if I do not have access to a metal pole?
Use the best baffle you can, and install it before attaching the box. A stovepipe or wobble-style baffle on a wooden post reduces climbing access by raccoons, snakes, and cats. Additionally, avoid mounting near branches that provide a “bridge” to the entrance, even if the baffle is installed.
Can I use a different wood than cedar if cedar is unavailable?
Yes, cypress and redwood are solid alternatives, and untreated pine is acceptable if you accept a shorter lifespan. The non-negotiable rule is to avoid pressure-treated lumber. Also choose boards that are not heavily chemically treated, and avoid interior coatings or glossy finishes that increase chick slipping or trap moisture.
When do I clean the box if birds use it for roosting in winter?
If you have winter roosting, plan a deeper clean after the main breeding season, then do a light air-out step later rather than fully scrubbing at the wrong time. Leaving the cleanout door slightly propped over winter can help air out and deter mice, but close it again before late winter so it is ready for early scouts.
What is the best way to fix a box that attracts the wrong species?
First, remove competing nests and eggs repeatedly if you are dealing with House Sparrows. Then adjust the entrance size using a species-specific design, the chickadee-sized 1-1/8 inch hole size is a common exclusion approach. If starlings are the issue, smaller-than-starling openings (below 1-1/2 inch) often prevent entry.
How often should I check on an active box without increasing risk to the chicks?
Keep checks brief and limited to about once or twice weekly when occupied. Avoid inspections during bad weather and never handle nests at night. If you see eggs or chicks, prioritize quick observation over extended monitoring, and return the box to its fully latched state immediately.
If the box stays empty all season, what should I troubleshoot first?
Start with the basics that most commonly fail: placement distance from trees or buildings, entrance hole size being correct and not chewed, and whether competitors can reach it. Then consider timing, boxes often need a full year for birds to discover them. After that, evaluate whether the habitat matches the species you built for, even if the measurements are perfect.
Next Articles
How to Make a Bird Brooder: Step-by-Step DIY Guide
Build a safe DIY bird brooder with parts list, sizing, temps, airflow, bedding, and step-by-step setup for chicks.
How to Make a Bird Breaster: DIY Backyard Build
DIY guide to build a backyard bird breaster: pick the right design, use safe materials, waterproof, mount, maintain, and
How to Make a Bird Carrier DIY for Safe Transport
DIY bird carrier guide: size, ventilation, secure door, safe materials, lining, and step-by-step build for pet transport