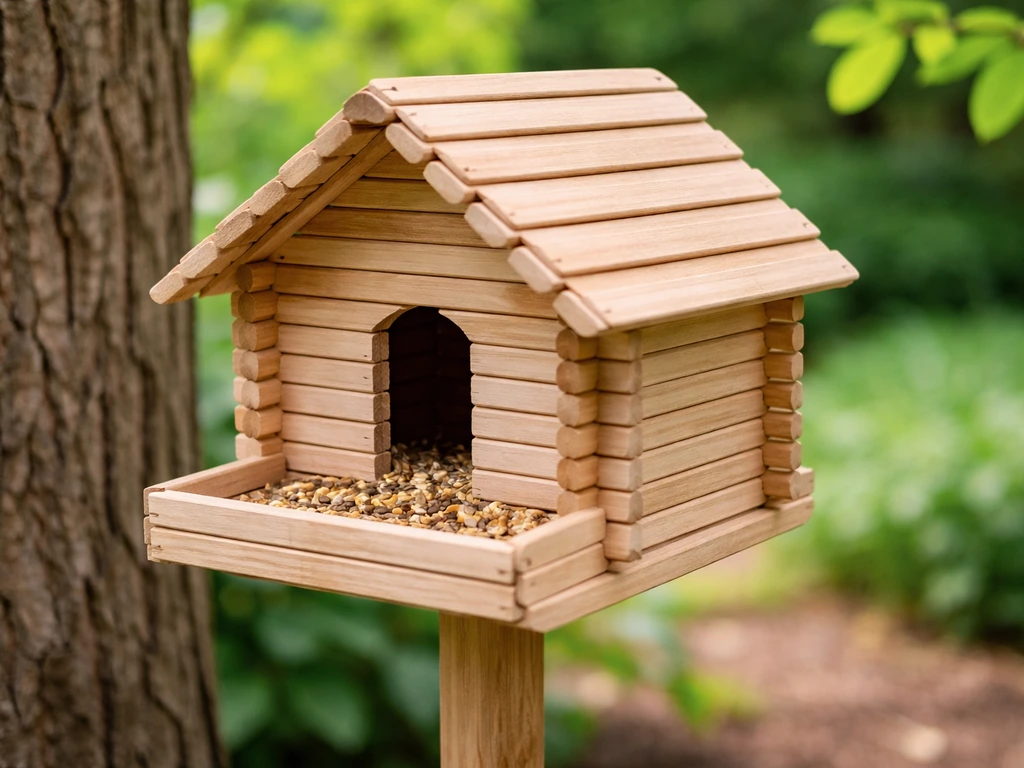
You can absolutely build a working birdhouse or bird feeder from ice cream sticks. Stack them log-cabin style with wood glue, cut a proper entrance hole, seal the outside with a bird-safe finish, and you have something real birds will use. The whole project costs almost nothing if you've been saving sticks, takes a few hours to build, and the result is sturdy enough to hang outdoors for a full season.
How to Make a Bird House With Ice Cream Sticks

Marcus Thornton
24 Apr 2026
What you'll need before you start
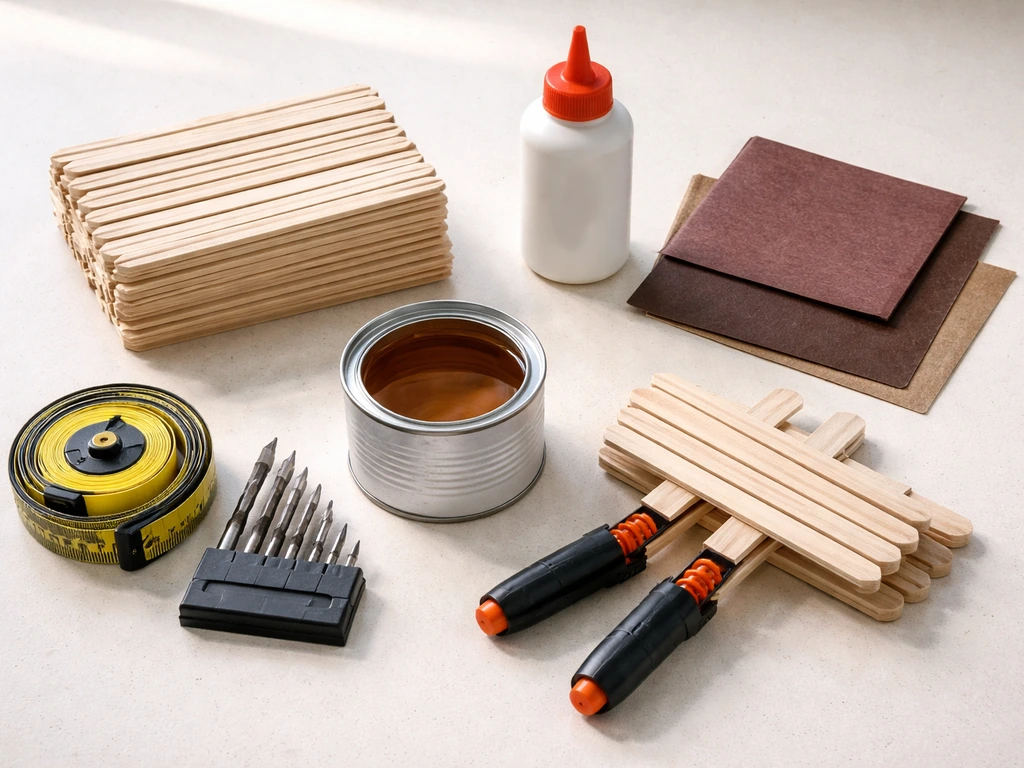
Ice cream sticks (also called craft sticks) are basically the same wood as popsicle sticks, just a little wider and thicker. That width makes them ideal for layering walls. A basic birdhouse needs roughly 150 to 200 sticks; a feeder needs fewer, around 80 to 120. Collect clean, uncolored sticks or buy a bag of natural craft sticks from any hobby store. Avoid dyed or flavored sticks since the residue can be a mild irritant inside an enclosed nesting space.
- 150 to 200 ice cream/craft sticks for a house build (80 to 120 for a feeder)
- PVA wood glue or non-toxic craft glue (Elmer's Wood Glue or Titebond II are solid choices)
- Small hand saw or serrated craft knife for trimming sticks
- Sandpaper, 120 grit and 220 grit
- Ruler and pencil
- Clamps or binder clips to hold joints while they cure
- A 1 to 1.5 inch hole saw or spade bit for the entrance hole on a house build
- Small drill with 1/8-inch and 3/8-inch bits for ventilation and drainage holes
- Untinted, water-based exterior polyurethane or linseed oil for weatherproofing
- Twine, wire, or a small screw-eye for hanging
- Optional: thin balsa or plywood sheet for the roof base, which gives you a flatter gluing surface
One thing I learned the hard way: cheap super glue sounds tempting because it sets fast, but it gets brittle in temperature swings and the joints start popping after a few months of outdoor exposure. Wood glue is slower but it creates a flexible bond that handles rain and heat much better. If you need faster setting, use a gel-style PVA and keep the build clamped for at least 30 minutes per layer.
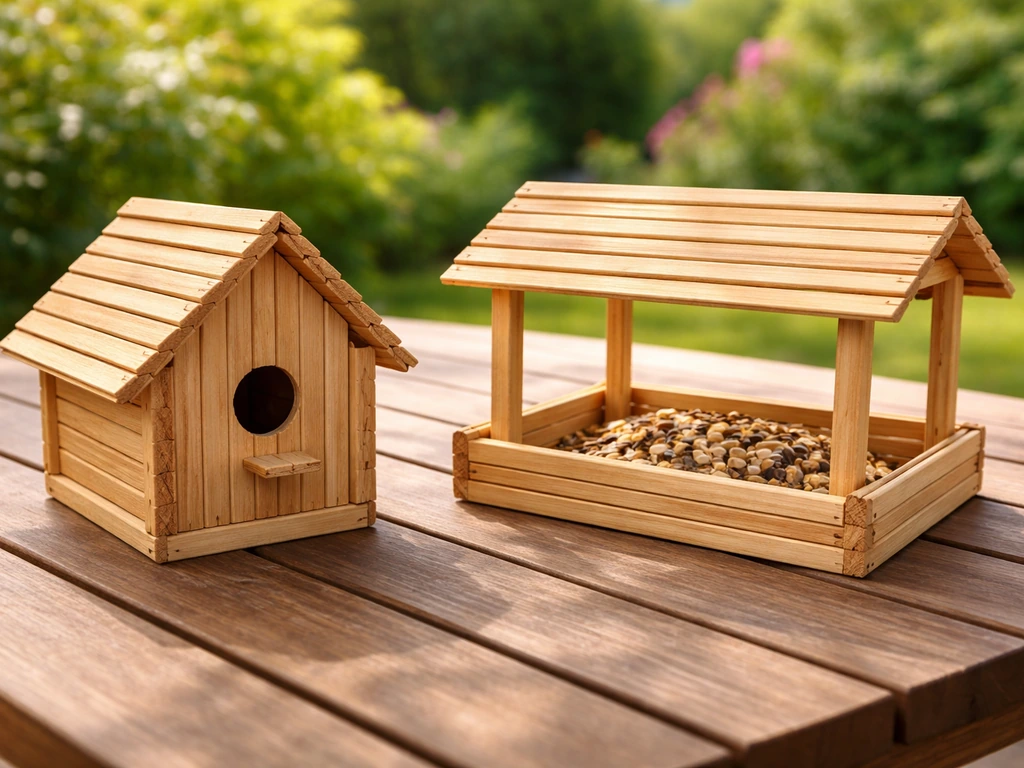
Birdhouse or feeder: which one should you build?
Both designs use the same stacking technique for the walls, so the core build process is almost identical. The difference is what you do with the roof and the front panel. Here's a quick comparison to help you pick.
| Feature | Ice Cream Stick Birdhouse | Ice Cream Stick Bird Feeder |
|---|---|---|
| Purpose | Nesting and sheltering cavity-nesting birds | Open feeding station for seed or suet |
| Front panel | Solid, with a drilled entrance hole (1" to 1.5" diameter) | Open or partially open with a low ledge to hold seed |
| Roof | Pitched and sealed for weather protection | Pitched but can have open sides for seed access |
| Drainage needed | Yes, holes in the floor | Yes, especially if offering wet food |
| Ventilation holes | Required near the top of walls | Less critical but helpful in hot climates |
| Best birds attracted | Sparrows, wrens, chickadees (size-dependent) | Finches, sparrows, juncos, any seed-eating species |
| Difficulty | Slightly harder (entrance hole sizing matters) | Slightly easier (more forgiving dimensions) |
If you're a first-time builder, the feeder is a gentler starting point because the dimensions don't have to be exact. But if you want birds to actually nest in your yard, the house is more rewarding. The instructions below cover both builds in parallel so you can follow whichever path fits your goal.
How to build it: step-by-step assembly
Step 1: Build the floor
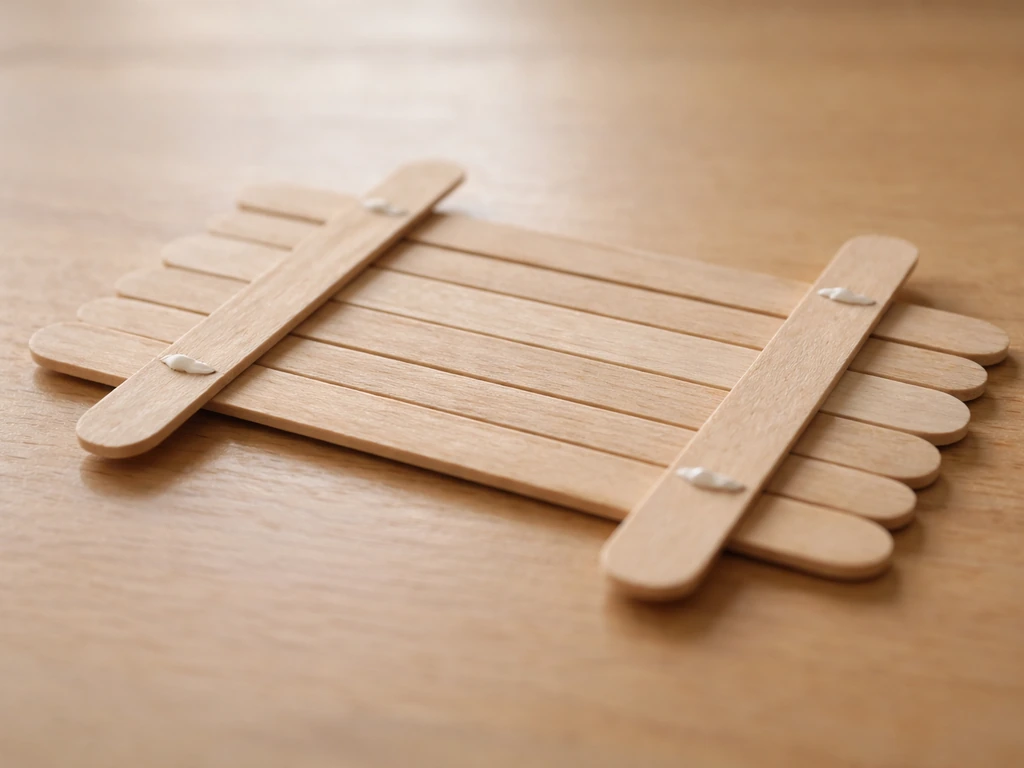
Lay five or six sticks side by side flat on your work surface. Glue two perpendicular sticks across the underside to lock them together, one near each end. This creates a solid floor panel roughly 4 inches square, which is the right size for a small bird like a wren or chickadee. Let this cure completely before moving on, about 20 to 30 minutes.
Once it's dry, drill your drainage holes: aim for at least four holes, 3/8 inch in diameter, spaced evenly across the floor panel. Water will get in no matter what you do outdoors, and these holes are what keep the inside dry and mold-free. For the feeder version, use the same floor but add a small lip (one stick glued flat along each edge) to keep seeds from sliding off.
Step 2: Stack the walls log-cabin style
This is the part most people associate with ice cream stick projects. Lay two sticks parallel across the front and back edges of your floor. Then lay two sticks perpendicular across those, overlapping the ends. Keep alternating layers, applying a thin bead of glue between each layer. The key is consistent pressure: press each layer down firmly and use binder clips at the corners while you go. Aim for 8 to 12 layers of wall height for a birdhouse, which gives you an interior cavity about 4 to 5 inches deep. That's appropriate for small cavity-nesters. The feeder just needs 3 to 4 wall layers to form the low sides.
Stick splitting is the most common problem at this stage. It usually happens when you apply glue too close to the end of a stick and then clamp hard. Leave about 3 to 4 millimeters of clearance from the end before applying glue, and you'll almost never split one. If a stick does crack, don't panic. Sandwich it between two healthy sticks in the next layer and the glued structure will still hold fine.
Step 3: Cut and attach the front panel (birdhouse only)
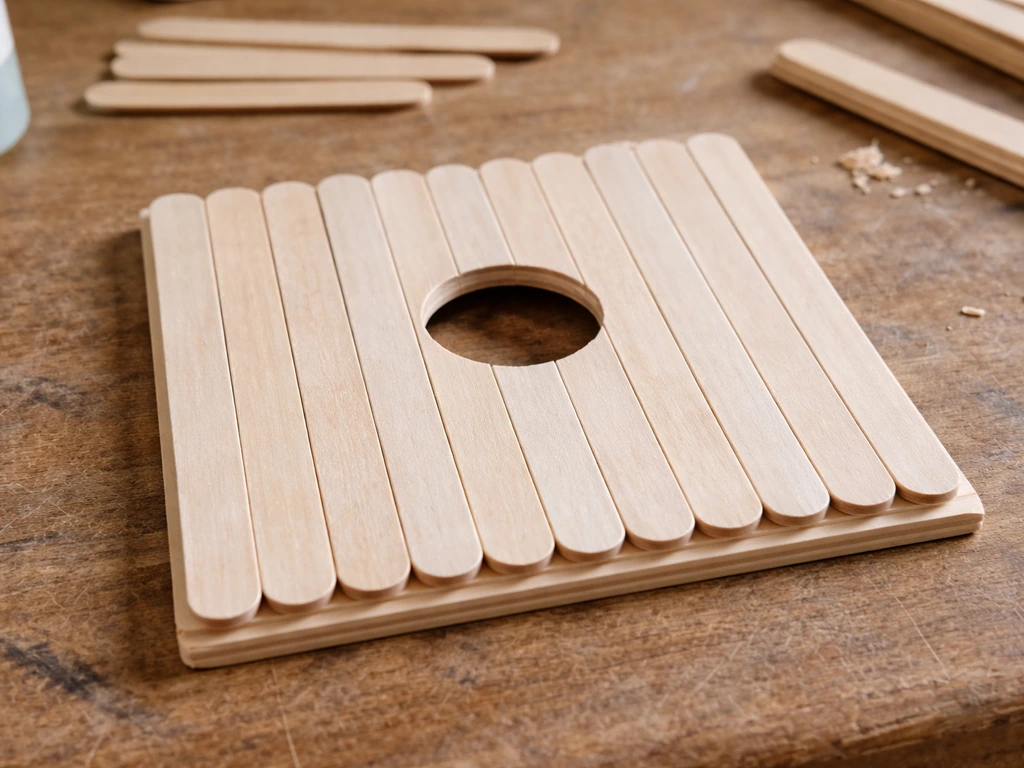
The front panel of a birdhouse needs to be a solid piece with a single entrance hole. Build a flat panel the same way you built the floor (sticks side by side with two cross-bracing sticks on the back). Then drill your entrance hole in the center, about two-thirds of the way up the panel. For sparrows and house wrens, use a 1.25-inch diameter hole. For chickadees, 1.125 inches works perfectly and actually discourages house sparrows from taking over. Don't go bigger than 1.5 inches unless you're targeting bluebirds or swallows with a different design entirely. Glue and clamp this panel to the front of your stacked walls.
Step 4: Drill ventilation holes before closing the top
Before you add the roof, drill two ventilation holes on each side wall near the top, about 1 inch below where the roof will sit. Use a 1/8-inch bit for ice cream stick walls since the material is thinner than lumber. These holes let hot air escape in summer and prevent condensation buildup that would otherwise create mold inside the nest. Without them, a sealed box can get dangerously hot on a sunny day. For the feeder, ventilation is less critical, but a couple of small holes near the top of each side wall still help air circulation.
Step 5: Build and attach the roof
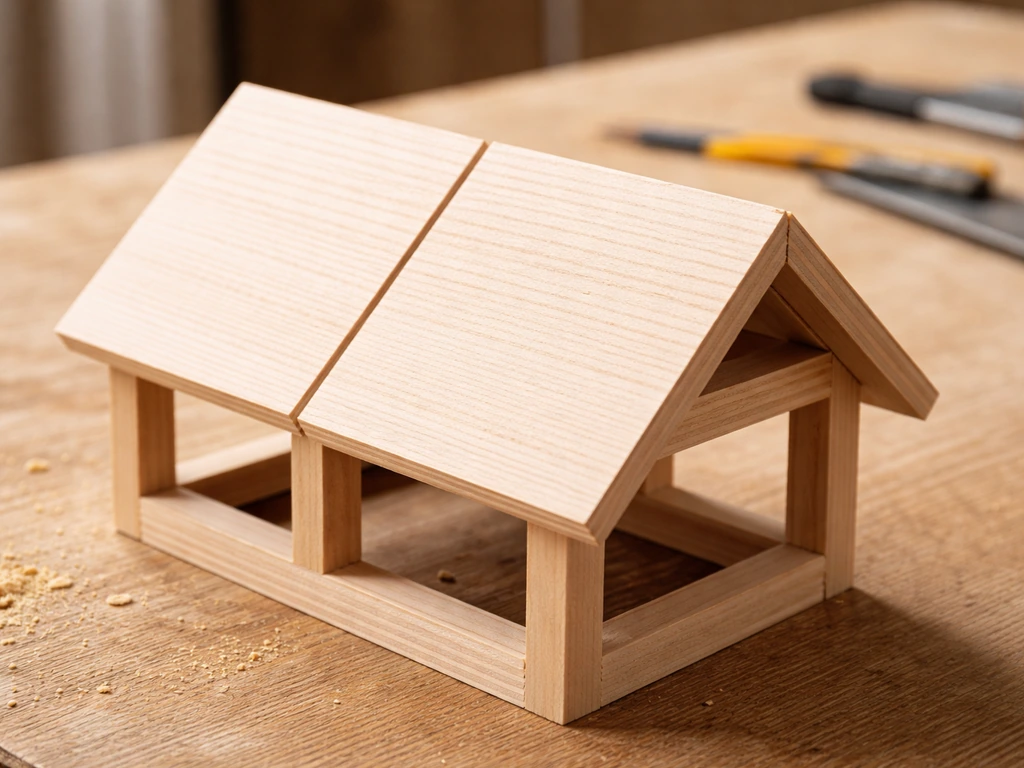
A pitched roof sheds rain and protects the entrance. Build two rectangular panels the same way as your floor and front panel. Cut one long edge of each panel at a 30 to 45 degree angle so they meet at a peak in the middle. Glue them together at the peak, let them cure, then glue the whole roof assembly to the top of your walls.
The roof should overhang the front by at least an inch so rain doesn't pour straight into the entrance hole. For extra waterproofing, apply a bead of glue along the peak seam on the outside. For the feeder, a simpler A-frame roof over the open center works well and still protects the seed from direct rain.
Step 6: Add a hanging point
Screw a small screw-eye into the roof peak, or thread a loop of heavy-gauge wire through the top layer of sticks before you glue the roof on. Either method works. If you're planning to mount on a post rather than hang it, glue a small platform of sticks to the bottom to give you a flat surface for securing with wire or screws.
Weatherproofing it so it actually lasts outside
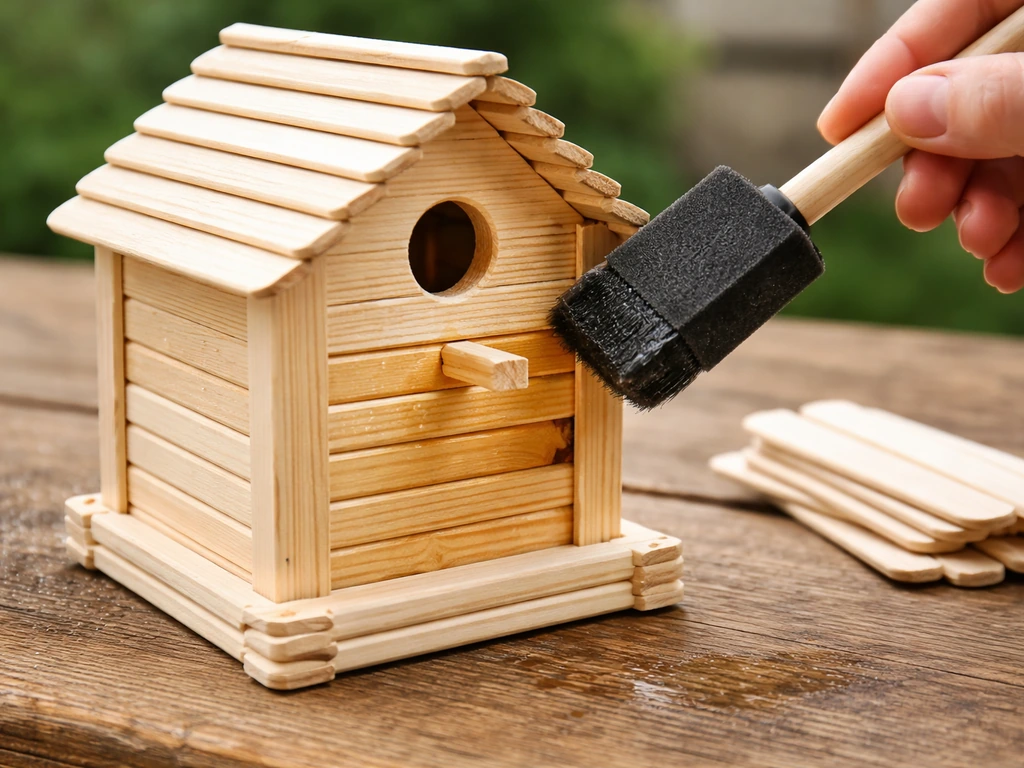
Ice cream sticks are birch or basswood, which are both relatively soft and absorb moisture quickly. Without a protective finish, your build will start warping or delaminating within a few weeks of outdoor exposure. The finish you choose matters a lot here, both for durability and bird safety.
The safest options are water-based exterior polyurethane, raw linseed oil, or tung oil. Apply two or three thin coats to all exterior surfaces, letting each coat dry fully before adding the next. Don't coat the interior of the house, the floor, or around the entrance hole opening. Birds that chew or pick at interior surfaces (which they do) shouldn't be ingesting finish. Raw linseed oil is a particularly good choice because it soaks into the wood fibers and doesn't form a film that birds can peel. Avoid any oil-based varnish, paint with biocides, or anything labeled 'mold-resistant' since those additives are toxic to birds.
For the feeder, since seeds and water sit directly on the surfaces, go with food-safe linseed oil or leave the interior completely unfinished and just seal the outside. Replace food and clean the tray frequently, and you won't have a mold problem regardless.
Where to mount it and how high
Placement is genuinely half the battle with getting birds to actually use what you built. A beautiful house in the wrong spot will sit empty all season. For a small birdhouse aimed at wrens or sparrows, mount it 5 to 10 feet off the ground on a pole or post, facing roughly east or northeast. That orientation catches early morning sun to warm the cavity but avoids the harsh afternoon heat that can overheat eggs and chicks. Keep it away from dense branches right at the entrance since cats and squirrels use those as launching pads.
For feeders, place them in a relatively open area where birds have good visibility and can spot approaching predators. A feeder hung about 5 to 6 feet off the ground near shrubs or trees (but not pressed right against them) gives birds a quick escape route while still feeling secure. Avoid placing feeders directly above garden beds or patios where the seed debris and bird droppings will cause problems.
The single best upgrade for a pole-mounted birdhouse is a predator baffle. A cone or cylinder baffle placed on the pole below the house makes it nearly impossible for raccoons, squirrels, and snakes to climb up. Research consistently shows nest boxes with predator guards have significantly higher nesting success rates. For an ice cream stick house, which is lighter than a wood box, a simple cone baffle made from sheet metal or a large plastic bowl threaded onto the pole works perfectly.
Safety checks before you hang it
Run through these before putting the house or feeder outside. A few minutes now saves a failed nesting attempt or an injured bird later.
- Check the entrance hole diameter with calipers or a drill bit gauge. Even 1/4 inch too wide lets in predators or competitor species. For wrens and chickadees, stay between 1.125 and 1.25 inches.
- Confirm there are no sharp stick ends or splinters protruding inside the cavity. Run your hand around the interior and sand down anything rough.
- Make sure the drainage holes in the floor are fully open and not clogged with glue.
- Confirm the ventilation holes near the top are clear on both side walls.
- Test the roof by pressing on it. If it flexes significantly, add another layer of sticks and let it cure before hanging.
- Check that all exterior glue joints are fully cured and not tacky. Fresh glue off-gasses fumes that are fine for us but can irritate birds in an enclosed space.
- Confirm there's no perch below the entrance hole. Commercial houses often include one, but perches actually help predators and competitors access the hole. Leave it off entirely.
- If you've used any finish, give it a full 48 to 72 hours to cure before hanging, especially in cooler weather where drying is slower.
Keeping it in good shape (and fixing what goes wrong)
Cleaning after nesting season
At the end of nesting season, usually late summer or early fall, take the house down and remove old nesting material. Scrub the interior with a stiff brush and a diluted solution of one part bleach to nine parts water. Rinse thoroughly and let it dry completely in the sun before storing or rehanging. Old nests harbor mites and parasites that will discourage birds from using the box the following year. Clean feeders every one to two weeks during active use, especially if you're offering nyjer seed or suet, which go rancid quickly.
What to do if it starts loosening or warping
Ice cream stick builds are repairable. If a wall layer is separating, inject a small amount of exterior wood glue into the gap with a toothpick, clamp it, and give it 24 hours. Warping is usually caused by insufficient weatherproofing on one side, so the fix is re-sanding and applying another coat of exterior finish to the affected area. If the floor gets badly water-damaged, you can build a replacement floor panel and glue it on over the old one rather than trying to remove it. If you want a different style, you can also learn how to make bird houses out of pvc pipe using similar planning for entrances, drainage, and ventilation.
If birds aren't using it
Give it at least one full season before concluding there's a problem. Birds are cautious and some species (especially wrens) scout for weeks before committing to a box. If it sits empty for two seasons, check the placement first: is the entrance facing into direct afternoon sun? Is there a branch within jumping distance that could harbor a predator?
Also double-check the entrance hole size. Bird-safe portal protectors and hole reducers are sold commercially with species-specific opening sizes, like 1 1/8 for chickadees entrance hole size. Audubon’s Spring Creek birdhouse sizing guidance includes entrance-hole dimensions for common cavity-nesters like chickadees, house wrens, and bluebirds [Also double-check the entrance hole size.
](https://springcreek. audubon. org/sites/default/files/staticpages/attachments/bbbprojectbirdhousesizes. pdf).
If the hole is even slightly too large, dominant species like house sparrows may have claimed it and prevented the smaller birds you're hoping to attract. A fresh coat of exterior finish and repositioning the house 10 to 20 feet away from the original spot can make a real difference.
Other DIY birdhouse ideas worth trying next
Once you've got the stacking technique down with ice cream sticks, you can apply similar log-cabin construction logic to other repurposed materials. Milk-carton birdhouses are another beginner-friendly option, and you can use many of the same ideas for entrance sizing, ventilation, and weatherproofing repurposed materials. Popsicle sticks work with essentially the same method and are slightly thinner, which can create interesting layered textures. If you want to go bigger for species like bluebirds or tree swallows, building with pallet wood gives you the extra thickness and structural strength those designs need.
If you want a larger, sturdier build, you can also follow a guide on how to make bird houses from pallets pallet wood. Milk cartons are another beginner-friendly option if you want a weatherproof shell without any woodworking at all, and a coconut shell makes a surprisingly charming single-cavity nest that certain small birds adore.
If you want a more natural look, you can also learn how to make a bird house with coconut shell using the same ideas for entrance size, drainage, and ventilation. Milk carton bird houses are a great option when you want a weatherproof shell with no woodworking Milk cartons. Each material has its own quirks, but the core principles of correct entrance sizing, drainage, ventilation, and safe placement are the same across all of them.
Once you understand the basics for entrance sizing, drainage, ventilation, and safe placement, you can also learn how to make a bird house out of wine corks with the same approach.
FAQ
Can I paint or varnish the inside of the bird house to make it more durable?
No. If you want birds to nest in it, you should leave the interior natural and uncoated. Add finish only to the outside, then keep the floor and the area around the entrance opening bare so birds do not ingest residues they may pick at inside an enclosed cavity.
What glue should I use if I want the ice cream stick bird house to last outdoors all season?
Plan on moving beyond craft glue for outside exposure. Use exterior-rated wood glue (PVA type) for layered construction, and let each wall layer cure while clamped. This prevents the joints from becoming brittle during temperature swings and reduces the chance of walls separating after a few months.
If I drill the entrance hole a little too big, can I fix it without rebuilding the whole front?
Not if the goal is nesting. The hole diameter you choose sets who can use it, and many smaller birds will not enter oversized openings. If you accidentally drill a hole too large, the usual outcome is that larger or more aggressive species occupy it, so start over or build a new front panel with the correct entrance size.
How many drainage holes do I need, and when should I drill them?
For typical ice cream stick builds, drill drainage holes after the floor panel cures and before you stack walls, and make them large enough to actually let water drain. A common mistake is using too few holes or holes that are too small, which can trap moisture and lead to mold even if the roof is well made.
Where should ventilation holes go, and what happens if I skip them?
Use ventilation holes near the top of the side walls, not near the entrance or in the roof. Even a well-built box can overheat in direct sun if there is no escape path for warm air, and condensation can form where warm moist air hits cooler surfaces.
Can I turn the birdhouse design into a bird feeder that holds wet or softened food?
Yes, but keep it simple and safe. A feeder tray with a slight lip helps seeds stay in place, and the best approach is frequent cleaning. If you let wet seed sit, it can sour quickly, so plan a cleaning schedule right from the start.
My roof overhang seems small. Will that affect how birds use it?
You do not want a fully sealed box. If the roof overhang is too short, rain can blow in at the entrance and keep the interior damp. Aim for at least an inch of overhang on the front for reliable rain protection, then check the entrance aligns under the overhang when hung.
The birdhouse is empty. How do I troubleshoot placement before assuming something is wrong with the build?
Avoid placing it in a spot that gets harsh afternoon sun right at the entrance. For most small cavity-nesters, an east or northeast-facing setup is more comfortable, and moving the house 10 to 20 feet away from a previous empty spot can help if the original location attracted predators or got too hot.
How many coats of outdoor finish do I need on the outside?
No. Ice cream sticks absorb moisture quickly, and heat can weaken glue bonds if the wood is not properly sealed. Two to three thin coats of exterior finish on the outside are the practical minimum, with full drying time between coats.
How do I repair a separated wall or a warped ice cream stick bird house?
If a wall layer separates, inject exterior wood glue into the gap, clamp it firmly, and allow a full 24 hours before hanging. If warping shows up, re-sand the affected area and apply another coat of exterior finish to the side that got exposed, because one weak side often drives the damage.
Next Articles
How to Make a Bird House or Bird Feeder From Popsicle Sticks
Step-by-step guide to build a popsicle stick bird house and feeder, with materials, tools, assembly, and weatherproof fi

How to Build a Chimney Swift Bird House DIY Guide
Step-by-step DIY plans to build a chimney swift bird house, with correct dimensions, placement, and weatherproofing for

How to Build an Oriole Bird House: Step-by-Step DIY
Step-by-step DIY for building an oriole bird house with right dimensions, weatherproofing, predator-safe placement, and