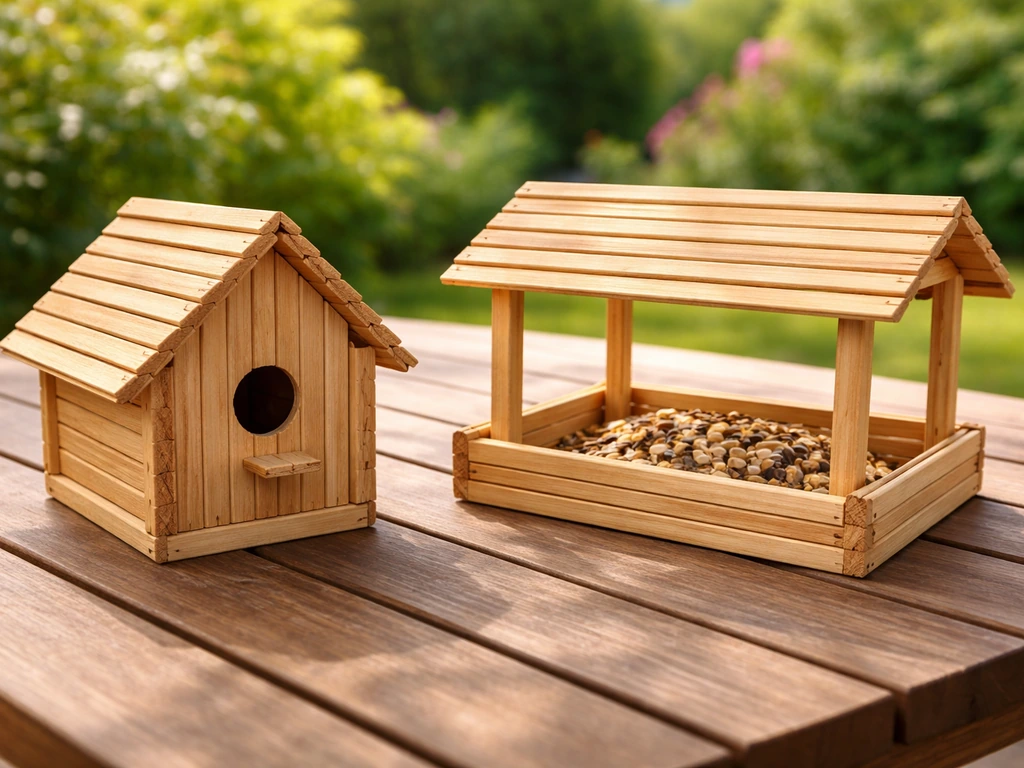
Yes, you can absolutely build a real birdhouse or bird feeder out of popsicle sticks. Not just a craft project that sits on a shelf, but something you can hang outside and actually attract birds to. I've built both, made plenty of mistakes along the way, and this guide gives you a complete, replicable plan for each. Whether you want a small nesting shelter for wrens or a platform feeder that gets busy by the following weekend, the steps below will get you there today.
How to Make a Bird House or Bird Feeder From Popsicle Sticks

Marcus Thornton
6 Apr 2026
Bird house or bird feeder: which should you build?
Before you grab the glue gun, it's worth knowing what you're actually building, because the two projects have different goals, different levels of complexity, and appeal to different birds. A birdhouse (or nest box) is a sheltered enclosure where birds nest and raise chicks. A bird feeder is an open platform or hopper that holds seed, attracting birds to eat. Both are satisfying to build, but they're not interchangeable.
If you want birds visiting frequently and visibly, start with the feeder. It draws traffic fast, especially if you load it with sunflower seeds or mixed seed. If you want something more rewarding over a longer timeframe, like actually watching a pair of house wrens nest and fledge chicks, build the birdhouse. The feeder is also the simpler first build, which matters if you're new to working with popsicle sticks. My honest advice: build the feeder first to get comfortable with the material, then tackle the birdhouse.
If you enjoy working with repurposed and found materials, you might also like our guides on how to make bird houses from pallets or how to make bird houses from milk cartons, both of which follow similar beginner-friendly principles with different materials.
What you'll need: materials and tools
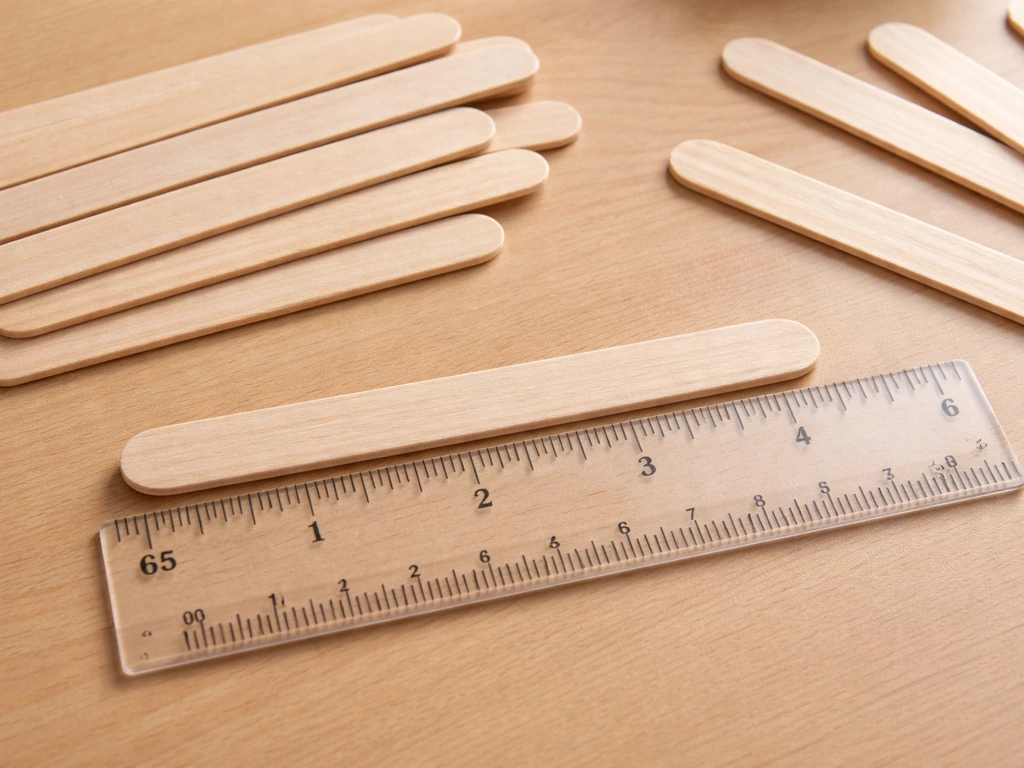
Popsicle sticks and craft sticks are the same thing for this project. Standard popsicle sticks measure about 4.5 inches long and 3/8 inch wide. Jumbo craft sticks run about 6 inches long and 3/4 inch wide. Both work, and the jumbo version gives you faster coverage and a sturdier wall, so grab those if you can. You'll need around 150 to 200 sticks for the feeder and 300 to 400 for the birdhouse. Buy them in bulk packs, which are cheap and widely available.
Adhesive is the most important material decision you'll make. Standard white PVA (school glue) is non-toxic but not waterproof, meaning your project will fall apart in rain. For anything going outside, you need a weatherproof wood glue rated for outdoor use, such as a D3 or D4 moisture-class PVA adhesive. These are widely sold as "outdoor wood glue" and bond well to the wood in craft sticks while remaining safe once cured. A hot glue gun can help you hold pieces in place while the wood glue sets, but don't rely on hot glue alone outdoors since it softens in heat and loses its grip.
- 150 to 400 popsicle sticks or jumbo craft sticks (buy extra)
- Weatherproof outdoor wood glue (D3/D4 rated PVA)
- Hot glue gun and sticks (optional, for clamping/positioning)
- Small saw or heavy craft scissors for trimming sticks to length
- Ruler and pencil for measuring
- Sandpaper (120 grit) for smoothing cut edges
- Small drill or hand awl for drainage and ventilation holes (birdhouse only)
- Wire, twine, or eye screws for hanging
- Water-based paint or milk paint (bird-safe, no oil-based products)
- Outdoor sealant rated as bird-safe (water-based polyurethane or natural oil finish)
One thing I learned the hard way: don't skip the sanding step after trimming sticks. Rough edges create weak glue joints because the contact surface is uneven. A quick pass with 120-grit paper makes a real difference in how strong the finished piece is.
Build 1: the popsicle stick bird feeder
Cut list for the feeder

This is a platform-style feeder: a flat tray with low side rails and a roof panel overhead. It's the most beginner-friendly feeder design, and it works. Here's what you need cut and ready before you glue anything.
| Part | Sticks Needed | Notes |
|---|---|---|
| Base/platform | 16 sticks (8 per layer, 2 layers) | Lay 8 sticks side by side, glue a second layer perpendicular on top |
| Side rails (x4) | 2 sticks per rail | Trim to fit the edges of your base; keeps seed from rolling off |
| Roof panel | 12 to 16 sticks | Slightly wider than the base to create an overhang |
| Roof supports/posts (x2) | 4 sticks each, glued into columns | Approx 5 to 6 inches tall; support the roof above the tray |
| Roof ridge brace | 2 sticks | Glued along the center underside of roof for rigidity |
Step-by-step feeder assembly
- Lay 8 sticks side by side on a flat surface with their long edges touching. Glue them together with outdoor wood glue along every seam. Let this dry fully (30 to 60 minutes minimum).
- Lay another 8 sticks perpendicular across the first layer. Glue this second layer down across all contact points. This cross-hatched base is your platform floor and it's much stronger than a single layer.
- Glue low side rails (2 sticks tall) along all four edges of the platform. These keep seed from blowing or sliding off the tray.
- Build two posts by stacking and gluing 4 sticks into a square column (2 x 2 arrangement). Make both posts the same height, around 5 to 6 inches.
- Let the posts cure, then glue them to opposite ends of the platform base. Hold each post for 2 to 3 minutes or use a rubber band to clamp while the glue sets.
- Build your roof panel the same way you built the base: 2 layers of sticks in a cross pattern. Make it slightly wider than the platform on each side so it overhangs by at least half an inch.
- Glue the ridge brace sticks along the underside center of the roof panel before attaching it to the posts.
- Attach the roof to the tops of both posts. Check that it's level. If it leans, add a small shim (a scrap stick piece) under the low side before the glue sets.
- Thread wire or sturdy twine through gaps between sticks near the top of both posts, or screw in a small eye screw on each post. This is your hanging loop.
Loading the feeder
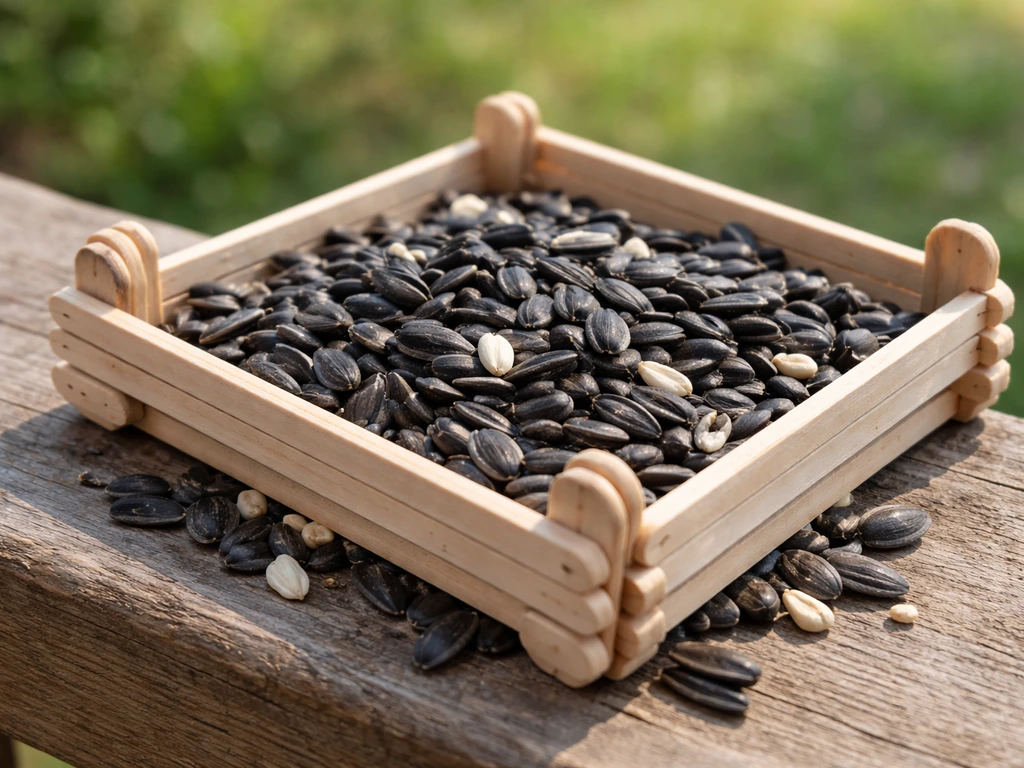
Once finished and sealed (more on that below), load the platform tray with black-oil sunflower seeds, mixed seed, or safflower seed. Avoid loose millet if squirrels are a problem in your yard, since it attracts them heavily. Keep the seed layer shallow, no more than half an inch deep, so it doesn't clump or mold between refills. Refresh the seed every 2 to 3 days, and clear any wet or stuck seed each time.
Build 2: the popsicle stick birdhouse
Cut list for the birdhouse
This plan builds a small nesting box sized for house wrens or chickadees, which are the most practical birds to target with a craft-stick birdhouse. The walls and floor are built up by layering sticks in a log-cabin style, which is strong and looks great. Before you start cutting, decide on your target species, because that determines your entrance hole size. A house wren needs a 1-inch entrance hole.
A Carolina chickadee needs 1-1/8 inches. A bluebird needs 1-1/2 inches. Audubon’s DIY bluebird box design specifies leaving a 1/2-inch ventilation gap at the top of the front for airflow [A bluebird needs 1-1/2 inches. ](https://www.
audubon. org/news/diy-build-bluebird-box). You can use a hand drill or a sharp awl to make the hole after the walls are assembled.
| Part | Sticks Needed | Notes |
|---|---|---|
| Front wall | 18 to 20 sticks | Build up layers; cut the entrance hole in the center after assembly |
| Back wall | 18 to 20 sticks | Same dimensions as front; add eye screw at top for hanging |
| Side walls (x2) | 14 to 16 sticks each | Slightly narrower than front/back; notch or trim ends to interlock |
| Floor panel | 10 to 12 sticks | Set slightly inset from walls; drill four 3/8" to 1/2" drainage holes |
| Roof (2 panels) | 16 sticks per panel | Angled or flat; overhang front and sides by at least 1 inch |
| Roof ridge cap | 4 to 6 sticks | Glued along the peak to seal the joint between roof panels |
Step-by-step birdhouse assembly
- Build all four wall panels first by laying sticks side by side and gluing each layer, then gluing a cross layer on top (same technique as the feeder base). Let each panel cure before moving on.
- Build the floor panel the same way. Once dry, drill or punch four drainage holes sized 3/8 to 1/2 inch diameter near the corners. These are non-negotiable: any water that gets inside the box needs to drain out or the nest will fail.
- On the front wall panel, mark the center for your entrance hole. The hole should be 6 to 8 inches above where the floor will sit. Use a drill with a spade bit or hole saw, or carefully cut the hole with a craft knife, to the correct diameter for your target species.
- Assemble the box by gluing the two side walls to the floor panel first. Use rubber bands or tape to hold the corners square while the glue sets (at least an hour).
- Glue the front and back walls onto the side/floor assembly. Check that all corners are square and that the front wall entrance hole is at the right height above the floor.
- Before gluing on the roof, add ventilation. Leave a 1/4-inch gap between the top of the side walls and the underside of the roof, or drill two small ventilation holes near the top of the front and back walls. This airflow keeps the nest box from overheating in summer.
- Build the roof panels as two flat sections, then prop them at a slight angle to create a peaked roof. Glue both panels so they meet at a ridge, and cap the ridge with a row of sticks laid along the joint.
- Make sure the roof overhangs the front, sides, and back by at least one inch. That overhang is what keeps rain from driving into the entrance hole or the ventilation gaps.
- Let the entire assembled box cure for 24 hours before handling or finishing.
If you enjoy building with natural or found materials, this log-cabin layering technique also adapts beautifully to other substrates. We have a full guide on how to make a bird house with a coconut shell if you want to see how the same design principles work in a different format.
Finishing for outdoor use: paint, sealant, and cure time
This step trips up a lot of first-time builders, so pay attention here. The wrong paint or sealant can genuinely harm birds, and the wrong drying approach will make your finish peel within a season. Do it right once and the structure lasts years.
Only use water-based paint or stain. Oil-based paints and stains are toxic to birds, full stop. Milk paint is an excellent choice: it's genuinely non-toxic, dries to a natural matte finish, and bonds well to raw wood. Water-based latex exterior paint also works well. Avoid anything labeled 'alkyd,' 'oil-based,' or 'solvent-based.' If the paint smells strongly of chemicals when wet, don't use it on a bird structure.
For the sealant, choose a water-based outdoor polyurethane or a natural penetrating oil rated for exterior use. Apply thin coats, letting each coat dry fully before adding the next. For the birdhouse interior, leave it unsealed: birds don't need a shiny interior, and some sealants off-gas inside a closed box in ways that aren't great for nesting birds.
Cure time matters more than dry time. The surface may feel dry to the touch within a day or two, but the finish isn't fully hardened and bird-safe until it's fully cured. Allow at least 7 to 15 days before light outdoor use, and ideally 30 days for complete curing before the structure is exposed to weather and birds are actively using it. If you're building in winter, cure indoors at room temperature since cold slows or disrupts the curing process.
One finishing trick I use: paint the exterior surfaces before final assembly whenever possible. It's much easier to get clean coverage on flat panels than on a fully assembled box with all its interior corners. Just leave the glue-joint areas unpainted so adhesion stays strong during assembly.
Hanging and placement: where and how to put them up
Where you put the birdhouse or feeder matters as much as how well you built it. Bad placement means no birds, regardless of how good the project looks.
For the bird feeder
Height and distance from windows are the two biggest placement factors. Hang your feeder either within 3 feet of a window or more than 30 feet away. That sounds counterintuitive, but the logic is simple: birds that are close to a window haven't built up enough flight speed to hurt themselves if they startle and hit the glass, while birds more than 30 feet away have enough space to redirect. The dangerous zone is 4 to 30 feet away, where birds get up to full speed before impact.
For pole-mounted feeders, aim for the feeding station to sit about 5 to 6 feet off the ground and at least 8 to 10 feet away from the nearest tree trunk, deck rail, or fence. This distance makes it harder for squirrels to jump onto the feeder from a launch point. A squirrel baffle on the pole just below the feeder is the most effective deterrent available.
For the birdhouse
Mount the birdhouse facing away from the prevailing wind direction (usually east or southeast in most of North America) to keep rain from driving into the entrance. A height of 5 to 10 feet off the ground works well for wrens and chickadees. Make sure there's some nearby cover, like shrubs or small trees, within 10 to 20 feet: birds use this cover to scope the box before entering. Don't mount it directly in full sun all day or the interior will overheat.
For hanging your popsicle stick birdhouse, eye screws threaded into the back panel work well. Run wire or heavy twine through both screws and hang from a branch, shepherd's hook, or bracket. Make sure the mount is stable: a birdhouse that swings violently in wind will discourage nesting.
If you're curious how mounting approaches differ across DIY birdhouse materials, check out our guide on how to make bird houses out of PVC pipe, which covers some different mounting strategies that work for heavier or more permanent installations.
Troubleshooting: what to fix when things go wrong
Loose or failing joints
If joints are separating, the most common causes are insufficient glue coverage, using indoor PVA outdoors, or not clamping the joint while the glue set. To fix a failed joint, clean off any old dry glue with sandpaper, reapply outdoor wood glue, and clamp or bind the joint for at least an hour. If you're making repairs on a fully assembled structure, a syringe applicator lets you get glue into tight gaps without disassembly.
Leaks and water inside the birdhouse
Water getting inside a birdhouse usually comes from one of three places: the entrance hole (if the roof doesn't overhang enough), the roof ridge joint (if the peak isn't well sealed), or gaps between wall panels. NestWatch (Cornell Lab) also highlights ventilation and other design features as key elements of a good birdhouse water getting inside a birdhouse usually comes from one of three places. Check that the roof overhang extends at least an inch past the front wall.
If the ridge is leaking, glue an additional layer of sticks along the peak or add a strip of waterproof tape across the ridge as a temporary fix while you plan a permanent repair. Any gaps between wall panels that face upward will funnel rain inside, so orient gaps so they face downward or sideways.
Warping
Popsicle sticks warp when one side gets wet and the other stays dry. This happens when you haven't sealed all surfaces evenly. If a wall panel is bowing, apply sealant to the concave (bare) side and clamp the panel flat while it dries. Going forward, always seal all faces of a panel, not just the outer-facing side. The cross-hatched double-layer construction described in the build steps significantly reduces warping compared to a single-layer wall.
Birds not using the birdhouse
Give any new birdhouse at least one full nesting season before worrying. If it's been ignored for two seasons, check: is the entrance hole the right size? Is the box in a high-traffic area (too much human activity nearby)? Is it facing into prevailing wind or rain? Is there no nearby cover for birds to perch and observe before entering? Fixing placement issues makes more difference than any modification to the box itself.
Paint peeling or sealant flaking
If the finish is peeling after one season, it either wasn't fully cured before being exposed to weather, or you used an interior-grade product outdoors. Strip the flaking areas back to bare wood with sandpaper, reapply a bird-safe exterior water-based paint, and follow with a proper outdoor sealant. Allow the full 30-day cure before the structure goes back outside.
Popsicle sticks vs. other DIY birdhouse materials
Popsicle sticks are genuinely good for this project, but they're not the only option and they do have trade-offs. Here's how they stack up against common alternatives.
| Material | Cost | Durability | Ease for Beginners | Best For |
|---|---|---|---|---|
| Popsicle/craft sticks | Very low ($3 to $8 for bulk pack) | Moderate (needs sealing) | Excellent | Feeders, decorative birdhouses, first builds |
| Pallet wood | Free to very low | High (thicker wood) | Moderate (requires saw) | Durable nesting boxes, larger builds |
| Milk cartons | Free (repurposed) | Low (degrades faster) | Excellent | Quick seasonal feeders, kids' projects |
| PVC pipe | Low to moderate | Very high (weatherproof) | Moderate | Long-lasting nest tubes, wrens, bluebirds |
| Wine corks | Low (if collected) | Low to moderate | Moderate | Decorative birdhouses, wall-mount displays |
| Coconut shell | Low | Moderate to high | Easy | Natural-look small wren/chickadee houses |
My recommendation: popsicle sticks are the best starting point. The material is cheap, forgiving, and lets you learn joinery and finishing techniques without wasting expensive lumber. Once you've built one or two popsicle stick projects and understand what makes a birdhouse work, you'll feel confident scaling up to more durable materials. If you want to explore another great beginner option, take a look at how to make a bird house with ice cream sticks, which uses very similar techniques and sticks that are often interchangeable with craft sticks.
And if you enjoyed the cork entry in that table, we have a detailed walkthrough on how to make a bird house out of wine corks that covers the full build process for that quirky and surprisingly effective approach.
The bottom line is this: a popsicle stick birdhouse or feeder you build today, with the right outdoor glue, a bird-safe water-based finish, and correct placement, will hold up for multiple seasons and genuinely attract birds to your yard. The materials cost almost nothing, the tools are minimal, and the skills you build transfer directly to every other birdhouse project you take on after this one. Start with the feeder, get comfortable, then build the birdhouse. You'll be surprised how quickly this becomes a habit.
FAQ
Can I use hot glue by itself or mixed with wood glue for a popsicle stick birdhouse or feeder?
Choose unfinished, outdoor-rated options for every surface birds touch, including the roof underside and any interior ledges. If you already glued with hot glue, fully cover those joints with an outdoor polyurethane or penetrating oil so the exterior stays intact even in direct sun and rain.
Should I seal the inside of the birdhouse or can I leave it unfinished?
Yes, but expect lower nest success and more maintenance. Birds often prefer natural spacing and drainage, so sealant should be water-based and exterior-rated, while the interior should stay unsealed. Also ensure the entrance hole is not painted over, paint can reduce airflow and make it harder for birds to enter.
What should I do if birds do not visit my popsicle stick feeder?
If you get no visitors after a couple of weeks, switch the feeder seed before changing anything else. Try black-oil sunflower first, then mixed seed or safflower if you have heavy finch or house sparrow pressure. Remove any wet seed and wash the tray so moldy residue does not keep birds away.
Can I leave a popsicle stick bird feeder outside year-round?
Do not, even if the feeder looks sturdy. Feeder slats and seed trays get soaked by weather and expand unevenly, which loosens glue lines over time. If you want a winter-proof project, add a weather cover design (roof overhang on all sides) and use outdoor-rated sealant on every face, then bring it inside during freezing rains or heavy snow.
Is it safe to use a wood hardener or epoxy to strengthen weak popsicle stick joints?
Add a hardener only if you can keep it bird-safe, and never use products labeled solvent-based, alkyd, or interior-only. Many “wood hardeners” contain chemicals that can off-gas, so for this project, stick to the water-based exterior paint or penetrating oil approach already covered.
Can I mount my popsicle stick birdhouse to a fence, post, or balcony railing instead of a tree?
Yes for feeders, but use bird-safe materials and avoid heavy metal hardware inside the box. A simple wire or heavy twine mount is fine, but keep the birdhouse from swinging, because constant motion can discourage nesting and wear down glue joints at the mount points.
Do I need to sand the entrance hole edges, and when should I drill the opening?
For entrance holes, drill cleanly after the walls are assembled, and keep the edges smooth by sanding the hole rim. Rough or jagged edges can reduce acceptance, especially for small species like chickadees, and can trap splinters.
How often should I refill and clean the feeder, and does the depth of seed matter?
Yes, it can be too much, especially for the feeder. A deep seed bed traps moisture and can grow mold, which repels birds and can be harmful. Keep the refill shallow and replace seed every 2 to 3 days, then increase frequency during hot, humid weather.
My finish is dry to the touch, can I put the birdhouse outside immediately?
Not usually. Some bird-safe paints dry quickly but still need full curing time before you introduce birds, and cold can slow curing. If you build in winter, cure indoors and only place outdoors after the full recommended cure window, even if the surface feels dry.
If my birdhouse gets ignored, what are the first things I should troubleshoot before making changes to the design?
Use an outcome check rather than trial-and-error modifications. If the structure is ignored for two seasons, inspect the entrance size for your target species, confirm roof overhang (to keep rain out of the entrance), and confirm the placement has nearby cover within the suggested range. Only after those checks, consider small changes like adjusting orientation away from wind-driven rain.
Next Articles

How to Build a Chimney Swift Bird House DIY Guide
Step-by-step DIY plans to build a chimney swift bird house, with correct dimensions, placement, and weatherproofing for

How to Build an Oriole Bird House: Step-by-Step DIY
Step-by-step DIY for building an oriole bird house with right dimensions, weatherproofing, predator-safe placement, and

How to Build a Chickadee Bird House Step by Step
Step-by-step DIY chickadee bird house with cut list, chickadee entry sizing, ventilation, drainage, and mounting tips.