A bird room is a dedicated indoor space where your birds can live, fly, and thrive beyond the limits of a single cage. You build it by converting a spare room, large closet, or purpose-built enclosure into an escape-proof, ventilated, enrichment-filled environment with the right surfaces, perches, lighting, and access points. The project is absolutely doable with basic carpentry skills, standard lumber, wire mesh, and some salvaged materials. This guide walks you through every stage: planning the space, making it safe, building the shell and doors, and setting up the interior so your birds stay healthy and stimulated long-term. If you are specifically looking for a bird garden, you can adapt these same planning and safety fundamentals outdoors for a garden layout birds can safely use This guide walks you through every stage.
How to Build a Bird Room: DIY Step-by-Step Guide

What exactly is a bird room (and what are you building)?
A bird room is not the same as a birdhouse in your backyard, a garden habitat, or even a standard outdoor aviary. It is an indoor, fully enclosed space dedicated to housing one or more birds, typically inside your home or in an attached structure like a garage or sunroom. The goal can vary a lot depending on your situation.
- A flight room: a whole spare bedroom or large room converted so birds can fly freely, returning to perches or open cages at will
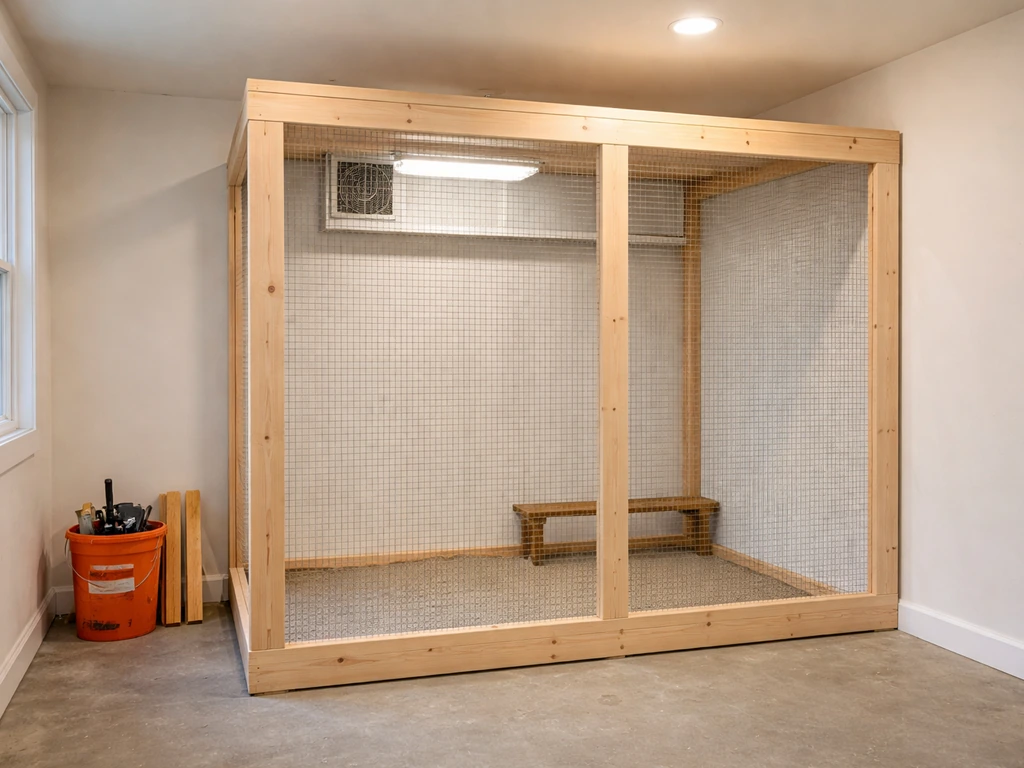
- An indoor aviary room: a framed, wire-mesh enclosure built inside a room, large enough for multiple birds (popular for finches, canaries, budgies, or cockatiels)
- A breeding room: a quieter, controlled-light space set up specifically to encourage nesting and raise chicks safely
- A flock room: a communal living area for a collection of companion parrots or softbills where socialization is the priority
Each of these has slightly different priorities, but the core build process is the same: you are creating a bird-safe enclosure with good airflow, escape-proof access, easy-clean surfaces, and enough space for natural behavior. If you are trying to build something similar in Minecraft, check out our guide on how to make a bird aviary in Minecraft. If you are more interested in an outdoor structure, that falls closer to a full aviary build. If you decide to go bigger or more outdoors, use the same planning mindset and follow a dedicated guide for how to make bird aviary enclosures. If you plan to go bigger outdoors, the next step is learning how to build a bird aviary in Australia with the right layout, materials, and safety checks how to make bird aviary. If you want the same concept outdoors, you can use these principles as a foundation for how to build a bird aviary later. This guide focuses on the indoor version.
Plan before you pick up a single tool
Choosing the right location
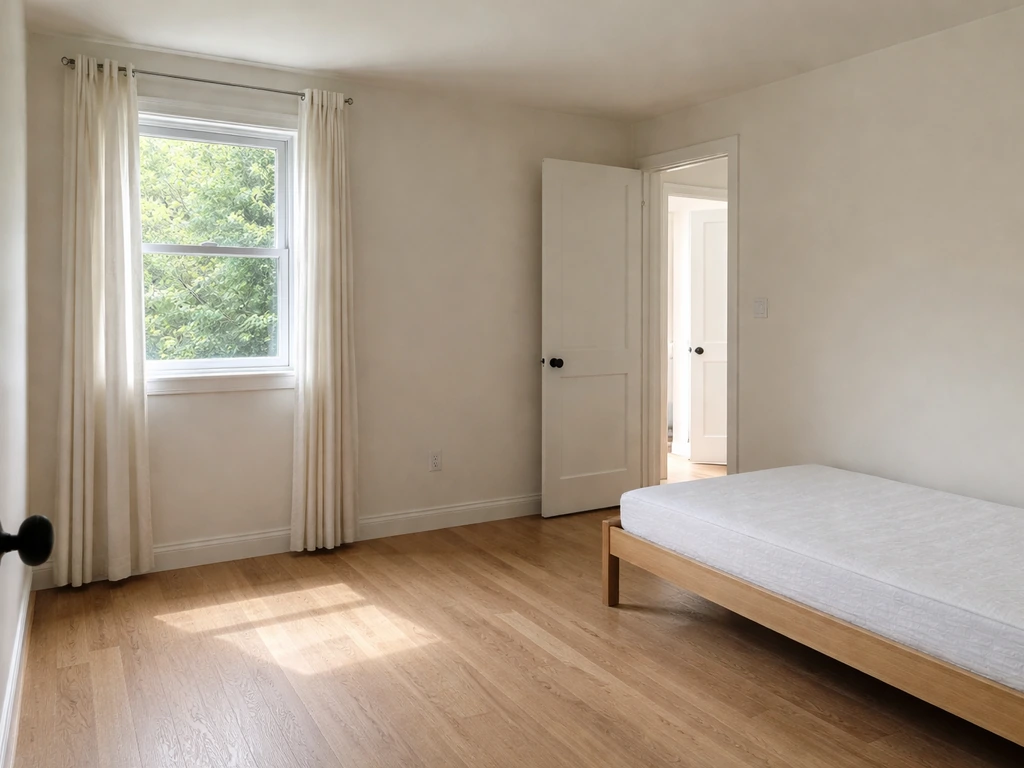
The single biggest planning decision is where the room goes. A spare bedroom is the easiest starting point because the shell is already built. A garage conversion works too, but you have to think harder about temperature control. Whatever space you choose, keep it away from the kitchen. This is not optional. Nonstick (PTFE) cookware fumes, even when you cannot smell them, can cause rapid, life-threatening respiratory distress in birds. The avian respiratory system is extraordinarily sensitive, and fumes from overheated pans can kill a bird in minutes. Keep the bird room on the opposite side of the house from where you cook, and make sure there is no shared ventilation duct between the kitchen and the bird space.
Beyond the kitchen rule, look for a room that gets some natural light, stays on a relatively stable temperature, and is not on a main household traffic route. Constant foot traffic past the enclosure stresses birds. Placing cages in corners where at least two sides feel secure helps birds feel safer and less exposed.
Sizing the space to your birds
Bigger is almost always better, but there are practical minimums. Your birds need enough room to extend both wings fully without touching a wall or ceiling, and for active fliers, the enclosure should be longer than it is tall to actually allow flight rather than just wing-flapping. A small cockatiel flock needs a different footprint than a pair of macaws. Write down your bird species, how many birds you have now, and how many you realistically expect to add. Then size the room or internal enclosure around the largest realistic flock, not the current one.
Temperature and humidity targets
For most common companion birds including budgies, cockatiels, conures, and parrots, aim to keep the room between 65 and 80 degrees Fahrenheit. Proper insulation and consistent airflow help you maintain stable temperature and humidity targets for your birds year-round aim to keep the room between 65 and 80 degrees Fahrenheit. Cockatiels specifically do well at 70 to 80°F. Humidity should sit at 40 to 50 percent for most species. Too dry and you get feather and skin problems, plus increased powder-down dust from species like cockatiels, cockatoos, and African greys. Too humid and you risk mold in food and nesting materials. A basic digital hygrometer (under ten dollars at any hardware store) is worth every penny.
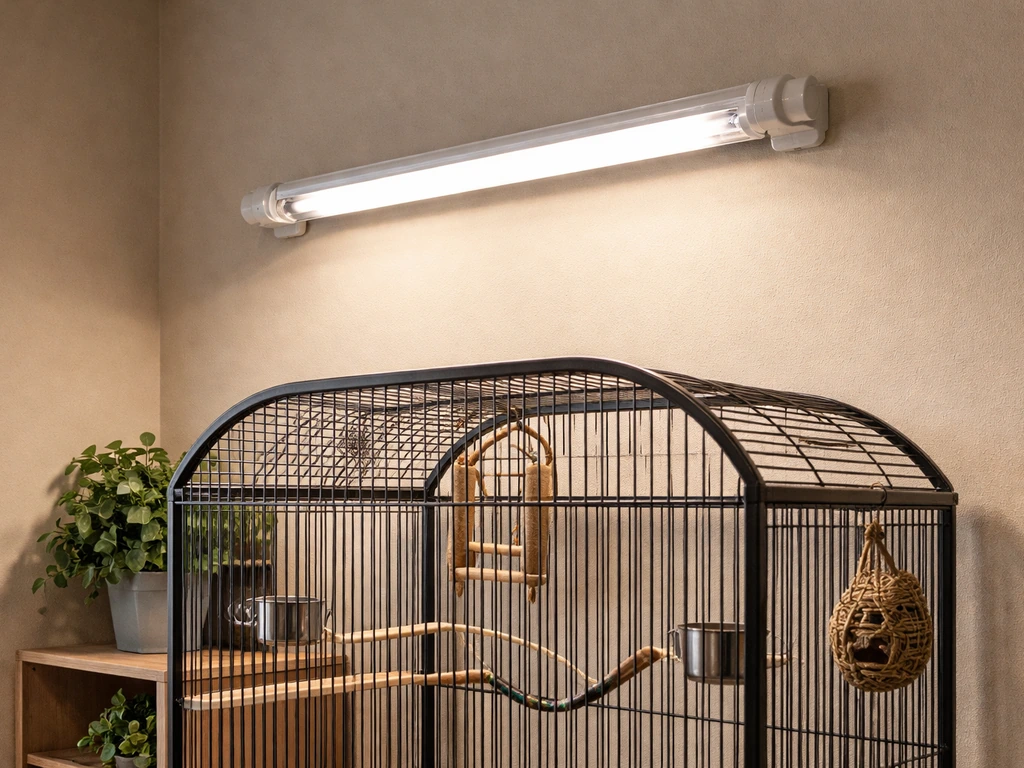
Lighting plan
Natural light is great, but do not rely on it alone. Birds need UV light for vitamin D synthesis and general wellbeing. Install full-spectrum UV lamps and run them for roughly the same number of hours the bird would experience daylight in its native environment. Critically, set up the lighting so there are zones: a brightly lit basking area and a shaded retreat. Forcing birds to live under constant uniform light is stressful. A dimmer or a second lamp on a separate timer is an easy way to create that variation. If you are setting up a breeding room, be aware that photoperiod (day length) directly influences breeding cycles, so controlling your light timer carefully matters more in that context.
Safety and comfort: the non-negotiables
Ventilation
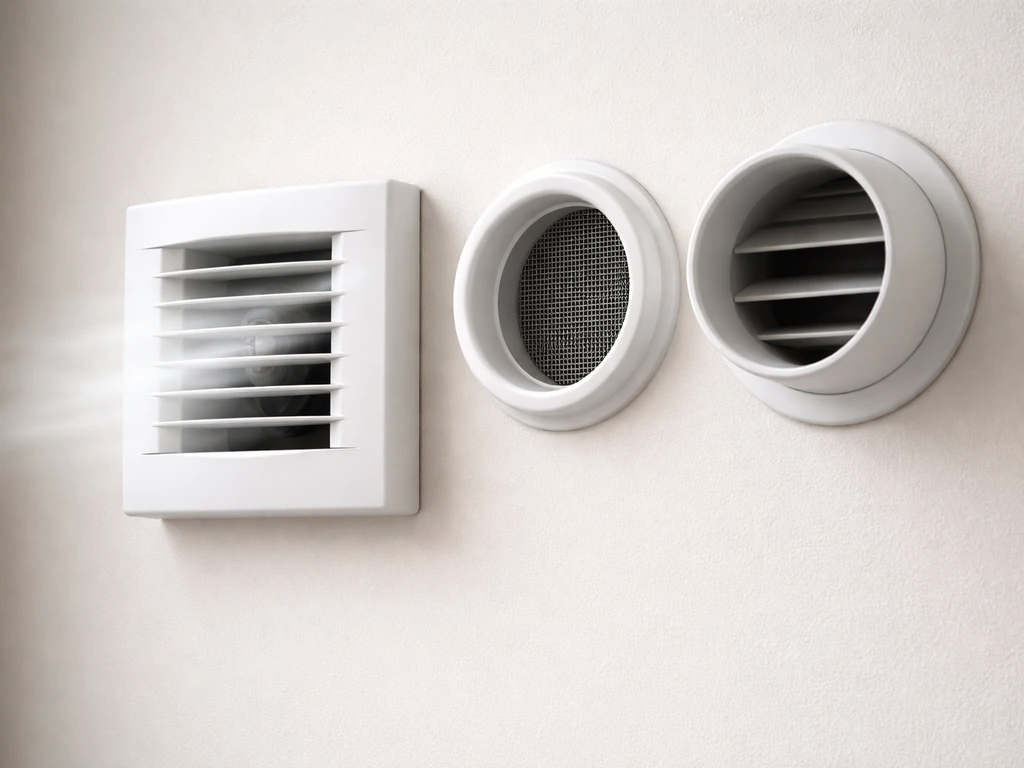
Good airflow is critical, especially if you keep powder-down species. Cockatoos, cockatiels, and African grey parrots produce fine particulate dust that accumulates fast in a closed room and can trigger pulmonary hypersensitivity in birds housed in poorly ventilated spaces. A simple HVAC vent with a HEPA filter, combined with a standalone air purifier rated for the room size, covers most situations. If you are building an enclosed aviary structure inside the room, make sure the mesh panels allow passive airflow rather than sealing the interior completely. You want fresh air moving through, not stagnant air sitting in the space.
Fumes and toxins
The kitchen fumes issue deserves repeating because it catches people off guard. PTFE nonstick coatings emit invisible, odorless toxic fumes when overheated. Other airborne hazards in a home include aerosol sprays, scented candles, air fresheners, paint fumes, and cleaning product vapors. During construction, use water-based paints and sealers, and let everything fully cure and off-gas for at least two weeks before birds move in. Never use spray cleaners inside the bird room when birds are present. If a bird is ever exposed to fumes or shows sudden respiratory distress, get it into fresh air immediately and call an avian vet.
Escape-proofing
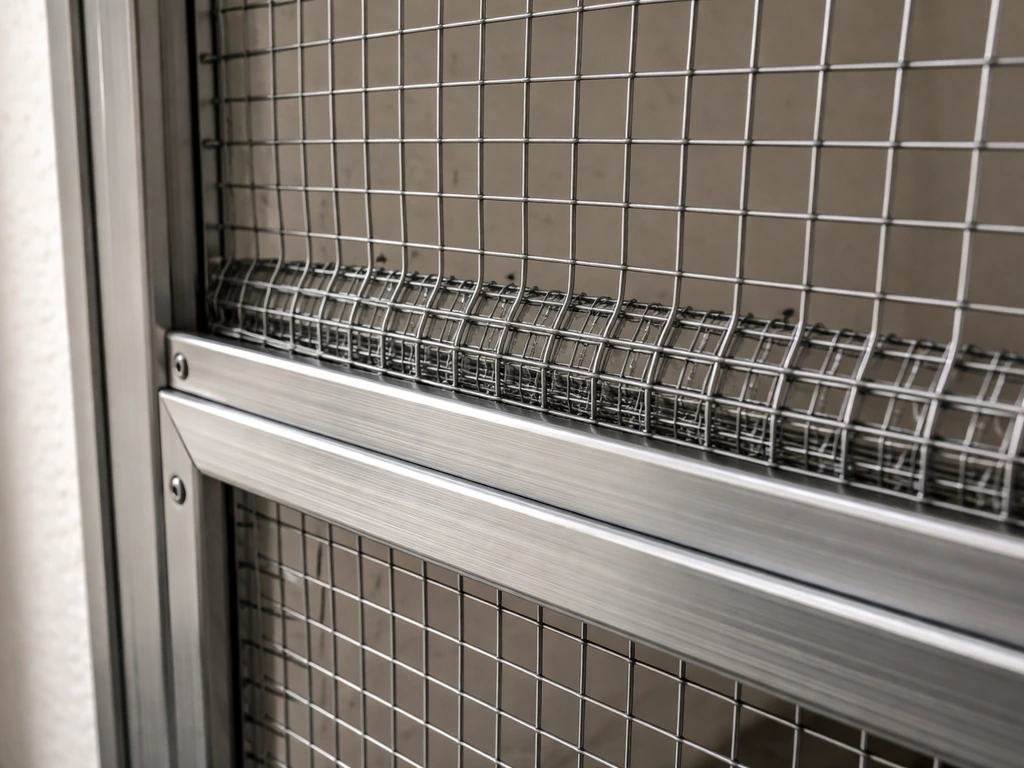
Escape-proofing has two layers: the enclosure itself and the room around it. For any wire mesh or cage panel used in the build, bar spacing must match your species. Openings that are too wide let birds squeeze through or, worse, get their heads trapped. A practical reference: 0.5-inch spacing for budgies, cockatiels, lovebirds, and parrotlets; 0.75-inch for conures and mini macaws. For the room door, build or modify it so it functions like an airlock. The bird-room door should never open directly to an unsecured space. Add a small vestibule or a secondary mesh door so you can close one door before opening another, eliminating the chance of a bird slipping past you on your way in or out. This is standard practice in any serious aviary build.
What you need: materials and tools
Core materials
- 2x4 or 2x3 framing lumber for any new walls or internal cage frames
- Welded wire mesh (galvanized, 16- or 19-gauge) in the correct bar spacing for your species
- Plywood or OSB (at least 1/2 inch) for walls, shelving, and floor protection
- Water-based, bird-safe paint or sealant for all painted surfaces
- Heavy-duty hinges, latches, and bolt locks for doors
- PVC-coated wire or stainless steel hardware for any interior fittings (avoid zinc and lead-based hardware)
- Natural wood branches (untreated apple, willow, birch, or eucalyptus) for perches
- Ceramic or stainless steel food and water dishes
- Vinyl or linoleum floor covering for easy cleaning (avoid carpet in the bird room entirely)
Repurposed materials that work great
You do not have to spend a fortune. Repurposed materials work well in a bird room as long as you vet them carefully for toxins and sharp edges. Old shelving units make excellent perch-mounting frames. Salvaged solid wood doors (stripped of old paint and resanded) are perfect for the vestibule door. Untreated wooden pallets can be broken down for framing if the wood is clean and dry. Second-hand stainless steel kitchen racks and dish-drying stands work brilliantly as interior shelving or perch supports. Just avoid anything with rust, unknown paint, treated lumber (like pressure-treated pine), or previous chemical exposure.
Tools you actually need
- Circular saw or hand saw for lumber cuts
- Cordless drill and a set of drill bits
- Staple gun (heavy-duty, for securing mesh to frames)
- Wire cutters and pliers for mesh work
- Level and tape measure
- Sandpaper (80 and 120 grit) for smoothing all interior edges
- Screwdriver set
- Safety glasses and work gloves (wire mesh edges are sharp)
If you do not own a circular saw, a jigsaw or even a handsaw gets the job done for most of this build. Almost every cut in a bird room is a straight line.
Building the bird room shell and access
Step 1: Prep the room
Strip out carpet if it is there. Carpet traps seed hulls, droppings, and moisture, and you cannot disinfect it properly. Replace with vinyl sheet flooring or seal the subfloor with a water-based epoxy and lay a linoleum tile on top. Wipe down all walls, check for any gaps around pipes or baseboards where a bird could get stuck, and fill those with non-toxic caulk. Sand down any rough wall edges at bird height.
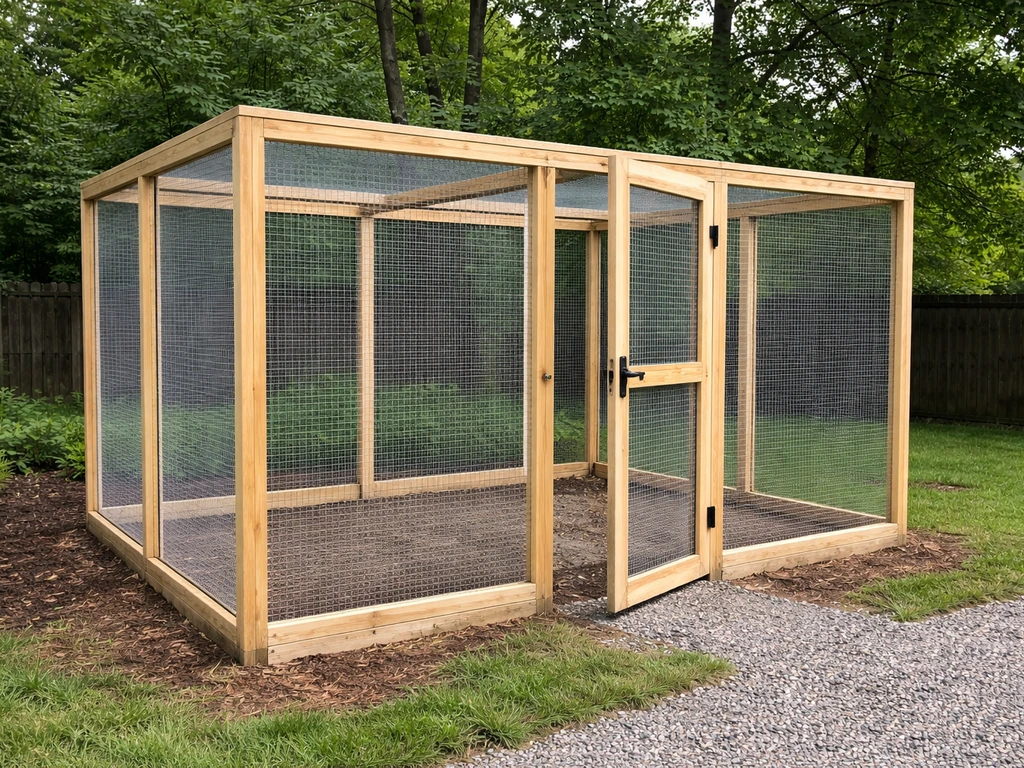
Step 2: Build or frame the enclosure walls
If you are using the whole room as a flight space, your main job is securing the perimeter. Check every window and add a secondary layer of framed mesh over window openings so you can open the window for ventilation without creating an escape route. If you are building a standalone internal aviary structure within the room (which gives you more flexibility, especially for breeding setups), frame it with 2x3 or 2x4 lumber. Build the frame sections flat on the floor first, then stand them up and bolt them together. The structure does not need to touch the ceiling unless you want full height, but taller is better for flight. Once the frame is up, cut mesh panels to fit each section and staple or screw them in with U-staples or washer-head screws. Pull the mesh tight before securing it, loose mesh sags and catches feet.
Step 3: Surfaces and cleaning considerations
Every interior surface should be smooth enough to wipe clean and durable enough to handle regular scrubbing with hot water and non-toxic disinfectant. Sand all interior wood edges with 120-grit paper so there are no rough or sharp surfaces that could injure a bird or catch feathers. Paint interior walls and wood surfaces with a bird-safe, water-based paint, let it cure completely before birds enter the space, typically two weeks minimum. Avoid putting sandpaper-style cage liners on any surface inside the room: birds will pick at them and can develop gastrointestinal problems from ingesting the grit.
Step 4: Build the access doors and vestibule
This step is where a lot of DIY bird rooms fall short, and it is one of the most important parts of the build. You need at least two doors: the main room door (or the enclosure access door) and a secondary door or mesh gate that creates an airlock between the bird space and the outside. Build a small vestibule, even just 24 to 30 inches deep, using a basic framed mesh panel with a hinged door. The workflow becomes: open outer door, step in, close outer door behind you, then open the inner door. Even a bird that escapes its perch cannot get past both doors before you react. Use heavy-duty latches with bolt locks on both doors, and consider carabiner clips on cage-within-room doors since many parrots learn to open simple hook latches on their own.
Setting up the interior: perches, food, water, and nesting
Perches
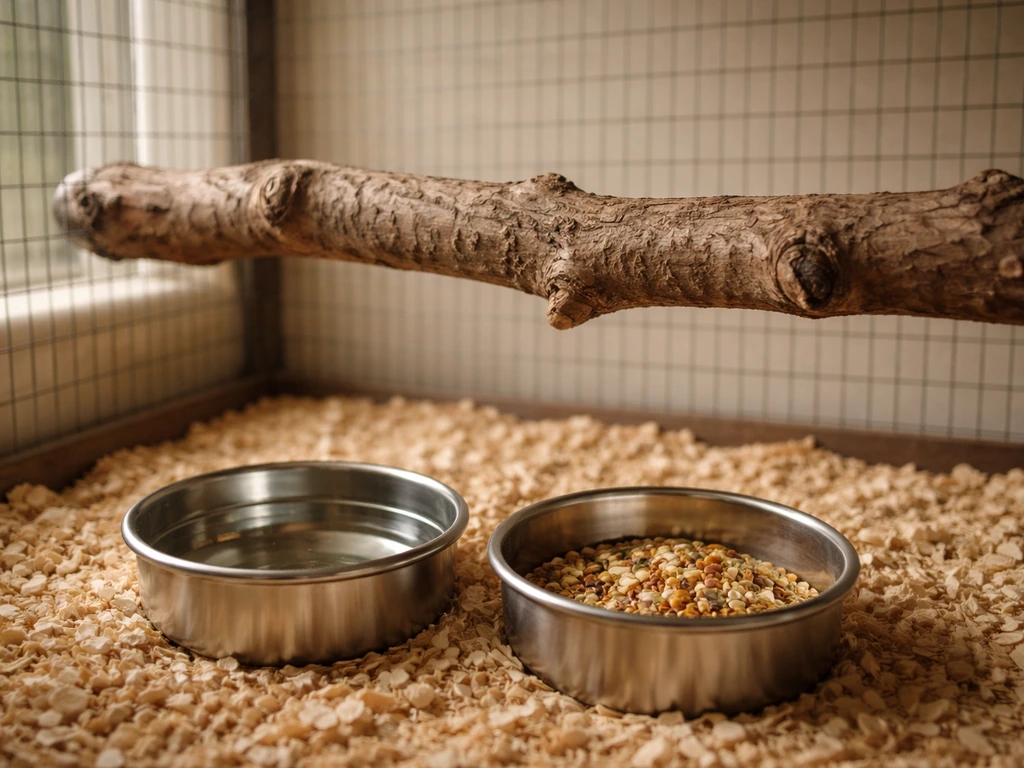
Natural wood branches are the best perch material you can use, and many of them are free. Apple, willow, birch, and eucalyptus branches (cleaned and dried) give varied diameters along a single branch, which exercises different foot muscles and helps prevent arthritis. Perch diameter should match the bird's foot size so that when the bird grips the perch, the toes wrap approximately 3/4 of the way around. For cockatiels, a diameter range of about 1/2 to 1 inch covers most individuals comfortably. Mount perches at different heights and avoid placing lower perches directly under higher ones to keep droppings from contaminating food or water below. Leave open flight paths between perches rather than cluttering the entire space.
Feeders and water
Use stainless steel or ceramic dishes wherever possible. Plastic dishes crack, harbor bacteria in scratches, and some birds will chew and potentially ingest them. Mount food and water dishes at a comfortable height, not directly below a perch, and make them easy to remove without reaching deep into the space in a way that stresses the birds. Daily dish cleaning is not optional: food and water dishes need washing every single day. Leaving wet seed or damp pellets in a dish overnight creates mold fast, especially in a room that holds some humidity.
Nesting and breeding areas
If you are building a breeding room, nest boxes should be mounted high (birds feel more secure nesting at height) and positioned so you can check them without major disruption. Use a simple hinged inspection door on each box. For species that produce heavy powder down like cockatiels and cockatoos, provide a shallow bathing dish or misting station inside the room. Regular water baths help birds maintain feather and skin quality and significantly reduce the amount of dust that builds up on surfaces. If breeding is not your goal, you can skip permanent nest boxes, though providing a small sleeping hut or partially enclosed rest area is still good welfare practice for many species.
Enrichment and keeping the room working long-term
Enrichment zones
A well-designed bird room is not just a big cage. It is a space that encourages natural behaviors: foraging, exploring, problem-solving, and social interaction. Think of the room in zones: a foraging zone where you hide food in puzzles or wrap treats in paper for birds to unwrap, a climbing and exercise zone with ropes, ladders, and varied perches, a rest zone with sheltered spots away from the main activity, and a social zone near where you spend time so birds can interact with you without pressure. Sensory variety matters too, including items with different textures, sounds, and materials.
Toy rotation
Do not just fill the room with toys and leave them there. Rotate toys regularly, either daily or weekly depending on how quickly your birds lose interest. Putting a toy away for two weeks and reintroducing it is often as stimulating to a bird as a brand new item. Use your deep-clean days (see below) as natural rotation checkpoints: swap toys, rearrange perches slightly, change up foraging locations. Birds that feel their environment changes predictably and safely stay more curious and mentally healthy.
Cleaning routine that actually works
A realistic cleaning schedule keeps the bird room healthy without burning you out. Here is what works in practice:
| Task | Frequency | Notes |
|---|---|---|
| Wipe down food and water dishes | Daily | Use hot water and mild non-toxic soap; rinse thoroughly and dry before refilling |
| Sweep or vacuum floor | Daily | Seed hulls and droppings accumulate fast; a handheld vacuum makes this quick |
| Replace cage liners or floor paper | Daily or every 2 days | Newspaper works fine; skip sandpaper liners entirely |
| Spot-clean perches and surfaces | Every 2 to 3 days | Scrape droppings while fresh; dried droppings are harder to remove |
| Full scrub of all surfaces and perches | 1 to 2 times per month | Use non-toxic disinfectant and hot water; let everything dry completely before birds return |
| Wash and rotate toys | Weekly | Wash before storing; inspect for damage before reintroducing |
Always dry surfaces completely before birds go back in. Damp seed and wet wood surfaces grow mold quickly, and mold spores are a real respiratory risk in a space with birds.
Upgrades to plan for over time
A bird room is never really finished. Once yours is running well, common upgrades include adding a dedicated misting system for baths, installing a timer-controlled full-spectrum lighting setup with a dawn-to-dusk dimming cycle, or adding a small pass-through hatch to a secured outdoor flight area for seasonal access. If you expand your flock later, you can add modular mesh panels to the existing frame rather than rebuilding from scratch, which is a good reason to build with a standard lumber grid from the start.
Quick-start checklist before your birds move in
- Location confirmed: away from kitchen, low traffic, stable temperature between 65 and 80°F
- Flooring: carpet removed, easy-clean vinyl or linoleum installed
- Walls and surfaces: painted with bird-safe water-based paint, fully cured for at least two weeks
- Mesh panels: installed with correct bar spacing for your species, no sharp wire edges exposed
- Vestibule/airlock entry built and functioning with two separately latching doors
- Ventilation: airflow confirmed, air purifier installed, no shared duct with kitchen
- Lighting: full-spectrum UV lamps installed with timer, light and shade zones created
- Perches: natural wood branches at varied diameters and heights, no perch directly over food or water
- Dishes: stainless steel or ceramic, easy-access mounting, daily cleaning plan confirmed
- Toxin check: no nonstick cookware nearby, no aerosols or scented products in the room
- Cleaning kit ready: non-toxic disinfectant, hot water access, brush or scraper, vacuum
- Enrichment baseline: at least one foraging item, one climbing structure, one sheltered rest spot
Building a bird room is one of the most rewarding projects you can do for your birds. It is also genuinely achievable on a modest budget with basic tools and some repurposed materials. Take it one section at a time, get the safety fundamentals right first (ventilation, escape-proofing, toxin-free surfaces), and then build out the enrichment layer as you learn what your specific birds respond to. A bird condo can be built by applying the same planning basics as a full bird room, especially escape-proofing, safe surfaces, and proper ventilation. The room will evolve, and that is a good thing.
FAQ
Can I build a bird room in a basement or garage if I manage temperature well?
Yes, but prioritize moisture control and airflow. Basements and garages often have higher humidity swings and cooler air near the floor. Add humidity monitoring, use sealed flooring you can wipe, and ensure the HVAC or filtered exhaust pulls air through the bird space rather than just circulating it around.
What bird-safe paint or sealers can I use during construction?
Use water-based, bird-safe products intended for interior surfaces, and do not rely on labels alone if the product is unknown or previously used. After painting or sealing, keep birds out until everything is fully cured and off-gassed for at least two weeks, then run ventilation and verify no fumes remain.
How do I choose the right wire mesh size without risking head entrapment?
Match bar spacing to the species and re-check during upgrades. If you plan to add birds later, pick spacing that fits the smallest-bodied birds you might house (many people overlook future parrotlets or lovebirds). Also confirm the mesh is tensioned properly, so it does not sag and widen gaps over time.
Is a separate enclosure inside the room better than using the whole room for flight?
Both can work, but choose based on cleaning and safety workflow. If you use the whole room as flight space, you must secure every opening and window. If you use a nested aviary, the outer room can be slightly simpler, but you still need proper airflow through the inner mesh so it does not become a stagnant dust chamber.
How can I prevent birds from escaping when I open doors and clean daily?
Treat entry like an airlock every time, and consider adding two-step access even for routine tasks. Keep food and water stations positioned so you are not forced to reach inside near doorways, and use latches that birds cannot learn to operate (carabiner clips and bolt locks help for parrots).
What are common construction mistakes that make bird rooms unhealthy?
The biggest ones are using porous materials you cannot disinfect (like carpet), leaving rough edges at bird height, and failing to fully seal gaps around baseboards or pipes. Another frequent issue is relying on stagnant air, especially when powder-down birds are involved, which makes fine dust accumulate faster.
How do I handle odorless threats, like aerosols and cleaning fumes, during maintenance?
Avoid spray products entirely while birds are in the room. Use non-spray cleaning tools, rinse thoroughly, and keep aerosol sources (air fresheners, candles, paints, aerosol disinfectants) outside the bird room plan. If you must clean elsewhere in the home, isolate the bird room by closing shared vents and running ventilation before re-entry.
Do I need UV lighting if the room has windows?
Windows can help with visible light, but do not assume they provide the UV range birds need for vitamin D synthesis. Use full-spectrum UV lamps and set up light zones so birds can move to shade when they want to. Also, run lighting on timers consistent with your species and daylight pattern.
How should I size perches and place them to reduce foot and droppings issues?
Match perch diameter to the birds’ feet so toes wrap about three-quarters of the way around when gripping, then provide varied diameters along the same natural branch. Place perches at multiple heights but avoid stacking directly over food and water, because droppings below can turn daily hygiene into a constant problem.
Are misting or bathing stations safe for all birds?
Many birds benefit, but you must control moisture and placement. Provide a shallow bath or misting option, then ensure airflow prevents damp areas from lingering. Use it as part of a feather-care routine, not as a way to raise humidity constantly, especially if your room already risks mold.
How do I create a practical toy rotation schedule without stressing birds?
Rotate on a predictable cadence, daily or weekly depending on how quickly your birds habituate. Store toys off-site or in a closed bin, then reintroduce them after about one to two weeks. Pair rotation with small perch and foraging location changes, since birds respond better to variety than to constant toy clutter.
What is the safest way to expand the bird room later?
Design the frame and interior layout to accept modular changes. If you build with a standard lumber grid and leave space for additional mesh panels, you can add sections without dismantling the whole setup. Always re-check bar spacing and door latching after modifications, because small structural changes can create new escape paths.
How do I respond immediately if a bird shows respiratory distress?
Move the bird to fresh air right away and stop all potential fume sources immediately. If symptoms are sudden or severe, contact an avian veterinarian urgently rather than waiting to see if it improves, since respiratory damage can progress quickly in birds.

Step-by-step DIY guide to build a safe small bird aviary, from planning and materials to wiring, doors, and maintenance.
Step-by-step plans to build indoor or outdoor wood bird aviary, from sizing and airflow to secure doors and finishing.
Step-by-step DIY plans to build a chimney swift bird house, with correct dimensions, placement, and weatherproofing for