You can build a bird shower perch in an afternoon using untreated wood, a few basic tools, and some hardware you probably already have. The goal is a stable, grippy landing spot positioned right next to your birdbath or water feature so birds have somewhere safe to perch, preen, and dry off after bathing. Get the diameter right for your target birds, skip any toxic finishes, and place it about 6 to 12 inches from the water's edge and you'll have something birds actually use.
How to Make a Bird Shower Perch: DIY Step-by-Step

Marcus Thornton
22 May 2026

What a bird shower perch is and where to put it
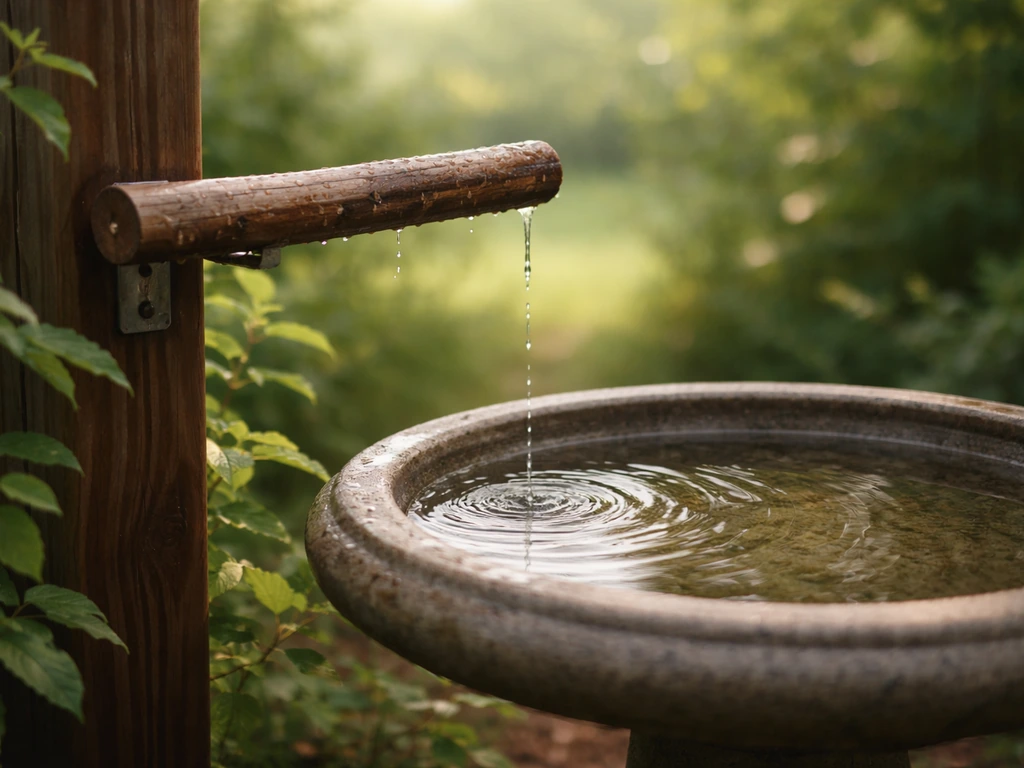
A bird shower perch is essentially a dedicated landing and preening bar positioned right next to a birdbath, dripper, or mister. Texas Parks and Wildlife brochures describe birdbath blank" rel="noopener noreferrer">drippers as a water-feature style that encourages bathing behavior with slow rhythmic dripping, rather than just standing water. After birds bathe, they need somewhere nearby to shake off, preen, and dry. If there's no convenient perch close to the water, a lot of birds will skip the bath entirely or just drink from the edge without ever getting in. Think of it as completing the bathing station rather than being a separate project.
Placement matters almost as much as the build itself. You want the perch sitting 6 to 12 inches from the splash zone, elevated just slightly above the water level so birds can hop between the two easily. Keep the overall setup about 10 to 15 feet away from dense shrubs or hedges that could hide a cat or other predator. Birds won't use a bath or perch that feels like an ambush waiting to happen.
At the same time, make sure there's some loose cover like a shrub or small tree within about 10 feet in the other direction so they have a quick escape route if they get spooked. That combination of open approach and nearby escape cover is the sweet spot for making birds feel safe enough to actually relax and use the thing.
For balconies and small spaces, the same rules apply in miniature. Mount the perch on the railing or attach it to a pot stand, and make sure there's at least a small potted plant or trellis nearby for birds to retreat to. Even on a second-story balcony, birds will find and use a well-placed bathing station.
Materials and tools you'll need
The most important rule here is to avoid treated lumber. Pressure-treated wood contains chemical preservatives that can leach into wet surfaces and harm birds, and this matters even more in a setup that's constantly wet. Stick with natural, untreated hardwoods or softwoods, or use natural branches. Cedar and redwood are both naturally rot-resistant and completely safe. For a simpler build, a sturdy section of natural branch works beautifully, especially one with a little natural texture already built in.
- Untreated cedar, redwood, or hardwood lumber (1x2 or 1x3 for the perch bar, 2x2 or 2x4 for the upright post)
- Natural branch offcuts as an alternative perch bar (oak, birch, maple, apple — avoid cherry, walnut, and any treated or painted wood)
- Exterior-grade stainless steel or galvanized screws (rust-proof is critical in a wet environment)
- Waterproof wood glue rated for outdoor use
- Aquarium-safe or food-contact-safe silicone sealant for any joints that will sit in or directly against water
- Sandpaper (80-grit for shaping, 120-grit for smoothing edges — used only during construction, not on the perch surface itself)
- Drill with bits sized for pilot holes and your mounting screws
- Hand saw or miter saw
- Measuring tape and pencil
- C-clamps or bar clamps
- Optional: a U-bolt or hose clamp kit for attaching to an existing birdbath stand
A quick note on finishes: skip them entirely for the perch bar itself. No paint, no varnish, no stain on any surface a bird will grip or land on. If you want to protect the base or post from ground moisture, a thin coat of raw linseed oil on just the post is acceptable, but keep it far from the perch bar and let it cure completely (at least a week) before birds can access the structure. The same goes for any sealant: use only aquarium-safe silicone, let it cure fully, and rinse the perch well before putting it outside.
Step-by-step build instructions
This is the basic free-standing version that works in a yard or on a patio. It takes about two to three hours including drying time for the glue.
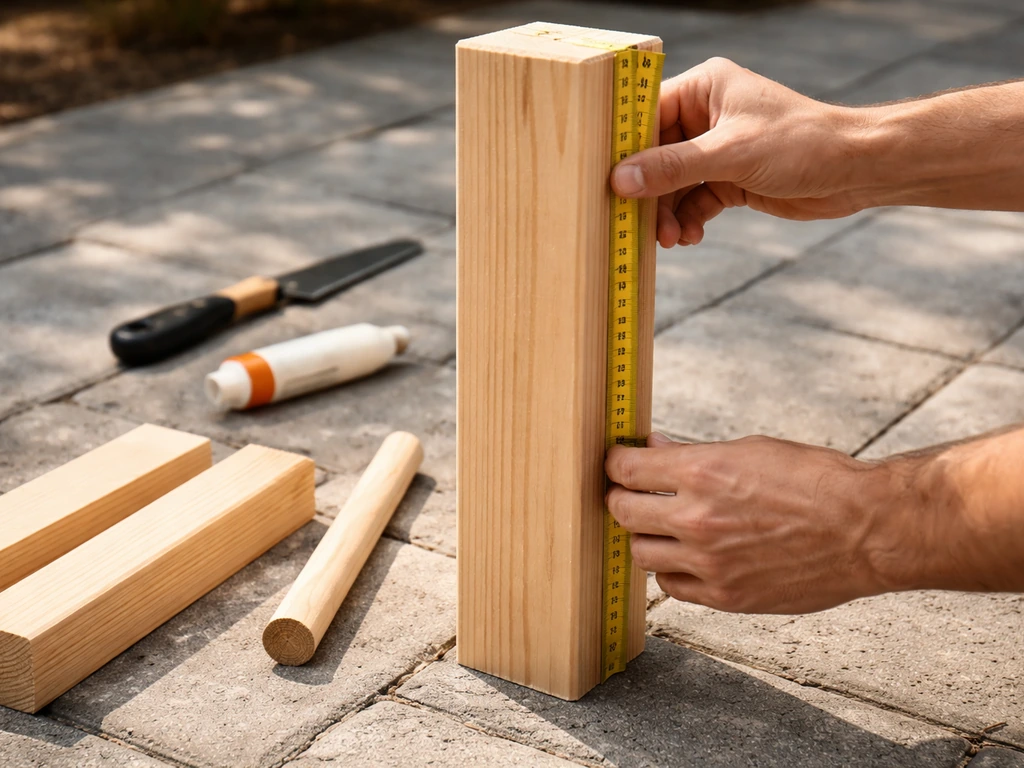
- Cut your upright post to height. For a standard pedestal birdbath, aim for a post height that puts the perch bar about 2 to 4 inches above the bath rim. For a ground-level or low bath, 8 to 12 inches total height works well. A 2x2 cedar post is sturdy enough for most small to medium birds.
- Cut your perch bar to length. For a single-bird perch, 10 to 12 inches is plenty. If you want to accommodate two or three birds at once, go 18 to 24 inches. Round any sharp cut ends with 120-grit sandpaper — run your finger along every edge and corner and smooth anything that catches.
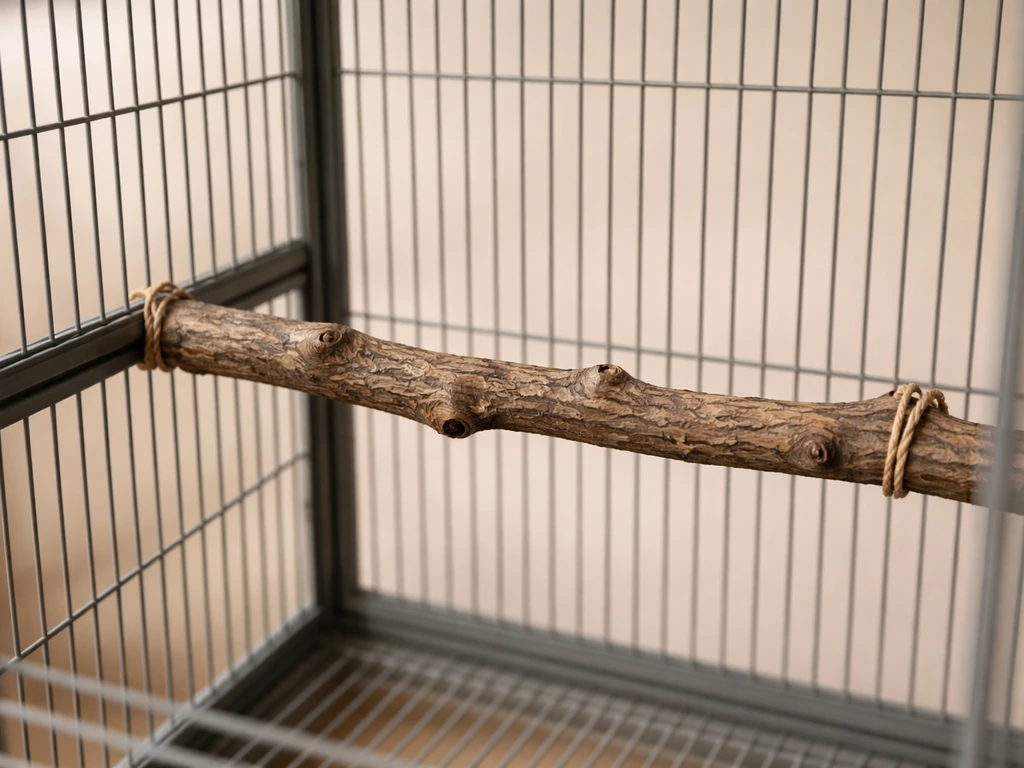
- If using a natural branch as the perch bar, strip any loose bark and check for splinters or cracked sections. Sand smooth any rough cut ends but leave the natural bark texture on the main gripping surface intact — that texture is genuinely useful grip for birds.
- Drill a pilot hole through the center top of the upright post, then attach the perch bar perpendicular to the post using two stainless steel screws. Pre-drilling prevents splitting. If the bar is a round branch, use a hose clamp or a saddle-style clamp to secure it instead of screws through the branch itself.
- For the base, cut two short crosspieces (about 6 to 8 inches each) from leftover 2x2 or 2x4 and attach them to the bottom of the post in an X or T-shape. This keeps the whole thing from tipping in wind or when a bird lands hard. Screw and glue all base joints.
- Sand every surface on the base and post smooth. The perch bar surface should stay naturally textured if it's a branch, or lightly scuffed with 80-grit if it's flat lumber — just enough texture for grip but not enough to catch or cut. Run your palm over it. If it doesn't feel smooth enough to hold without discomfort, it's not safe for bird feet either.
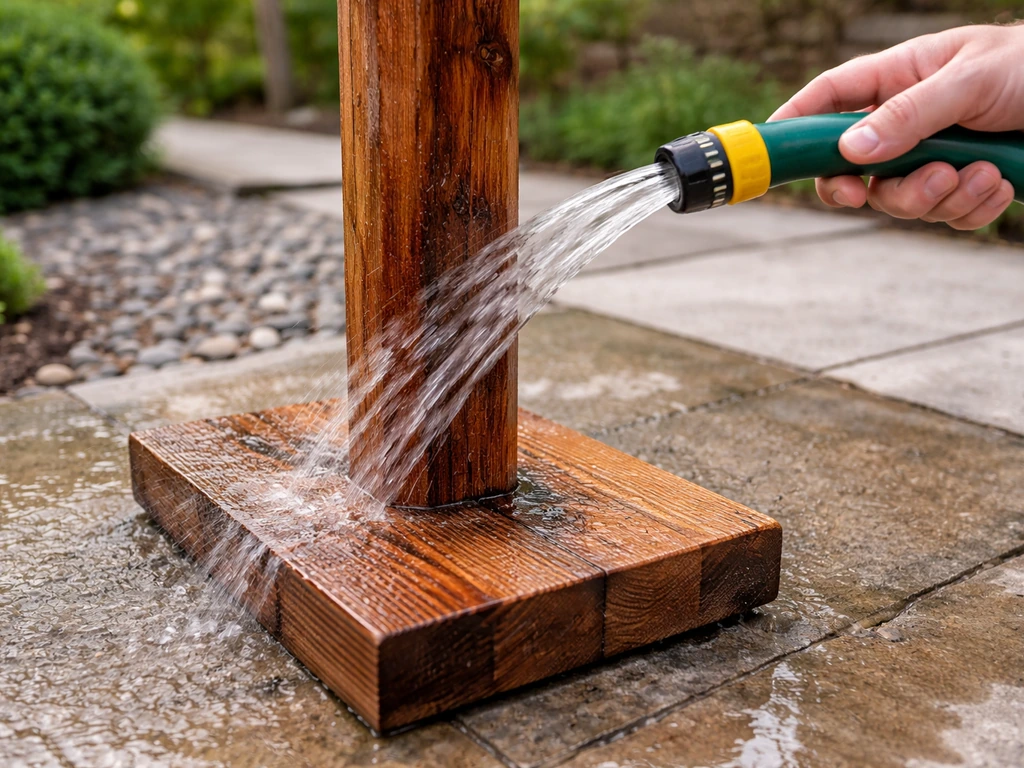
- Let all glue cure completely (check your glue's label — most exterior wood glues need 24 hours). Rinse the entire structure with clean water before putting it outside.
Adjusting the design for different birds and grip needs
Perch diameter is the single biggest factor in whether birds can actually grip it. The rule of thumb is that a bird's toes should wrap about three-quarters of the way around the perch. If the bar is too thick, their feet splay flat and they slip. Too thin, and smaller birds clench too tight and tire out. Here's a practical size breakdown:
| Bird type | Perch diameter | Notes |
|---|---|---|
| Finches, warblers, small sparrows | 3/8 to 1/2 inch | Thin branch or dowel works well here |
| Robins, starlings, medium thrushes | 3/4 to 1 inch | Standard 1x2 lumber edge or medium branch |
| Jays, mockingbirds, larger songbirds | 1 to 1.5 inches | Round branch or 1x2 lumber face |
| Pigeons, doves, larger birds | 1.5 to 2 inches | 2x2 post edge or thick branch |
For yards with a mix of bird sizes, consider making a two-tier perch with a thinner bar on top and a thicker one below. This also solves the problem of larger birds monopolizing the whole structure. If you want variety without a complicated build, stagger two perch bars at slightly different heights on the same post, using the size guidelines above.
Texture matters too, especially when the perch is wet. A natural branch is ideal because the bark gives birds something to actually dig their toes into. If you're using smooth lumber, score the surface lightly with a wire brush or rough it up gently with 80-grit sandpaper during construction. The key word there is during construction. Don't leave sandpaper on the perch surface or use sandpaper-covered wraps as a grip solution, these cause foot sores over time. Think of it more like lightly weathering the surface than coating it. A slightly irregular, naturally textured branch will always outperform smooth wood when wet.
If you're building for hummingbirds specifically, go much thinner: a 1/4-inch dowel or very slender twig is appropriate. Hummingbirds don't bathe the same way larger birds do, but they will use a fine mist from a dripper setup and tend to perch on extremely fine branches afterward. Position the perch higher, about 12 to 18 inches above the water feature, and keep it in partial shade.
How to attach and install it

You've got a few good options here depending on your setup. Each method has tradeoffs for stability, portability, and whether you're working with an existing birdbath or starting from scratch.
Free-standing base
The T-base or X-base described in the build steps above works well for flat surfaces like patios or decking. If you're placing it on soil, add a ground stake by extending the post an extra 6 to 8 inches and driving that section into the ground. Wet ground can soften and tip a base-only design, so staking is worth doing if your setup gets any kind of wind.
Clamping to an existing birdbath or stand
If you already have a pedestal birdbath, the easiest attachment is a U-bolt or hose clamp around the pedestal stem. Drill a hole through your post, thread the U-bolt through, and tighten it against the stem. Position the perch bar so it sits just above and to one side of the basin, not blocking the water surface. This setup is also easy to remove for cleaning, which matters a lot in practice.
Balcony railing mount
For balconies, use railing brackets (the kind used for flower boxes work fine) to clamp the base of the post to the railing. Make sure the perch is on the outside of the railing, not the indoor side, and that the water dish or dripper is positioned at roughly the same height. A shallow terra cotta saucer on a small shelf bracket makes a perfect minimalist balcony birdbath to pair with this setup.
Repurposed materials
Old garden stakes, thick bamboo poles, driftwood, and apple or cherry tree prunings all make excellent perch posts and bars if they're uncoated and chemical-free. I've built a version using an old wooden broom handle as the post and a forked apple branch as the perch bar, it looked better than a hardware-store build and the birds used it immediately.
If you're going the branch route, the article on how to make bird perches out of branches covers prep and safety in more detail and is worth reading alongside this one. If you're starting from scratch, this guide on how to make a bird ladder can help you add more feeding and perching options over time The article on how to make bird perches out of branches.
If you want a branch-based build, the article on how to make bird perches out of branches walks through prep, sizing, and safety so the perch is grip-friendly for birds.
Weatherproofing, safety, and keeping it clean
Cedar and redwood hold up well in outdoor, wet conditions without any treatment. If you used pine or another softwood, the base and post will eventually weather and soften, so check joints every few months and retighten or replace screws as needed. Stainless steel or hot-dipped galvanized fasteners are non-negotiable here, cheap zinc screws will rust within a season and can leave orange staining that birds seem to avoid.
Clean the perch every time you clean the birdbath, which should be at least once a week in summer and every couple of weeks in cooler months. Algae and droppings build up fast on wet wood. Use a diluted vinegar-and-water solution (roughly 1 part white vinegar to 9 parts water) and a stiff brush, then rinse thoroughly with plain water. Avoid bleach directly on the perch bar. While bleach is sometimes used to clean birdbath basins, any residue on a surface birds grip and stand on can be harmful. If you do use it on the basin, rinse five or six times and let it air dry completely before refilling.
Inspect the perch surface regularly for splinters, cracked wood, or any lifting grain. Wet wood splits over time. If you see a raised grain or rough patch developing, a very light pass with 120-grit sandpaper to knock it down is fine, just rinse well afterward. Replace the perch bar if it starts to crack through or if the wood feels spongy when you press it, soft, rotting wood can harbor mold and bacteria that isn't good for birds.
One extra weatherproofing step worth doing: angle the top of your upright post slightly if you're using a flat-cut top, or drill a small drain hole through the joint where the perch bar meets the post. Water pooling in that joint is the number one cause of rot in this type of build. A 1/8-inch angled relief cut on the top of the post sends water running off instead of sitting there.
When it's wobbly, slippery, or birds just ignore it
The perch keeps tipping
A tipping perch is almost always a base issue, not a post issue. Widen the base crosspieces to at least 8 inches each direction, or add a third crosspiece. For soil placement, always stake it. If you're on a hard surface and can't stake, you can mount the base to a heavy flat stone or a concrete paver using construction adhesive (just make sure it's fully cured and the stone is large enough to act as a real counterweight). A perch that moves or falls when a bird lands on it will be abandoned immediately.
Birds are slipping on wet wood
First, check the diameter against the size chart above. A perch that's too thick for the bird visiting it will cause slipping no matter what the surface feels like. If the size is right, the surface is probably too smooth. Rough it up gently with a wire brush rather than sandpaper, which gets too abrasive for bird feet. If you used smooth lumber, seriously consider swapping the perch bar for a natural branch, the difference is dramatic and immediate. Bark texture in the right diameter range grips wet bird feet in a way that sanded lumber just doesn't replicate.
Birds visit the bath but won't use the perch
This usually comes down to placement or familiarity. If you want a climbing-style setup instead, you can use the same careful placement and grip-focused materials when you learn how to make a bird climbing net bird shower perch. Make sure the perch is within 12 inches of the bath on the side birds typically approach from. If they can see it but have to fly away from their escape cover to reach it, they'll skip it.
Try moving the perch 90 degrees around the bath so it sits on the side closest to the nearby shrub or tree. Sometimes it also just takes a week or two for birds to learn a new feature, don't move it again immediately.
If birds are actively using the bath but still not landing on the perch after two weeks, try roughening the perch surface a bit more and check that there are no shiny or reflective elements near the perch that might be spooking them. If you still see birds avoid the perch, review the specific guidance on how to make manzanita bird perches for the best natural grip and shape.
Birds avoid the whole station
This is almost always a safety-perception problem, not a construction problem. Revisit the placement: is there dense cover within a few feet that could hide a predator? Is the bath in a high-traffic area where humans or pets pass close by? Move the whole station to a quieter spot with an open approach on one side and escape cover nearby on the other. Birds that feel trapped or watched won't stop to bathe or preen no matter how well-built the perch is.
FAQ
Can I paint, stain, or varnish the bird shower perch to make it last longer?
For most yard birds, avoid treating the perch itself, and do not rely on exterior paints or clear coats anywhere a bird’s feet touch. If you want protection for the upright only, use a thin layer of raw linseed oil on the post, keep the oil off the bar by at least a few inches, and give it a full week to cure in dry weather before birds can access the structure.
How high should the perch bar be relative to my birdbath water?
In practice, you want the top of the perch bar so birds can hop from the water edge without needing to jump upward. A helpful target is keeping the bar slightly above the bath rim (not level with it), and positioning it 6 to 12 inches from where water splashes, so they land on dry-ish grip rather than directly on the wet lip.
What should I do if different bird species are visiting and one size takes over the perch?
If you are building for a mix of visitors, two-tier spacing helps. Use a smaller top bar sized for smaller birds, and a thicker lower bar for larger birds, and stagger heights enough that birds do not feel like they have to land on a single dominant spot.
Is the perch size different if I want hummingbirds to use the bird shower setup?
Hummingbirds usually respond better to very fine perches than to standard landing bars. Use a slender 1/4-inch dowel or twig, place it higher (about 12 to 18 inches above the water feature), and keep it in partial shade to reduce glare on wet surfaces.
If my wood is smooth, can I rough it up after assembly to improve grip?
Yes. Scoring or roughing the surface should happen during construction, not after installation as a “grip coating.” A better approach is to use naturally textured bark on a branch, or lightly rough smooth wood with a wire brush, then rinse and let it weather naturally rather than adding sandpaper edges that can irritate feet over time.
What hardware should I use so the perch does not loosen or rust in the wet area?
Fasteners matter most in wet joints and areas that see movement. Use stainless steel or hot-dipped galvanized hardware, and check that the perch bar is tight and aligned so it does not rock. Cheap zinc screws rust quickly and can create surface grime birds may avoid.
My perch feels wobbly when birds land. How do I fix tipping safely?
If the perch keeps tilting or wobbling, treat it as a stability problem first. Widen the base crosspieces (aim for at least 8 inches each direction), add a third crosspiece if needed, and if on soil, stake the setup. On hard surfaces, use a real counterweight like a heavy paver and ensure any adhesive is fully cured before letting birds use it.
Birds try to land but slip off. Is it the diameter or the surface texture?
Start by confirming the diameter matches the local bird size. If toes cannot wrap about three-quarters of the way around the bar, slipping is likely. If the diameter is correct, focus on texture, switch from smooth lumber to a bark-on branch, or use only light roughening like a wire brush to avoid overly abrasive surfaces.
Why would birds use the bath but never land on the perch?
Not always. Birds may avoid the setup if it feels exposed or if the bathing area is near frequent human or pet traffic. Try rotating the perch position around the bath so it is closest to the side with nearby escape cover, and consider moving the entire station if it sits in a high-traffic pathway.
What are common non-building reasons birds avoid the perch even if it’s the right size?
Reflective or shiny elements can deter landing. Scan for things like polished metal near the perch, bright glare on wet wood, or hardware that catches light at eye level. If you see any, reposition the perch, cover reflective items away from the landing zone, and re-check placement after you remove the visual trigger.
What is the safest way to clean the perch bar and keep it bird-safe?
For cleaning, do not use bleach on the perch bar because residue on grip surfaces can be harmful. A practical method is a diluted vinegar solution (about 1 part white vinegar to 9 parts water), scrub with a stiff brush, then rinse thoroughly with plain water and allow it to dry before refilling.
How often should I inspect or replace the perch if it stays wet?
Yes, you should schedule checks. Inspect every few months for raised grain, splinters, cracks, and spongy or soft areas. If the bar starts cracking through or feels soft (a sign of rot), replace it rather than sanding indefinitely, because mold and bacteria can form inside damaged wood.
How can I reduce rot where the perch bar meets the post?
Angle or drainage helps prevent rot at the joint where water collects. If your upright post top is flat cut, angle the top slightly so water sheds, and if possible drill a small drain relief at the joint where the bar meets the post, since pooling there is a major rot trigger.
Next Articles
How to Make Bird Perches Out of Branches Step by Step
Step-by-step guide to craft safe bird perches from branches: picking wood, sizing, cleaning, mounting, and troubleshooti
How to Make a Bird Ladder: Wooden DIY Step by Step
Step-by-step plan to build a safe wooden bird ladder, with sizing, spacing, tools, anchoring, and bird-safe finishing.
How to Make a Bird Climbing Net Step by Step DIY
Step-by-step DIY guide to build a safe bird climbing net with size, knotting, mounting, tension, and care tips.