You can build a safe, grippy rope bird perch in under an hour using natural cotton or sisal rope, a wooden dowel or branch as your base, and a handful of hardware screws or cage clips for mounting. The key things to get right are rope diameter (matched to your bird's foot size), tight wrapping or knotting so nothing slips or frays mid-use, and a secure mount that doesn't wobble. Get those three things right and you'll end up with a perch your bird will actually use every day. If you meant a Minecraft bird house, the main steps are choosing a location, gathering blocks, and following a simple build pattern in your world how to make a bird house in minecraft.
How to Make a Rope Bird Perch Step by Step Safely

Marcus Thornton
29 Apr 2026
Why rope bird perches work (and where to use them)
Rope perches give birds something that flat wooden dowels or PVC pipes simply can't: a slightly yielding, textured grip surface that flexes under foot pressure. That flex means the tendons and joints in a bird's feet aren't locked into the same position all day. Over time, that variety in grip angle and surface texture is genuinely good for foot health, especially for birds that spend most of their time indoors in a cage.
The texture also helps birds stay stable without gripping too hard. Smooth dowels make birds work harder to hang on, which tires their feet. A rope-wrapped or braided perch with some give lets them relax. That's why you'll often see parrots go straight to a rope perch and just sit there looking very comfortable.
Where do rope perches work best? Inside cages as a mid-level or corner perch, in aviaries strung between posts or anchor points, near feeding stations where birds want a comfortable landing spot, and as climbing connectors between platforms. They're less ideal as an outdoor perch in wet climates because natural rope absorbs moisture and rots, but for indoor or covered outdoor setups they're one of the best options you can build.
If you've already built a general bird perch from a branch or dowel, a rope perch is a natural next step, and the two designs work really well together in the same cage. A rope ladder connecting two branch perches, for example, gives your bird a full enrichment setup that exercises feet, legs, and coordination all at once. If you want to take it further, a bird rope ladder is a great way to connect perches and add climbing enrichment.
Choosing the right rope and parts
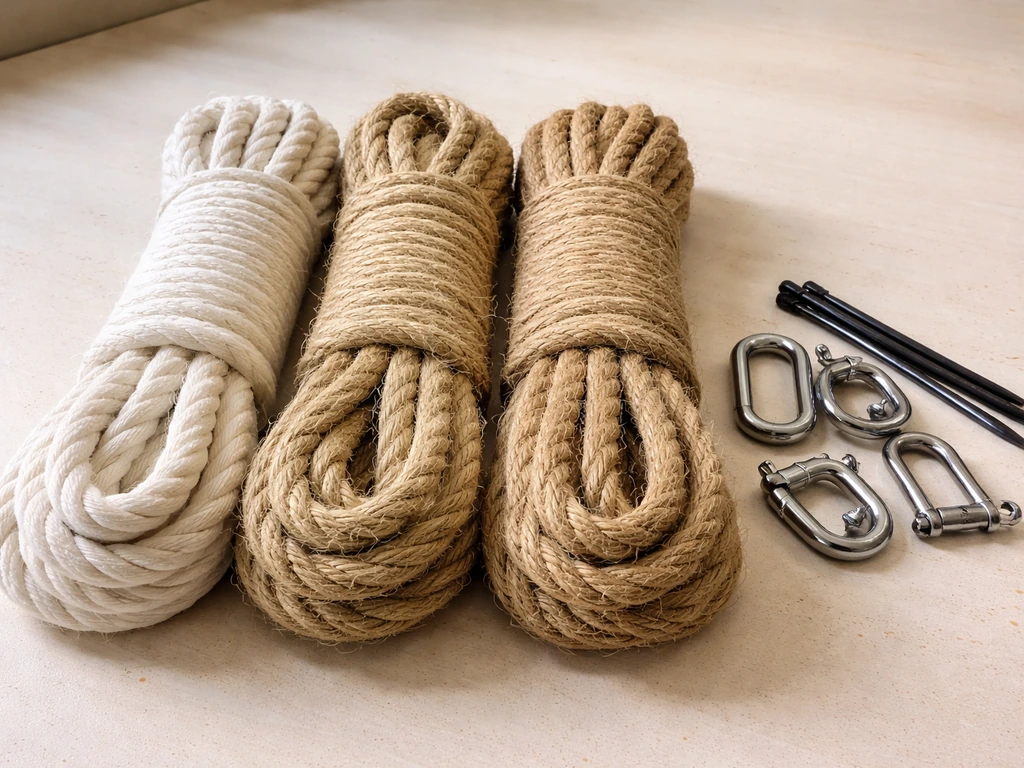
This is where a lot of first-timers go wrong, and I've made this mistake myself: buying whatever rope looks sturdy at the hardware store without checking what it's made of or how it's finished. Some rope has chemical coatings, dyes, or synthetic cores that are genuinely toxic to birds. So let's go through what's actually safe. The Aussie Parrotlets care guide PDF v.3 states that sisal rope is among the safest rope-perch options, making sisal a preferred fiber what's actually safe.
Safe rope materials
| Rope Type | Safety | Grip / Texture | Durability | Best For |
|---|---|---|---|---|
| 100% natural cotton | Safe if undyed or bird-safe dye | Soft, medium grip | Moderate | Small to medium birds, budgies, cockatiels, lovebirds |
| Sisal | Safe, naturally undyed | Rough, high grip | Good | Medium to large parrots, birds that need strong grip |
| Jute | Safe if untreated | Medium, slightly rough | Moderate | Small to medium birds |
| Hemp (unbleached) | Safe if untreated | Medium-rough | Good | Medium birds, parakeets, conures |
| Nylon / polyester | Not recommended | Slick or variable | High | Avoid — threads can fray into thin filaments that wrap around toes |
| Polypropylene | Not recommended | Slick | High | Avoid — same entanglement risk as nylon |
My top recommendation for most people is unbleached cotton rope. It's widely available, soft enough for small birds, has enough texture for medium parrots, and it doesn't have the aggressive fraying problem that synthetic ropes do. blank" rel="noopener noreferrer">Sisal is a close second for larger birds like African greys or Amazon parrots that need a really grippy surface and can handle the coarser texture.
Sizing the rope diameter to your bird's feet
The rope (or the finished perch diameter) needs to match your bird's foot so that the front toes wrap around about two-thirds of the perch and the back toe (hallux) can still grip. If the perch is too thin, the toes overlap and the bird can't grip properly. Too thick, and the foot is stretched flat without any grip at all.
| Bird Size / Species | Recommended Perch Diameter | Rope Diameter to Use |
|---|---|---|
| Finches, canaries | 3/8 inch (approx. 1 cm) | 1/4 inch rope or thinner |
| Budgies, parrotlets | 1/2 inch (approx. 1.3 cm) | 1/4 to 3/8 inch rope |
| Cockatiels, lovebirds | 5/8 to 3/4 inch (1.6–1.9 cm) | 3/8 inch rope |
| Conures, caiques | 3/4 to 1 inch (1.9–2.5 cm) | 1/2 inch rope |
| African greys, Amazons | 1 to 1.5 inch (2.5–3.8 cm) | 3/4 inch rope or wrap over dowel |
| Macaws, cockatoos | 1.5 to 2 inch (3.8–5 cm) | 3/4 to 1 inch rope over thick dowel base |
For larger birds, you'll almost always want to wrap rope around a wooden dowel or natural branch base rather than relying on the rope alone to hold the bird's weight. The rope gives the texture and grip; the dowel gives the structural strength.
Hardware and other parts you'll need
- Wooden dowel or natural branch (for the base, if building a wrapped perch)
- Screw eyes or eye bolts: stainless steel, sized to fit your rope diameter
- Quick links or snap hooks: stainless steel, for attaching to cage bars or aviary wire
- Cage clips or perch clamps: for cage-bar mounting without drilling
- Wood glue (non-toxic, PVA-based): for securing knot ends on the dowel
- Beeswax (optional): for coating rope ends to reduce fraying without chemicals
- Zip ties (bird-safe grade): for secondary securing of knots if needed
Avoid anything with zinc hardware (common in cheap craft supplies) because zinc is toxic to birds. Stick to stainless steel for all metal parts, and double-check that any wood you use is untreated and from a bird-safe species. Pine, birch, poplar, and manzanita are all good. Avoid cedar, which has aromatic oils that irritate respiratory systems.
Tools you'll need and measurement / placement planning
Basic tools
- Tape measure and pencil
- Drill with bits sized for your eye bolts
- Scissors or a sharp craft knife (for cutting rope cleanly)
- Lighter or matches (to singe rope ends on synthetic rope only — do NOT use on natural cotton or sisal)
- Needle-nose pliers (for tightening eye bolts and closing quick links)
- Ruler or caliper (optional but useful for checking rope diameter against perch size charts)
Planning your perch placement
Before you cut any rope, figure out exactly where the perch is going. Rope perches are flexible, which is great, but it also means they can swing and press against cage walls or toys if you don't plan the spacing. As a general rule, leave at least 2 inches of clearance on all sides so your bird's tail doesn't drag on the cage wall and its feet don't rub on bars when gripping the perch.
Height placement matters too. In a cage, put your rope perch at a mid to upper height, where birds naturally feel safe. The perch shouldn't be directly above food or water dishes (for hygiene reasons), and it shouldn't be so close to the cage top that the bird's head is cramped. For aviary placement, string the rope perch diagonally or horizontally between two fixed posts, at a height where the birds in that aviary naturally congregate.
Measure the span between your two anchor points and add 10 to 15 percent to your rope or perch length to account for knots, eye bolts, and any natural sag. A rope perch that's too tight will put constant tension on the mounting hardware; a little slack is fine and actually mimics a natural branch flex.
Step-by-step construction methods

There are three main ways to build a rope bird perch: wrapping rope around a dowel base, braiding rope into a freestanding perch, or knotting a simple hung rope perch. Once you choose the right construction method, you can also train your bird to use the new perch safely and comfortably There are three main ways to build a rope bird perch. If you are building a bird perch in Minecraft, you can use the same idea by creating a simple, climbable perch spot that matches where your bird would land rope bird perch. Each works differently and suits different birds and placements. Here's how to do each one. If you want more detailed guidance, follow our step-by-step instructions for how to make a bird perch.
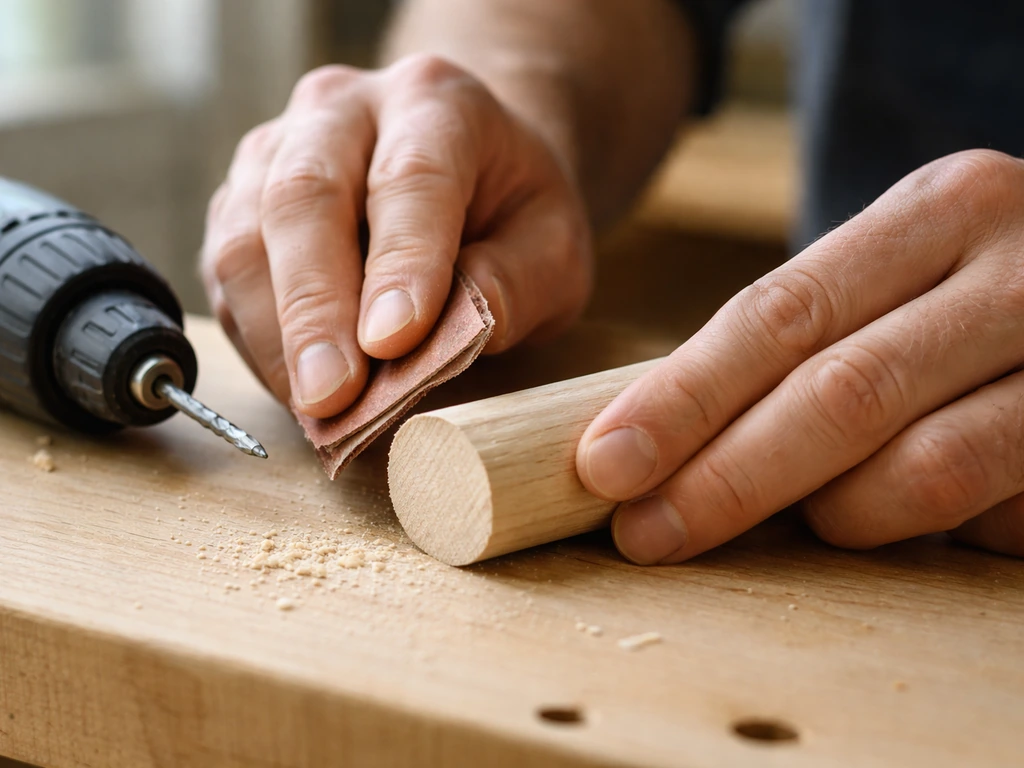
Method 1: Rope-wrapped dowel perch
This is the method I recommend for beginners and for larger birds. You get a sturdy perch with the texture benefits of rope and the structural strength of wood.
- Cut your dowel to your planned perch length. Sand any rough ends with 120-grit sandpaper.
- Drill a small pilot hole in each end of the dowel, sized for your eye bolt threads.
- Screw in one stainless steel eye bolt at each end until snug. Leave the eye (loop) pointing upward or outward depending on your mount direction.
- Apply a small bead of non-toxic PVA wood glue where the rope will start — about 1/2 inch from one eye bolt end.
- Press the rope end into the glue, hold for 30 seconds, then begin wrapping the rope tightly around the dowel in close, even coils. Each wrap should touch the previous one with no gaps.
- Keep tension consistent as you wrap. Loose wraps will slide and bunch once a bird lands on them.
- When you reach the other end, apply another bead of glue, press the rope end into it, and hold. Then tie off with a simple overhand knot pulled tight against the dowel.
- Trim any excess rope to within 1/2 inch of the knot. Apply a tiny dab of glue to the cut end to prevent unraveling.
- Let dry completely (at least 2 hours for PVA glue) before mounting or letting any bird near it.
Method 2: Braided freestanding rope perch
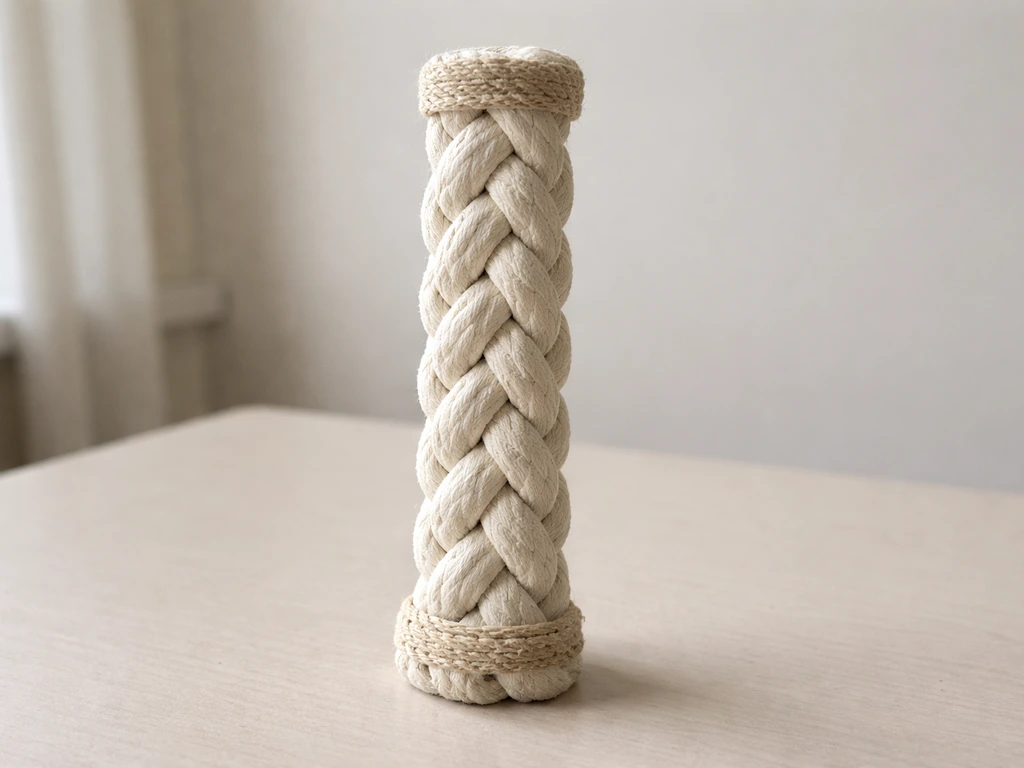
A braided perch uses multiple strands of rope plaited together, creating a thick, naturally textured perch without a wooden core. It's great for smaller birds and for hanging perches in aviaries where you want more flexibility and swing.
- Cut three equal lengths of rope, each about 1.5 times the desired finished perch length (the braid shortens the total).
- Gather all three strands together and tie a large overhand knot about 2 inches from one end, leaving a tail for attaching hardware later.
- Braid the three strands together using a standard 3-strand flat braid (right over middle, left over middle, repeat). Keep tension even and firm.
- When you reach the desired perch length, tie another large overhand knot at that end, again leaving a 2-inch tail.
- Thread a quick link or snap hook through each tail loop (you can loop the tail back on itself and wrap it a few times before tying off for a cleaner finish).
- Test the braid by gripping it firmly and pulling in opposite directions — it shouldn't slip or loosen. If it does, re-braid with tighter tension.
- Trim any stray fiber ends cleanly and apply a tiny dab of non-toxic glue to exposed cut ends.
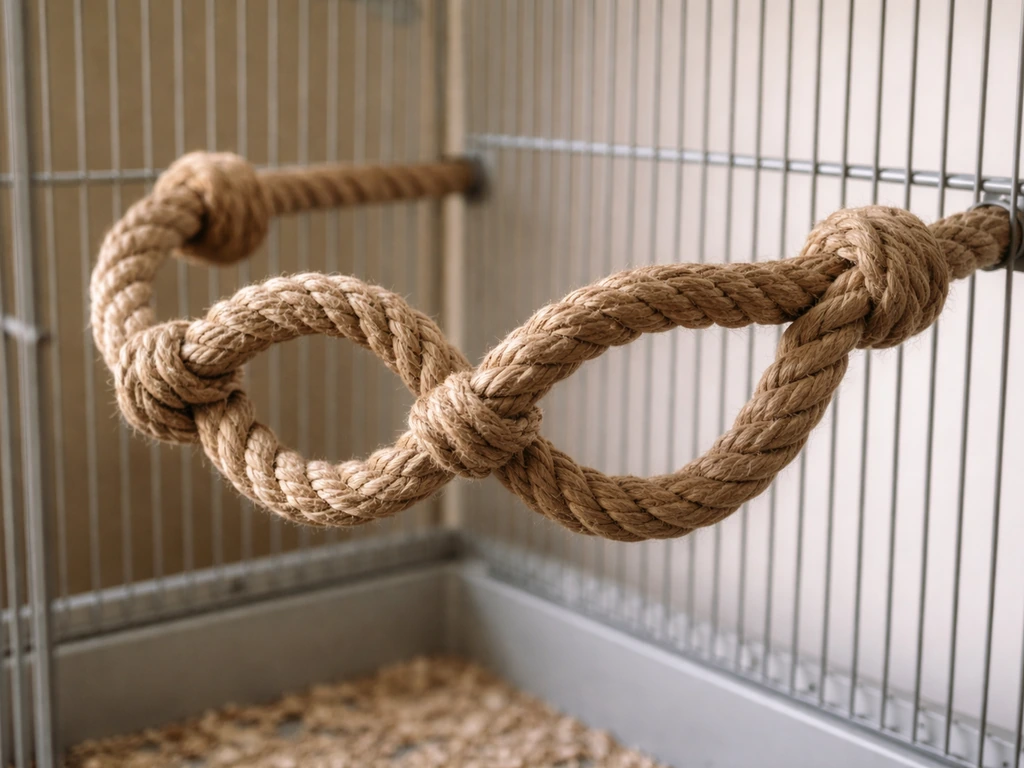
Method 3: Knotted hanging rope perch
This is the simplest method, a single thick rope hung between two points with strategic knots to create grip zones. It works well for small to medium birds and is a great first project if you're new to this.
- Cut one length of thick cotton rope to 1.5 times your desired span (to allow for knot bulk).
- At each end, tie a large figure-eight knot or double overhand knot to create a stopper that won't pull through your hardware.
- Along the middle section, tie a series of equally spaced overhand knots — every 3 to 4 inches — to create raised grip points the bird can curl its toes around.
- Thread each end through a quick link or cage clip and close the hardware securely with pliers.
- Pull the rope taut between your two anchor points and check that it hangs at the right height with about 1/2 inch of natural sag at the center.
- Trim any rope tails to within 1 inch of the end knots and seal with a dab of non-toxic glue.
Making clean, safe ends
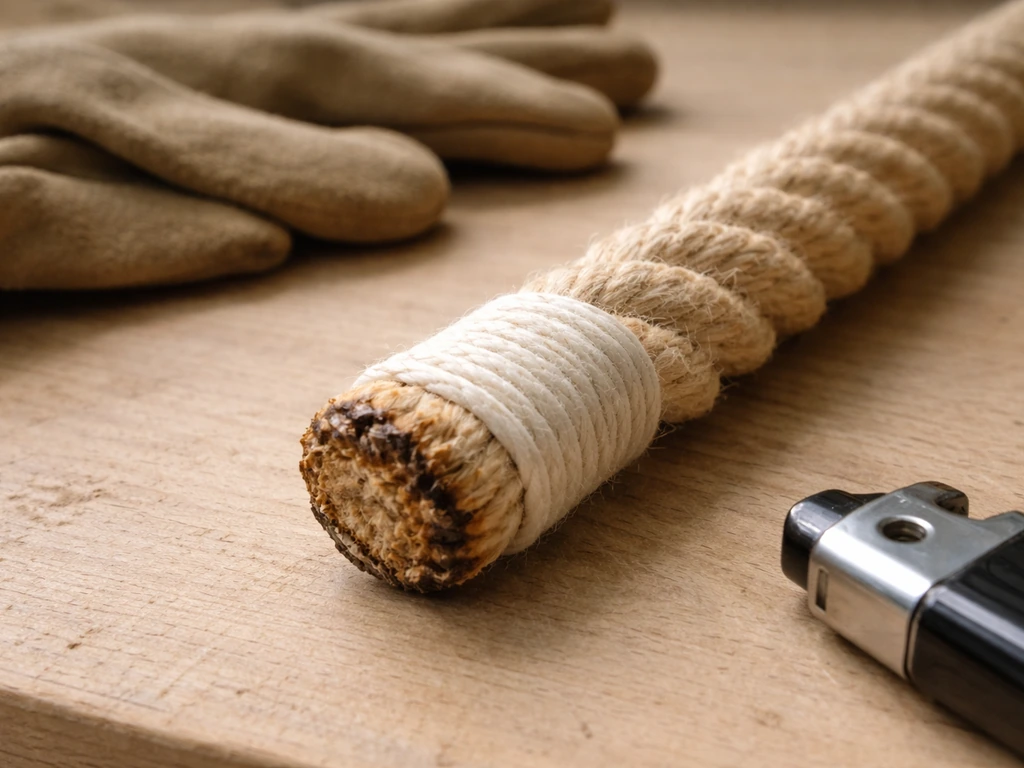
Rope ends are where most perches get into trouble. A frayed end can turn into a tangle of loose threads within days. For natural cotton and sisal, the best approach is a tight overhand knot right at the cut end, followed by a small dab of non-toxic PVA glue. Let it dry fully before the bird has access. Another option is to tightly wind a few loops of the same rope around the end (called a whipping knot), which looks neat and adds zero chemical risk. Do not use super glue or epoxy, both can be toxic if chewed.
Secure mounting options for cages vs. aviaries
Mounting in a cage
For cage bars, the cleanest solution is stainless steel quick links that hook directly onto the horizontal bars. Thread the quick link through your eye bolt or rope loop, hook it onto the cage bar, and close it with pliers until it won't rotate open. Don't rely on hardware that closes with a simple twist, birds are smarter than that and will work it open.
Perch clamps (sometimes called wing-nut clamps) are another great option. They attach to two cage bars simultaneously and hold a perch firmly in place without any drilling. These are especially useful if you want to reposition the perch occasionally. For a rope-wrapped dowel perch, screw the clamps onto the dowel ends before wrapping so the clamp hardware is under the rope and can't be accessed by the bird.
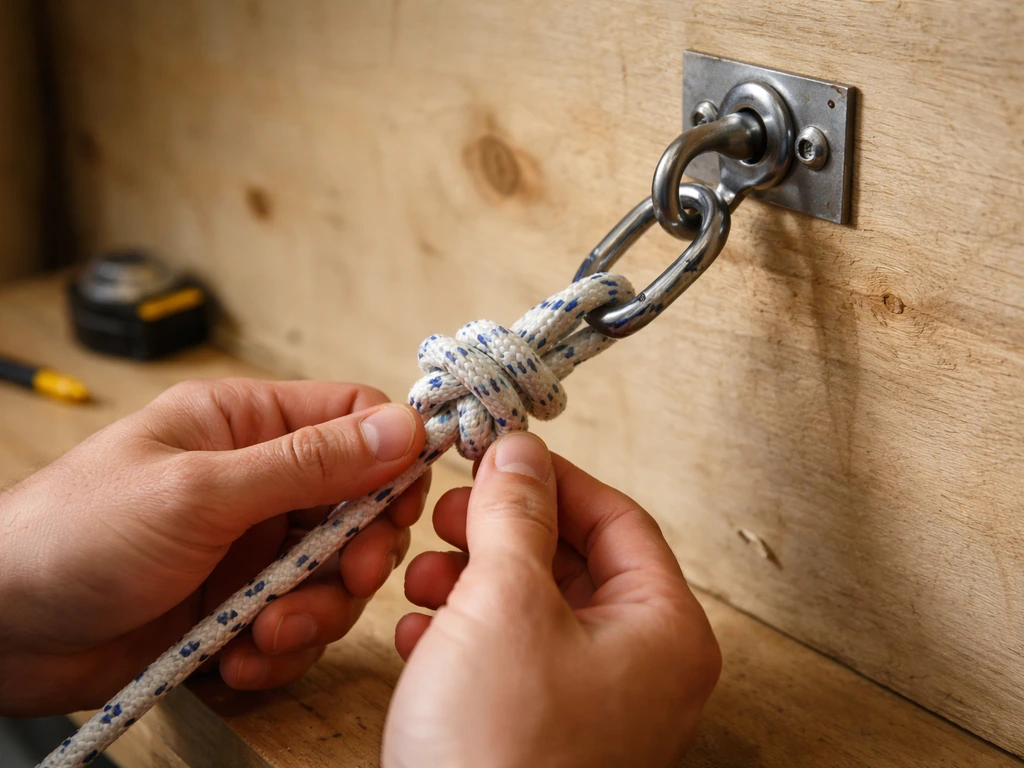
Mounting in an aviary
In an aviary, you have more options because you're usually working with wooden posts or wire mesh frames. For wooden posts or walls, drill a pilot hole and install a stainless steel eye bolt at each anchor point. Hook your perch's end hardware onto the eye bolts and close with pliers. For wire mesh, use J-hooks or S-hooks through the mesh openings, then close the hook tightly with pliers so it can't be pulled out.
Span length matters more in an aviary than in a cage. If your rope perch spans more than 18 inches, add a support point at the center by tying a short vertical rope from the perch up to an overhead wire or rafter. This prevents excessive sag and stops the perch from swinging wildly when multiple birds land on it at once.
What not to do with mounting
- Don't tie rope directly to cage bars with a loose knot — birds will untie it or the knot will work loose from swinging motion
- Don't use adhesive hooks or suction cups — they fail under weight and a falling perch is a serious injury risk
- Don't mount so close to the cage wall that the bird's tail brushes the bars during normal perching
- Don't use zinc or galvanized hardware anywhere the bird can chew on it
Safety checks and how to prevent fraying and entanglement
This section is the most important part of the whole guide, and I want you to read it carefully even if you skim everything else. Rope perches are one of the most common sources of bird injury when they're not built or monitored correctly. The risks are real: loose threads can wrap around toes, feet, or legs and cut off circulation, which can mean loss of a toe, a limb, or worse. Entanglement in frayed rope can also happen around a bird's neck or wing. These aren't edge cases, they're documented, preventable tragedies.
The good news is that a well-built and regularly inspected rope perch is genuinely safe. The problems come from perches that are already starting to fray and haven't been caught in time, or from rope that's too thin for the bird using it (thin threads are the dangerous ones, not thick rope strands). Here's how to keep your perch safe from day one.
Before you let any bird near the perch
- Run your hand firmly along the entire perch. Nothing should shift, slide, or feel loose.
- Tug hard on both end connections. If anything pulls free or the hardware opens, fix it before the perch goes in the cage.
- Check that no rope end is sticking out more than 1 inch anywhere. Trim and glue any stragglers.
- Make sure the perch length is appropriate: no section of rope should be long enough to form a loop that could wrap around your bird's neck. As a guideline, keep individual rope spans shorter than the bird's total body length.
- Confirm there are no sharp knot edges, protruding wire, or hardware edges that the bird's foot could get caught on.
- Make sure all glue is fully dry — wet glue is toxic until cured.
Watching for birds that shred rope
Some birds are chewers and shredders by nature, many cockatoos, African greys, and some conures fall into this category. If your bird actively picks at rope and pulls out individual threads, rope perches may not be the right choice for that bird unsupervised. A thread pulled free from a perch can wrap around a foot or leg with surprising speed. If you want to keep using a rope perch for a shredder, only allow access when you can watch directly, and remove the perch when you're not there. You might also look at a PVC pipe perch or a natural branch as a safer everyday option for that particular bird.
Preventing fraying from the start
- Use rope with a tight weave or braid — loosely twisted rope frays much faster
- Seal all cut ends with PVA glue or a whipping knot before the perch goes in
- Choose rope diameter appropriate for your bird — thin rope frays into dangerous threads; thicker rope frays into manageable chunks
- Avoid rope with visible loose surface fibers even before use
- Re-glue any spots that start to fray before they progress
Maintenance and troubleshooting for long-lasting use
A rope perch isn't a set-it-and-forget-it project. But the maintenance routine is genuinely simple once you build it into your normal bird care schedule. Here's what I do and what to watch for.
Your regular inspection routine
| Frequency | What to Check |
|---|---|
| Daily (30 seconds) | Quick visual scan for any new fraying, loose threads, or hardware that looks shifted |
| Weekly | Run your hand along the full perch, tug the end connections, check for odor or moisture that signals bacterial growth in the rope |
| Monthly | Full removal and close inspection, check rope for discoloration or stiffness, test all hardware for zinc or rust signs, replace any section that looks compromised |
| As needed | Replace the perch entirely if fraying is widespread, if the rope has absorbed droppings deeply, or if the bird has chewed through more than 20% of any section |
Cleaning the perch
Natural rope perches can be spot-cleaned with a damp cloth and mild dish soap (rinse thoroughly and dry completely before returning to the cage). Don't soak a rope perch in water, it weakens the fibers and takes a long time to dry, and a damp perch can harbor bacteria and mold. For heavier buildup, your best move is to replace that section of rope rather than trying to deep-clean it. The materials cost is low enough that replacement makes more sense than fighting with a saturated rope.
Troubleshooting common problems
| Problem | Likely Cause | Fix |
|---|---|---|
| Rope feels slick, bird slips | Rope too smooth (cotton can get slippery when new) | Lightly roughen surface with sandpaper, or switch to sisal for that bird |
| Knots slipping or loosening | Knot type not suited for rope diameter, or tension too low | Re-tie with a double overhand knot, pull extremely tight, and add a dab of PVA glue to the knot |
| Perch wobbles or swings too much | Span too long without center support, or end mounts not tight enough | Add a center vertical tie-off, or tighten end hardware with pliers |
| Fraying starts at ends | Cut ends weren't sealed properly at build time | Trim frayed section, re-knot, and seal with PVA glue; let dry fully before replacing in cage |
| Fraying appears in the middle | Bird is actively chewing, or rope quality is low | Inspect for chewing behavior; consider replacing rope with a tighter-weave option or switching perch type for heavy chewers |
| Bird ignores the perch | Placement too close to high-activity areas, or rope material too unfamiliar | Move to a quieter spot at the bird's preferred height, or rub a small amount of the bird's favorite food on the rope to encourage investigation |
When to replace vs. repair
Here's my honest rule: if the perch looks rough, replace it. Natural rope is cheap, and a new perch takes less than an hour to make. Don't try to nurse a badly frayed perch along with extra glue and tape. The risk isn't worth the cost savings. On the other hand, a single loose end or a small fray spot at one end is absolutely repairable, trim it back 2 inches, re-knot, seal, and you're good. Trust your instincts: if you'd hesitate to let your bird use it, it's time to build a new one.
Pre-use checklist
- Rope is 100% natural cotton, sisal, jute, or untreated hemp — no synthetic materials
- All rope ends are knotted and sealed with non-toxic glue
- All hardware is stainless steel (no zinc or galvanized metals)
- Rope diameter matches your bird's foot size per the sizing guide
- No individual rope section is long enough to loop around your bird's neck
- End connections have been tugged hard and didn't budge
- All glue is completely dry before the bird accesses the perch
- Placement has at least 2 inches of clearance from cage walls and other perches
- Perch is not directly over food or water dishes
- You've watched your bird on the perch for the first 15 minutes to check for slipping, entanglement, or hardware issues
FAQ
How do I choose the right rope diameter if I am not sure about my bird’s foot size?
Do a quick fit test after you wrap or knot the perch. Aim for the front toes to wrap around the perch comfortably (about two-thirds), and the back toe to still close without stretching the foot flat. If you can press the perch with your finger and the bird’s toes cannot curl around to grip, it is too thick; if the bird’s toes overlap, it is too thin.
My rope looks clean, but it sheds fibers. Is that safe?
Some early shedding can happen as ropes “break in,” but ongoing fuzzing and loose loops are a warning sign. Run your fingernail along the surface and check whether strands detach easily. If fibers keep coming loose after you knot and seal ends, replace the rope, because thin loose threads are the ones that can tangle around toes or legs.
Can I use synthetic rope, like polypropylene or nylon, if it feels strong?
Avoid it if it has an unknown finish, melts, or has stiff coating. Even if synthetic rope is strong, coatings and synthetic cores can be unsafe if chewed, and fraying behavior can be harder to manage. Stick to unbleached cotton or sisal, or a rope specifically labeled bird-safe, then seal cut ends carefully.
What is the safest way to seal rope ends for a chewer?
Use a tight overhand knot at the cut end, or a neat whipping knot, then let any glue fully cure before the bird can access the perch. For birds that aggressively shred, also trim back any loose tails after sealing so there is nothing for the bird to hook and pull on.
How tight should the rope perch be, should it have slack?
Plan for a little slack, the perch should not stay under constant tension that forces hardware to fight the rope’s movement. Too-tight mounts can loosen over time, especially with repeated flexing. If your span is measured correctly (including knots and hardware), you can keep the mount secure while still allowing slight natural movement.
How often should I inspect the perch, and what specifically am I looking for?
Check at least once a week, and more often for shredders. Look at the rope ends first (fraying, loosened knots, loose threads), then scan the whole surface for thinning, raised bundles, or places where the bird’s feet rub hardest. If you would not feel comfortable putting your hand near a loose strand, the bird should not use it.
My bird sleeps or hangs with toes curled deeply. Does that mean the perch is the wrong size?
It can indicate a mismatch. If toes are over-bent, the perch may be too thin, or the bird may be gripping too hard due to low texture. If the bird flattens the foot without visible toe closure, the perch may be too thick. Adjust the diameter rather than changing nothing.
Where should I place rope perches relative to food and water, if I only have one cage layout option?
Ideally do not mount directly above dishes to reduce mess and contamination, and keep clearance so droppings and wet food do not land on the perch. If you have no alternative, increase distance, position the perch slightly to the side of dishes, and clean the rope area more frequently rather than relying on spot cleaning only.
Can I mount rope perches outdoors or in a humid aviary?
Natural rope absorbs moisture and can rot or become weaker over time, so it is usually a bad choice for uncovered humid or rainy areas. If you use one in a covered aviary, inspect more frequently after wet weather, keep it well-off the ground, and replace it if fibers soften or the surface becomes spongy.
What should I do if my bird refuses to use the new rope perch?
Try placement first, position it at a similar height and near a familiar route (for example, between the cage corner and feeding area). Then limit competition, do not remove the old perch immediately, add the rope gradually so the bird can choose it without stress. Supervise short sessions to confirm the grip looks comfortable.
Is a rope perch safe for birds that chew, or should I avoid rope entirely?
Do not use it unsupervised for active shredders. If your bird pulls out individual threads, the loose strand can wrap around a toe or leg quickly. For those birds, use rope only when you can watch directly, or choose a branch or PVC perch for everyday use and reserve rope for supervised enrichment.
How can I prevent the perch from swinging into cage walls or toys?
Use spacing and span planning together. Leave at least about 2 inches of clearance on all sides, and measure anchor points so the rope is not overly long. In long spans (especially over 18 inches in an aviary), add a center support so the perch cannot sag and swing during multiple landings.
Next Articles

How to Make a Bird Perch Out of PVC Pipe
Step-by-step guide to build a stable, non-slip PVC bird perch with safe finishes, mounting options, and maintenance tips
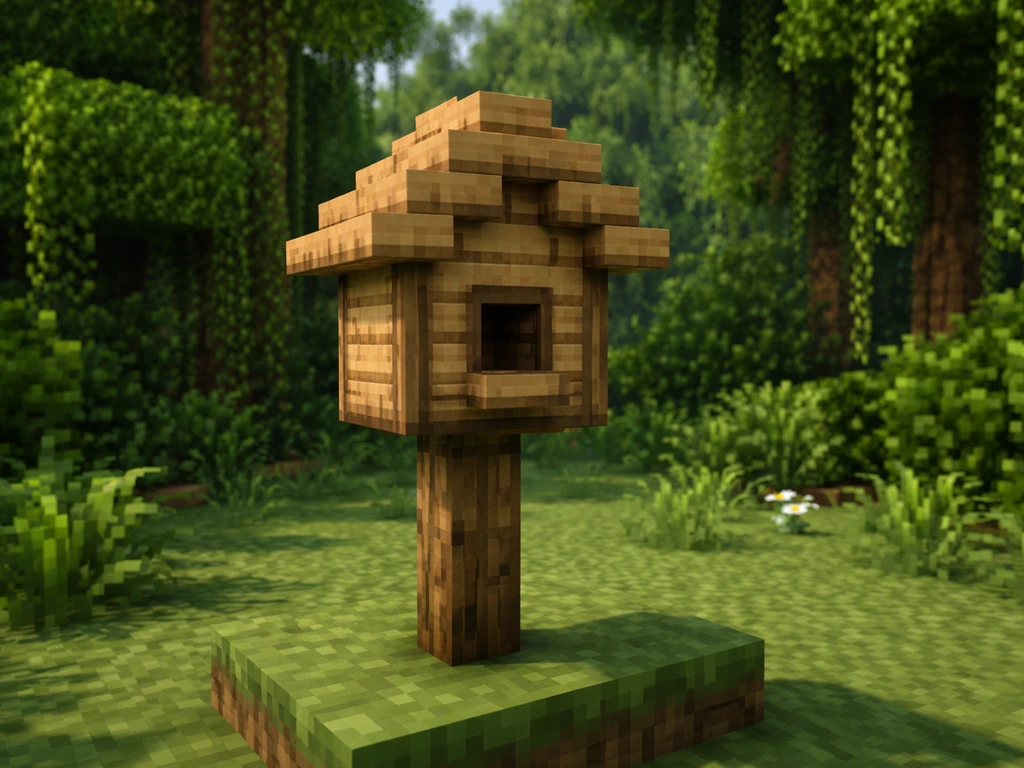
How to Make a Bird House in Minecraft: Step-by-Step
Step-by-step Minecraft bird house build with exact blocks, placement tips, and upgrades to help birds spawn and use it.
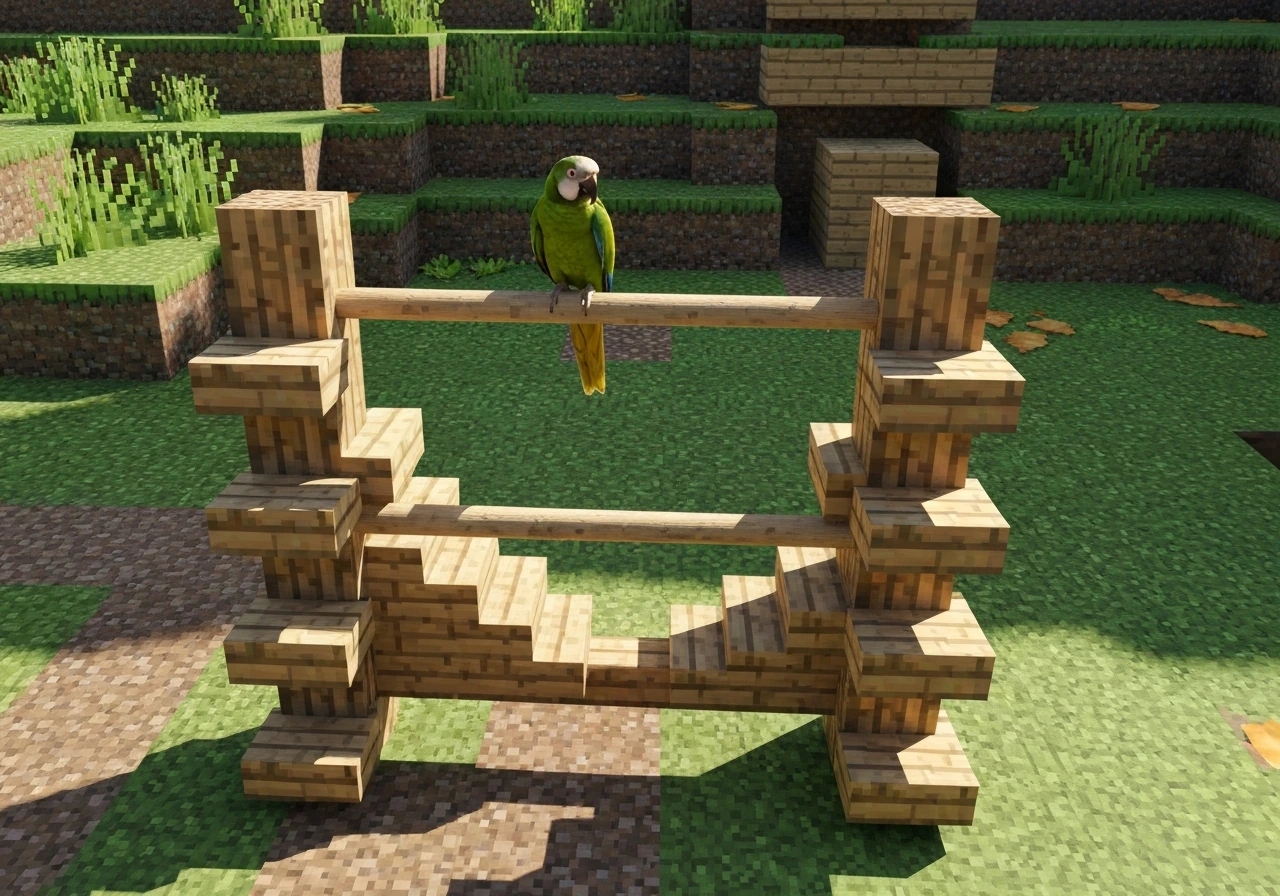
How to Make a Bird Perch in Minecraft: Step-by-Step
Build a Minecraft bird perch with fence and stairs steps, placement tips, and upgrades for wall or tree aviaries.