A bird bench is a simple perch-and-rest platform you build for your backyard birds. Think of it as a landing zone: a flat or barred surface, usually mounted on a post or hung near a feeder, where birds can pause, survey their surroundings, preen, or queue up before hitting your feeder. You can build one in an afternoon with a few cedar boards, some galvanized screws, and basic hand tools. The build is genuinely beginner-friendly, and the result will get used fast if you place it right.
How to Make a Bird Bench: DIY Step-by-Step Guide

Marcus Thornton
23 May 2026
What exactly is a bird bench, and what do you want it to do?
Before you cut a single board, decide what job your bench is doing. A bird bench for the backyard typically means one of three things: a flat platform perch where birds land and rest, a multi-perch bar structure (think of a tiny bleacher) that gives several birds a spot at once, or a combination bench-and-feeder where the flat surface doubles as a tray feeder. All three are worth building, but the construction steps differ a bit, so it helps to pick your direction now.
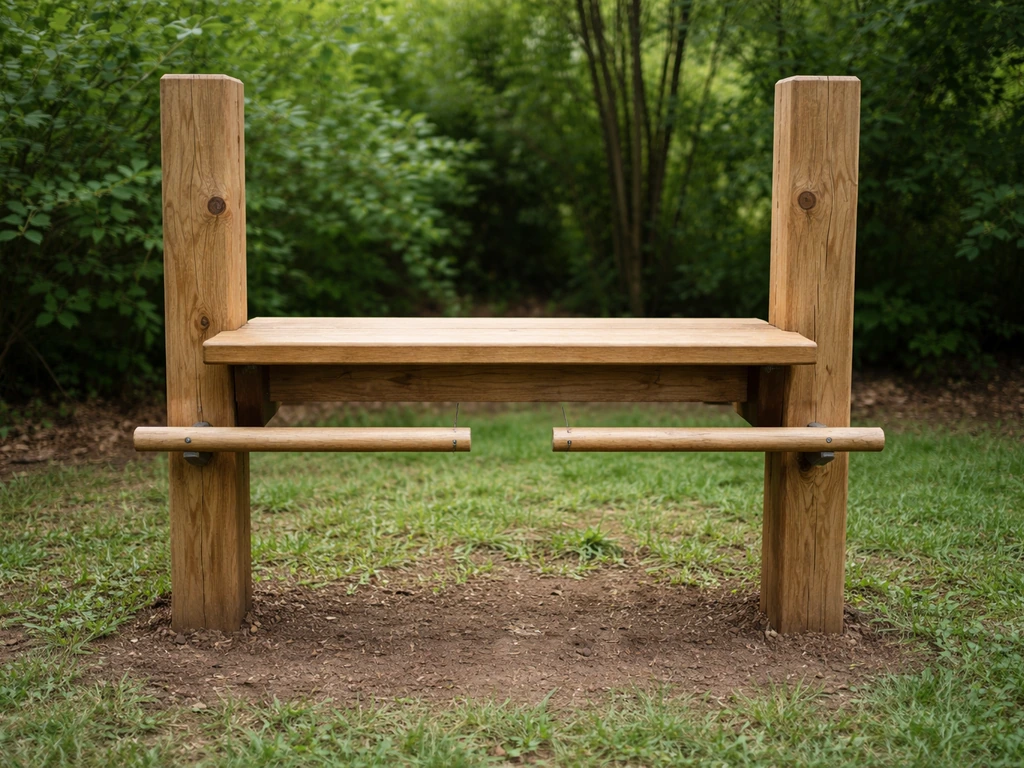
For most backyard bird watchers, the most useful version is a multi-perch platform: a small rectangular frame, maybe 16 to 24 inches wide, with one or two horizontal perch bars at different heights, mounted on a post near your existing feeders. Birds treat it as overflow seating. Chickadees, sparrows, finches, and nuthatches use it constantly. If you also want to attract larger birds like jays or mourning doves, build the platform wider (24 inches or more) with a flat, open landing surface rather than just bars.
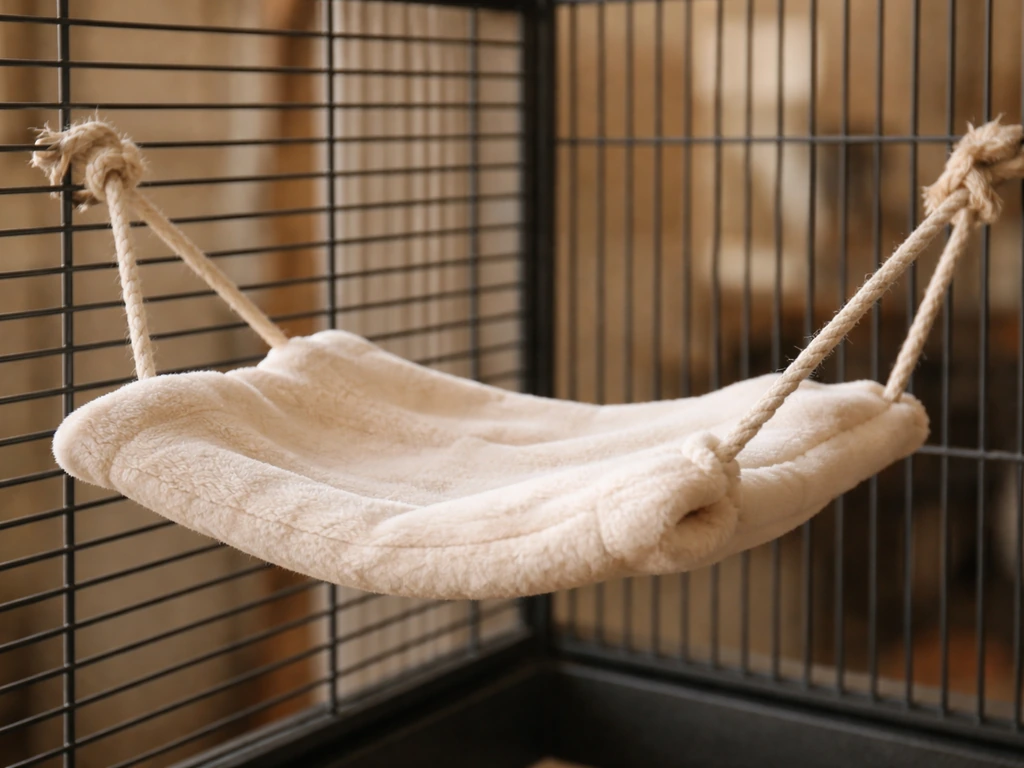
The bench can also pull double duty alongside other enrichment structures. If you already have bird swings or hammocks for pet or aviary birds, the bench fills a different role: it's a stable, stationary perch rather than a moving one. That distinction matters for nervous or younger wild birds that prefer a solid landing.
Materials and tools: what to buy and what to skip
Best woods for a bird bench
Cedar is the best all-around choice for an outdoor bird bench. It's naturally rot-resistant, lightweight, easy to work with hand tools, and non-toxic. White pine and yellow pine are solid budget alternatives and also on NestWatch's approved list. What you want to avoid is pressure-treated lumber: those preservatives, including copper compounds, creosote, and pentachlorophenol, are genuinely toxic to birds. Also skip fresh pine with a lot of sap or resin, since the sticky residue can coat feathers. If you're repurposing old lumber, that's great, just make sure it wasn't treated or painted with lead-based paint, which can flake and contaminate the area where birds land and forage below.
Hardware
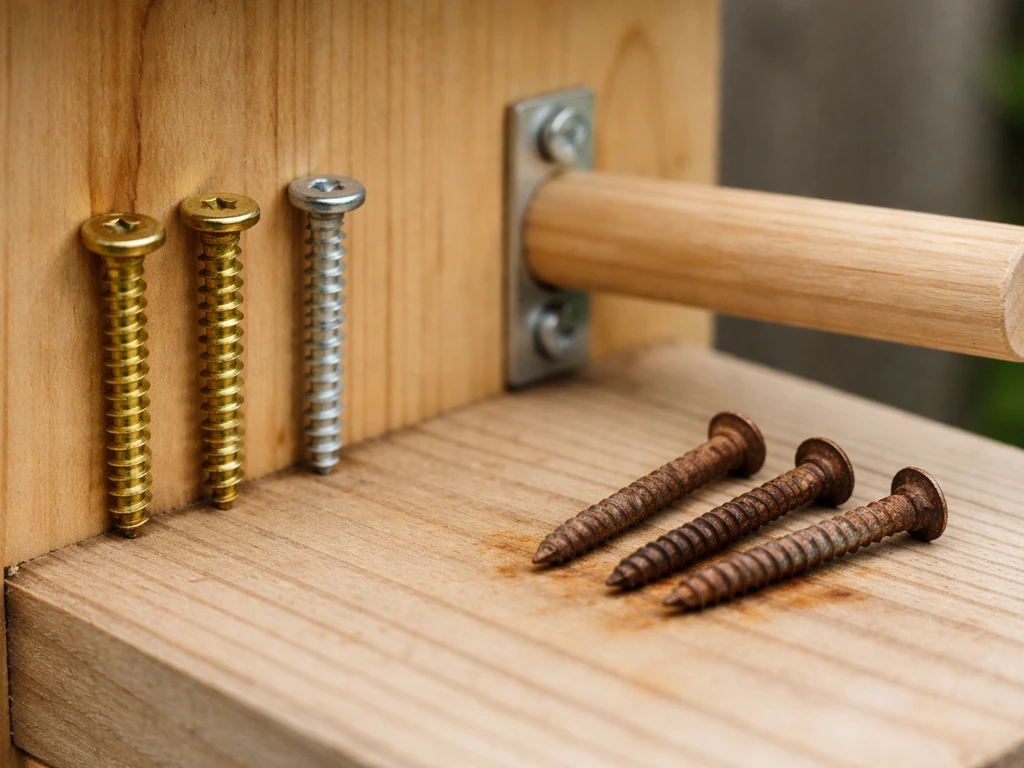
Use brass or galvanized screws throughout. Regular steel screws rust quickly outdoors and can stain the wood with rust streaks that may irritate birds' feet over time. Go with #8 galvanized wood screws in 1.5-inch and 2.5-inch lengths. You'll also want galvanized corner brackets if you want a really rigid frame, though screws alone work fine for a basic build.
Perch bar materials
For the actual perch bars (the horizontal bars birds sit on), you have a few good options: natural branches, wooden dowels, or cut square stock. Natural branches are actually the best choice for foot health. Ornithologists consistently recommend varying perch diameter to relieve foot pressure and reduce the risk of foot deformities, and a branch that tapers slightly gives birds a built-in range of grip diameters. A straight hardwood dowel works too, but try to offer at least two bars at different diameters. A good rule of thumb: the perch diameter should roughly match the bird's foot size so that when the bird grips it, the toes nearly meet underneath but don't fully overlap. SpectrumCare recommends matching perch diameter to the bird’s foot size rather than relying only on the packaged label the perch diameter should roughly match the bird's foot size. For small songbirds like finches and sparrows, that's about 0.5 to 0.75 inches. For larger birds like jays or starlings, go 0.75 to 1.25 inches.
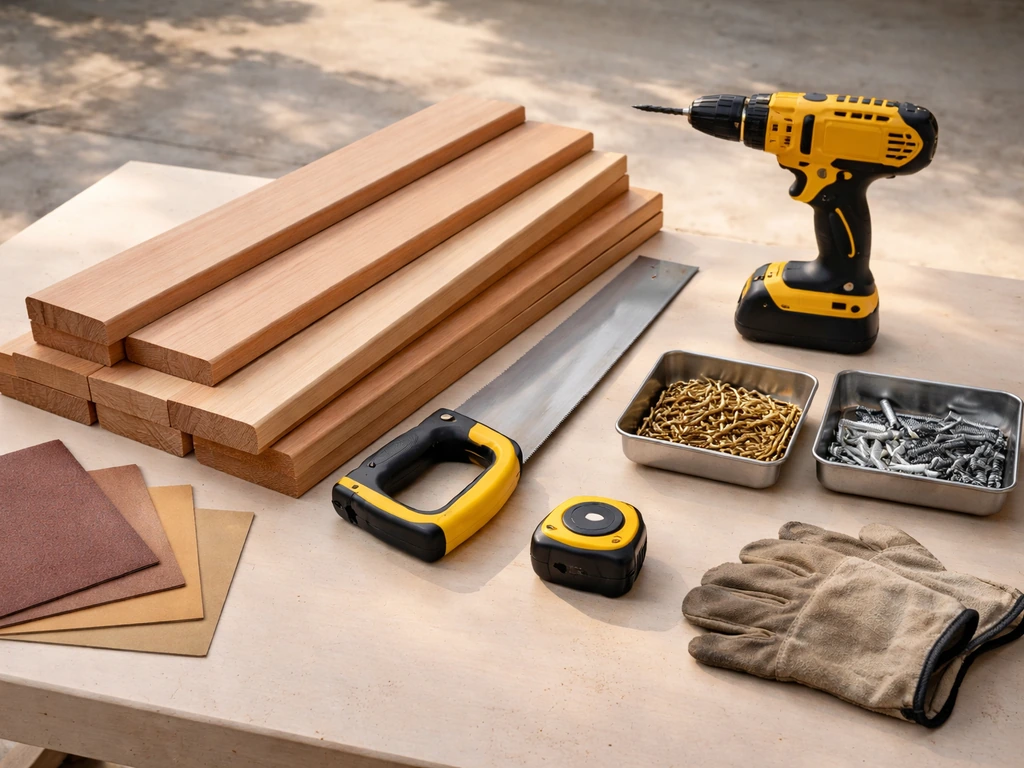
Tools you'll need
- Circular saw or handsaw (to cut frame pieces)
- Drill with bits (pilot holes prevent splitting in cedar)
- Screwdriver or driver bit
- Tape measure and pencil
- Sandpaper: 80-grit and 120-grit
- Clamps (optional but helpful when assembling alone)
- Level (for post mounting)
- Paintbrush (for finishing)
Design choices that actually affect whether birds use it
Size and spacing
For a multi-perch backyard bench, a frame footprint of 18 to 24 inches wide by 10 to 14 inches deep is a practical starting point. That gives you room for two perch bars spaced 4 to 6 inches apart vertically. If you're mainly targeting small songbirds, keep each perch section around 6 inches wide per bird (the same spacing standard used in managed bird care settings). For a wider community bench that multiple birds can share, a 24-inch perch bar gives room for three to four small birds at once.
Height off the ground
Mount the bench so the top perch bar sits between 4 and 6 feet off the ground. This puts birds high enough to feel safe from ground predators but low enough that you can easily refill or clean any attached tray feeder. If you're also using a predator baffle on the post (strongly recommended), the baffle's top should sit at least 4 feet off the ground, with the bench above that.
Drainage and cleaning access
If your bench includes a tray or platform surface, drill four to six quarter-inch drainage holes in the floor of the tray. This prevents standing water, which breeds bacteria and mold fast. Space the holes evenly across the surface. Also design the tray to be removable or at least accessible from one side so you can scrub it out weekly.
Predator safety
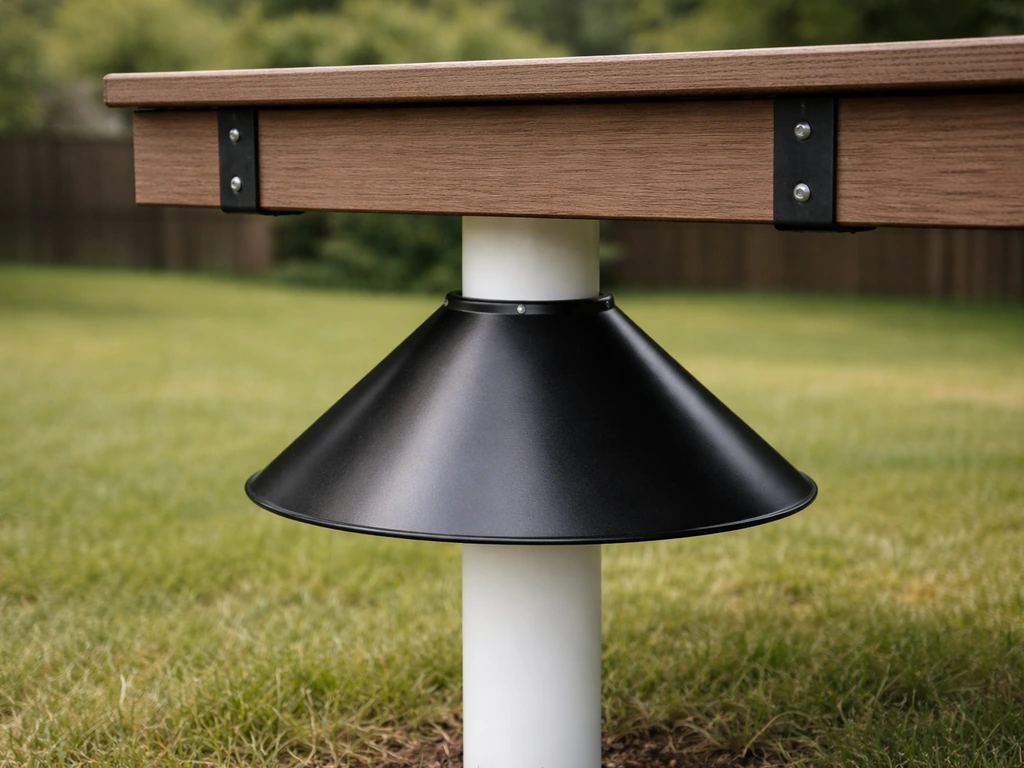
A bench mounted on a smooth metal or PVC post with a cone-style squirrel baffle below it is much safer than one hung in a tree or attached to a fence. Raccoons, cats, and snakes can access tree-mounted structures easily. If you must mount on a tree, fit a wide baffle around the trunk. The baffle should be positioned so its top edge is at least 4 feet up from the ground and directly below the bench.
Step-by-step build plan
This plan builds a post-mounted multi-perch bench: a rectangular cedar frame with two perch bars at different heights. After you finish the bird bench, you can also follow a similar approach to make a complete bird playground with perches, feeders, and safe enrichment spots make a bird playground. It's about a 2-hour build for a beginner. Cut all your pieces first, sand everything smooth (birds' feet will thank you), then assemble.
Cut list (for an 18-inch bench)
| Part | Material | Dimensions | Quantity |
|---|---|---|---|
| Side rails (uprights) | 1x4 cedar | 12 inches long | 2 |
| Top and bottom rails | 1x4 cedar | 18 inches long | 2 |
| Perch bar (lower) | Hardwood dowel or branch, 0.75 in diameter | 20 inches long | 1 |
| Perch bar (upper) | Hardwood dowel or branch, 0.5 in diameter | 20 inches long | 1 |
| Optional tray floor | 1x6 cedar | 18 x 10 inches | 1 |
| Mounting cleat | 2x4 cedar | 6 inches long | 1 |
Assembly steps
- Sand all pieces with 80-grit sandpaper, then finish with 120-grit. Pay extra attention to the perch bars: they should feel smooth with no splinters whatsoever.
- Mark perch bar hole locations on the side rails. Place the lower bar hole 3 inches up from the bottom rail, and the upper bar hole 7 inches up from the bottom rail. Drill holes slightly smaller than your dowel diameter so the bars fit snugly without glue.
- Dry-fit the two side rails and two horizontal rails (top and bottom) into a rectangular frame. Pre-drill pilot holes at each corner to prevent splitting, then drive 2.5-inch galvanized screws through the top and bottom rails into the ends of the side rails.
- Slide the perch bars through their holes. If they're loose, a small dab of exterior wood glue at each entry point holds them. Do not use interior glue or any glue with solvents.
- If adding a tray floor, attach it to the bottom of the frame with 1.5-inch galvanized screws from below. Drill drainage holes before attaching.
- Attach the mounting cleat to the back of the frame, centered, using two 2.5-inch screws. This is the block that will bolt to your post.
- Do a final sand on any sharp corners or edges, especially the top edges of the frame rails where birds may perch.
Weatherproofing and bird-safe finishing
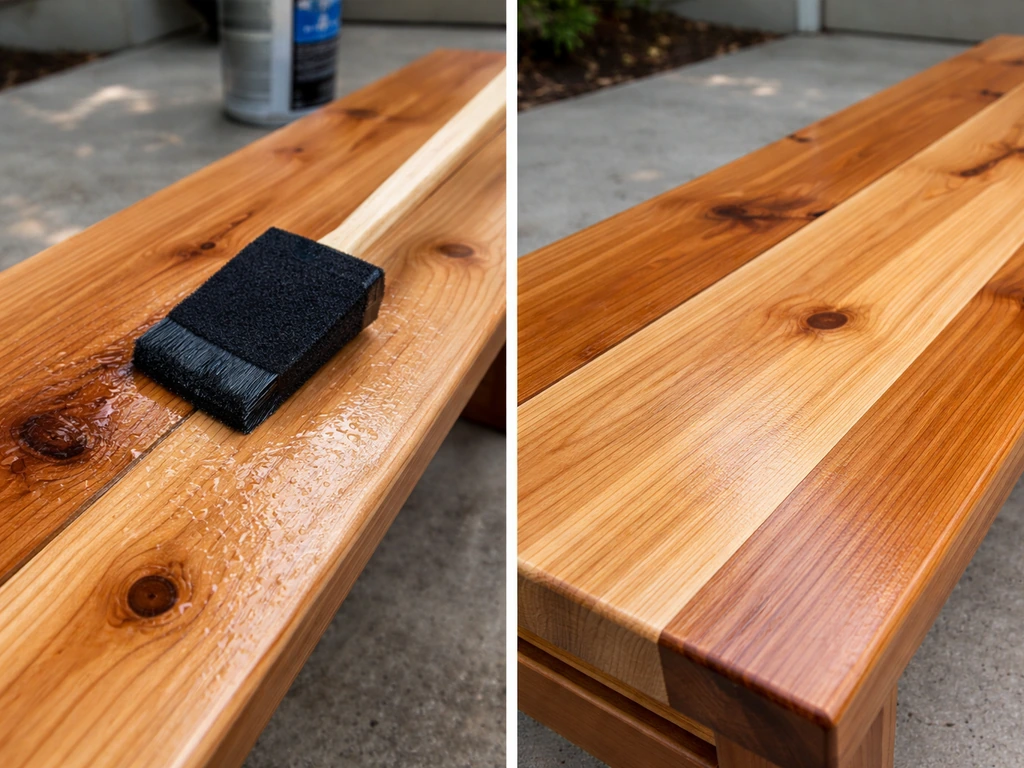
Cedar holds up well on its own, but a finish extends its life significantly and makes cleanup easier. The key rule: anything you put on this bench must be non-toxic to birds once cured. That rules out most conventional exterior stains, oil-based paints, and especially any product containing fungicides or biocides. Many linseed oil formulations marketed for exterior wood contain additives that aren't meant to contact birds, so don't just grab a bottle off the hardware store shelf without checking the label.
Your best options are a water-based exterior polyurethane (applied thinly, fully cured for at least 72 hours before placing the bench outdoors), a pure tung oil finish (no additives, fully cured), or simply leaving the cedar unfinished and letting it weather naturally to a gray patina. If you go unfinished, plan to replace the bench in 5 to 7 years rather than 10 or more. Avoid any finish on the perch bars themselves. Let those surfaces stay raw wood, since that's what birds grip directly.
Apply finish to the frame only, in a thin coat, and let it cure fully in a ventilated space before birds have access. Never rush this step. One of the easiest mistakes to make is finishing on a Friday afternoon and putting the bench out Saturday morning. Give it the full cure time.
Installing and placing the bench so birds actually use it
Placement makes or breaks how fast birds adopt the bench. The best spot is within 10 to 15 feet of an existing feeder, shrub, or small tree, so birds have a staging area they feel comfortable moving between. If you want birds to feel even more cozy on the bench, use comfortable spacing and place it where they can easily retreat how to make a bird cozy. Avoid placing the bench in the open center of a lawn with no cover nearby: birds need the perception of an escape route, so some vegetation within a few feet matters.
For window safety, follow the same guideline used for feeders: place the bench either within 3 feet of a window or more than 30 feet away. The logic is simple. Within 3 feet, a bird startled off the bench can't build fatal momentum before hitting the glass. Beyond 30 feet, birds are far enough that window reflections don't confuse their flight path. The danger zone is the 3-to-30-foot range.
To mount on a 4x4 wooden post, use two 3-inch galvanized lag bolts through the mounting cleat into the post. Check level front-to-back and side-to-side before final tightening. For a metal conduit post, use hose clamps around the post tightened against the back of the cleat. Either way, test the bench by pressing down firmly on one corner before leaving it unattended. A wobbly bench will spook birds and eventually fall.
Keeping the bench clean and dealing with common problems
Cleaning routine
If your bench has a tray surface, scrub it at least once a week during active feeding season. Wet seed, droppings, and debris accumulate fast and can transmit disease between birds that use the same surface repeatedly. For a routine clean, remove debris, scrub with a stiff brush and hot water, then rinse well. For a deeper monthly clean, soak or scrub with a 9-parts-water to 1-part-bleach solution, let it sit for 10 to 15 minutes, then rinse thoroughly and let it dry completely before putting it back out. Bleach residue is harmful to birds, so the rinse step is non-negotiable. Skip soap-based cleaners on surfaces birds contact directly: soap strips the natural oils from feathers.
Troubleshooting common issues
| Problem | Likely cause | Fix |
|---|---|---|
| Birds ignore the bench | Placed too far from cover or in open space | Move within 10-15 feet of shrubs or feeder; add a brush pile nearby |
| Bench wobbles after a few weeks | Screws loosening in post or cleat | Re-tighten lag bolts; add a second cleat if needed |
| Perch bars getting slippery | Weathering and algae buildup | Sand lightly with 80-grit; scrub with diluted bleach solution and rinse |
| Squirrels monopolize the bench | No baffle on post | Install a cone-style baffle with the top at least 4 feet off the ground |
| Perch bars splitting or cracking | Dowels too thin or wood dried out | Replace with thicker branches or dowels; seal ends with tung oil |
| Droppings accumulating on tray | No drainage holes or holes clogged | Clear existing holes or drill additional ones; clean tray weekly |
Seasonal maintenance
At the start of each spring, inspect all screws and joints, replace any perch bars that have developed cracks, and apply a fresh thin coat of your chosen exterior finish to the frame. If you live somewhere with hard winters, take the bench down and store it in a shed or garage during the coldest months. Cedar holds up well, but freeze-thaw cycling in joints accelerates failure. A bench stored over winter can easily last 8 to 10 years instead of 4 or 5.
Expanding the setup
Once your bench is up and getting regular bird traffic, it's easy to expand. A small tray feeder screwed to the bottom rail turns it into a full feeding station. A hook attached to the top rail lets you hang a bird swing or hammock alongside the bench, giving birds the option of both stable and moving perches. That combination tends to attract a wider variety of species and keeps the backyard busier throughout the day.
FAQ
Can I make a bird bench using a metal post or fence rail instead of a wooden 4x4 post?
Yes, but treat it as a rot-prone surface: keep the metal post outside in contact with wet wood to a minimum, and use galvanized or stainless hardware only. Also, drill weep holes or ensure drainage paths so water cannot pool where the tray meets the frame.
What should I do if birds are not using the bench after I build it?
Aim for a perch height that lets the bird land without jumping from a large distance. If you notice birds hesitate, land awkwardly, or only use the feeder, lower the bench slightly (for example 3.5 to 4.5 feet) or add a wider landing surface on the tray to improve grip and takeoff.
Is it okay to use wood glue in the bench build?
Avoid glued joints in the perch area, especially outdoors, since most wood glues are not rated for wet cycling and can fail around drainage and cleaning. For a beginner build, screw-and-bracket construction is safer, and if you use any glue keep it on frame corners, not on or near perch surfaces.
If I use wooden dowels or square stock instead of branches, how can I make sure the perch is safe for feet?
For dowels and square stock, round all gripping edges and sand to a smooth finish, then add at least two perch diameters. Also check the bar spacing so claws can wrap comfortably, and never leave splinters or sharp transitions where birds shift their weight.
How often should I clean a tray-style bird bench, and what if it gets algae or slime?
If you must use a tray, add a removable tray or one-sided access so you can scrub without disturbing the rest of the frame. During wet weather, clean more often and watch for algae buildup, which can make surfaces slippery even if you are draining them.
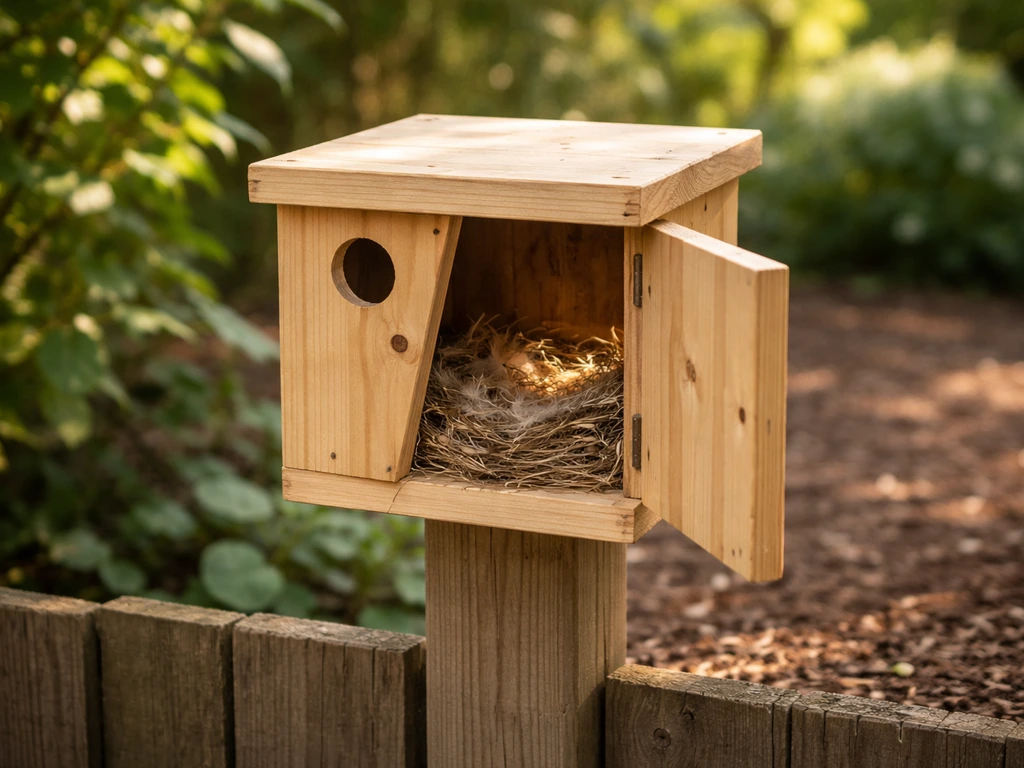
Can I mount the bench near a birdhouse or brush pile?
Yes, but keep the location plan conservative: do not place the bench where squirrels or cats can wait at ground level. Use a predator baffle on the post, position the bench so there is nearby cover for birds, and avoid locations that block the escape route.
My bench feels a little loose, how do I fix it before birds start using it?
If the bench is wobbly even slightly, it can stop bird use because landing is a high-risk moment for them. Tighten mounts, add corner brackets or a cleat for the mounting points, and re-test after the first week because wood can compress slightly around bolts and lag connections.
Should I cover or store the bench when it rains or during winter?
Covering can help during heavy storms, but avoid leaving it under impermeable plastic for long periods, since trapped moisture speeds decay. If you cover, use breathable storage or remove the cover after storms so the wood fully dries.
Does the window safety rule change if the bench is near bushes or a small tree?
Use the same window placement rule, but also consider nearby obstacles like shrubs or fences. If birds can reach the bench while staying in cover, it often reduces stressful flight paths, but the 3-foot to 30-foot danger zone still applies.
What are common mistakes when using bleach to clean bird bench trays?
Bleach can be effective, but mistakes are common: never leave residue, always rinse thoroughly, and fully dry before returning it to the birds. If you want a gentler approach for routine cleaning, stick to hot water plus a stiff brush, and reserve bleach for monthly deep cleans.
Next Articles
How to Make a Bird Hammock Step by Step DIY Guide
Build a safe bird hammock step by step: size, materials, knots, tension, mounting, outdoor vs indoor setup, and troubles
How to Make a Bird Cozy: DIY Shelter and Comfort Guide
Step by step DIY shelter, roosting and enrichment tips to keep backyard, nest, or pet birds safe, warm, and calm.
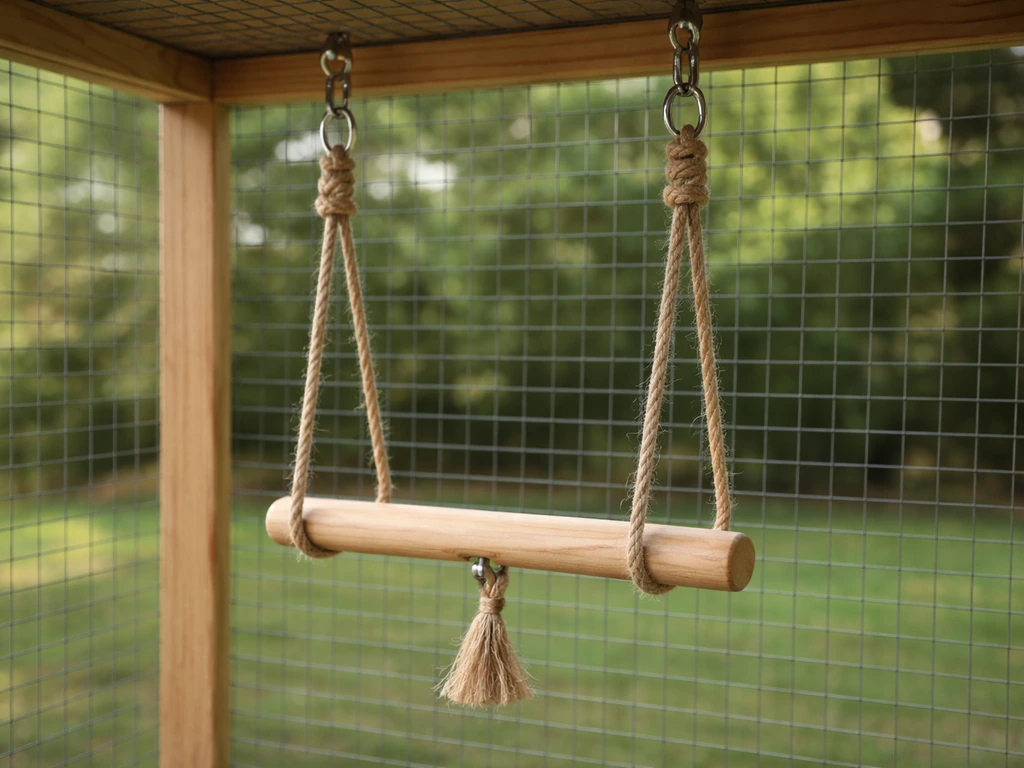
How to Make a Bird Swing: DIY Steps, Sizing, and Safety
Step-by-step how to make a bird swing with sizing, safe materials, secure mounting, and hazard-proofing tips.