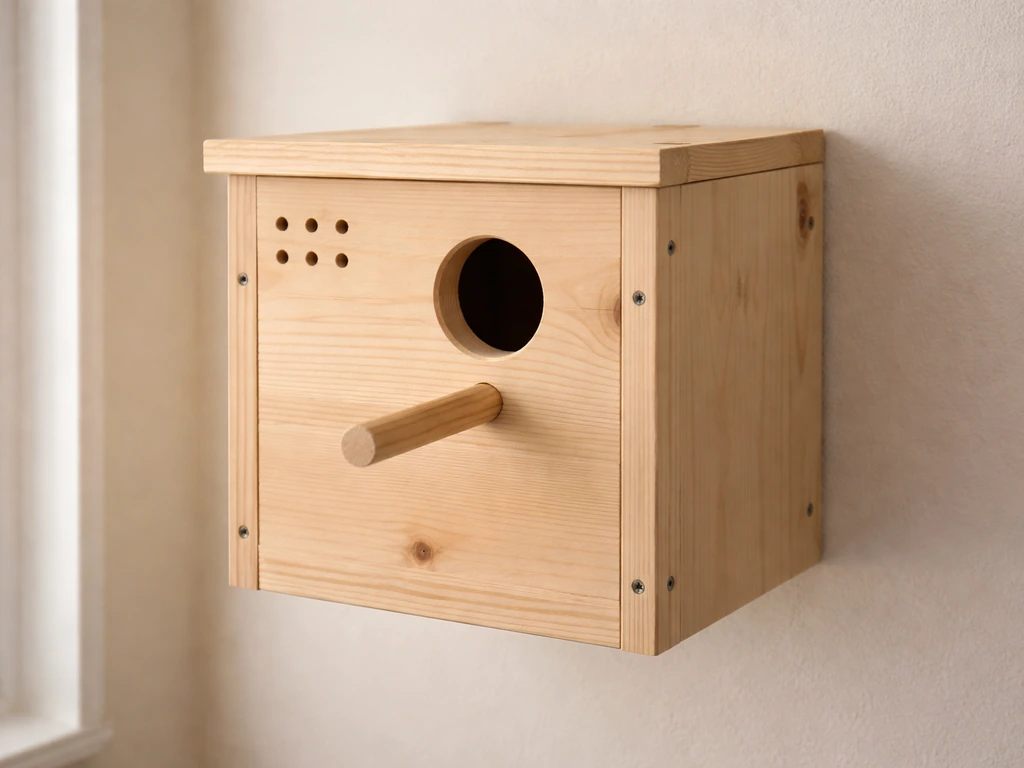
You can build a safe, species-appropriate cockatiel nest box in an afternoon with basic tools and a single sheet of plywood. The short version: a box roughly 10 to 12 inches on each side, a 2.5 to 3 inch round entrance hole near the top, a few ventilation holes under the roofline, pine shavings for bedding, and a hinged or removable panel for cleaning. That's the whole formula. The rest of this guide fills in the details so yours actually works and your birds actually use it.
How to Make a Cockatiel Nest Box DIY Step by Step

Marcus Thornton
15 Apr 2026
Cockatiel nesting box basics
Cockatiels are cavity nesters in the wild. They don't build elaborate woven nests like finches do, they find a hollow in a tree and settle in. That means they want enclosed, dark, private spaces with a single small entrance they can guard. A nest box gives them exactly that, and providing one is often the difference between a breeding pair that never bothers and one that gets right to work.
A cockatiel nest box is essentially a wooden box with a small round hole near the top, sized specifically for this species. The box needs to be large enough for a pair to turn around comfortably, stable enough not to wobble when the birds land on the entrance perch, private enough to reduce stress from outside activity, and easy enough for you to open for cleaning and egg checks. Those four features, size, stability, privacy, and access, are what separate a box that gets used from one that gets ignored.
One design detail worth knowing early: a slightly concave or indented bottom center is a real advantage. Eggs roll less, clutches stay together, and the hen sits more securely. Some breeders carve this depression themselves; others just add a small amount of bedding that naturally forms a shallow bowl. Either approach works fine.
Choosing materials and safe dimensions
Wood choice matters more than you think
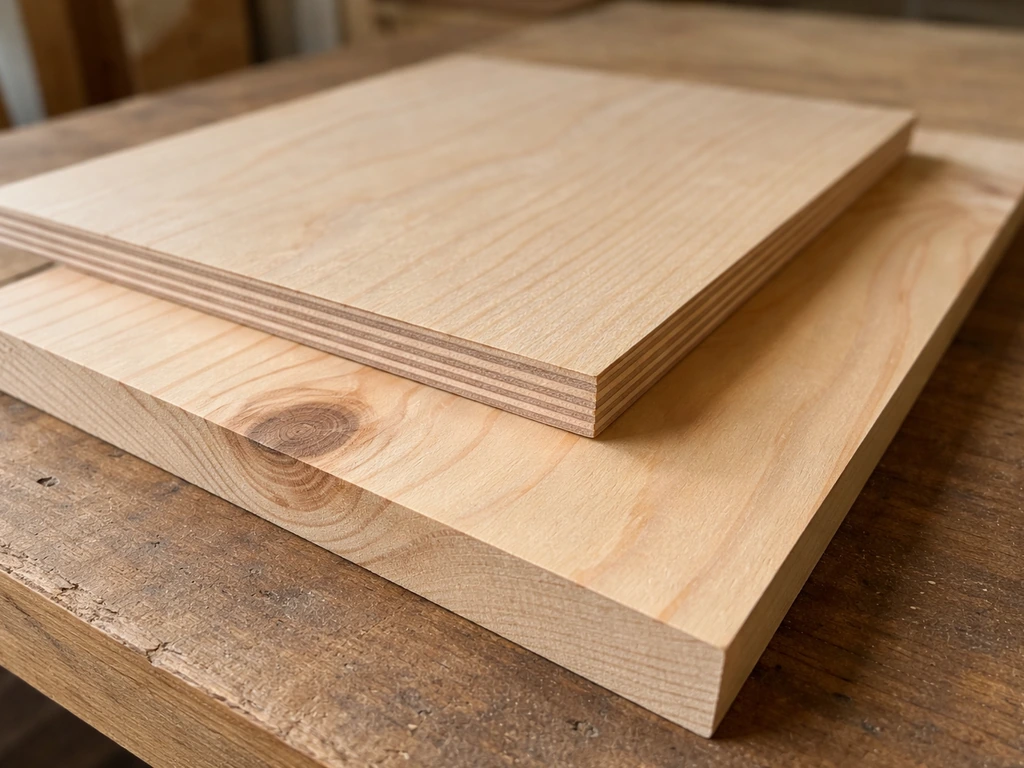
Plain, untreated plywood or solid pine is the go-to material for most DIY cockatiel boxes, and for good reason. It's cheap, easy to cut, holds screws well, and doesn't off-gas anything harmful. The single most important rule here: never use pressure-treated lumber. Pressure-treated wood is imbued with a combination of pesticide and fungicide that has no place inside a bird's nesting space.
The same logic applies to exterior paints and stains that give off VOCs, even after they're dry, the risk isn't worth it. Stick to untreated, unpainted wood on the interior.
If you want to seal the outside for weather resistance, a water-based exterior sealant applied only to outer surfaces and allowed to fully cure before the birds go anywhere near it is acceptable, but honestly, plain pine in an indoor aviary or sheltered outdoor cage will last for years without any finish at all.
If you want to extend the life of the box, glue all the joints before nailing or screwing them. This one extra step dramatically reduces gaps where moisture and bacteria can accumulate, and it makes the whole structure more rigid. Hardware cloth or untreated hardwood dowel rod works well for a small entrance perch below the hole. For fasteners, use plain galvanized or stainless screws, nothing coated with colored finishes or lubricants.
Dimensions: what the numbers actually look like
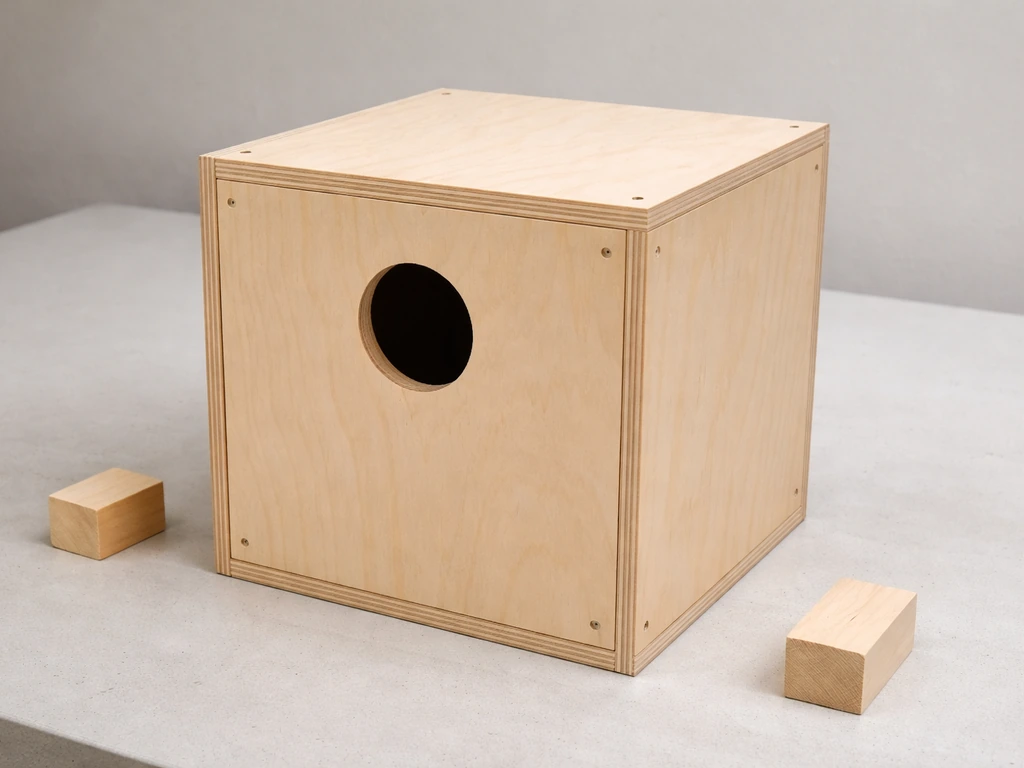
A typical cockatiel nest box is a plywood box measuring 10 to 12 inches on each side. The most commonly cited breeder standard is 12 inches x 12 inches x 12 inches (a perfect cube), which gives a pair of cockatiels plenty of room to move without feeling exposed. Commercially sold boxes run slightly smaller, one common retail size is 12 inches high by 9 inches wide by 11.5 inches long, and those work fine too. For a first build, targeting 10 to 12 inches in every dimension keeps you in the safe zone.
The entrance hole is the most species-specific measurement. The majority of cockatiel breeders use a 3-inch round hole placed near the top of the front panel. Some commercial boxes go slightly smaller at 2.5 inches. Do not go smaller than 2.5 inches or larger than 3.5 inches, the hole needs to be snug enough that the birds feel secure but large enough that they can enter and exit without difficulty. Position the hole about 2 inches down from the top edge of the front panel. This placement gives the birds a small interior ledge to land on just inside the entrance, which they use to orient themselves before dropping down to the nest floor.
| Dimension | Minimum | Ideal | Notes |
|---|---|---|---|
| Box height | 10 inches | 12 inches | Taller gives more privacy above the clutch |
| Box width | 9 inches | 12 inches | Wider helps pairs share space without stress |
| Box depth (front to back) | 9 inches | 12 inches | Deeper = more darkness = calmer hens |
| Entrance hole diameter | 2.5 inches | 3 inches | Round hole, not square, for cockatiels |
| Entrance hole placement | 2 inches from top | 2–3 inches from top | Leaves interior ledge for landing |
| Wood thickness | 1/2 inch plywood | 3/4 inch plywood | Thicker = better insulation and durability |
Tools and step-by-step build plan
What you need before you start
- One sheet of 3/4-inch untreated pine plywood (a half sheet is enough for one box)
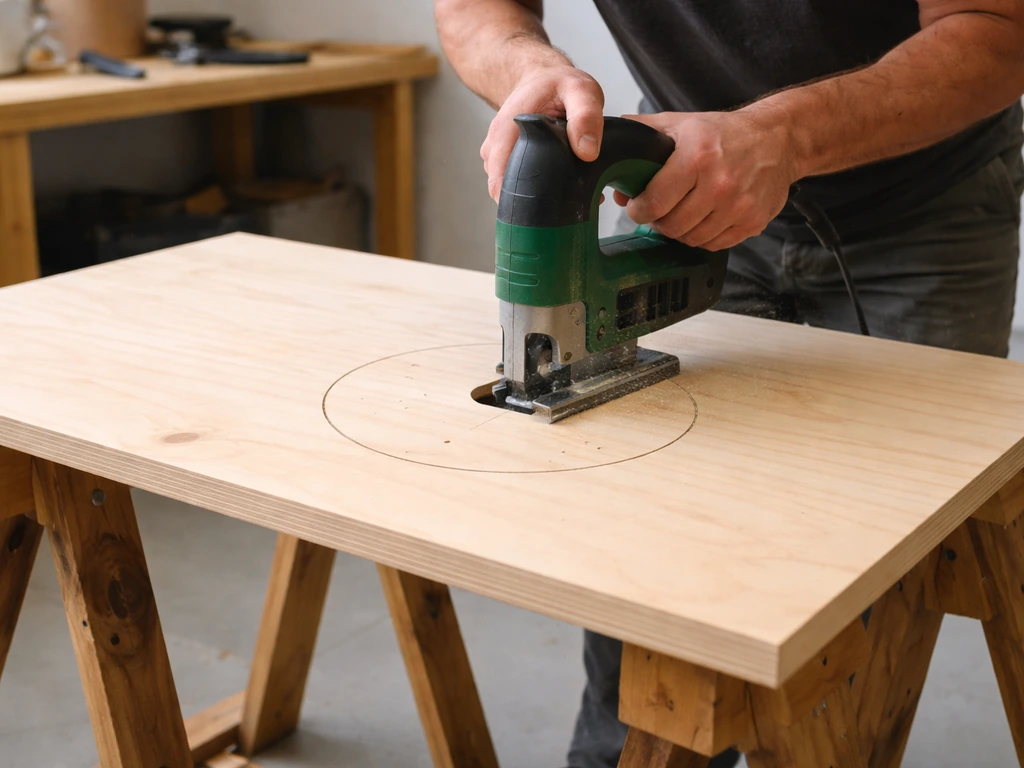
- Jigsaw or hole saw bit (2.5 to 3 inch) for the entrance hole
- Circular saw or hand saw for panel cuts
- Drill and 1/4-inch bit for ventilation holes
- Wood glue (PVA/carpenter's glue)
- Galvanized or stainless wood screws (1.5 inch and 2 inch)
- Sandpaper (medium grit, around 120)
- Small hinges and a latch or hook (for the access panel)
- Measuring tape, pencil, square
Cut list for a 12 x 12 x 12 inch box
- Front panel: 12 inches wide x 12 inches tall (entrance hole cut here)
- Back panel: 12 inches wide x 12 inches tall
- Two side panels: 10.5 inches wide x 12 inches tall (accounts for front/back panel thickness)
- Bottom panel: 10.5 inches wide x 12 inches deep
- Top/roof panel: 12.5 inches wide x 13 inches deep (slight overhang on front and sides keeps rain and mess out)
Assembly, step by step
- Cut all panels to size. Sand all edges and interior surfaces smooth — rough edges can catch feathers and injure birds.
- Cut the entrance hole in the front panel using your hole saw or jigsaw. Center it horizontally, positioned 2 to 3 inches down from the top edge.
- Drill ventilation holes now, before assembly (easier to do flat on the workbench). See the next section for placement details.
- Apply wood glue to all joining edges. Start by attaching the side panels to the back panel, then attach the front panel. Let glue set for a few minutes before adding screws.
- Drive screws through the front and back panels into the side panels, and through all panels into the bottom panel. Space screws every 4 to 5 inches.
- Attach the roof panel. If you're making it removable for cleaning access, attach it with two small hinges on the back edge and a simple hook-and-eye latch on the front. An easy-open top for cleaning and removal of nesting materials is one of the most useful features you can build in.
- If you want to create a slight concave depression in the floor, use sandpaper or a rounded rasp to gently hollow the center of the bottom panel about 1/4 inch deep before final assembly.
- Attach a small untreated wood or dowel perch just below the entrance hole on the outside — about 3 to 4 inches long is enough.
- Do a final sand of all interior surfaces and blow or brush out all dust before introducing the box to the birds.
Entrance, ventilation, bedding, and placement
Ventilation without drafts
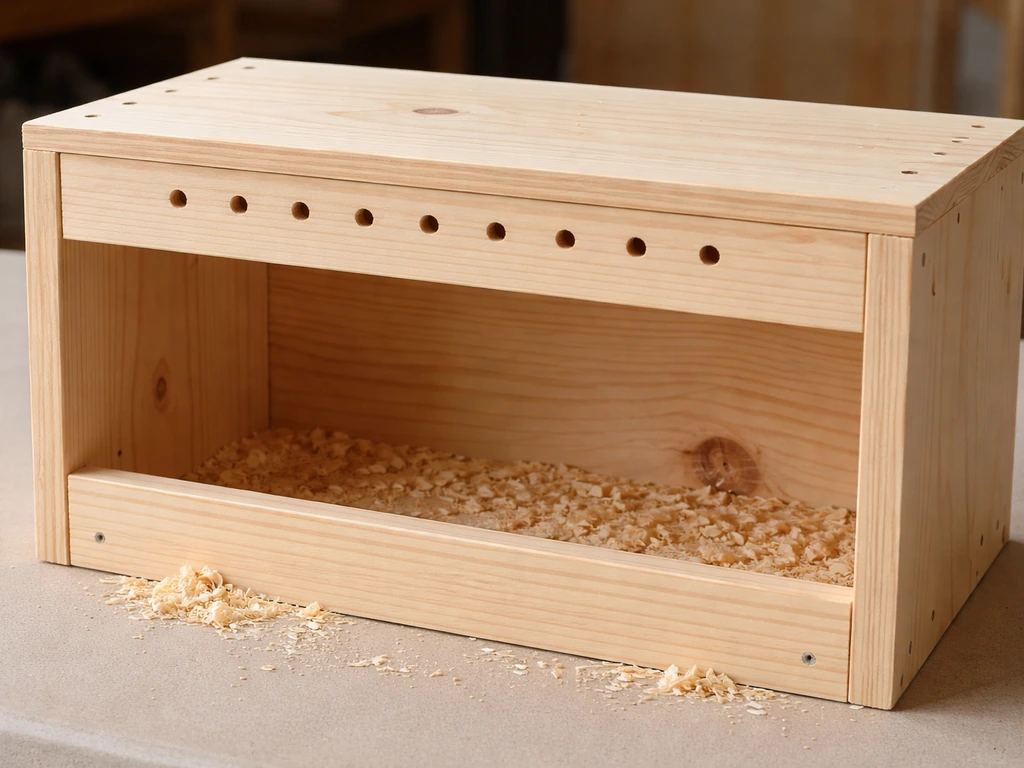
Ventilation is one of those details that looks minor until a clutch of chicks overheats or a box develops a damp, musty smell. The fix is simple: drill a few 1/4-inch holes on the sides just under the roof to allow for airflow during warm weather. Four to six holes total (two or three per side) is plenty. [Place them near the top, not in the middle or bottom](https://nestwatch.
org/learn/all-about-birdhouses/features-of-a-good-birdhouse/), so that rising warm air can escape without creating a draft at the nest floor where eggs and chicks sit. The U. S. Fish & Wildlife Service’s nest-box guidance also recommends drilling ventilation-related holes just below the roofline, near the top, as part of the ventilation design [ventilation holes near the top](https://digitalmedia.
fws. gov/digital/api/collection/document/id/1107/download). You can also leave a very small gap between the roof panel and the top of the side walls, about 1/4 inch, if you prefer not to drill holes through the assembled box.
Bedding: what actually works
Pine shavings (not sawdust, and not cedar) are the standard bedding for cockatiel nest boxes. They absorb moisture, smell neutral, and give the hen something to arrange. Add about 1 to 2 inches of shavings to the floor. Do not use sawdust, the fine particles are a respiratory irritant.
Corncob bedding holds moisture and can grow mold quickly. Cat litter, most loose wood chips, and cedar shavings are also on the avoid list for the same respiratory and ingestion risk reasons. You'll sometimes see plain paper products like newspaper or paper towels recommended as cage liners for general cage use, and while they're easy to monitor and low-dust, they're poor nesting materials inside the actual nest box, cockatiels don't nest well on flat, slick surfaces.
For the nest box interior specifically, stick with plain pine shavings.
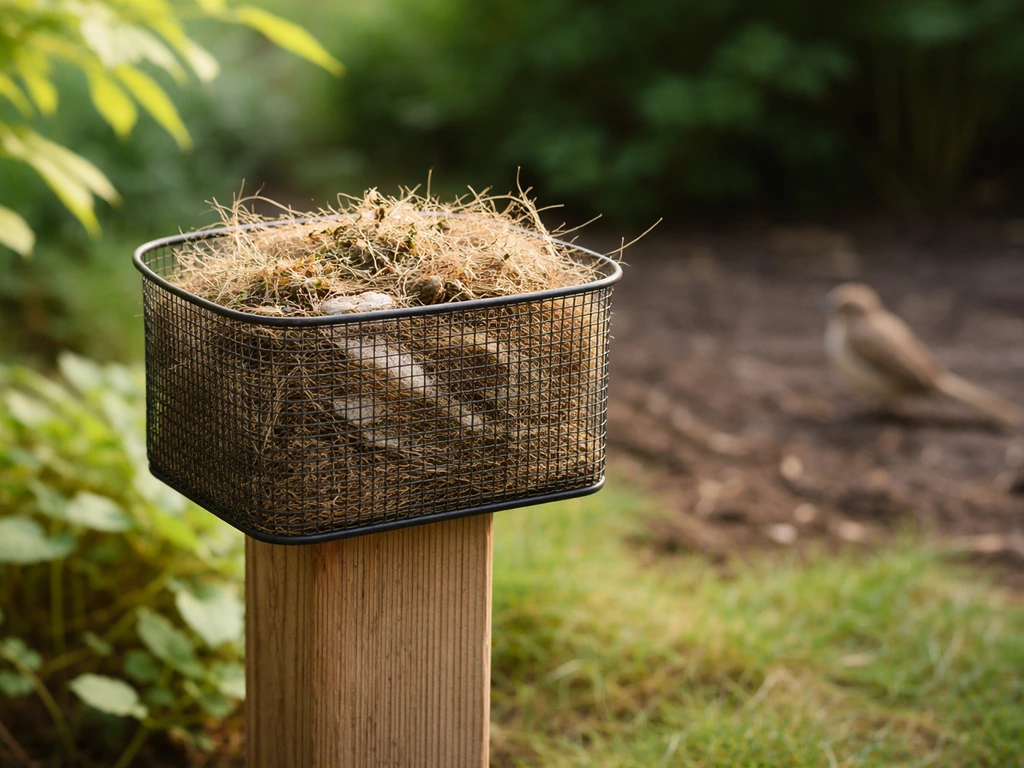
If you're interested in offering birds nesting material outside the box to enrich their environment, that's a separate and fun project. You can make a bird nesting material holder to offer soft fibers near the cage, cockatiels will sometimes carry bits inside the box on their own.
Placement inside the cage or aviary
Mount the nest box high in the cage or aviary, near the top. Cockatiels feel safer elevated, and a higher position also reduces interference from cage-mates in a colony setting. Secure it firmly so it does not shift or bounce when the birds land on the entrance perch, any wobble will stress the breeding pair and may cause them to abandon the box entirely.
In a single-pair breeding setup, the box is typically mounted on the outside of the cage with the entrance hole opening inward through a cutout in the cage wall, so the full interior floor space stays clear. Position the entrance hole away from direct light sources and drafts. Dark and still is what cockatiels are going for.
Cleaning, maintenance, and safety checks
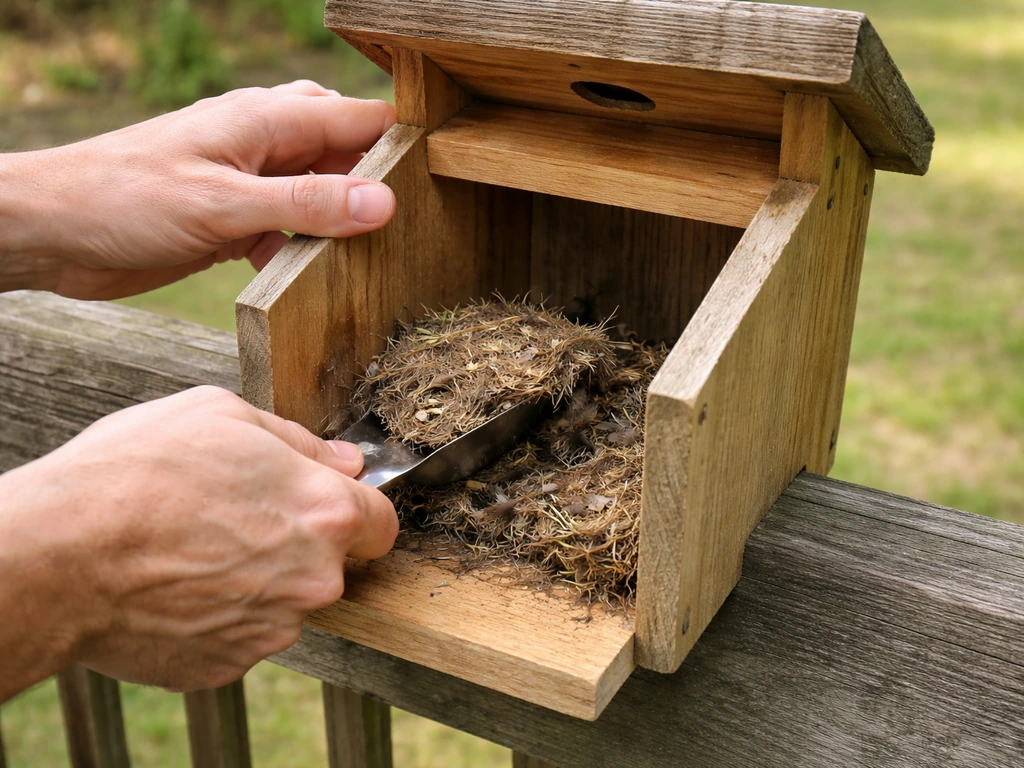
A nest box that doesn't get cleaned becomes a health hazard. Old nesting material holds bacteria, mite eggs, and moisture, none of which you want near a breeding pair or a new clutch. Clean the box thoroughly before and after each nesting cycle. Remove all old bedding, scrub the interior with a stiff brush, then disinfect with a 10% bleach solution or an enzyme-based bird-safe cleaner.
The key step after any disinfectant: rinse thoroughly so no residue remains inside the box before the birds return. Bleach oxidizes rapidly and becomes essentially harmless within about 24 hours when fully rinsed, but don't rush this step. If you're ever unsure which disinfectant is genuinely safe for your birds, consult an avian veterinarian, different products leave different residues and carry different risks.
After cleaning, do a structural inspection. Check every joint for looseness, look for splinters or cracked panels, confirm the entrance hole edges are still smooth, and make sure the ventilation holes haven't been packed with debris. Check that the mounting hardware is still tight and the box doesn't rock. Replace bedding with fresh pine shavings before the next use. At minimum, plan for a full clean at least once a year even if the box hasn't been actively used, dust and ambient moisture do accumulate.
One note on wood longevity: if your box is in an outdoor aviary and exposed to weather, glued joints hold up significantly better than screws alone over multiple seasons. If joints start to gap or the wood shows signs of softening, it's time to rebuild rather than patch. A rotting floor is a real risk for egg and chick safety.
Common mistakes and how to fix them
The birds are ignoring the box completely
This is the most common complaint, and it almost always has a fixable cause. First, check placement: is the box mounted high, away from drafts and direct light? Is it stable, or does it sway when a bird lands? Is there a lot of cage activity right at the entrance, other birds, a perch that causes traffic, a food dish mounted too close? All of these create stress that cockatiels respond to by ignoring the box. Try relocating it to a quieter, higher position. Also check the lighting around the box, cockatiels prefer dim interiors, so if the entrance is catching direct sunlight for most of the day, that's a deterrent.
Second, check timing. Cockatiels are seasonal breeders, and a pair that's not in breeding condition won't engage with a nest box regardless of how well it's built. Make sure the pair is mature (at least 18 months old), healthy, and getting appropriate light cycles (roughly 12 to 14 hours of light per day to encourage breeding behavior). A box that sits ignored for weeks during off-season isn't a failure, it's just timing.
Damp smell or mold inside the box
A musty odor usually means moisture is getting in and the bedding isn't drying between cleanings. Check your ventilation holes, are they blocked? Is the box mounted somewhere that gets condensation? In outdoor aviaries, make sure the roof overhangs the front and sides enough to shed rain away from the entrance hole. Indoors, avoid mounting the box near any humidity source. Replace bedding more frequently during active nesting (the hen and chicks produce a lot of moisture), and if mold is visible, do a full disinfection clean before the next use.
Eggs rolling or clutch getting scattered
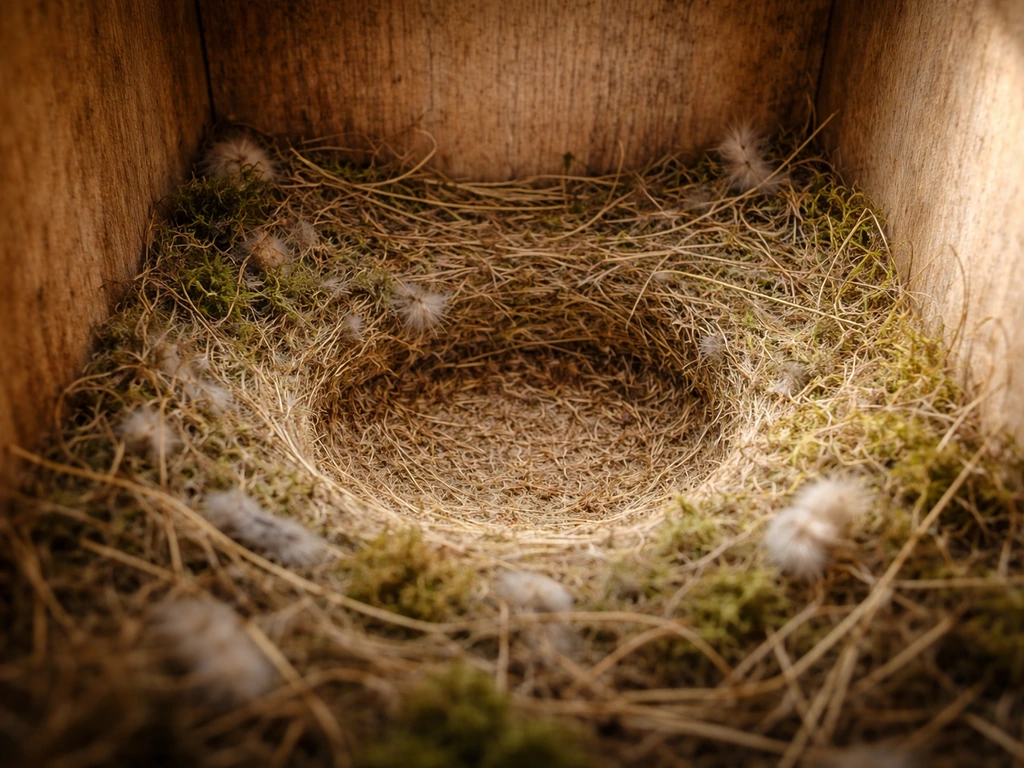
If eggs are consistently rolling to the corners of the box, your floor is too flat and smooth. Carve or sand a shallow concave depression in the center of the floor panel, about 1/4 to 1/2 inch deep, and add a layer of pine shavings. The combination of the depression and the shavings creates a natural bowl that keeps the clutch together under the hen. This is a simple fix and makes a real difference in hatch rates.
Box is unstable or vibrates when birds land
Add a second mounting point if you're only using one. A box this size and weight needs at least two secure attachment points, one at the top and one at the base, or two points along the back panel. Use properly rated cage wire clips, bolts through the cage bars, or a dedicated mounting bracket. A shaky box is stressful for nesting birds and can cause the pair to abandon an active clutch.
The nest box is deteriorating quickly
If your box is softening or warping after one season, you probably used thin plywood (under 1/2 inch) or skipped the gluing step. Upgrade to 3/4-inch plywood and glue every joint before screwing. If you're in a damp climate or outdoor aviary, a water-based exterior sealant on all outer surfaces (never interior) adds meaningful protection. Avoid the temptation to use pressure-treated scraps, the risks to the birds are not worth the extra durability.
If you find yourself with leftover plywood scraps from this build, there are creative ways to put them to use. You can make a bird nest with cardboard as a temporary supplement or enrichment feature for non-breeding birds in a separate space. For more budget-friendly construction ideas, the approach of making a bird nest with waste material is worth exploring for secondary enclosures or practice builds. And if you're experimenting with alternative container shapes before committing to a full woodworking build, learning how to make a bird nest with a plastic bottle can give you a feel for size and entrance-hole placement before cutting into your good plywood.
The bottom line with cockatiel nest boxes is that getting the basics right matters far more than perfection. Right wood, right size, right hole, good ventilation, clean bedding, and a stable mount, that's it. If you are looking for a plastic-bottle option instead, focus on creating a similarly secure, enclosed nesting space before putting it in the cage right wood, right size, right hole. Build it, put it up, give your birds a few weeks, and adjust from there. Most breeding pairs will tell you exactly what they think of your work pretty quickly.
FAQ
Can I use the same nest box design for multiple cockatiels, or should each pair have its own box?
Plan one nest box per breeding pair. In shared aviary setups, multiple pairs using the same box greatly increases competition at the entrance perch and can lead to fighting, stress, or refusal to incubate. If you keep more than one pair, space boxes apart so each entrance has a quiet approach path and visual privacy from the others.
How do I know if the entrance hole is the right size for my cockatiels?
Watch for smooth entry and exit during the first few days. If birds hesitate at the entrance, scrape repeatedly, or seem unable to turn comfortably inside, the hole may be too small or poorly positioned. If your hole edges are rough, file or sand them smooth because snagging feathers is a common reason for early rejection.
Should I put a landing perch under the entrance hole, or is the hole itself enough?
A small, simple perch below the hole helps most cockatiels. It gives them a stable place to orient before dropping to the nest floor, and it reduces wobble when they land. Use an untreated hardwood dowel or hardware cloth only, and keep the perch firmly fixed so it cannot rotate or swing.
Is it okay to place the nest box on the inside of the cage instead of the outside cutout mount?
It can work, but it changes traffic and light exposure. Inside placement often puts the entrance closer to foot traffic, perches, and cleaning activity, which can deter breeding. If you must mount inside, block direct light on the entrance and keep the box high and away from other doors, food stations, and high-activity perches.
What should I do if the hen won’t lay after the pair starts investigating the box?
First, confirm the pair is actually in breeding condition, timing matters. Also consider that the hen may need additional nest-carrying opportunities, but avoid adding loose nesting materials inside the box that can mold or clog ventilation. Stick to pine shavings inside, and if you offer external nesting fibers, keep them in a separate holder so the nest box interior stays controlled.
How often should I clean during an active nesting cycle?
Avoid frequent deep cleaning once eggs are present. You can do quick checks only when necessary, removing only obviously soiled, wet, or broken material, then leave the rest undisturbed. Full removal of bedding and full disinfection should be done before the cycle starts and after the cycle ends to prevent stress and scent disruption.
Can I use bleach or disinfectant during the breeding season, or will residues harm the birds?
Use disinfectants only when the birds are out of the box, then rinse thoroughly. Bleach can be safe after proper rinsing and drying, but residue or lingering odor is risky for newly incubating hens and chicks. Let the box fully air-dry, and only reintroduce when it feels dry to the touch and has no chemical smell.
What if the nest box develops a musty smell even after cleaning?
That usually means moisture is getting in faster than it can dry. Check that ventilation holes are open, the roofline or overhang prevents rain splash at the entrance, and the box is not mounted near condensation sources indoors. Increase the frequency of bedding replacement during the active period, and if mold is visible, do a full disinfection and rebuild if any wood has softened.
Is sealing the outside of the box always required for outdoor use?
Not always, but outdoor exposure can shorten life if the wood is unprotected. Use a water-based exterior sealant only on outer surfaces, keep it off the interior and off the entrance edges, and allow full cure before placing birds near it. If the box is in a sheltered outdoor cage with good roof overhang and low direct rain impact, plain pine often lasts, but inspect the floor and corners every season.
How can I prevent eggs from rolling if my floor is already concave?
If eggs still roll, the depression may be too shallow or not centered properly. Aim for a consistent shallow bowl, then ensure the bedding layer is even, thick enough to cushion but not so deep that it allows shifting. Also verify the box level on the mount, a tilted box encourages eggs to drift toward one side.
What mounting method is safest to prevent the box from rocking?
Use at least two solid attachment points so the structure cannot pivot. Bolting through cage bars or using a dedicated bracket is more reliable than relying on clips alone, especially if your birds land with force on the entrance. After mounting, gently test for movement by applying light pressure at the front and sides, then re-tighten any hardware before introducing the breeding pair.
Next Articles
How to Make a Bird Nesting Material Holder DIY Guide
Step-by-step DIY plans and safe materials to build a bird nesting material holder that attracts the right birds.
How to Make a Bird Nest With Waste Material Safely
DIY guide to build safe backyard bird nesting platforms from clean waste materials, with materials, steps, placement, an

How to Build a Chimney Swift Bird House DIY Guide
Step-by-step DIY plans to build a chimney swift bird house, with correct dimensions, placement, and weatherproofing for