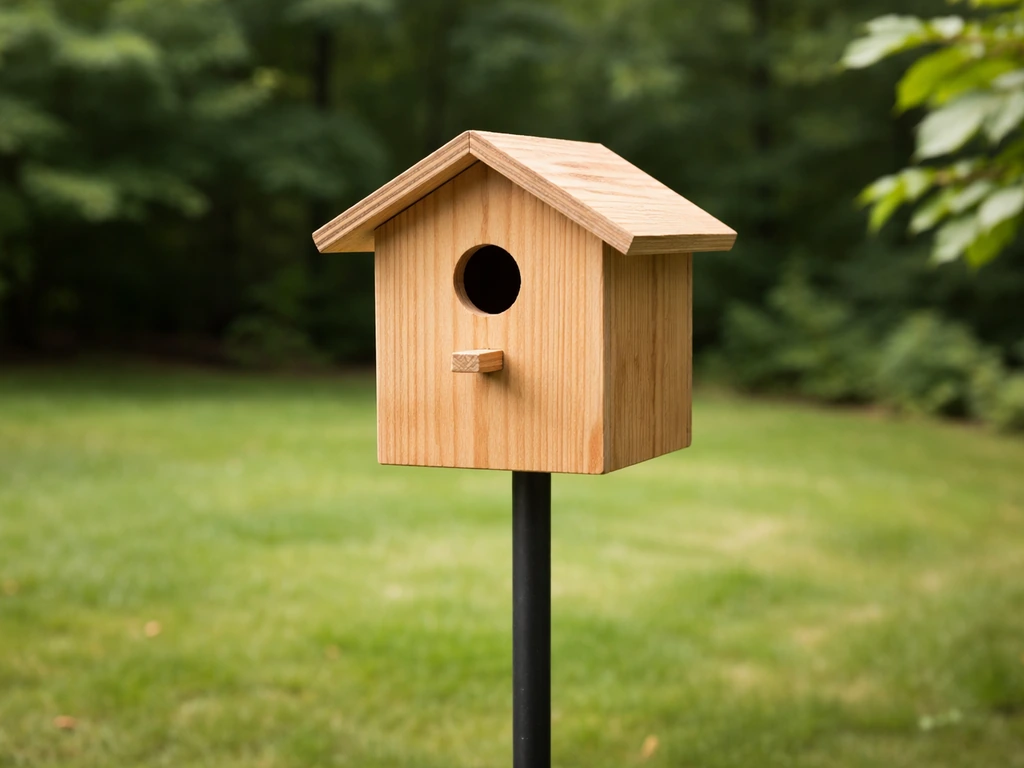
You can absolutely build a bird home today with basic tools, a few boards of untreated wood, and an afternoon. Whether you want a simple nesting box for bluebirds, a cozy wren house, or a larger shelter-style enclosure, the core process is the same: pick the right design for your target bird, get the entrance hole size correct, mount it at the right height with a predator guard, and add proper drainage and ventilation. Do those five things and you are ahead of most store-bought houses already. If you want to go beyond a plain nesting box, look for specific bird decoration ideas you can build alongside your housing setup bird decorations.
How to Make a Bird at Home: DIY Birdhouse Setup

Marcus Thornton
16 May 2026
Choose the right bird home type for your goal

Before you cut a single board, decide what you are actually building. There are three practical categories for a backyard DIY bird home: a cavity nesting box (what most people picture), a larger shelter box for bigger birds like barn owls, and a small managed aviary or flight enclosure. Each serves a different purpose and requires a different commitment of time, materials, and space.
A cavity nesting box is the easiest starting point. It suits songbirds like eastern bluebirds, house wrens, chickadees, and tree swallows. These are birds that naturally nest in tree cavities, so a simple wooden box with the right entrance hole mimics exactly what they need. If you are new to building bird homes, this is where to start. You can finish one in a couple of hours with a single pine board.
A barn owl box is a step up in size but still very manageable. Plans developed by groups like the Santa Clara Valley Bird Alliance walk you through a roomier enclosure with specific ventilation and drainage specs suited to larger raptors. If you have a barn, orchard, or open field nearby, barn owls are incredible to attract and they do a real service by hunting rodents.
A small backyard aviary or flight enclosure is a bigger project entirely. Think framed structure, hardware cloth panels, and a weather shelter section. This is worth attempting if you are rehabilitating a bird temporarily or creating a safe outdoor enrichment space. It is a weekend build at minimum, not an afternoon. For most readers starting out, the cavity nesting box is the right call.
| Bird Home Type | Best For | Difficulty | Time to Build |
|---|---|---|---|
| Cavity nesting box | Bluebirds, wrens, chickadees, swallows | Beginner | 2 to 4 hours |
| Barn owl box | Barn owls in open/rural settings | Intermediate | Half day |
| Small aviary/enclosure | Enrichment, temporary rehab | Advanced | Full weekend |
The entrance hole size is the single most important design decision because it controls which bird can actually get in. An eastern bluebird needs a 1 1/2 inch diameter hole. A mountain bluebird needs a slightly larger 1 9/16 inch hole. A house wren can squeeze through a 1 1/4 inch hole. Get this wrong and you either block your target bird or let in a house sparrow that will take over. More on exact sizing in the build section below.
Pick location, height, and placement for safety and success
Location is where most first-time builders go wrong. You can build a perfect box and get zero occupants simply because it is in the wrong spot. Birds are picky about their real estate and they have good reasons for it.
Height and orientation
For eastern bluebirds, mount the box so the floor is about 4 to 6 feet off the ground on a smooth metal pole. House wrens are more flexible and will accept boxes hung 5 to 10 feet up on a fence post or tree. The entrance hole should face away from the prevailing wind (usually facing east or southeast works well in most of North America) so rain does not blow straight in.
Sun, shade, and surroundings
Avoid full south or west exposure in hot climates. A box baking in afternoon sun can overheat eggs and nestlings. Partial shade in the afternoon is ideal. That said, do not tuck the box in dense shrubs. Cavity-nesting birds like an open flight path to the entrance so they can spot predators on approach. A box placed at the edge of an open area, facing a lawn or meadow, tends to get occupied faster.
Spacing and site hazards
If you are putting up multiple boxes, space bluebird boxes at least 100 yards apart. They are territorial and two boxes close together will just create conflict. For wrens, spacing of 50 to 100 feet is usually fine. Keep all boxes away from heavy foot-traffic areas, busy roads, and spots where cats roam freely. Cats are one of the biggest threats to fledglings making their first flights.
Materials, tools, and beginner-friendly build plans
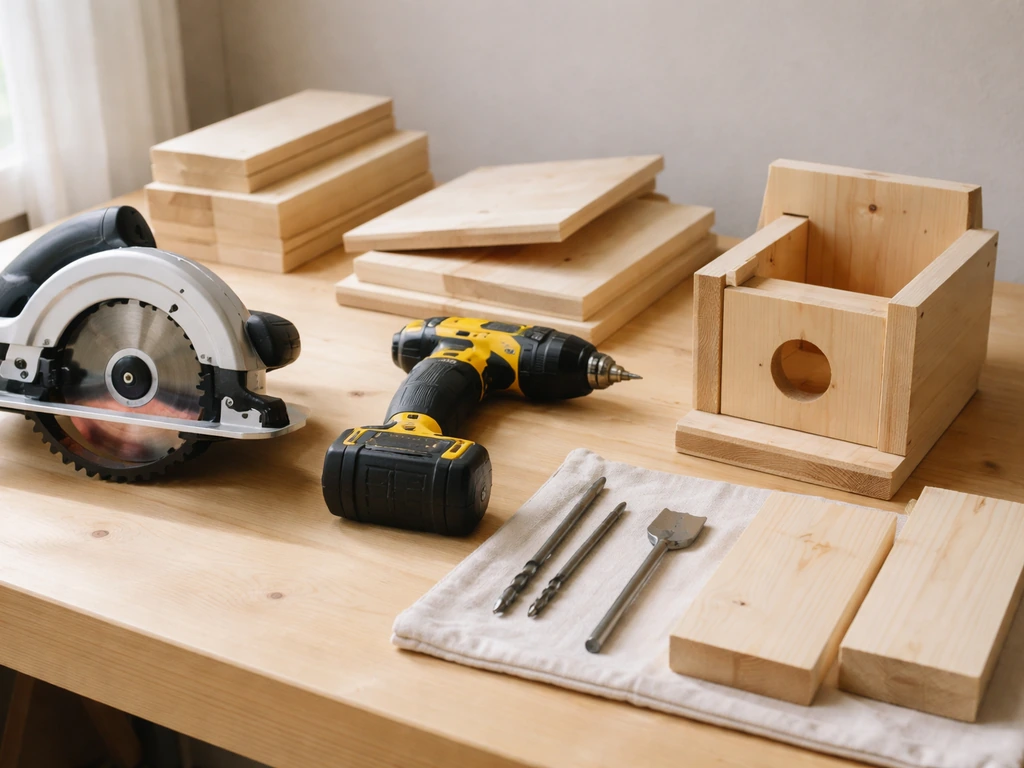
You do not need a workshop full of specialty tools. I have built perfectly functional nesting boxes with a circular saw, a drill, a 1 1/2 inch spade bit, sandpaper, and exterior wood screws. That is genuinely all you need for a basic cavity box.
Best wood choices
Use untreated wood. Cedar, pine, and redwood are all great choices because they resist rot naturally or hold up well when properly built. Avoid treated lumber, plywood with formaldehyde-based glues, and anything painted on the inside. The fumes from treated or painted surfaces can harm nesting birds. Rough-cut lumber on the interior surfaces is actually a plus because it gives nestlings grip when climbing out. If you can only find smooth lumber, score the inside of the front panel below the hole with a chisel or saw to give young birds something to grab.
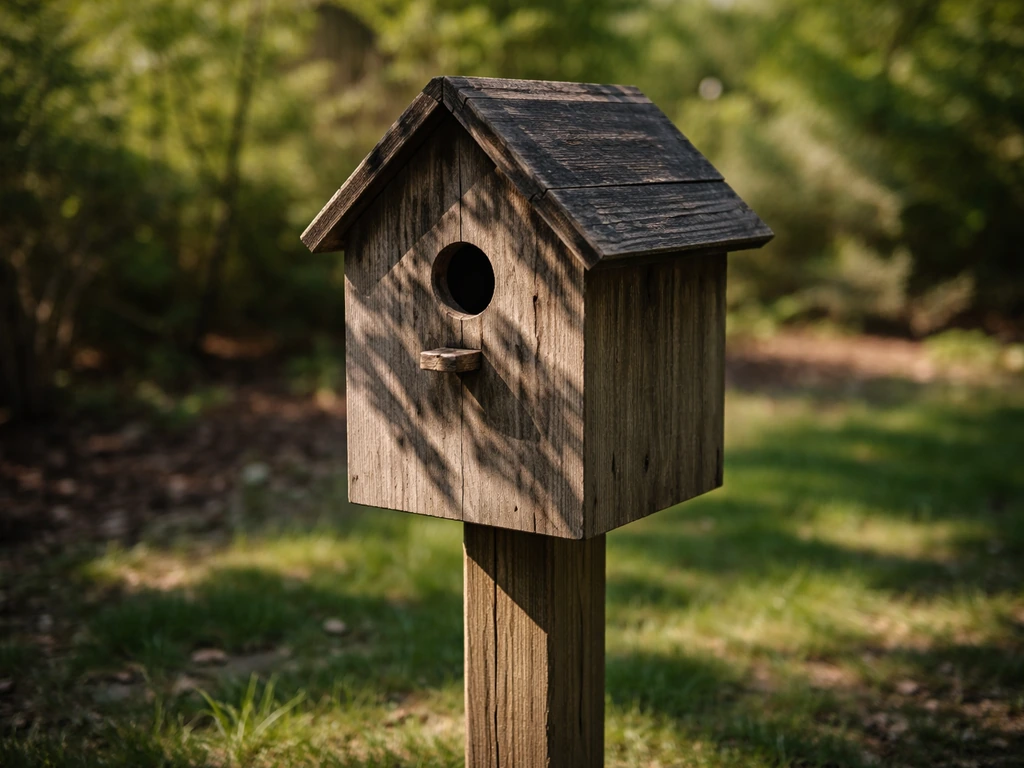
Repurposed fence boards work beautifully and cost next to nothing. Old cedar fence pickets are a staple in my shop. Just make sure they have not been pressure-treated. If the wood has a slightly greenish tint or a waxy feel, skip it.
Tools list
- Circular saw or hand saw for cutting boards to length
- Drill with standard bits and a 1 1/4 to 1 9/16 inch spade or Forstner bit (size depends on your target species)
- Exterior wood screws (1 5/8 inch or 2 inch, coated or galvanized)
- Sandpaper (medium grit for smoothing the entrance hole edges)
- Tape measure and pencil
- Speed square for marking straight cuts
- Optional: jigsaw for any angled cuts on the roof
Cut list for a basic bluebird nesting box
Audubon's bluebird box plan is one of the clearest beginner plans available and uses a single 1x6 pine board (which actually measures 3/4 inch thick by 5 1/2 inches wide). The floor piece should give you a 4x4 inch interior floor, with the entrance hole centered on the front panel so its center sits 2 inches from the top and 2 1/2 inches from each side. The top (roof) piece in Audubon's plan measures 11 1/4 inches by 11 inches and slopes toward the front to shed rainwater forward. Thick walls of at least 3/4 inch are important for insulation, which is why 1x lumber (actual 3/4 inch) is the standard recommendation.
Quick species entrance hole reference
| Species | Entrance Hole Diameter | Hole Height Above Floor | Floor Size |
|---|---|---|---|
| Eastern Bluebird | 1 1/2 inches | 8 inches | 4 x 4 inches |
| Mountain Bluebird | 1 9/16 inches | 8 inches | 4 x 4 inches |
| House Wren | 1 1/4 inches | 6 inches | 4 x 4 inches |
| Black-capped Chickadee | 1 1/8 inches | 6 to 8 inches | 4 x 4 inches |
| Tree Swallow | 1 1/2 inches | 6 inches | 5 x 5 inches |
Step-by-step construction: building your nesting box
This walkthrough follows the standard cavity nesting box approach. It is designed for a bluebird box but the same steps apply if you adjust the dimensions for another species. After the framing and dimensions are set, you can follow the same general approach to learn how to make a bird cage craft that is safe for birds.
- Cut your boards to length. You need a front panel, a back panel, two side panels, a floor, and a roof. Mark and cut each piece to your target species dimensions. For a bluebird box, the front and back are typically around 10 to 11 inches tall, the sides taper slightly to create a roof slope, and the floor is 4x4 inches.
- Drill the entrance hole on the front panel before assembly. Use the correct spade or Forstner bit for your target bird. Center the hole so its middle sits 2 inches from the top edge and 2 1/2 inches from each side edge. Drill slowly and sand the edges smooth inside and out so there are no splinters.
- Drill drainage holes in the floor. Make at least four holes, 3/8 to 1/2 inch in diameter, near the corners. Rain will always find a way in and these holes let it drain before it soaks the nest. This is one of those steps that feels minor but makes a real difference in whether the box stays usable season after season.
- Drill ventilation holes in the upper side walls. Drill two 5/8 inch holes on each side wall near the top (four total across both sides). This prevents heat buildup in summer and reduces condensation. Overheating is a genuine killer of nestlings in poorly ventilated boxes.
- Do not add a perch. This is a common mistake on first builds. Perches are unnecessary for the birds and they actually give predators a foothold to reach into the entrance. Leave them off entirely.
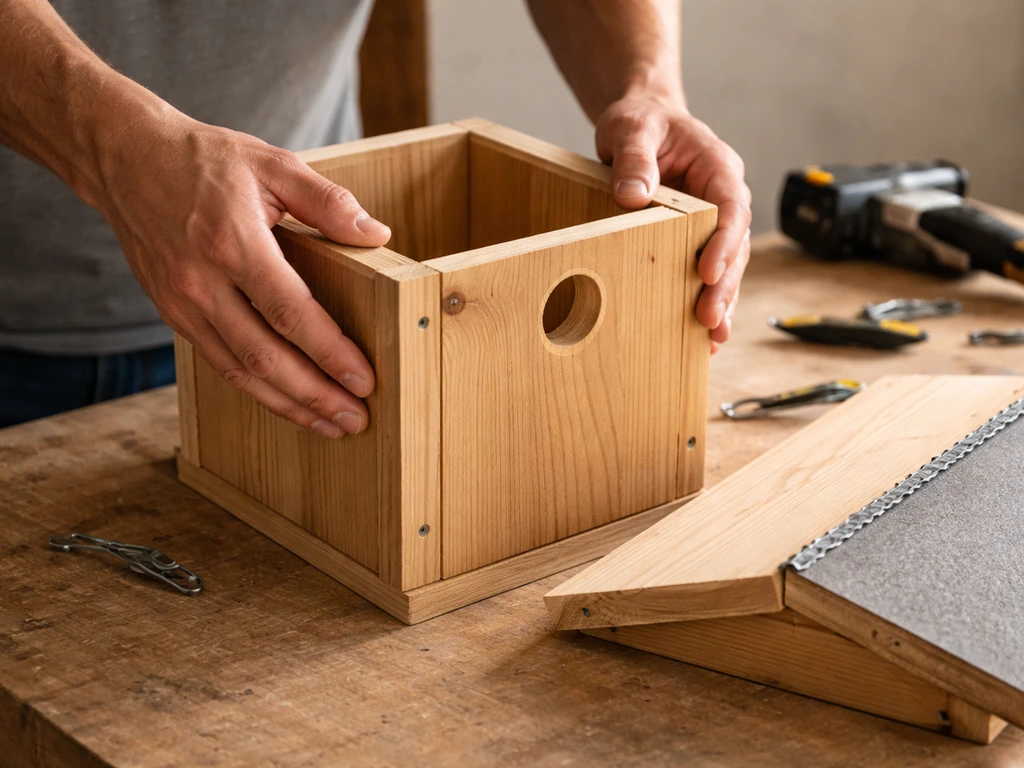
- Assemble the box using exterior screws. Attach the two side panels to the back panel first, then attach the front panel, then screw the floor up from below into the side panels. Leave the roof loose or hinged for now so you can clean the box between seasons. A single screw at the top of one side panel that pivots open is a simple and effective access door design.
- Attach the roof with a slight forward slope so rain runs toward the front rather than pooling against the back wall. Overhang the front and sides by at least an inch for extra weather protection.
- Sand any rough edges on the outside, but leave the interior rough for grip. Do not paint or stain the inside. If you want to protect the exterior, a single coat of exterior-grade linseed oil or a natural stain on the outside surfaces only is fine.
Add weatherproofing, ventilation, and predator protection
The box itself is only half the job. How you mount it and protect it from predators determines whether any birds successfully fledge from it. I learned this the hard way with my first bluebird box, which got raided by a raccoon before the eggs even hatched.
Weatherproofing details
The sloped roof with at least a 1 inch overhang handles most rain. Make sure all exterior joints are tight and consider running a thin bead of exterior caulk along the roof-to-wall seam on the outside only. Never caulk interior seams because moisture needs somewhere to escape. The drainage holes in the floor are your backstop when water does get in.
Predator guards: do not skip this
You should not put up a nest box without a predator guard. Raccoons, snakes, and squirrels will find the box, and a guard is the difference between a thriving nest and a raided one. There are two reliable approaches: a baffle on the mounting pole and a hardware cloth Noel guard over the entrance.
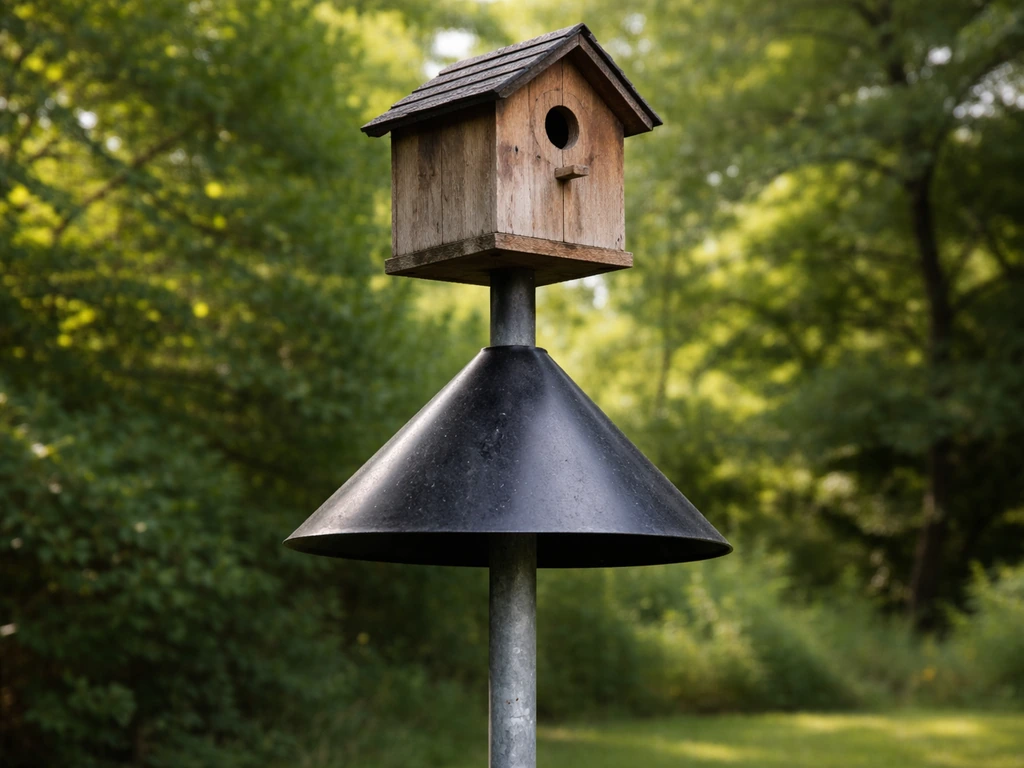
A cone or stovepipe baffle installed on the pole below the box is the most effective deterrent against climbing predators. A metal stovepipe section (about 8 inches in diameter and 18 inches long) slipped over the pole and positioned so it spins or tilts stops raccoons and snakes cold. Cone baffles work on the same principle. Place the baffle so its top is at least 4 feet off the ground and no branches or structures nearby give a predator a route to jump around it.
A Noel guard is a short tube of hardware cloth (half-inch mesh) attached around the entrance hole and extending outward about 3 inches. It makes it nearly impossible for a raccoon to reach into the box with its paw. For houses in areas with high raccoon pressure, using both a pole baffle and a Noel guard together gives you the best protection.
Ventilation recap
The four ventilation holes (two per side wall, 5/8 inch diameter, near the top) are non-negotiable in warm climates. A box that reaches 107 degrees Fahrenheit inside on a summer day will kill eggs and nestlings even when an adult is sitting on the nest. Ventilation is not just comfort, it is survival.
Maintenance, cleaning schedule, and troubleshooting
Building the box is the fun part. The follow-through is what actually produces birds year after year. A box that never gets cleaned and checked will eventually become a parasite hotel that birds avoid.
Cleaning schedule
Once breeding season ends, typically by mid-August in most of North America, open the box and remove all old nesting material. Scrub the interior with a bleach solution of 1 part bleach to 9 parts water, rinse well, and let it dry completely in the sun before closing it back up. This kills parasites and bacteria that would otherwise wait for next season's occupants. NestWatch recommends leaving nest material in place during the active breeding season since disturbing a nest mid-use does more harm than good, but a thorough clean after fledging is important.
If your area has bluebirds that attempt two or even three broods in a season, you can do a quick clean between each brood once the young have fledged and the adults have moved on. Just confirm the box is truly empty before opening it.
When to expect birds to move in
Bluebirds start scouting nest sites as early as late February or March in warmer regions. Wrens typically arrive a bit later, in April or May. Put your box up at least four to six weeks before your local breeding season starts so birds have time to find and claim it. A box installed in June might not get used until the following spring. Patience is part of the deal.
Troubleshooting when no birds show up
If your box sits empty for a full season, work through this checklist before giving up:
- Check the entrance hole diameter. Even being 1/8 inch off can matter. Measure twice and compare to your target species.
- Reconsider the location. Too much shade, too close to a fence that predators use, or in an area without the open flight path birds prefer are the most common culprits.
- Check the mounting height. If the box is too low (under 4 feet), ground predators are likely deterring birds from even approaching.
- Verify the interior is dry. If the floor stays wet, the box smells wrong to birds. Add or enlarge drainage holes.
- Look for house sparrow activity. House sparrows will claim a box and exclude native cavity-nesters. If sparrows are a problem, removing their nests repeatedly (it is legal because they are an introduced species) and researching sparrow-resistant designs can help.
- Consider the season. If it is late summer and you just put the box up, just wait. Early spring installation is the key.
- Try a different spot entirely. Move the box 50 feet and give it another full season. Sometimes a small shift in orientation or surroundings makes all the difference.
Building a bird home is genuinely one of the most satisfying DIY projects you can do because the result is a living, active thing. Once you have one bluebird box up and occupied, you will want to build another with slight tweaks, try a wren house, and eventually branch out into more ambitious builds. If you are wondering how to make DIY bird homes, use the same measurements and placement rules as you experiment with new designs.
From there it is a natural step to explore things like decorating your birdhouse for visibility, creating a bird seed covered birdhouse to attract additional species, or even building small bird cage craft structures for enrichment. Building small bird cage craft structures for enrichment is a natural next step once your nesting box is working.
You can also decorate your bird house in a safe way using natural, non-toxic finishes and avoiding anything that could affect ventilation or heat decorate your birdhouse. The foundation is the same: right dimensions, right placement, solid weatherproofing, and a predator guard. Start with one box this weekend and iterate from there.
FAQ
Can I clean out the birdhouse while the birds are using it?
Don’t remove a used nest during active incubation or when chicks are present. Wait until the season ends (after fledging and the box is truly empty), then empty and scrub. If you want to reduce disease risk, keep a simple inspection schedule instead of frequent opening, for example once after the brood is finished rather than every few weeks.
What should I do if my birdhouse stays empty even though the hole size is right?
If the entrance hole is correct for your target species but birds are not moving in, double-check nearby competition and placement. House sparrows and starlings often take over when boxes are too close, poorly oriented, or missing predator protection. Also confirm the box height and that it is not tucked behind dense foliage that blocks predator-free approach paths.
Is it safe to paint or stain the birdhouse to match my yard?
Yes, you can, but keep the interior unfinished and ventilation effective. Use non-toxic, exterior-rated finishes only on the outside surfaces, and avoid sealing inside faces, the drainage area, or the ventilation hole edges. Overcoating can reduce airflow or trap moisture, so test a small area first and ensure the box can fully dry before use.
Should I take the birdhouse down in winter, and how do I handle offseason cleaning?
During winter, leaving a nesting box in place can be fine, but don’t assume it should be “in use.” If your goal is to help birds, remove debris and do a full clean at the end of the season, then close it for winter. If you live in an area with severe weather, check the roof overhang and caulk only on the outside seams so water can still escape.
How do I make sure the interior is safe and easy for fledglings?
Avoid any interior surface that stays smooth and slick. Rough lumber is ideal, and if you have only smooth boards, add grip by scoring below the entrance hole as described in the build. If you are using recycled fence boards, also inspect for splinters or sharp edges that could injure nestlings.
How can I monitor whether my birds are nesting without disturbing them?
It helps to add some monitoring, but keep it light. Use binoculars or a quick visual check from a safe distance, then close it and don’t repeat often. Frequent opening can cause nest abandonment, and if you see a predator sign such as claw marks, address guarding immediately rather than repeatedly checking the nest.
Can I scale the box up for different bird species, or should I build separate designs?
A “can’t-miss” way is to follow species-specific hole sizing and also verify wall thickness and ventilation. For cavity nesters, the box should have insulation value from thicker walls (for many DIY boxes, 3/4 inch stock is a common standard) and enough airflow near the top. If you are attracting larger birds, don’t just scale up the entrance, also match drainage and ventilation for the species.
How much clearance do I need around the predator guard and pole?
Yes. Predators can climb from nearby structures, so maintain clearance around the pole, baffle, and entrance. Trim branches that allow a jump onto the roof or baffle, and keep the pole area free of footholds like stacked wood or fencing hardware close to the guard.
What is the best way to reduce cat and raccoon risk for a home bird setup?
Use the box as a tool to reduce risk, not just to add habitat. If you have cats, place boxes so the approach path does not bring cats within easy stalking distance, and prioritize predator guards plus spacing from heavy foot-traffic. In many neighborhoods, the single biggest improvement is a working baffle that stops raccoons and snakes.
How do I keep eggs from overheating in hot weather?
If temperatures routinely exceed the box’s comfort range, ventilation becomes even more critical. Ensure the ventilation holes are not blocked by caulk, paint, or warping, and verify the roof overhang is still tight so rain does not enter when air is hot and humid. If you can, choose partial afternoon shade and avoid full south or west exposure.
I followed the instructions but still got no occupants for a whole season. What are the highest-impact fixes?
If the box remains unused for a full season, don’t only change one thing. Work through placement, competition, and guarding: verify the height, entrance orientation away from prevailing wind, spacing from other boxes, and that the guard is preventing predator access. Also confirm your timing, put it up at least several weeks before the local breeding window.
Next Articles
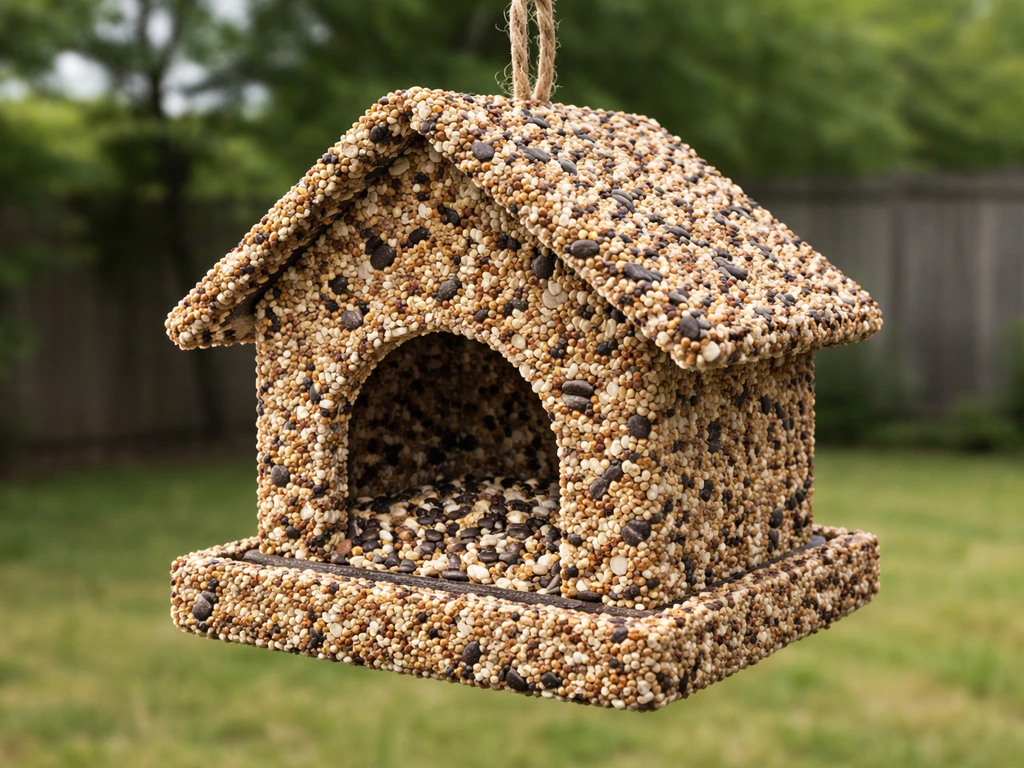
How to Make a Bird Seed Covered Birdhouse Feeder
Step-by-step DIY bird seed covered birdhouse feeder with parts list, construction, placement, and maintenance tips.
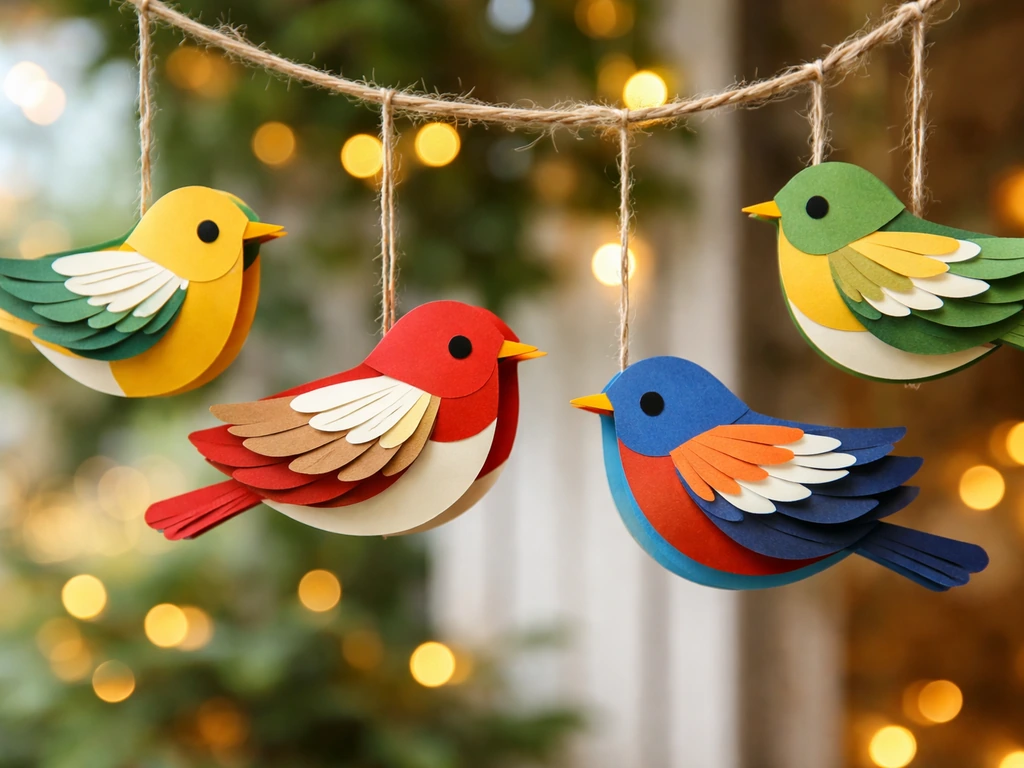
How to Make Bird Decorations: Paper Birds and Ornaments
Step-by-step guide to make paper bird ornaments and non-paper Christmas bird decorations with safe, outdoor-ready tips.
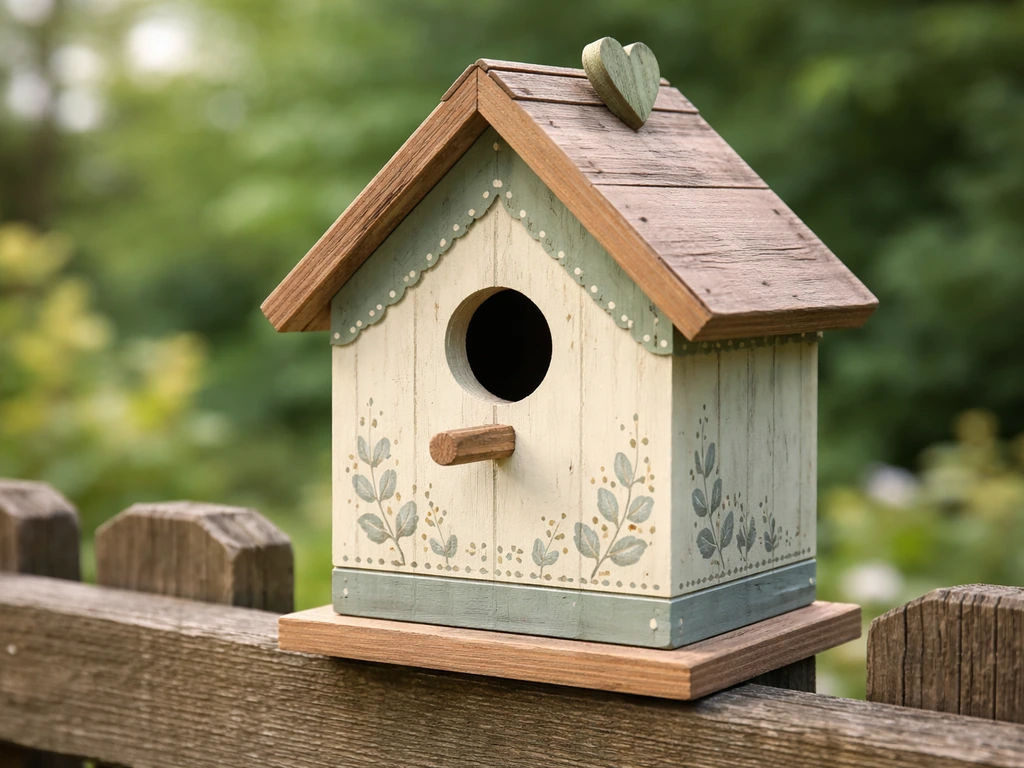
How to Decorate a Bird House Safely Step by Step
Step-by-step how to decorate a bird house safely with bird-safe paints, finishes, and durable outdoor details.