You can absolutely make a birdhouse look great without turning it into a hazard for the birds you're trying to attract. The short answer: paint only the exterior, skip the inside and entrance hole entirely, choose earth tones or muted naturals, let everything dry for several days before mounting, and keep decoration away from ventilation gaps and drainage holes. That's the core of it. Everything below is about doing it well, confidently, and with the right materials so your finished birdhouse actually gets used.
How to Decorate a Bird House Safely Step by Step

Marcus Thornton
13 Apr 2026
What birds actually need from a birdhouse
Before picking up a paintbrush, it helps to understand what makes a birdhouse functional versus just decorative. Birds nesting in a box need four things: a correctly sized entrance hole, a rough interior so fledglings can climb out, ventilation to prevent heat buildup, and drainage so water doesn't pool on the floor. Decoration decisions have to respect all four of these.
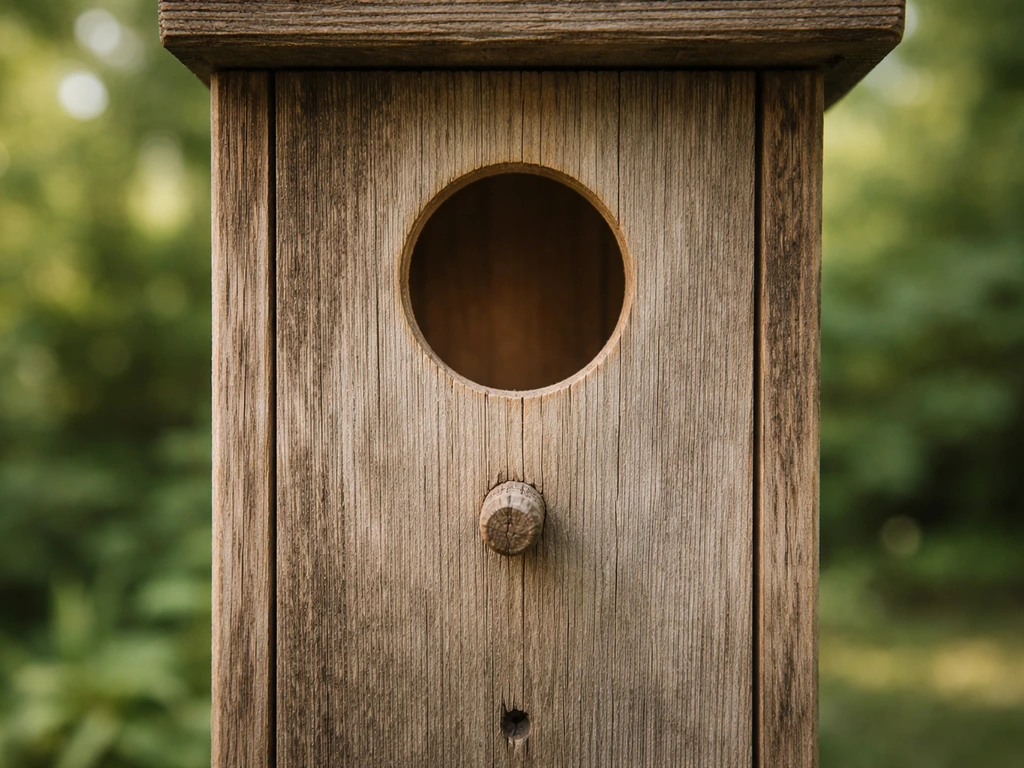
The U.S. Fish & Wildlife Service is clear on this: do not paint the inside of the box or the entrance hole. The Alaska Department of Fish and Game echoes that rule and adds that the interior below the entrance should be rough or grooved so nestlings can grip the wood on their way out. If you sand or paint that interior surface smooth, you're making escape harder. Ventilation matters too: gaps between the roof and sides, or small holes drilled just below the roofline, prevent the interior from turning into an oven on a hot July afternoon. Four quarter-inch drainage holes in the floor prevent standing water. None of that should be blocked, filled, or painted over.
One more thing worth mentioning: avoid adding a perch below the entrance hole. It looks charming, but the Alaska Department of Fish and Game specifically notes that perches increase predator access. Leave them off any functional nesting box.
Prep work before you pick up a brush
Good decoration starts with a clean, sound surface. If you're working on a new birdhouse, knock down any rough edges with 120-grit sandpaper, wipe off sawdust with a damp cloth, and let the wood dry completely before applying anything. If you're refreshing an old or used birdhouse, cleaning is non-negotiable. Old nesting material has to come out because some cavity-nesting birds won't nest again in a box that still holds last season's nest. Scrub the exterior with a mild soap-and-water solution, rinse thoroughly, and let the box dry for at least 24 to 48 hours before you start decorating.
While you have the box open, check for cracks, loose joints, or splintered wood around the entrance hole. A little wood glue and a clamp fixes most small separations. Sand any rough spots on the exterior flat so paint or stain adheres evenly and doesn't peel at high points. If the drainage holes are clogged with debris, clear them out with a skewer or a small drill bit. Repairs first, decoration second, every time.
Bird-safe finishes and color choices
What to use
The North American Bluebird Society recommends light colors like earth tones and white specifically because they reflect sunlight and help prevent overheating inside the box. That's your best general guidance for color: go muted and natural. Think weathered gray, barn red, sage green, tan, or soft white. These colors blend with outdoor environments, which is exactly where birds feel safe. Exterior latex paint works well because it's water-resistant, low-odor when fully cured, and widely available. Exterior wood stains are another solid option, especially for cedar or pine birdhouses where you want the wood grain to show through. Tung oil and linseed oil are natural alternatives that soak into the wood rather than sitting on the surface, which means less peeling over time.
What to avoid
Skip anything glossy. High-gloss finishes can reflect light in ways that deter birds and don't breathe the way flat or satin finishes do. Avoid oil-based paints and varnishes that take weeks to fully off-gas. Strong chemical odors from solvents, polyurethane, or shellac can linger and keep birds away. Never use lead-based paint, creosote, or wood preservatives that contain toxic compounds. And repeat after me: nothing goes on the interior surfaces or around the lip of the entrance hole. Not primer, not paint, not stain. That rule comes from multiple wildlife agencies and it's not negotiable.
| Finish Type | Best Use | Drying Time (exterior) | Bird Safety Notes |
|---|---|---|---|
| Exterior latex paint | Color and weather protection | 1-2 hours touch dry, 3-5 days full cure | Safe when fully cured; exterior only |
| Exterior wood stain | Natural look, shows wood grain | 2-4 hours, 48-72 hours full cure | Safe when cured; exterior only |
| Tung oil / linseed oil | Penetrating natural finish | 24-48 hours per coat | Low odor, very bird-friendly |
| High-gloss varnish / polyurethane | Not recommended | N/A | Strong fumes, deters birds |
| Lead-based paint / creosote | Never | N/A | Toxic; never use on birdhouses |
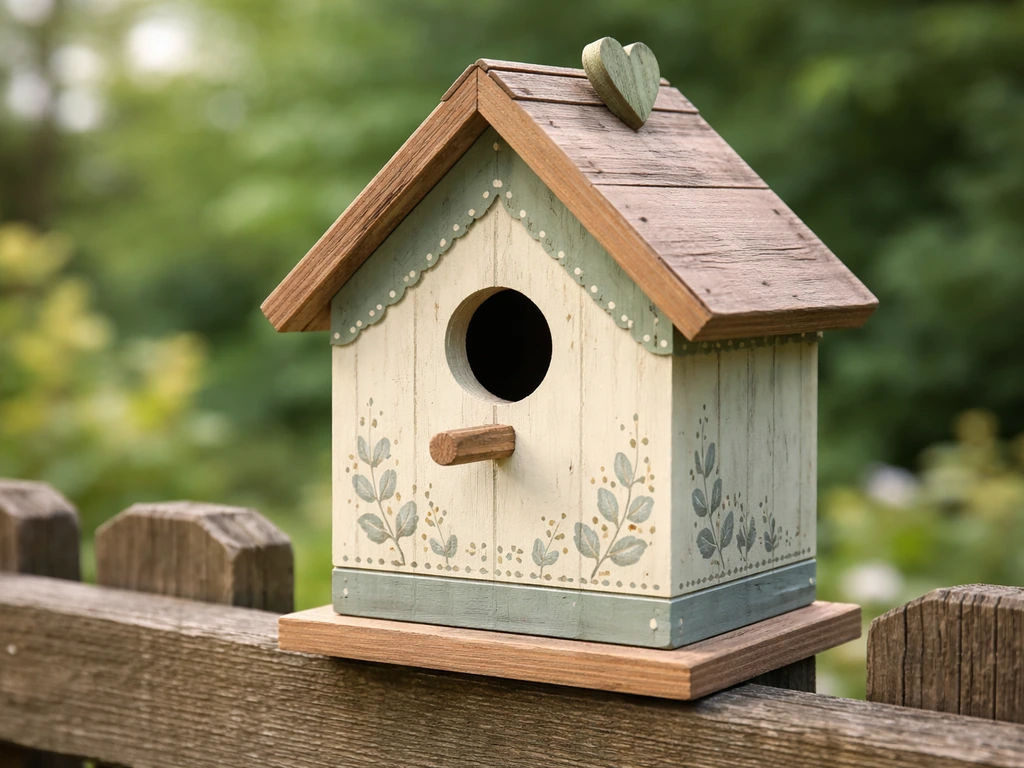
Decoration ideas that won't get in the way
Once you've got a clean, prepped exterior and a safe base coat, there are plenty of ways to add character without compromising function. The key is keeping all decoration on exterior flat surfaces and away from the entrance hole, ventilation gaps, and drainage holes.
Trim and applied details
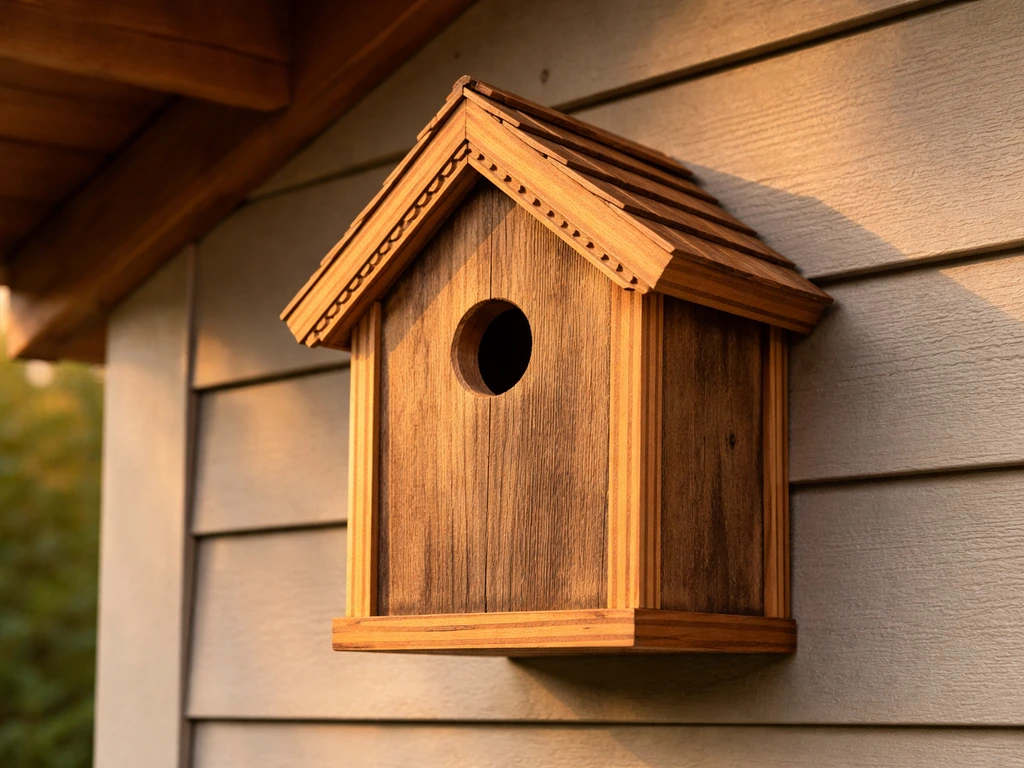
Thin strips of cedar or pine glued and nailed along the roofline, corners, or base add a classic cottage look. Keep trim pieces thin (1/4 inch is plenty) and seal them on all sides before attaching so moisture doesn't sneak in behind them. Avoid placing trim near the entrance hole or any vent gaps. If you're working with repurposed materials, thin slices of birch bark pressed and glued onto the exterior panels look genuinely beautiful and weather well.
Wood burning
A wood-burning tool (pyrography pen) lets you add designs directly to bare wood with zero paint or chemicals involved. Geometric patterns, simple leaf shapes, or even a species silhouette on the front panel look sharp and hold up outdoors better than paint when sealed with a thin coat of exterior tung oil afterward. This is one of my personal favorite techniques because it adds real visual detail without any risk of toxic finishes. Stay well away from the entrance hole edges and vent gaps.
Painted patterns and accents
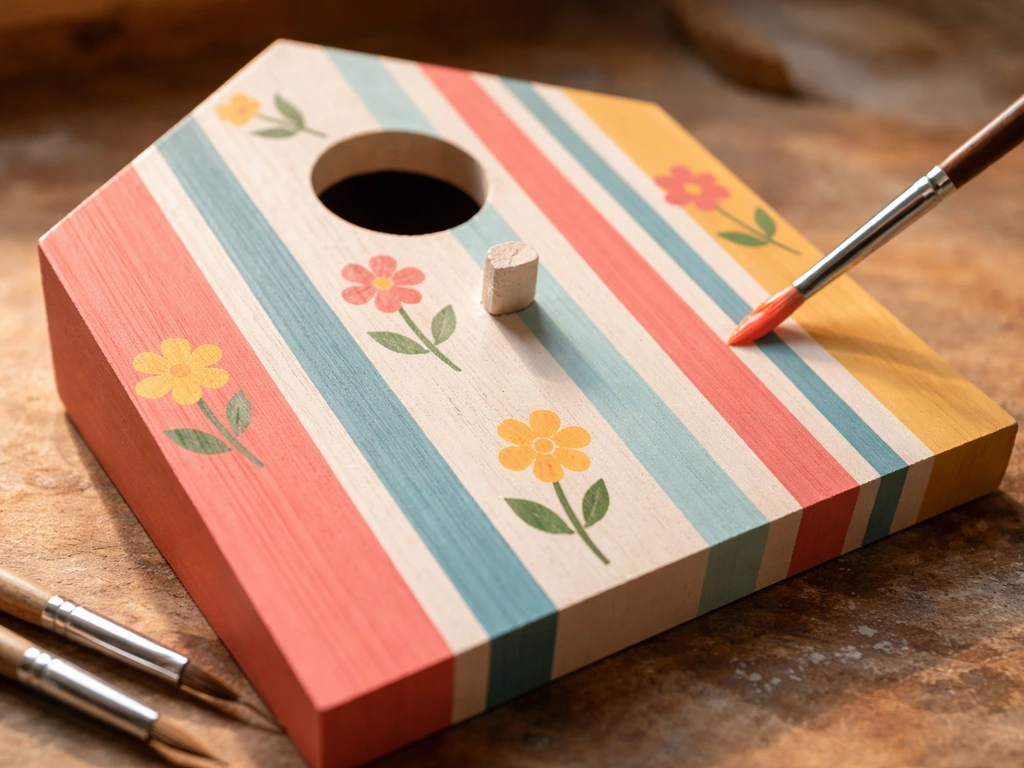
Stripes, checkers, simple floral patterns, or a hand-painted scene on the front panel all work well with exterior latex paint. Use small artist brushes for detail work and let each color layer dry fully before adding the next. Keep patterns on the flat panels only. If you want to get creative with a full themed design, thinking through how to make bird decorations as standalone pieces first can actually help you practice brushwork before applying it to the birdhouse itself.
Decoupage
Decoupage works surprisingly well on birdhouse exteriors. Use thin paper or fabric, a water-based decoupage medium (Mod Podge Outdoor formula is a good pick), and seal with two or three topcoats. The trick is sealing all edges so moisture doesn't lift the paper at the corners. Avoid placing decoupaged elements anywhere near the entrance hole or roof junction where water sheds off. Let the final coat cure fully before the birdhouse goes outdoors.
Weatherproofing so it actually lasts
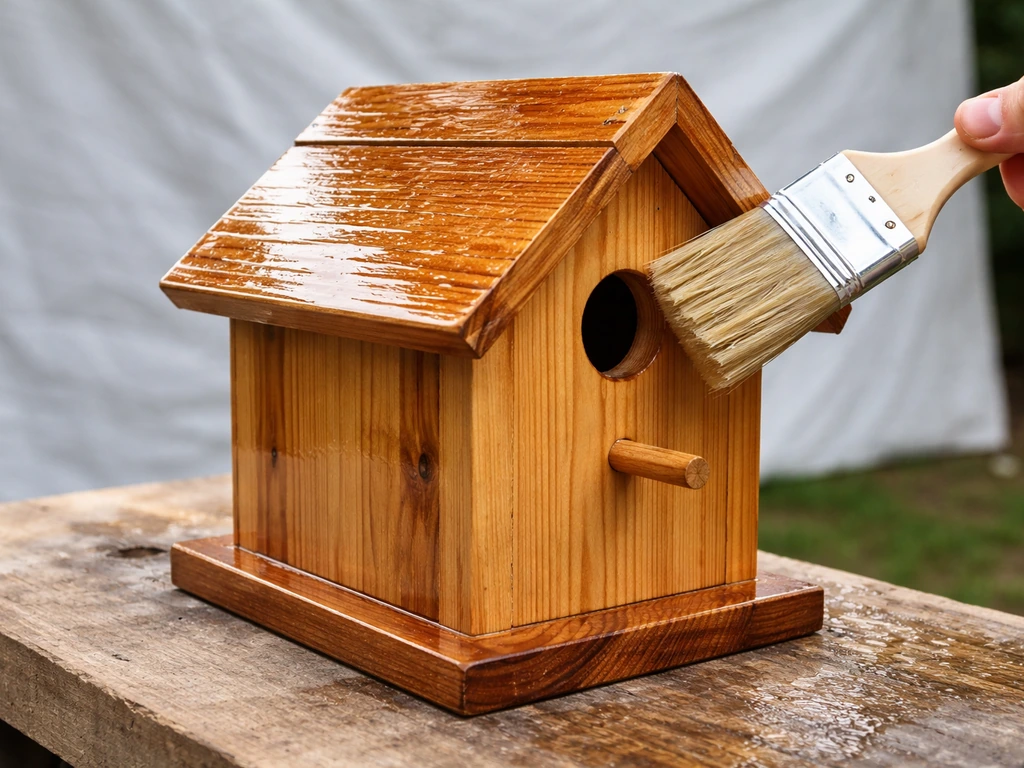
A birdhouse that looks great in April but peels and warps by August is a wasted effort. Weatherproofing is the step most beginners skip or rush, and it shows. Once your decorative layers are fully dry, apply a final protective coat appropriate to your base finish. If you used exterior latex paint, a clear exterior water-based topcoat adds a layer of UV and moisture protection without sealing the wood too hard. If you used a penetrating oil, a second coat after the first has fully absorbed is usually enough.
Curing time is not optional. Multiple wildlife and construction guides are consistent on this point: let paint and finish dry thoroughly for several days before mounting the birdhouse. Three days minimum for latex in warm weather, five to seven days if temperatures are below 60 degrees Fahrenheit or humidity is high. Residual solvent odors from insufficiently cured paint will keep birds from investigating the box, and all that work goes to waste. Patience here pays off directly.
When mounting, think about the location alongside the finish. A birdhouse in full afternoon sun will fade and crack faster than one with morning sun and afternoon shade. Consider the roof overhang when mounting: a roof that extends at least an inch past the front panel keeps rain from driving into the entrance hole. If you're mounting on a pole, adding a predator baffle below the box protects your birds far more than any paint color will. Clemson Extension guidance on bluebird boxes recommends mounting at a minimum of 5 feet high, which also keeps decoration visible from a comfortable viewing distance.
Matching your decoration to the bird you're trying to attract
Decoration and species attraction are more connected than most people realize. Color choice, entrance hole size, and even box proportions signal to birds whether a cavity is worth investigating. A purely decorative birdhouse with a tiny hole and no interior depth isn't going to attract any species, no matter how beautiful the paint job. If your goal is to actually house birds, the decoration has to come second to the species-specific design.
Bluebirds are a great example. The North American Bluebird Society recommends light-colored exteriors specifically for heat reflection, and bluebird boxes have a very specific entrance diameter (1.5 inches for Eastern Bluebirds). Painting around or over that entrance lip ruins the spec. Chickadees prefer darker, more sheltered-looking boxes, so a natural wood stain rather than a bright white works better. Wrens are less picky about color but need a small entrance (1 to 1.125 inches) and a box placed in shrubby cover. Understanding how to make a DIY bird habitat that genuinely matches each species means reading up on those specs before finalizing any design choices.
NestWatch emphasizes that nest box design and placement must match bird needs, and they provide species-specific plans that include interior dimensions, entrance hole sizes, and mounting heights. If you haven't confirmed your box matches the species you're targeting, do that before decorating. Redecorating a finished box is much easier than rebuilding one. And if you're working on a completely new build, the same principle applies: get the structure right first, then make it beautiful. For inspiration on a new build from scratch, how to make a bird at home covers the foundational construction steps that decoration later builds on.
For those who want the birdhouse to double as a garden feature, a seed-covered exterior is a genuinely creative option that attracts birds visually and offers a bit of foraging interest. If that appeals to you, check out how to make a bird seed covered birdhouse for a practical walkthrough of that technique. Just note it works best on purely decorative houses rather than active nesting boxes, since seed coating can block ventilation gaps and attract moisture if not managed carefully.
If your project is leaning more toward an enclosure or aviary design than a standard nesting box, the decoration logic shifts a bit. A larger structure has more surface area to work with and different ventilation priorities. Reading through how to make a bird cage craft can give you useful ideas for decorative framing and finishing that translate well to larger enclosure projects.
Your step-by-step plan for today
Here's the practical sequence. Follow this order and you won't miss anything important.
- Clean the birdhouse: remove old nesting material, scrub the exterior with mild soap and water, rinse well, and let dry for 24 to 48 hours.
- Inspect and repair: check for cracks, loose joints, and blocked drainage or ventilation holes. Fix and clear before moving on.
- Sand the exterior: 120-grit sandpaper on all outer surfaces. Do not sand the interior. Wipe dust away with a damp cloth and let dry.
- Tape off no-go zones: use painter's tape to protect the entrance hole lip, any ventilation gaps at the roofline, and drainage holes in the floor.
- Apply your base coat: one thin, even coat of exterior latex paint or wood stain in your chosen color. Earth tones, muted greens, or soft white are best choices.
- Let it dry fully: minimum one hour before handling, but don't rush the next step. Wait at least 24 hours before adding decorative layers.
- Add your decorative elements: painted patterns, wood-burned details, decoupage, or trim pieces. Work one panel at a time and let each element cure.
- Apply a clear protective topcoat: one or two coats of exterior water-based clear coat or a second application of penetrating oil. Let dry.
- Full cure before mounting: wait three to seven days depending on temperature and humidity. The box should have no detectable paint odor before you mount it.
- Mount at the correct height: at least 5 feet off the ground for most species, with a predator baffle on the pole if possible. Face the entrance hole away from prevailing wind and afternoon sun.
Quick do this / don't do this recap
| Do This | Don't Do This |
|---|---|
| Paint only the exterior surfaces | Paint the inside of the box |
| Use exterior latex, stain, or natural oil finishes | Use glossy varnish, polyurethane, or solvent-heavy products |
| Choose earth tones, white, or muted naturals | Use bright, highly saturated colors on functional nesting boxes |
| Let finish cure 3-7 days before mounting | Mount the box the same day you paint it |
| Keep entrance hole, vents, and drainage holes clear | Block or paint over ventilation gaps or drainage holes |
| Roughen the interior wood below the entrance hole | Sand or paint the interior smooth |
| Add trim, wood burning, or decoupage to flat exterior panels | Add a perch below the entrance hole |
Materials checklist
- 120-grit sandpaper
- Mild soap and a scrub brush for cleaning
- Painter's tape
- Exterior latex paint or exterior wood stain in your chosen color
- Small artist brushes for detail work
- Wood-burning tool (optional, for pyrography details)
- Decoupage medium: Mod Podge Outdoor formula (optional)
- Thin trim strips of cedar or pine (optional)
- Exterior water-based clear topcoat or tung oil for sealing
- Predator baffle for mounting pole
That's really all there is to it. Clean prep, the right finishes, decoration kept away from the functional zones, and enough curing time before the box goes up. Do those things and you end up with a birdhouse that looks intentional and handmade in the best way, and that birds will actually want to move into.
FAQ
Can I paint the inside or the lip around the entrance hole if I use a water-based, non-toxic product?
No. Even if the paint is “outdoor” or “non-toxic,” applying it to the inside, the entrance hole edge, or the floor/vent openings can interfere with escape, grip, airflow, and drainage. If you already painted those areas, the safest move is to strip or sand back to bare wood and re-clear the ventilation and drainage points, then let everything dry fully before mounting.
How many layers of paint or sealant should I apply for a decorated birdhouse?
Use the shortest option that creates an even coat and stays off the functional zones. In practice, this means do one light exterior coat, wait to cure, then add details only on flat panels. Thick layers and heavy texture can trap moisture and flake later, so if a detail feels “built up,” treat it as decoration that should be sealed lightly and sparingly.
What should I do differently when decorating a previously used birdhouse?
If a birdhouse is already used, do not just repaint it. Remove old nesting material completely, scrub the exterior, check again for cracks near the entrance area, clear the drainage holes, and ensure the interior surfaces remain rough where they affect fledgling grip. After cleaning and repairs, let it dry 24 to 48 hours (or longer if it still smells musty) before you add any finishes.
Will painting around the entrance hole change the entrance size and affect which birds use it?
Test for fit and function before decorating by measuring the entrance diameter and confirming it matches the species you want, since paint and primer can add a thin layer that slightly reduces the opening. If the opening is already tight, remove paint from the entrance lip and keep all finishes strictly outside that edge and away from vent gaps.
What’s the safest way to weatherproof a decorated birdhouse after adding art, trim, or decoupage?
For sealing, prioritize products that cure hard and are designed for exterior use. If you used paint, a compatible clear exterior water-based topcoat can add UV and moisture protection, and you still need full curing time afterward. For oil finishes, let each coat fully absorb before adding another, and avoid creating a gummy surface that attracts debris.
Can I use decoupage or paper crafts on a birdhouse that will face heavy rain?
Yes, but treat it like a moisture and durability problem. If the paper edges lift or seams aren’t fully sealed on all sides, they can peel under wetting and freezing cycles. Only use decoupage on exterior flat surfaces, seal every edge thoroughly, and cure until completely dry before rain exposure.
How can I tell if my finish is fully cured and safe for birds?
Skip sealants that stay strongly tacky or keep strong solvent odors for days. Even with “low odor,” you should smell the completed exterior and ensure the project no longer has noticeable fumes before mounting. If it smells strong, extend curing time and avoid placing the birdhouse in direct sun that could accelerate odor release.
Are decorative trim pieces and glued-on accents safe if they’re not near the entrance hole?
Most of the time, yes, as long as it stays on exterior flat surfaces. However, thin trim and glued-on pieces should be sealed on all sides before attachment to prevent moisture intrusion behind them. Also keep trim and decorative bits away from the roofline/vent junctions so water can shed without being trapped under decorative elements.
Does the placement of the birdhouse change whether my decorations will hold up and stay safe?
Deciding where to mount matters for durability as well as bird success. Place the birdhouse where rain is less likely to blow directly into the entrance, ensure there is overhang protection, and consider full afternoon sun fading. For predator prevention, a baffle is more reliable than relying on decoration or color to deter threats.
If I want the birdhouse to look like it has a perch, is it ever okay to add one for decoration?
You generally should not. A perch below the entrance can increase predator access, and decorations that create a “landing surface” near the entrance can have the same effect even if they are artistic (like a faux shelf). Keep anything that functions like a platform away from the entrance zone entirely.
What’s the best way to choose colors or themes if I’m trying to attract a specific bird species?
If you’re trying to attract a specific species, decorations should follow the species plan, not lead it. Confirm entrance size, interior depth, and mounting height first, then choose colors and patterns that do not compromise those parameters. For some species, color preference and placement also matter, so a “beautiful” design that ignores specs may go unused.
Can I make my decorated birdhouse seed-covered so birds will forage from the outside?
Seed coatings can be problematic because they can block airflow paths and can hold moisture if not managed carefully. Even if the exterior looks exciting, treat seed-covered designs as decorative projects for non-active or purely ornamental houses, or only attempt it with strict control so ventilation and drainage are never obstructed.
Does the same “only decorate the exterior” rule apply to decorative bird cages or larger enclosures?
If it’s an active nesting box, keep decoration out of any area that affects ventilation, drainage, or escape routes. If it’s a larger aviary-style craft instead, decorative framing is different, but the same safety idea applies: avoid trapping birds in enclosed, poorly ventilated corners with materials that can off-gas or collect moisture.
Next Articles

How to Build a Chimney Swift Bird House DIY Guide
Step-by-step DIY plans to build a chimney swift bird house, with correct dimensions, placement, and weatherproofing for

How to Build an Oriole Bird House: Step-by-Step DIY
Step-by-step DIY for building an oriole bird house with right dimensions, weatherproofing, predator-safe placement, and

How to Build a Chickadee Bird House Step by Step
Step-by-step DIY chickadee bird house with cut list, chickadee entry sizing, ventilation, drainage, and mounting tips.