You can build a simple, humane bird catcher today using a wire mesh box, a few basic hardware pieces, and a handful of bait. If you want the best results, use this guide's full approach for how to make the best bird trap, including bait and placement tips simple, humane bird catcher. The goal is a catch-and-release enclosure: a box the bird walks into, can't escape from on its own, and stays safe inside until you gently retrieve it.
How to Make a Humane Bird Catcher DIY Guide

Marcus Thornton
23 Apr 2026
This is the right tool for catching an escaped pet bird, relocating a small bird stuck inside your house, or safely handling a bird before passing it to a rehabber. It's not complicated, and you don't need fancy tools to pull it off.
What kind of bird catcher do you actually need?
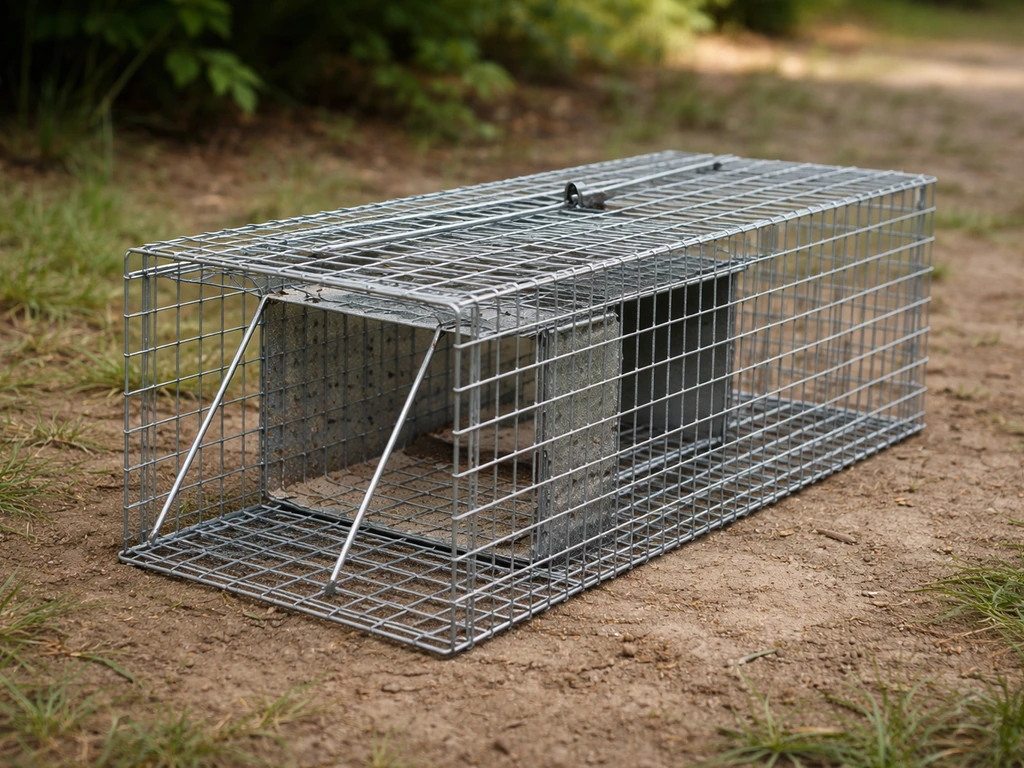
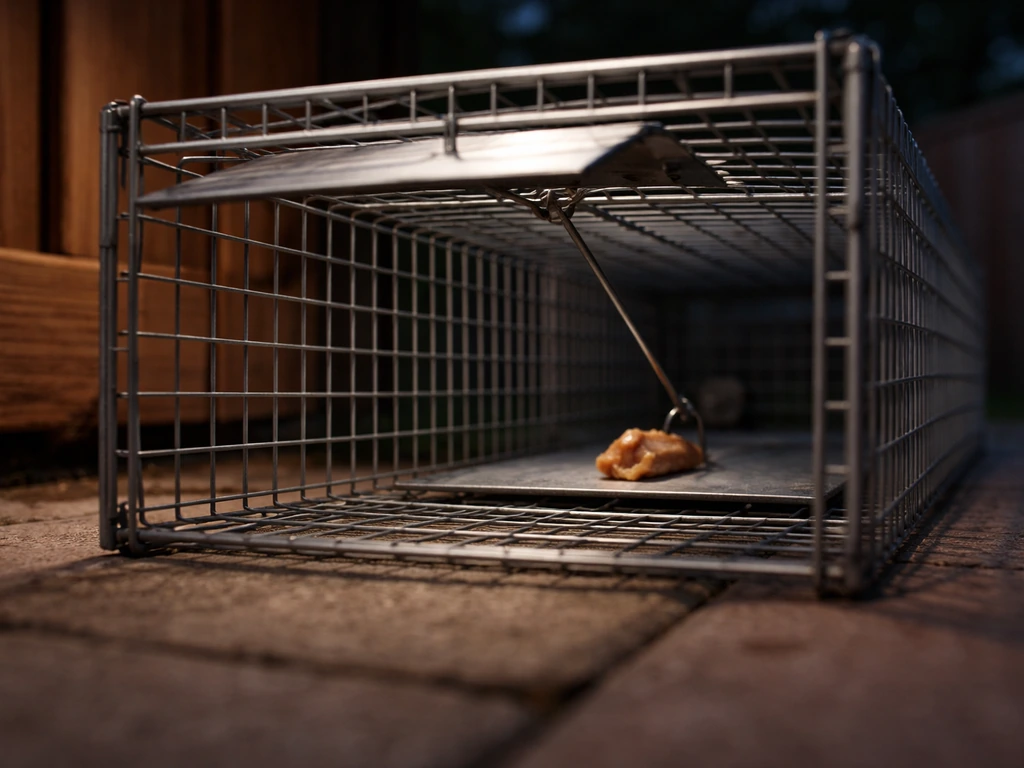
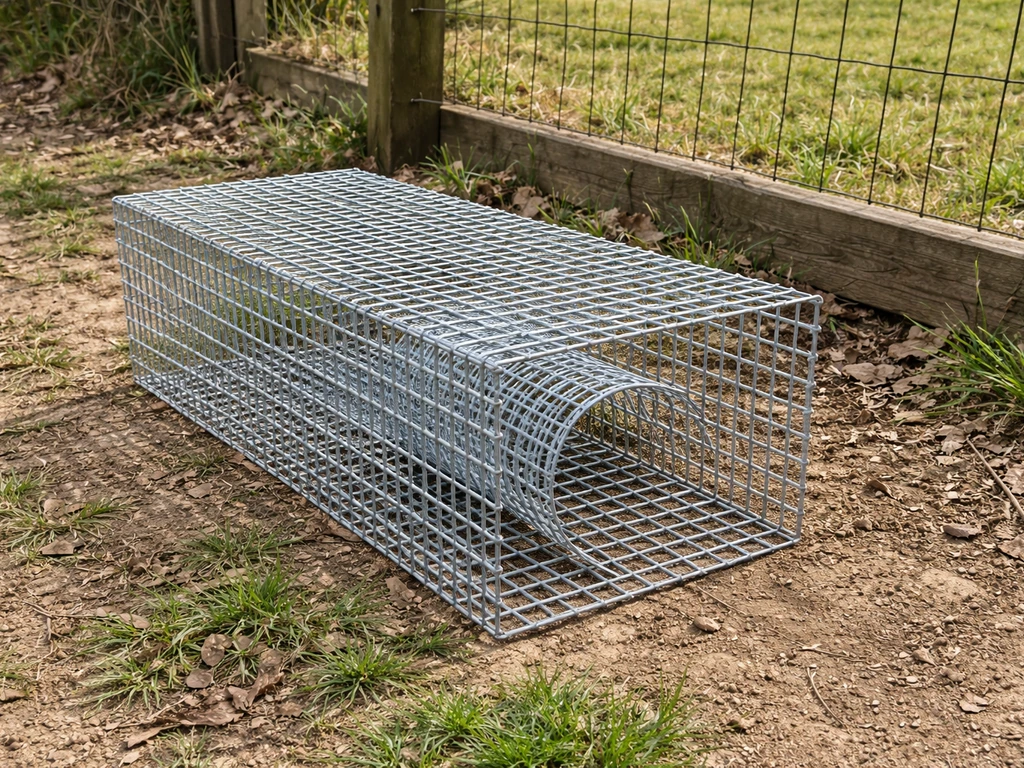
Before you start cutting wire, it helps to know which style of bird catcher fits your situation. There are two main designs worth knowing: a box trap (a simple enclosed cage with a trigger-drop door) and a funnel-door enclosure (an entry cone that lets birds walk in but makes it nearly impossible for them to find the exit). Both are humane when built and used correctly, but they suit different situations.
The box trap with a drop-door is the easiest to build from scratch and works well for escaped pet birds or a single small bird you've spotted in a specific spot. The funnel-door style is better when you're dealing with birds that have moved into a structure (like a vent or soffit) and need a passive, hands-off solution. For most readers here, the box trap is the right starting point. That's what this guide builds. If you're dealing with starlings in a structure, the funnel-door approach used in products like one-way exclusion doors is worth exploring as a companion topic.
Check the law before you build anything
This part isn't optional. Wild birds are protected in almost every country. In the US, migratory birds are covered under the Migratory Bird Treaty Act, and the USFWS requires a permit for capture, handling, and disposition of migratory species.
For humane capture, handling, and disposition of migratory birds, the USFWS provides guidance specifically intended for wildlife managers, regulatory personnel, and anyone authorizing or conducting handling of live-captured migratory birds USFWS requires a permit for capture, handling, and disposition of migratory species.
In Washington State specifically, WAC 220-450-030 makes it unlawful to possess or transport live wildlife or wild birds without a permit (with narrow exceptions). In the UK, the Wildlife and Countryside Act 1981 protects all wild birds, and intentionally taking or injuring them is a criminal offence.
EU member states operate under the Birds Directive, which establishes the same baseline: capture and possession of wild birds is prohibited unless a legal derogation applies.
There are legal uses for a DIY bird catcher, though. Catching an escaped pet bird you own is generally fine. Temporarily containing an injured wild bird before transferring it to a licensed wildlife rehabilitator is widely accepted as the right thing to do. Removing non-native pest species like house sparrows or European starlings falls under different rules in many US states. When in doubt, call your local wildlife agency or animal control first. They can tell you what's allowed in your area without judgment, and in many cases they'll point you to a local rehabber who can take it from there.
When to call a professional instead
If the bird looks injured, sick, or lethargic, a DIY catch-and-hold situation can become a welfare problem fast. Stress alone increases mortality risk, and incorrect feeding or watering can seriously harm small birds. Contact a licensed wildlife rehabilitator as soon as possible. Organizations like Best Friends Animal Society also recommend notifying animal control and local humane organizations when the legal and safety context isn't clear. Your job in that scenario is safe short-term containment and fast handoff, not rehabilitation.
What you'll need: materials and tools
Here's what you need to build a basic box trap suitable for small birds like sparrows, finches, or a budgie-sized escaped pet. Almost everything on this list can be sourced from a hardware store, repurposed from scrap, or substituted with a cheaper alternative.
- Hardware cloth or welded wire mesh, 1/2-inch grid (about 2 feet x 3 feet total) — this is your main structure
- Wire cutters (or tin snips if mesh is heavier gauge)
- Zip ties or fine-gauge wire for joining panels (50+ zip ties is plenty)
- Needle-nose pliers
- A small hinge (1-2 inches) for the drop door — or repurpose an old cabinet hinge
- A lightweight trigger mechanism: a simple stick-and-string system works fine (more on this below)
- Thin wooden dowel or pencil-sized stick for the trigger prop
- Lightweight fishing line or string (about 6 feet)
- Small bungee cord or rubber band for door tension (optional but helpful)
- Wire staples or cable clips if you want to attach panels to a lightweight wood frame
- Scrap plywood or thin wood board (optional) for a solid floor — keeps bait dry
- Work gloves — mesh edges are sharp until you bend them flush
Repurposed options: an old pet carrier with a modified door works as a ready-made frame. A wire dish rack cut apart and reassembled gives you pre-bent mesh panels. Old window screen mesh is too fine for most builds but can serve as a liner inside a larger wire frame to prevent tiny birds from squeezing through gaps.
How to build the catch box, step by step
This design produces a box roughly 18 inches long, 10 inches wide, and 10 inches tall. That's a good starting size for sparrows, finches, starlings, and pet birds up to the size of a small parakeet. You'll find sizing adjustments for other birds at the end of this guide.
- Cut your panels. From the hardware cloth, cut two 18x10-inch pieces (top and bottom), two 10x10-inch pieces (the two short ends), and one 18x10-inch piece for the back. Leave the front open for now. That's five panels total.
- Bend and smooth all cut edges. Use pliers to fold any sharp wire tips back on themselves. This is one of the most important steps: a rough interior edge can injure a bird's feet or wings during capture. Take your time here.
- Join the panels. Stand the bottom panel flat, then attach the back panel vertically using zip ties or wire at every 2-inch interval along the seam. Add the two side panels the same way. Attach the top last. You now have an open-fronted box.
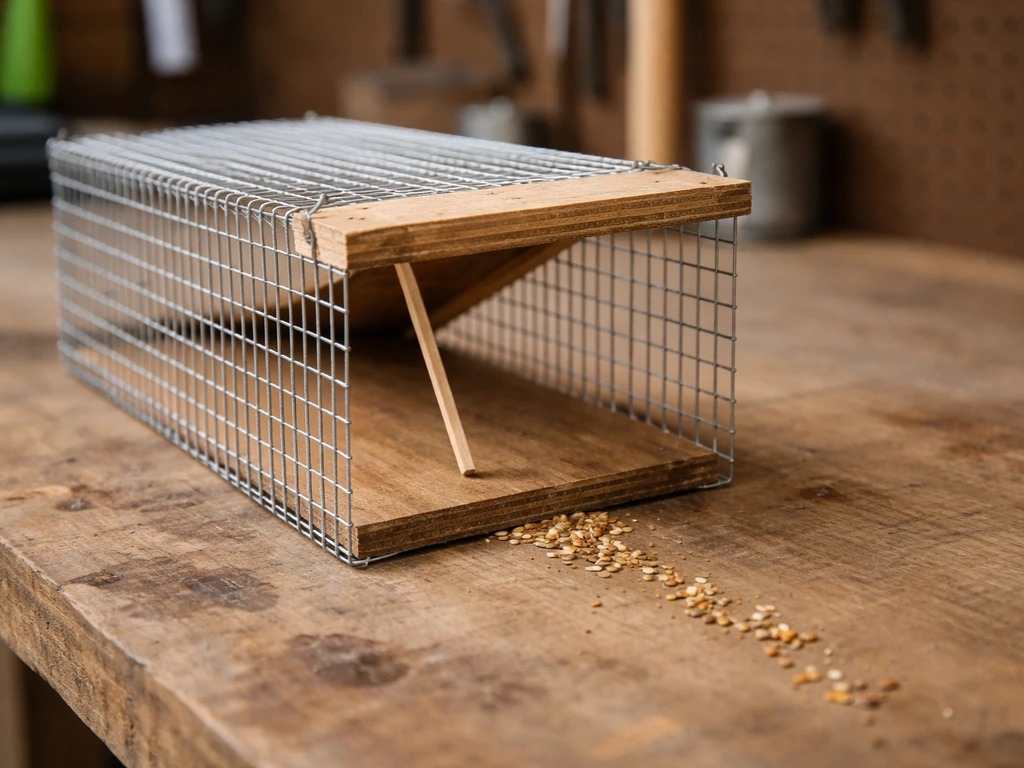
- Build the drop door. Cut one more 10x10-inch mesh panel for the front door. Attach it to the top edge of the front opening with a hinge so it swings down (not out). When the door is released, gravity drops it shut. Add a small bungee cord or rubber band near the hinge to make sure it closes firmly and stays closed.
- Build the trigger system. Cut a wooden dowel about 6 inches long. This is your prop stick. Tie fishing line to one end. Thread the line through the top panel of the box and out the back, long enough for you to hold from about 10 feet away. To set the trap, prop the door open with the dowel (door up, dowel under the door edge, holding it at roughly a 45-degree angle). When you pull the string, the prop falls, the door drops.
- Add a solid floor (optional but recommended). Cut a scrap plywood board to 18x10 inches and sit it inside the bottom of the box. It keeps bait visible, prevents it from falling through the mesh, and is gentler on bird feet than bare wire.
- Test the mechanism before baiting. Set the prop, pull the string from 10 feet away, and confirm the door drops cleanly and latches shut. If it bounces back open, add a second rubber band or reposition the hinge so the door lands flush with the frame.
Bait, placement, and setting up for success

Choosing the right bait
Match the bait to the bird. For most small wild birds like sparrows and finches, millet, sunflower chips (no shell, easier for small beaks), or cracked corn work well. For an escaped pet budgie or canary, use the bird's familiar seed mix from home: the familiar smell is a powerful draw. Avoid bread, which offers zero nutrition and can be harmful. Do not leave water dishes inside the trap: they spill, make bait soggy, and add a drowning risk for panicked small birds. Keep bait portions small (a tablespoon is plenty) so the bird has to move toward the center of the box to eat.
Where and how to place the trap
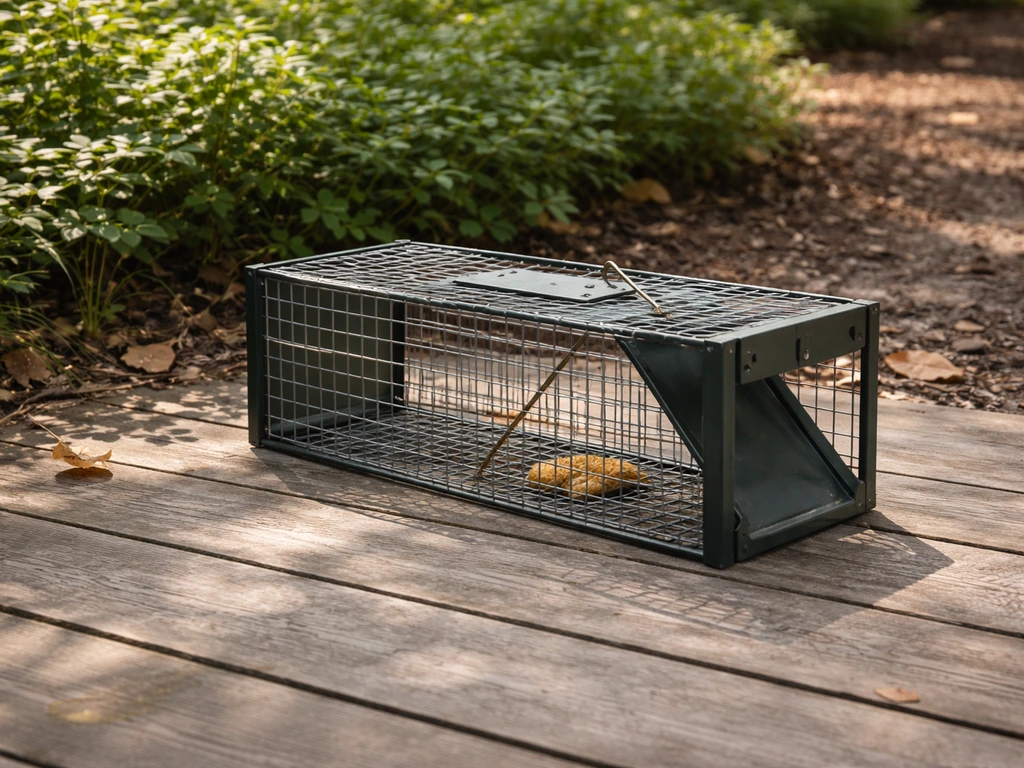
Place the box in a spot where you've already seen the bird foraging or resting. For outdoor catches, a flat surface in light shade is better than full sun (heat stress builds fast inside an enclosed box). Put a small line of bait leading up to the entrance, then a slightly larger pile just inside the opening, with the main portion at the back center of the box. This trail encourages the bird to move deeper in before triggering your pull. Keep yourself at least 10 feet back and out of the bird's sight line. Covering the trap sides and top with a piece of natural-looking fabric, burlap, or light brush camouflage helps skittish birds feel safer approaching.
How to set it without spooking the bird
Set up the box, prop the door, lay your bait trail, then walk away slowly and wait. Don't hover. Birds are far more likely to approach when they can't see a person standing nearby staring at them. If you're catching an escaped pet indoors, dim the room lighting slightly (birds are calmer in low light) and use the bird's favorite treat right at the back of the box. Hold the trigger line from around a doorframe or behind furniture.
Once the bird is inside: handling and release
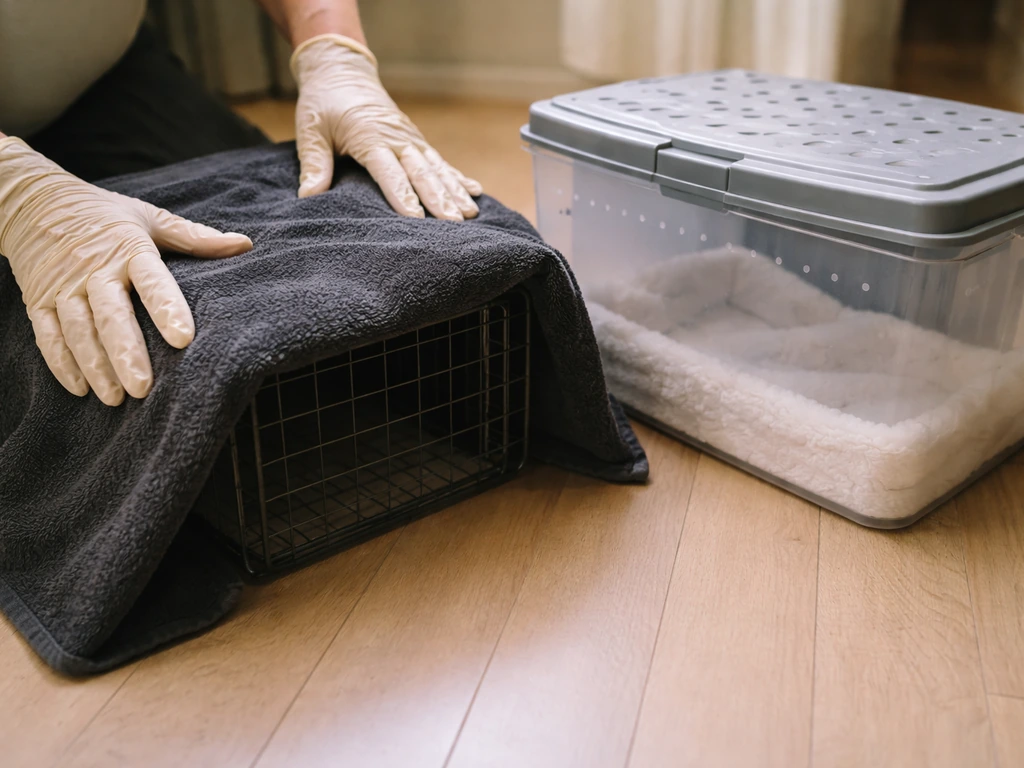
Move quickly but calmly once the door drops. Cover the entire trap with a dark cloth or towel immediately. This is not optional: a bird in a confined space that can see threats around it will thrash, and that's where injuries happen. The darkness calms them down within seconds. Don't peer in through the mesh, make loud noises, or let kids or pets crowd around.
To transfer the bird to a holding container, prepare a ventilated box lined with a soft cloth or paper towels before the catch. Open the trap door just enough to guide the bird through while keeping your hands gentle and movement slow. If you need to handle the bird directly, cup it loosely in both hands with its wings held gently against its body. Never grip tightly. Do not hold it upside down.
Keep the bird in a warm (not hot), dark, quiet place while you arrange next steps. Human noise, eye contact, and touch are stressful to wild birds, so minimal interaction is better. Do not try to feed or water it unless you're experienced with that species. Release or transfer as soon as possible. For wild birds, releasing within 24 hours of capture is the target. In no case should you hold a wild bird longer than necessary, and housing more than one bird per container creates additional stress and injury risk.
Releasing a wild bird
Take the container to the release spot before opening it. Open the container lid in a calm, sheltered area with cover nearby (bushes, trees) so the bird can orient and hide quickly. Step back immediately. Don't watch it too closely: giving the bird space is part of a good release. If you're handing an injured bird to a rehabilitator, follow their intake instructions, which typically involve keeping the bird in the dark container until the rehabber takes over.
Troubleshooting and sizing tweaks
The bird won't enter the trap
This is the most common problem. Usually it's one of three things: the bait trail doesn't lead far enough inside the box, the bird can see you watching, or the box is placed in the wrong spot. Try moving the trap to exactly where the bird was last seen eating or perching, not just near it. Extend the bait trail so it starts 2 feet outside the box. Leave the area completely for 20-30 minutes. Patience matters more than bait quality most of the time.
The bird enters but escapes before the door drops
Your trigger timing is probably late, or the bird is eating near the entrance rather than moving to the back. Move the main bait pile even further toward the back wall. You can also add a small stick or wire perch across the interior mid-point: birds often pause there, giving you a clear trigger moment. Practice the pull motion so it's smooth and quick, not jerky.
The door bounces back open after dropping
Add a second rubber band stretched between the door bottom and the box frame to create closing tension. Alternatively, attach a small magnet to the door edge and a matching metal washer to the frame so the door snaps shut. The door needs to close and stay closed on first contact.
Sizing the box for different birds
| Bird type | Recommended box size | Mesh grid size | Notes |
|---|---|---|---|
| Sparrow, finch, wren | 14"L x 8"W x 8"H | 1/2 inch | Standard build works well; use millet or sunflower chips as bait |
| Starling, blackbird | 20"L x 10"W x 10"H | 1/2 to 3/4 inch | Scale up the base design; heavier gauge wire recommended |
| Budgie or small parakeet | 16"L x 10"W x 10"H | 1/2 inch | Use the bird's home seed mix as bait; dim lighting helps |
| Pigeon, dove | 24"L x 14"W x 12"H | 1 inch grid acceptable | Heavier door needed; use cracked corn or peas as bait |
| Robin, thrush | 18"L x 10"W x 10"H | 1/2 inch | Mealworms or soft fruit work as bait; avoid long hold times |
One mistake I made early on was building a box that was just barely big enough, thinking a tighter space would make capture easier. It doesn't. A panicked bird in a tight box injures itself much faster than one in a box with a little room to settle. Bigger is almost always safer, as long as the design still forces the bird toward the back to reach the bait.
One-way door style: when to consider it instead
If you're dealing with birds that have taken up residence in a vent, soffit, or wall cavity, a DIY funnel-door style enclosure can work as a passive removal tool. The concept is the same as commercial one-way exclusion products: the bird exits through a cone-shaped opening and can't re-enter. The key warning here is that birds can sometimes get stuck inside the funnel itself if the design is off.
Commercial products from companies like Bird-X are designed with smooth interiors specifically to avoid this. If you go the DIY route on a funnel door, make the exit cone wide enough for the bird to pass through without squeezing, and check it at least twice daily. More detail on trap-style bird catchers, starling-specific designs, and snare-style approaches are worth looking at as companion projects if your situation calls for something different.
For a dedicated approach to removing starlings, see the starling-specific options and setup tips in this guide: how to build a starling bird trap.
FAQ
Is it okay to use this kind of DIY bird catcher for a baby bird (nestling or fledgling)?
Only as a short-term holding step. Baby birds are more fragile, and many species require specific feeding and warmth. If you find a fledgling on the ground, try to reunite it with its parents first, and if it is clearly injured or not able to thermoregulate, contact a licensed wildlife rehabilitator immediately. Use the trap only to prevent further injury while you arrange handoff, and keep it dark and warm (not hot) during transport.
What if I don’t know whether the bird is wild or my escaped pet?
Assume it could be protected wildlife until you can confirm. Look for leg bands, behavior (tame flocking versus wild foraging), and whether the bird resembles a local wild species versus a common pet variety. If there’s any uncertainty, treat it as wild: minimize handling, avoid feeding attempts, and contact local animal control or wildlife agency for guidance.
How can I tell if my trap size is appropriate without knowing the exact species?
Choose a box that gives the bird some room to turn and settle, not just enough space to stand. If you can, match to the bird’s apparent body size, but err on the larger side because tight enclosures increase self-injury when the bird panics. If you see the bird repeatedly hitting the same corner or crouching hard against the mesh, your fit is likely too tight and you should move to a safer holding approach and seek advice.
Do I need to add a perch inside the trap?
A small interior perch can help some birds pause and move into position for the trigger, but it should not be high or loose enough to snag feet. If your design already forces movement toward the back via bait placement, a perch is optional. Avoid slippery surfaces, and don’t add anything that could trap the bird’s toes during door closure.
Can I use a cage light or UV light to attract the bird faster?
Not recommended. Additional light and visual stimulation can increase stress, and some birds may retreat instead of approaching. If you are catching indoors, dim or reduce direct lighting and let the bait be the main focal point. For outdoor catches, choose shade and avoid bright, direct sun on the trap.
What should I do if the bird doesn’t go all the way in and keeps pecking at the entrance?
Reposition the bait so the main pile is deeper in the box, and extend the bait trail further, at least around 2 feet outside the entrance. Also make the approach zone quiet and out of sight for 20 to 30 minutes so the bird can feel safe without you present. If the trigger is dropping too early, confirm the door stays propped long enough for the bird to move past the trigger point.
Is it safe to leave the trap set overnight outdoors?
Generally no. Temperature swings, predators, and prolonged confinement increase welfare risks, and you can lose control of who discovers the trap. Plan to check promptly and avoid leaving it unattended for long periods. If you must wait, do so in a short window and within reasonable daylight, then reset or switch strategies if the bird does not approach.
What’s the safest way to cover the trap right after it closes?
Use a dark cloth or towel to cover the entire box immediately, so the bird cannot see threats or you. Avoid lifting the cover repeatedly to peek, and do not tap or shake the mesh. Keep the covering in place during transfer so the bird stays calmer and thrashing is reduced.
Can I feed or water a bird inside the trap or before releasing it?
Don’t add water inside the trap, and avoid feeding during holding unless you are experienced with that specific species and have proper guidance. For sick or injured birds, the priority is minimizing stress and arranging proper care. If you are releasing a healthy bird quickly, bait should already be sufficient to guide the capture, and any extra handling increases risk.
What if the bird gets injured during capture or shows bleeding or severe distress?
Treat it as an emergency welfare issue. Stop the DIY handling approach, keep the bird dark and warm (not hot) in a ventilated container, and contact a licensed wildlife rehabilitator or animal control right away. Do not attempt to self-treat injuries unless you are trained, because incorrect methods can worsen bleeding, shock, or organ damage.
How do I prevent the door from accidentally reopening or failing to close?
Test the trigger action before setting bait. Ensure the closing tension is strong enough to snap shut on first contact, whether you use rubber bands or a quick-release magnet method. Also confirm there is no bait, wire, or debris interfering with the door path, and practice the pull motion so it is smooth and consistent each time.
If I’m relocating a bird outside, where should I release it exactly?
Release as close to the capture site as possible (same yard or immediate area) when it is a healthy wild bird, so it can reorient to familiar territory and cover. Bring the holding container to the release point before opening it, open in a sheltered spot with nearby cover, and step back immediately. Avoid releasing in open, predator-heavy areas or far away from where it was foraging.
Next Articles
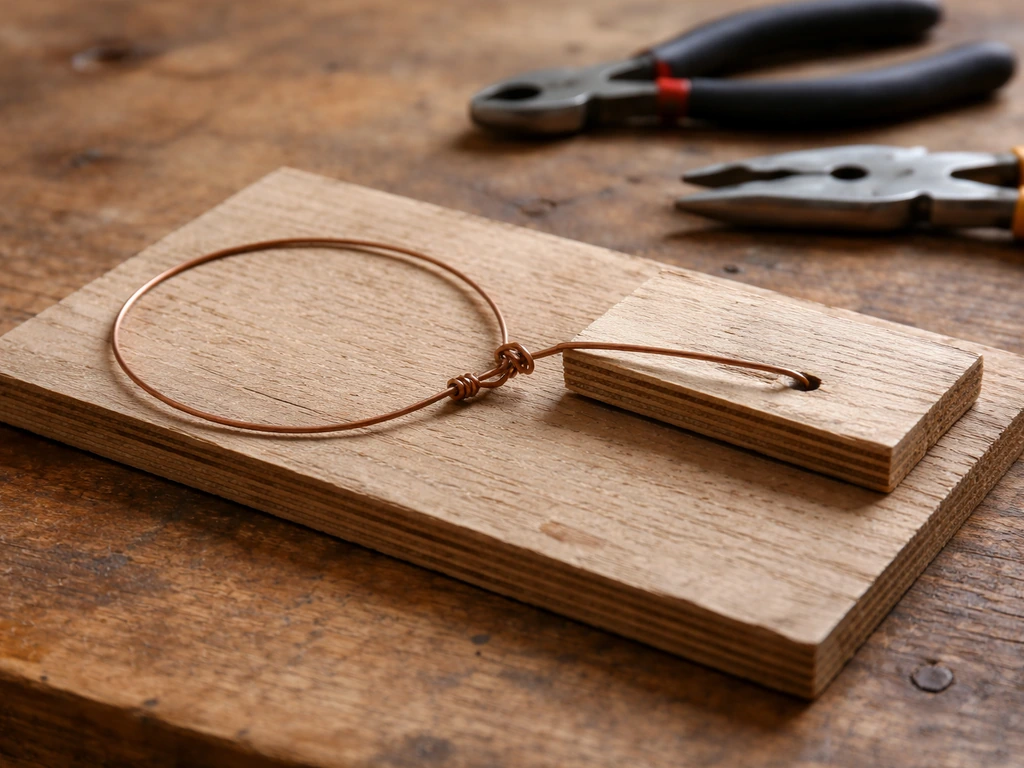
How to Make Bird Snares: DIY Snare Trap Steps
Step-by-step DIY guide to build, set, and test a bird snare trap, plus legality and humane alternatives.
How to Build a Starling Bird Trap: DIY Step by Step
DIY step-by-step guide to build a humane one-way starling trap, set timing bait cues, and prevent repeat problems.

How to Make a Bird Trap: Step-by-Step DIY Guide
Step-by-step DIY bird trap guide: choose design, build, set, monitor, and humane release with safer alternatives.