Yes, you can build a DIY bird trap at home using basic materials, and this guide walks you through every step: picking the right design for your situation, building it, setting it up, and handling the bird safely after capture. Before anything else, though, you need to be clear on two things: why you're trapping, and whether you're legally allowed to do it. Before attempting to trap, ask whether you can legally trap and comply with Washington state laws on trapping and transporting wildlife legally allowed to do it. Get those right, and the rest is just woodworking and patience.
How to Make a Bird Trap: Step-by-Step DIY Guide

Marcus Thornton
2 Apr 2026

Choosing the right trap goal and target species
The first question isn't "what trap should I build?" It's "what am I actually trying to accomplish?" The answer determines everything: trap design, bait, placement, and what you do after you catch the bird. The most common backyard trapping goals break down into a few categories.
- Controlling invasive species like European Starlings or House Sparrows that are outcompeting native cavity nesters at your nest boxes
- Relocating a nuisance bird that has gotten into a structure or is causing damage
- Temporarily capturing a bird for banding, health assessment, or transfer to a wildlife rehabilitator
- Catching a stray or escaped pet bird (non-native species) safely
Your target species shapes your trap design more than anything else. A funnel trap sized for a starling won't reliably catch a much smaller House Sparrow, and a cage trap set at ground level will pick up chipmunks before it ever sees the bird you want. Match your design to the bird's size, feeding behavior, and typical movement patterns around your yard. If you're dealing with starlings specifically, the approach is detailed enough that it's worth reading up on how to build a starling bird trap as a dedicated starting point, since that species has a very well-documented set of trap styles that work.
One more thing to nail down before you grab a single piece of wood: what will you do immediately after you catch the bird? Washington Department of Fish and Wildlife makes this point plainly, and it's good advice: trapping isn't appropriate if you can't responsibly carry out the next step. Have a plan for release, euthanasia (for invasive species), or transfer to a rehabber before the trap is ever set. Figuring this out after you've got a stressed bird in a cage is too late.
Legal and ethical considerations for trapping birds
This section isn't here to scare you off. It's here because skipping it can turn a well-intentioned backyard project into a federal problem. The Migratory Bird Treaty Act (MBTA) makes it unlawful to pursue, hunt, take, capture, kill, or possess migratory birds except as permitted by regulations. That list covers nearly every songbird native to North America. The U.S. Fish and Wildlife Service implements the MBTA under 16 U.S.C. §§ 703-712 and the associated regulations in 50 CFR Part 21, which set up permit frameworks for capture and handling in depredation situations. Violating the MBTA is a federal offense, so you need to know which side of the line your project falls on.
The good news for most backyard DIYers: House Sparrows and European Starlings are not protected under the MBTA because they are non-native, invasive species introduced from Europe. You can legally trap and dispatch them without a federal permit. Native species (bluebirds, wrens, chickadees, and essentially everything else) are protected, and trapping them requires a permit from USFWS. If you accidentally catch a native bird, you release it immediately, no questions asked. That's not just good ethics, it's the law.
State and local laws add another layer. Some states require permits even for invasive species management, and local ordinances can restrict trapping on certain properties. Check with your state wildlife agency before you start. The Washington Trappers Association, for example, points residents to WDFW and USDA-APHIS Wildlife Services for nuisance trapping guidance, which is a model approach for any state. When in doubt, call your state fish and wildlife office. A five-minute phone call is a lot easier than dealing with a violation.
On the ethics side: humane trapping means you're committed to checking the trap frequently, minimizing stress to the bird, and having a clear plan for what happens next. A trap you set and forget isn't humane trapping, it's just negligence. We'll cover monitoring in detail later, but go into this knowing it requires active involvement.
Materials and tools for common DIY bird trap designs
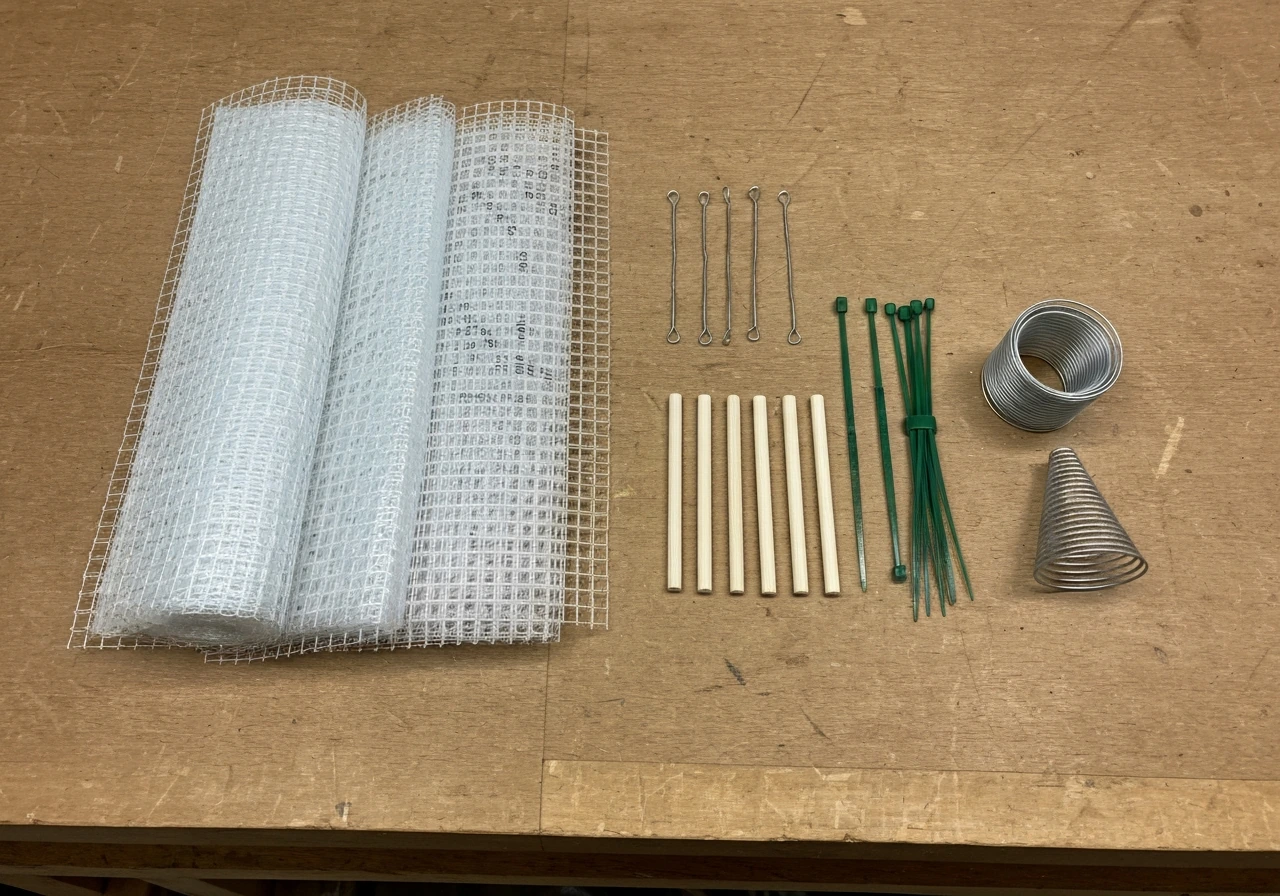
Most functional bird traps use one of three basic mechanisms: a drop-door cage (a box or cage where a triggered door falls shut), a funnel trap (birds walk in through a cone-shaped entry and can't find their way back out), or a repeating trap (a funnel design that allows multiple birds to enter over time without needing a reset). All three can be built from materials you can pick up at a hardware store or repurpose from around the garage.
Drop-door cage trap
- Hardware cloth (1/2-inch or 1/4-inch mesh), enough for a box roughly 16x12x12 inches for sparrow-sized birds or up to 36x16x12 inches for starlings
- Thin wooden dowels or wire for the trigger mechanism
- A flat piece of plywood or stiff wire mesh for the drop door
- Wire cutters and needle-nose pliers
- Zip ties or wire for joining panels
- Optional: a wooden frame (1x2 lumber) for rigidity
Funnel/repeating trap
- Hardware cloth in the same mesh sizes as above
- Wire or thin sheet metal for forming the funnel cones
- A separate holding chamber (can be a small wire cage or mesh box)
- Wire cutters, pliers, and zip ties
- A small dish or jar lid for water and bait inside the holding chamber
- Optional: paint or weatherproofing spray if the trap will be outdoors long-term
You don't need power tools for either design. Wire cutters and pliers handle 90% of the work. If you want to add a wooden frame for stability, a hand saw and a drill with a screwdriver bit are enough. I've built functional traps entirely from repurposed hardware cloth left over from a chicken coop project, and they worked just as well as anything sold commercially. The key is tight, clean joints where panels meet, so birds can't push through gaps or injure themselves on sharp wire ends. Always fold or crimp any cut wire edges inward.
Step-by-step build instructions for each trap type
Building a basic drop-door cage trap
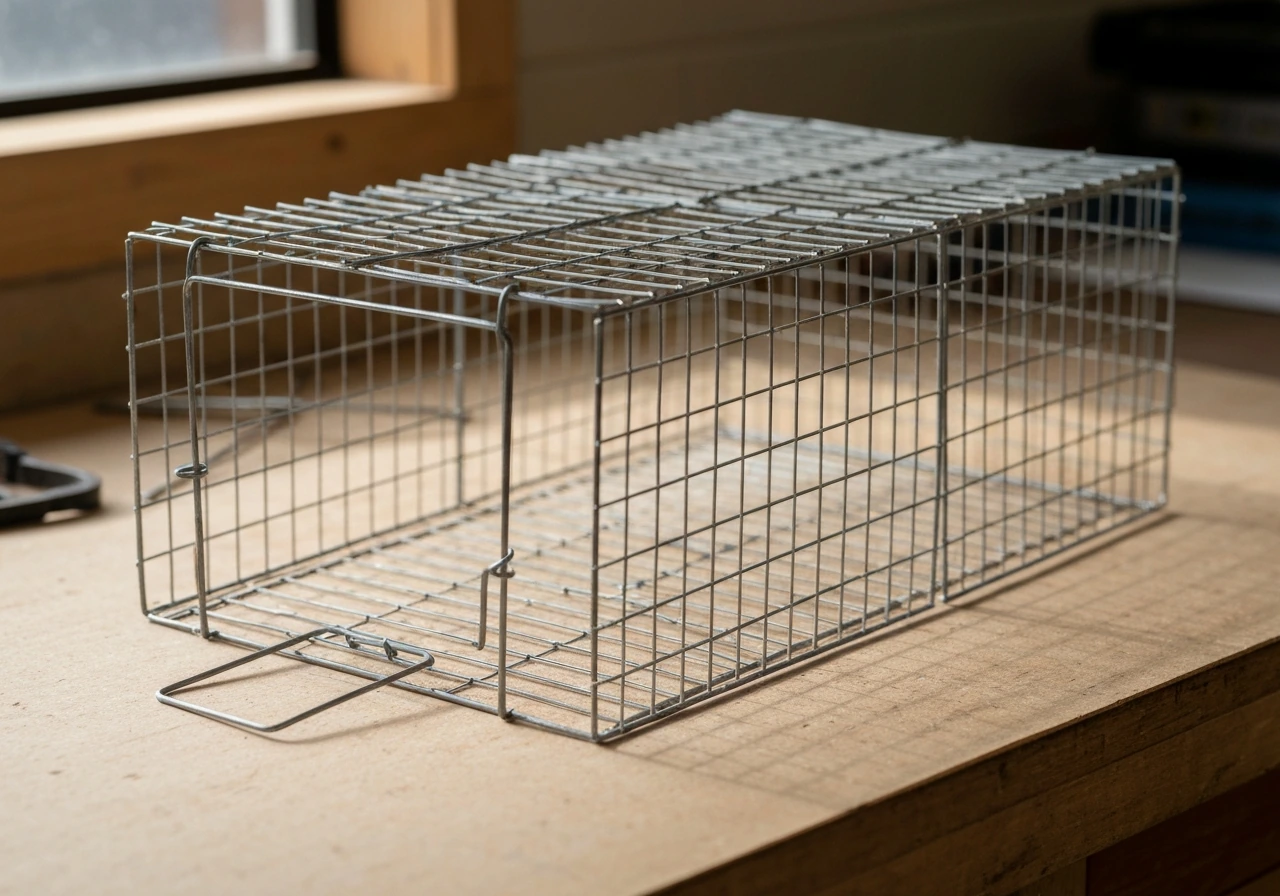
- Cut hardware cloth into five panels: bottom, two sides, back, and top. For a sparrow-sized trap, each panel is roughly 12x12 inches. For starlings, go 16x12 for sides, 36x12 for top and bottom, and 16x12 for the back.
- Join the panels using zip ties or wire loops at every 2-3 inches along each seam. Pull them tight and clip off excess zip tie tails so there are no sharp points inside.
- Leave the front of the cage open for now. Cut a door panel slightly larger than the front opening (it needs to overlap on all sides to stay shut when it drops).
- Bend a small wire hook at the top of the door panel. This hook rests on a thin dowel or wire rod that runs horizontally across the top of the cage front, holding the door open.
- Attach a lightweight trigger perch or bait platform inside the cage, connected by a thin wire to the horizontal rod. When the bird lands on it or disturbs the bait, the rod shifts, the hook releases, and the door drops.
- Test the trigger mechanism a dozen times before ever setting the trap. The drop should be fast and complete. Adjust the trigger sensitivity so it releases reliably but isn't so hair-trigger that wind sets it off.
- Fold or file all cut wire edges on the inside of the cage to remove sharp points. Run your hand along every interior surface before calling it done.
Building a funnel/repeating trap
- Build a rectangular holding chamber from hardware cloth: roughly 24x12x12 inches works well for starlings. Join all panels except the entry face with zip ties as above.
- For the entry face, cut a circular or square hole centered in the panel. For starlings, Nixalite's design uses a 2-inch diameter opening that can be adjusted smaller for selectivity. For House Sparrows, 1.5 inches is more appropriate.
- Form a funnel cone from a separate piece of hardware cloth or thin sheet metal. The wide end of the funnel should match the hole size on the outside of the entry face, and the narrow end (the actual opening birds pass through) extends several inches into the interior of the holding chamber.
- The key to funnel trap physics: birds walk toward light and food, push through the narrow inner opening, and then can't locate that small entry point to exit. Angle the inner funnel tip slightly downward so it's not at eye level for a bird standing inside.
- Attach a second funnel on the opposite end of the chamber if you want a true repeating design that accepts multiple birds over time.
- Add a small hinged door on the top or side of the holding chamber for easy access during release. Secure it with a simple wire latch.
- Place a small water dish and a flat bait tray inside the chamber, secured so they don't tip when a bird lands.
If you want to go deeper on snare-style alternatives to these cage designs, there's a solid breakdown of options in this guide on how to make bird snares, though cage traps are generally safer for backyard use because they don't risk injuring a non-target animal the way a snare can.
How to set up, bait, and place the trap safely
Bait selection
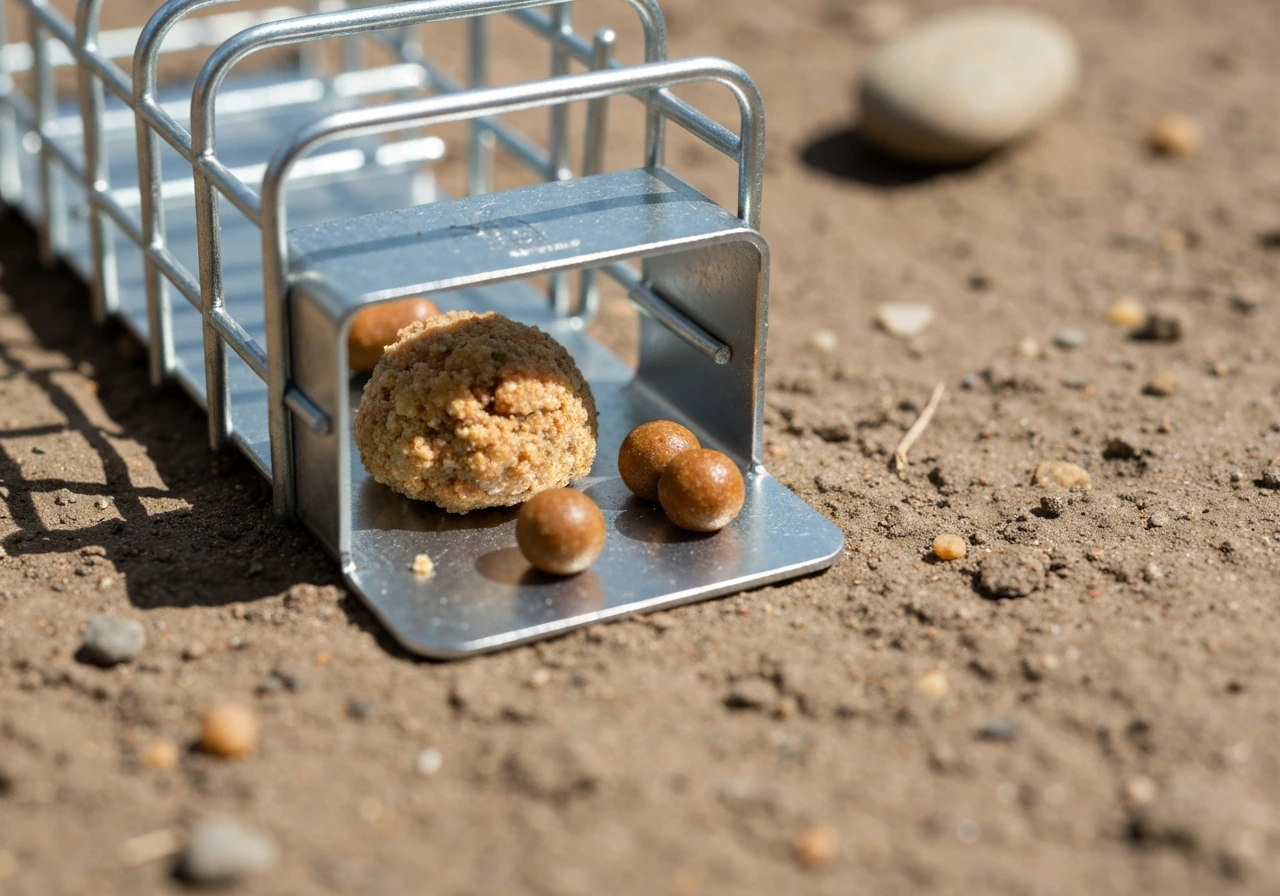
Bait is one of the biggest variables in whether your trap works at all. The wrong bait attracts the wrong animals, and the right bait in the wrong form can be ignored entirely. Match the bait to the species: starlings respond well to cracked corn, scratch grain, bread scraps, and suet; House Sparrows take millet, cracked corn, and bread crumbs readily. Nixalite's operational guidelines emphasize that correct bait for the target species is one of the primary factors determining trapping success, right alongside trap location.
A technique called pre-baiting (or free-feeding) significantly improves results. Before you even set the trap's trigger or close the funnel, leave bait in and around the trap for several days with the trap either open or disabled. This gets the target birds comfortable with feeding near the trap and teaches them to associate that spot with food. PestSmart's national trapping standard operating procedures recommend this free-feeding period explicitly because it improves selectivity and reduces non-target captures. It takes patience, but it cuts down dramatically on the time you spend waiting once the trap is armed.
Placement
Where you put the trap matters almost as much as what you put in it. Place the trap in an area where you've already seen the target birds feeding or perching. If you're targeting starlings or sparrows near your nest boxes, set the trap within 20-30 feet of that activity. Elevating the trap is a smart move: placing it on a picnic table bench, a low deck railing, or a sturdy garden table reduces the chance of catching ground-foraging mammals like chipmunks and squirrels. Sialis.org specifically recommends elevated placement near vines or shrubs as a practical setup for House Sparrow traps.
Keep the trap in partial shade if temperatures are above 75°F. A bird sitting in a wire cage in direct afternoon sun can overheat in under an hour. Also, Nixalite's guidelines note that water should be kept in or near the trap at all times when birds are being targeted, both to attract birds and to keep any captured bird alive and comfortable until you check.
Placement and acclimation tips at a glance
| Factor | Recommendation |
|---|---|
| Height | Elevated surface (table, bench, railing) to reduce mammal bycatch |
| Location | Within sight of active feeding or perching area |
| Shade | Partial shade required above 75°F |
| Water | Small dish inside the trap at all times |
| Pre-baiting period | 3-5 days of free-feeding before arming the trap |
| Bait for starlings | Cracked corn, scratch grain, suet, bread scraps |
| Bait for House Sparrows | White millet, cracked corn, bread crumbs |
One thing I learned the hard way: don't set a trap in a spot that's heavily trafficked by squirrels. Even if your funnel or door design doesn't catch them, squirrels investigating the trap will scare off birds and can even damage the mesh. If a non-target animal like a chipmunk or squirrel does end up inside, release it immediately. Trapped mammals can injure or kill any bird that's also inside the cage.
Monitoring, release, and what to do after capture
How often to check the trap
This is where a lot of well-meaning trappers fall short. Checking once a day is the absolute minimum, and daily checks are what trapping welfare standards like the AIHTS specify as the required interval. In practice, during active trapping you should be checking every two to four hours during daylight. A bird trapped in a wire cage is stressed, exposed, and vulnerable to heat, predators, and injury. Research on trap welfare outcomes shows that animals remaining in traps for extended periods after capture suffer measurably worse welfare outcomes, and that exceeding acceptable check intervals is one of the leading causes of trap-related trauma. Set a phone alarm. Check the trap. Every time.
Do not set the trap and leave the property for the day. If you can't be home to monitor it, don't arm it that morning. This isn't optional if you care about doing this humanely, and it's also the standard that wildlife agencies expect if you're ever asked about your trapping practices.
Handling the bird after capture
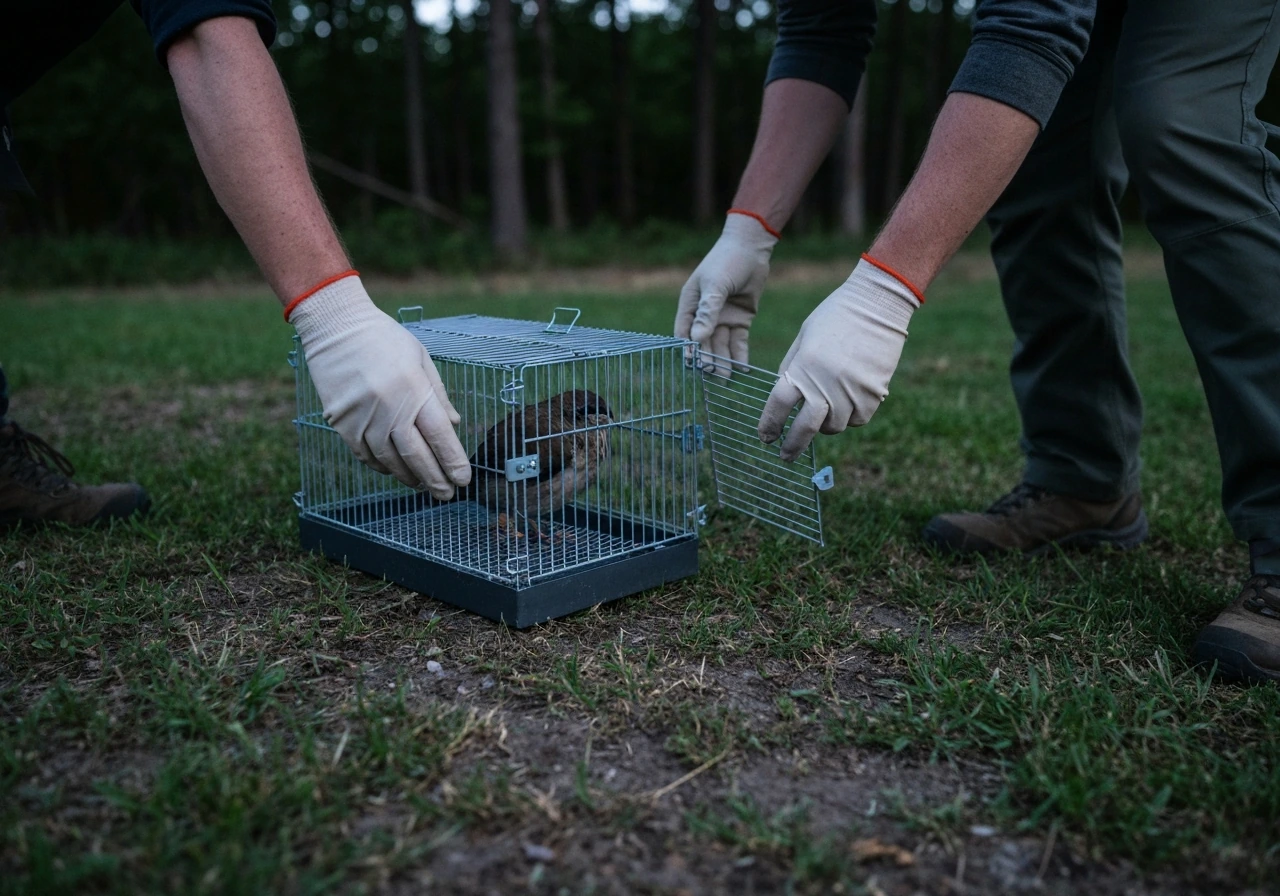
When you approach a trap with a bird inside, move slowly and quietly. Sudden movement causes the bird to thrash, which is how wing injuries happen. Open the release door (the hinged side panel or top access door you built in) just enough to get your hand in, then cup the bird gently with one hand over its back and wings folded against the body. Your thumb and forefinger loosely encircle the neck just enough to control the head without applying any pressure to the throat. Never squeeze. A bird handled correctly feels secure, not crushed.
If you're releasing a native bird you caught accidentally, walk at least 30 feet from the trap before opening your hands and pointing the bird toward cover. For invasive species that you're relocating (rather than dispatching), be aware that birds have strong homing instincts. WDFW notes explicitly that released animals can travel back toward the capture site, which can create new hazards if they cross roads or other obstacles to get back. Relocation without also addressing the attractant (the food source, the open nest box, etc.) often just means you'll catch the same bird again next week.
Indiana DNR's guidelines specify that within 24 hours of capture, you must either release the bird or take the appropriate next step (euthanasia for invasive species, transfer to a rehabilitator for injured natives). Don't let a captured bird sit in a trap or holding container longer than that under any circumstances.
What comes next
After a successful catch-and-release or catch-and-dispatch, reset your trap only if the original problem persists. Clean the inside of the cage with plain water (no soap or chemicals that leave a scent), refresh the bait, and refill the water dish. If you're running a repeating funnel trap and catching multiple birds, check it more frequently, not less. Captured birds inside the holding chamber will call out and actually attract more birds, which sounds great but means the welfare clock is ticking faster.
If you're dealing with a recurring invasive-species problem rather than a one-time nuisance situation, combine trapping with exclusion: close up the nest box entries that invasive species are using, add predator guards, and swap to feeders that physically exclude starlings. Trapping alone without fixing the underlying attractant is like bailing a boat without plugging the hole. For a broader look at catching techniques beyond cage traps, the guide on how to make bird catcher tools covers some additional methods worth knowing.
Picking the best design for your situation
If you've read through this and you're still not sure which trap design is right for your specific situation, a direct comparison helps. Here's how the three main DIY designs stack up against each other for backyard use.
| Design | Best for | Catches multiple birds? | Build complexity | Key limitation |
|---|---|---|---|---|
| Drop-door cage | One bird at a time, quick captures | No (resets required) | Low | Needs frequent resetting; trigger can misfire in wind |
| Funnel trap | Invasive species control over a session | Yes | Medium | Birds must be removed before they injure each other |
| Repeating trap | Ongoing invasive species management | Yes, continuously | Medium-High | Requires most frequent monitoring of all three designs |
For most backyard situations involving invasive species, a funnel or repeating trap is the more practical choice because you don't have to be standing there watching it constantly reset. But it demands more commitment to monitoring. If you just need to catch one problem bird and you'll be home all day, the drop-door cage is simpler to build and easier to control. For a deeper dive into optimizing whichever design you land on, the guide on how to make the best bird trap goes into more detail on refinements that improve capture rates without compromising the bird's welfare.
The bottom line: a well-built, correctly placed, and actively monitored trap is a legitimate and effective tool for managing invasive species and solving genuine nuisance situations in the backyard. Build it right, follow the legal requirements for your state and species, check it constantly, and always have your post-capture plan ready before you arm it. That combination is what separates responsible trapping from a bad outcome for both you and the bird.
FAQ
How close should the bait and trap be to where birds are nesting or feeding?
Aim to place the trap within roughly 20 to 30 feet of active feeding or perching, then keep the bait right at the entrance path (not several feet away). If you notice birds feeding on one side of the yard and the trap is on the other, adjust placement first before changing bait, since distance and travel routes drive success.
What should I do if I catch a bird species I did not plan for (especially a native bird)?
Release immediately after confirming it is native, and do not “wait to see” if it will quiet down. Keep your handling time as short as possible, move at least 30 feet away before opening your hands, and stop using that bait and location until you re-check legal requirements for that species.
Can I use the same trap for different bird species?
Sometimes, but not reliably. Trap type and opening size need to match the target species size and behavior, and bait selectivity matters too. If you switch species, re-evaluate mesh gaps, trigger sensitivity, entry geometry, and the bait type, because a trap that fits one bird can either miss another or increase non-target captures.
How do I reduce the chance of catching chipmunks, squirrels, or other non-target animals?
Elevate the trap on a stable surface so it is less accessible to ground foragers, avoid areas with heavy squirrel activity, and ensure there are no easy climbing routes to the bait. Also use tight panel fit and smooth, inward-folded wire edges so curious animals cannot damage the mesh or get stuck in ways that increase risk to birds.
How often should I check a funnel or repeating trap compared with a drop-door cage?
Check funnel and repeating setups more frequently because each capture increases activity and can draw additional birds into the holding area. As a practical rule, keep the same welfare-first interval, and if multiple birds are likely to arrive, shorten the interval further during daylight.
What is a safe way to handle a bird if it is thrashing or trying to bite?
Approach slowly, keep your hands steady, cup the bird over the back with wings folded against the body, and control only the head with a loose grip. Avoid pressure on the throat and do not squeeze, because that increases injury risk. If the bird seems overheated, move to shade and focus on a quick, controlled release or proper transfer.
Is pre-baiting required, and how long should it be?
Pre-baiting is not always mandatory, but it often improves selectivity and reduces time the trap sits armed with uncertain results. Use a few days of free-feeding with the mechanism disabled or trap left open, so birds associate the exact spot with food before you activate the trigger.
What should I do about water for captured birds?
Provide water accessible within the trap area so a captured bird is not left without hydration while you monitor. Use a stable water dish that cannot tip easily, and refresh it as bait is refreshed. If weather is hot, partial shade plus water matters more for welfare than most people expect.
Can I legally trap invasive birds if state rules are stricter than federal rules?
Yes for the federal baseline in many cases, but you still must follow state and local requirements. Some states or municipalities require permits even for nuisance control, so confirm with your state wildlife agency before trapping or transporting anything, even if the species is non-native.
What if my trap accidentally captures a non-bird animal, like a mammal?
Remove the non-target immediately and release it as quickly and gently as possible. Trapped mammals can injure birds if they share space, so treat non-bird capture as a sign to change placement, elevation, or access routes rather than continuing with the same setup.
How long can I keep a captured invasive bird before dispatch or transfer?
Do not delay. Follow your state’s timeframe for post-capture action, and in any case do not leave the bird in a holding container beyond the minimum window required by local rules. If you cannot complete the next step promptly, do not arm the trap.
Should I reset and rebait right after a catch?
Reset only if the same problem persists and only after you clean out residue from the interior with plain water (no lingering scents). Refresh bait and water, but increase monitoring frequency if the trap is a repeating funnel, since new arrivals may be drawn by calls and activity from birds already captured.
What is the best next step if trapping keeps working but the nuisance returns?
Combine trapping with exclusion by removing the attractant source. For example, close access points to nest boxes, add appropriate guards, and switch to feeders or setups that physically prevent access by the targeted invasive species. Trapping alone often repeats the cycle until the underlying access and food source are addressed.
Next Articles

How to Build a Chimney Swift Bird House DIY Guide
Step-by-step DIY plans to build a chimney swift bird house, with correct dimensions, placement, and weatherproofing for

How to Build an Oriole Bird House: Step-by-Step DIY
Step-by-step DIY for building an oriole bird house with right dimensions, weatherproofing, predator-safe placement, and

How to Build a Chickadee Bird House Step by Step
Step-by-step DIY chickadee bird house with cut list, chickadee entry sizing, ventilation, drainage, and mounting tips.