If you want to build a bird snare trap, here is the honest starting point: the construction itself is straightforward, but the legal and ethical side is what will make or break whether this is a project you should actually finish. This guide walks you through every step, from picking materials to placing the trap, but it also gives you the full picture on what you are legally allowed to do, how to keep birds safe, and when a cage trap or deterrent is a smarter choice. Read the first section before you cut a single piece of wire.
How to Make Bird Snares: DIY Snare Trap Steps

Marcus Thornton
19 Apr 2026
Before you build: legal, ethical, and safety considerations
This is not a formality. Under the U. S. Migratory Bird Treaty Act (MBTA), the word "take" is legally defined to include trap, capture, and collect.
That means trapping a migratory bird without a federal permit is a federal offense, full stop. The vast majority of wild bird species in the U. S. are protected under the MBTA, including songbirds, waterfowl, raptors, and most backyard species.
There are only a small number of exceptions: European starlings, house sparrows, and feral pigeons are not protected under the MBTA at the federal level, but many states still regulate how and whether you can trap them. Florida FWC, for example, publishes specific rules requiring a permit or a recognized exemption before you can legally place a bird trap. Before you build anything, check with your state wildlife agency.
Snares specifically carry extra scrutiny. Animal welfare organizations and wildlife agencies alike flag snares as body-gripping traps that can cause severe injury, and the IUCN has published explicit welfare guidance stating that no leg snare should be set in a way that results in a bird being suspended off the ground. The MSPCA notes that even experienced trappers unintentionally capture non-target animals, including pets.
MSPCA-Angell reports that even experienced trappers can capture unintended species, with non-target captures sometimes approaching “two non-target animals for every target animal. ” [non-target captures can occur at rates approaching “two non-target animals for every target animal. ”](https://www. mspca.
org/animal_protection/wildlife-trapping/). So if you live in a suburban or semi-rural area, a snare in the yard is a real risk to neighborhood cats and small dogs, not just the target bird.
If you are outside the U.S., the rules are no less strict. In the UK, the Wildlife and Countryside Act 1981 governs snare use with specific offences attached to improper placement. Most developed countries have similar frameworks. The short version is this: check your local law before you build, and if you cannot get a clear answer, contact your state or regional wildlife agency directly. USDA APHIS Wildlife Services is also a resource if your situation involves nuisance or depredation management.
- Only unprotected species (European starlings, house sparrows, feral pigeons in the U.S.) can be trapped without a federal permit in most situations.
- State permits or exemptions may still apply even for unprotected species, so confirm with your state wildlife agency.
- Trapping on National Wildlife Refuges requires compliance with state laws, state regulations, and USFWS authorization.
- Any captured bird must be humanely handled: USFWS guidance requires humane conditions for capture, handling, housing, and disposition.
- USDA APHIS requires traps to be checked no less frequently than required by applicable regulation, which in many states means at least once every 24 hours.
- If captured alive, many state rules (such as Florida FWC) require that nuisance wildlife be released legally or euthanized humanely within 24 hours of capture or trap inspection.
- Snares pose a real non-target risk to pets and other wildlife, especially in residential areas.
Materials and tools for a bird snare trap
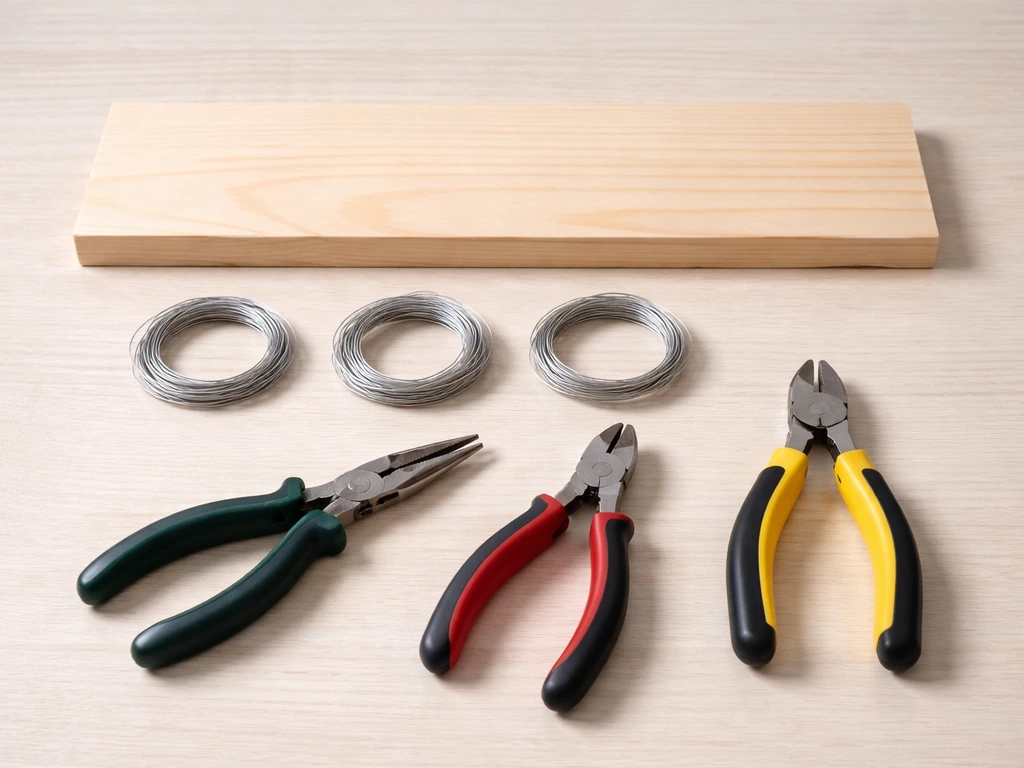
The beauty of this build is that most of what you need is either cheap or already in your garage. I have made functional snare-style traps almost entirely from repurposed materials, and the results work just as well as anything store-bought, provided you are careful about wire gauge and loop diameter. Here is what you actually need.
Core materials
- Thin wire: 24 to 28 gauge stainless steel or galvanized wire is ideal for smaller birds; 20 to 22 gauge for medium-sized birds like pigeons or starlings. Copper wire is softer and easier to work with for beginners but bends out of shape faster.
- Anchor stake or post: a 12-inch to 18-inch wooden or metal stake to fix the snare to the ground or a surface. Scrap dowel rod, a heavy nail, or rebar offcut all work.
- Thin cord or paracord (optional): for attaching the snare anchor to a heavier base when ground staking is not practical.
- A trigger platform or perch: a thin flat piece of wood (3/4 inch plywood scrap, a craft stick, or a flat tree branch), roughly 4 to 6 inches long.
- A small wooden base board: scrap 1x4 or similar, about 8 to 12 inches long, for mounting the whole assembly.
- Small finishing nails or staples: for securing the trigger platform to the base.
- Bait: grain, cracked corn, sunflower seeds, or bread crumbs depending on the target species.
Tools
- Needle-nose pliers (essential for forming wire loops cleanly)
- Wire cutters
- A pencil or small dowel (3/8 to 1/2 inch diameter) to form loops around
- Small hammer and nails, or a staple gun
- Ruler or tape measure
- Sandpaper (to smooth any wood edges that could snag wire)
You do not need power tools for this. Everything above can be found at a dollar store or hardware store for under $15 total if you are buying new. I usually pull wire from old picture-hanging wire, scrap fence line, or twist ties from a hardware bag, and the base board from pallet wood. Repurposed materials are completely fine here as long as the wire is not corroded and the wood is not treated with chemicals that could leach near bait.
Core design: snare loop, trigger, and release mechanism
A bird snare trap has three functional parts working together: the loop (the snare itself), the trigger (what the bird interacts with to spring the trap), and the release or retention mechanism (what keeps the loop from collapsing prematurely or loosening after capture). Getting the proportions right is the difference between a trap that works and one that either misses the bird entirely or, worse, injures it through excessive constriction.
The snare loop
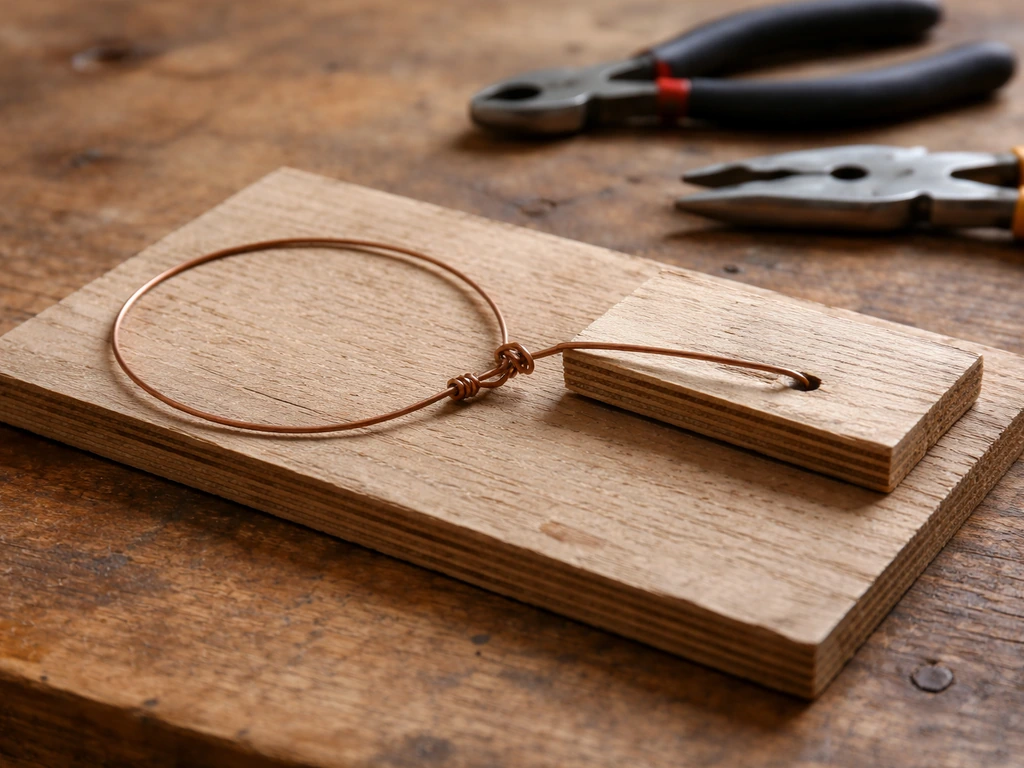
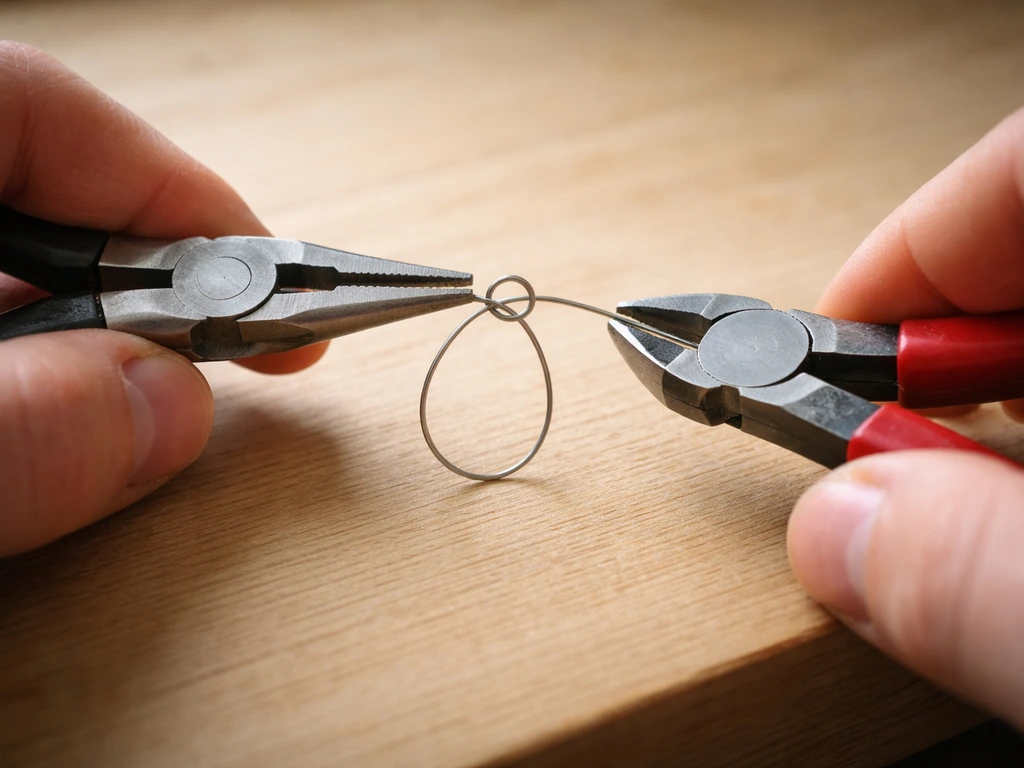
The loop sits upright in the bird's path, sized to fit loosely around the body or leg without clamping tight before the bird moves through it. For a sparrow-sized bird, a loop of about 1.5 to 2 inches in diameter works well. For a pigeon or starling, go 2.5 to 3 inches. To form the loop, wrap your wire twice around a pencil or small dowel, then twist the free end back on itself 3 to 4 times to create a sliding eye. The loop should slide freely through the eye but not fall open on its own. Test it by pulling gently: it should tighten smoothly with no catching or kinking.
This is where a lot of first builds go wrong. I ruined my first three snares by twisting the eye too tightly, which caused the loop to seize up instead of sliding. Go slowly, keep the twists even, and test the slide action every time before you move on. If the loop drags or binds, unwind it and start the eye twist again.
The trigger
The trigger is a small flat perch or platform positioned in the center of the snare loop. When the bird lands on the trigger to reach the bait, its weight depresses the platform, which in turn pulls the snare upward or inward around the bird's feet or body, depending on your configuration.
The trigger should be sensitive enough that a bird landing on it causes it to release, but stiff enough that wind or light debris does not set it off. A trigger platform made from a thin piece of balsa wood or craft stick, notched into a support post at a shallow angle, gives you this balance. The notch depth controls sensitivity: a shallow notch means easier triggering, a deeper notch means more pressure required.
The retention mechanism
Once the snare fires, you need the loop to stay tightened around the bird without constricting so hard that it causes injury. USFWS migratory-bird permit memorandums include [humane expectations for capture, handling, and captivity duration](https://www. fws. gov/sites/default/files/documents/migratory-bird-permit-memorandum-capture-handling-disposition-depredating-birds.
pdf), which can guide humane-handling decisions if you are working under a federal permit. For a humane design, the simplest approach is a fixed stop, a small crimp or bead threaded onto the wire so that the loop can only close to a minimum diameter (about 1 inch for small birds, 1. 5 inches for larger ones). This prevents the snare from collapsing fully around a leg or neck.
I cannot stress this enough: a loop with no stop is dangerous. It can cut off circulation or cause injury very quickly. The stop takes about 30 seconds to add and is non-negotiable for any humane build.
Building steps: assemble the trap from repurposed parts
- Cut a 12-inch length of 24 to 26 gauge wire. This will become your snare. Smooth any sharp cut ends with a fine file or by folding them back slightly with pliers.
- Form the sliding loop by wrapping one end of the wire twice around a pencil (or dowel sized to your target bird), then twisting the tail back on itself 3 to 4 times to create a neat sliding eye. Test the slide action before proceeding.
- Add a stop crimp: thread a small metal bead or fold a tiny piece of wire perpendicular across the snare wire about 1 inch from the loop opening. Crimp it firmly with pliers so it cannot slide. This sets the minimum loop diameter.
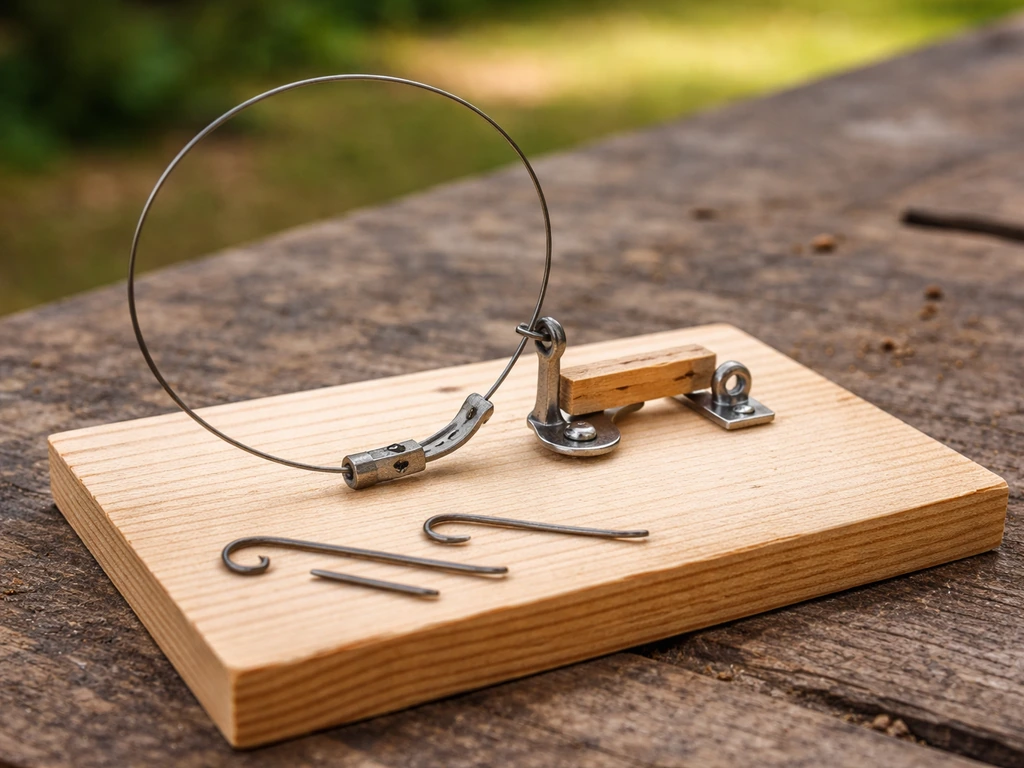
- Attach the free end of the snare wire to your anchor stake or base board. Wrap it tightly 4 to 5 times around the stake and twist to lock. The snare should have about 4 to 6 inches of wire between the anchor point and the loop.
- Build your trigger platform: cut a thin piece of wood (craft stick or 1/8-inch plywood scrap) to about 4 inches long and 1 inch wide. Sand the edges smooth. Cut a shallow notch about 1/4 inch deep near one end using a craft knife or saw.
- Mount a small upright support post (a 3-inch nail or screw, or a short scrap dowel) on your base board, positioned so the trigger platform rests at a slight downward angle when notched onto it. Nail or screw the post firmly to the base.
- Balance the trigger platform on the support post via the notch. It should rest flat when no weight is applied and tip forward when light pressure is placed on the far end.
- Position the snare loop so it stands upright directly above the trigger platform, centered over it. The loop should sit about 1 to 1.5 inches above the trigger surface so a landing bird walks into it. Secure the anchor end of the snare to the base board with a staple or a small nail bent over the wire.
- Place bait (cracked corn, seeds, or crumbs) on and around the trigger platform. The bait draws the bird onto the trigger, where it steps into the standing loop.
- Test the trigger action slowly using a small weight (a coin works) placed on the platform end. The platform should tip, and the loop should tighten. If it does not, adjust the notch depth or reposition the anchor point slightly.
The whole assembly sits on the base board, which you then stake or weight down outdoors. Keep the base as flat and stable as possible, because a rocking or tilted base is the number one cause of false triggers in my experience. A couple of flat rocks laid on the edges of the board are all it usually takes.
Placement and setup: where and how to position it effectively
Placement makes a bigger difference than any refinement to the trap itself. Birds are cautious, and they will not approach a trap that looks out of place or sits in an exposed area where they feel vulnerable. Here is what actually works.
Location
Set the trap near an existing food source or along a regular feeding path. Edges are better than open middles: the border between a lawn and a shrub line, the base of a fence, or near a bird feeder are all high-traffic spots. Birds like to approach bait from cover. If you place the trap in the middle of an open lawn, expect a long wait. Place it within 12 to 18 inches of cover (a bush, a garden border, a low wall) and your capture rate goes up significantly.
Height and orientation
For ground-feeding birds (sparrows, starlings, pigeons), keep the trap flat on the ground. The snare loop should stand vertically, no higher than 3 to 4 inches above the trigger surface. Do not elevate the trap on a platform or shelf, because IUCN welfare guidance explicitly states that a leg snare must not be set in a way that results in the bird being suspended off the ground. A bird caught at height can injure itself struggling. Ground level is both safer and more effective for ground feeders.
Concealment and scent
You do not need to go overboard here, but a little concealment helps. Drape a few dry leaves or scattered grass clippings loosely around the base board (not over the trigger or loop). Avoid touching the snare wire with bare hands before setting, as bird species with strong scent sensitivity may avoid it. Wearing thin gloves when handling the trap hardware is a simple precaution.
Baiting approach
Pre-bait the area for one to two days before setting the trap. Place bait directly on the ground near (but not on) the trap. Once birds are regularly visiting the spot, load the trigger platform and set the loop. This patient approach is far more effective than just setting up and hoping. For starlings, cracked corn and dog kibble work well. For house sparrows, millet and bread crumbs are hard to beat.
Testing, adjustments, and preventing failures
Before you leave the trap unattended, run through a manual test. Press down gently on the trigger platform with the tip of a pencil. The loop should tighten fully around the pencil within half a second of the platform tipping. If it hesitates or only partially closes, the snare anchor point needs to move closer to the trigger, or the snare wire is too stiff and needs replacing with a thinner gauge.
Common failures and fixes
| Problem | Likely Cause | Fix |
|---|---|---|
| Loop does not tighten when triggered | Anchor point too far from trigger or wire too stiff | Move anchor closer; switch to thinner wire (24–26 gauge) |
| Loop collapses before bird arrives | Loop eye too loose or wire too light | Re-form the eye with a tighter twist; use slightly heavier wire |
| Trap fires in wind or from debris | Trigger notch too shallow | Deepen the notch by 1/16 inch and retest |
| Bird takes bait but does not trigger trap | Bait placed too far from trigger center | Place bait directly on the trigger platform, not beside it |
| Loop stops before fully tightening | Stop crimp positioned too far from loop opening | Move the crimp closer to the loop, leaving 1 inch minimum diameter |
| Base board shifts after setting | Not weighted or staked adequately | Add flat stones on board edges or use a longer ground stake |
Once the trap is live, check it frequently. USDA APHIS guidance requires traps to be checked no less frequently than applicable regulations specify, and in most U.S. states that means at minimum every 24 hours. In practice, I check every few hours when a trap is active, especially in warm weather. A bird caught in a snare will exhaust itself struggling, which causes injury and stress quickly. The trap is only humane if you are checking it consistently. If you cannot check it regularly, do not set it.
Weather also affects performance. Rain can make the trigger wood swell and stick, preventing it from tipping cleanly. Seal the trigger platform with a light coat of linseed oil or exterior varnish before use. Wind can false-trigger or shift the loop out of position, so add a small wind block (a brick, a board propped at an angle) on the windward side if conditions are breezy.
Humane alternatives and next-step guidance
Here is the honest truth: for most situations a backyard bird enthusiast or DIYer faces, a snare trap is not the right first tool. A snare is harder to build safely, carries more injury risk for the bird, and is harder to justify legally compared to other options. Before you commit to this build, consider whether one of these alternatives fits your actual goal better. If you decide that a snare is not the right fit, see how to make bird catcher for safer, more practical setup ideas.
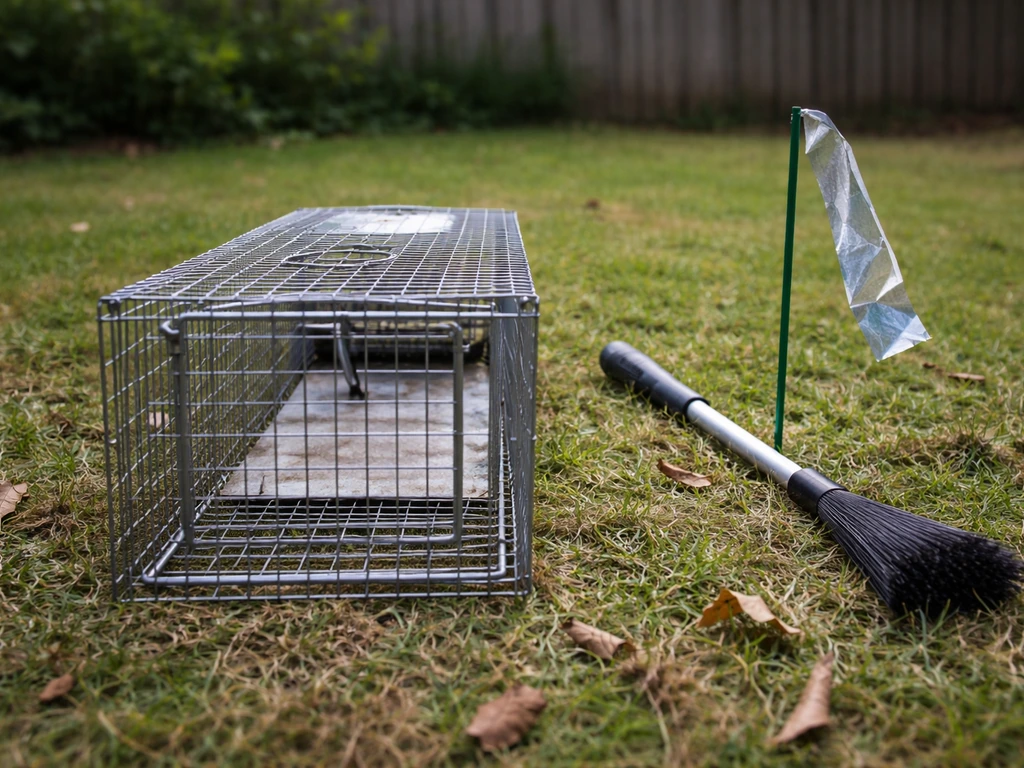
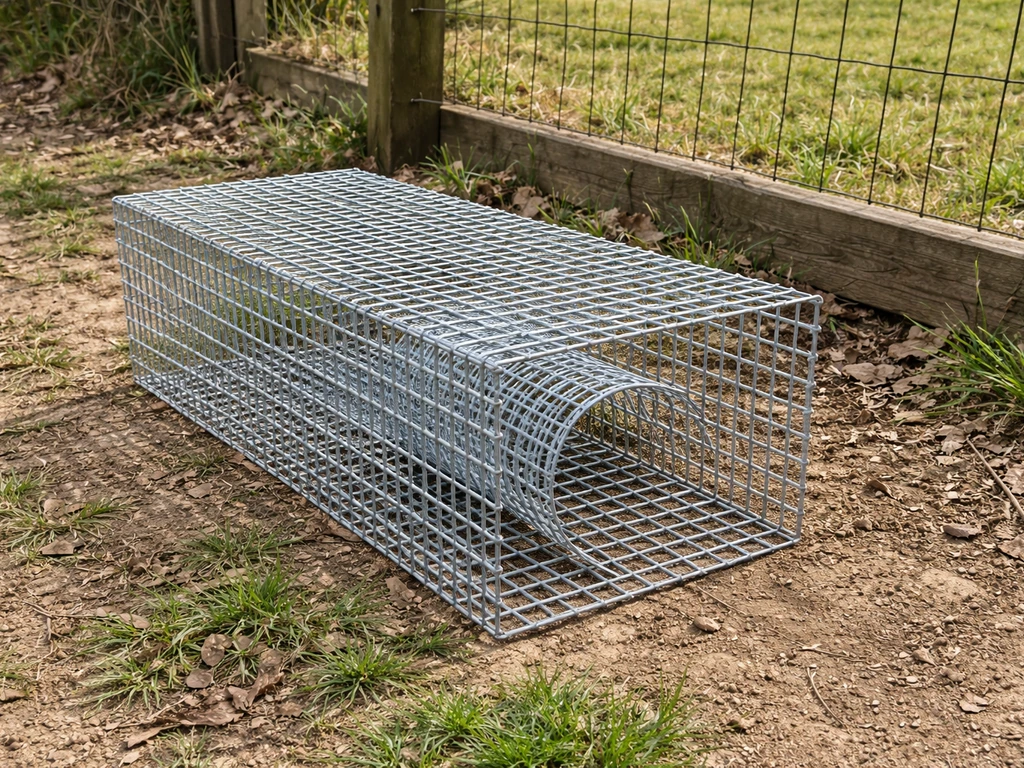
Live cage traps
A simple wire cage trap with a drop door or spring door is safer for the bird, easier to check, and more widely accepted under permit frameworks. USDA APHIS has published specific guidance on modifying cage-style funnel traps for European starlings (the Troyer V-top style), which is a documented, professionally supported approach. Cage traps completely contain the bird after capture, which reduces injury and makes handling easier.
If you are dealing with nuisance starlings or house sparrows, a cage trap is genuinely the better choice. There are also detailed guides available on how to build starling-specific cage traps and other general bird traps that fit this approach. If you specifically need a starling option, you can also review how to build a starling bird trap using the same capture-focused cage approach build starling-specific cage traps.
If you still want to focus on removal instead of capture, you can also look up how to make trap for bird options that prioritize quick, humane checks build starling-specific cage traps.
Deterrents
If your goal is to reduce unwanted bird activity (rather than capture a specific individual), deterrence is almost always the right answer. Reflective tape, visual predator decoys, habitat modification (removing food sources or nesting spots), and physical exclusion with netting are all effective. The Houston Humane Society Wildlife Center and USDA APHIS Wildlife Services both position deterrence as the first line of management before trapping is considered. Deterrents require no permits, carry no injury risk, and do not require you to figure out what to do with a captured bird.
When to call a professional
If the situation involves a protected species, a large number of birds, or repeated nuisance incidents, contact a licensed wildlife damage control operator or your state wildlife agency. Washington Department of Fish and Wildlife recommends reaching out to a wildlife damage control company, veterinarian, or animal shelter if you cannot handle trapping humanely and legally yourself. USDA APHIS Wildlife Services is another federal resource for depredation situations that require professional intervention. They have the permits, the equipment, and the experience to handle it without putting you at legal risk.
After you capture a bird: what happens next
If you do trap a bird legally, you need a plan before you set the trap. Florida FWC rules are representative of many states: live-captured nuisance wildlife must be released legally or euthanized humanely within 24 hours of capture or trap inspection. "Releasing legally" means releasing the animal on-site or at an approved location, not dropping it across town where it becomes someone else's problem. If you plan to relocate the bird, confirm with your state wildlife agency that relocation is permitted and where. Handle the bird with thick gloves, minimize handling time, keep it in a ventilated dark container to reduce stress, and get it processed (released or otherwise) as quickly as possible.
Building a working bird snare trap is genuinely achievable with basic tools and repurposed materials, and this guide gives you everything you need to do it. But the project only makes sense if the legal groundwork is in place first and you have a clear, humane plan for what happens after capture. Get those two things sorted, and the construction itself is the easy part.
FAQ
Is it ever legal to make bird snares at home if I am targeting only sparrows or pigeons?
Possibly, but legality is species-specific and state-specific. Even when a species is not protected under the federal MBTA, your state may still require a permit, limit methods (snare vs cage), or prohibit trapping entirely in certain seasons or locations. Check your state wildlife agency rules for the exact species and trapping method before building.
What’s the biggest safety mistake that makes snares inhumane, even if the loop is the right size?
Not planning for rapid inspection and release. A snare can cause injury quickly if it is left unattended, and it is easy to underestimate struggle time in warm weather or during windy periods. The humane requirement is active monitoring at the minimum frequency required by your local rules.
Can I set a snare for a backyard bird problem like one bird at a time instead of general nuisance?
Yes in theory, but in practice most DIYers have trouble with selectivity and end up catching non-target animals. If you cannot guarantee the trigger conditions are only met by the target species (and that you can inspect immediately), a cage trap, deterrent, or professional wildlife control is usually the safer and more legally defensible approach.
What should I do if a non-target animal is caught, like a cat, dog, or protected bird?
Treat it as an emergency and stop the trap operation immediately. Contact a licensed wildlife rehabilitator, your state wildlife agency, or local animal control for instructions on removal and transport. Do not attempt to relocate protected birds without explicit guidance, and do not “try again” with the same setup.
How can I tell whether my trigger sensitivity is too high or too low before using it outdoors?
Use repeated controlled tests and check for false triggering. If wind or debris could move the platform or loop, you need to adjust the notch depth and support stability. Also do a gentle manual test multiple times to confirm the loop consistently tightens without sticking.
Is treating the trigger wood with linseed oil or varnish enough to prevent weather-related failures?
It helps, but it is not a full guarantee. Swelling and sticking can still happen after heavy rain, and varnish can wear over time. Re-test the trigger after storms, and if the platform drags even once, retire or rebuild that component.
Do repurposed materials like old wire or pallet wood ever create hidden risks?
Yes. Old wire can have corrosion or kinks that change how the loop tightens, and treated or chemically sealed wood can leach near bait or into the mechanism. Inspect wire for stiffness and smooth sliding, and only use untreated or clearly safe wood for the base and trigger.
If I’m not sure about relocation rules after capture, what’s the safest default plan?
Do not rely on relocation without written confirmation. If your rules allow relocation, confirm the approved release site and permitted handling time with your state wildlife agency. If you cannot get a clear answer, choose a method that avoids live capture, or stop and use deterrents or professional help.
How do I reduce the chance of catching birds other than the one I’m trying to manage?
Avoid generic baiting strategies that attract many species at once. Use bait that matches the target species’ feeding preference, and keep placement along cover and feeding routes instead of open areas that draw a wider mix of birds. If multiple species are actively feeding, consider exclusion or professional trapping instead.
What should I keep in mind if I live in an area with kids or pets near where snares would be placed?
Assume a neighborhood animal could find the trap, even if it seems hidden. Use deterrence and exclusion first, and if you proceed with any trap, ensure it is placed where pets and kids cannot access it, and you can check it frequently enough to prevent prolonged entanglement.
Next Articles
How to Build a Starling Bird Trap: DIY Step by Step
DIY step-by-step guide to build a humane one-way starling trap, set timing bait cues, and prevent repeat problems.

How to Make a Bird Trap: Step-by-Step DIY Guide
Step-by-step DIY bird trap guide: choose design, build, set, monitor, and humane release with safer alternatives.

How to Build a Chimney Swift Bird House DIY Guide
Step-by-step DIY plans to build a chimney swift bird house, with correct dimensions, placement, and weatherproofing for