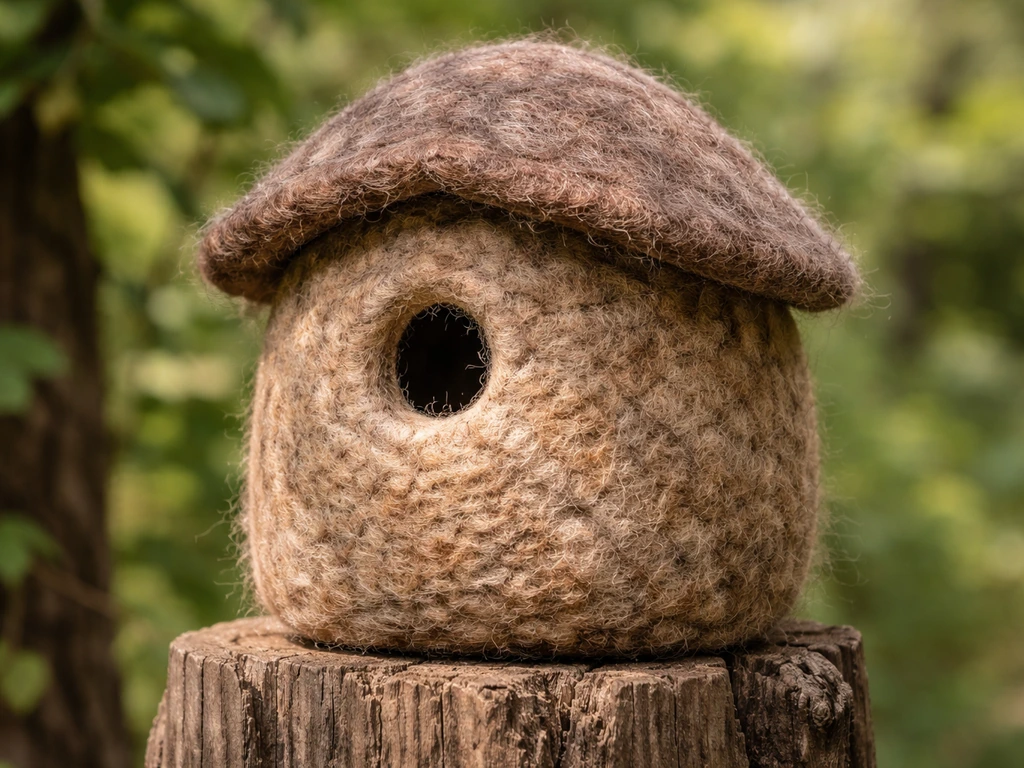
You can absolutely make a functional, bird-safe felted wool birdhouse today. The process combines wet felting or needle felting to build sturdy panels, then assembles those panels around a simple inner form or frame to create a shelter that's surprisingly durable outdoors. Wool's natural lanolin gives it built-in water resistance, but you do need to design the structure carefully, because felt is not fully waterproof. Get the panel thickness right, plan your shrinkage math before you cut anything, pick hole dimensions that match your target species, and add drainage and ventilation, and you'll have a birdhouse that looks handmade in the best possible way and actually gets used.
How to Make Felted Bird Houses Step-by-Step Guide

Marcus Thornton
1 May 2026
Materials and tools you'll need
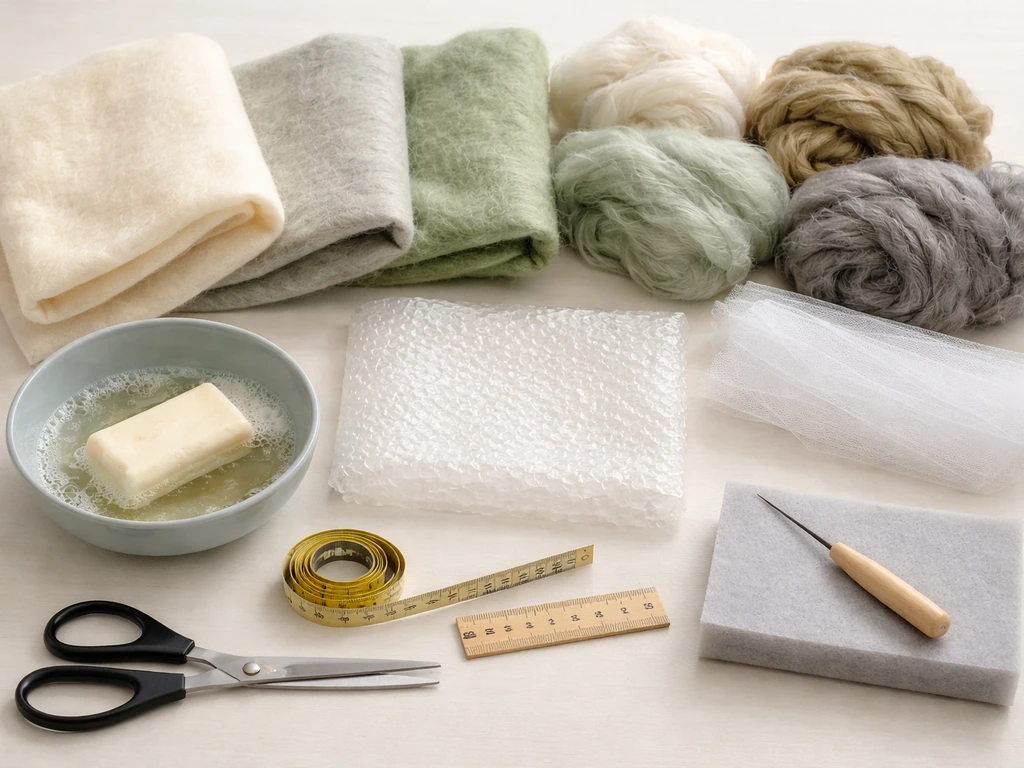
The core material is wool roving or a pre-felt sheet. Pre-felt (partially felted wool that hasn't fully bonded yet) is a great starting point because it's already stable enough to cut and position, but it's still 'feltable,' meaning it will bond and compress further when you wet-felt or needle-felt it into your final panels. Merino or Corriedale roving works best for wet felting. Avoid superwash wool entirely since the chemical treatment strips the scales that make felting possible in the first place.
- Wool roving or pre-felt sheets (Merino, Corriedale, or similar non-superwash wool), roughly 200–400g for a small single-compartment house
- Bubble wrap or a bamboo reed mat for wet felting (acts as your agitation surface)
- Warm water and a small amount of dish soap or wool wash
- A foam pad (at least 2" thick) if you're needle felting panels
- Felting needles in medium gauge (38 or 40 gauge work well for structural panels)
- A rigid inner form: a cardboard box, foam block, or simple wooden frame to shape the house during felting
- Sharp scissors and a rotary cutter with cutting mat for trimming panels
- A ruler and fabric marker for templates
- A large towel and a salad spinner or spin cycle for removing water
- Waterproof wood glue or a hot glue gun for panel assembly
- Optional: a water-repellent spray finish rated for natural fibers
- Thin wooden dowels or bamboo skewers for reinforcing the roof join
- Leather punch or sharp awl for entry hole and drainage holes
For tools you might not have: a salad spinner is surprisingly useful for removing water from wet-felted panels without distorting them. If you don't have felting needles, you can do this project entirely with wet felting and skip needle work. If you don't have a foam pad, a folded-up yoga mat works fine. The main thing you cannot skip is the wool itself. Synthetic felt from a craft store will not bond, will not hold up outdoors, and is not safe for birds. Stick with real wool.
Choosing a design for the birds you actually want
The single most important dimension in any birdhouse is the entrance hole diameter. Get it wrong and you either lock out the species you want or invite house sparrows and starlings to take over. Here's a practical reference table for common backyard cavity nesters, using specifications from wildlife agency guidelines:
| Species | Entrance Hole Diameter | Interior Floor Size | Depth of Box | Hole Height Above Floor |
|---|---|---|---|---|
| Chickadee | 1 1/8" | 4" x 4" | 8–10" | 6–8" |
| House Wren | 1 1/8" to 1 1/4" | 4" x 4" | 6–8" | 4–6" |
| Tree Swallow | 1 1/2" | 5" x 5" (approx. 12 x 12 cm) | 6–10" | 4–6" |
| Eastern Bluebird | 1 1/2" | 5" x 5" | 8–12" | 6–10" |
| Purple Martin | 2 1/8" | 6" x 6" | 6" | ~1" above compartment floor |
The entry hole for a chickadee or wren needs to be sized exactly at 1 1/8" because even a slightly larger hole lets house sparrows move in and evict or kill the intended residents. For bluebirds and swallows, 1 1/2" is the sweet spot. For purple martins, the traditional round hole is about 2 1/8", with an acceptable range of 1 3/4" to 2 1/4". Position the hole 1" to 1 1/2" above the interior floor for most species, though martins prefer the hole placed very close to the compartment floor (around 1" up). The interior depth matters too: deeper boxes give nestlings a safer drop zone away from predator reach.
For a first felted birdhouse project, I'd recommend starting with a chickadee or wren box. The small floor size (4" x 4") means less material, fewer panels to manage, and a faster build. A small bird house like this chickadee or wren box is a great size to learn how to make small bird house features such as drainage, ventilation, and the right entry-hole diameter. If you want to go bigger, similar sizing logic applies whether you're building for bluebirds or making something like a small decorative house. The principles here translate well across scales, and you can apply the same felting workflow to larger structures once you've got one small box under your belt.
The felting process: panels, shaping, and assembly
Step 1: Do your shrinkage math first
This is the step most beginners skip, and it's why their panels end up the wrong size. Wool shrinks significantly during wet felting, anywhere from 25% to 40% per side depending on your wool type, water temperature, and how aggressively you work it. Some batches shrink even more. Before you cut any panels, felt a 10" x 10" test square with the same wool you're using for the actual build, full cycle, rinse, dry. Measure the result. If your test square finished at 6.5" x 6.5", your shrinkage rate is 35%. Now reverse-calculate: if you need a finished panel that's 5" x 8", divide each dimension by 0.65 to get your starting cut size (about 7.7" x 12.3"). Different batches of the same wool can behave differently, so test every new batch.
Step 2: Lay out and felt your panels

Plan out all the panels you need: two side walls, a front wall (with the entry hole placement marked), a back wall, a floor, and a roof piece. For a chickadee box with a 4" x 4" floor and 8" depth, your finished panel dimensions will be roughly: two side walls at 4" x 8", a front and back at 4" x 8" (front includes the hole), a floor at 4" x 4", and a roof at 5" x 5" (slightly oversized for overhang). Scale all of those up using your shrinkage percentage to get your starting sizes.
- Lay bubble wrap textured-side-up on a flat surface. Place a piece of netting or tulle over it.
- Lay wool roving in thin, even layers at right angles to each other (horizontal layer, then vertical layer, repeat for 4–6 layers total). The more layers, the thicker and denser the final panel.
- Wet the wool thoroughly with warm soapy water. Press out air pockets gently by pressing flat hands across the surface, don't rub yet.
- Cover with netting and begin rolling the whole thing into a tight log using the bubble wrap. Roll back and forth with firm pressure for 5–10 minutes.
- Unroll, check for weak spots, fold edges in, re-roll from the opposite direction. Repeat rolling cycles for 20–30 minutes total until the panel is firm and doesn't pull apart when you tug the surface lightly.
- Rinse out the soap in cool water (sudden temperature changes can over-shrink the piece), spin out excess water, and lay flat to dry on a towel.
- Once dry, trim each panel to your reverse-calculated starting size using a rotary cutter and ruler. Be precise: small errors here become big alignment problems during assembly.
Step 3: Needle-felt the panels for extra density (optional but recommended)
After wet felting, your panels may still have soft spots or thin areas. This is where needle felting helps. Place each dry panel on your foam pad and use a 38 or 40 gauge needle to poke firmly and evenly across the whole surface. Work from the fiber side downward so the needle goes into the foam, not into your hand or a hard table. Don't tug the needle sideways while it's in the fiber, the barbs will snap it. Consistent vertical stabbing compresses and bonds the fibers further. Aim for panels that feel firm and stiff, like a sturdy felt hat, not floppy.
Step 4: Cut the entry hole and assemble
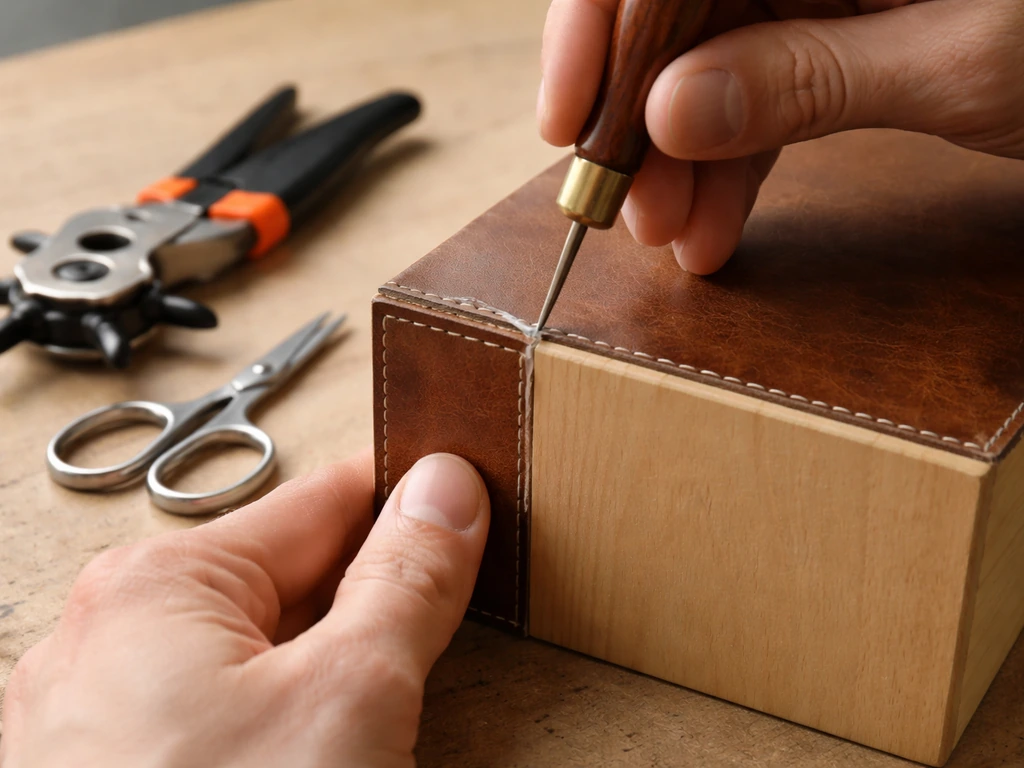
Use a leather punch or sharp awl to cut the entry hole in your front panel. Work up to the final diameter in stages: punch a starter hole, then gradually enlarge it with scissors. For a 1 1/8" hole, a standard leather punch set has a punch close to that size. Check the diameter against a ruler. The interior surface below the hole needs to be rough so nestlings can climb out at fledging time. Felt is naturally textured, which helps, but you can needle-felt a few extra passes in that spot to create a slightly raised, grippy texture. This acts like the fledgling ladder that commercial box builders score into wood.
To assemble, butt the panels together and use waterproof wood glue along the seams. Hold or clamp while the glue sets. For extra strength, reinforce interior corners by needle-felting a strip of thick roving into each interior seam after the glue is dry. This bonds the panels together with fiber as well as adhesive. The roof panel should overhang the front by at least 1" to divert rain from the entry hole. Attach the roof with glue and reinforce the ridge with a thin wooden dowel or bamboo skewer pushed through the felt from outside and glued in place.
Weather resistance, ventilation, and safe nesting features
Wool felt is naturally water-resistant because of lanolin (the waxy protective coating on wool fibers), but it is not waterproof. Water will eventually penetrate the felt in sustained rain, which is why the structural design matters as much as the material. You need to manage rain, not just repel it.
Add at least four drainage holes to the floor, each about 3/8" to 1/2" in diameter. Use your leather punch for this. These let any water that enters through the entry hole or seams drain out before it pools and chills eggs or nestlings. A recessed floor (set 1/4" above the bottom edge of the walls, letting the walls act as a small lip) helps too, since it keeps the floor from sitting directly in any puddles that collect inside. Wikipedia’s nest box overview notes that good nest boxes have a recessed floor with drainage and ventilation holes, plus a sloped or overhanging roof blank" rel="noopener noreferrer">recessed floor helps keep the floor from sitting in puddles.
Ventilation is just as important as drainage. Ventilation holes and drainage help keep nest boxes drier and allow airflow, which is important for safe nesting conditions. Without airflow, a birdhouse in summer can reach temperatures that kill chicks. Add small gaps (about 1/4") at the top corners where the walls meet the roof, or use your leather punch to add ventilation holes near the top of the side walls. Four holes, one at each top corner of the side panels, gives good cross-ventilation without creating rain entry points if they're placed just under the roof overhang.
To boost the felt's outdoor durability, apply a water-repellent spray rated for natural fibers once the assembled house is fully dry. These finishes improve splash resistance without blocking wool's natural breathability, which matters because a completely sealed felt house would trap moisture inside rather than letting it wick away. Reapply every season. Do not machine wash the house or submerge it in water, either of those will distort the shape and break down the fiber structure. Spot-clean with a damp cloth if needed.
One thing I learned the hard way: don't skip the predator guard. A simple metal baffle on the mounting pole, or a metal hole guard plate around the entry (a thin metal ring the same diameter as your entry hole, tacked or glued over the felt opening), prevents squirrels and raccoons from gnawing the felt entry hole wider and accessing the nest. Felt is much easier to chew than wood. A metal hole guard is a cheap fix that saves the whole build.
Finishing, hanging, and keeping it usable season after season
Finishing the exterior
Once the house is assembled and the glue is cured, you can needle-felt additional roving onto the exterior for color, texture, or extra weatherproofing thickness. Earth tones (browns, greens, grays) help the house blend into a garden or tree setting, which birds seem to prefer. Avoid white or very bright colors on the exterior since they can attract attention from predators. The interior should stay plain natural wool, no dyes, no finishes. Birds can be sensitive to chemical residues in nesting spaces.
Hanging and placement
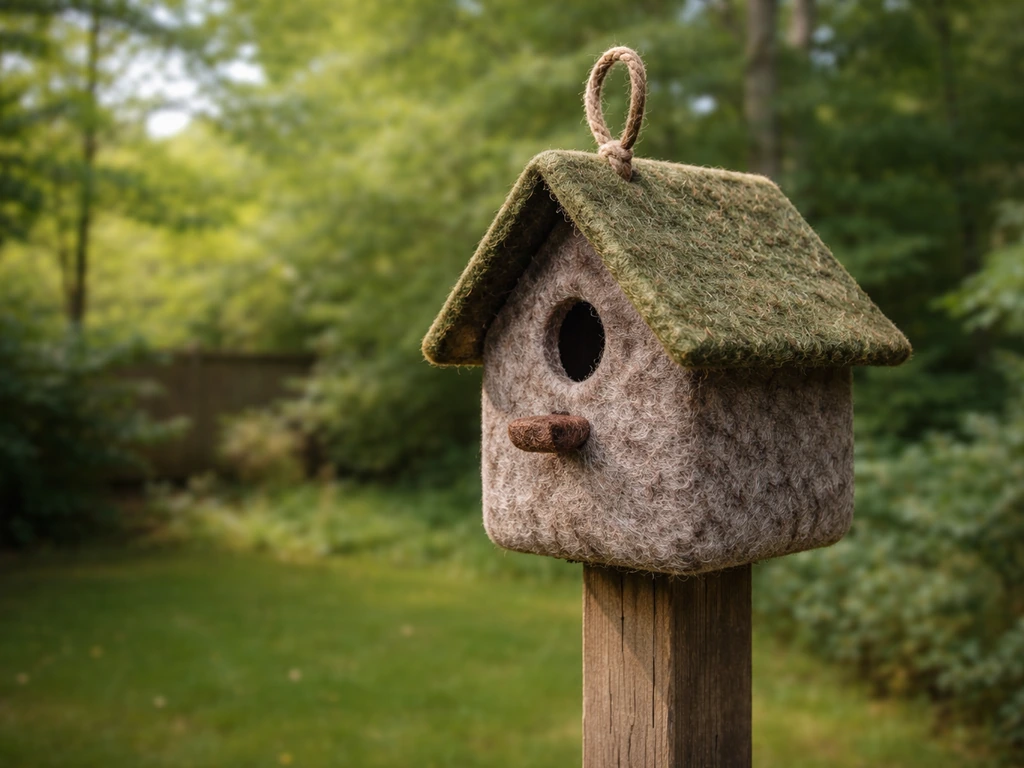
Felt birdhouses are lightweight, which is actually an advantage for mounting. Thread a sturdy jute or wire loop through the roof ridge (reinforce the attachment point with a wooden bead or small wood scrap inside the felt so the loop doesn't tear through) and hang from a branch or a mounted hook. For pole mounting, glue or stitch the base to a thin plywood or wooden backing board and attach that to the pole. This protects the felt floor from direct contact with the mounting hardware and gives the structure extra rigidity.
- Mount chickadee and wren boxes 5–15 feet off the ground, on a post or tree, facing away from prevailing wind and harsh afternoon sun
- Mount bluebird and swallow boxes on open poles in clear areas, 4–6 feet high, away from dense shrubs
- Face the entry hole away from prevailing rain direction, typically facing east or southeast in most of North America
- Keep at least 100 feet between bluebird or swallow boxes to reduce competition
- Install a baffle on the mounting pole to deter climbing predators
Seasonal maintenance
At the end of each nesting season (usually late summer), take the house down and clean it out. Remove old nesting material, check for mites or parasites, and let the house air out for a few days before putting it back up. Felt houses can harbor nest parasites just like wooden ones. Inspect the seams, drainage holes, and ventilation gaps: re-glue any lifted seams, clear any blocked drainage holes with a skewer, and touch up the water-repellent finish. If any panel has become significantly misshapen or compressed, you can re-wet it lightly, reshape it by hand around a form, and let it dry to recover the structure. Store the house indoors over winter if you're in a climate with heavy snow or ice, since prolonged freeze-thaw cycles are harder on felt than on wood.
A well-made felted birdhouse, properly maintained, can last three to five seasons or longer. The first one you build will teach you where to add thickness, how to reinforce seams, and how your particular wool handles outdoor conditions. Most people build a second one six months later that's noticeably better. If you find you enjoy working with felt as a construction material, the same principles here scale up well for larger projects or more architectural forms, and they also connect naturally to other birdhouse material approaches like ceramic or stone builds, where managing weight, weatherproofing, and interior dimension accuracy are equally central concerns. If you want a more permanent look, you can also learn how to make stone bird houses with the right layout and weatherproofing steps ceramic or stone builds. If you want a different look, you can also learn the basics of ceramic bird houses and build one step by step.
Your concrete next steps: gather your wool roving today, felt and measure a 10" x 10" test swatch to get your shrinkage number, then calculate your panel starting sizes based on that data. Cut your panels, wet felt them, let them dry, and start assembly this weekend. The whole first build from material prep to hanging can realistically happen in two to three days, and most of that time is just waiting for wet panels to dry.
FAQ
Can I use regular craft felt or pre-cut felt sheets instead of wool roving and pre-felt?
Regular felt made from polyester or acrylic will not bond into a single durable structure when wet, and it can shed fibers outdoors. If you only have pre-cut wool sheets, confirm they are unfinished wool (not fully finished and not superwash), then still run a small shrink and wet-bond test so the seams and entry hole end up the right size.
How do I prevent the roof from sagging or pulling the walls out of shape after assembly?
Make the roof panel slightly oversized (especially near the front overhang) and ensure the ridge attachment point has a solid interior backing (a dowel or scrap embedded in the felt). Also let waterproof wood glue cure fully before handling, and avoid moving the house while the roof is still curing because felt fibers compress and memory is slow to return.
What if my 10 x 10 test swatch shrinks unevenly?
Uneven shrink usually means the wool thickness, agitation, or water temperature was inconsistent. Re-test with the same batch using identical water temperature and the same wetting cycle as you plan for the build. If one corner shrinks more, cut using the worst-case dimension and then trim finished panels to final size after felting.
How wet should the wool be during wet felting, and how do I avoid overworking it?
Use enough water to keep fibers mobile, but avoid puddling that creates thin, weak areas. A simple check is that the surface looks evenly matted, not streaky or glossy. If the panel feels overly stiff or “glassy” before it reaches your target thickness, stop early, dry, then needle-felt later to finish compressing evenly.
Should I seal the whole felt house, including the interior?
No. Apply outdoor water-repellent spray only after the house is fully assembled and completely dry, and keep finishes on the exterior. Leaving the interior untreated helps maintain breathability and reduces residue that could affect nestling sensitivity.
How do I know whether my entry hole height and interior depth are correct for the species I want?
Use the entry diameter as the first filter, then confirm the placement relative to your floor and the total interior depth. If your box ends up too shallow, even a correctly sized hole can lead to premature fledging and higher predation risk because nestlings have less buffer space. For small-box starts, prioritize the chickadee or wren-style proportions rather than scaling up randomly.
What’s the safest way to mount the felt bird house so it doesn’t twist?
For hanging, run the loop through the reinforced roof ridge and avoid tying directly to thin felt only, since movement can tear fibers over time. For pole mounting, mount to a rigid backing board first, then attach the felt base to that board, so vibration does not flex the felt floor and widen seams.
Can I paint or dye the felt to match my yard?
You can add exterior color using needle-felted roving, but avoid dyes and chemical treatments on the interior. If you do dye any wool, test a scrap piece first and rinse thoroughly, then build a quick seam sample to ensure bonding still works and odor is minimal before using it in a nesting space.
How do I keep drainage holes from clogging with felt fuzz or nest debris?
Cut drainage holes cleanly with a leather punch so edges are compacted. After assembly, lightly needle-felt around the hole edge if fibers fray, and during cleaning seasons, clear holes with a skewer before re-hanging. Using a recessed floor lip also reduces how much debris can settle directly into puddle-prone areas.
Will the felt absorb odors or attract mites, and how should I clean it?
Felt can retain residues if left dirty, and it can also host parasites like other box materials. At season end, remove all nesting material, scrub only with a damp cloth (no soaking), let the house air out for several days, and inspect seams, ventilation gaps, and drainage holes before storage or re-mounting.
My panels are strong but still feel a bit soft in one spot. Do I need to start over?
Usually not. Needle-felt additional roving only on the soft area using consistent vertical stabbing and compress until the surface feels like firm felt hat material. Focus on the weak panel region, not the whole wall, so you avoid changing shrink proportions around the entry opening.
How often should I reapply water-repellent spray?
Reapply at least once per nesting season or more often if the house is in frequent driving rain. Wait for full dryness before spraying, and don’t overcoat, because heavy buildup can reduce breathability and increase interior moisture retention.
Is a predator guard mandatory for all species, not just for protecting the hole from gnawing?
It’s strongly recommended any time squirrels, raccoons, or similar chewers are present. Even if the entrance diameter is correct, predators may enlarge access points or damage seams, so a metal baffle on the mounting pole and a properly fitted metal hole guard ring are the most reliable combined approach.
Next Articles
Ceramic Bird Houses How to Make a Durable DIY Guide
Step-by-step guide to making durable, bird-safe ceramic bird houses with proper design, glazing, curing, weatherproofing
How to Make a Small Bird House: Step-by-Step DIY Guide
Step-by-step plan to build a small birdhouse, choose safe dimensions, cut and assemble, drill entry, ventilate, mount an

How to Build a Chimney Swift Bird House DIY Guide
Step-by-step DIY plans to build a chimney swift bird house, with correct dimensions, placement, and weatherproofing for