Yes, you can absolutely build a small bird house today, even if you've never picked up a jigsaw before. The whole project takes a single afternoon, costs almost nothing if you have scrap wood lying around, and produces something genuinely useful for backyard birds. The key is getting a few measurements right, avoiding some common material mistakes, and adding small details like drainage holes and a cleanout panel that most beginner tutorials skip. Follow this guide and you'll have a finished, mountable birdhouse by the time the light fades.
How to Make a Small Bird House: Step-by-Step DIY Guide

Marcus Thornton
14 Apr 2026
Pick the right design and target species first
Before you cut a single board, decide which bird you're building for. This isn't just a nice-to-have choice; it directly determines the box dimensions and entrance hole size. Build the wrong size and the birds you want will ignore it, while House Sparrows or European Starlings move in instead.
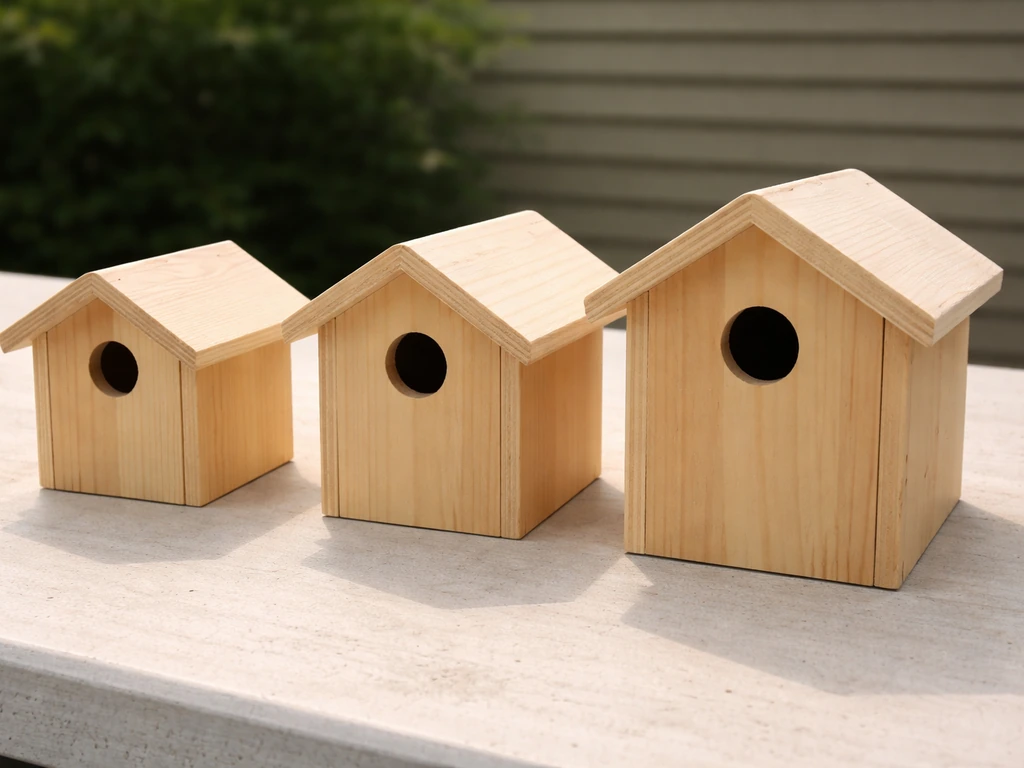
For most beginners making a small birdhouse, the three most practical target species are the Black-capped Chickadee, the House Wren, and the White-breasted Nuthatch. They're all common across North America, they actively use nest boxes, and they're comfortable nesting close to homes. Using species-specific dimensions from Audubon's Birdhouse and Nesting Chart, here's how they compare:
| Species | Floor Size | Box Height (inside) | Entrance Hole Diameter | Entrance Height Above Floor | Mounting Height |
|---|---|---|---|---|---|
| House Wren | 4" x 4" | 6–8" | 1–1.25" | 4–6" | 5–10 ft |
| Black-capped Chickadee | 4" x 4" | 8–10" | 1.125" (1 1/8") | 6–8" | 5–15 ft |
| White-breasted Nuthatch | 4" x 4" | 8–10" | 1.25" | 6–8" | 12–20 ft |
House Wrens are the most forgiving species to build for. They'll accept a slightly imprecise box, they nest at low heights (as low as 5 feet), and a 1.25-inch entrance hole is easy to drill with a standard spade bit. If you're a first-timer, start with a wren box. Chickadees are a close second, and their slightly smaller 1 1/8-inch entrance hole actually helps exclude larger competing birds. The plan below is sized for either species, with notes for adapting to nuthatches.
One thing worth knowing: small birdhouses have very different requirements than larger cavity-nesting structures. If you eventually want to build for woodpeckers, flickers, or owls, that's a whole different project. Check out how to make a big bird house when you're ready to scale up, but for now keep your focus on the wren-to-chickadee size range.
Tools and materials (including safe repurposed wood)
Wood choices that actually work

The best wood for a small birdhouse is 3/4-inch rough-sawn cedar. Rough cedar is naturally rot-resistant, holds screws well, and the textured surface gives birds easy footholds inside the box. Redwood and pine are solid second choices. If you're using exterior-grade plywood for your first build because that's what you have, it works fine as long as it's exterior grade. What you absolutely must avoid is pressure-treated lumber of any kind. Pressure-treated wood contains chemical preservatives that are harmful to birds, and the same rule applies to any repurposed wood that was chemically treated for structural protection.
Repurposed lumber from pallets, old fence boards, or reclaimed barn wood is a fantastic option and one I'd encourage you to try. The rough, weathered texture is actually better than sanded new wood. Just make sure the source boards were never treated with pesticides, fungicides, or sealants. If you're not sure, don't use them for the interior surfaces. Old exterior fence cedar is almost always safe and one of the best free materials around.
Tool list
- Circular saw or hand saw (for straight cuts)
- Drill with a 1 1/8- or 1 1/4-inch spade bit or hole saw (for the entrance hole)
- 1/4-inch drill bit (for ventilation and drainage holes)
- Tape measure and pencil
- Clamps (at least two)
- Brass or galvanized wood screws, 1 5/8-inch and 2-inch lengths
- Sandpaper, 80-grit (for the entrance hole edge only)
- A small brass hinge and corresponding screws (for the cleanout panel)
Use brass or galvanized screws throughout. Regular steel screws will rust out in a season or two and can cause panels to fail. I learned this the hard way on my second build when I found the floor had dropped out by the following spring. Galvanized nails work in a pinch, but screws give you a much stronger joint and let you disassemble the box for deep cleaning later.
Cut list and dimensions for a small bird house
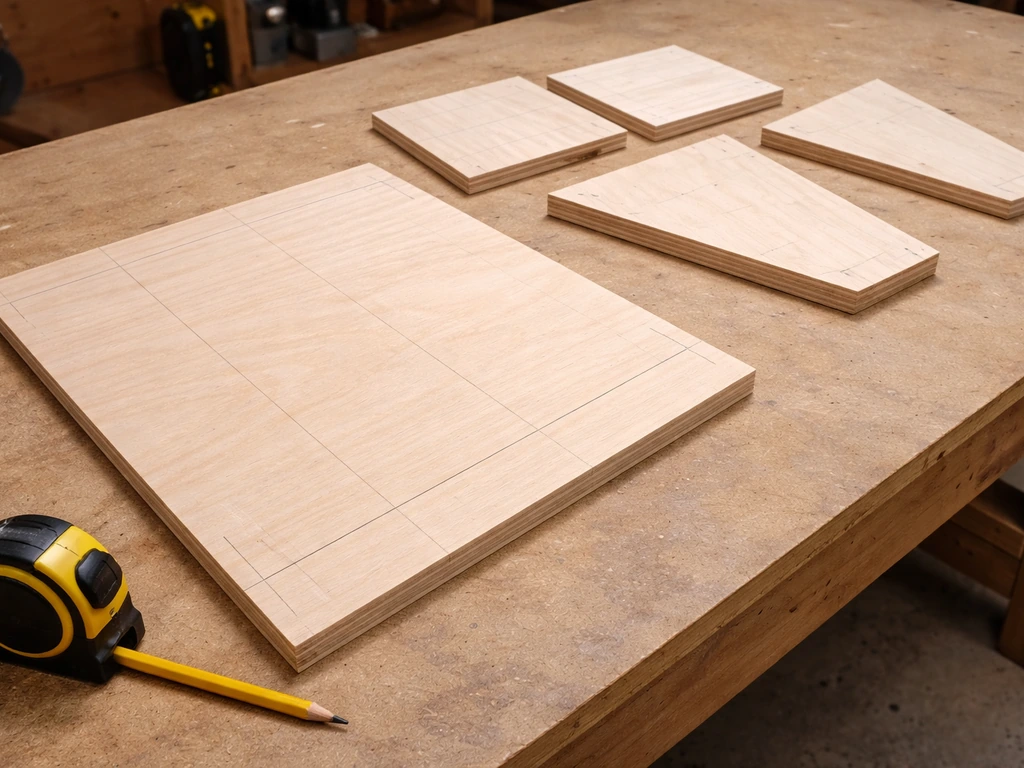
The following cut list is sized for a House Wren or Chickadee. All pieces are cut from 3/4-inch thick wood. Measure twice, cut once, and label every piece with a pencil as you go.
| Piece | Dimensions (W x L) | Quantity | Notes |
|---|---|---|---|
| Floor | 4" x 4" | 1 | Cut 1/2" off each corner for drainage |
| Front | 4" x 9" | 1 | Drill 1 1/8" entrance hole, center at 7" from bottom |
| Back | 4" x 12" | 1 | Extra length for mounting via screw through top and bottom |
| Side (left/right) | 4" x 9" | 2 | Can be cut with a slight angle at top for sloped roof |
| Roof | 6" x 7" | 1 | Wider/longer than box to create overhang on all sides |
The back piece being longer than the front is intentional. Those extra inches above and below the box give you a clean surface to drill a mounting hole and attach the house to a pole or post without compromising the interior space. The roof at 6 inches wide gives you a 1-inch overhang on each side, which is enough to shed rain away from the entrance hole.
Step-by-step assembly
- Cut all pieces according to the cut list. Mark the face (outer) side of each board before cutting so you don't lose track of orientation.
- Prepare the floor by cutting or sanding the corners at 45-degree angles, removing about 1/2 inch from each corner. This creates drainage gaps around the perimeter and prevents water from pooling inside the box.
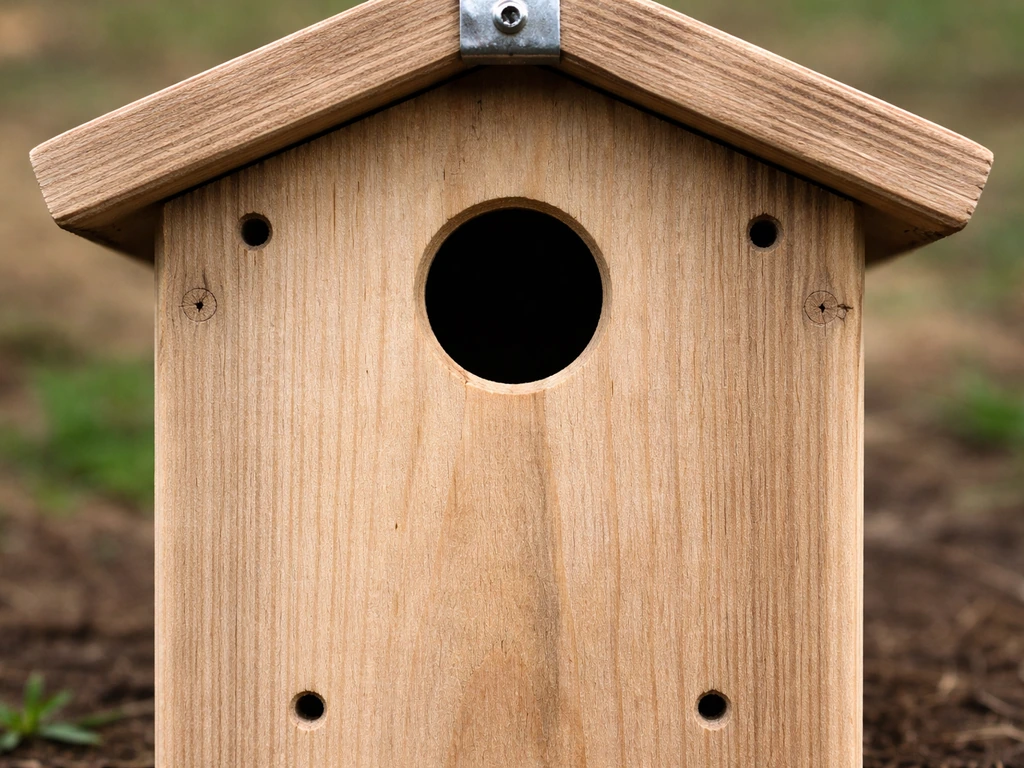
- Drill the entrance hole in the front piece. Center it horizontally and place it 7 inches up from the bottom edge. Use a 1 1/8-inch spade bit for chickadees or 1 1/4-inch for wrens. Drill slowly, place scrap wood behind the panel to prevent tear-out, and sand the hole edge smooth so birds don't snag their feathers.
- Drill ventilation holes in the side pieces. Drill two 1/4-inch holes near the top of each side panel, roughly 1 inch down from the top edge and 1 inch in from either end. These allow heat and moisture to escape during hot days.
- Drill drainage holes in the floor. Drill four 1/4-inch holes evenly spaced across the floor as a backup in case the corner gaps aren't enough. Two in the front half, two in the back half works well.
- Attach the floor to the back piece first. Stand the back piece upright and screw the floor to its bottom front edge using two 1 5/8-inch galvanized screws. The floor should be flush with the front face of the back board.
- Attach the two side panels. Screw each side into the back board and down into the floor edges. Use two screws per joint, pre-drilling pilot holes to avoid splitting.
- Attach the front panel. This is where you choose whether to make it a fixed front or a hinged cleanout panel. For a hinged side panel instead (which I prefer for easier cleaning), leave the front fixed and instead attach one side panel with a single pivot screw at the top and a hook-and-eye latch at the bottom so it swings open.
- Attach the roof last. Center it over the box so the overhang is equal on both sides (about 1 inch per side) and extends at least 1–2 inches past the front. Screw down through the roof into the top edges of the side panels and back. Use three or four screws to keep it secure in wind.
Entrance hole, ventilation, and drainage: the details that matter
The entrance hole is the most important single feature of your birdhouse, and a few millimeters really does make a difference. A 1 1/8-inch hole will let a chickadee enter while keeping out House Sparrows and starlings. Bump it up to 1.5 inches or larger and you've essentially built a sparrow condo. Drill carefully, and if your spade bit runs slightly large, try a hole saw instead for a cleaner, more accurate diameter.
Ventilation is what keeps chicks from cooking on hot summer afternoons. The 1/4-inch holes near the tops of the side panels handle this in most cases. Some builders prefer to leave a small gap between the top of the front panel and the underside of the roof instead, which works equally well as long as it's sheltered by the roof overhang. Either approach is fine; the goal is moving air without letting in rain. Don't skip this step thinking your climate is mild enough. Even a few hot days without ventilation can be fatal for nestlings.
Drainage is equally non-negotiable. Even a well-placed box will get moisture inside during heavy rain. The corner cutouts on the floor combined with four 1/4-inch floor holes give water somewhere to go. I once built a box without drainage and found a flooded nest after a storm. The eggs were fine, but the female abandoned the box after that. Don't skip the floor prep.
Roof, finishing, and keeping birds safe from predators and weather
The roof needs a slope. A flat roof traps water and will warp within a year. The easiest way to add slope is to cut the tops of your side panels at a slight angle (about 10–15 degrees) before assembly so the roof sits tilted naturally. Alternatively, you can add a small wedge-shaped spacer at the back to lift the rear edge. Aim for a 1-to-2-inch overhang on the front and sides. This keeps rain from driving directly into the entrance hole during storms.
For finishing, the rule is simple: nothing on the inside, and only safe, natural options on the outside. Do not paint or stain the interior surfaces at all. On the outside, leaving the wood bare is perfectly fine and actually what most birds prefer. If you want to add some weather protection to the exterior, a thin coat of raw linseed oil works without introducing harmful chemicals. Never use latex paint on the inside, and skip the wood stain entirely. The wood will weather naturally and look better for it within a season.
Predator protection starts at the entrance hole. One smart upgrade is attaching a 1-inch-thick wood block (with the same size hole as your entrance) flush over the front of the box around the entrance opening. This extended entrance tunnel makes it much harder for a raccoon or cat to reach inside and pull out eggs or nestlings. It's a simple addition: just cut a small square of scrap wood, drill the matching hole through it, and screw it onto the front panel so it's flush and centered over the existing hole.
If you're interested in building with completely different materials for a different visual style, it's worth knowing your options. Some makers go the route of ceramic bird houses for a more decorative result, or explore natural textures through stone bird house construction. Those materials require different techniques but the core sizing principles remain the same.
Mounting, placement, and keeping the box in good shape year after year
Where and how to mount the box
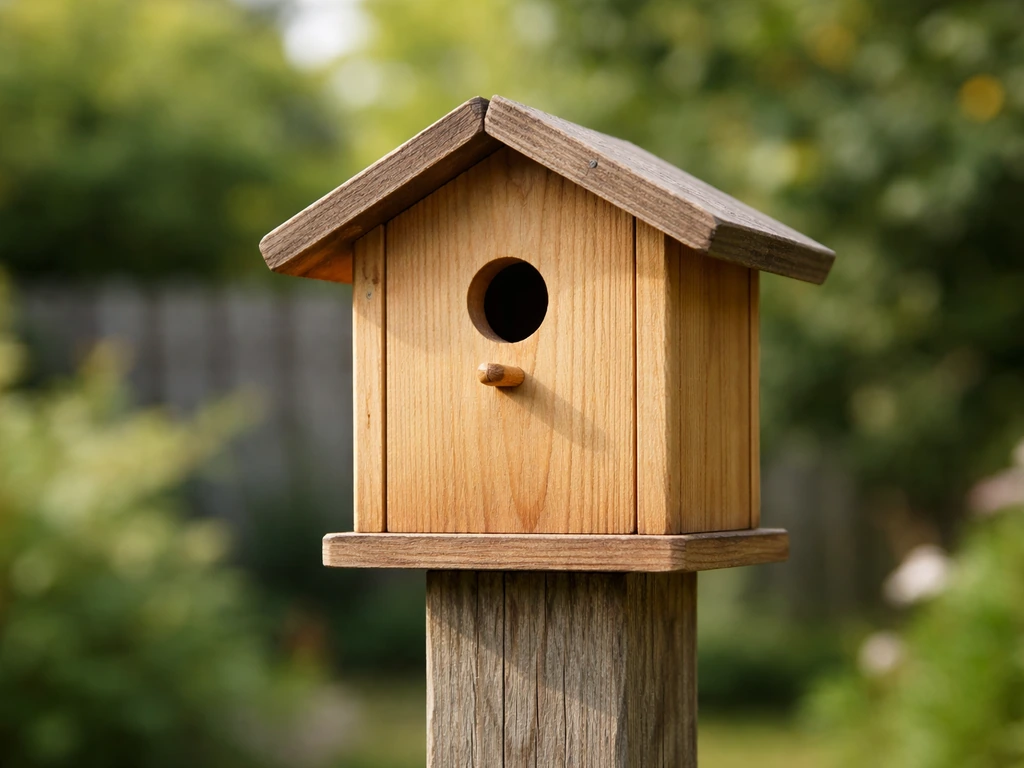
Mount a wren or chickadee box between 5 and 10 feet off the ground on a smooth metal or PVC pole if possible. A wooden post works, but a metal pole is much harder for raccoons and squirrels to climb. For extra protection, add a cone-shaped or cylinder baffle to the pole below the box. This alone is probably the single biggest thing you can do to improve nest success after the box itself. NestWatch recommends smooth, slippery poles precisely because raccoons are persistent climbers, and a baffle defeats them reliably.
Face the entrance hole away from prevailing winds, ideally toward the east or southeast. This gives the birds morning sun (which helps dry out overnight moisture) while avoiding the afternoon heat. Keep the box away from thick brush or branches that run right up to the entrance hole, as these act as launching pads for predators. A clear flight path to the entrance is what birds look for when house-shopping.
Cleaning and maintenance
Clean the box out once per year at minimum. The best time is after the breeding season ends, typically in late summer or early fall, once you're confident the chicks have fledged and the adults are no longer using the box. Remove old nesting material completely, scrub the interior with a stiff brush (no soap or chemicals), and let it dry fully before closing it back up. Leaving old nesting material inside encourages mites and can deter birds from reusing the box next season.
If you want to clean mid-season, only do so when there is absolutely no sign of active breeding, meaning no adults entering and exiting, no sound of chicks inside. The hinged side panel or hinged roof you built makes this inspection easy. A quick peek once a week during breeding season tells you a lot, and birds generally tolerate a brief, non-intrusive check if you're quick about it.
Each fall, check the screws and roof for weather damage. Tighten any loose fasteners, replace screws that are rusting (swapping to fresh galvanized or brass), and check that the floor corner drainage gaps haven't clogged with debris. A box that gets this basic annual attention will last five to ten years easily, especially if you used cedar.
A few material alternatives worth knowing
Wood is the default for small birdhouses, and for good reason. It insulates well, breathes, and is easy to work with basic tools. But if you enjoy experimenting with craft materials, there are other approaches that work for decorative or sheltered situations. Felted bird houses are a popular craft option for indoor or covered porch display, though they're not suitable for fully exposed outdoor mounting in wet climates without extra waterproofing.
For your first build, stick with 3/4-inch cedar or pine. Get one box built, mounted, and used by actual birds before you start experimenting with alternative materials or designs. There's nothing quite like watching a chickadee carry nesting material through an entrance hole you drilled yourself. That's the moment all the measuring and drilling pays off, and it makes every subsequent build more satisfying.
FAQ
Can I build a small bird house using reclaimed wood, like old fence boards or scrap lumber?
Yes, but make sure you use untreated, exterior-safe cedar or pine boards (not pressure-treated and not chemically sealed). Even if the wood was meant for interiors, a birdhouse can work outdoors if the surfaces are left bare or only lightly treated on the outside with raw linseed oil.
What if I accidentally drill the entrance hole slightly too large?
If you see a tight fit, do not enlarge the entrance after the hole is built, instead verify you drilled to spec during cutting. A hole that is even slightly oversized can invite unwanted competitors, especially House Sparrows, and fixing it usually requires replacing the front panel.
Should the roof be removable for cleaning, and how do I make it secure without blocking airflow?
For a small birdhouse that targets wren, chickadee, and nuthatch sizes, aim for a snug, non-sliding roof that still sheds water. If your design uses screws, countersink so screw heads do not interfere with roof seating, and avoid any caulk on the inside surfaces that could off-gas or seal ventilation.
How do I decide the best mounting height for a small birdhouse?
Mounting heights can be adjusted, but keep them within the typical ranges for your target species. If you place the box too low, it can be easier for predators to reach and can increase disturbance; if it is too high, some beginner-friendly species (like wrens) may be less likely to use it.
Do I need to sand the inside for a cleaner look, or can I leave the wood rough?
If the board surfaces are smooth, you can add a subtle foothold by leaving rough-sawn interior surfaces or adding a light texture on the inside wall above the floor. Avoid sanding the interior smooth, and do not add perches that extend past the entrance, since some perches increase predator access.
Can I open the cleanout panel during the breeding season to check on progress?
Only partially. A single quick check can be done if you do not see active adults entering and exiting and you do not hear chicks, but avoid repeated inspections and extended open time in warm weather. If you find active breeding, stop and return later.
Is leaving the outside unpainted always safe in rainy climates?
It depends on the box material and your climate. In wet regions, bare wood still works when the roof overhang and drainage are correct, but you should prioritize frequent annual inspections and clear floor holes, since blocked drainage is a bigger failure point than rain exposure alone.
How should I apply raw linseed oil, and how often should I reapply it?
If you do use oil, keep it thin and only on the exterior, and allow full curing before mounting. Re-oiling too often can seal the exterior surface, which reduces moisture exchange over time, so one season of protection and then reassess is usually enough.
How far should I place the birdhouse from trees, shrubs, or branches near the entrance?
No, do not install a birdhouse too close to dense brush or directly adjacent to branches that reach the entrance area. Birds need a clear flight path, and predators use cover to approach, so leave a buffer space around the front of the house.
How can I tell whether my birdhouse is getting unsafe due to hardware or weather damage?
Use the correct fasteners and check them every fall. A good rule is to ensure no rust is visible, the roof is still tight, and the floor drainage holes are not clogged with droppings or debris; replacing corroded screws is cheaper than repairing a dropped floor.
Next Articles

How to Build a Chimney Swift Bird House DIY Guide
Step-by-step DIY plans to build a chimney swift bird house, with correct dimensions, placement, and weatherproofing for

How to Build an Oriole Bird House: Step-by-Step DIY
Step-by-step DIY for building an oriole bird house with right dimensions, weatherproofing, predator-safe placement, and

How to Build a Chickadee Bird House Step by Step
Step-by-step DIY chickadee bird house with cut list, chickadee entry sizing, ventilation, drainage, and mounting tips.