You can build a solid bird training perch in an afternoon using a natural wood branch, a couple of screws, and a base you likely already have in the garage. If you are starting from scratch, follow a step-by-step guide to make a bird perch that fits your bird's feet and training needs. The key is matching the perch diameter to your bird's foot size, using non-toxic wood, and keeping the whole thing stable enough that your bird trusts it. Once it's built, you use it as the anchor point for step-up and recall training, short sessions, positive rewards, and a setup that puts the perch right at your bird's chest level so stepping across feels easy and natural.
How to Make a Bird Training Perch: DIY Step-by-Step

Marcus Thornton
11 May 2026
What a bird training perch is (and when you actually need one)

A training perch is a standalone, portable perch you use specifically during training sessions, not a cage perch, and not a permanent play stand. The idea is that it gives your bird a consistent, neutral location to land and stand during step-up, step-down, and recall work. Because it lives outside the cage, it doesn't carry the territorial associations that cage perches sometimes do, which makes it a better starting point when you're working on new behaviors.
You'll use it most for step-up training (teaching your bird to step from the perch onto your hand on cue), step-down training (the reverse, stepping from your hand back to the perch), and recall work where the bird learns to hop or fly toward you on command. It also doubles as an enrichment perch during out-of-cage time, which is a nice bonus for foot health since varying perch surfaces and diameters help birds distribute pressure across different parts of their feet rather than loading the same spots every time.
If you're doing consistent training with a pet bird, or even conditioning a wild-caught rehab bird to tolerate handling, a dedicated training perch makes sessions more structured and the environment more predictable for the bird. That predictability reduces stress and speeds up learning considerably.
Picking the right design for your bird's size and goals
Before you build anything, nail down the perch diameter. The most useful rule of thumb is that the perch should let your bird wrap its foot about three-quarters of the way around. That grip position is comfortable, secure, and doesn't strain the tendons. If the perch is too thin, the bird's toes curl all the way under and the foot stays in a tense, cramped position. Too thick and the bird can't grip properly at all.
| Bird Size/Species | Recommended Perch Diameter | Minimum Perch Length |
|---|---|---|
| Finches, canaries, budgies | 3/8" to 5/8" (0.95–1.6 cm) | 4 inches |
| Parakeets (budgerigars) | 3/8" to 3/4" (0.95–1.9 cm) | 4 inches |
| Cockatiels, lovebirds | 5/8" to 7/8" (1.6–2.2 cm) | 6 inches |
| Small conures, caiques | 3/4" to 1" (1.9–2.5 cm) | 8 inches |
| Medium parrots (African greys, Amazons) | 1" to 1.5" (2.5–3.8 cm) | 10 inches |
| Large parrots (macaws, cockatoos) | 1.5" to 2" (3.8–5 cm) | 12+ inches |
For training perches specifically, you want some natural variation in diameter along the perch length rather than a perfectly uniform dowel. Uniform dowel perches put constant pressure on the same spot on the underside of the foot every single time the bird stands, which over time contributes to pressure sores and bumblefoot. A natural branch with slight curves and diameter changes solves this automatically. If you do use a dowel as the base, I'll show you how to wrap sections of it to add that variation.
For design style, you have three practical options: a simple T-perch on a weighted base (best for small to medium birds and beginners), an adjustable-height T-perch with a threaded rod or PVC stand (good if you train multiple birds or want to dial in chest-level positioning), and a multi-perch ladder or step setup (great for recall training where the bird hops between stations). If you want to go the PVC route, you can adapt an adjustable-height design by selecting safe PVC pipe, adding a stable weighted base, and securing the perch bar so it cannot shift during training adjustable-height T-perch with a threaded rod or PVC stand. Pick based on your bird's size and what training you're actually doing. If you're just starting with step-up work, the basic T-perch is all you need.
Materials and tools you'll need
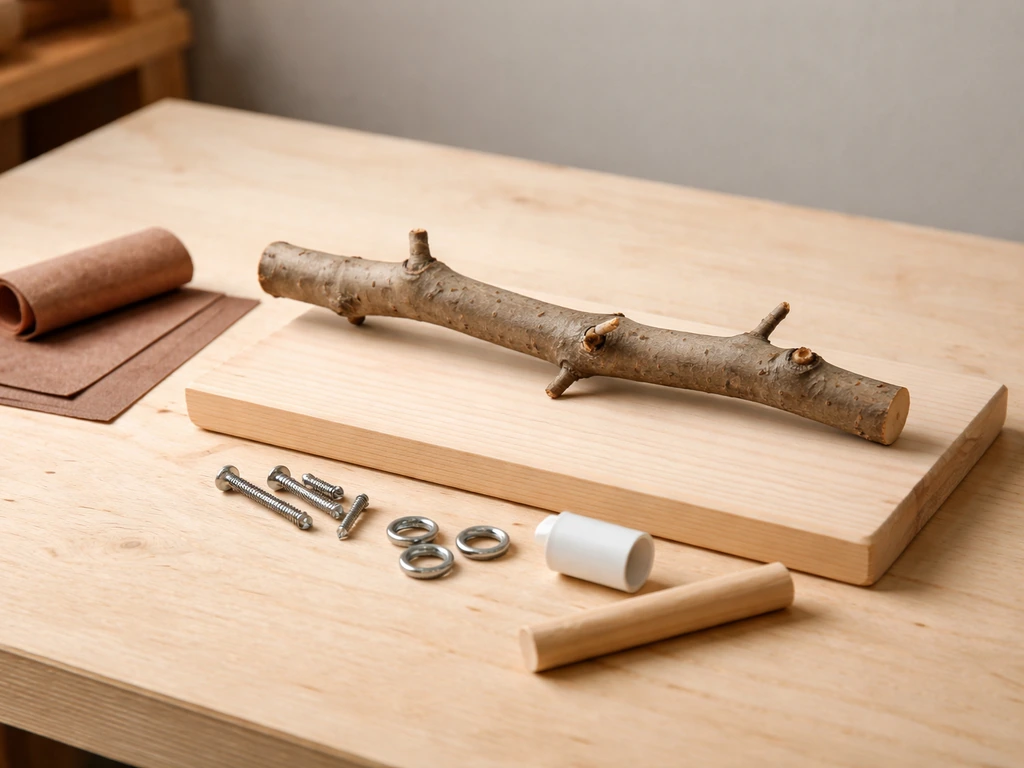
The good news is that most of this comes from your backyard, a hardware store scrap bin, or repurposed lumber. You don't need specialty bird-supply pricing for any of it.
For the perch itself
- Natural wood branch from a bird-safe tree: apple, pear, beech, ash, willow, poplar, elm, grapevine, or maple are all solid choices. Make sure the tree hasn't been sprayed with pesticides or herbicides. Grapevine is particularly good for texture and foot health.
- OR a wooden dowel in the right diameter for your bird — use this as a fallback if you can't source a branch, and plan to add texture wrapping
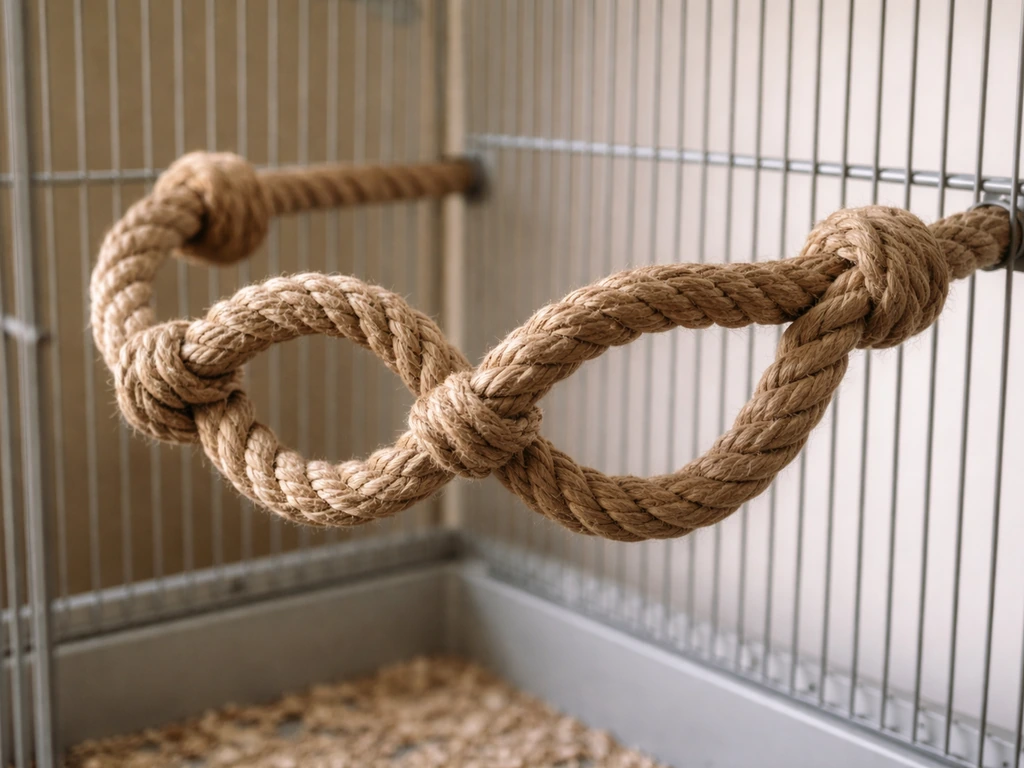
- Hemp rope or untreated cotton rope (3/8" to 1/2" diameter) for wrapping sections of a dowel perch or adding a rope perch segment
- Non-toxic wood glue or beeswax (optional, for securing rope wraps)
- Bird-safe finish: raw, unfinished wood is ideal — no varnish, stain, or paint
For the stand/base
- A piece of 3/4" plywood or solid lumber for the base (at least 10" x 10" for stability with small birds, 14" x 14" for medium/large birds)
- A 3/4" wooden dowel or PVC pipe for the upright post (3/4" PVC is a common, easy-to-source option that works well)
- Two wood screws (1.5" to 2") for attaching the post to the base
- Wood glue or a pipe flange fitting for PVC builds
- Optional: non-slip rubber mat material or furniture feet for the base underside
- Optional for adjustable builds: threaded rod (1/2"), two hex nuts, and a drill with spade bits
Tools
- Hand saw or jigsaw (for cutting branch/dowel to length)
- Drill with bits appropriate for your post diameter
- Sandpaper (120 and 220 grit) for smoothing cut ends
- Screwdriver or drill driver
- Tape measure
- Optional: bench vise or clamps to hold pieces while drilling
Step-by-step build plans
Plan 1: Basic T-perch
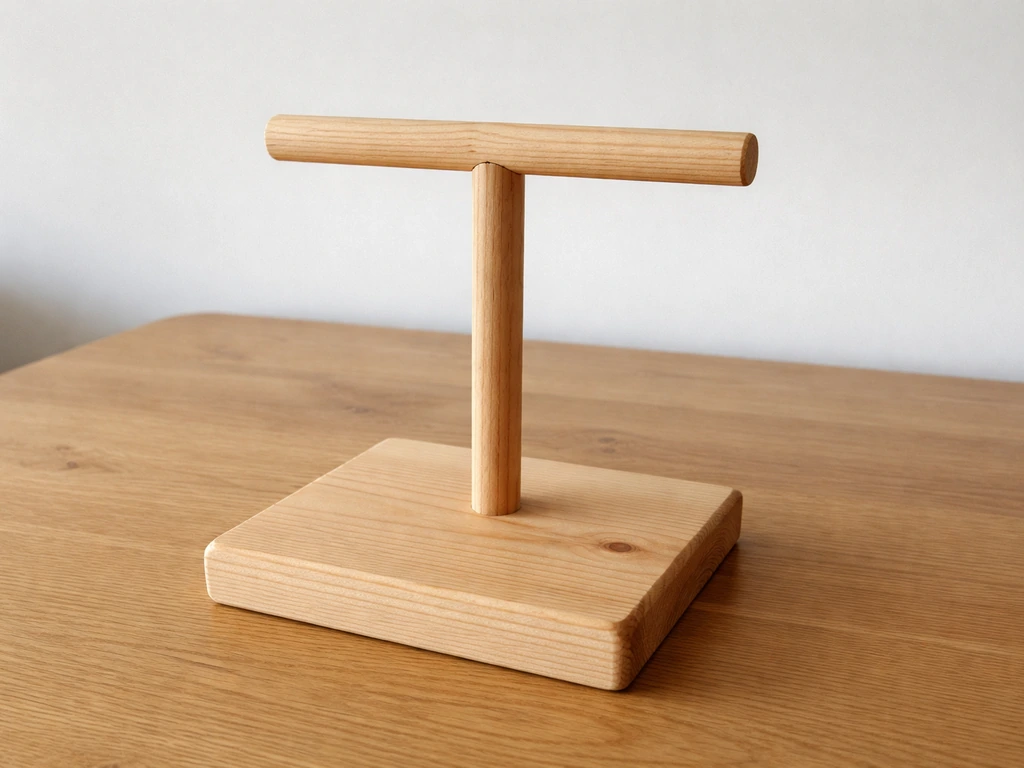
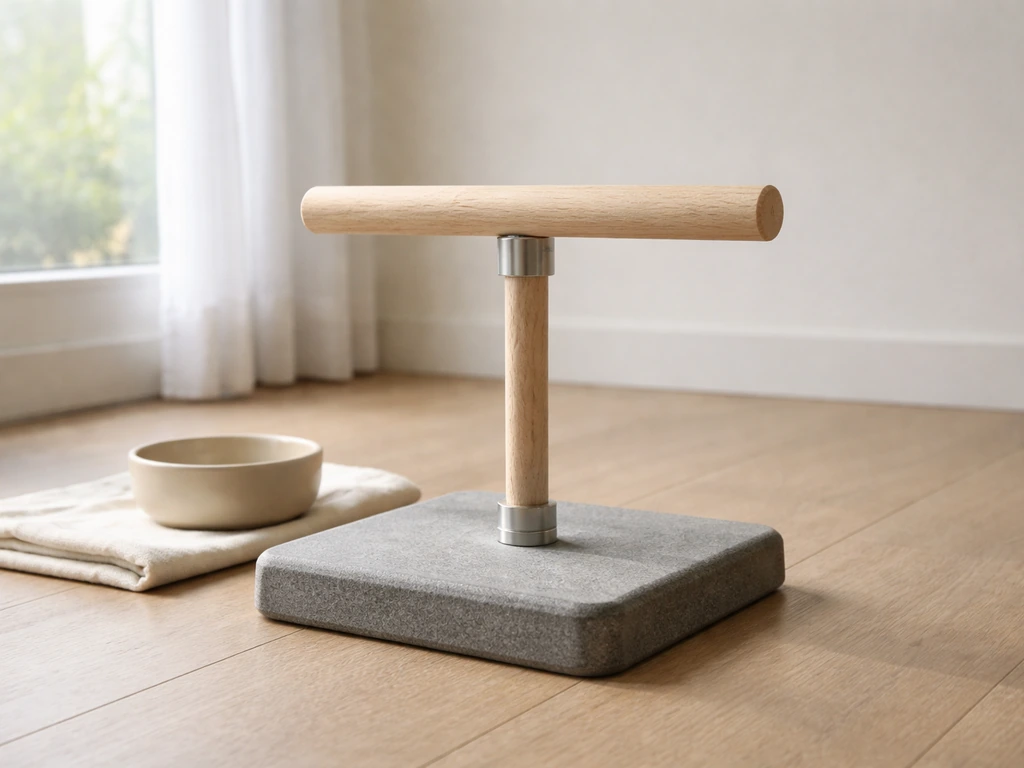
This is the version I'd tell anyone to build first. It takes about 30 minutes and requires almost nothing in the way of tools. The finished product is a weighted base with a vertical post and a horizontal perch bar forming a T shape.
- Cut your base board to size (10"x10" minimum for small birds). Sand the edges smooth so you're not handling splinters during training sessions.
- Mark the center of the base board and drill a hole slightly smaller than your post diameter. For a 3/4" dowel or PVC post, drill a 5/8" pilot hole first, then widen to fit snugly.
- Cut your vertical post to a height appropriate for your training setup. For most small-to-medium birds, 12" to 18" works well. You want the perch bar to end up at roughly your forearm height when the base is on a table, so the bird is at chest level when you present your hand.
- Sand the bottom 1" of the post, apply wood glue to the pilot hole, and press the post in firmly. For a PVC build, use a pipe flange screwed directly to the base instead — it's more secure and makes the post removable.
- Let the glue cure for at least an hour, then add two screws from the underside of the base up into the post for extra hold.
- Cut your horizontal perch branch or dowel to the appropriate length for your bird (see the table above). Drill a hole through the top of the vertical post at the diameter of your perch branch.
- Thread the perch branch through the hole so equal length hangs on each side, creating the T shape. Secure it with a small screw from above through the post and into the perch, or wrap tightly with hemp rope if you'd rather avoid screws in the perch itself.
- If using a uniform dowel as the perch bar, wrap several sections with hemp rope or untreated cotton rope to add diameter variation and grip texture. Space the unwrapped sections so the bird has multiple surface options.
- Attach non-slip rubber feet or a rubber mat piece to the underside of the base so it doesn't skate across the table when the bird lands.
Plan 2: Adjustable-height T-perch
This version lets you raise and lower the perch height, which is genuinely useful for recall training (you can start with the bird and your hand close together, then gradually increase the distance and height difference as the bird gets confident). It's also handy if you train multiple birds of different sizes.
- Build the base exactly as in Plan 1, but make the post hole slightly larger — you're going to slide an outer sleeve (a section of wider PVC pipe or a wooden tube) over a threaded rod or inner post.
- Cut a length of 1" PVC pipe to your maximum desired height (say, 24"). This is your outer sleeve, fixed to the base.
- Cut a length of 3/4" threaded rod about 6" longer than the outer sleeve. This inner rod slides inside the sleeve.
- Drill a cross-hole through the top of the outer PVC sleeve. Feed a bolt through this hole — tightening it presses against the inner rod to lock it at the height you want. A wing nut here means you can adjust without tools.
- Attach the perch bar to the top of the inner threaded rod using a T-fitting or by drilling through a wooden cap you've glued to the rod top.
- Add the same rope-wrap texture and non-slip base finish as Plan 1.
Plan 3: Multi-perch ladder/recall station
Once your bird reliably steps up, a multi-perch setup turns the training perch into a recall station. The bird learns to hop between perch rungs toward you on cue, which is the foundation of true recall training. Think of it as a short horizontal ladder on legs, with perch rungs spaced close enough that the bird can step or hop between them confidently. If you want a similar step-up and recall setup, you can also learn how to make a bird rope ladder with secure spacing and safe materials multi-perch ladder.
- Cut two side rails from 1/2" wooden dowel or PVC pipe, each about 18" long. These are the ladder sides.
- Drill evenly spaced holes along each rail — spacing depends on your bird's body length. For budgies and small birds, 3" apart. For medium parrots, 5" to 6" apart.
- Cut perch rungs from your natural branch or rope-wrapped dowel at a consistent length (enough to extend 1" past each rail on both sides).
- Thread the rungs through the holes and secure each with a small drop of non-toxic wood glue or a thin screw from outside the rail.
- Mount the ladder on two vertical legs (same construction as the T-perch post/base, just with two bases instead of one, or a single wide base with two posts).
- The ladder can be angled slightly upward (10 to 15 degrees) toward you during training — this means the bird is always stepping slightly up toward your direction, which mimics natural movement toward a reward and makes recall feel intuitive.
- If you want to add rope sections alongside the wood rungs for variety, this is the place to do it — alternate one wood rung, one rope rung, repeat.
Mounting and placement: where and how to set it up safely
The base needs to be genuinely stable. A bird landing from a hop or a short flight puts more force on a perch than you'd expect, and if the whole stand wobbles or tips, you'll spook the bird and set back training significantly. For small birds, a base weighted with a thin layer of tile adhesive or a small paving stone glued underneath adds low-center-of-gravity stability without making the stand unwieldy. For larger parrots, you need a substantially heavier base, at least a 14"x14" piece of 3/4" plywood, and even then you might want to clamp it to a table edge during early sessions.
Place the training perch away from the bird's home cage during sessions. This is intentional, you want the bird's attention on you and the perch, not on the cage as a safe retreat. Keep the perch away from windows with direct traffic outside (movement distracts and stresses birds), away from drafts from vents or fans, and away from the kitchen where Teflon-coated cookware fumes can be lethal. Eye level or slightly below when you're seated at a table is a good working height for most training.
For recall training specifically, position the perch so the bird is facing you at a distance you can control. Start with the perch right next to your hand, literally touching distance, and move it back only once the bird is stepping to your hand with zero hesitation. Positioning the target perch at the bird's chest level (rather than above its head or down at its feet) makes the step-up motion feel natural and reduces the chance the bird refuses or retreats.
Training setup: how to actually use the perch to teach step-up and recall
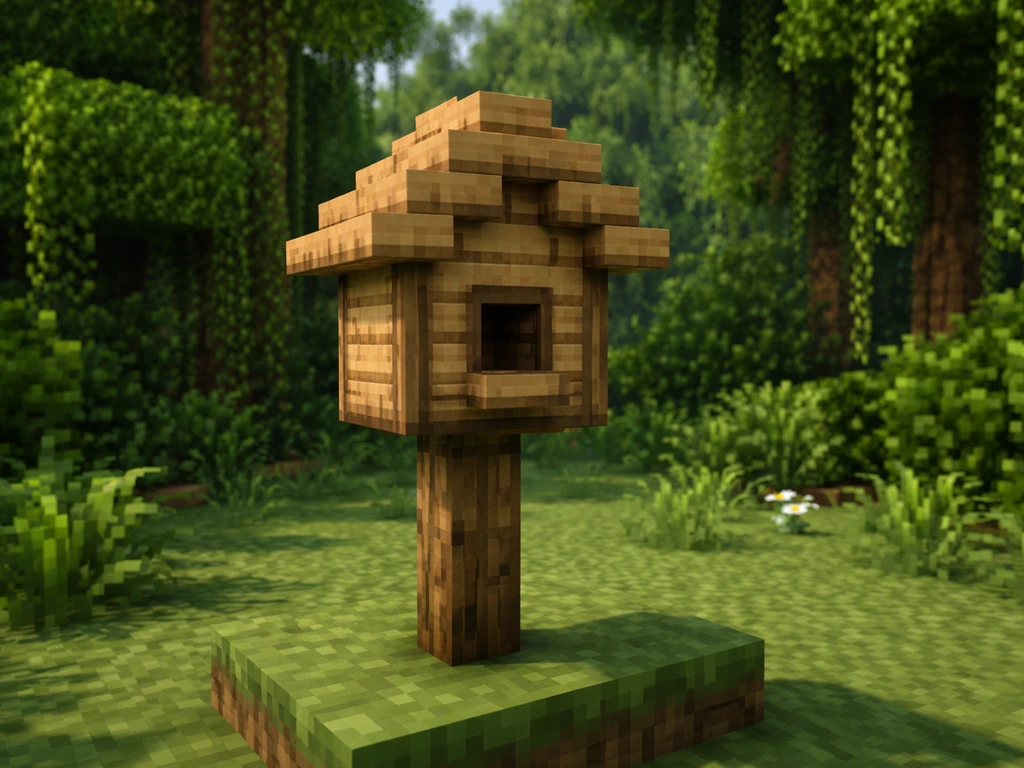
The training perch is a tool, and how you introduce it matters as much as how you built it. If you also mean a Minecraft bird house, you can adapt the same woodworking idea into blocks and decorative steps in-game how to make a bird house in minecraft. If you're looking for a Minecraft version of this setup, see how to make a bird perch in Minecraft so your in-game bird area matches your training style.
Start by simply letting your bird explore the perch without any training pressure. Put it near the cage (not inside), sprinkle a few favorite treats on the perch surface or at the base, and let the bird approach on its own terms. Don't push, don't lure aggressively, just let curiosity do the work. This usually takes one to three short sessions depending on the bird's confidence level.
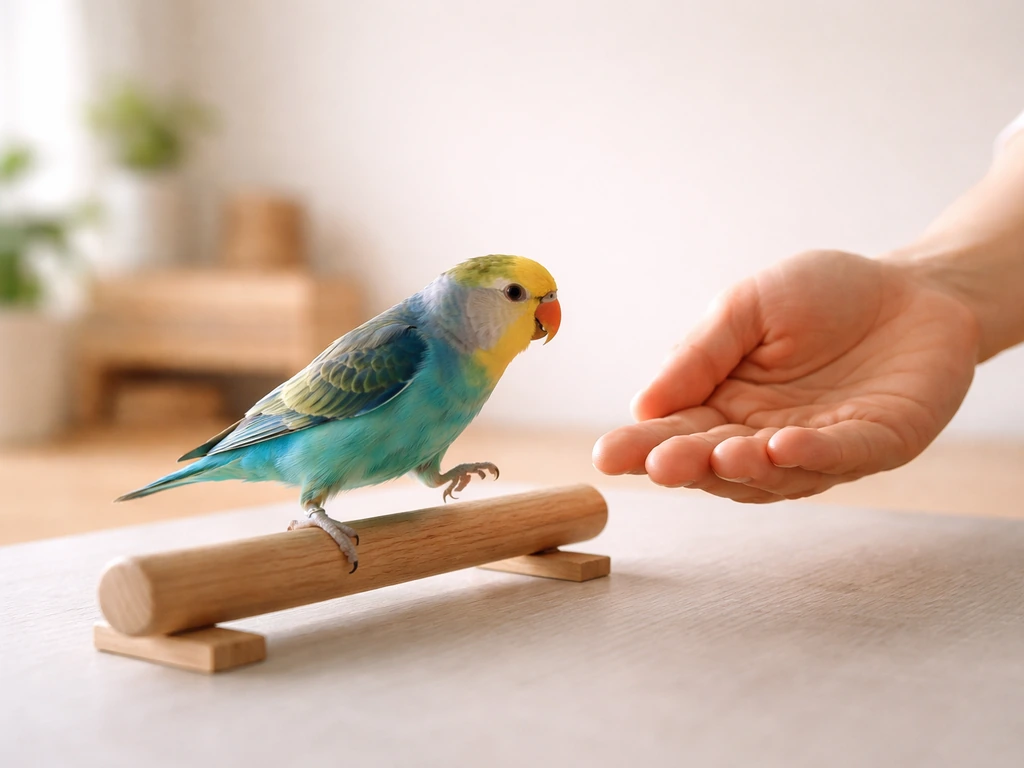
Once the bird is comfortable standing on the perch without alarm calls or puffed feathers, you're ready to start step-up work. Hold your hand or finger, or a hand-held dowel if you're working with a bird that isn't yet finger-tame, at the bird's chest level, just in front of its feet. You want the bird to step up onto your hand as the path of least resistance. Offer a high-value treat the moment any foot lifts toward your hand, and mark the moment with a consistent sound (a clicker works well, or a short verbal cue like "good"). Keep sessions to three to five minutes maximum.
Step-down comes next, taught in separate sessions after step-up is reliable. Lower your hand toward the training perch until the bird's feet touch it, reward immediately as both feet land. The reason you teach these separately over days to weeks rather than all at once is that pairing them in the same early session can confuse the bird about which behavior earns the reward.
For recall work on the multi-perch setup, you build the behavior in stages: comfort on the perch, then step-up to your hand from the nearest rung, then the same from one rung back, then two rungs back, and so on. The rule of thumb is that if the bird's performance drops, hesitating, refusing, or looking anxious, you've moved too fast.
If the bird hesitates, refuses, or looks anxious, RSPCA guidance suggests you have likely moved too fast and should slow down to calm, gradual training with short sessions across days How to Train Your Pet Bird.
Shorten the distance, lower the difficulty, end the session on a successful rep, and try again tomorrow. Trying to push through refusals almost always makes things worse. If the bird hasn't mastered basic step-up reliably, it is not ready for distance recall work, that sequencing matters.
Always end on a win. Even if the session went poorly, find something the bird did correctly, reward it, and then close the session. This keeps the bird's association with the training perch positive and means it will approach the next session with curiosity rather than avoidance.
Cleaning, maintenance, and safety checks
Natural wood perches pick up droppings and food residue quickly, and you need to clean them regularly, not just for hygiene but because soiled perches can harbor bacteria that cause foot infections, which is the last thing you want when you're handling a bird's feet frequently during training.
For daily maintenance, wipe down the perch surface with a damp cloth after each training session to remove any visible debris. For a more thorough weekly clean, scrub the perch with a diluted bleach solution (1 ounce of bleach per quart of water is a safe and effective ratio for bird-safe disinfecting), then rinse very thoroughly with clean water and let the perch dry completely before using it again.
Residual bleach fumes are harmful to birds, so full drying is non-negotiable, leave it overnight if you're unsure. If you're cleaning rope sections, the same diluted bleach rinse works, but rope dries slowly so plan around that. If you’re wondering how to make a rope bird perch, plan for secure tying, tight spacing, and thorough cleaning so the surface stays safe and comfortable rope sections.
Do a quick safety check before every training session. It takes about thirty seconds and could prevent a real injury. Run your hand along the perch surface feeling for splinters, sharp protruding screw tips, or loose rope ends the bird could get a toenail caught in. Wiggle the perch bar and the vertical post to confirm nothing has loosened. Check the base for any wobble. If anything feels unstable, fix it before the bird goes anywhere near it.
Natural wood perches do wear and eventually crack or become too soft and porous to clean properly. When a perch reaches that point, replace it, the branch you used is renewable and costs nothing but time to source. [Replace perches and habitat accessories when they are worn or damaged](https://www. petmd.
com/bird/parakeet-care-sheet), and follow PetMD’s cleaning guidance for safer maintenance of your parakeet’s setup. Rope perches should be retired as soon as any significant fraying appears, because loose strands can wrap around toes and cut off circulation surprisingly fast. The test is simple: if it doesn't come fully clean after washing, or if the structure feels compromised, swap it out. Your bird's feet and your training relationship are worth more than squeezing extra weeks out of a worn-out perch.
If you want to extend the life of a natural branch perch, lightly sand any rough spots every few weeks rather than waiting for a full splinter to form. Rotating two perches on alternating weeks also gives each one proper drying time and slows wear overall, a small thing that adds up over months of regular training use.
FAQ
What perch diameter should I use if my bird’s feet seem to be different sizes on each foot?
Measure with a gentle trial fit, aim for a wrap that reaches about three-quarters of the way around the foot on the more difficult side, then choose the larger effective grip. If one foot consistently grips poorly, you may need a slightly smaller or larger section on the perch by adding a second wrapped area rather than changing the whole perch.
Can I use pressure-treated lumber or any wood that “seems” safe because it is natural?
Avoid pressure-treated wood and any timber with unknown coatings, stains, or sealants, even if it looks natural. Stick to untreated, non-toxic wood, and if you used screws or fasteners near the perch surface, keep all materials fully exposed and uncoated so your bird can not chew or scrape off residues.
How should I choose the wood if my bird likes to chew or investigate the perch?
For chewers, prioritize denser hardwood branches (or repeatedly inspect softer growth that dents easily), and avoid perches with knots that can crumble. If the bird chews chunks off, replace the branch immediately, do not rely on sanding or “patching” because small loose splinters can form quickly.
Is it okay if the perch surface is smooth, or should it be rough?
A slightly textured surface is better than perfectly smooth because it improves traction and reduces toe strain. If the branch is very slick, lightly sand only enough to remove sharp ridges while keeping some natural texture, then clean thoroughly before use.
Do I need to sand and seal a DIY perch to make it cleaner?
Sealing is usually not recommended because many finishes add odor, taste, or unknown chemicals, and they can crack where the bird bites. Instead, rely on regular wiping and periodic bleach disinfection with full rinsing and complete drying, and replace the perch once it becomes porous or hard to sanitize.
Can I attach the perch bar with glue instead of screws?
Use screws or other mechanical fastening if possible, especially for larger birds and any adjustable designs. Glue joints can loosen with heat and repeated handling, and hidden failure is hard to detect during your quick wobble check.
How do I prevent the base from sliding on smooth floors?
Add grip at the bottom, such as non-toxic rubber feet or a textured non-slip pad under the base, and keep the perch centered so landing force does not lever it sideways. If you glued weight underneath, verify the added weight does not make the base tip during a controlled wiggle test.
What’s a safe way to make an adjustable-height T-perch without the bird getting pinched?
Use hardware that does not create gaps or pinch points at height adjustments, and cover any exposed moving threads. Before each session, move the perch through its adjustment range by hand to ensure nothing binds, and confirm the locking mechanism holds when you apply side pressure.
My bird lands and immediately fluffs. What should I adjust first?
First check stability (wobble is a common cause), then confirm the height is at the bird’s chest level when you are seated. If the bird is still alarmed, shorten the session and go back one step, let the bird explore longer before starting step-up rewards.
Can I use the training perch right next to the cage for faster learning?
You can initially place it closer for comfort, but during training sessions keep it away from the cage so the bird cannot retreat to cage associations. If you must start near the cage, gradually increase distance over a few sessions while keeping your cues and reward timing consistent.
How long should I wait before attempting recall after the bird learns step-up?
Only move to distance recall when step-up is reliable with zero hesitation across your usual session conditions. In practical terms, if the bird skips the hand, steps back, or refuses even occasionally, finish step-up improvement first, then introduce recall in small staged increments.
What if my bird refuses the perch after I clean it with bleach?
Do not shorten the drying time. Rinse very thoroughly, then dry completely with no lingering odor, and consider wiping with clean water after the bleach rinse to remove any film. If the bird still avoids it, switch to more frequent damp-cloth cleaning and replace the perch if it remains off-putting or worn.
How often should I replace a natural wood perch?
Replace when cracks deepen, the wood becomes too soft to clean well, the perch surface cannot be made splinter-free by sanding, or the structure no longer feels trustworthy in your wobble test. For rope sections, retire as soon as fraying appears or if the rope does not fully clean after washing.
What is the safest way to clean rope sections if they are used as part of the training perch?
Use the same diluted bleach ratio, rinse thoroughly, then plan for longer drying time than wood. Keep the rope out of use until it is fully dry and does not smell of disinfectant, because damp rope can harbor odor and residue, and birds are more likely to chew it.
Next Articles
How to Make a Rope Bird Perch Step by Step Safely
Step-by-step guide to build a safe rope bird perch, choosing the right rope, mounting, knotting, sizing, and maintenance

How to Make a Bird Perch Out of PVC Pipe
Step-by-step guide to build a stable, non-slip PVC bird perch with safe finishes, mounting options, and maintenance tips
How to Make a Bird House in Minecraft: Step-by-Step
Step-by-step Minecraft bird house build with exact blocks, placement tips, and upgrades to help birds spawn and use it.