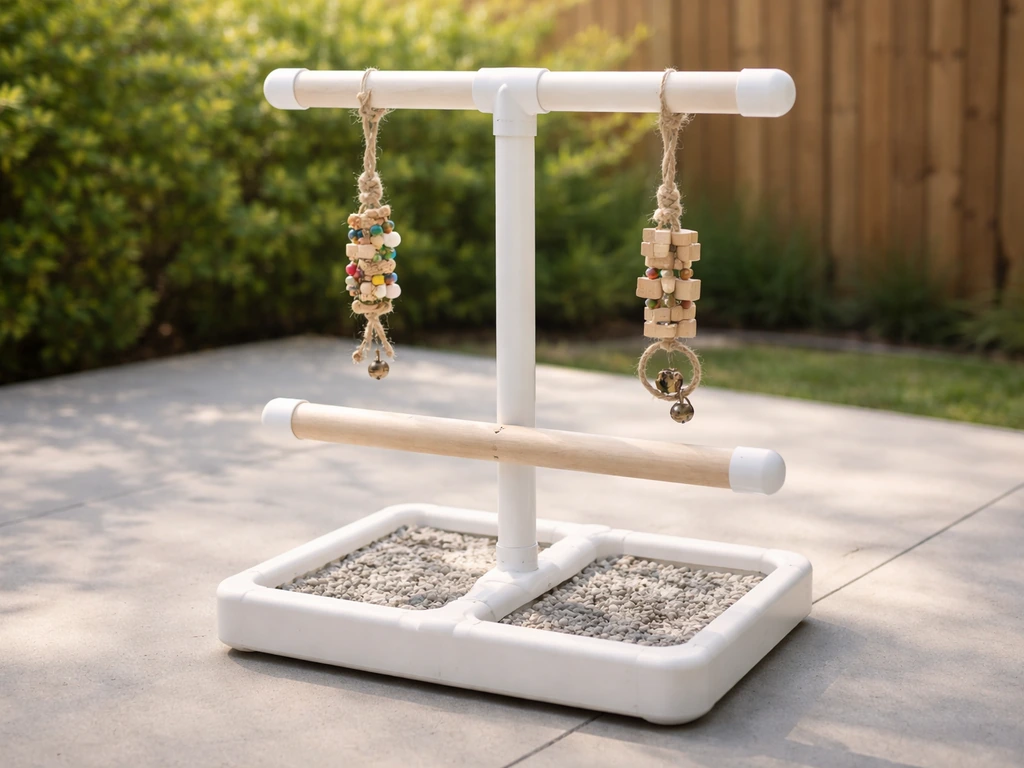
You can build a solid PVC bird play gym in an afternoon for under $30. Use Schedule 40 PVC pipe (3/4" diameter for small birds like budgies and cockatiels, 1" for medium parrots), cut it to length with a hacksaw or pipe cutter, join the pieces with T-fittings and elbow connectors, and finish with a weighted base or clip-on cage mount. The result is a safe, washable, customizable enrichment structure your bird will actually use.
DIY PVC Bird Play Gyms Instructions: Step-by-Step Guide

Marcus Thornton
11 May 2026
Materials and bird-safety choices
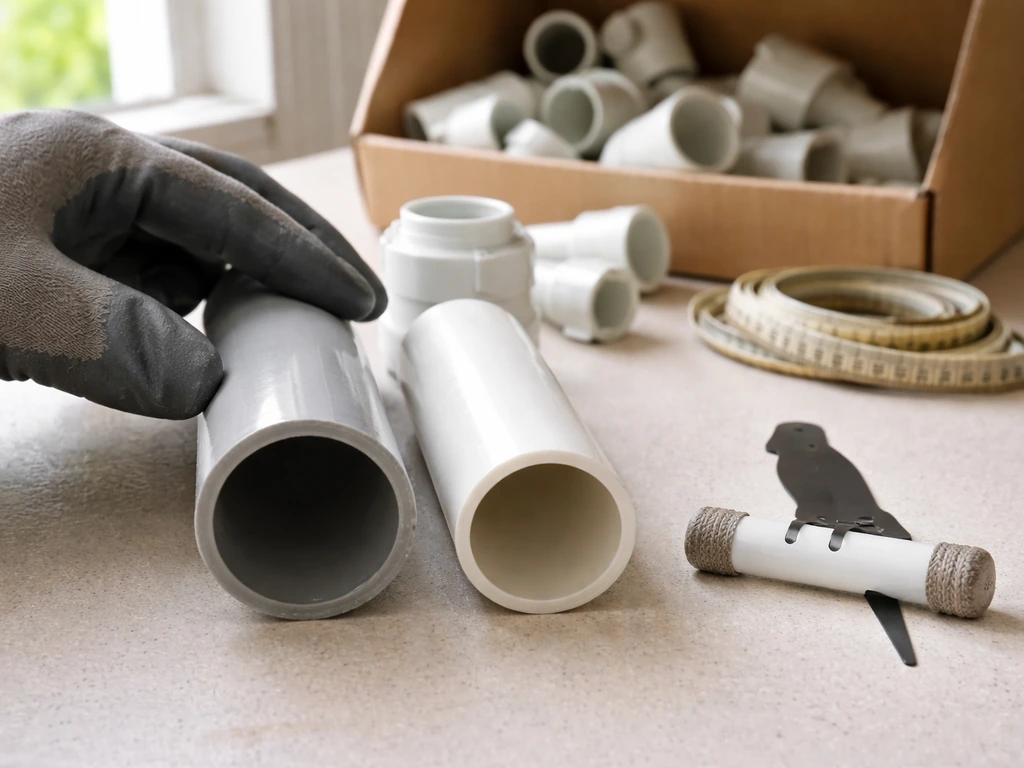
Schedule 40 PVC is the right choice for this project. It's rigid enough to hold perches and toy attachments without flexing, widely available at any hardware store, and affordable. Schedule 80 has thicker walls and is slightly stronger, but the outside diameter is identical to Schedule 40 for any given nominal size, so all fittings stay compatible. For a bird gym, the extra wall thickness of Schedule 80 isn't necessary unless you're building something very large or mounting a heavy bird like a macaw. Stick with Schedule 40.
For pipe diameter, match the size to your bird. The goal is that your bird's toes wrap about two-thirds of the way around the perch without meeting underneath or lying flat on top. Either extreme causes pressure points and long-term foot problems. Here's a practical starting point by bird size:
| Bird Size | Examples | Recommended Pipe Diameter |
|---|---|---|
| Extra small | Finches, canaries, budgies | 3/8" to 3/4" |
| Small-medium | Cockatiels, lovebirds, parrotlets | 3/4" to 7/8" |
| Medium | Sun conures, caiques, small Amazons | 3/4" to 1" |
| Large | African greys, large Amazons, large cockatoos | 1" to 1.5" |
For hardware, avoid anything galvanized. Galvanized metal contains zinc and sometimes lead, both of which are toxic to birds. Use stainless steel hardware (screws, wing nuts, quick links) or food-grade plastic clips throughout. When it comes to cement or primer for joining joints, birds' respiratory tracts are extremely sensitive to chemical fumes. PVC solvent cement is fine to use, but it needs to fully off-gas before your bird ever touches the gym. Cure it outdoors and give it a minimum of 48 to 72 hours in fresh air before bringing it inside, longer in cold or humid conditions.
Here's your core materials list for a starter gym sized for a budgie or cockatiel. Scale pipe lengths up for larger birds.
- Schedule 40 PVC pipe, 3/4" nominal diameter, one 10-foot length (or buy two 5-foot sticks)
- Four 3/4" T-fittings
- Four 3/4" 90-degree elbow fittings
- Two 3/4" four-way cross fittings (or use extra T-fittings in a pinch)
- Two 3/4" end caps
- PVC primer and solvent cement (purple primer, clear or gray cement)
- Stainless steel screw hooks or cup hooks (for toy attachment)
- Small stainless steel quick links or carabiners
- Sandpaper (120-grit and 220-grit)
- Optional: a weighted PVC base plate made from 1.5" pipe and end caps filled with sand or gravel
Tools you'll need: a hacksaw or ratcheting PVC pipe cutter, a tape measure, a permanent marker, a cordless drill with small drill bits (1/8" and 3/16"), and a round file or deburring tool. That's it. You don't need a miter saw, and you don't need power tools beyond the drill.
Design planning and your parts list
Before cutting a single piece, sketch your layout on paper. Even a rough sketch helps you count fittings and avoid a frustrating trip back to the hardware store. There are three common layouts for a PVC bird gym, and each suits a different space and bird personality.
| Layout Style | Best For | Base Needed | Complexity |
|---|---|---|---|
| T-bar (single horizontal perch on two uprights) | Budgies, travel/portable use, cages | Weighted end caps or cage clamps | Beginner |
| H-frame (two horizontal bars on four uprights) | Cockatiels, small conures, multiple birds | Four-leg weighted base | Beginner-intermediate |
| Tower (multi-level with platforms and ramps) | Medium parrots, enrichment-focused builds | Wide four-leg base plus cross-bracing | Intermediate |
The T-bar is the best starting point if this is your first build. It's a simple horizontal perch bar connected to two vertical uprights that either sit in weighted end-cap bases or clip onto a cage top. You can expand it later by adding a second horizontal bar to turn it into an H-frame. I built my first one in about 45 minutes, made several mistakes, and still ended up with something my cockatiel loved immediately.
Starter T-bar cut list (3/4" Schedule 40 PVC, fits budgies and cockatiels)
- 2 pieces at 12" (vertical uprights)
- 1 piece at 18" (main horizontal perch bar)
- 2 pieces at 6" (base cross-arms, one per upright)
- 2 T-fittings (one per upright, connecting upright to base arms)
- 1 T-fitting (center of horizontal bar, for toy hook attachment)
- 4 end caps (one per base arm end, fill two with gravel for weight)
For an H-frame, duplicate the horizontal perch bar and add a second pair of T-fittings so you have two perch levels at different heights. For a tower build, add 4" to 6" platform pieces (short horizontal stubs with end caps serving as landing spots) at each level junction. Keep platform stubs at least 4 inches long so small birds have room to stand and turn.
Cutting and prepping your PVC
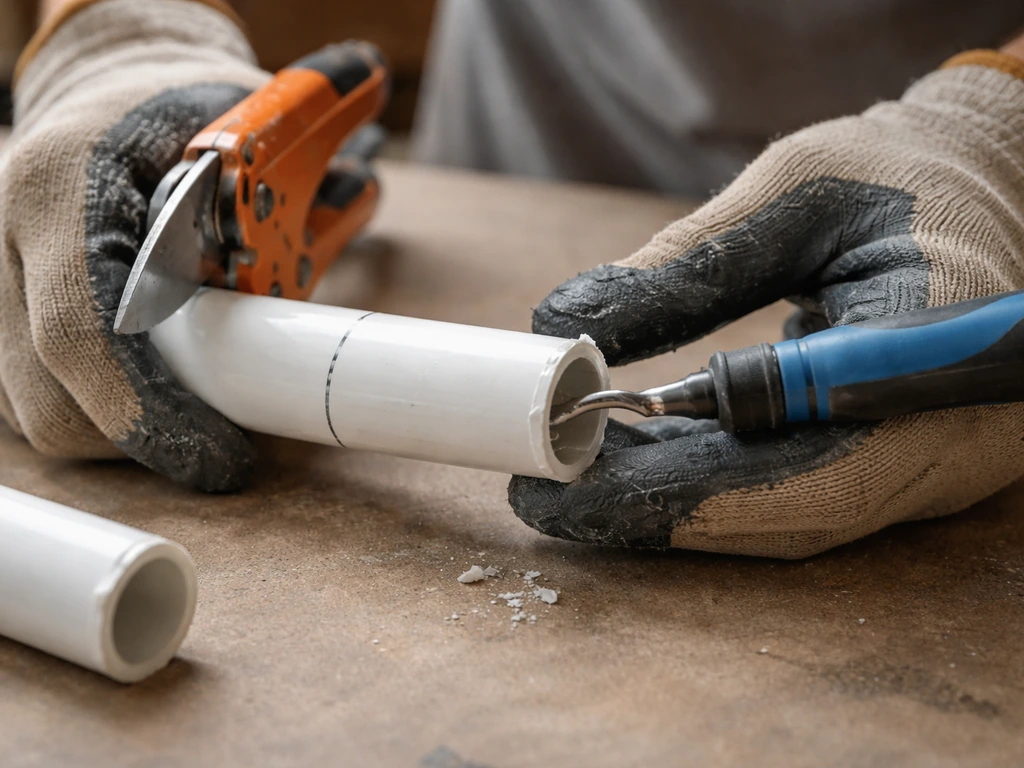
Measure twice, mark with a permanent marker, and cut once. A ratcheting PVC pipe cutter gives you the cleanest cut and is the fastest option, but a hacksaw with a fine-tooth blade works just as well. If you use a hacksaw, clamp the pipe to a workbench or use a miter box to keep the cut straight. Crooked cuts mean fittings won't seat flush, and that creates wobble.
After every cut, deburr the inside and outside of the pipe end. Use the deburring tool on the inner rim, then hit both edges with 120-grit sandpaper. Any sharp edge or burr can nick a bird's foot or beak. Follow up with 220-grit to smooth everything to almost a polished finish. Run your finger along every cut end before assembly. If it catches your fingernail, it needs more sanding.
Lightly sand the outside of each pipe end that will be glued into a fitting. About an inch back from the end is enough. This roughens the surface so the cement bonds properly. Do the same inside each fitting socket. Then dry-fit every piece before you open the cement. Lay the whole gym out on your workbench and confirm every joint fits snugly. PVC fittings should require a firm push to seat and should bottom out with a slight twist. If a joint slides in too easily or wobbles, that fitting is a bad match for that pipe. Swap it before cementing.
For the drill work: anywhere you want to add a screw hook for toys or a hanging element, mark the spot and drill a pilot hole with a 1/8" bit first. A pilot hole prevents the PVC from cracking when you drive in the screw hook. For larger attachment hardware, step up to a 3/16" bit. Always drill perpendicular to the pipe surface, not at an angle.
Assembly and making it stable
Work in a well-ventilated area (outdoors is ideal) and do all your cementing in one session so pieces don't cure at misaligned angles. The workflow is: apply PVC primer to the pipe end and the inside of the fitting socket, wait about 10 seconds until the primer becomes tacky but isn't fully dry, then immediately apply cement to both surfaces and push the pipe into the fitting with a quarter-turn twist to spread the cement evenly. Hold the joint for 15 to 30 seconds. Cure time varies with temperature and humidity, so don't rush it. Let the full assembly sit undisturbed for at least 24 hours in a warm, dry spot before handling or loading it with toys.
Stability is the part beginners underestimate. A lightweight PVC gym with narrow base arms tips over easily, and a tipped gym can injure a bird or trap a foot. There are three ways to address this, and I recommend combining at least two of them.
- Fill base-arm end caps with dry sand or fine gravel before capping them permanently. This lowers the center of gravity without adding visible bulk.
- Widen your base footprint. Base cross-arms of 6" feel barely stable. 8" to 10" cross-arms make a big difference. Go wider if floor space allows.
- Add cross-bracing between uprights. A single diagonal pipe segment connecting one upright to the opposite base arm eliminates lateral sway the same way it does in deck framing and PVC trellis builds. Use 45-degree elbows and a short connecting pipe for a clean look.
If you're mounting the gym to a cage top instead of using a freestanding base, use cage-top clamps or J-hooks made from bent stainless steel. The connection points need to be able to hold at least a few times the bird's body weight when the bird lands hard or flaps. Tighten clamps fully and check them every week. A gym that shifts or slides on the cage top is a foot-entrapment risk.
Adding perches, toys, and enrichment
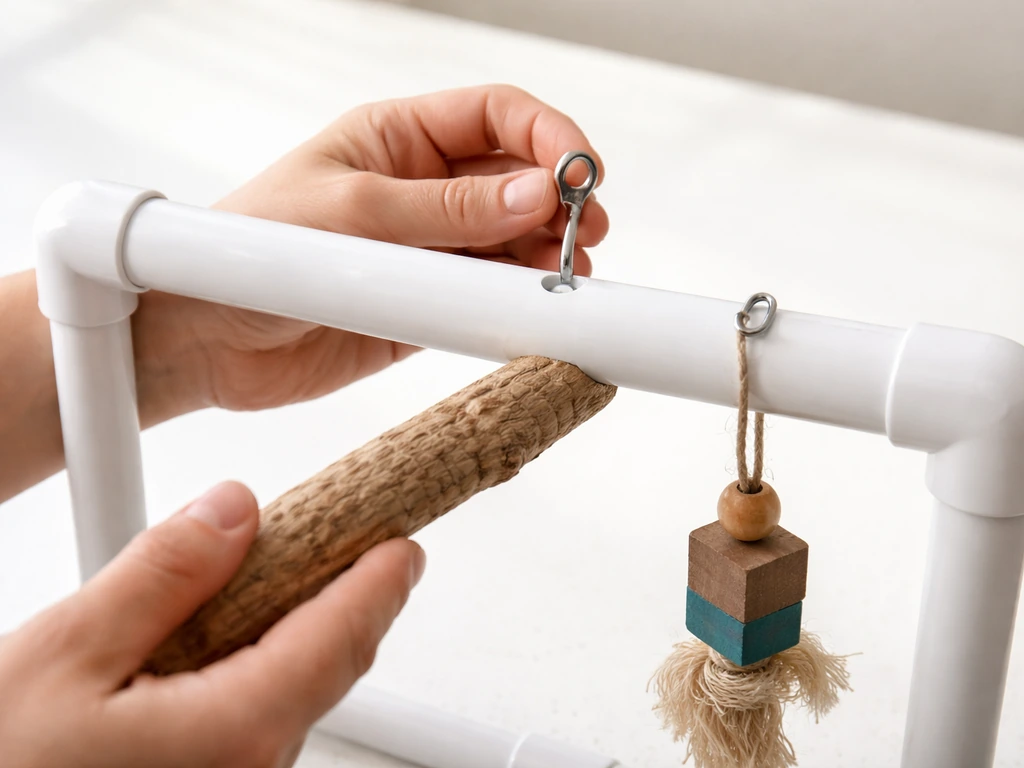
The PVC frame is the skeleton. What you add to it is what makes it actually enriching for your bird. The main horizontal bar is already a perch, but adding natural wood perches alongside the PVC ones is a good idea. Wood provides texture variation and helps wear nails naturally (smooth PVC alone doesn't do this). Attach wood perch stubs to the frame using stainless steel screw hooks: drill a pilot hole into the wood end, twist in a screw hook, then clip that hook to a quick link attached to a hook in the PVC frame. That way you can swap perches in and out easily.
For toys, use the pre-drilled pilot holes to install screw hooks at the top center of the horizontal bar and at any T-fitting stub you've added for that purpose. Use stainless steel quick links to hang toys. Never use split rings or jump rings from jewelry supply stores because birds can catch a beak or toenail in the gap. Quick links close completely and can be tightened with your fingers. Check that every toy hangs freely without touching another hanging item at rest. Toys that tangle together can trap feet or necks.
A few enrichment additions that work especially well on PVC gyms:
- Rope boing coils attached between two horizontal bars (great for climbing)
- Small stainless steel cups clipped to the frame as foraging stations for treats
- Cork bark or driftwood strips zip-tied to the frame with bird-safe plastic zip ties (trim ends flush so there are no sharp points sticking out)
- Hanging foot toys or rings from the center T-hook
- A swing hung from the top bar on two separate attachment points so it swings level
Avoid any toy hardware made from galvanized metal. Also skip adhesives, paints, or coatings on anything the bird will chew. Birds off-gas test everything with their beaks, and what seems like a small amount of residue matters when a bird weighs 80 grams. If you want to wrap part of the PVC pipe for grip texture, use natural fiber rope (sisal or hemp) and tie it off tightly at both ends rather than gluing it.
Finishing, safety checks, and where to put it
Before your bird touches this thing, do a complete inspection. Run your hands over every surface and joint. Check every cut edge for sharp spots. Tug each toy attachment point hard. Wiggle each perch to confirm it doesn't rotate or pull free. Push on the top of the frame from different angles to test for wobble. If it rocks more than a couple of millimeters, widen the base or add weight to the base arms before introducing your bird to it.
If you used solvent cement, cure the finished gym outdoors for at least 48 to 72 hours before your bird uses it. In cool or humid conditions, extend that to a full week. The fumes from fresh PVC cement can irritate or poison a bird even in small concentrations. This isn't something to rush. Set it on the porch or in the garage with good airflow, and let it fully off-gas. Same principle applies if you added any rope wrapping with cord that was treated or dyed. When in doubt, rinse everything in plain hot water, let it dry fully, and then do the off-gas wait.
For placement, a freestanding gym works best on a flat, stable surface at or slightly above your bird's normal perch height so they feel confident stepping onto it from their cage. To round out your DIY setup, you can also learn how to make a bird bed so your bird has a safe place to rest and sleep a freestanding gym works best.
Keep it away from drafts, air vents, ceiling fans, and kitchen areas (cooking fumes are a serious bird hazard). If you're mounting it on a cage top, confirm the cage top bars are strong enough to hold the gym plus a bird landing hard. For outdoor use during supervised time, anchor the base against wind. A gust that tips a gym onto a bird can cause serious injury.
Troubleshooting common problems
It wobbles no matter what
The most common cause is base arms that are too short or too lightweight. First, try adding more weight to the base end caps (a tablespoon more sand makes a real difference). If that doesn't fix it, cut new base arms that are 2 to 4 inches longer and redo those joints. Adding a diagonal cross-brace as described above is the most effective single fix for lateral wobble. If you glued joints slightly out of square, the cure is usually to add a stabilizing cross-member rather than disassembling the frame.
Fittings won't fully seat or keep popping off
This usually means the pipe end was cut at a slight angle. The fix before cementing is to re-cut the end square. If you've already cemented and a joint is misaligned, cut it apart with a hacksaw, add a coupling fitting, and re-cement with a short connecting stub. PVC is forgiving that way. You can almost always recover from a bad joint without scrapping the whole build.
The perch diameter feels wrong for your bird
If your bird is gripping the PVC perch bar and their toes wrap all the way around and meet underneath, the pipe is too thin. Petersen Products’ PVC pipe spec table lists Schedule 40 PVC dimensions, including 3/4" nominal OD of 1. 050 in and a minimum wall thickness of 0. 113 in [3/4" nominal OD and minimum wall thickness for Schedule 40 PVC](https://www.
petersenproducts. com/pipe-specs/pvc). Go up a nominal pipe size (3/4" to 1", for example). If they're standing flat-footed without any grip, the pipe is too thick.
Either add smaller-diameter natural wood perches alongside the frame, or rebuild that perch segment with a smaller nominal pipe. Getting the perch diameter right matters more than most people think. The foot health issues caused by wrong perch size are the same ones that come from smooth same-diameter perches in cages.
Bird won't use the gym at all
This is almost always a trust and familiarity issue, not a gym problem. Place the gym near the cage for a few days before asking your bird to step onto it. Put a few favorite treats on the perch bar. Let the bird investigate from the cage before you expect them to step off the cage and onto the new structure. If you want to move from a simple PVC gym to an enclosed play space, follow a bird tent guide for safe airflow and secure fabric panels. Some birds take two weeks to fully accept a new gym. It's not a failed project.
Cleaning and keeping it safe over time
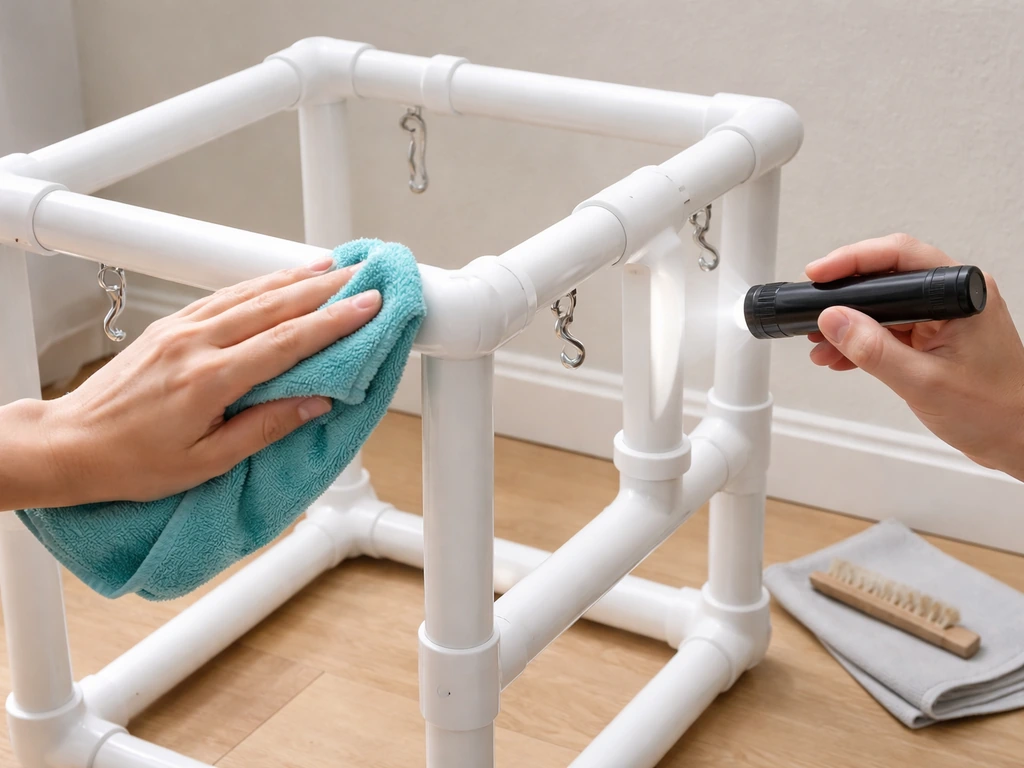
PVC is one of the easiest materials to clean, which is one of the big practical advantages of this kind of build. Wipe down the entire gym at least once a week with a damp cloth. For deeper cleaning, bring the whole structure to the bathtub or a utility sink, scrub with a mild dish soap and a stiff brush, rinse thoroughly, and let it dry completely before putting it back. Any residual soap can irritate a bird's feet or get ingested during preening, so rinse longer than you think is necessary.
Do a monthly safety inspection even if everything looks fine. Check every screw hook for tightening (they back out over time). Check every quick link to confirm it's fully closed. Look at rope and natural perch elements for fraying, cracking, or mold. If a perch won't come clean or shows cracks that could trap a nail, replace it. The same rule applies to any toy attachment: if it's frayed, broken, or corroded, it comes off the gym. A bird nail caught in a corroded quick link gap or a frayed rope loop is a life-threatening emergency, and it's completely preventable.
Beyond cleaning and hardware checks, reassess your bird's enrichment every few months. Birds habituate to the same toys and perch layout. Rotating toys, adding new textures (cork bark, different wood species), and rearranging the layout keeps the gym mentally stimulating. The modular nature of PVC fittings means you can reconfigure the whole structure without cutting new pipe. Just soak cemented joints you want to separate in warm water to soften them, or cut and re-couple with a short stub. This kind of adaptability is exactly why PVC is such a good material for DIY bird enrichment builds.
If you enjoy this kind of project, there are natural next steps in the same direction. If you want to go further with enrichment beyond a starter frame, you can also learn how to make a bird gym that fits your space and your bird’s size. A homemade bird swing, a soft fabric bird tent for sleeping enrichment, or a full bird playpen setup all follow similar build logic and share many of the same safety principles around materials, attachment hardware, and placement. Each project builds on what you learned here.
FAQ
Can I use the PVC gym indoors right after cementing, or do I really need to wait the full off-gas time?
You should wait the full cure and off-gas window before allowing chewing or climbing. If you must test it sooner, keep the bird away and run ventilation for several hours, then do a smell check after handling the joint with gloves. Any strong chemical odor means more waiting time.
What’s the difference between “nominal size” and the real pipe measurement, and how does it affect perch fit?
Nominal size does not equal the exact outside diameter, so buying “3/4 inch” PVC may still vary slightly by manufacturer. To avoid foot problems, aim for the two-thirds toe wrap target using the physical pipe outside diameter you receive, and adjust perch parts with wood stubs if needed.
Will a freestanding PVC gym work on carpet, or does it need a hard surface?
Carpet can cause the base to sink, tilt, and scrape during climbing, increasing wobble and tipping risk. Put the gym on a flat, non-slip mat or thin rubber liner, and verify stability by pushing from multiple angles after the bird has tested it a few times.
How can I prevent the gym from sliding even if I mount it to a cage top?
Use cage-top clamps or J-hooks rated for the combined load, then add a non-slip barrier between clamp and cage top (for example, a thin food-safe rubber sheet) if the clamp still tightens securely. Re-check weekly, because metal-to-metal connections loosen faster with vibration.
Is it safe to add rope, fabric, or natural fibers for grip and toys?
Rope and natural fibers are fine if they are tied off tightly and kept chew-resistant. Avoid any rope treated with dyes, finishes, or flame retardants, and replace rope as soon as you see fraying or loose strands that could snag toes.
Why do some joints become wobbly even when the glue set correctly?
Wobble usually comes from mis-seated fittings, crooked cuts, or flexing at the base arms. Before cementing, do a firm dry-fit with a slight twist, and after assembly check diagonal movement. If it wobbles after cure, add a stabilizing cross-member rather than adding more cement.
Can I paint or add a coating to the PVC to make it look nicer or resist stains?
Avoid paints, sealers, and coatings on any surface the bird can chew or mouth. Even “non-toxic” products may off-gas or flake. If you want visual variety, use removable wood perch stubs or add accessories that can be replaced instead of coating the frame.
What should I do if my bird’s feet get sores or their nails are overgrowing after using the gym?
Stop using the suspect perch segment immediately and switch to an appropriate-texture perch, often smooth wood or a slightly different diameter. Overgrowth and soreness can be a sign the perch is the wrong diameter or has insufficient texture, and it can also indicate a broader nail-health issue that may require an avian vet.
Are screw hooks and quick links considered “bird-safe” if they are stainless steel?
They are safer than galvanized, but you still need to check for sharp threads, burrs, and complete closure. After installing, run a gloved finger around the contact points and tug hard to confirm nothing can rotate into a gap. Replace any part that shows corrosion, deformation, or repeated loosening.
How often should I re-tighten hardware like screw hooks and check toys?
Do a quick daily glance for dangling items and any new movement, then a more thorough inspection at least monthly. Tighten screw hooks whenever you notice gaps or toy wobble, and remove any toy that tangles with others at rest.
Can I disassemble or modify a cemented PVC joint later?
Yes, PVC solvent cement joints can usually be cut apart if needed. If you want to avoid total rebuilds, use modular sections (perch stubs or detachable cross-members) and plan joints so you can re-couple with short connecting stubs instead of redoing the whole frame.
How do I know the gym is the right height and placement for my bird?
The best starting position is at or slightly above the bird’s normal perch height, where stepping on feels low-risk. If your bird refuses to step up after several days, move the gym closer to the cage and reduce the “first landing” distance by lowering one level or adding a temporary perch ramp.
Next Articles
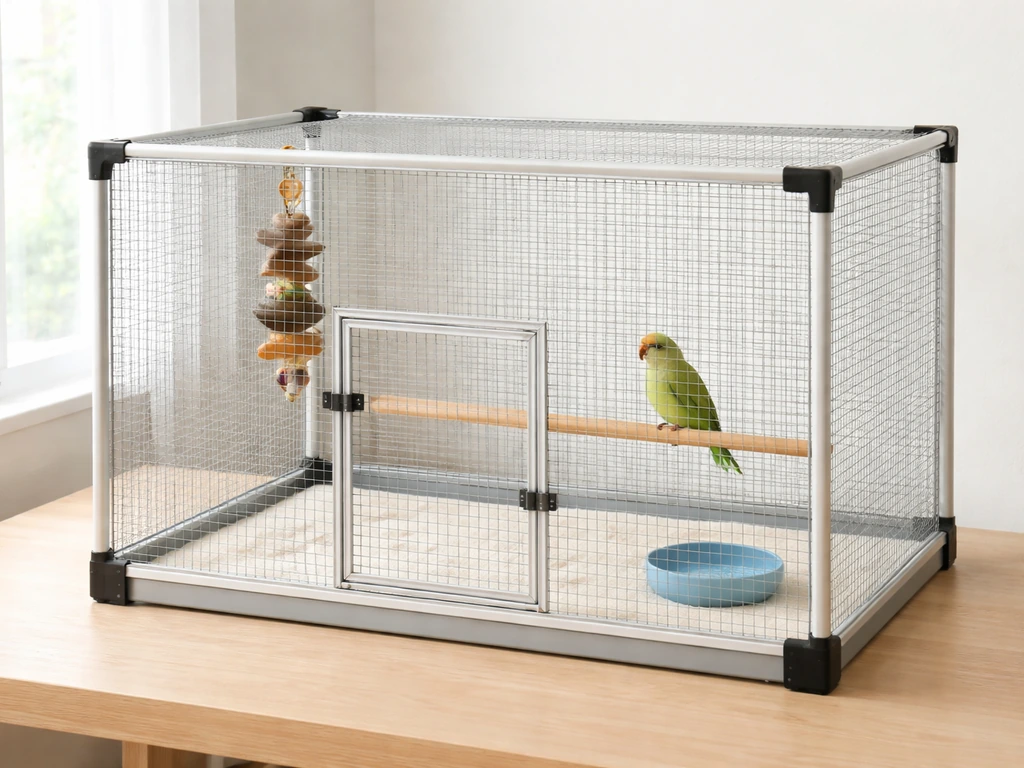
How to Make a Bird Playpen: DIY Safe Build Guide
Step-by-step guide to build a safe DIY bird playpen with size planning, escape-proof materials, setup, and enrichment.
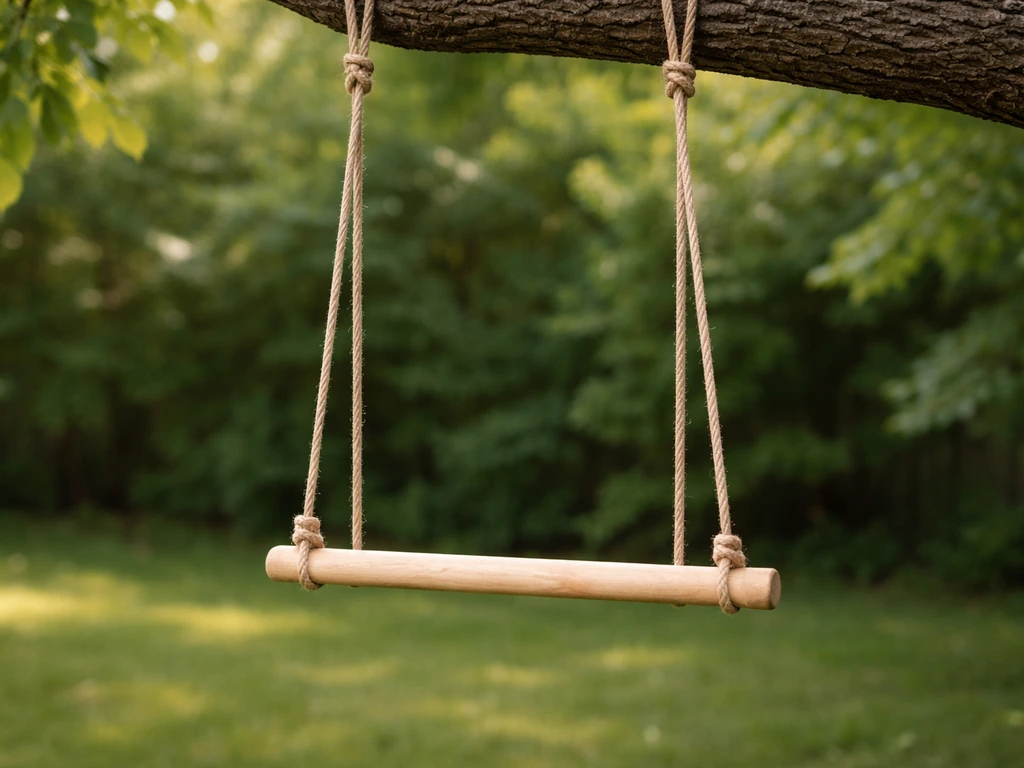
How to Make a Homemade Bird Swing: DIY Guide
Build a safe backyard bird swing with step-by-step DIY plans, sizing for bird types, and mounting and maintenance tips.
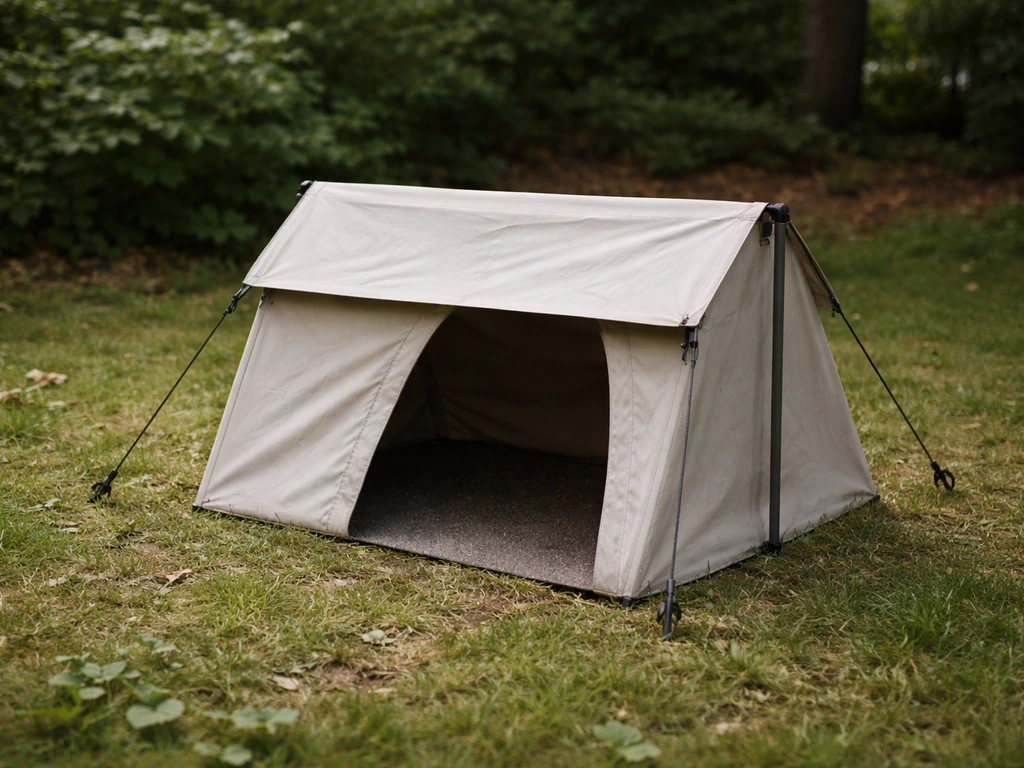
How to Make a Bird Tent: DIY Steps, Materials, Sizing
DIY bird tent guide with materials, sizing, step-by-step builds, weatherproofing, safety, and placement for backyard bir