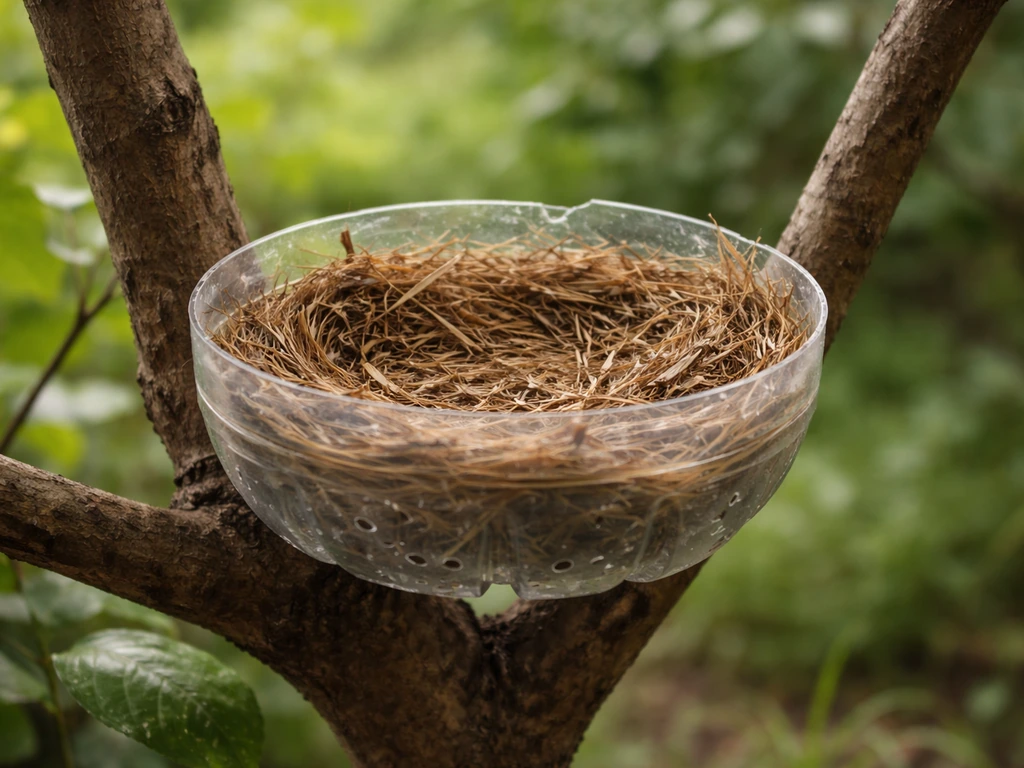
You can make a usable plastic-bottle nesting cup in about 30 minutes with a clean bottle, a craft knife, sandpaper, and a few natural materials. Cut the bottle into a shallow open cup, smooth every edge so no plastic can cut a bird, poke drainage holes in the bottom, line it with untreated grass or moss, and secure it firmly to a branch or fence post at the right height. Done right, this gives small birds like robins, song sparrows, or doves a stable platform to build on or raise young in. Done poorly, a slick-sided or jagged bottle does nothing at best and harms birds at worst. This guide covers every step so yours actually works.
How to Make a Bird Nest With a Plastic Bottle

Marcus Thornton
15 May 2026
What "bird nest" actually means when you're building one
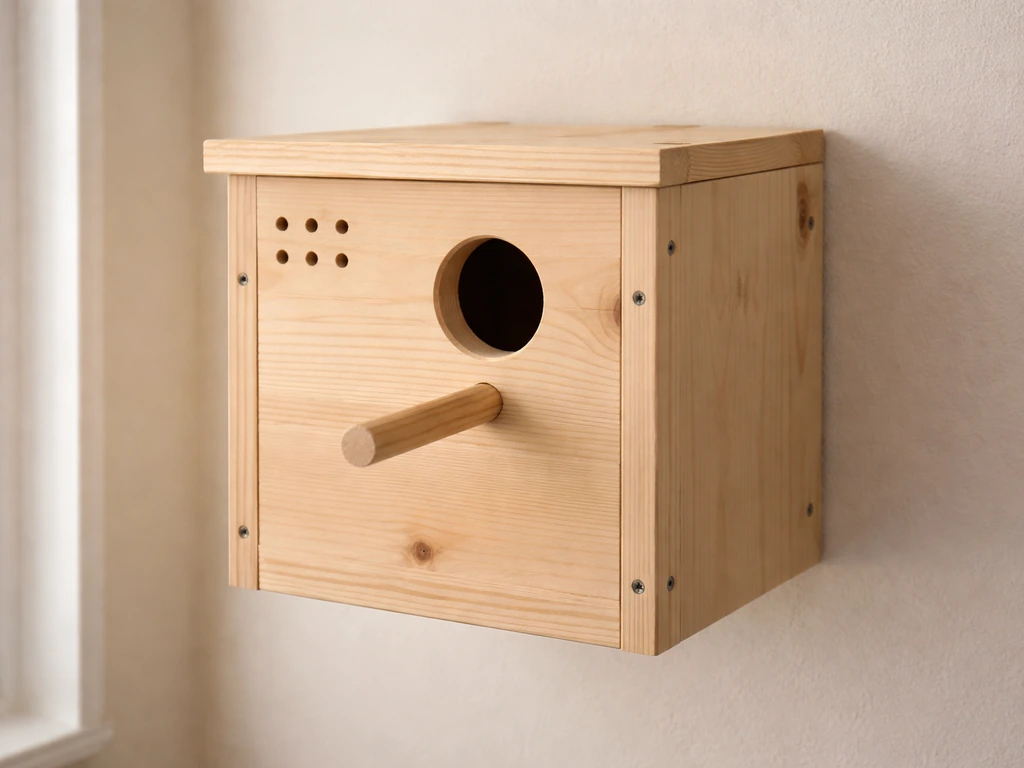
Before you cut anything, it helps to know what you're making and what it isn't. A nesting cup (also called an open-cup nest support or surrogate nest) is an open, bowl-shaped platform that holds nesting material and gives birds a stable base. This is different from an enclosed birdhouse or nest box, which has walls, a roof, and a small entrance hole sized for a specific species. Enclosed boxes suit cavity-nesting birds like bluebirds, wrens, and chickadees. Open-cup structures suit birds that naturally build exposed nests: robins, song sparrows, mourning doves, finches, and similar species.
A plastic-bottle build is best understood as a nest support, not a nest itself. Wild birds will still construct or arrange their own material inside it. Your job is to give them a stable, safe, correctly sized bowl that holds that material in place and drains properly. Wildlife rehabilitation centers including the Tufts Wildlife Clinic use exactly this principle, building surrogate nest cups from plastic margarine or similar containers with drainage holes poked in the bottom. You're applying the same idea in a backyard context, using a repurposed bottle instead of a tub.
If you're drawn to making a decorative nest-shaped craft rather than a functional wildlife structure, that's a completely separate project. This guide focuses on the functional version. For enclosed box styles, projects like a cockatiel nest box or a chickadee nest tube follow different dimensions and designs entirely. If you want a cockatiel specifically, use a cockatiel nest box design rather than an open-cup bottle nest.
Choosing the right bottle and gathering your supplies
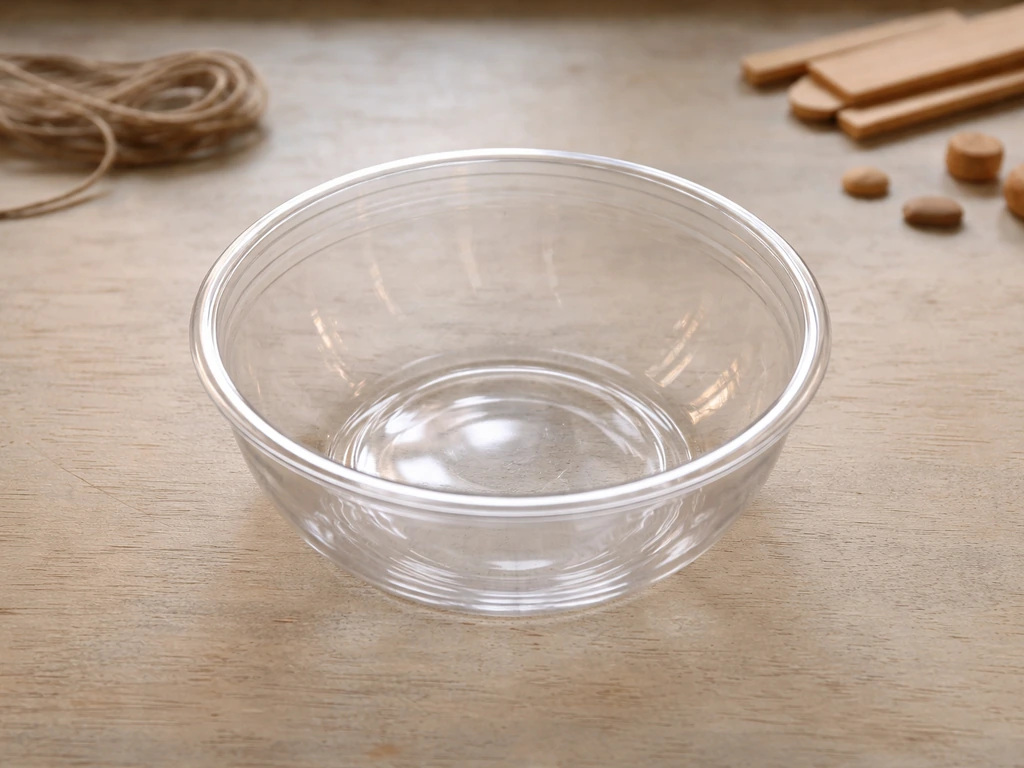
The bottle matters more than people expect. You want a wide-diameter plastic bottle, ideally 1 liter or larger, with a rounded base. A 2-liter soda bottle, a wide-mouthed juice bottle, or a large yogurt or margarine tub all work well. Avoid narrow bottles where the base diameter is less than about 4 inches (10 cm), because the cup will be too small and shallow. Thin, brittle plastic (like cheap water bottles) cracks when you cut it and leaves sharp micro-shards. Thicker HDPE or PET plastic, the kind used in juice and soda bottles, cuts more cleanly.
One honest mistake I made early on: I used a clear, thin-walled water bottle because it looked tidy. The first time I tried to smooth the cut edge, the wall flexed and created new micro-tears. Go for thicker-walled bottles every time. Rinse the bottle thoroughly and let it dry completely before you start cutting.
Here is everything you'll need for this build. Most of it you probably already have at home.
- 1 clean plastic bottle (2-liter soda bottle, wide-mouthed juice bottle, or similar, at least 4 inches / 10 cm diameter at the base)
- Craft knife or sharp scissors (a craft knife gives cleaner cuts on curved plastic)
- Sandpaper or a nail file (100-grit or coarser to smooth cut edges; 220-grit to finish)
- Awl, skewer, or small drill bit (for drainage and ventilation holes)
- Zip ties, wire, or strong twine (to mount or hang the finished cup)
- Natural lining materials: untreated dry grass clippings, moss, dried leaves, or small twigs
- Optional: a thin layer of non-toxic, waterproof adhesive or natural materials to add interior texture
A quick note on lining materials: the U.S. Fish and Wildlife Service, the Canadian Wildlife Federation, Cornell Lab's NestWatch, and All About Birds all specifically warn against providing string, yarn, twine, dryer lint, or pet and human hair. These fibers can wrap around a nestling's leg or neck and cause serious injury or death. Stick to untreated natural items: dry grass clippings (no pesticides or fertilizer), moss, leaves, small twigs, lichen, or rootlets. That's it. Simple is safer here.
How to cut, shape, and smooth the bottle nest
The goal is to end up with a shallow, open bowl roughly 3 to 5 inches (7.5 to 13 cm) deep and as wide as possible given your bottle. Here is the step-by-step process.
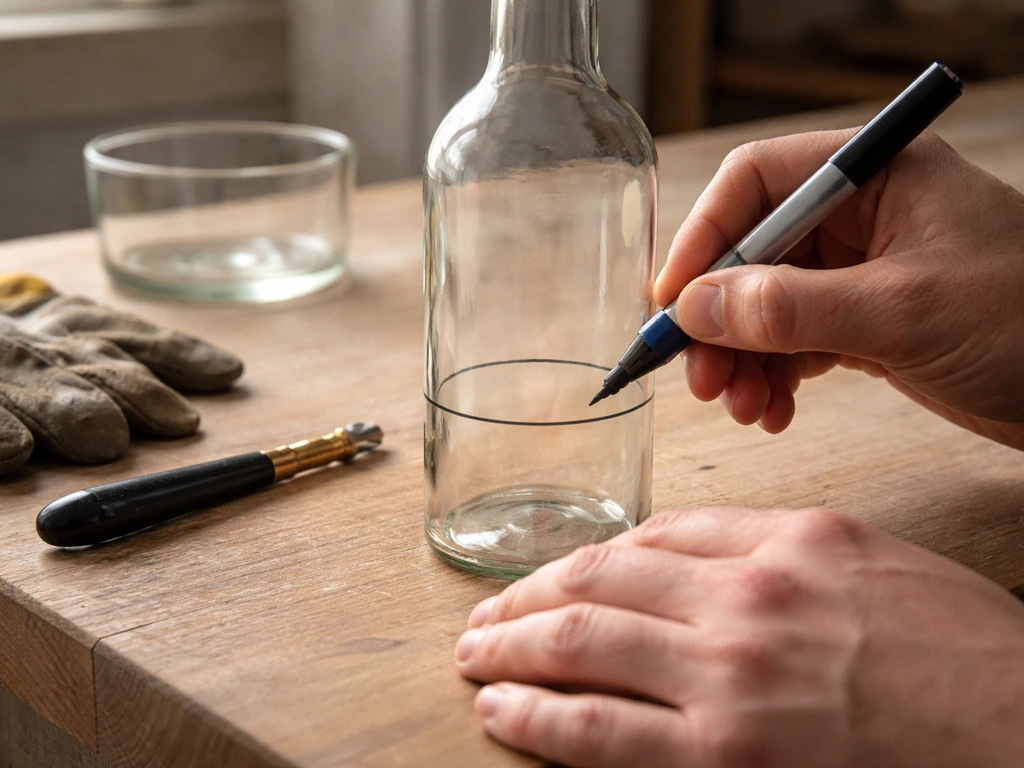
- Mark your cut line. Use a marker to draw a line around the bottle at the height you want your cup walls. For most small songbirds, aim for walls about 2 to 3 inches (5 to 8 cm) tall. Higher walls hold material better in wind; shorter walls make the cup more accessible. Mark evenly all the way around.
- Make the initial cut carefully. Poke the tip of your craft knife into the plastic just below the line to make a starter hole, then cut slowly around the bottle along your line. Take your time on curves. If you're using scissors, the starter hole lets you insert one blade cleanly.
- Smooth the cut edge immediately. This is the most important safety step. Run your sandpaper around the entire cut edge using small circular motions. Work from coarser grit to finer. The edge should feel smooth when you run your fingertip along it with gentle pressure. A jagged or sharp edge will injure a bird's feet or legs. I usually spend more time on this step than on the actual cutting.
- Check for any cracks or stress fractures in the cut wall. If the plastic has cracked down from the cut, trim that section lower and re-sand it. A crack creates a sharp flex point.
- Shape the base if needed. Most bottle bases are naturally cup-shaped, which is ideal. If your bottle base is flat or uneven, you can use gentle heat from a heat gun or hairdryer on the lowest setting to very slightly soften and press the base into a more concave shape. Do this briefly and with care. Do not use open flame.
- Add drainage holes. Use your awl or a small drill bit to poke 4 to 6 holes in the very bottom of the cup, spaced evenly. Each hole should be about 3 to 5 mm in diameter, large enough to let water drain freely but small enough that lining material doesn't fall straight through. This step is non-negotiable: standing water in a nest cup leads to mold, chilled eggs, and sick or dead nestlings.
- Add ventilation holes near the top of the walls. Drill or poke 4 small holes just below the rim, spaced evenly around the cup. These allow airflow and help the cup dry out quickly after rain.
- Rinse the cup again to remove any plastic dust or shavings from cutting and sanding. Let it dry completely before adding lining.
Making it actually usable: lining, texture, drainage, and stability
A smooth, shiny plastic interior is one of the main reasons birds ignore homemade bottle nests. This kind of nest support can also be made from other waste-safe materials, as long as you avoid unsafe fibers home-made bottle nests. Birds look for texture and grip when choosing a nest site because smooth surfaces don't hold their own nest material in place. There are a few ways to fix this without using anything unsafe.
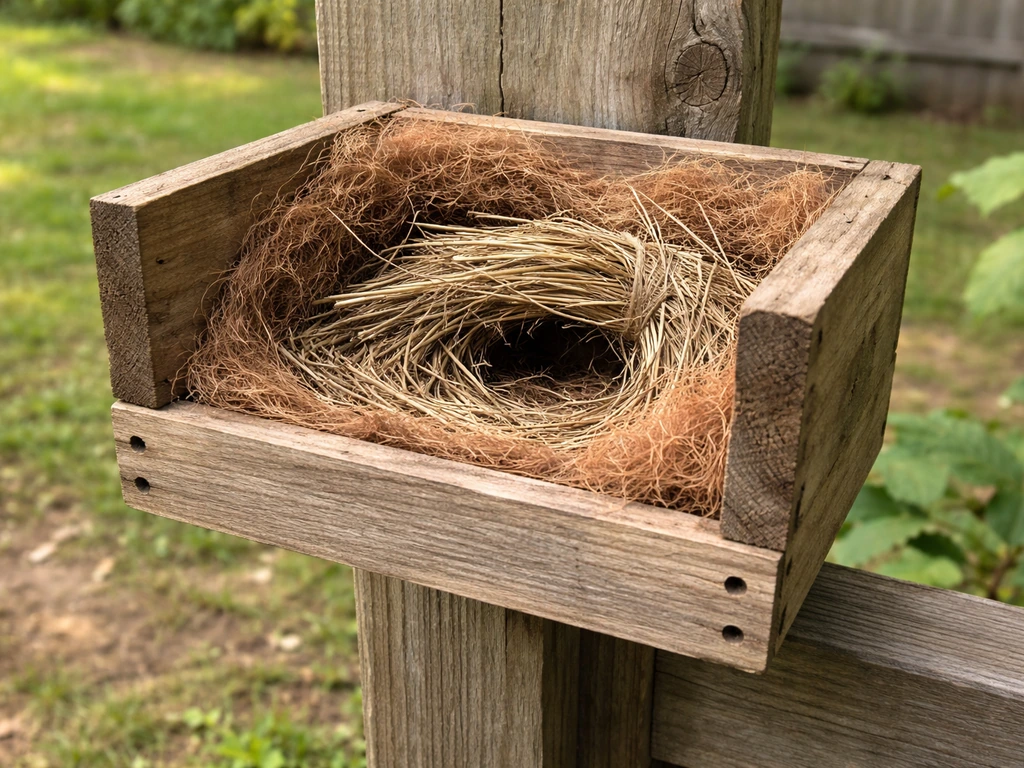
The simplest approach is to press a layer of dry moss or dry grass into the bottom and partway up the walls of the cup. Pack it firmly enough that it stays put when you tip the cup slightly. This creates both texture and an initial foundation of material. Some birds will accept this starter lining and begin adding to it; others will rearrange it completely, which is fine. The point is to give them something to anchor their own additions to.
If you want more grip on the plastic walls themselves before adding lining, you can lightly score the inside surface with coarse sandpaper. This gives the plastic a matte, slightly rough texture that holds material better. Another option some builders use is to apply a very thin, even coat of non-toxic outdoor wood glue to the inside, then press dry grass or coconut fiber (plain, untreated) into it before it dries. This creates a semi-permanent textured lining.
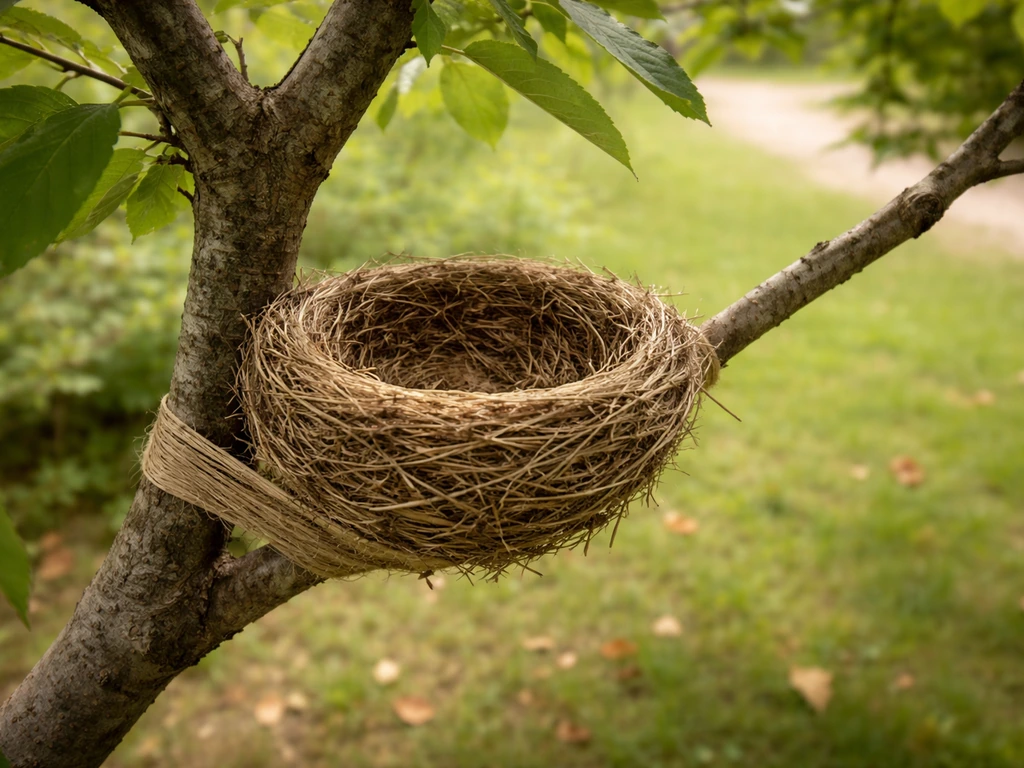
Stability is the other big factor. A cup that wobbles or swings wildly in wind will not be used. Plan ahead for how you're going to mount this thing before you go outside with it, because the mounting method often determines whether you add any extra attachment points to the cup itself. Drilling two small holes near the rim on opposite sides lets you thread wire or a zip tie through for a very secure fixed mount. A cup mounted with wire through the rim to a fixed branch barely moves even in moderate wind.
Where to place it and how to set it up properly
Placement is where a lot of well-made nest cups fail to attract birds. Location, height, orientation, and predator protection all matter.
Height and positioning
For open-cup nesters like robins and sparrows, a height of 5 to 15 feet (1.5 to 4.5 meters) off the ground is a practical working range. Lower than 5 feet puts the nest in easy reach of cats and other ground predators. Higher than 15 feet makes monitoring difficult, though birds themselves have no objection. Mount the cup on a branch fork, a sturdy post, or a sheltered section of fence. A branch fork is ideal because it provides natural support on multiple sides, reducing movement.
Orient the cup so the opening is slightly sheltered from the prevailing wind direction. If you get strong afternoon sun, position the cup so it's in partial shade during the hottest part of the day. This is especially important with plastic, which can get very hot in direct summer sun. Oklahoma's wildlife guidance specifically calls out that plastic can overheat in summer, so a shaded or partially shaded spot is worth the extra thought. Morning sun is fine and actually helpful in cooler months.
Predator protection
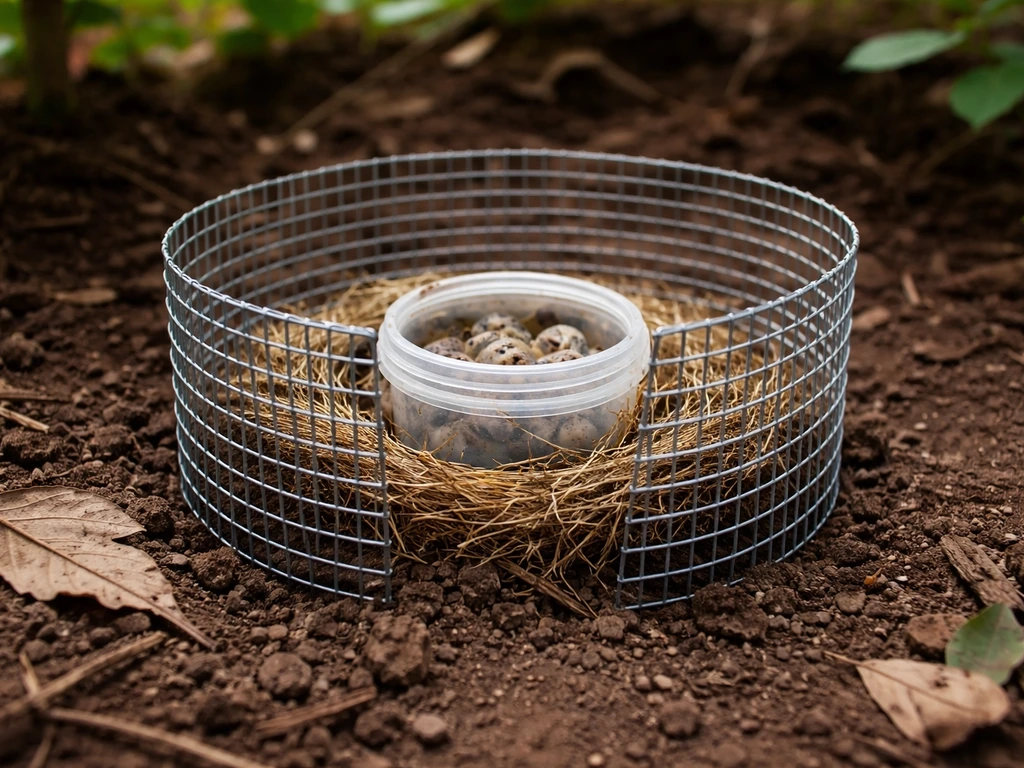
Predator guards significantly increase nest success. The Tennessee Wildlife Resources Agency recommends hardware cloth (flexible wire mesh) as part of guard designs for nest structures. For a cup nest, a simple cone or cylinder baffle made from hardware cloth or sheet metal mounted below the cup on the same post or branch creates a barrier that squirrels, raccoons, and snakes can't easily pass. Even a basic cone baffle made from a sheet of metal flashing, cone-shaped and slid over the post below the cup, cuts predation dramatically. If you're mounting on a fence or wall, a projecting arm that positions the cup away from any vertical surface (so nothing can climb directly to it) helps.
Weather protection
Position the cup where there's some overhead cover: under a tree canopy, a roof overhang, or even a dense shrub above it. This reduces rain pooling even if your drainage holes work well, and it cuts direct sun exposure. The drainage holes you added earlier handle rain that does get in, but reducing rain entry in the first place makes the nest drier and more attractive to birds.
Safety, bird welfare, and a few legal basics
In the United States, most wild songbirds are protected under the Migratory Bird Treaty Act. You cannot legally interfere with an active nest (one with eggs or live young) once birds have chosen it. This means once a bird starts using your cup, leave it alone except for very brief, low-disturbance monitoring. Cornell Lab's NestWatch Code of Conduct is the gold standard here: avoid approaching a nest when young are close to fledging, never visit at dusk when females return to roost, and if you want to take photos, use reasonable distance, avoid flash, and keep it brief. The principle is: your curiosity should not cost the birds their nest.
If you find a fallen nest with live birds in it (which is a common reason people search for nest-building guidance), a substitute cup like this one, placed as close to the original nest location as possible and secured to the nearest branch, is a recognized wildlife rehabilitation approach. The Louisiana Department of Wildlife and Fisheries and the Tufts Wildlife Clinic both describe this exact use case. Place the fallen nest material or a fresh grass lining inside the cup and return the nestlings gently. Contrary to the old myth, parent birds will not abandon young because a human touched them.
On materials safety: no sharp plastic edges, no synthetic fibers in the lining, no treated wood or painted surfaces inside the cup, and no nesting materials that have been exposed to pesticides, fertilizers, or herbicides. All About Birds specifically notes that plastic strips, cellophane, and aluminum foil are not appropriate nest materials to provide. Keep it natural inside the cup.
At the end of the nesting season (after you're certain fledglings have left and the nest is fully inactive), remove the old nesting material, clean the cup with a mild solution of 1 part bleach to 9 parts water, rinse thoroughly, and let it dry completely before storing or re-deploying. The British Trust for Ornithology and the Natural History Museum both emphasize confirming nesting is finished before cleaning any nest structure. Annual cleaning reduces parasite buildup and increases the chance birds use the same site again.
What to do if birds aren't using it
Give any new nest structure at least one full season before concluding it doesn't work. Birds investigate potential sites on their own schedule, and some species are cautious about new objects in their territory. That said, if weeks pass with zero interest, there are specific things worth checking.
| Problem | Likely Cause | Fix |
|---|---|---|
| Birds approach but don't land or use it | Surface too slick or no texture inside | Add more moss/grass lining; lightly sand interior walls for grip |
| Cup swings or wobbles in wind | Mounting too loose or on a flexible branch | Re-mount with wire through rim holes to a sturdier, more fixed point |
| Water pooling after rain | Drainage holes too small or clogged with lining material | Enlarge holes slightly; use coarser lining that won't plug the holes |
| Lining keeps falling out | Walls too low or interior too smooth | Add a tighter-packed moss base layer pressed firmly into the cup; use deeper walls |
| Cup overheating on hot days | Direct afternoon sun exposure | Relocate to a spot with afternoon shade or partial overhead cover |
| No bird activity at all | Wrong location (too low, too exposed, no nearby cover) | Move to 6-10 feet height near dense shrubs or trees; add a baffle below |
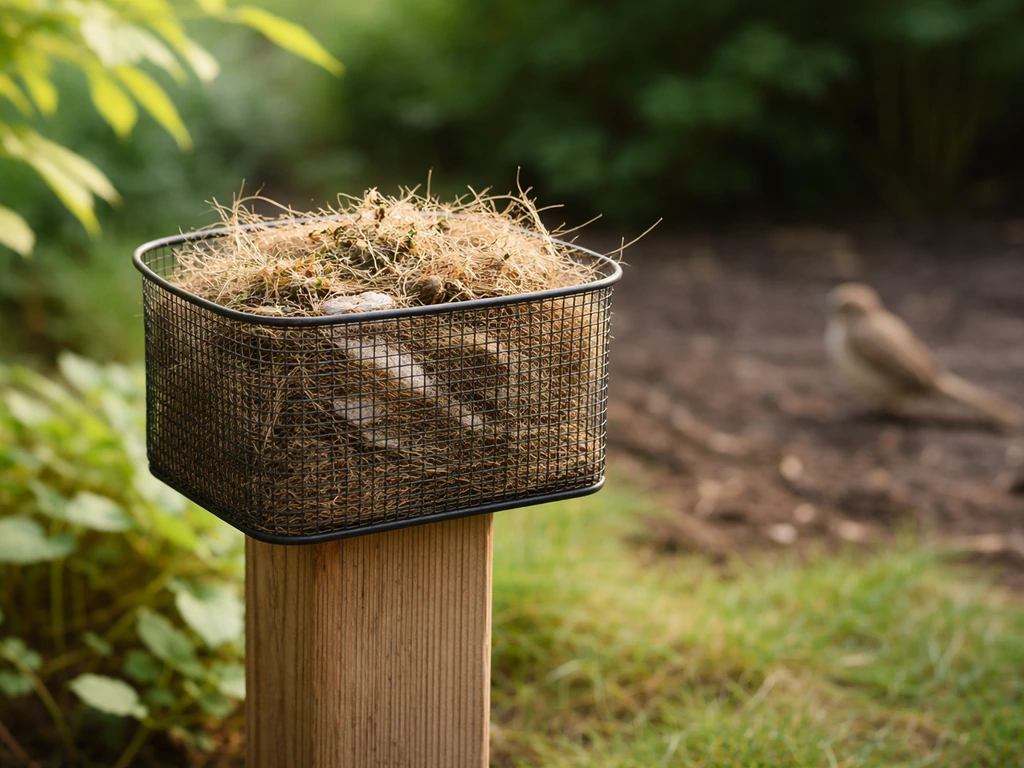
If you've worked through all those fixes and still no interest after a full season, it may simply be that the species in your area are cavity nesters rather than open-cup nesters, and an enclosed nest box design would serve them better. It's also worth looking at what nesting materials are available nearby. If there's no loose dry grass, moss, or similar material within easy reach of the site, birds may choose a location closer to their building supplies. Putting out a nesting material holder nearby (filled with safe natural materials) can help bridge that gap. Placing a nesting material holder nearby, filled with safe natural materials, can help bridge that gap when birds do not seem interested.
When to remove it: if a cup has been in place for two full seasons with zero use and you've tried all the adjustments above, there's no point leaving a degraded plastic structure in the garden. Remove it, inspect whether the plastic has become brittle or cracked (UV exposure does this over time), and either replace it with a fresh build or consider a different material entirely. A cardboard nest form or a natural woven-fiber cup might work better in your specific microhabitat. If you want a softer option, a cardboard nest form can be a good alternative to a plastic cup, as long as it stays dry and safe for birds. The whole point is to give your local birds what they'll actually use, not to be attached to one build.
FAQ
How do I choose the right bird species for an open-cup plastic bottle nest support?
Focus on species that naturally build an exposed, open cup on branches or ledges, like robins, song sparrows, mourning doves, and some finches. If you are unsure what’s nesting locally, watch which species carry nesting material into the same area and pause until you see them adding material to an open platform, then replicate that with a cup at similar height and placement.
What size bottle works best if I cannot find a 1-liter or larger container?
If the bottle base diameter is under about 4 inches (10 cm), the cup tends to be too narrow and shallow to function reliably. A practical workaround is to use a wider bottle and cut it to keep a deeper bowl (closer to 3 to 5 inches deep), rather than relying on a smaller diameter container that will force too little nesting material.
Can I make the cup deeper than 5 inches to improve stability?
Deeper can reduce rain shelter and can make the cup feel less “open” for some birds. Aim for about 3 to 5 inches deep and maximize width within your bottle limits. If you need extra grip, improve texture and mounting instead of increasing depth.
Where exactly should I mount it, and should it face a certain direction?
Mount it so the opening has slight shelter from the prevailing wind and position for partial shade during the hottest part of the day if summers are intense. Also ensure there is overhead cover nearby (tree canopy, shrub, or overhang) so direct rain entry is reduced even if drainage holes help.
Do I need to add a predator guard every time?
It is strongly worth adding if you have squirrels, raccoons, snakes, or frequent cats in the area. A simple cone or cylinder baffle under the cup, made from hardware cloth or sheet metal, blocks climbing routes from below. If you cannot add a guard, place the cup in a location that is harder to reach from the ground and away from vertical climb paths.
Should I put nesting material in the cup when I first install it?
You can, and a small amount of dry grass clippings, moss, or leaves in the bottom is usually helpful as a starter anchor. Do not overfill. The bird may rearrange it, but the initial base should be packed enough to stay in place when you gently tip the cup.
How can I roughen the plastic without making it unsafe?
Use controlled methods like coarse sandpaper to lightly score the interior, then thoroughly feel the surface for snags. The goal is matte grip, not sharp points. After smoothing, rinse and dry so there is no plastic dust residue.
Is it okay to use glue to texture the inside of the cup?
Only if the glue is clearly non-toxic and made for outdoor use, and you still press safe, untreated natural material into it after applying a very thin, even layer. Let it fully cure and confirm there are no sticky spots left. If you smell strong fumes after curing, do not mount it yet.
What should I do if I see birds investigating the cup but not using it?
Give them time and check the “boring basics” first: stability (no wobble), texture (not slick), proper drainage holes, and correct height. Avoid frequent visits or moving the cup once birds are close to choosing it, since repeated disturbances can reset their interest.
Can I check the cup to see if eggs are there?
Limit yourself to very brief, low-disturbance observation only. If eggs or live young are present, do not handle or adjust the cup. If you must observe, keep distance, avoid approaching near fledging periods, and do not inspect at dusk when adults may be returning.
If a nest falls or gets displaced, should I transfer it into the bottle cup?
If you find nestlings in a fallen nest, a surrogate cup placed as close as possible to the original location is a recognized wildlife rehabilitation approach. Put safe fresh lining material in the cup and return the nestlings gently. Avoid repeated handling, and stop once they are settled.
What materials must I never use inside the cup?
Do not use string, yarn, twine, dryer lint, or human or pet hair, because fibers can wrap around a nestling and cause serious injury. Also avoid synthetic or reflective items like cellophane, aluminum foil, or plastic strips, and do not use treated, painted, or pesticide-exposed materials.
How do I clean and store the cup safely between seasons?
Only clean after nesting is fully finished, then remove old material completely. Use a mild bleach solution (1 part bleach to 9 parts water), rinse thoroughly, and dry completely before storing. Inspect the plastic after cleaning for brittleness or cracks caused by UV exposure.
How long should I keep the cup up if birds show no interest?
Give it at least one full season before concluding it does not work, since birds investigate on their own schedule. If there is still no use after two full seasons and you have addressed texture, mounting, placement, and predator protection, it may be time to remove it and rebuild or switch to a different nest support type.
What if there is no loose nesting material nearby, and birds still ignore the cup?
Birds may choose locations closer to building supplies if dry grass, moss, or twigs are scarce. Add a nesting material holder nearby filled with safe untreated natural materials, so the area becomes easier for birds to build without traveling far.
How do I tell whether my cup is too hot or too exposed?
If the cup sits in full afternoon sun, the plastic can become very hot. Place it in partial shade during peak heat and ensure overhead cover when possible. If you can feel the plastic surface is uncomfortably hot to your touch for more than a moment, change placement.
Citations
The U.S. Fish & Wildlife Service advises against providing string, twine, yarn, dryer lint, and pet hair as nesting materials because fibers can wrap around birds/nestlings’ legs and necks and lead to injury or death.
https://www.fws.gov/story/helping-wildlife-while-avoiding-common-pitfalls
Canadian Wildlife Federation’s DIY guidance says to put out safe lining materials (untreated grass clippings and other plant-based items) and explicitly says: “Do not provide hair (human or animal), string, yarn or loose bits of thread” due to entanglement risk.
https://cwf-fcf.org/en/resources/DIY/habitat-projects/map-your-backyard/provide-nesting-materials-for.html
Tufts Wildlife Clinic describes making a surrogate nest cup using a plastic margarine or Cool Whip container with small drainage holes poked in the bottom.
https://vet.tufts.edu/tufts-wildlife-clinic/surrogate-bird-nest
A Louisiana wildlife rehabilitation guide for substitute nests says to use an open plastic container (e.g., a large margarine tub) as a nest base for cup-shaped nesting support (with design focused on holding nest material and preventing moisture problems).
https://www.wlf.louisiana.gov/assets/Resources/Publications/Wildlife_Rehabilitation/substitute_nest_2020.pdf
A substitute-nest guidance suggests using an open plastic container (including a margarine tub or similar) and notes that bottom drainage/structure details matter for a temporary “nest cup.”
https://www.pigeonpatrol.ca/what-should-i-do-if-an-entire-nest-of-birds-has-fallen/
NestWatch’s Code of Conduct emphasizes minimizing disturbance during monitoring: avoid approaching nests when young are close to fledging and avoid checking at or after dusk when females may return to the nest.
https://nestwatch.org/learn/how-to-nestwatch/code-of-conduct/
NestWatch states that taking photos can be low-disturbance when done in moderation and following the Code of Conduct (including avoiding flash when possible and using reasonable distance/cover when near nestlings).
https://nestwatch.org/learn/how-to-nestwatch/faqs/can-i-take-photos-of-a-nest-is-this-data/
A nest box care guide for birdhouse management includes guidance on looking after nest boxes over the season, including cleaning/management timing (useful for replacement/cleaning intervals in DIY structures).
https://www.bto.org/sites/default/files/bto-nest-boxes-essential-guide.pdf
Oklahoma’s woodworking for wildlife guidance says small holes are important for drainage and ventilation, and also advises avoiding plastic (except certain commercially made types) because plastic/metal can get too hot in summer.
https://www.wildlifedepartment.com/outdoorok/ooj/woodworking-wildlife-nest-boxes
A state guide stresses that predator guards are critical for reducing nest predation and recommends using hardware cloth (flexible wire mesh) as part of guard designs.
https://www.tn.gov/twra/wildlife/woodworking-for-wildlife/nest-box-predator-guard.html
A bluebird nest box care page states boxes should be cleaned annually to increase the chance of future nesting and includes cleaning approach guidance (and notes the importance of ensuring nesting is finished before cleaning).
https://sjpt.org/cleaning-your-bluebird-nest-boxes/
The Natural History Museum’s bird-nesting-box guidance includes instructions on cleaning, including the requirement to be certain nesting has finished and fledglings have left before moving/cleaning.
https://www.nhm.ac.uk/discover/how-to-make-a-bird-nesting-box.html
All About Birds says dry grass can be used for nesting lining only if it hasn’t been treated with pesticides, and it generally recommends against providing certain materials (e.g., it mentions plastic strips/cellophane/aluminum foil are not recommended as provided materials).
https://www.allaboutbirds.org/news/providing-nest-material-for-birds-dos-donts/
NestWatch recommends sticking to natural items such as moss, twigs, leaves, lichen, rootlets, or untreated grass clippings (not treated with fertilizer/pesticides/chemicals) when providing nest materials.
https://nestwatch.org/blog/what-kind-of-nest-materials-are-best-to-provide-for-birds/
A DIY nest tube build guide describes drilling ventilation holes above the entrance and drilling drainage holes on the bottom/around the drainage area (showing a practical pattern: ventilation above entrance; drainage in the floor/bottom).
https://www.natureconservancy.ca/en/what-you-can-do/bring-nature-home/learn/diy/build-a-chickadee-nest-box.html
The same U.S. Fish & Wildlife Service guidance adds that string/twine/yarn/dryer lint/pet hair can cause lethal entanglement and that you can instead gather safe natural items such as twigs, leaves, seeds, mosses, lichens, and untreated grass clippings.
https://www.fws.gov/story/helping-wildlife-while-avoiding-common-pitfalls
Tufts provides an example of a simple plastic nest substitute container (plastic tub with small holes for drainage) and suggests lining approaches using grasses/torn paper-type materials as appropriate for temporary support.
https://vet.tufts.edu/tufts-wildlife-clinic/surrogate-bird-nest
An Audubon-hosted PDF provides nest box dimensions by species (including measurements like floor height/depth and entrance-hole dimensions/placements), useful for matching a DIY “nest cup/shelter” concept to likely species requirements.
https://hogisland.audubon.org/sites/default/files/documents/nest_box_chart_0.pdf
The NestWatch manual includes standardized field measurement guidance such as recording the “Height Above Ground” measured to the bottom of the nest, and recording nest-site orientation.
https://nestwatch.org/wp-content/uploads/2013/03/NestWatch_manual_130326.pdf
(Reinforces monitoring safety) NestWatch’s Code of Conduct is designed to prevent disturbance that could cause nest abandonment or reduce chick survival.
https://nestwatch.org/learn/how-to-nestwatch/code-of-conduct/
A DIY plastic bottle feeder guide includes the principle of adding small drainage holes so water doesn’t pool, illustrating a relevant drainage concept for plastic cup-based backyard bird supports.
https://www.co.burlington.nj.us/DocumentCenter/View/11295/DIY-Plastic-Bird-Feeder
NOAA’s Marine Debris Program on plastic bottle bird feeders emphasizes careful cutting/handling and includes design elements like placing/breaking parts appropriately for bird access; it also supports the general safety practice of using drainage/venting where relevant to avoid standing water.
https://marinedebris.noaa.gov/plastic-bottle-bird-feeders
Hometalk hosts a DIY “bird’s nest made of plastic bottle” craft example, useful as a reference point for what people mean by bottle “nest” projects (but not authoritative for animal-welfare design).
https://www.hometalk.com/diy/outdoor/garden/bird-s-nest-made-of-plastic-bottle-41053084
A retail guide notes that “birdhouse” is commonly used for many structures intended for nesting or shelter, reflecting everyday terminology that birders distinguish more precisely by nest-box vs shelter types.
https://www.farmstore.com/blog/backyard-birdhouses-nest-boxes-guide-to-species-placement-care/
Next Articles
How to Make a Cockatiel Nest Box DIY Step by Step
Step-by-step DIY cockatiel nest box with safe materials, exact measurements, ventilation, mounting, and cleaning tips.
How to Make a Bird Nesting Material Holder DIY Guide
Step-by-step DIY plans and safe materials to build a bird nesting material holder that attracts the right birds.
How to Make a Bird Nest With Waste Material Safely
DIY guide to build safe backyard bird nesting platforms from clean waste materials, with materials, steps, placement, an