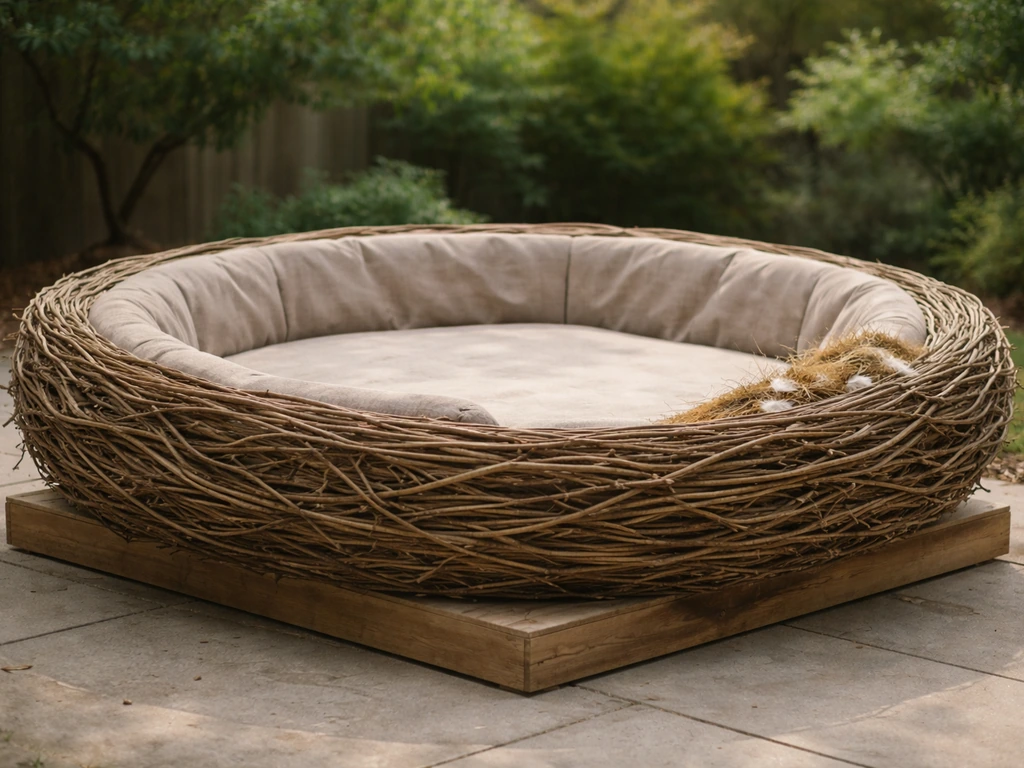
You can absolutely build a human-sized bird nest that a person can sit in and that real backyard birds will actually use. The trick is treating it as a giant open platform nest, roughly 4 to 5 feet in diameter and 12 to 18 inches deep, built from untreated natural wood, woven branches, and biodegradable fibers. Set it at the right height, face it away from prevailing wind, add drainage, and you've got something that functions as a genuine bird-friendly habitat feature, not just a prop.
How to Make a Human-Sized Bird Nest With a Safe Bed

Marcus Thornton
23 Apr 2026
First, figure out exactly what you're building
Before you buy a single stick, you need to decide between two very different things. Option one is a purely decorative giant nest, the kind you might set up as a garden centerpiece or photo spot for kids. It looks like a nest, but birds probably won't raise young in it. Option two is a functional giant platform nest: a structure that doubles as a human seat or feature piece but is genuinely designed to attract open-nesting birds like robins, mourning doves, or even raptors. This guide focuses on option two, because that's what aligns with actually helping your backyard birds.
The distinction matters because the functional version has real design rules. You need to use untreated wood and natural fibers, think about drainage and predator access, and place the nest where birds will actually find it comfortable. A purely decorative nest can be made of anything. A bird-safe one cannot. If you're leaning toward a smaller decorative version, the approach is closer to making a fake bird nest or a model nest, which are separate projects worth exploring on their own. If you want the look only, you can adapt the shape by exploring options like a fake bird nest or model nest instead of building for actual nesting birds. If you are specifically trying to make a model of a bird nest for display or practice, you can adapt the steps here while keeping the materials safe and realistic model nest.
Pick the right nest style and location before you build
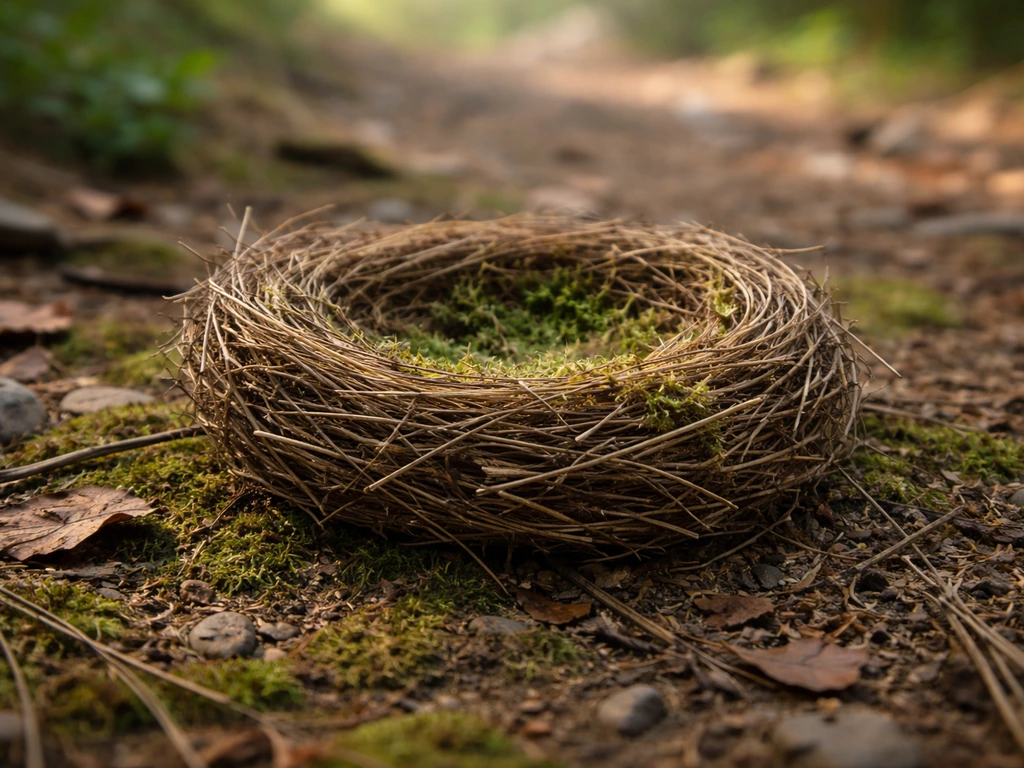
A human-sized nest works best as a platform nest design, mimicking what species like robins, doves, hawks, and ospreys naturally build. These are open, cup-shaped or flat-platform structures, not enclosed cavities. Cavity nesters (bluebirds, chickadees, wrens) need a box with a small entrance hole, so they won't use an open nest no matter how well you build it. Stick with platform nesters and you're working with the right format.
Where to put it
Placement is honestly where most people get this wrong. For a human-sized open nest that birds will use, aim for a spot that gets 40 to 60 percent sunlight, with some shade in the afternoon to prevent the nest from overheating in summer. Avoid areas where pesticides or herbicides are used nearby, since birds foraging around the nest will be exposed to whatever you're spraying. Mount or position the nest so the entrance (the open top, in this case) faces away from your prevailing wind direction. For most of the US, that means facing roughly southeast or east.
Height depends on what you're attracting. Robins and doves are comfortable at 5 to 15 feet. Raptors prefer higher. If you want the nest to also function as a seating feature that humans can get in and out of easily, 2 to 3 feet off the ground on a sturdy platform is the practical compromise. Just know that ground-level or very low nests need serious predator protection, since cats, raccoons, and snakes are all real threats. A baffle around any support pole goes a long way.
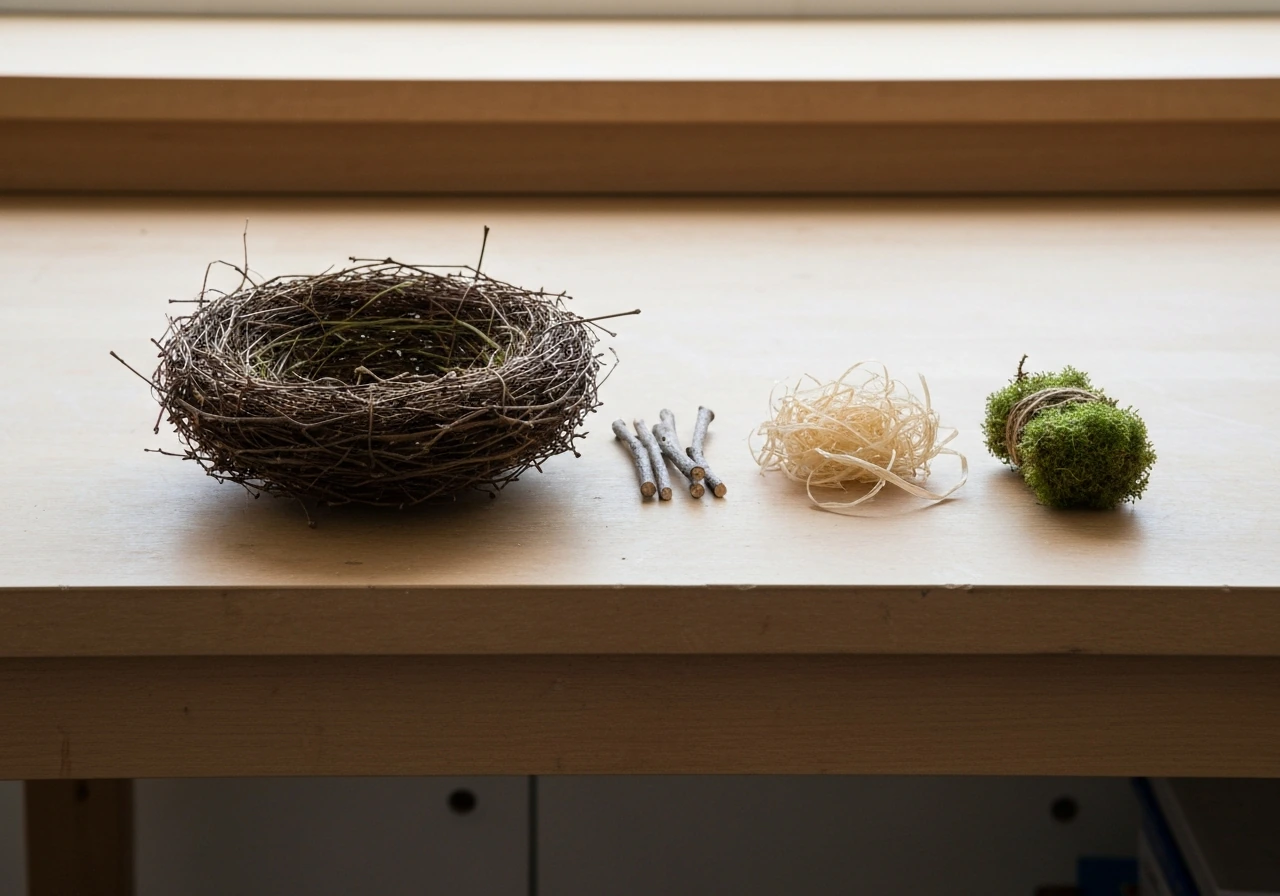
Materials, dimensions, and the structural plan
Here's what works for a nest in the 4 to 5 foot diameter range that can support a person sitting in it (roughly 200 lbs with some safety margin) and still be bird-safe. The key material rule is simple: everything that touches birds or their eggs must be untreated and unpainted. No pressure-treated lumber, no stained wood, no synthetic rope or plastic mesh.
Recommended materials
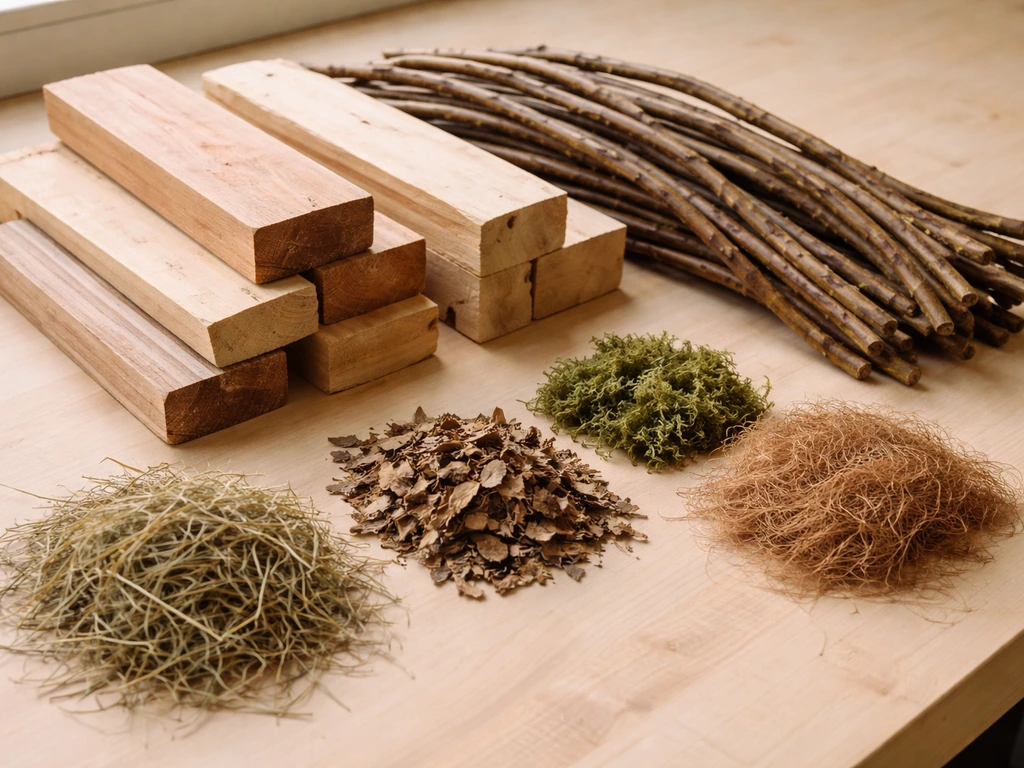
- Frame: untreated cedar, pine, or fir branches or lumber (cedar is best for outdoor durability without chemical treatment)
- Weaving material: flexible branches 0.5 to 1 inch in diameter (willow, birch, grapevine are ideal), dried to reduce splitting
- Lining fibers: jute twine, sisal rope, or coir fiber, all 100% biodegradable and loose-weave (these are also wildlife-safe per US Fish and Wildlife Service guidelines)
- Base platform: untreated 3/4-inch pine or cedar planks or a welded steel ring (1/2-inch rebar bent into a circle works well) to hold the frame shape
- Support structure: 4x4 untreated cedar post or a tripod of thick branches for mounting
- Fasteners: galvanized screws or nails, or natural cordage (jute or sisal) for lashing
- Inner lining: dry grass, leaves, moss, and soft plant fiber for the finished nest cup
Dimensions that actually work
| Component | Recommended Size | Why It Matters |
|---|---|---|
| Overall nest diameter | 4 to 5 feet | Comfortably fits an adult; wide enough for large platform nesters |
| Interior cup depth | 12 to 18 inches | Deep enough to hold a human seated; mimics large raptor platform nests |
| Wall thickness (woven sides) | 4 to 6 inches | Provides structural rigidity and insulation for nesting birds |
| Base platform clearance | 2 to 3 feet off ground (minimum) | Reduces predator access; still reachable for human use |
| Drainage holes in base | 4 to 6 holes, 1/2 inch diameter | Prevents water pooling that causes mold and rot |
| Main structural branches | 1.5 to 2 inches diameter | Strong enough to hold the nest shape under load |
How to build it, step by step
I'll be honest with you: my first attempt at a giant nest sagged badly in the middle because I skipped the rigid base frame. Don't do that. Start with structure, then add the weaving, and the whole thing holds together much better.
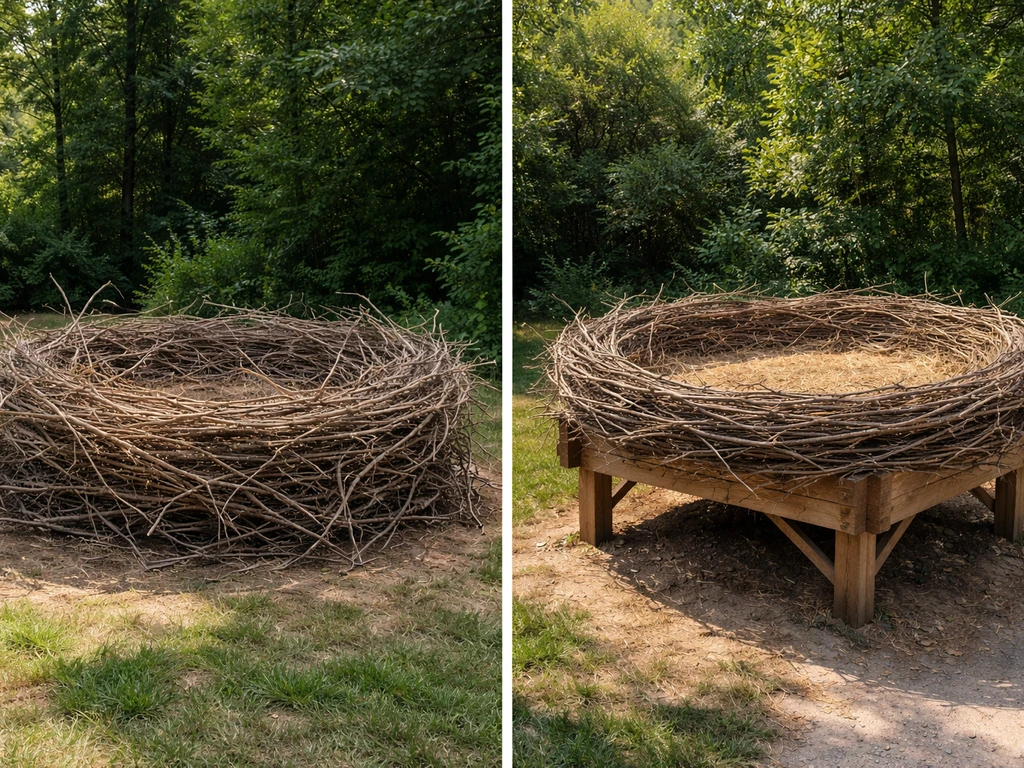
Step 1: Build the base frame
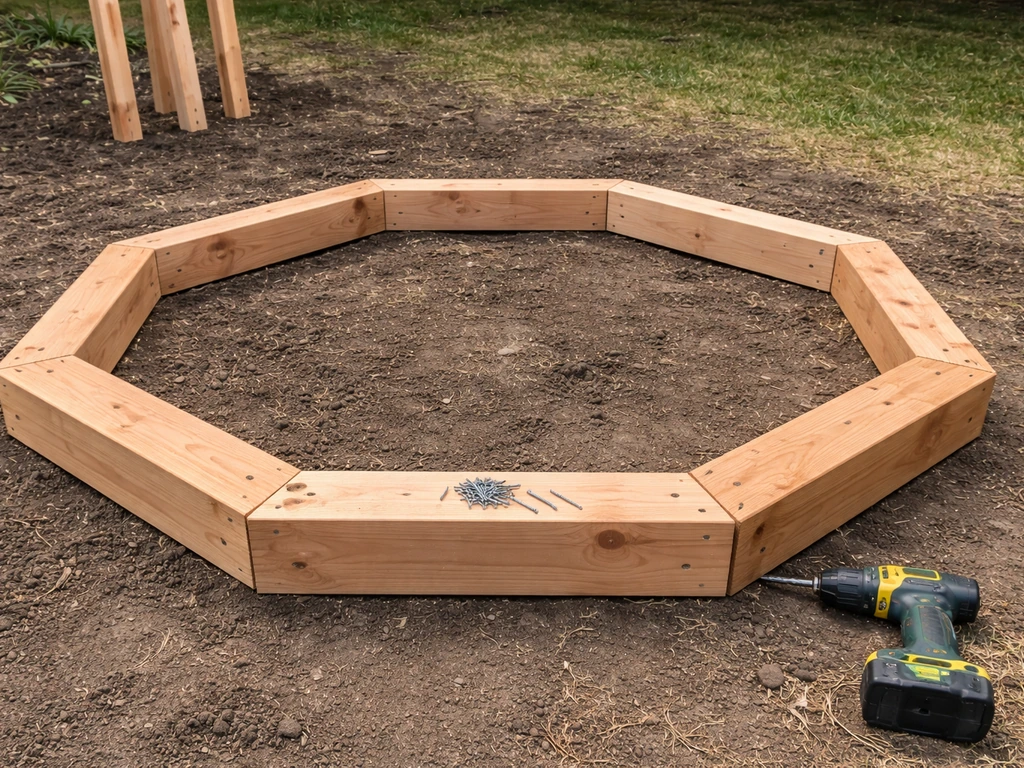
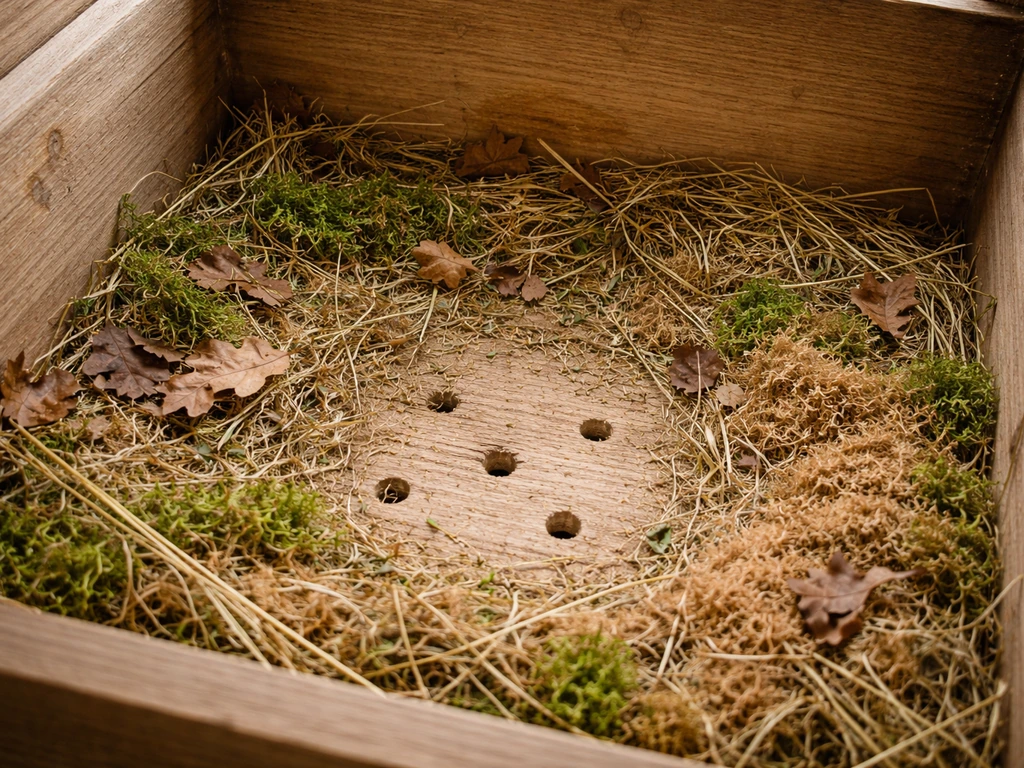
Cut a circle of untreated cedar planks or bend a rebar ring to your target diameter (4 to 5 feet). If using wood, create a simple octagonal or circular frame from 2x4 cedar, screwing the pieces together with galvanized screws. This is your foundation. Drill your drainage holes now, before anything else goes on top. Aim for at least four half-inch holes spread evenly across the base so rainwater drains freely.
Step 2: Build up the outer wall frame
Lash or screw 6 to 8 vertical branch stakes (about 18 to 24 inches tall, 1.5 to 2 inch diameter) around the perimeter of your base frame, spaced roughly every 8 to 10 inches. These are the ribs of your nest walls. Angle them very slightly outward so the nest has that classic bowl shape widening toward the top. Secure each stake firmly at the base because these carry the weaving load.
Step 3: Weave the sides
This is the fun part and where it starts looking like a real nest. Use flexible branches (willow is my favorite because it bends without snapping), weaving them horizontally around the vertical stakes in an over-under pattern. Start at the base and work upward. Pack the weaving tightly enough to feel solid but with some natural gaps, since those gaps help with ventilation and airflow. As you weave, use jute twine to lash each horizontal pass to the vertical stakes at every third or fourth weave. This is what keeps the walls from spreading outward under weight.
Step 4: Line the interior
Once the structure is woven, line the interior cup with layers of dry grass, leaves, moss, and coir fiber. This is where birds will actually nest and where a human will sit. Pack the lining material firmly so it doesn't shift. A thick layer (3 to 4 inches) also cushions the hard wooden base beneath. Avoid any synthetic materials here. No foam, no plastic fiber fill, no polyester batting. Stick to natural plant material and biodegradable fibers.
Step 5: Anchor it
Mount the nest on a sturdy 4x4 cedar post, a tripod of thick branches, or directly onto an existing tree platform. The mounting point needs to handle the combined weight of the nest structure (which can easily be 50 to 80 lbs once complete) plus a seated adult. Bolt or lag-screw the base frame to the support rather than just resting it in place. If you're mounting on a pole, add a predator baffle, a cone or collar of sheet metal around the pole, below the nest. This one step dramatically improves the odds that birds will actually use it.
Step 6: Weatherproof the wood frame
You cannot use paint, stain, or chemical sealant on the parts birds will contact. For the structural wood base and stakes, a light coat of raw linseed oil (not boiled, which contains chemical driers) on the wood frame only, not the woven branches or lining, gives some moisture resistance without toxicity. Cedar naturally resists rot and is a great choice here precisely because it doesn't need treatment. Let any oil coat dry fully (at least 48 hours) before putting birds or people near it.
Keeping it comfortable and clean
A giant nest is a commitment. It needs more maintenance than a standard nest box, but none of it is complicated. The biggest enemies are water pooling, mold, and parasites building up in old nesting material.
Drainage and ventilation
Those drainage holes you drilled in step one pull double duty. They let water out after rain and also improve airflow under the nest lining, which significantly reduces how long the interior stays damp. If you find water pooling after rainstorms, add more holes or enlarge existing ones to half an inch. You can also slightly tilt the base platform (a degree or two toward one side) to encourage drainage flow in a specific direction.
When to clean and how
Do not clean or disturb an active nest during breeding season. This is both a legal protection (active bird nests are federally protected in the US) and just the right thing to do. Wait until there is absolutely no sign of breeding activity, typically late fall or early winter in most regions. Then remove all old nesting material, scrub the wood base and woven frame with a solution of 1 part bleach to 10 parts water, rinse thoroughly, and let it dry completely before adding fresh lining. This sanitation step kills parasites and bacteria that can harm future nesting birds.
Replacing worn parts
Plan for the interior lining to be fully replaced every one to two seasons. The woven branch walls should last three to five years if you used dense, dry branches and lashed them well. When individual branches start to rot or break, unlash them and weave in fresh replacements without dismantling the whole structure. This modular approach is one reason lashing with jute twine is smarter than screwing everything together: you can replace sections easily.
Tool list, build tips, and what usually goes wrong
Tools you'll need
- Hand saw or circular saw (for cutting base frame lumber)
- Cordless drill with bits (including a 1/2-inch bit for drainage holes)
- Galvanized screws (2.5 to 3 inch for structural connections)
- Pruning shears or loppers (for shaping flexible weaving branches)
- Heavy-duty scissors or a utility knife (for cutting jute/sisal twine)
- Measuring tape
- Work gloves (willow and grapevine can be scratchy)
Tips that save you from redoing it
- Soak stiff branches in water for 30 minutes before weaving to make them more flexible and less likely to snap
- Dry your weaving branches slightly before final installation so they shrink and tighten in place rather than loosening as they dry
- Use at least two lashing points per horizontal weave pass, not just one at the end
- Build the nest where you plan to mount it, or as close as possible: a finished giant nest is surprisingly heavy and awkward to carry
- If you're using grapevine, strip the leaves before weaving to reduce mold risk
- Test the base frame for wobble before weaving anything: fix instability early rather than late
The most common failure points
Sagging base is the number one problem. It happens when the base frame isn't rigid enough or the drainage holes are too large and compromise the structure. Fix it by adding cross-bracing under the base using 1x4 cedar strips bolted across the diameter before mounting. The second most common issue is mold in the lining, which usually means the drainage isn't working or the lining material was installed damp. Always start with fully dry lining material. The third issue is the nest slowly spreading outward at the top as the weaving loosens. Prevent this by adding a horizontal lashing ring of thicker branch or jute twine around the outside of the walls about two-thirds of the way up, cinching the whole structure inward.
One thing worth noting: don't add any perches or decorative branches that stick out from the outside of the nest walls. Perches give predators a foothold to reach inside, and every serious nest-building resource flags this as a mistake. Keep the outside walls smooth and the inside lined and deep.
Your build checklist before you start
- Decide on final diameter and height (4 to 5 feet wide, 12 to 18 inches deep is the sweet spot)
- Source untreated cedar or pine for base frame, flexible willow or grapevine for weaving, jute or sisal for lashing
- Identify your mounting location: check sunlight, wind direction, and predator access
- Build and drill the base frame first, including drainage holes
- Lash vertical branch stakes to the perimeter of the base
- Weave horizontal branches up the sides, lashing every third pass
- Line the interior cup with dry grass, moss, and coir fiber
- Mount and anchor the nest to its support, add predator baffle to pole if applicable
- Apply raw linseed oil to structural wood frame only, wait 48 hours before use
- Check back after the first rainstorm for drainage performance and wall stability
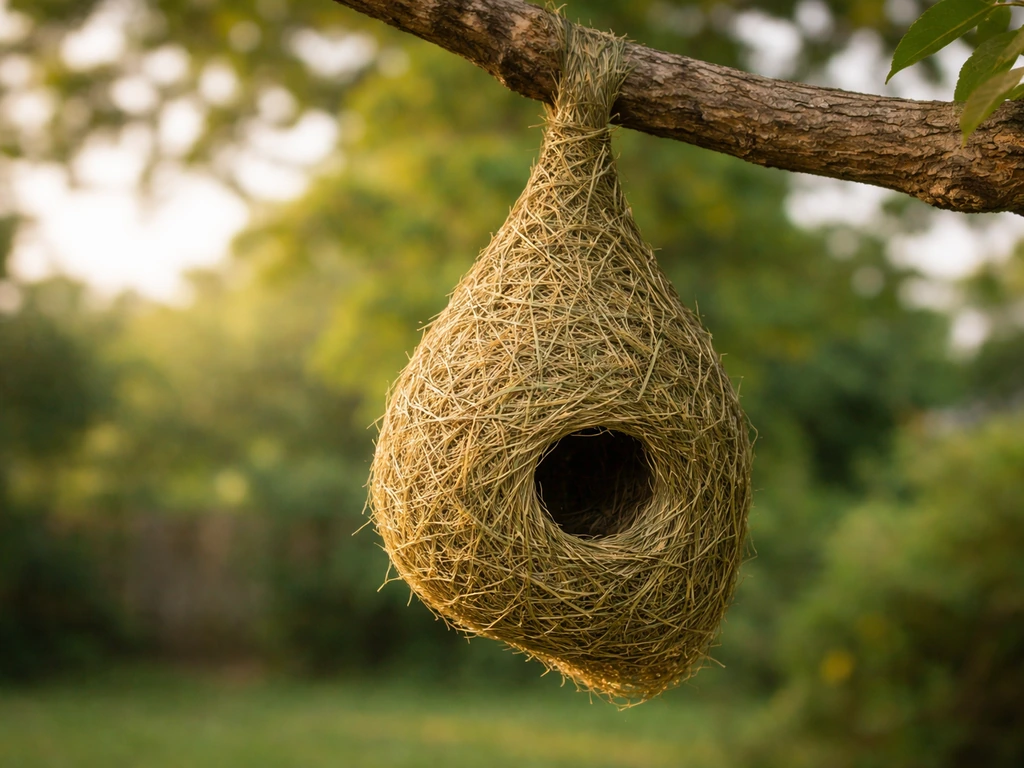
This is genuinely a one-weekend project if you have your materials ready. Follow the same build steps and bird-safe material rules to nail how to make a bird and nest that will actually be used how to make bird and nest. If you want a smaller version of this project, follow the same principles and learn how to make a mini bird nest in a way that still stays bird-safe. The weaving takes longer than people expect, so set aside a full Saturday for the build and a Sunday morning for mounting and finishing. Once it's up, you'll have something that works as a garden feature, a seating spot, and a real platform habitat for local birds. If you are specifically interested in weaver birds, you can adapt this nest-building approach for a weaver bird nest setup how to make weaver bird nest. That combination is hard to beat, and the birds will sort out the rest.
FAQ
What birds are most likely to use a human-sized platform nest like this?
Platform nests tend to be used by open-nesting birds such as robins and some doves, but local results vary. To increase odds, match height and location to your region and observe what species already use nearby lawn edges, open shrubs, or natural platforms. If you see mostly cavity nesters in your yard, a platform design may not be the right approach.
Can I add a landing board or small perch so birds can “access” the nest more easily?
Avoid exterior perches or protruding branches that give predators a foothold. If you want birds to approach easily, focus on placement near natural cover and make sure the surrounding area has safe pathways, rather than adding footholds on the nest structure itself.
How do I prevent the lining from shifting or compacting when someone sits in the nest?
Keep the interior lining thick (about 3 to 4 inches) and firmly pack it in place. Also drill or brace the base so it stays rigid, since wobble and sagging cause the lining to migrate. If you expect frequent human use, plan to refresh the lining more often (potentially every season) so it remains stable and hygienic.
Is it safe to use treated lumber anywhere in the frame or supports?
No, not anywhere birds can contact. The article specifies untreated, unpainted components for materials that touch birds or eggs. If you must use treated lumber for structural reasons, keep it fully out of reach of the nesting interior and seal it with a non-chemical method that still avoids contact, but the safest path is untreated cedar throughout.
Can I use synthetic twine or rope to make weaving tighter?
Don’t. The parts that touch birds and their eggs should be natural, unpainted, and uncoated. Synthetic rope can trap moisture or fray into sharp bits, and it also isn’t biodegradable, which conflicts with the bird-safe, biodegradable fiber approach described.
How many drainage holes is “enough,” and what hole size helps most?
Aim for several evenly spaced holes on the base, and if you still see pooling after rain, enlarge or add more. The article’s troubleshooting suggests adjusting toward about half-inch holes. If you add too few holes, the lining stays damp and drives mold, so start with the recommended distribution before enlarging later.
What height should I choose if I want both birds and easy human access?
A practical balance is 2 to 3 feet off the ground for human entry and exit. However, that height increases predator pressure, so you should prioritize a baffle on pole mounts and consider a sturdier, less accessible mounting option like a tree platform where climbing predators have harder access.
How do I handle the nest during breeding season if I need to adjust or repair the structure?
Do not disturb an active nest. Wait until there is no sign of breeding activity, then repair the structure and fully replace or sanitize the interior lining. If the nest becomes damaged unexpectedly, observe from a distance first, and only intervene after confirming it is inactive.
Can I paint or stain the outside to make it blend into my landscaping?
You can avoid the problem by not painting or sealing any part birds will contact. The outside can be less critical if it stays unreachable by birds, but overspray and contact risk are common, so the safest approach is to keep the entire bird-contact build untreated and use only allowed finishes on portions clearly outside bird reach.
What should I do if birds don’t move in the first year?
Treat it as a placement and species-fit problem. Confirm it is a platform nest, with open top access, and that it receives 40 to 60 percent sunlight with afternoon shade. Re-check height, wind direction, nearby pesticide use, and whether local birds are open-nesters. Often, birds take time to accept novel structures, so keep it in place and refresh the lining periodically.
How can I tell whether my design is too shallow or too deep for nesting?
Most open-nesting species prefer a bowl-like platform with a comfortable cup depth created by the interior lining. If the interior feels hard, shallow, or doesn’t hold a stable, centered depression, birds may reject it. Adjust by increasing lining depth and ensuring it stays tightly packed and cushioned, rather than changing the overall frame dimensions first.
Is there a way to reinforce the base without making it unsafe or uncomfortable for birds?
Yes, reinforce underneath the frame and keep reinforcements away from the nesting interior. The article notes cross-bracing under the base to fix sagging. This improves rigidity and indirectly protects birds by preventing wobble and damp pooling, without adding materials that birds will contact.
Next Articles
How to Make a Model of Bird Nest: DIY Step by Step
Step by step DIY guide to craft a realistic or bird safe bird nest model using natural materials, sizing and tips.
How to Make a Weaver Bird Nest at Home, Step by Step
Step-by-step guide to make a functional weaver bird nest at home using safe natural materials and proper hanging.
How to Make a Fake Bird Nest: Easy DIY Steps
Step-by-step DIY guide to make realistic fake bird nests for crafts using natural and repurposed materials, safely and e