You can make a convincing fake bird nest at home in an afternoon using materials you probably already have: dried grass, twigs, raffia, jute twine, or even yarn and white glue. The build process is straightforward whether you want a craft prop for a spring display, a decoration, or a simple enrichment piece for a backyard setup. The key is knowing which approach fits your goal, because a nest you plan to put outdoors near birds needs to be made very differently from one that stays on a shelf.
How to Make a Fake Bird Nest: Easy DIY Steps

Marcus Thornton
7 Apr 2026
Craft prop vs. bird-safe enrichment: know which one you're making
This matters more than most craft guides admit. A fake nest made with yarn, glue, and dryer lint looks great on a mantle but can seriously injure or kill a bird if left outdoors. The U.S. Fish and Wildlife Service specifically warns that string, twine, and yarn can wrap around birds' legs or necks, cutting off circulation and often resulting in death. Dryer lint looks like natural nesting material but holds moisture, disintegrates, and may carry detergent chemicals or fabric softener residues. So before you pick your materials, decide: is this going inside your home as a display piece, or is it going outside where birds might interact with it?
There's also a legal angle worth knowing. Under the Migratory Bird Treaty Act, native bird nests, eggs, and chicks are federally protected in North America. It is illegal to disturb, move, or destroy the nest of a native bird species. This means the project here is always about building something from scratch, not repurposing or relocating a real wild nest. If you're curious about what goes into an authentic-looking structure, guides on how to make bird and nest projects with natural materials can help you understand the real thing without ever touching one.
What you need: materials and tools
For a simple craft prop (indoor use)
- Yarn or jute twine (heavy-weight works best for structure)
- White craft glue or PVA glue (diluted 1: 1 with water)
- A balloon or small bowl (used as a mold)
- Petroleum jelly or plastic wrap (to prevent sticking to the mold)
- Scissors
- Small rubber eggs or decorative moss (optional, for display finishing)
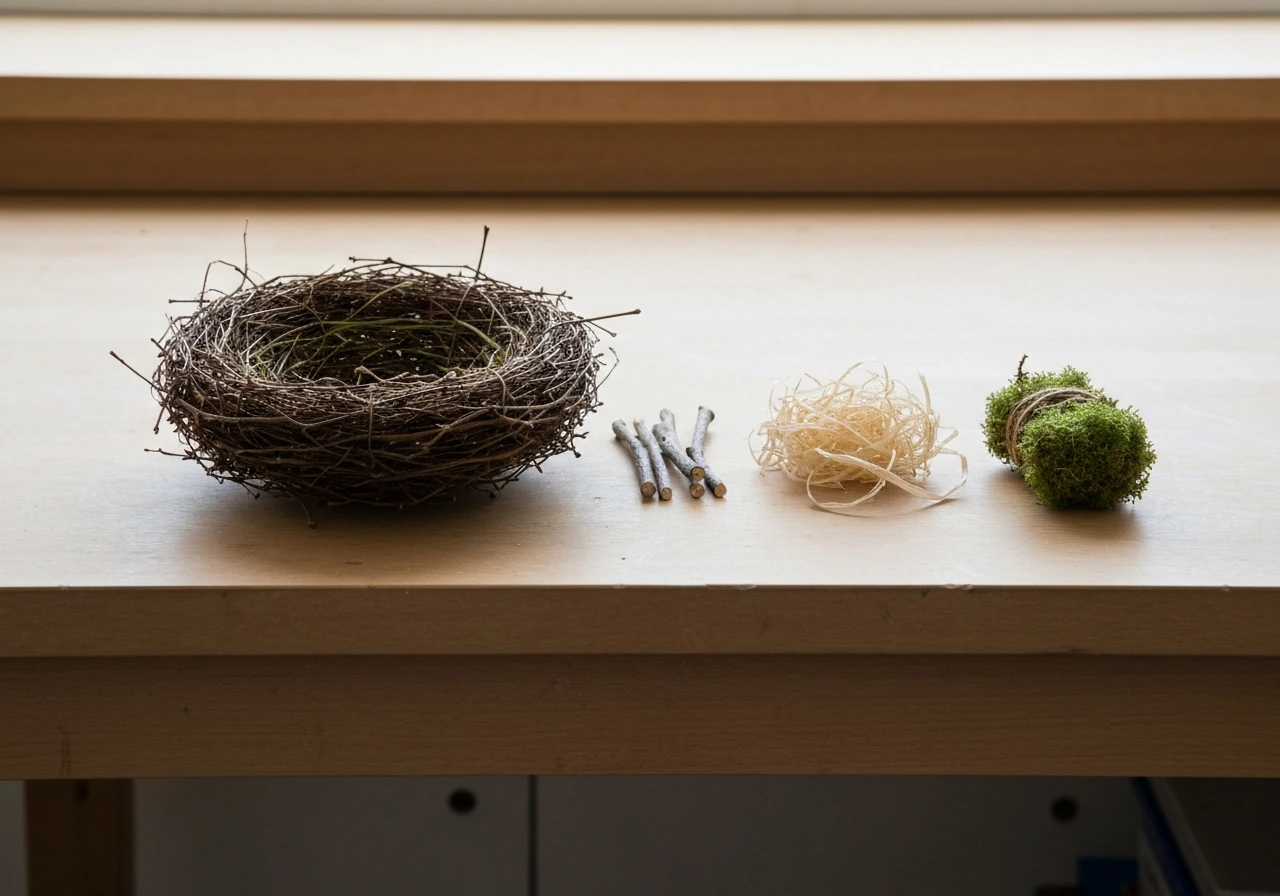
For a natural-material nest (realistic look, indoor display or bird-safe outdoor use)
- Dried grass stems trimmed to 2–4 inches (a common ingredient in real songbird nests)
- Thin flexible twigs or stems (willow, grape vine, or similar)
- Dried moss
- Raffia or dried plant fibers
- Jute twine (for binding only, kept short and well-secured if going outdoors)
- White craft glue (for indoor props only; omit or use minimal amounts for outdoor versions)
- Scissors and small pruning snips
- Bowl or container to shape the base
A quick note on what not to use: skip dryer lint entirely, avoid long loose yarn ends, and stay away from pet hair or synthetic fibers if the nest is going anywhere near actual birds. These materials all come with documented hazards and are worth leaving out of any project in this space.
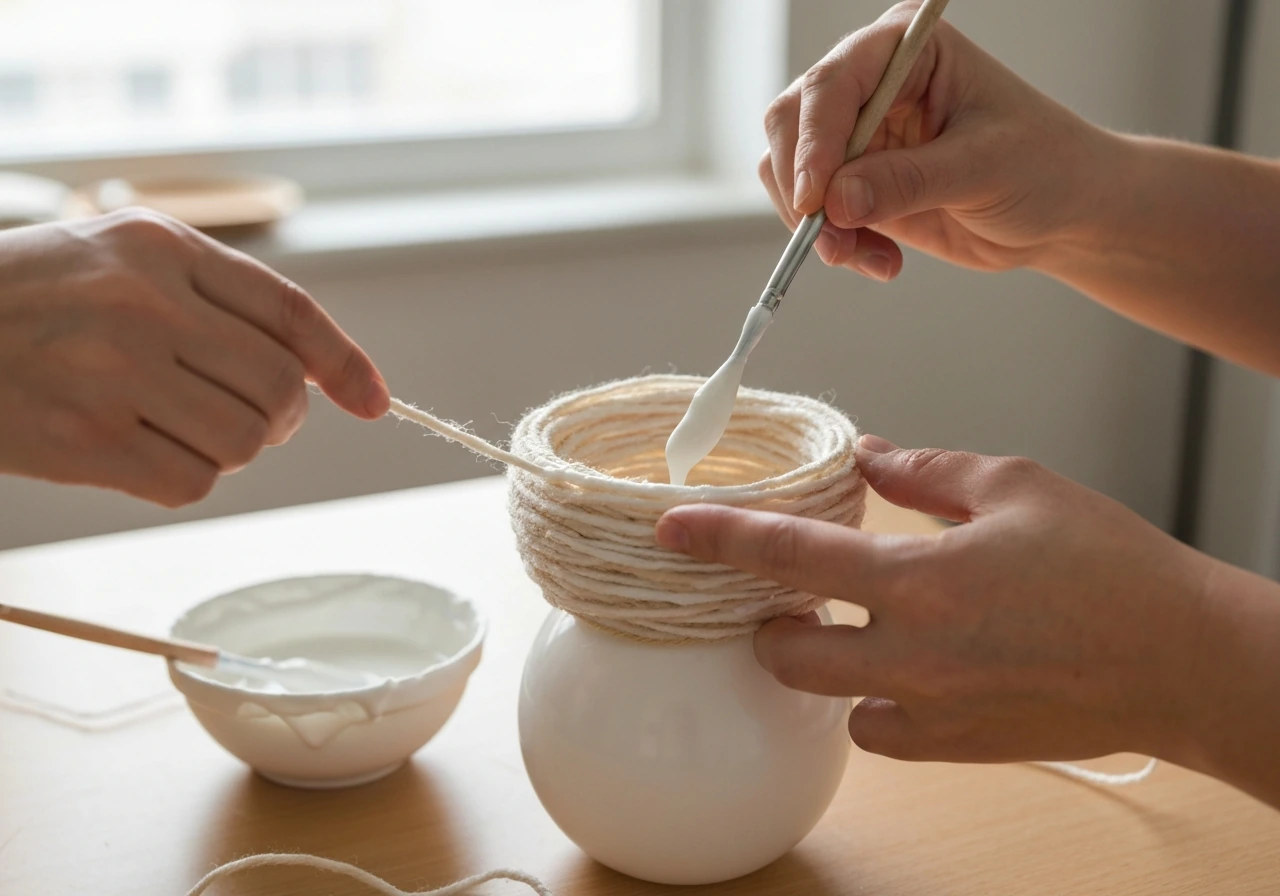
The beginner build: balloon or bowl mold method
This is the easiest method and produces a great-looking result fast. It works especially well as a model of a bird nest for school projects, spring crafts, or home decor.
- Inflate a round balloon to roughly 5–6 inches in diameter. A larger balloon makes a larger nest, but it also requires more yarn, more glue, and noticeably more drying time.
- Coat the bottom half of the balloon with petroleum jelly or cover it with plastic wrap so the dried nest releases cleanly.
- Mix white craft glue with water in a 1: 1 ratio in a small bowl.
- Dip lengths of yarn or jute twine into the glue mixture and begin wrapping them around the bottom portion of the balloon in overlapping circles, working from the center base outward and building up the sides to form the nest rim.
- Keep layering until you have a thickness of at least 3–4 yarn layers throughout. Thinner spots will crack or collapse when dry.
- Set the balloon (nest side down) in a cup or ring to hold it upright. Place it in a dry, covered spot and let it cure for a full 24 hours. Humidity slows drying significantly, so if it still feels soft after 24 hours, give it another half day.
- Once fully dry, pop the balloon and gently peel it away from the inside of the nest.
- Trim any loose ends and press any lifted sections back down with a dab of glue.
Alternatively, you can use the bowl method instead of a balloon. Press your materials into a small greased bowl, let dry for 24 hours, and carefully peel the nest away. You may need to re-press the nest back into the bowl once or twice during drying if the sides start to slip. Both methods work well; the balloon gives a rounder, deeper cup while the bowl gives you more control over rim height.
If you want to go really small with this approach, the same technique scales down nicely. There's a whole range of ideas covered in guides on how to make a mini bird nest that are perfect for jewelry, ornaments, or tiny display pieces.
Natural-material nests: getting the realistic look right
If you want something that actually looks like a real nest rather than a yarn craft, you need to work with natural materials and weaving techniques. Real bird nests are shallow depressions with a rim deep enough to keep eggs from rolling out, sometimes lined with small bits of vegetation, shell fragments, or feathers. Replicating those details is what makes the difference between "obviously fake" and "wait, did a bird build that?"
Weaving method with dried grass and stems
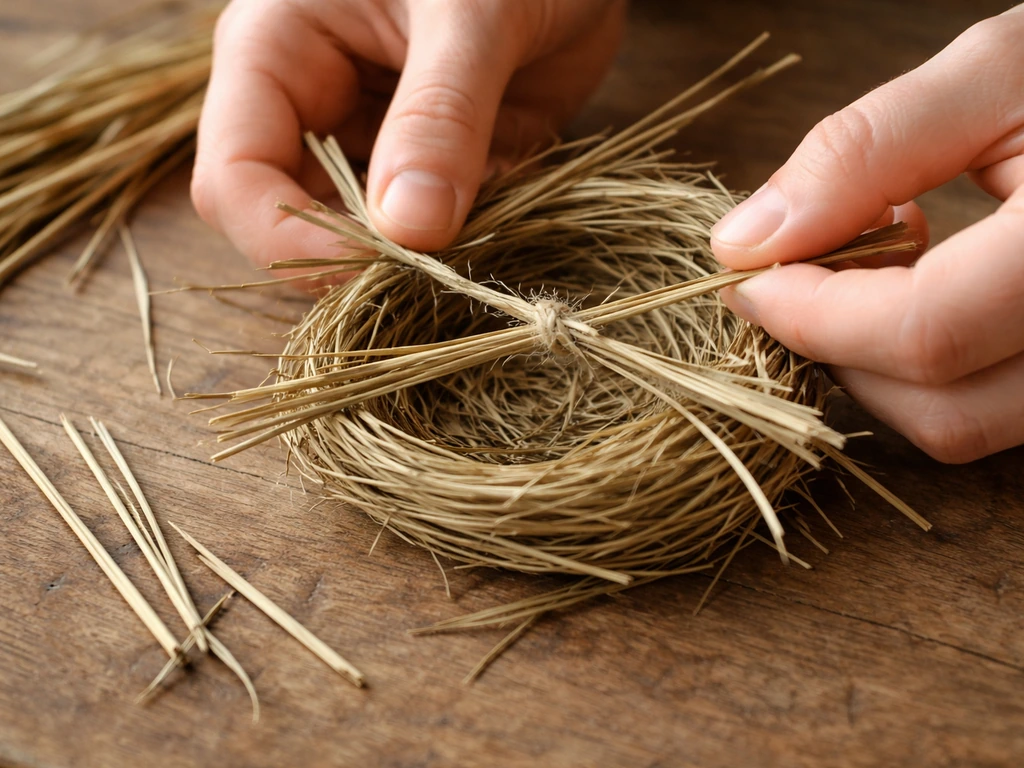
- Gather a bundle of dried grass stems or raffia, each trimmed to about 10–12 inches. Jute twine in a grass-matching color works as a supplement.
- Lay several stems across each other in a pinwheel or swirl pattern to form the base, working from the middle outward.
- Begin threading additional stems in circles around the base, weaving each one over and under the radial stems as you go.
- As you build up the sides, weave progressively tighter to curve the rim upward. The tightening tension is what creates the cup shape naturally.
- When the rim reaches about 2–3 inches high, run a length of thread through several spots around the rim to secure any loose pieces and hold the rim's shape.
- Add dried moss or fine grass to the interior as a lining for realism.
- If this is an indoor prop only, apply a very light misting of diluted white glue to lock fibers in place and let dry fully before handling.
The weaving approach takes more patience than the balloon method but produces a result that genuinely looks like the real thing. If you want to go deep on this technique, a detailed walkthrough of how to make a bird nest with grass covers the material prep and weaving steps in much more detail.
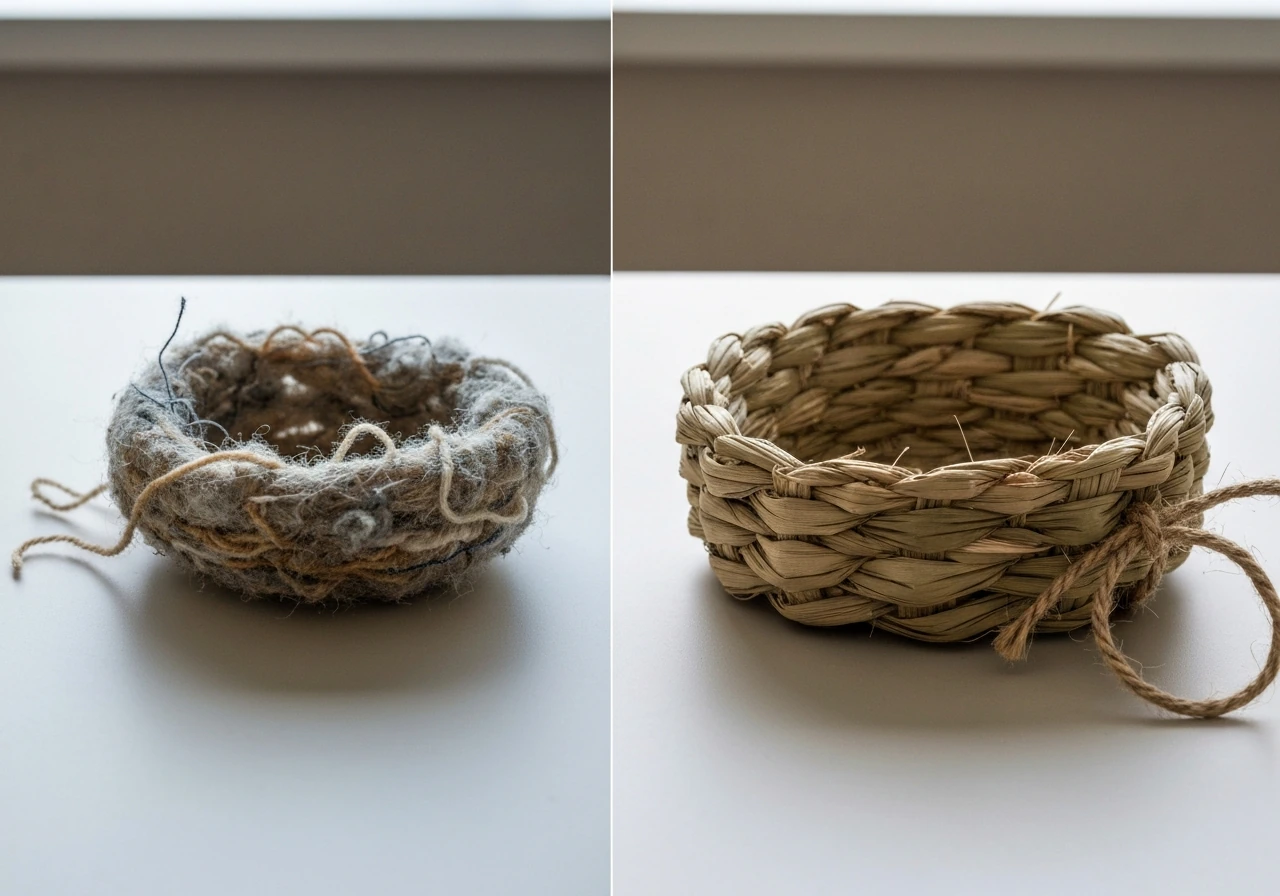
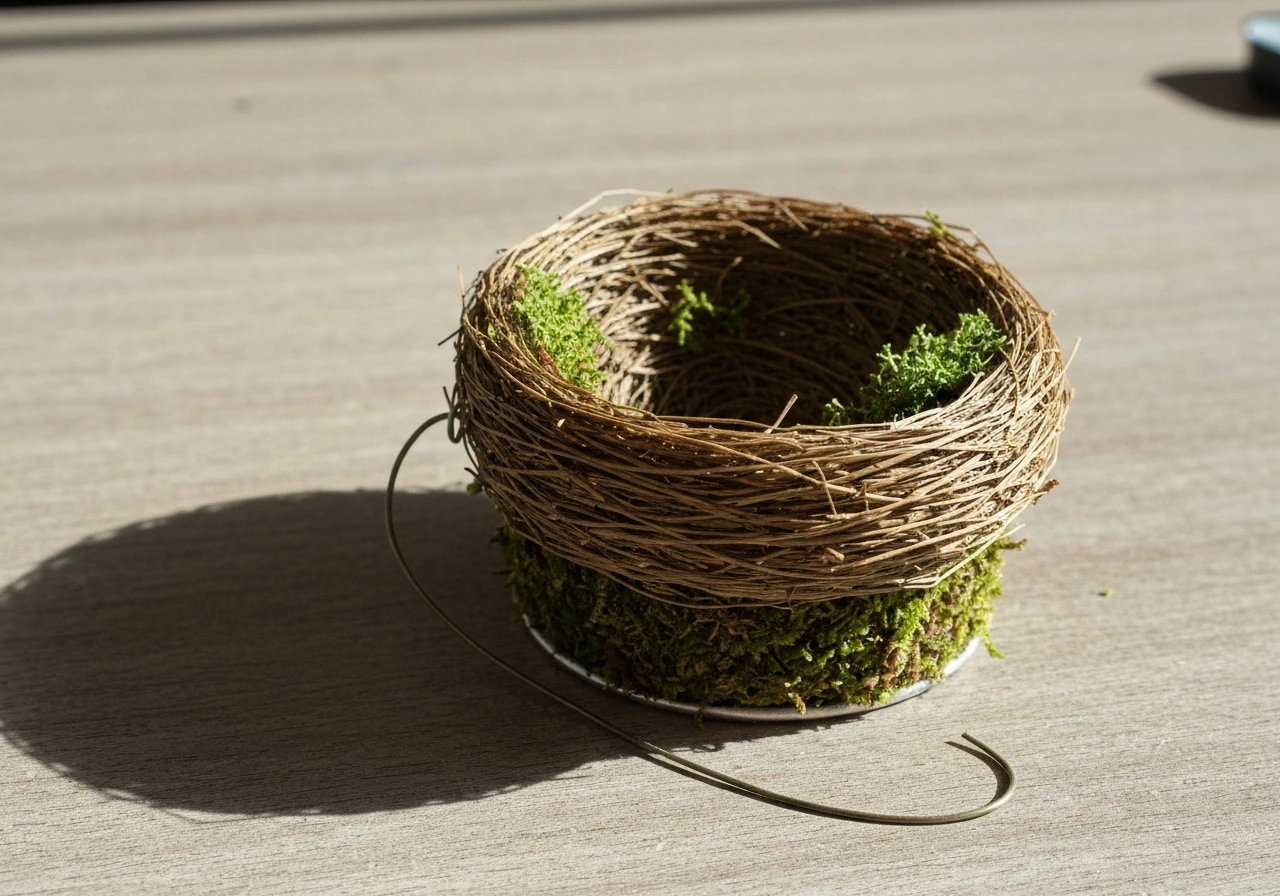
Moss and jute display nest
For a decorative nest that looks great in a spring wreath or centerpiece, try the moss-and-jute method. Start with a base of twisted dried moss shaped roughly into a ring. Wrap jute twine around the outside of the moss bundle to help it hold its shape and give it structural integrity. Pack more moss into the interior cup, pressing it down firmly to create the depression. This style works especially well at a display size of about 4–5 inches across. For a larger, more dramatic version, a display nest described in some guides runs 10–12 inches and uses taller raffia alongside the jute twine.
Artificial and makeshift nest designs
Sometimes you need something fast and functional rather than decorative. A makeshift or temporary nest might be needed as a photography prop, a stand-in enrichment piece for a captive bird, or just a placeholder you can build in under 30 minutes. These designs prioritize speed and simplicity over realism.
| Design type | Main materials | Build time | Best for | Outdoor safe? |
|---|---|---|---|---|
| Balloon/yarn glue nest | Yarn, white glue, balloon | 30 min + 24 hr dry | Craft props, school projects, decor | No |
| Bowl-press nest | Dried grass, white glue, small bowl | 20 min + 24 hr dry | Realistic display props | No (glue residue risk) |
| Woven natural nest | Dried grass, stems, moss | 45–90 min | Realistic props, photography, enrichment | Yes (no glue) |
| Moss and jute nest | Dried moss, jute twine | 20–30 min | Wreaths, seasonal decor | No (loose fibers) |
| Twig basket nest | Thin flexible twigs, plant fiber ties | 30–45 min | Rustic props, enrichment | Yes (if fiber ends secured) |
The twig basket version is essentially a miniature version of the woven nest but uses thin flexible twigs (willow or grapevine work well) instead of grass. Soak the twigs in water for 20 minutes to make them pliable, then coil and weave them into a cup shape, tying any joints with short, well-knotted pieces of plant fiber. No glue needed, which makes it the cleanest option for outdoor use. It also holds its shape well without any drying time beyond the natural curing that happens as the twigs dry out in place.
If you're interested in what a more elaborate woven nest structure looks like at a larger scale, the ideas in a guide on how to make a human sized bird nest are genuinely impressive and use the same core weaving principles just scaled way up.
For those who want to understand what master-level natural nest construction actually looks like, the intricate techniques used by weaver birds are worth studying. Learning how to make a weaver bird nest gives you a real appreciation for tension-based weaving that you can apply at any scale.
Finishing, durability, and how to attach or place the nest
Finishing touches for display nests
Once your nest is dry and structurally sound, a few finishing steps make a big difference. Tuck small pieces of dried moss into the interior cup and press them gently into place. Add a light misting of diluted white glue (1:3 glue-to-water ratio) over the outer surface only to consolidate loose fibers, then let it dry again completely. If you're adding decorative eggs, small rubber or ceramic eggs in blue, speckled, or white finishes look the most convincing at about 1 inch diameter for a standard 4–5 inch nest. Secure them with a small dot of hot glue if the nest is going to be moved around.
Making it last
Indoor craft nests are pretty durable once fully cured. The main enemy is humidity, which can soften glued joints over time. Storing them in a dry place and keeping them away from steam (kitchens, bathrooms) extends their life considerably. If you want to give a woven natural-material nest more longevity indoors, a light coat of matte spray sealant locks the fibers without making the nest look plasticky. For something you're planning to keep permanently as a display piece, a nesting ball approach is also worth considering. A guide on how to make a bird nesting ball shows a related construction technique that produces a more durable, sphere-shaped version that holds up well over time.
Attaching and placing the nest
For display use, a small piece of floral wire looped through the base works well for hanging. Wreath wire or a low-temp hot glue gun lets you secure the nest inside a wreath without damage. For photography or prop use, a small lump of floral foam under the nest gives it a stable, adjustable base. If you're placing the nest on a shelf or in a decorative vignette, a ring of preserved moss around the base hides any imperfections at the edges and makes it look like it belongs in its spot.
Keeping it safe if you're placing this near actual birds
If your goal goes beyond decoration and you want to support backyard birds, a fake nest is not really the right tool. What actually helps birds is offering safe nesting materials (short, natural fiber pieces left loose in a mesh bag or small basket) and providing proper nest boxes designed for specific species. Providing materials that birds can choose to incorporate on their own terms is the approach recommended by wildlife organizations, and it is very different from placing a pre-made structure and expecting birds to use it.
If you do place any nest-like structure outdoors, keep these points in mind. Never place it near an active nest or in a location where ground-nesting birds are likely present. Disturbing nesting birds can cause them to abandon eggs or chicks, and interfering with active native bird nests is a federal offense under the Migratory Bird Treaty Act. Keep all fiber ends short and fully secured so nothing can wrap around a bird's legs or neck. Avoid all glue residues, detergent-scented materials, and synthetic fibers in any piece that might be touched by birds.
It's also worth knowing that providing loose nesting materials outdoors is most effective during early spring nesting season, and safe material options include short dried grass stems, small strips of natural cotton, and chemical-free plant fibers. The distinction between a craft prop and a genuine wildlife enrichment effort matters here because the techniques, materials, and placement logic are genuinely different.
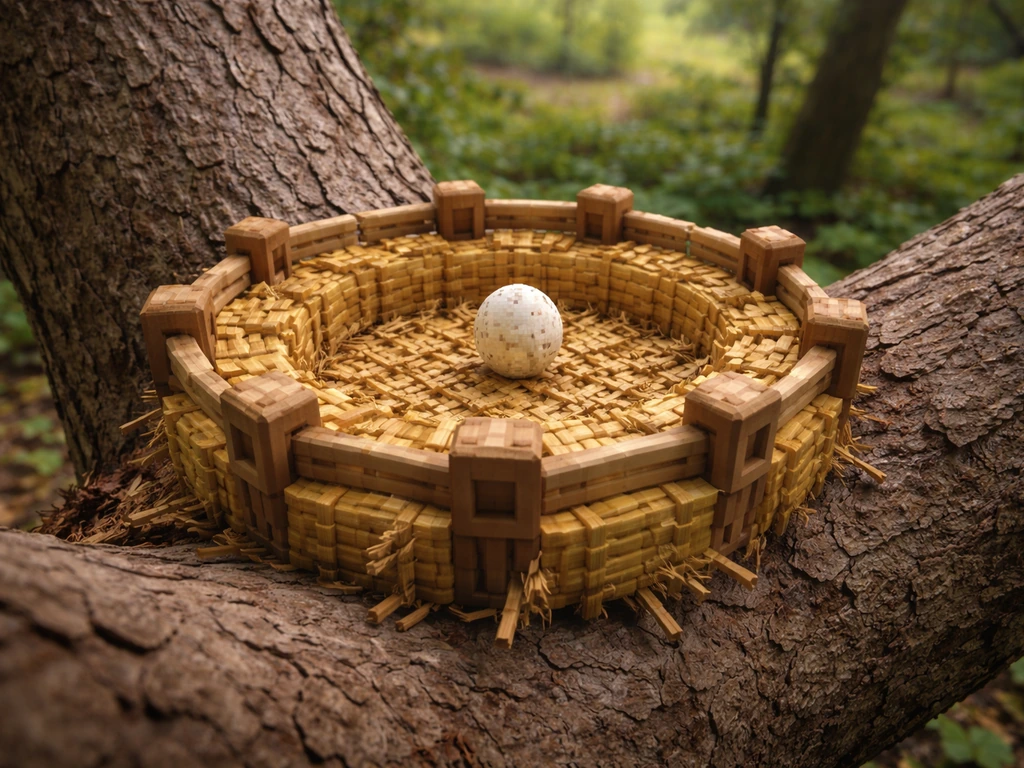
If this project has you wanting to go further into the world of bird housing and habitat support, exploring a full natural grass nest construction project is a good next step. And if you want a fun, low-stakes version to practice techniques before committing to a real build, you can always try a digital version first: working out the design logic of how to make a bird nest in Minecraft is surprisingly useful for visualizing construction layers before you pick up actual materials.
The bottom line is that making a fake bird nest is genuinely easy, the materials are cheap, and the results look great with almost any method you choose. Pick the approach that matches your goal (display craft, photography prop, or bird-safe outdoor enrichment), stick to the material guidelines for whichever category you're in, and give every glued version the full 24-hour dry time it needs. That last part is the step most people skip, and it's the main reason craft nests fall apart.
FAQ
Can I use fishing line, thread, or clear string to make the nest look tighter and more realistic?
Avoid anything that is thin, continuous, or forms loose loops outdoors, including fishing line and clear string. Even if it blends visually, it can still tangle around legs or necks. If the nest is for display only, keep all strands short and sealed into the weave so nothing hangs free.
How do I make sure the nest will not shed fibers once it is dry?
Do a gentle “tug test” on the rim and outer cup, then add only a light consolidation step to the outside. If you use diluted white glue, apply it sparingly to the exterior fibers only, and let it fully cure until the surface feels dry and firm, not tacky.
What is the safest way to add fake eggs so they do not come loose?
For movable props or centerpieces, secure eggs with a tiny dot of hot glue on the underside only, then avoid running glue over the nest fibers. If the nest is for indoor display, you can also embed eggs slightly into moss on top for extra friction, but do not add heavy glue masses that can flake.
My balloon method nest keeps losing its shape while drying. What should I change?
Re-press during drying when the sides start to slump, and reinforce the cup rim earlier rather than later. A common fix is to pack the rim area more tightly with the same fiber bundle you are using for the interior, so the edge sets first and supports the rest of the structure.
Can I paint or dye a natural-material nest to match a specific bird habitat or decor theme?
If the nest is just for indoor decor, you can lightly tint natural fibers before assembly, then seal with a matte finish. For anything that might be near birds, skip dyes and scented sealants, because residues and fumes are unnecessary risks.
Is it okay to place a fake nest outdoors as a decoration without expecting birds to use it?
Even if you do not intend it as a nesting aid, treat it as wildlife-contact territory. Keep it away from likely nesting areas, ensure no fiber ends are loose, and do not include any material type that can unravel or hold chemicals (including dryer lint, scented fibers, and detergents).
How can I tell whether my materials are “too dangerous” for any outdoor contact?
If a material can form long free strands, unravel into loops, or carry chemical residues (detergents, fabric softeners, dryer sheets), it is too risky. Also avoid anything that stays wet longer than natural vegetation, since moisture holding can degrade the craft and create problematic residue.
What size should I make the nest if I am using it for a school model or photo prop?
For most classroom or tabletop displays, a 4 to 5 inch nest reads clearly without becoming fragile. If you increase scale, reinforce the structure at the rim and base earlier, because larger nests require more tension and tighter packing to stay rigid.
How long does a glued indoor craft nest typically last, and what causes premature failure?
Indoor nests usually last longer once fully cured, but humidity can soften joints and loosen fibers over time. Keep them away from steam sources like kitchens and bathrooms, store them dry, and avoid handling when the nest feels even slightly damp.
Can I make the nest more stable for a shelf or wreath without altering the look?
Use a hidden support method instead of extra glue on visible fibers. A small concealed base (floral foam for props, or a discreet ring of wire through the base) helps prevent wobbling while keeping the rim and interior looking natural.
Are there any glue types I should avoid for bird-safe projects?
Avoid glues that leave strong odors or sticky residue, and avoid applying glue liberally across the structure. If you are aiming for any outdoor proximity, limit consolidation to a minimal diluted glue mist on the exterior only, then let everything dry completely before any exposure to air and moisture.
What is the best “practice first” project if I want to learn weaving without committing to a full nest?
Start with a small scale version using the same weaving logic (coiling and weaving a shallow cup) or a mini nest approach. It lets you test tension, rim tightness, and how fibers behave while staying low-cost if you need multiple attempts.
Next Articles
How to Make a Bird Nest in Minecraft: Bedrock Guide
Step by step Bedrock guide to build a Minecraft bird nest, including materials, placement tips, and troubleshooting.

How to Build a Chimney Swift Bird House DIY Guide
Step-by-step DIY plans to build a chimney swift bird house, with correct dimensions, placement, and weatherproofing for

How to Build an Oriole Bird House: Step-by-Step DIY
Step-by-step DIY for building an oriole bird house with right dimensions, weatherproofing, predator-safe placement, and