Making a model of a bird nest is genuinely one of the most satisfying DIY projects in this hobby, and it is more achievable than most people expect. Whether you want a realistic display piece for education, a craft prop with decorative eggs, or an actual functional nesting structure that wild birds might use, the core skills are the same: pick the right form, use the right materials, and build it with enough structure that it holds together under real-world conditions. This guide walks you through every step, from choosing your purpose to troubleshooting a nest that keeps falling apart. If you are working through a Minecraft build and want to recreate the look of a real nest, use this guide to plan the structure and materials you need how to make a bird nest in minecraft.
How to Make a Model of Bird Nest: DIY Step by Step

First, decide what this nest is actually for
This is the single most important decision you will make before touching a single twig, because it changes everything downstream: the materials you use, the binding methods, the finishing, and where you put the finished nest. There are two main paths.
A display model is a prop or educational piece. You might be building it for a classroom, a nature table, a photography backdrop, or just because you want a beautiful, realistic nest to sit on a shelf with some decorative eggs inside. For this use, you have more flexibility with adhesives, wire armatures, and sealants because birds will never actually touch the thing. You can even add decorative moss, lichen, or a resin finish to make it look stunning and last for years.
A functional nesting structure is something you intend to place outdoors where a real bird might actually use it, either by building inside it or using it as a supplemental nesting platform. For this use, blank" rel="noopener noreferrer">every single material choice has to be bird-safe and non-toxic, because birds will handle it, line it, and feed nestlings inside it. Audubon recommends using bird-friendly nesting materials that are safe for nest building blank" rel="noopener noreferrer">bird-safe and non-toxic. No shortcuts, no synthetic adhesives touching the interior, no treated wood shavings. I will flag which approach each step applies to as we go.
If you are not sure which path you want, start with a display model. You will learn the construction techniques without any pressure, and once you are comfortable, you can build a second version using only natural, bird-safe materials for actual outdoor use. I made that mistake in reverse my first time, and ending up with a lovely looking nest that I could not ethically put outside was frustrating.
Choose the nest style and the bird you are modeling
Birds do not all build the same nest, and matching your model to a real species makes it look far more convincing and teaches you something useful. There are three main styles worth knowing for this kind of project.
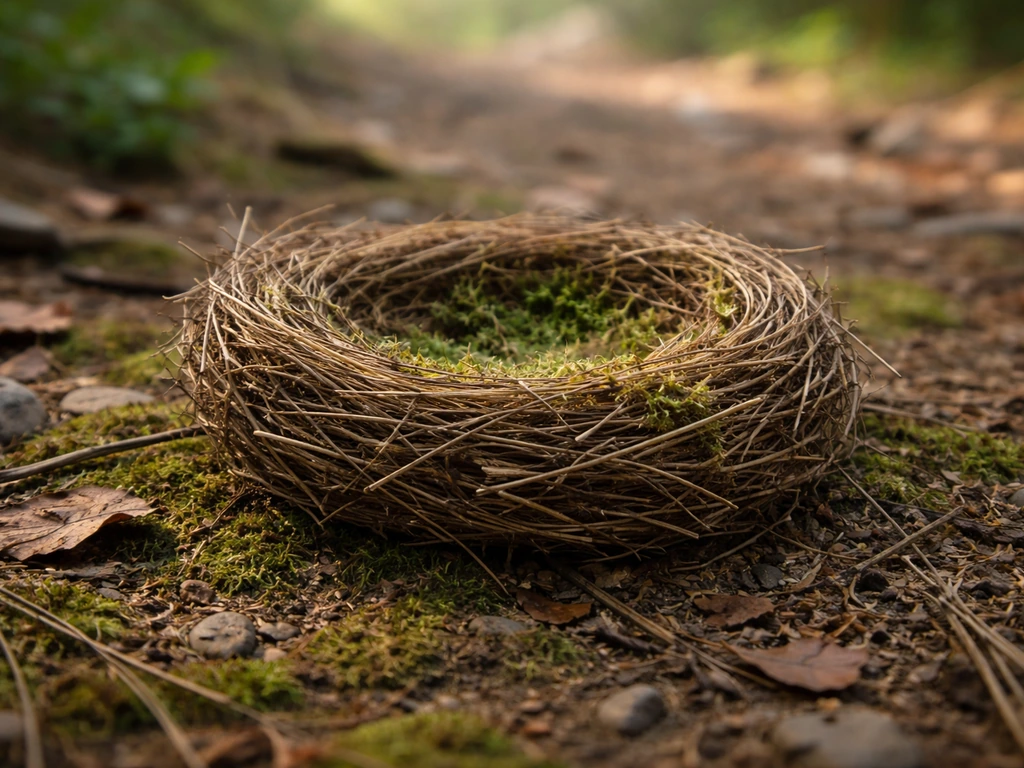
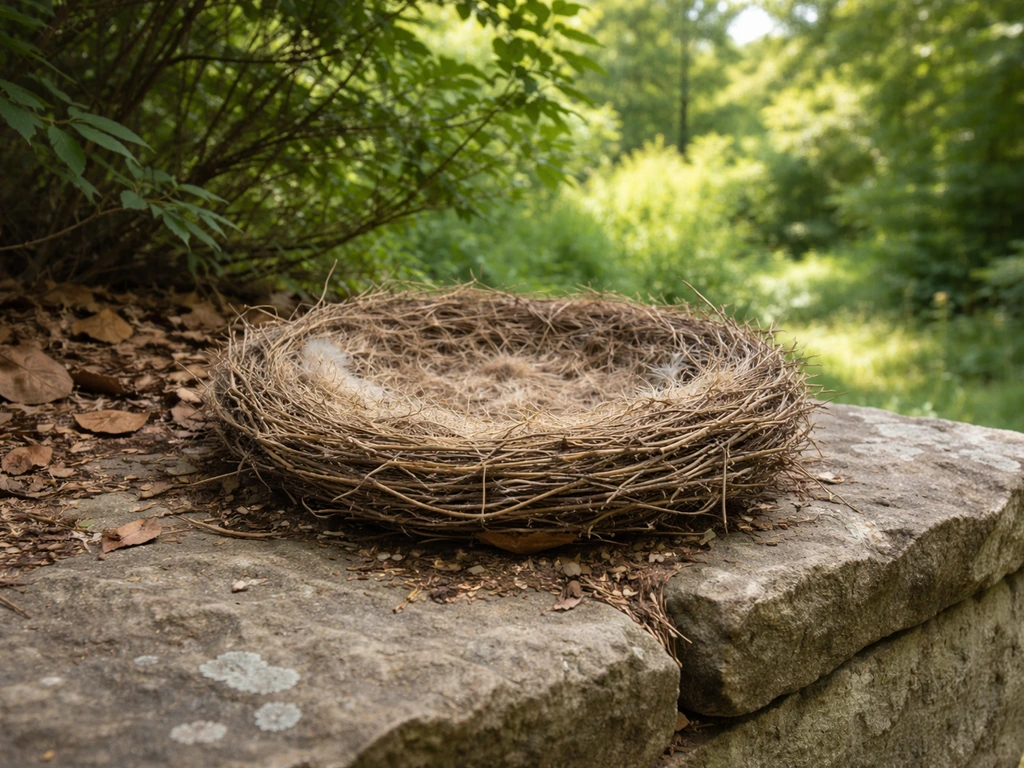
Cup nest
This is the classic nest shape most people picture: a rounded, open bowl made from woven grass, fine twigs, and soft inner lining. If you want the full, step-by-step approach for grass specifically, see our guide on how to make a bird nest with grass. Robins, sparrows, finches, and warblers all build cup nests. The interior cup diameter for a robin is roughly 4 inches across and about 2 to 2.5 inches deep. For a sparrow, go a bit smaller, around 3 inches across. This style is the most rewarding to build by hand because the weaving technique looks impressive but is not actually that complicated once you have the base form sorted.
Platform nest
Platform nests are broader and flatter, built by birds like mourning doves and some raptors. They are a loose collection of sticks layered into a rough platform rather than a tightly woven bowl. These are the easiest style to build because precision matters less, and they work well as functional outdoor nesting platforms if placed on a sheltered ledge or in a tree fork. For a mourning dove, a platform roughly 8 inches across works well.
Ground-style nest
Ground nesters like killdeer and some sparrow species build scrape nests: shallow depressions lined with grass, leaves, or small pebbles. As a model, these are great for educational displays because they show how minimal a nest can actually be. As a functional structure, they are tricky to replicate in a backyard setting without creating predator exposure problems, so they are better left as display pieces.
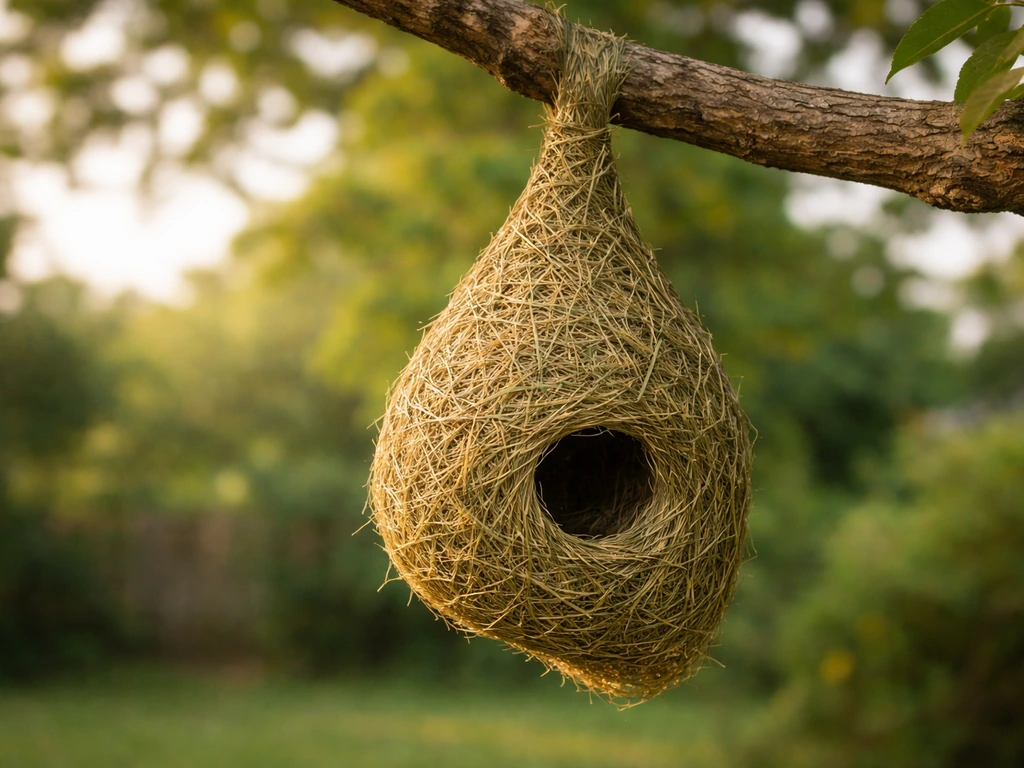
If you want to go deeper on specialty styles, a woven hanging nest like those built by weaver birds is a whole separate skill set and a genuinely impressive project worth tackling once you have the cup nest technique down. If you want the deeper, species-specific version, follow our weaver bird nest walkthrough for the hanging style and materials. Similarly, a mini nest model scaled down for display purposes uses the same techniques but with finer materials. If you are specifically aiming for a mini bird nest, scale the same structure and lining steps down carefully so it still looks realistic and holds its shape mini nest model.
Bird-safe materials and what to absolutely avoid
Getting the materials right is non-negotiable, especially if there is any chance birds will interact with your finished project. Here is what works well and why.
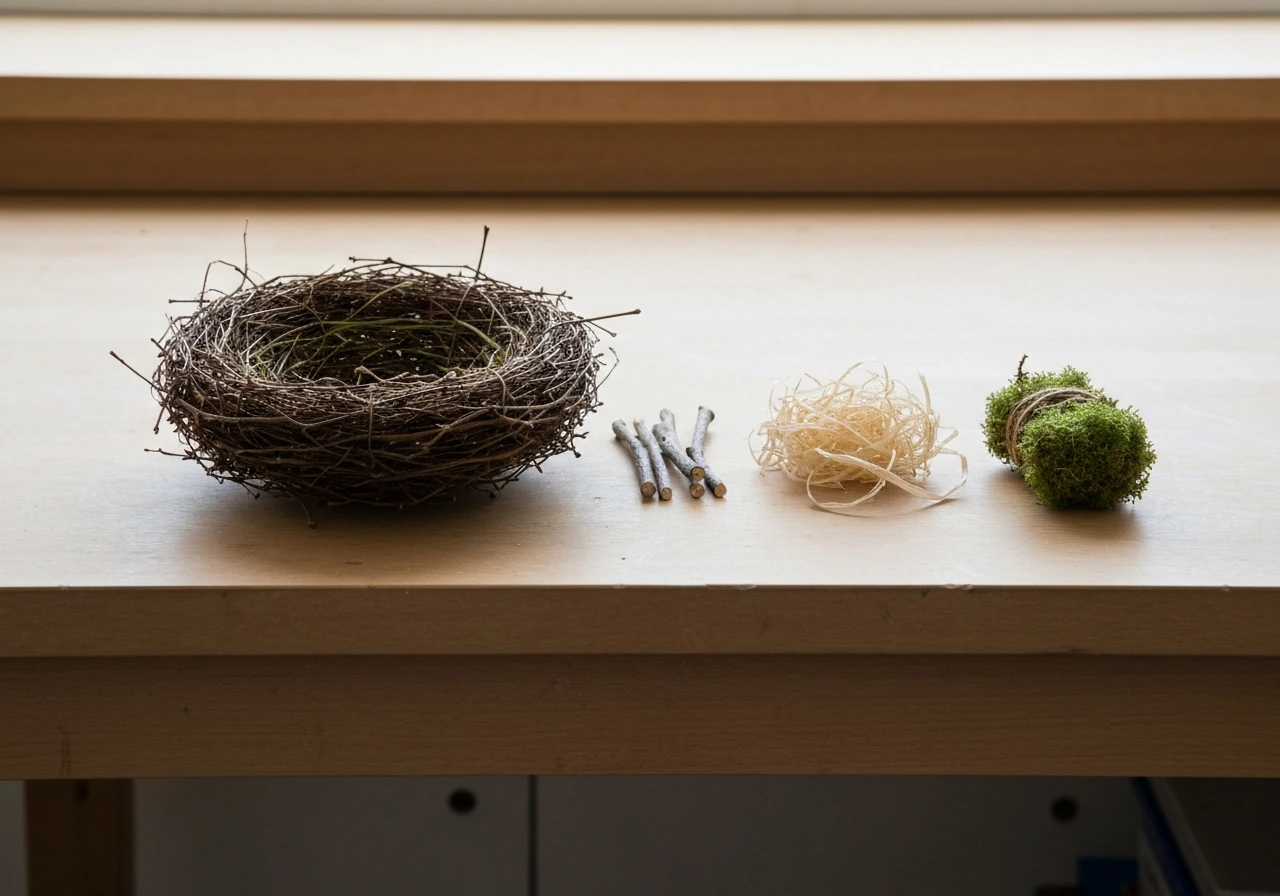
Good materials to use
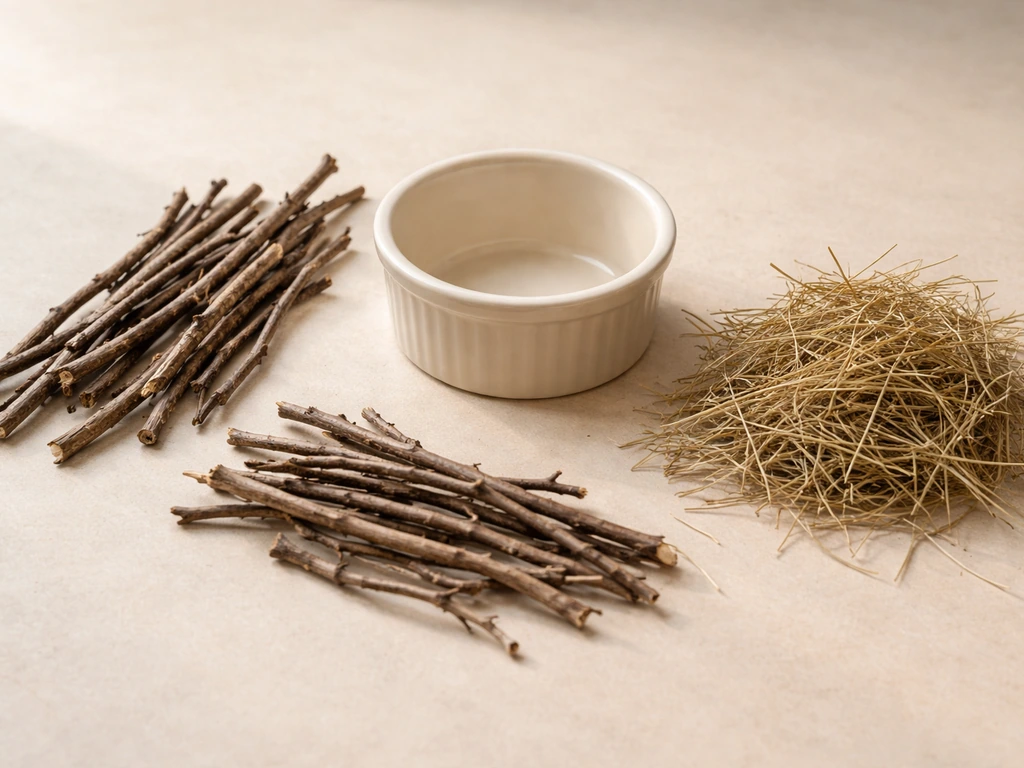
- Dry twigs and small branches (collected from the ground, not cut from living trees): these form the structural outer layer and hold their shape well
- Dried grass clippings (untreated, no pesticides): ideal for the middle weave layer and for lining a functional nest
- Straw or hay: good structural filler, widely available at garden centers, and birds readily accept it
- Dry moss (collected or purchased from craft stores for display; natural collected moss for functional nests): adds realistic texture and insulation
- Dried leaves: useful as a middle layer and for ground-style models
- Coconut fiber (plain, no dyes): excellent lining material that birds naturally accept
- Plant-based raffia (undyed): works for weaving and binding, and birds can incorporate it into real nests
- Feathers (naturally molted, not purchased synthetic): an optional inner lining layer for display or functional use
Materials to leave out completely
This list matters. String, yarn, twine, and any fibrous material with strand length over about 4 inches can wrap around the legs and necks of nestlings, cutting off circulation. The U.S. Fish and Wildlife Service is explicit about this danger, and it is one of the most common well-intentioned mistakes people make when setting out nesting materials. Dryer lint sounds cozy but it collapses when wet, losing all insulating value and potentially exposing nestlings to cold. Human hair carries the same entanglement risk as string. Plastic strips, aluminum foil, and cellophane are outright hazards and should never be part of any nest, display or otherwise. Treated wood, chemically coated wire, and synthetic adhesives used on interior surfaces are also off the list for any nest that real birds will use.
| Material | Display Model | Functional Nest | Notes |
|---|---|---|---|
| Dry twigs/branches | Yes | Yes | Backbone of any nest style |
| Untreated dried grass | Yes | Yes | Best all-purpose filler |
| Dried moss | Yes | Yes (natural) | Adds texture and insulation |
| Coconut fiber | Yes | Yes | Great lining material |
| Craft wire (exterior only) | Yes | No interior | For armature only on display models |
| Hot glue | Yes | No | Display use only; never touches interior of functional nests |
| Dryer lint | No | No | Collapses when wet, no insulation value |
| String / yarn / twine | No | No | Entanglement hazard for nestlings |
| Human hair | No | No | Same entanglement risk as string |
| Plastic strips / foil / cellophane | No | No | Hazardous regardless of use |
Build the base form and get the dimensions right
The base form is the skeleton that gives your nest its shape while you build around it. Getting this right early saves you from a frustrating collapse halfway through construction. I skipped this step on my first attempt and ended up with a lopsided, too-wide nest that looked nothing like a real cup nest.
For a cup nest: use a bowl mold
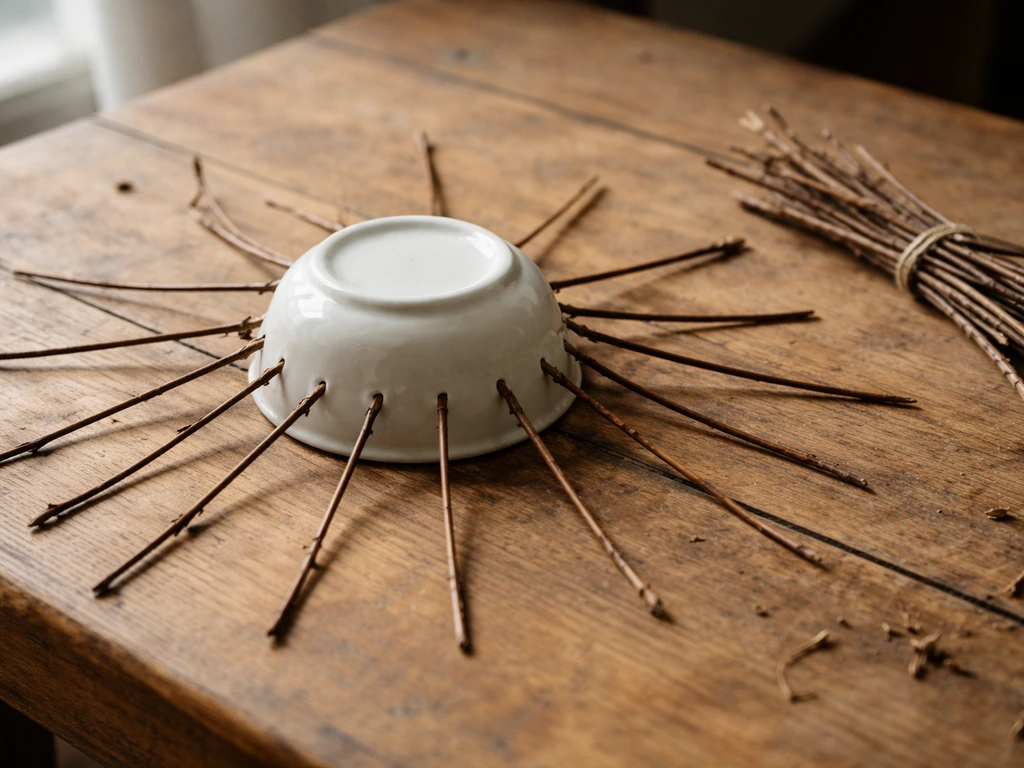
Find a round bowl or ramekin with the interior diameter you are targeting. For a robin-style cup nest, a 4-inch diameter bowl works perfectly. For a sparrow or finch style, go down to 3 inches. Wrap the outside of the bowl in plastic wrap so your materials do not stick to it. This bowl is your temporary mold. You will build the nest over and around it, let it set, and then remove the bowl once everything is firm.
Species size reference
| Bird Species | Interior Cup Diameter | Interior Depth | Outer Diameter (approx) |
|---|---|---|---|
| American Robin | 4 inches | 2.5 inches | 6 to 7 inches |
| House Sparrow | 3 inches | 2 inches | 5 inches |
| House Finch | 3 inches | 1.5 to 2 inches | 4.5 to 5 inches |
| Mourning Dove (platform) | 8 inches | 1 inch (flat) | 8 to 10 inches |
| Display model (generic) | 3 to 4 inches | 2 inches | 5 to 6 inches |
For a platform nest, skip the bowl mold. Instead, lay your sticks across a flat surface and build outward and upward in layers, which I will cover in the next section. For a ground-style display, a shallow plate or the lid of a jar works as a temporary base form.
Start with the outer structural layer
Collect twigs around 4 to 8 inches long and roughly pencil-width or thinner. Lay 6 to 8 of them across the bottom of your inverted bowl mold in a loose spoke pattern, letting them extend past the rim. These become the foundation of your outer wall. Press them gently against the curve of the bowl. Do not worry about perfection here. Real nests are not perfect, and a little unevenness actually makes the model look more authentic.
Weaving, stacking, and joining: building up the walls
This is the part most people overthink. Birds do not weave in neat, regular patterns the way basket makers do. They push, tuck, and loop. Your goal is to mimic that organic quality, not to produce a tidy grid.
The basic tuck-and-loop technique for cup nests
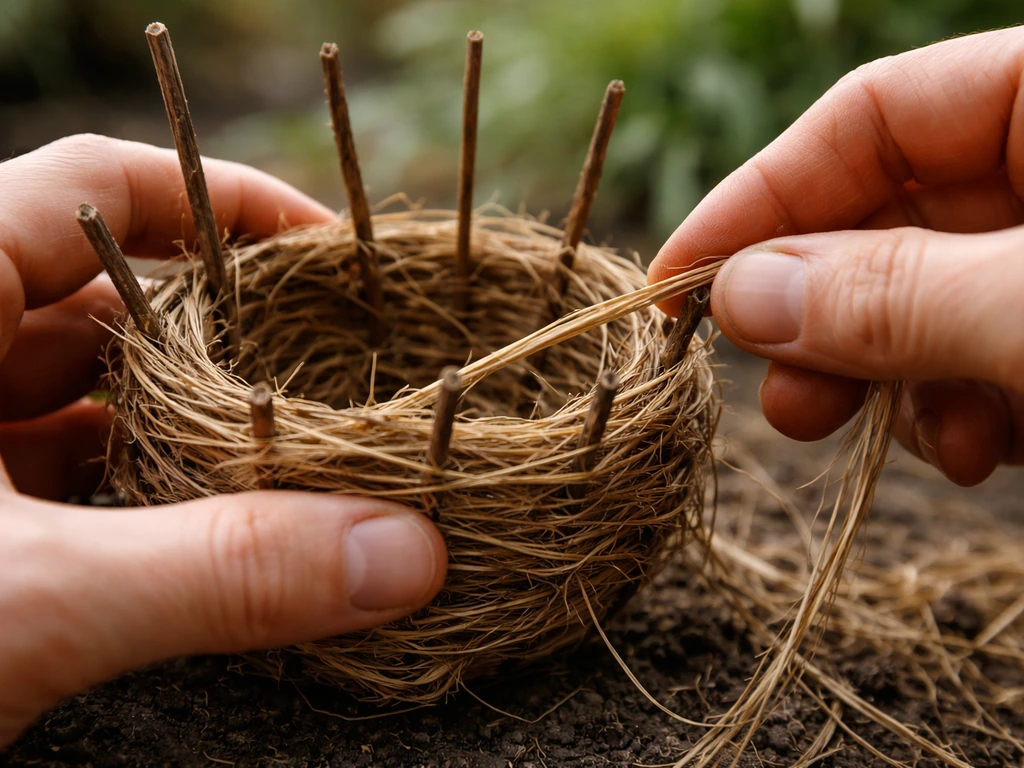
- With your spoke twigs in place over the bowl mold, begin weaving finer twigs or stiff dried grass stems horizontally around the spokes, going over one and under the next in a loose spiral working upward from the base.
- After each pass around the circumference, press the material downward firmly against the bowl to keep the cup shape tight. This is the step I used to skip, and it is why early nests came out too wide and shallow.
- Add a second layer using medium-weight dried grass bundles, pressing them into the gaps between the twigs. Tuck the ends inward and downward so they are anchored by the layer above.
- For a display model, you can add a thin bead of hot glue at the base intersections only (never on the interior surface) to lock the structure once you are happy with the shape.
- For a functional nest, rely on tension and interlocking rather than adhesive. Wet the grass or fiber slightly before weaving; it becomes pliable and grips better as it dries and tightens.
- Continue building upward until the walls are about half an inch above the rim of your bowl mold. This gives the nest walls enough height to hold eggs or decorative inserts without them rolling out.
- Carefully slide the bowl mold out from inside. The nest should hold its shape. If it collapses, the outer layer was not interlocked tightly enough; press it back into shape and add more horizontal weaving passes before removing the mold again.
Stacking technique for platform nests
Platform nests are built by layering rather than weaving. Start with a loose bundle of sticks laid in one direction, then cross a second layer perpendicular on top, and continue alternating directions with progressively finer material. There is no mold needed. Just keep the footprint roughly circular as you build. A shallow central depression forms naturally if you press down gently at the center of each layer with your thumb. For mourning doves, keep it loose and open-structured because a too-dense platform actually discourages use.
Adding the inner lining
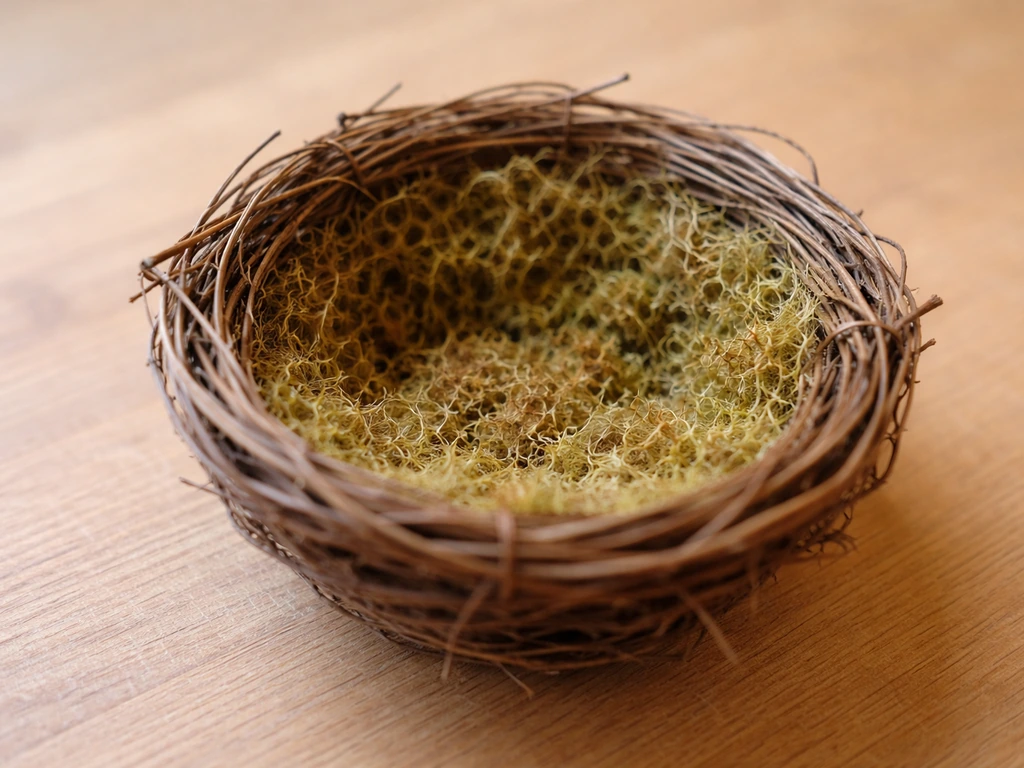
The inner lining is what makes a nest look finished and realistic. For display models, fine dried moss pressed gently into the cup interior works beautifully and photographs well. For functional nests, use coconut fiber, soft dried grass, or plant-based raffia in short lengths (under 4 inches to avoid entanglement risk). Press the lining material firmly into the cup so it conforms to the shape and does not lift out. If you are making a display model with decorative eggs, the lining is what seats the eggs naturally and keeps them from rocking.
Finishing the nest, placing it, and handling weather
Display model finishing
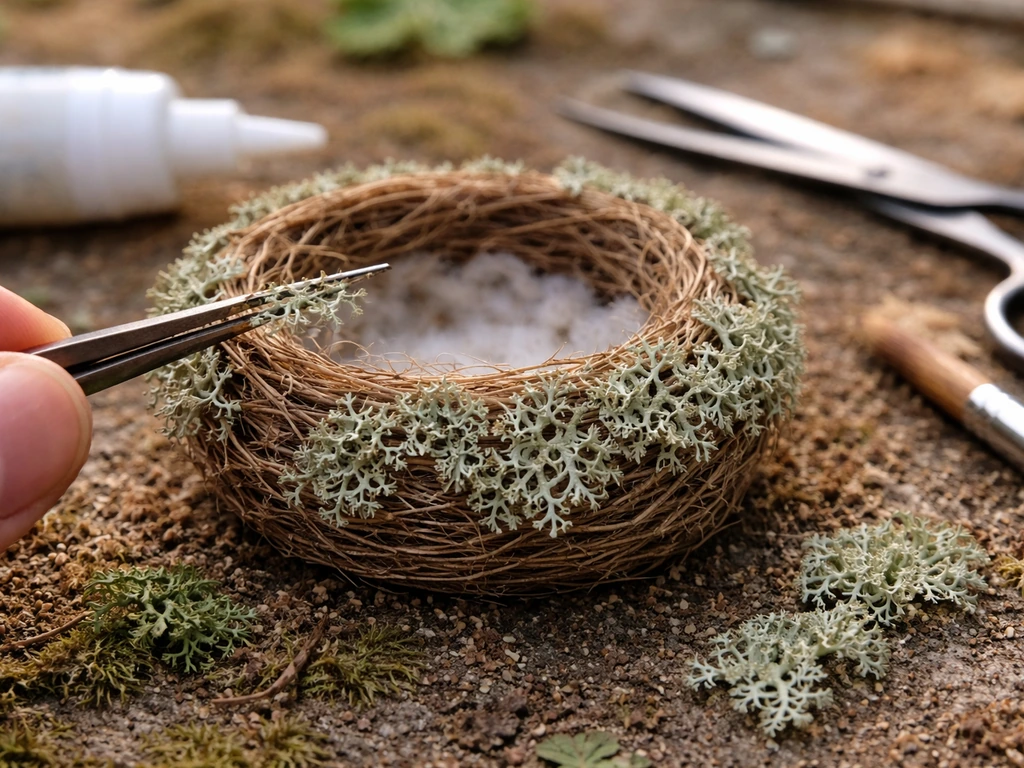
Once the structure is dry and firm (give it 24 hours minimum after any wet-weaving step), you can add decorative details. Pressed lichen glued onto the outer surface is the single best detail that makes a model look like a real wild nest. Small fragments of bark, a few tiny feathers tucked into the rim, and a dusting of fine dried grass give a very convincing finished look. For a long-lasting display piece, a very light coat of matte clear sealant sprayed from 12 inches away will lock everything in place without making it look plastic. Keep the interior uncoated if you are displaying eggs, so they sit naturally.
Functional nest finishing and placement
A functional nest placed outdoors needs no sealant, but it does need placement that manages weather. The biggest failure point for outdoor nesting structures is water pooling in the cup. Place cup-style nests in a naturally sheltered position: under a dense branch canopy, on a protected ledge, or inside a nesting shelf box that has a roof overhang. Orient the nest so prevailing wind does not blow directly into the open cup. For platform nests, a slight forward tilt of the supporting surface helps rain run off rather than pool.
Timing matters too. Spring is the obvious season, but in many regions birds begin scouting nest sites in late February or early March. Having structures in place by early April (which, given today's date, means you are right on time for late-season placement in most of North America) gives birds the best chance to discover and accept them.
Placement height and position by nest type
- Cup nest on a shelf or fork: 5 to 15 feet off the ground, sheltered from direct sun and rain, in or near shrub cover
- Platform nest for mourning doves: 6 to 12 feet, on a flat ledge or nesting shelf bracket attached to a fence or tree
- Display model indoors: keep out of direct sunlight to prevent fading; a north-facing shelf or glass display case works well
Safety, troubleshooting, and setting up a real bird-friendly space
Safety and ethics to keep in mind
If you place a functional nest structure outdoors and birds begin using it, do not disturb it. In the United States, active nests with eggs or nestlings are protected under the Migratory Bird Treaty Act. You can monitor from a respectful distance, but handling an active nest or moving it is not legal and is obviously harmful to the birds. If you build a functional nesting platform or shelf and want to be able to clean it between seasons, design it with a removable floor panel or a hinged side so you can access the interior after the season ends and the birds have moved on.
Common problems and how to fix them
| Problem | Likely Cause | Fix |
|---|---|---|
| Nest collapses when mold is removed | Not enough interlocking passes in the weave | Add more horizontal weaving layers before removing the mold; dampen materials slightly for better grip |
| Walls too stiff and unnatural looking | Twigs too thick or too many adhesive points | Use finer material for the outer layer; reduce adhesive to base intersections only |
| Cup too wide and shallow | Mold not pressed firmly enough during construction | Use a narrower mold and press material down against it every 2 to 3 weaving passes |
| Nest gets soggy outdoors | Placed in exposed position without roof shelter | Move under branch canopy or add a nesting shelf with a roof overhang |
| Insects or mold appearing | Organic material retained moisture | Ensure full drying before display or placement; replace lining material seasonally for functional nests |
| Birds ignoring the functional nest | Placed too recently or in too exposed a location | Give it 2 to 4 weeks; move to a denser, more sheltered spot with nearby cover |
Turning your model into a full bird-friendly setup
A handmade nest model is a great entry point, but it works best as part of a broader backyard habitat. Birds choose nesting sites based on food proximity, water access, shelter, and predator exposure, not just whether a nest structure is available. Pairing your nesting platform or shelf with a nearby water source, native plantings that provide insects and cover, and a predator baffle on any pole-mounted structure dramatically increases the chance that birds will actually use what you build.
If you enjoyed building a basic cup nest model, there are natural next steps worth exploring. If you want to take the skills from this cup nest model and apply them to a complete real-project plan, see our guide on how to make a bird nest for a clearer overview of the materials and steps. A nesting ball made from a wire frame stuffed with natural fiber gives birds loose material to harvest and incorporate into their own nests, which is a different but complementary project. If you are comfortable with the weaving technique, a full weaver-bird style hanging nest is a serious construction challenge that showcases just how sophisticated bird architecture really is. And if you want to scale up the fun, a human-sized nest built from flexible branches and straw makes a remarkable garden installation or teaching prop for groups. If you want that big, garden-scale result, focus on proportions and bird-safe materials so it still reads as a believable nest a human-sized nest.
The model you just built is proof that you can work with natural materials, follow a form, and produce something that looks like the real thing. That is exactly the skill set you need for every bird housing project on this site. Start simple, build confidently, and let the birds tell you what works.
FAQ
How can I make my nest model look more like a real nest at the rim and edges?
For a realistic look, make the “rim” slightly thicker and uneven by adding a couple of extra twig wraps around the top edge after the cup shape sets. For functional nests, keep the rim and interior loosely packed so birds can pull lining material without snagging on long fibers.
My nest keeps falling apart, what’s the most common construction mistake?
If your cup keeps collapsing, the usual cause is a too-sparse outer wall or twigs that are too short. Use longer, pencil-width twigs for the foundation layer (about 4 to 8 inches) and press them firmly into the curve before you start layering and adding inner lining.
Can I use sealant if I’m putting decorative eggs in the nest?
Yes, but only as a display piece. Avoid sealing the interior with any product if eggs are involved, because many sealants leave an odor or residue. For displays, seal the outside lightly and keep the cup lining uncoated so eggs seat naturally.
What placement choices reduce predation risk for outdoor nesting platforms?
Do not place a functional nest near predators. For platforms, choose a sheltered location where you can minimize open access from below or from perches, and avoid placing it where it can be easily reached by cats or squirrels.
How can I encourage birds to use my outdoor nesting model without disturbing it?
If you want to help birds find it without increasing risks, add “free harvest” lining material nearby that is bird-safe (short, dry plant fibers) and keep the built structure intact. Do not move or open the nest once birds start visiting.
What dimensions should I target for different bird styles?
Choose the species first, then tune dimensions. A quick starting point is robin cup size around 4 inches wide, sparrow around 3 inches, then adjust depth based on how tightly you pack the inner lining. If the nest looks too deep or too shallow, your proportions will read “wrong” even if weaving is accurate.
How do I prevent the nest from tearing when I remove the mold?
If you are using a bowl mold, wrap it well to prevent sticking, then remove only after at least a full day of drying. Rushing the unmolding is a leading cause of cracked bowls and deformed cups, especially when the inner lining is damp.
Can I add extra padding or filler to make a functional nest more comfortable?
For functional use, don’t add “filler” like synthetic padding or long fibers to bulk it out. Instead, build the structural wall from appropriate twigs and use short, plant-based lining that conforms to the cup, then leave it unsealed.
How should I build a platform nest if I don’t have a mold?
If you’re aiming for a platform, don’t chase a precise circular shape. Keep layers alternating directions and allow a gentle center depression, then stop when it holds together with natural gaps. Over-compressing a platform can make it less inviting.
How does weather or material moisture affect how long the nest stays intact?
Use only dry materials. Dry twigs and dry plant lining reduce shrinkage and warping, and they help the structure set within the expected 24-hour drying window after wet steps.
What’s the best way to clean or refresh a functional nest after the season ends?
For cleanup between seasons, design access into the structure ahead of time, like a removable floor panel or hinged side. This lets you remove accumulated lining and debris after birds leave, without forcing you to open an active nest.
How do I make the finished nest look realistic rather than handcrafted and uniform?
To keep the model from looking too “perfect,” vary twig thickness and spacing slightly, and add small realism details like a thin dusting of fine dried grass on the exterior. Use delicate textures rather than heavy coatings, especially on the outer wall.
Step-by-step guide to make a functional weaver bird nest at home using safe natural materials and proper hanging.
Step-by-step DIY guide to make realistic fake bird nests for crafts using natural and repurposed materials, safely and e
Step by step Bedrock guide to build a Minecraft bird nest, including materials, placement tips, and troubleshooting.