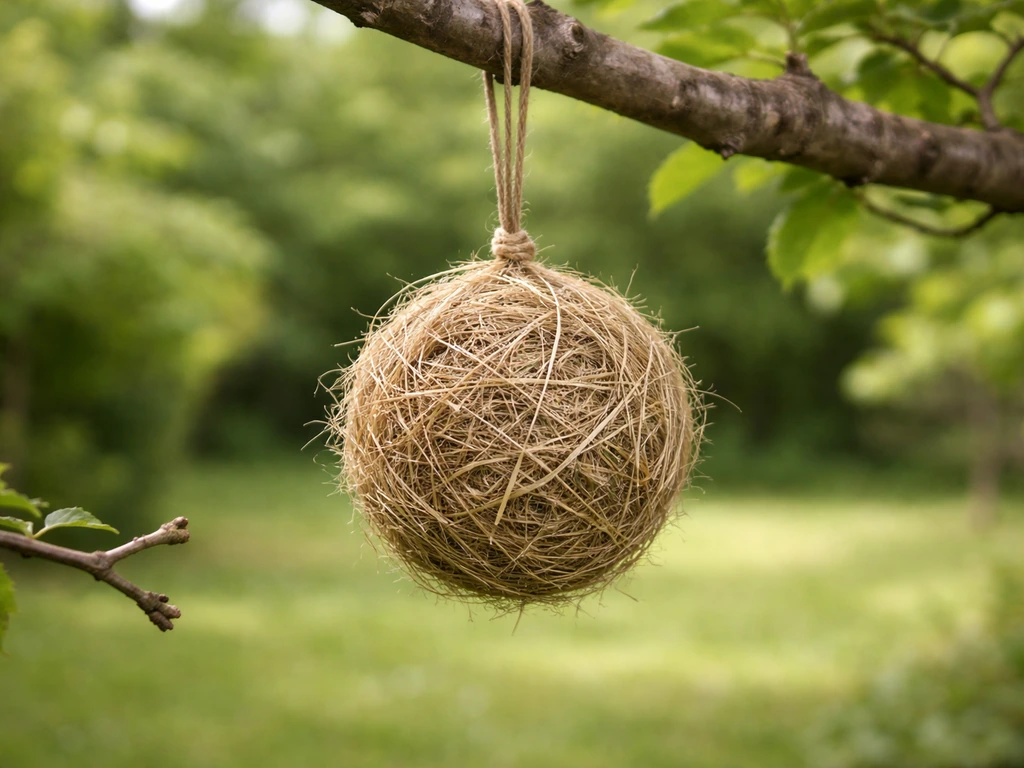
A bird nesting ball is a small, open-mesh sphere packed with natural fibrous materials that birds can pull out and carry back to wherever they're building a nest. If you're also looking for a smaller option, the approach for how to make a mini bird nest follows the same idea but scales it down for tighter spaces. If you want to make it from scratch, skip the nesting ball approach and follow this guide on how to make a bird nest with grass. If you are looking for the same idea in a different game, you can also learn how to make a bird nest in Minecraft. You hang it in the garden, and birds help themselves to the stuffing like a free materials depot. Making one takes about 20 minutes, costs almost nothing, and genuinely works, but the filler materials you choose matter more than anything else, because some popular choices (yarn, string, animal hair) can injure or kill the birds you're trying to help.
How to Make a Bird Nesting Ball Step by Step

What a nesting ball actually is, and which birds will use it

A nesting ball is not a birdhouse and not a nest itself. It's a material dispenser: a contained, weather-resistant holder stuffed with loose natural fibers that nesting birds can pluck out strand by strand to weave into their own nests elsewhere. Think of it as a self-serve hardware store for birds in spring.
The birds most likely to visit a nesting ball are small to medium cavity and open-cup nesters that actively seek soft lining materials. In North American backyards, that typically includes American robins, house wrens, chickadees, titmice, house finches, goldfinches, nuthatches, and sometimes hummingbirds looking for plant down. Swallows will occasionally grab materials mid-flight if the ball is placed in an open spot. Essentially, if a bird builds a nest within a half-mile of your yard, there's a reasonable chance it'll investigate.
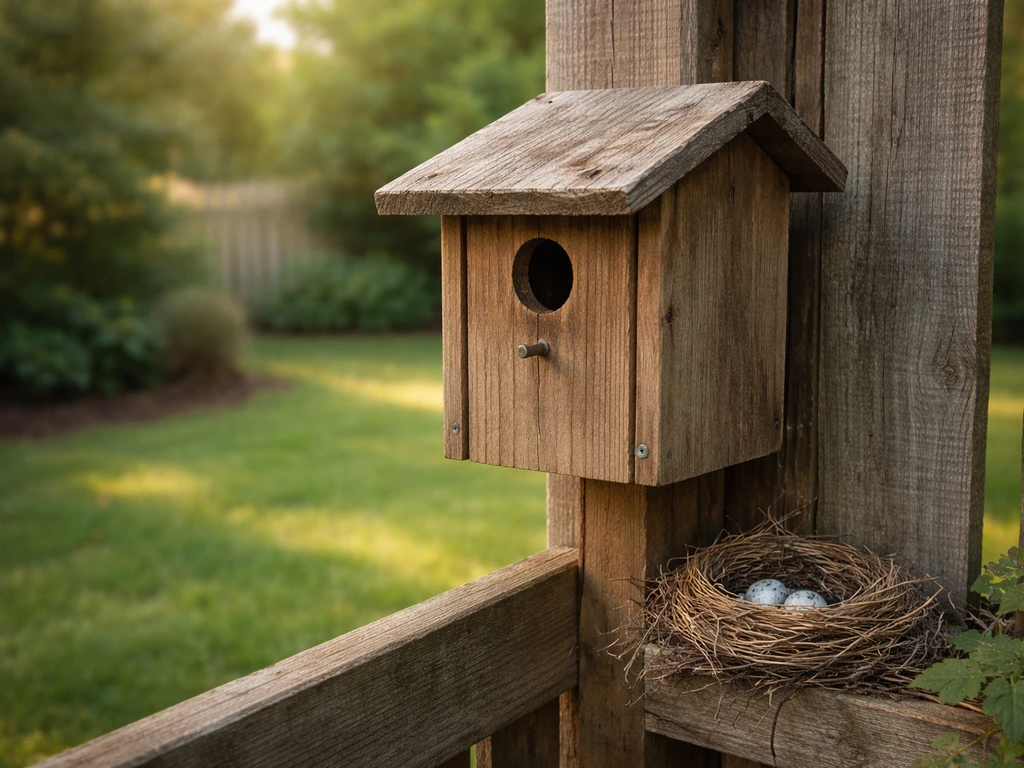
Nesting balls are a different project from nesting boxes or birdhouses (which provide a physical enclosed space for laying eggs), and they're not the same as decorative fake nests either. If you're interested in those directions, they're worth exploring as separate builds. If what you mean by “fake bird nest” is a decorative nest display, keep in mind that birds have different safety and material needs when they are actually nesting. A nesting ball's whole value is the raw material it offers during breeding season, which in most of the U.S. runs from March through July.
Picking safe materials: what to stuff it with (and what to skip)
This is the part that trips up a lot of first-time makers, and it's important enough that I want to address it directly before anything else. The U.S. Fish & Wildlife Service, Cornell Lab's NestWatch, Audubon, and the Canadian Wildlife Federation all specifically warn against offering blank" rel="noopener noreferrer">string, yarn, twine, and animal hair as nesting materials. The reason is simple and serious: blank" rel="noopener noreferrer">these long, stringy items can wrap around a bird's legs, feet, or neck, sometimes cutting off circulation, sometimes killing nestlings outright. Wildlife rehabilitators regularly receive birds injured this way. So no matter how soft that skein of yarn looks, it does not go in a nesting ball.
What does go in? Short, natural, loose fibers that birds can grab without getting tangled. The key word is short: nothing longer than about 4 to 6 inches, and ideally most pieces are even shorter than that. Here's what works well:
- Raw cotton fiber (not cotton balls, which can compact and trap moisture — use loose raw cotton or dried cotton plant fibers)
- Dried moss (sphagnum or dried sheet moss, pulled into loose clumps)
- Dry grass clippings cut into short pieces (3 to 4 inches max, fully dried before use)
- Plant fluff and seed down: dried cattail fluff, milkweed down, thistle fluff
- Coconut coir fiber (sold as a loose material at garden centers, not the compressed bricks)
- Short jute fibers (not jute twine — loose jute fiber, in pieces under 4 inches)
- Small pieces of undyed, untreated cotton fabric frayed into short threads
- Feathers that have been naturally shed (not plucked, and not from waterfowl, which can carry disease)
A note on alpaca fiber and pet fur: you'll see these recommended in some places, but Apalachee Audubon and others flag them as entanglement risks for the same reasons as yarn. I'd leave them out. Stick to plant-based, short-strand materials and you're in safe territory.
Choosing the right mesh or holder
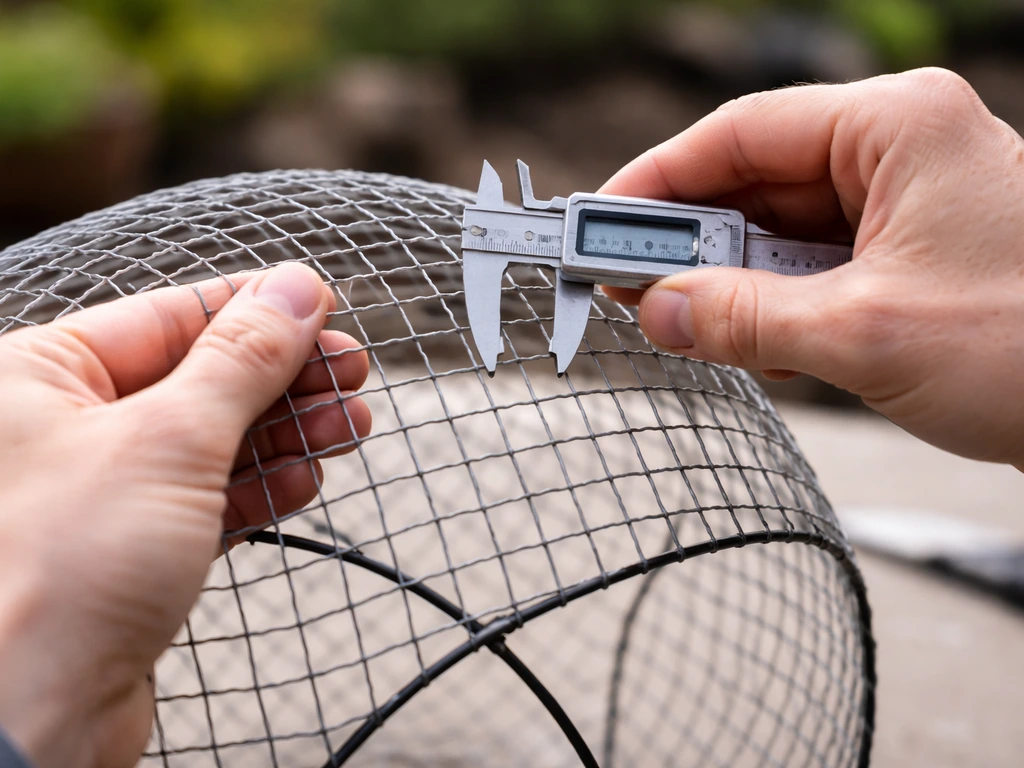
The outer structure of the ball can be made from a few different things. The mesh needs to be large enough that birds can poke their beaks in and pull material out, but not so large that a bird's foot could slip through and get caught. A hex wire mesh (hardware cloth) with openings of 1 inch is a good size. You can also use a clean suet cage recycled from a spent suet block, these are already the right size and are built for outdoor use. Alternatively, a simple open weave made from 100% natural jute netting or untreated wooden frames wrapped in jute netting works well. Avoid plastic netting at all costs: it degrades in UV light, can fray into sharp edges, and if a strand comes loose it poses an entanglement risk.
Tools and setup
You don't need much. Here's what to have on hand before you start:
- Wire cutters or heavy scissors (for cutting hardware cloth)
- Needle-nose pliers (for bending and closing wire edges)
- Work gloves (cut wire edges are sharp — protect your hands)
- Ruler or tape measure
- A hanging hook or short length of thin-gauge galvanized wire for the suspension loop
- Your chosen mesh: a 12 x 12 inch square of 1-inch hex hardware cloth is enough for a 5-inch ball
- Your pre-dried, pre-cut nesting materials
- Optional: a second person helps when shaping the wire around the fill material
If you're using a recycled suet cage instead of forming your own wire ball, you can skip the wire cutters and pliers for the body construction, you just need something to fasten the cage shut and a hook to hang it. That's actually the fastest beginner route and it produces a result just as functional as a hand-formed ball.
How to make the nesting ball, step by step
Target size for a finished nesting ball is roughly 5 inches in diameter. That's large enough to hold a useful amount of material, small enough to hang easily and not become a water-trapping sponge. Here's the full build process:
- Dry your materials completely first. This step gets skipped and then regretted. Any moisture in the fill will cause mold within days once the ball is hanging in a shaded spot. Spread your grass clippings, moss, or cotton fiber on a flat surface in full sun for at least 24 hours before building. Squeeze clumps to check — they should feel completely dry and slightly crisp, not soft or cool.
- Cut your nesting material pieces to size. Go through your fill and pull apart any pieces longer than 5 inches. Scissors work fine. You want a loose, airy pile of varied textures — a mix of moss, cotton, and dried grass works particularly well together because the different textures mimic what birds find naturally.
- Cut your wire mesh. Using wire cutters and gloves, cut a circle or rough square of 1-inch hex hardware cloth about 14 inches across. This gives you enough material to wrap around a 5-inch ball with overlap for closing.
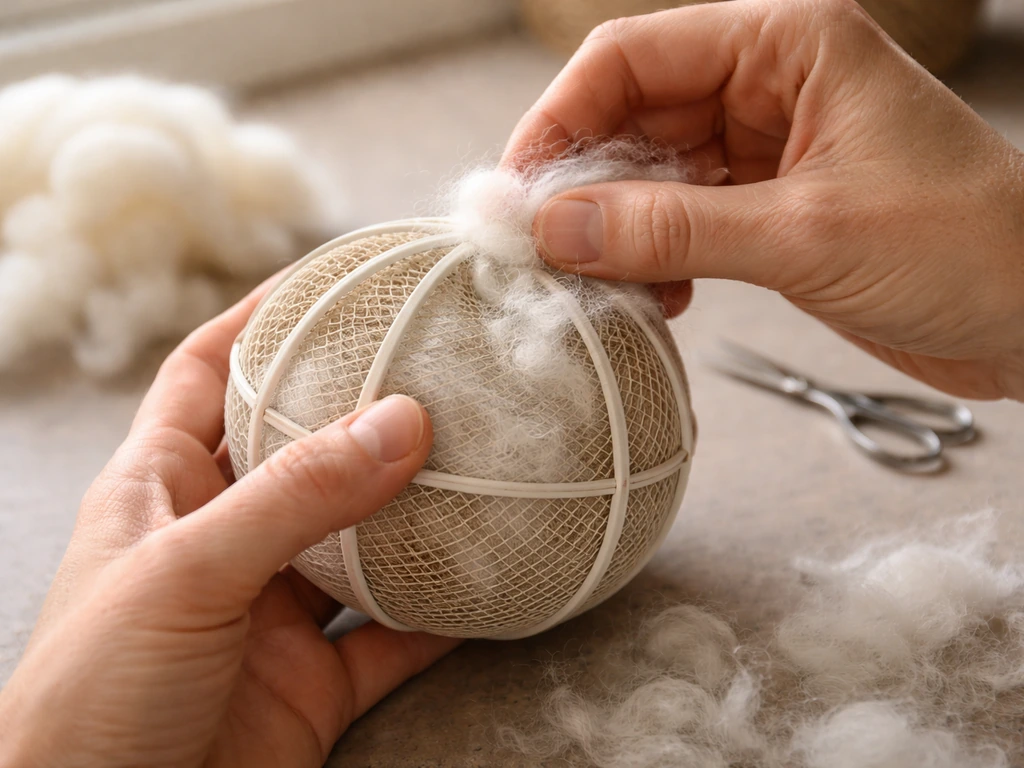
- Bend the wire into a rough bowl shape using your hands and pliers. You're aiming to create a half-sphere you can pile materials into before closing it up.
- Load the fill. Place a generous, loosely packed handful of your dried materials into the wire bowl. You want it well-filled but not compressed — birds need to be able to pull individual strands out. A compressed ball of material isn't accessible.
- Close and shape the ball. Fold the remaining wire mesh up and over the fill, shaping it into a sphere as you go. Use needle-nose pliers to bend any protruding wire ends inward and tuck them flat so there are no sharp points exposed. Go around the whole ball and check every edge. This is the most important safety step of the build.
- Attach your hanging loop. Cut a 6-inch piece of thin-gauge galvanized wire. Thread it through the mesh near the top of the ball and twist the ends together tightly to form a closed loop. Make sure it's secure — you don't want the ball dropping if a bird lands on it.
- Give the finished ball a gentle shake. Loose material should be accessible but not falling out in clumps. If material pours out freely, the mesh openings are too large or the fill is too loose — add a little more material. If you can't pull any out with your fingers, the ball is too tightly packed.
If you're using a repurposed suet cage: fill it loosely with your dried materials, close the latch, add a hook or short wire loop to the top, and you're done. If you want a bird-nest model that behaves like this build, follow the same steps of choosing safe fibers, selecting the right mesh, and keeping the size bird-friendly repurposed suet cage. Honestly, it takes four minutes and birds don't care about aesthetics. I've had suet cage nesting balls outperform my handcrafted wire balls simply because the openings were perfectly sized.
Where to hang it, how to mount it, and what to watch for
Placement makes a big difference. You want the nesting ball visible to birds but close enough to cover (shrubs, trees) that birds feel safe approaching it. A spot 5 to 10 feet off the ground, hanging from a branch or shepherd's hook within 10 to 15 feet of dense vegetation, is ideal for most backyard species. Full shade all day is too humid and risks mold; full sun all day dries out the materials too fast and can overheat them. Dappled light or morning sun with afternoon shade is the sweet spot.
Hang the ball so it's stable and doesn't spin wildly in wind, birds won't approach a swinging, erratic target. A fixed shepherd's hook arm works better than a long swaying cord. If you're hanging from a tree branch, keep the drop short (6 to 8 inches of wire or cord between the branch and the ball) and make sure the hook is actually attached to the branch, not just draped over it.
Once it's up, leave it alone for the first week or two. Birds are cautious. They'll notice it before they use it. If you see birds perching nearby and looking at it, that's a good sign. If you see a bird actually pulling material out, resist the urge to go watch closely, give them space and observe from a distance.
Check the ball weekly. After rain, check for moisture inside, you can open it and fluff the material to help it dry. If it smells musty or you can see visible mold, empty it completely, let the wire dry, and refill with fresh dried material. Most nesting balls last 4 to 6 weeks of active use during breeding season before needing a refresh. Once nesting season is over (typically by late July in most of North America), take the ball down, clean it, and store it for next year.
Common mistakes, things that go wrong, and how to fix them
Birds aren't using it
Give it at least two to three weeks before troubleshooting. If nothing is happening after that, try moving it closer to a shrub or tree edge, you want the ball to feel like it's near cover, not floating in open space. Also check timing: nesting balls are most useful from late February through June depending on your region. A ball hung in August may see zero action until the following spring.
Material falling out or clumping
If material is falling out in clumps, the mesh openings are too large for the fiber size you used. Try packing the ball more firmly (without compressing it so tight birds can't pull anything out), or use slightly larger pieces of material. If the material is clumping and matting together, it went in damp. Remove it, dry it completely, and refill.
Sharp wire edges
Run your bare hand slowly around the outside of the finished ball before hanging it. Any spot where the wire snags your skin will snag a bird. Use pliers to fold those ends inward and flat. Don't rush this step. I made a ball for my first season and found two sharp edges I'd missed when I went to re-stuff it, they hadn't caused problems yet, but they easily could have.
Mold inside the ball
Mold means moisture got in and didn't drain or dry. Check your placement: if the ball sits in a low-airflow spot, try somewhere with better air circulation. Make sure the ball is hanging freely rather than pressed against a fence or wall. If you're in a rainy climate, a small roof made from a piece of cedar shingle above the ball can reduce direct rain exposure without blocking access.
A quick safety checklist before hanging
| Check | What to look for | Fix if needed |
|---|---|---|
| Wire edges | No sharp points or snags anywhere on the surface | Bend all cut wire ends flat with pliers |
| Material length | No single fiber piece longer than 5 to 6 inches | Pull apart or cut any long strands before loading |
| Material dryness | Fill feels dry and slightly crisp, not cool or soft | Spread in sun for another 24 hours before using |
| Mesh opening size | Openings around 1 inch — not smaller, not much larger | Switch to hardware cloth if using other mesh types |
| Hanging loop security | Loop won't slip or untwist under weight | Twist wire ends tightly and fold the twist back on itself |
| No plastic parts | No plastic netting, ties, or hardware on or in the ball | Replace all plastic elements with metal or natural alternatives |
| No prohibited materials | No yarn, string, twine, pet fur, or human hair inside | Remove and replace with safe plant-based fiber alternatives |
Making a nesting ball is one of the more immediately rewarding backyard bird projects you can do, partly because the results are visible, you can actually watch birds using what you built. If you get the material safety right and place it well, you're giving local birds a real advantage during one of the most demanding periods of their year. And once you've made one, making a few more to distribute around the yard takes almost no extra time. If you are imagining something bigger for a display or a backyard project, see how to make a human sized bird nest for a scale-appropriate approach. If you want the specific steps for weaver birds, the techniques for building and placing a weaver bird nest are a bit different, so it helps to follow a dedicated guide. Try placing them at different heights and locations to see which spot gets the most traffic, you'll learn a lot about how your local birds move through the space. If you want the nest itself, see our guide on how to make bird and nest materials that can support different nesting styles.
FAQ
Can I use dried hay, grass clippings, or straw in a bird nesting ball?
You can, but only if the pieces are short and dry. If you use hay or straw, break it into smaller strands (aim for mostly under 4 to 6 inches). Avoid anything that still feels springy, damp, or mold-prone, because moisture will trigger clumping and mold inside the ball.
What should I do if birds pull out all the material in a few days?
That usually means the ball is underfilled or the fiber is very easy to grab. Refill soon, but do it quickly and from a distance, and keep the material dry. If it keeps emptying fast, consider adding a second nesting ball in another nearby spot rather than packing the first one too tightly.
How many nesting balls should I put in one backyard?
Start with one to test your local bird traffic, then add more if you see frequent visits or active pulling. In many yards, 2 to 3 balls spaced within view of dense cover is plenty, because too many in one small area can create competition for the same materials.
Is it safe to put a nesting ball near a feeder or other bird equipment?
Usually yes, but avoid placing it directly where birds have to land on sharp hardware or where predators can hide easily. Keep it near vegetation cover, but not so close to feeders that the ball swings into them or gets knocked down repeatedly, since a damp, fallen ball is more likely to grow mold.
Can I leave the nesting ball out year-round?
It's best to remove it after the breeding season. After nesting season, material availability is lower and the ball can become a damp storage spot for moisture or pests. Follow the usual late spring to late July window, then take it down, clean it, and store it dry for next year.
Do I need to sanitize the ball before the next nesting season?
Yes. At minimum, empty it completely, let all parts dry thoroughly, then inspect the mesh and hook area for fraying or sharp snags. If you used a suet cage, check the latch and hinge for rust or damage, and replace any deteriorated mesh rather than patching it.
How do I prevent mold without removing the ball every time it rains?
Use drier, shorter fibers and avoid fully shaded, low-airflow locations. Make sure the ball hangs freely with a little clearance from fences or walls. If rain is frequent where you live, adding a simple overhead cover (like a small cedar shingle) can reduce direct soaking while still allowing air to circulate.
Will nesting balls attract invasive or aggressive species?
They can attract a range of cavity and open-cup nesters, but you can reduce unwanted grabs by using the correct mesh size and short fibers that nesting birds can pull without getting tangled. Also, place balls near cover rather than in fully open spots, since open sites tend to invite more opportunistic activity.
My ball has sharp wire ends or the mesh snags my glove, is it still usable?
No. If you can feel snags on bare skin or gloves, birds can too. Fold any sharp points inward and flat, and check every restuffing or refill cycle, because movement can shift ends over time, especially after wind-driven swinging.
What’s the best way to troubleshoot if birds never use it?
Give it 2 to 3 weeks, then adjust placement first. Move it closer to the edge of dense shrubs or tree cover within 10 to 15 feet, and ensure the height is around 5 to 10 feet off the ground. Also confirm timing matches your region’s nesting season, late February through June is often most effective.
DIY guide to build a birdhouse or nest support: site, materials, safe dimensions, predator-proofing, and maintenance tip
Step-by-step guide to make a safe grass bird nest, choose the right grass, build a cupped bowl, and place it for local b
Step-by-step DIY guide to build a safe human-sized bird nest bed with sturdy frame, proper dimensions, and easy maintena