You can absolutely make a weaver bird nest at home that real birds might actually use. If what you want is more directly about how to make a model of bird nest, you can adapt this weaver-style home method into a simpler display version with the same woven shape and doorway concept. If what you want is more directly about how to make a bird nesting ball for home use, you can follow that more specific approach alongside this weaver-style method. If you want a larger, human sized bird nest outcome, you can scale the same weaver-inspired woven structure and entrance-chamber concept to fit a room or porch setup weaver bird nest. To make a human sized bird nest, you can scale up the same weaver-inspired woven structure and entrance-chamber design to fit your room or porch setup. The key is understanding that weaver nests are not just bundles of grass stuffed into a ball. They are woven, tensioned structures with a specific internal chamber and a deliberate entrance tunnel. Once you understand that basic architecture, replicating it with natural materials you can find or buy cheaply is very doable, even if you have never done any weaving before.
How to Make a Weaver Bird Nest at Home, Step by Step

How weaver birds build nests (so you can copy the method)
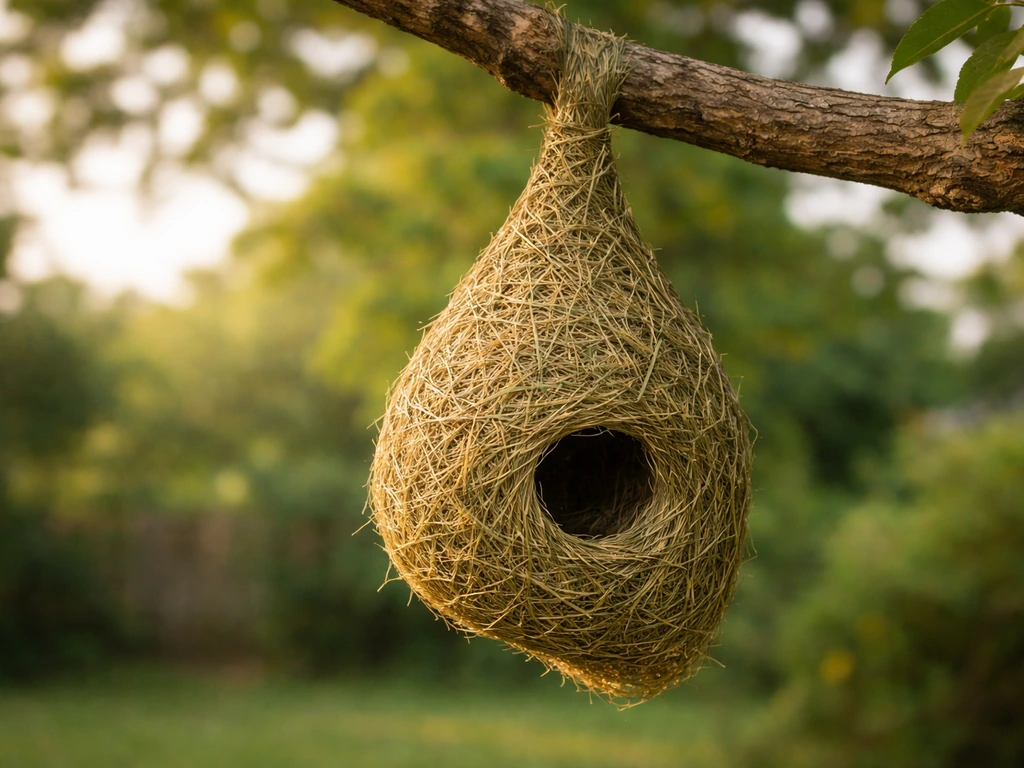
Weaver birds are named for exactly what they do. The male typically builds the nest by weaving long, thin strips of plant material (usually fresh green grass blades) into a tight, enclosed ball with a separate entrance tunnel hanging below. The process is genuinely two-stage. In species like the southern masked weaver, the male builds the main chamber first, then waits for a female to inspect it. If she approves, he finishes the structure. In baya weavers, that same sequence plays out with the female signaling acceptance before the male adds the entrance tunnel as the final stage.
The entrance tunnel is the design feature that sets weaver nests apart from most other bird nests. In baya weavers it points downward, making the opening hard for predators to reach into. Sociable weavers take this further: their communal nests have entrance passages lined with downward-pointing spiky straw stems that actively discourage snakes from entering. Entrance tunnel dimensions matter too. In sociable weavers, the tunnel can be up to 10 inches (25 cm) long and roughly 3 inches (7 cm) wide for the outer opening, narrowing to about 1 inch (2.5 cm) at the inner passage. Keep those numbers in mind when you build your version.
The materials also follow a pattern worth copying. If you want a simpler grass nest project instead of a classic weaver design, use this guide on how to make a bird nest with grass. Baya weavers start with fresh, pliable green grass strips because the moisture makes them flexible enough to weave tightly. As the nest is completed and left in place, the grass dries and stiffens, locking the structure into a rigid, weatherproof shell. Inside, the chamber is lined with soft, downy plant material for insulation. If you replicate that two-layer approach (woven outer shell, soft inner lining), you are giving wild weavers something structurally familiar.
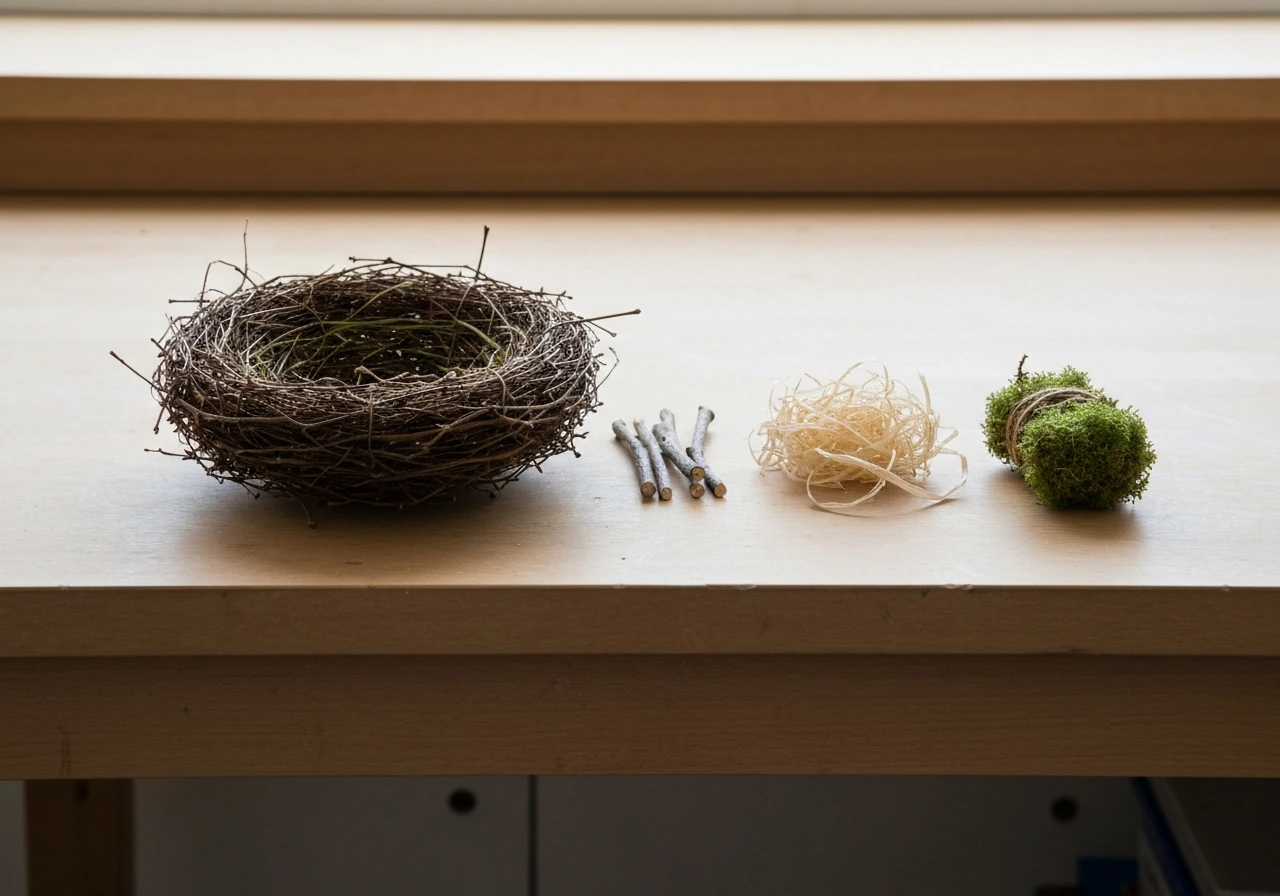
What you need to make a weaver bird nest (materials and tools)
The good news is that most of what you need is either free from your yard or very cheap. You do not need specialty tools. Here is what I recommend gathering before you start:
Materials
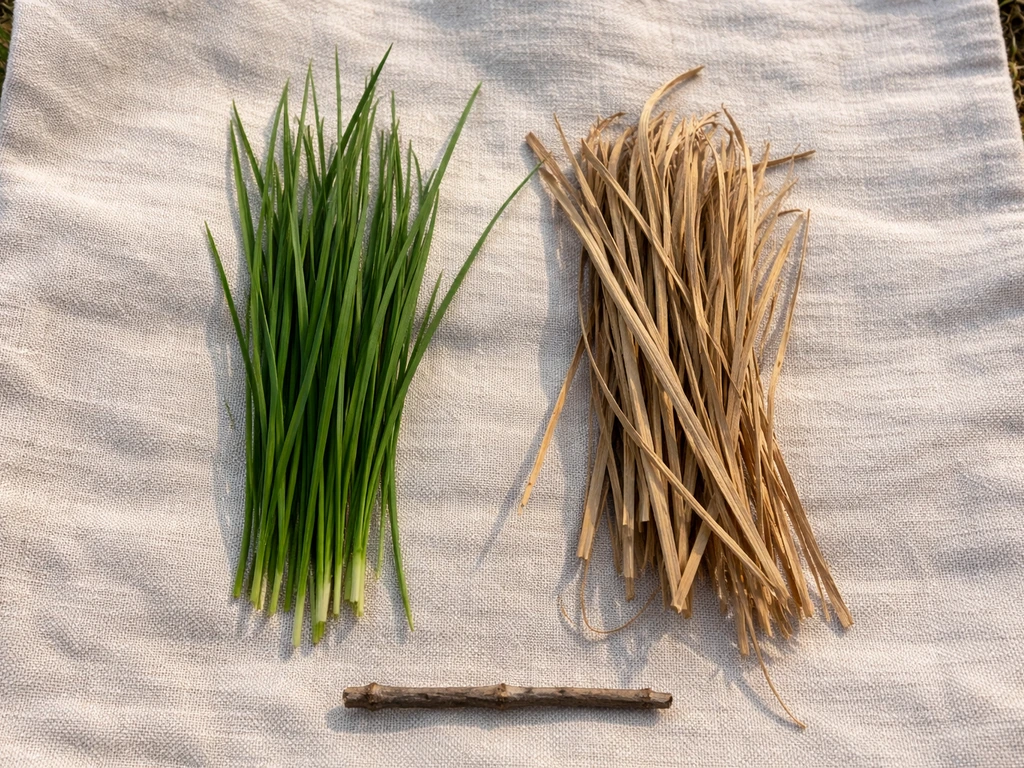
- Long grass blades or dried sedge strips, ideally 12 to 18 inches (30 to 45 cm) long and about 0.25 inch (6 mm) wide. Collect these fresh if possible so they are pliable; dried grass works but needs a 10-minute soak in water first.
- Palm leaf strips or thin reed strips as an alternative to grass, especially useful for the entrance tunnel where you want a bit more rigidity.
- Thin natural twine (jute or sisal), to reinforce the attachment point at the top of the nest where it connects to a branch.
- Soft inner lining material: cotton plant fluff, dry moss, animal fur (from a brush, not synthetic), or fine dry plant down. This goes inside the brood chamber.
- A thin, flexible starter ring made from a supple twig or vine about 4 to 5 inches (10 to 12 cm) in diameter. This forms your initial loop and keeps the opening circular as you build.
- A small handful of short, stiff straw stems for the entrance tunnel lining (optional but great for mimicking the predator-deterrent spiky interior sociable weavers use).
Tools
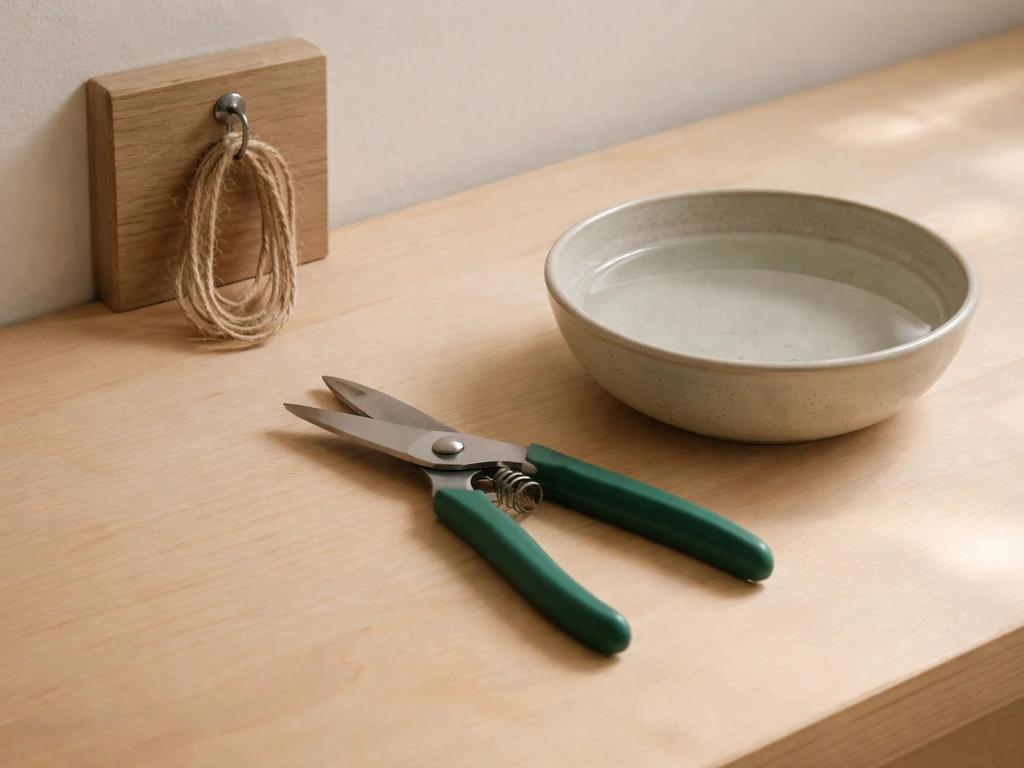
- Small scissors or garden snips for trimming strip ends
- A shallow bowl of water for soaking dried grass
- A sturdy hook or short nail to hang the frame while you work (working with the nest hanging makes weaving much easier)
- Optional: a thin knitting needle or wooden skewer to tuck strip ends into the weave
Avoid any synthetic materials, treated twine, or anything dyed or chemically preserved. Birds can ingest fibers during nest maintenance and synthetic materials can entangle chicks. The U.S. Fish & Wildlife Service also cautions that string, twine, or yarn can wrap around birds’ legs and necks, cutting off circulation and often resulting in death. Stick to natural, untreated plant matter throughout.
Step-by-step: how to make a weaver bird nest at home
Work slowly through these steps. The first nest you make will probably not be pretty, and that is fine. By the time you finish it you will understand exactly what to do differently on the next one. After you have the basic weaving technique down, you can apply it to make a mini bird nest that is easier to finish and great for beginners. Hang the project on a hook or nail at eye level so both hands stay free.
- Form your starter ring. Bend a supple green twig or thin vine into a circle about 4 to 5 inches (10 to 12 cm) across and tie the ends together with a short piece of jute twine. This ring becomes the equator of the nest chamber.
- Attach the hanging loop. Take a strip of twine or a long grass stem and tie it to the top of the ring at two points, creating a short loop above the ring. This is what you will eventually attach to a branch, so make it strong. Double-knot it.
- Weave the upper dome. Take a long, damp grass strip and loop it over the top of the ring, pull both ends down, and cross them under the ring before looping them back up to the top. Repeat with 8 to 10 strips, spacing them evenly around the ring like spokes. You now have a rough open cage above the ring.
- Close and tighten the dome. Start weaving a new horizontal strip over and under the vertical spokes, working your way upward from the ring toward the top of the dome. Tuck each strip end behind a spoke and into the previous row. Work in rounds. After 4 to 6 rounds the dome should begin to feel firm.
- Build the lower half of the brood chamber. Mirror the same spoke-and-weave process below the ring, working downward. Leave a gap of about 2.5 inches (6 cm) at the very bottom of the sphere. This is where the entrance tunnel will attach.
- Add the soft inner lining. Before you close the bottom opening fully, stuff the inside of the chamber with your soft lining material (moss, cotton fluff, fine down). Pack it loosely so it insulates but does not block the chamber. Then weave a few more rows to partially close the bottom, leaving your entrance gap clear.
- Build the entrance tunnel. Take 8 to 10 longer, slightly stiffer strips (palm leaf or reed works well here) and attach them to the edges of the bottom gap, pointing downward. Weave them together in a tube shape, working downward for 3 to 4 inches (7 to 10 cm) minimum. For a baya-style nest or sociable weaver-style nest, aim for a tunnel 6 to 10 inches (15 to 25 cm) long with an inner opening of about 1 to 1.5 inches (2.5 to 4 cm). Tuck stiff straw stem tips into the tunnel lining so they point downward and inward, mimicking the anti-predator feature of sociable weaver nests.
- Let it dry completely. Hang the finished nest in a shaded, airy spot for 24 to 48 hours. As the grass dries it will tighten and stiffen, locking everything in place just as it does in a wild nest. Do not rush this step.
One honest note: the weaving in steps 3 and 4 is the part most beginners rush and then regret. If your strips feel like they are loosening as you add new ones, pause and squeeze the whole dome with both hands to compress the weave before adding the next row. That extra 30 seconds of compression on each round makes a noticeable difference in how solid the finished nest feels.
Where to place it: mounting and habitat setup for attraction

Placement is where a lot of DIY nest projects fail, not construction. Weaver birds are selective about where they build and accept nests. In the wild, weaver nests are almost always suspended from the tips of hanging branches or thin twigs over open water, clearings, or open shrubby areas. The hanging position is intentional: it makes the nest hard for snakes and climbing predators to reach. The Los Angeles Zoo notes that black-headed weaver nests are intricately woven spherical structures of hundreds of blades of grass or reeds (or palm fronds) and hang from branches with a bottom entrance that helps deter predators like snakes.
In your backyard, choose a branch tip that sways freely in the wind. A branch about 6 to 15 feet (1.8 to 4.5 m) off the ground over a garden bed, open lawn, or small water feature is ideal. Avoid mounting the nest flush against a wall, fence, or tree trunk where predators can easily approach it. The nest should hang freely, not be wedged into a fork.
Use the jute loop you built into the top of the nest to tie it to the chosen branch tip. Make sure the entrance tunnel points straight down, not sideways. A sideways entrance does not give birds the drop-down access they are instinctively looking for. If the nest swings too violently in wind, add a second light tie about halfway up the branch to dampen excessive movement, but keep some swing. A little movement is fine and normal.
If you are in a region where sociable weavers or baya weavers are not present but related weaver species are, the same placement principles apply. Most weaver and weaver-adjacent species (including village weavers, red bishops, and similar Ploceidae family members) strongly prefer hanging nest structures in open or semi-open habitat. Check what species are local to you and adjust tunnel length based on their typical nest dimensions.
Tips to get it right
Common mistakes that prevent birds from using the nest
- Making the entrance tunnel too short or too wide. A tunnel under 3 inches (7 cm) gives predators easy access. Aim for at least 6 inches (15 cm) long and no wider than 1.5 inches (4 cm) at the inner opening.
- Using synthetic or treated materials. Even a small amount of nylon twine or dyed fiber can deter birds and cause harm to chicks.
- Mounting the nest against a solid surface. If anything can walk or climb up to the nest without swinging and flying, predators will find it before birds do.
- Placing the nest in heavy shade. Weaver birds prefer open, sunlit positions with clear flight paths in and out.
- Building too loose a structure. A floppy nest will shift and collapse in wind. Compress and tighten each weaving row before adding the next.
Durability
A well-made grass nest will last one to two seasons outdoors before it degrades enough to need replacing. If you want a shorter-term, non-nesting craft that is easier to maintain, use these ideas on how to make a fake bird nest instead. To extend its life, you can apply a very light misting of plain water to the outside of the nest at the start of each nesting season. This re-hydrates the fibers slightly and prevents cracking or brittleness. Sociable weavers in the wild continually add fresh material to their nests to keep them intact during active use, so if you see a wild bird actively adding material to your structure, that is a great sign. Do not disturb it.
Bird acceptance
Birds can take days to weeks to investigate a new structure. Do not move the nest every few days if birds have not shown immediate interest. Place it during late winter or early spring before nesting season begins. Female weavers inspect nests carefully before accepting them, specifically evaluating the nest-tree and entrance characteristics, so give them time to make that assessment on their own schedule. If you have placed the nest in a good spot and nothing visits after a full nesting season, try a different branch position or add a water feature nearby to make the habitat more attractive.
Alternatives: DIY nest support for different weaver species and nesting preferences
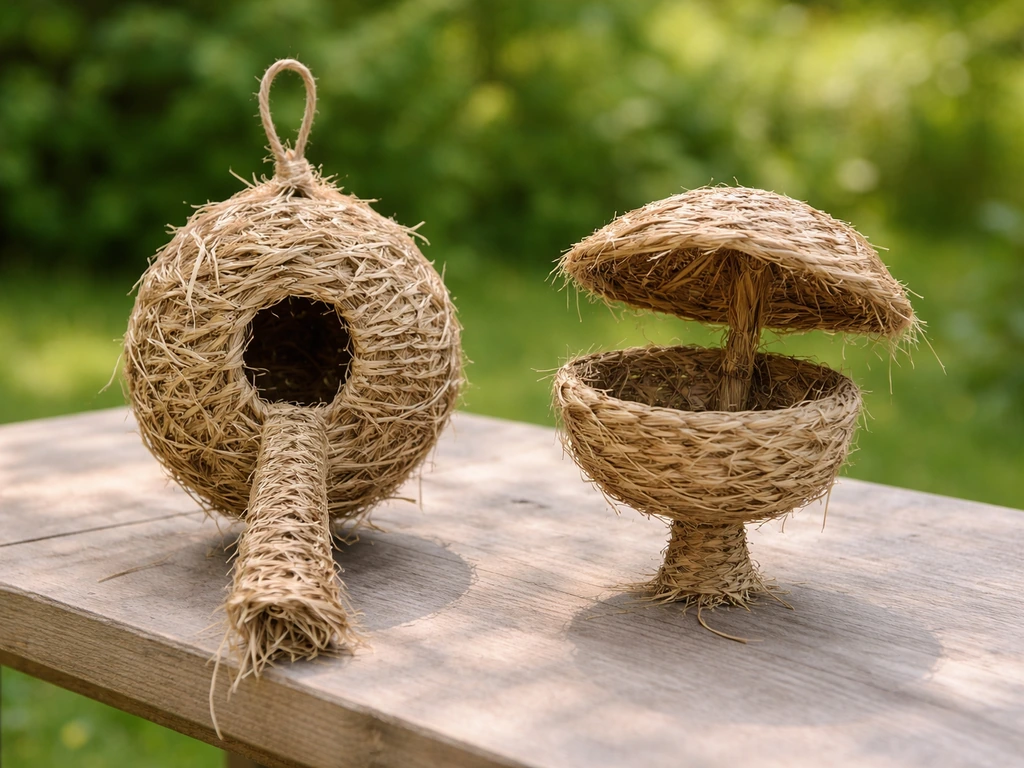
Not all weaver species use the same nest design. The fully enclosed woven sphere with a long hanging entrance tunnel is the classic baya weaver or village weaver style. But some species in the weaver family build simpler structures, and if you are trying to attract a specific local species, matching their preferred nest style will improve your chances considerably.
| Species / Type | Nest Style | Key DIY Adjustments |
|---|---|---|
| Baya weaver | Enclosed sphere with downward entrance tunnel, 6 to 10 inches (15 to 25 cm) long | Use fresh green grass strips; build full tunnel; hang over water or open garden |
| Southern masked weaver | Compact woven sphere, shorter entrance than baya, often over reeds or shrubs | Slightly shorter tunnel (3 to 5 inches / 7 to 12 cm); place near wetland margin or dense shrubs |
| Sociable weaver (communal) | Large communal thatched structure; individual chambers with 10-inch (25 cm) tunnels and spiky inner lining | Single-chamber version works; focus on spiky straw lining inside tunnel; mount high on a solid post or thick branch |
| Red bishop / widowbird (related Ploceidae) | Simple woven oval, often hidden in tall grass; no long entrance tube | Woven oval chamber attached to upright grass stems; skip the long tunnel; place low in tall grass clumps |
| General / unknown local weaver | Open woven cup or enclosed sphere depending on species | Build the full enclosed sphere with medium tunnel (4 to 6 inches / 10 to 15 cm); this suits the widest range of weaver species |
If you are not sure which weavers are in your area, the enclosed sphere with a medium-length hanging tunnel is the safest all-around design. It also doubles well as a decorative natural object if birds do not use it right away. And if you enjoy this kind of project, the skills transfer directly to making nesting balls with fiber bundles for other bird species, or even scaled-up structures. The core weaving technique you practice here is the same foundation you would use for any woven natural-fiber nest project. The core weaving technique you practice here is the same foundation you would use for any woven natural-fiber nest project, including how to make bird and nest styles for different bird types.
If this is your first time working with natural grass weaving, start small. A mini practice version using just the dome and ring (without the full tunnel) will let you get comfortable with the over-under weaving pattern before you commit to the full build. That practice round is never wasted time. If you meant the same kind of project in Minecraft, see how to make a bird nest in Minecraft for the game-specific steps and materials.
FAQ
Can I make a weaver bird nest from dry grass instead of fresh grass?
It is much harder to weave dry grass into a tight, tensioned shell. If you only have dry material, soak the strips in plain water until pliable, then wipe off excess so they do not mildew. Fresh grass (or rehydrated grass) is what locks the shape as it dries.
What should I use if I cannot find thin green grass blades in the right size?
Look for similarly sized, flexible natural strips (other long-leaf grasses or reedlike blades) with a “strip” shape, not thick stems. If the material is too stiff, the dome will spring back and the weave will loosen. Test with a small sample, if it cracks when you bend it, switch materials.
How do I keep the entrance tunnel from twisting so it points straight down?
When you tie the finished nest to the branch, align the jute loop so the tunnel hangs under gravity. If it drifts sideways, add the second tie midway up, but keep it light so the nest still sways naturally. Also confirm the final tunnel bundle is compressed before you hang it.
Is it safe to use jute or twine for the structure?
Natural jute fibers can work as an anchoring loop or tying material, but avoid synthetic, dyed, or chemically treated threads. The key risk is entanglement, especially if a fiber sheds during inspection, so trim loose ends and keep ties minimal.
How much downy lining should I put inside the chamber?
Use a light, soft layer, not a thick stuffing. Too much lining can hide the chamber opening details and make it harder for birds to feel the nest structure. Leave the woven shell firm, and reserve the lining for insulation at the bottom and inner walls.
Can I leave the nest outdoors year-round, or does it need to be replaced?
Expect outdoor nests to degrade over time, typically around one to two seasons. If you want to keep it longer, do only light rehydration early in the nesting period, and do not attempt heavy soaking once it is brittle, that can cause it to collapse.
Should I clean or refresh the nest if birds do not use it right away?
Avoid repeated handling. Birds need time to inspect, and frequent movement can make them abandon the structure. If you do want to adjust, do it once, early in the season, then leave it alone long enough for a proper inspection window.
How do I choose the right branch position if there is no branch that sways freely?
You still need suspension that allows gentle movement, so pick the thinnest available hanging tip rather than a wide, rigid fork. If everything is too rigid, consider a different mounting point over open space rather than forcing the design against a wall or trunk, which predators can access more easily.
What if I want to attract a specific weaver species, how should I change the design?
Match the tunnel length and overall enclosure style to what the local species builds. When unsure, the enclosed sphere with a medium hanging tunnel is the safest general pattern because it resembles the classic weaver architecture many related species accept.
Can I use this as a craft, without trying to attract live birds?
Yes, but treat it as a non-nesting decoration by placing it where birds are less likely to access it, and avoid using materials birds might incorporate into a real nest. If your goal is a realistic nest, keep fibers untreated and construction accurate, but accept that wildlife use is unpredictable.
How can I tell if birds are inspecting correctly?
Look for signs like brief perching near the entrance, repeated peeks into the tunnel, and additional material added to the structure. Birds that are truly interested will not just ignore it, they will spend time assessing the entry drop and the stability of the hanging dome.
Step-by-step DIY guide to make realistic fake bird nests for crafts using natural and repurposed materials, safely and e
Step by step Bedrock guide to build a Minecraft bird nest, including materials, placement tips, and troubleshooting.

Step-by-step DIY plans to build a chimney swift bird house, with correct dimensions, placement, and weatherproofing for