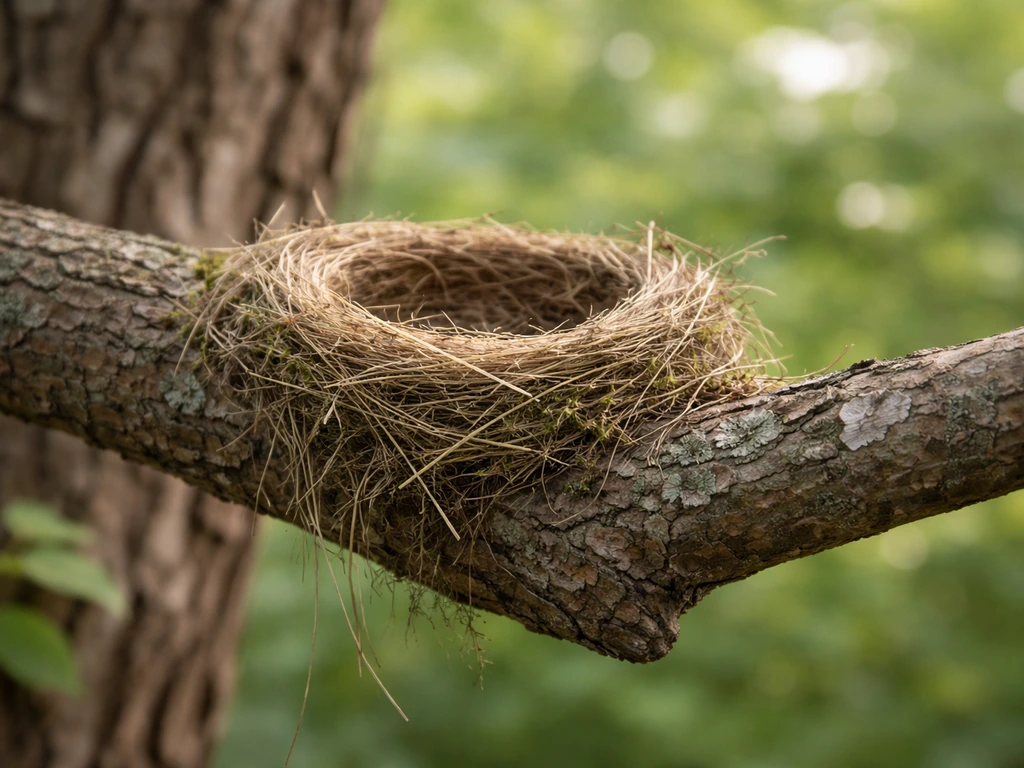
You can build a functional, bird-friendly mini nest today using natural materials you probably already have or can grab for free outside. To make a bird nest with grass, focus on using dry, untreated grass and securing it in a cup shape or open platform so birds can finish the build. The key is keeping it small and cup-shaped (most backyard birds want something that fits snugly around their body), using only natural, untreated materials, and mounting it where birds already feel comfortable. Done right, a mini nest can go from your workbench to a tree in a couple of hours, and birds may investigate it within days.
How to Make a Mini Bird Nest: Step-by-Step DIY Guide

Marcus Thornton
23 May 2026
What "mini bird nest" actually means (and who you're building for)
"Mini bird nest" covers a few different things depending on what you're trying to do. Most people asking this question want one of three things: a small cup-style nest form they can mount or hang in a shrub or tree, a compact nesting platform with a protective lip, or a hanging nest with an enclosed or partially enclosed structure. All three are valid and work for different birds. The common thread is that they're scaled for small to medium backyard species, not large cavity nesters.
The birds most likely to use a mini nest you make include American robins (cup nesters on horizontal branches and ledges), house wrens (cavity or semi-enclosed nesters), chickadees (tight cavity nesters), and song sparrows or finches (cup nesters in dense shrubs). Each has different preferences, but if you build a sturdy, unlined or lightly lined small cup or enclosed nest structure and put it in the right spot, you have a real shot at attracting one of these species. Orioles build impressive hanging basket nests on their own, but you can support them with hanging material stations rather than a pre-built structure.
This guide is not about decorative craft nests for wreaths or holiday displays. If you want a fake or model nest for display purposes, that's a different project entirely. If you want a fake bird nest for décor, start with safe materials and avoid anything that could be mistaken for a real nesting site fake bird nest for display purposes. This is about real, functional structures and nesting material offerings that give actual birds a better shot at breeding successfully in your backyard. If you're looking for how to make a model of bird nest that actually supports breeding birds, focus on real, functional structures rather than decorative craft versions.
Materials, tools, and safety rules before you start
The single most important rule in this whole project: avoid anything synthetic, treated, or long enough to tangle. Yarn, string, twine, and fabric scraps are the big ones. The U.S. Fish and Wildlife Service explicitly warns that string and yarn can wrap around birds' legs or necks, cutting off circulation and killing them. Even short pieces of fabric can mat together and trap small birds. Stick to what birds use in the wild, because they've had millions of years to figure out what works.
Safe materials to use
- Dried grasses (cut short, no longer than 3 to 4 inches)
- Pine needles and pine straw
- Dried leaves (crumbled smaller pieces are easier for birds to work with)
- Moss (natural, not dyed or treated)
- Small strips of bark from untreated wood
- Plant fluff (cattail fluff, milkweed fiber, cottonwood down)
- Small feathers found outdoors (no synthetic down)
- Dry twigs in pencil-thin sizes and shorter
- Spanish moss or lichen if you have it locally
- Natural mud or clay if you want to help bind a form
What to avoid completely
- Yarn, string, or twine of any length
- Human hair and pet fur in large quantities (can tangle nestlings)
- Dryer lint (holds moisture and can collapse on chicks)
- Pressure-treated or chemically finished wood
- Paint or stain on interior surfaces
- Synthetic adhesives or hot glue on any surface birds will contact
- Plastic of any kind inside the nest structure
- Long cotton or alpaca fibers (even natural fibers can tangle)
Tools you actually need
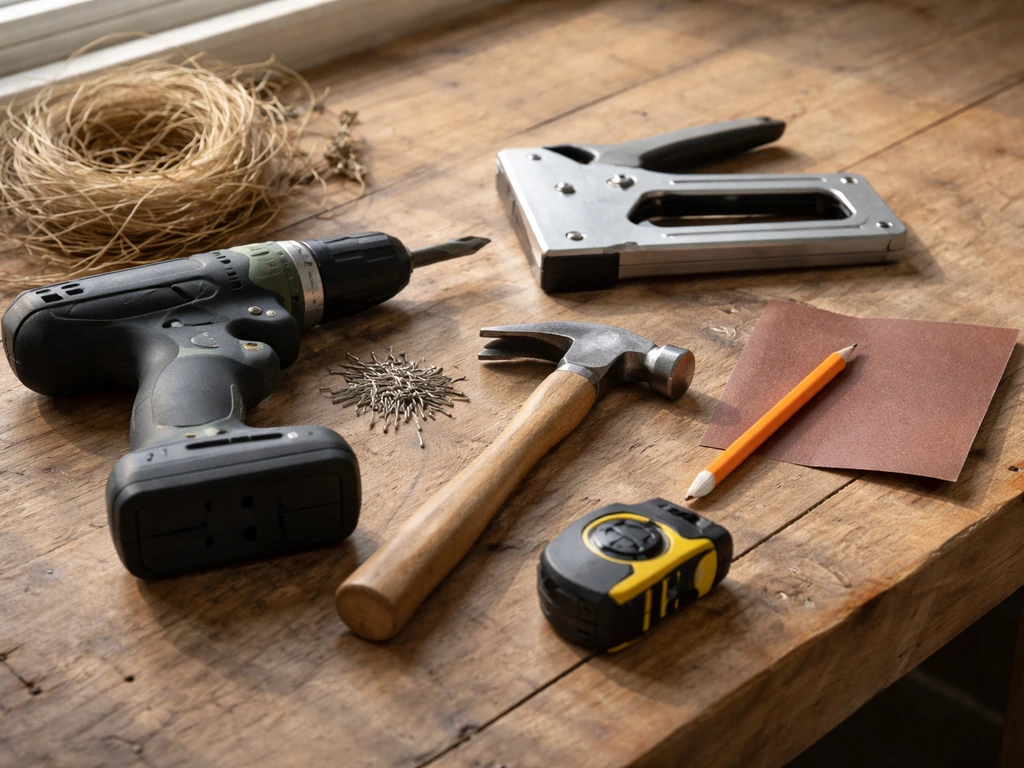
You don't need a workshop. A handsaw or jigsaw for cutting wood, a drill with a 1.5-inch spade or hole saw bit, a hammer and nails or a staple gun, sandpaper (medium grit), and waterproof wood glue labeled non-toxic are enough for any build in this guide. If you're using PVC pipe for a chickadee nest tube, you just need a PVC cutter or hacksaw and a drill. Let any glue cure fully before the structure goes outside, since drying fumes can harm birds in an enclosed space.
Three ways to build a mini bird nest (pick the one that fits your setup)
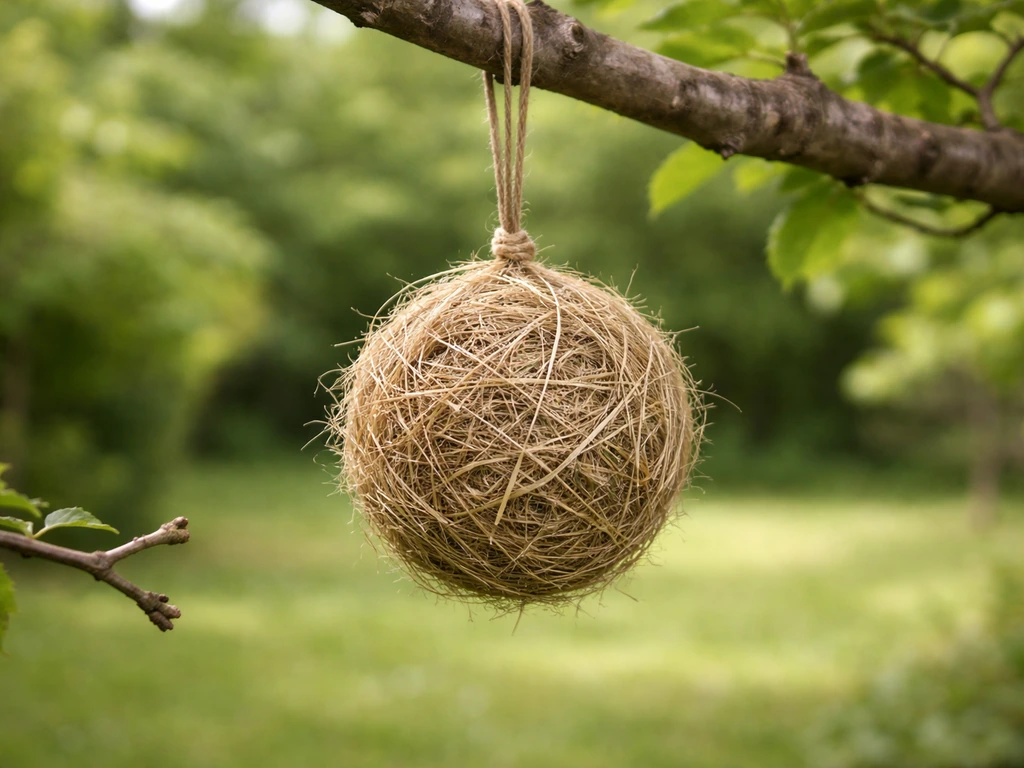
I'm giving you three build paths here: a lined cup nest mounted on a surface, a simple hanging enclosed nest, and a compact nesting platform. Each takes a different skill level and works for different birds. Read through all three before you start so you pick the one that matches both your tools and your backyard. If you're looking for a bird nesting ball option instead, this guide also covers how to make a bird nesting ball in a way that stays safe for backyard birds. Once you pick the build path, you can follow these steps for how to make bird and nest structures that match local birds and your space.
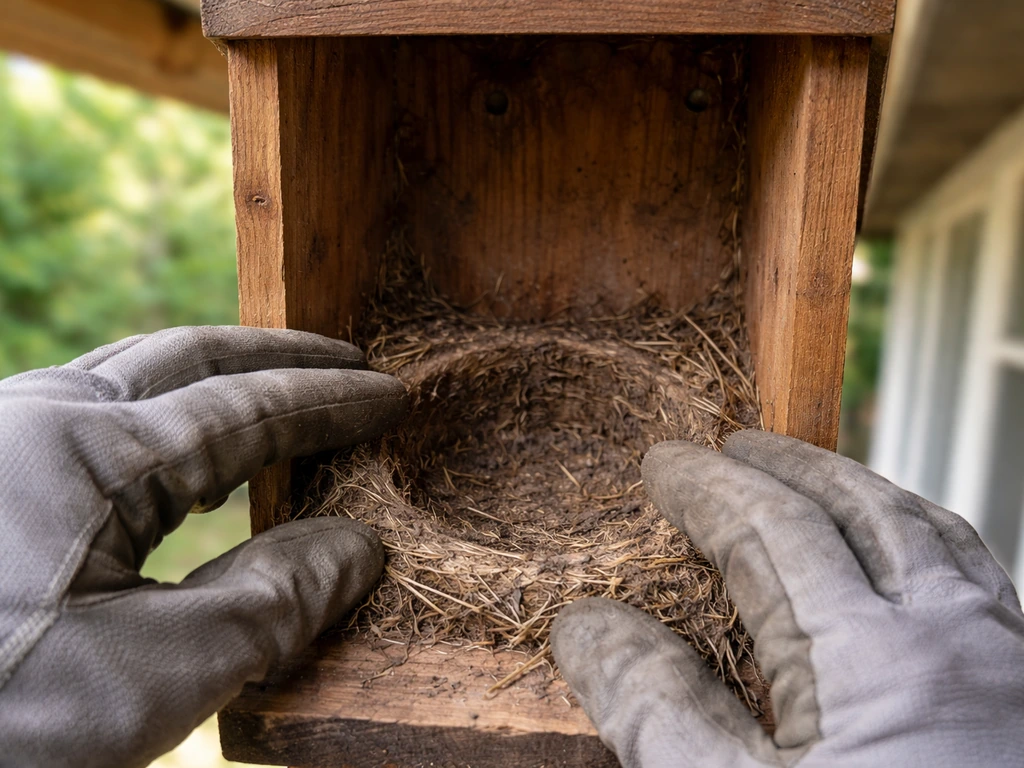
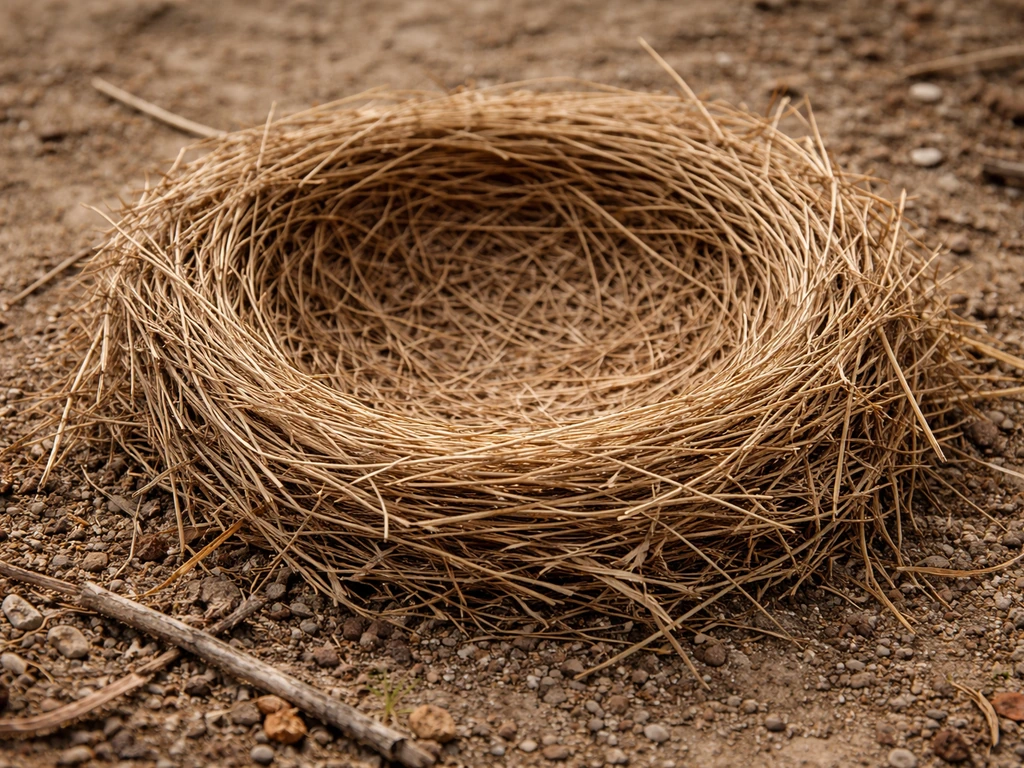
Build 1: Lined cup nest (best for robins, finches, song sparrows)
This is the easiest build and the one I'd recommend for beginners. You're essentially making a shallow wooden or wicker cup that birds can line themselves, then mounting it on a sheltered surface. The cup gives birds a starting form so they spend less energy building from scratch.
- Cut a circular base from untreated plywood or a cedar scrap, roughly 4 to 5 inches in diameter and at least half an inch thick. Sand the edges smooth.
- Cut four short side pieces (1 inch tall, about 1.5 inches wide) from the same wood and nail or glue them around the base edge to create a shallow rim. You want a bowl-like shape, not a box.
- Drill two small drainage holes (3/16 inch) in the base so rainwater doesn't pool.
- Drill one small hole in the back of the rim for a mounting screw, or attach a small L-bracket to the back.
- Let any glue dry completely (at least 24 hours) before you add any natural lining.
- Loosely pack the inside with a thin layer of dry moss or short grass clippings. Don't over-pack it. Birds will rearrange or replace the lining themselves, and they prefer to feel like they're building, not just moving in.
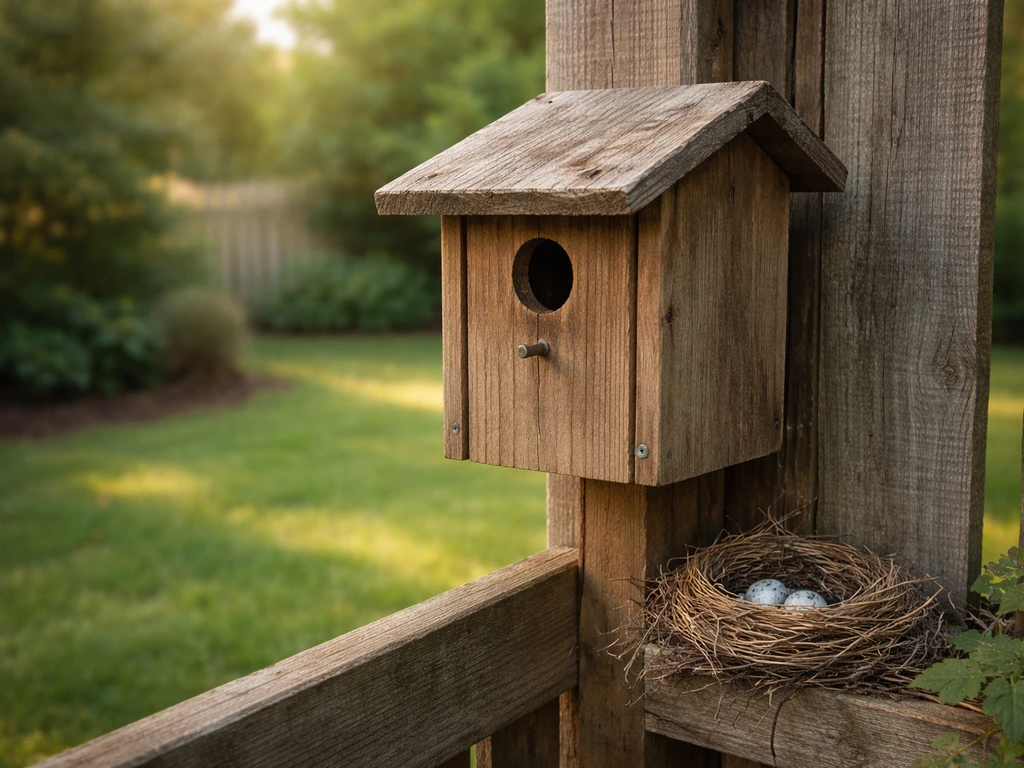
Build 2: Small hanging enclosed nest (best for wrens, chickadees)
This is closer to a traditional nest box but scaled down and hung from a branch rather than mounted on a post. If you are thinking about a Minecraft-style build instead, see how to make a bird nest in minecraft for a block-by-block comparison. House wrens are especially adaptable and will use almost any small enclosed cavity in a reasonable spot, which makes this a great project if you want fast results.
- Cut a small box from untreated pine or cedar: floor 4 inches by 4 inches, sides 6 inches tall, a sloped roof (front wall slightly shorter than back wall to shed rain).
- Assemble with exterior screws rather than nails so you can open it for cleaning later. One side panel should be hinged or removable.
- Drill a 1.25-inch entrance hole centered on the front panel, about 1 inch from the top. This size works well for wrens and is tight enough to exclude larger, more aggressive birds.
- Do not add a perch below the hole. Perches actually help predators, not the birds you're inviting.
- Drill two small drainage holes in the floor and two small ventilation gaps at the top of each side wall (about 3/8 inch each).
- Drill two holes through the roof or back for hanging wire or a strong natural rope. Thread through and secure with a knot inside. Use galvanized wire if possible since it won't corrode and weaken.
- Sand all interior edges smooth and leave all surfaces unfinished or use only a water-based, non-toxic exterior finish on the outside only.
Build 3: Compact nesting platform (best for robins, mourning doves)
Some birds don't want an enclosed cavity at all. Robins and mourning doves prefer an open or semi-open shelf with a rim, mounted under an eave or on a tree fork. This is the fastest build of the three.
- Cut a platform base from untreated wood: 6 inches by 6 inches works well for robins.
- Attach a front rail that's about 1.5 inches tall across the front edge to keep the nest from sliding off. Leave the sides open.
- Mount a back brace or keyhole bracket on the back edge for hanging or screwing to a vertical surface.
- Add two drainage holes in the base.
- Optionally staple a small square of untreated burlap to the floor surface to give the nest a gripping texture. Birds will build on top of this.
- Keep the platform sheltered above (under an eave, inside a dense shrub canopy, or on the underside of a large branch) to protect from rain and direct sun.
Where to put it, how to mount it, and when to have it ready
Placement is honestly where most DIY nest projects succeed or fail. You can build a perfect little nest and have birds completely ignore it if it's in the wrong spot. Here's what actually matters.
Height and position by nest type
| Nest type | Target birds | Recommended height | Best location |
|---|---|---|---|
| Lined cup nest | Robin, finches, sparrows | 5 to 15 feet | Dense shrubs, tree fork, sheltered ledge |
| Hanging enclosed nest | Wren, chickadee | 5 to 10 feet | Hanging from branch, away from trunk |
| Nesting platform | Robin, mourning dove | 6 to 15 feet | Under eave, on shed wall, in large shrub |
For the enclosed hanging nest, chickadees specifically prefer an unobstructed flight path to the entrance hole. Don't tuck it deep into dense foliage. Hang it at the edge of a tree canopy or on a branch that has clear airspace in front of the hole. House wrens are less particular and will use boxes in surprisingly open spots, but they still prefer some nearby cover for perching and watching.
For any mount on a post or pole rather than a tree, metal poles outperform wood posts for predator resistance. Texas Parks and Wildlife recommends mounting bluebird boxes at least 5 feet off the ground on a metal pole, and the same principle applies to small nest structures. A greased metal pole is much harder for raccoons and squirrels to climb than a wooden post or a tree.
Timing matters more than most people realize
Have your nest structure up by early spring, ideally 4 to 6 weeks before breeding season peaks in your region. For most of the continental U.S., that means having everything in place by late February to mid-March. Birds scout nest sites before they commit, and a structure that's been sitting in place for a few weeks looks more established and less suspicious than one that just appeared. If you're reading this in late May, don't panic. Many species have second broods or start nesting later than people expect. It's worth putting structures up even now.
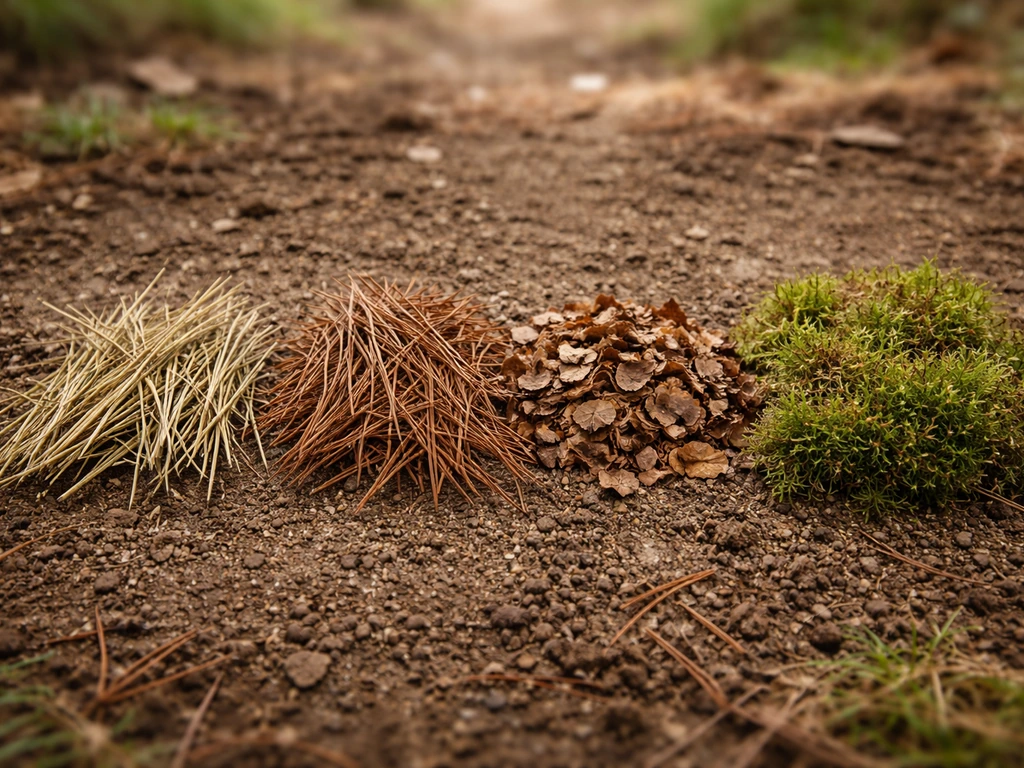
Nesting material: what to offer and how to offer it
Providing nesting material separately from your built structure is one of the most underrated ways to attract birds and support nesting success. If you're aiming for a human sized bird nest, use the same principles of natural materials, safe placement, and bird-friendly design that make these smaller nest projects work how to make a human sized bird nest. Birds use what's locally available, so if your yard has good material, birds treating it as a territory are more likely to nest nearby.
The Canadian Wildlife Federation recommends filling a mesh onion bag (the kind produce comes in) with safe natural materials and hanging it from a branch. This works really well. Pack it loosely so birds can pull material out. You can also just scatter small piles of dry grass and moss on a flat surface or in a shallow dish.
Good materials to offer in a nest material station
- Dry grass clippings cut to 3 to 4 inch lengths (chemical-free lawn, no herbicide)
- Pine needles
- Moss (natural, not dyed)
- Small feathers
- Plant fluff: cattail, milkweed, cottonwood
- Small strips of natural bark
- Dry leaves broken into small pieces
- Short pieces of plant fiber like dried plant stems
If you want to offer any cotton fiber or similar material, keep pieces very short (under 3 inches) and only use 100% natural cotton with no synthetic blend. Even then, some sources recommend skipping it entirely since the risk-benefit isn't clearly in the bird's favor. I personally just stick to grasses, moss, and feathers and haven't had trouble attracting birds to the material station.
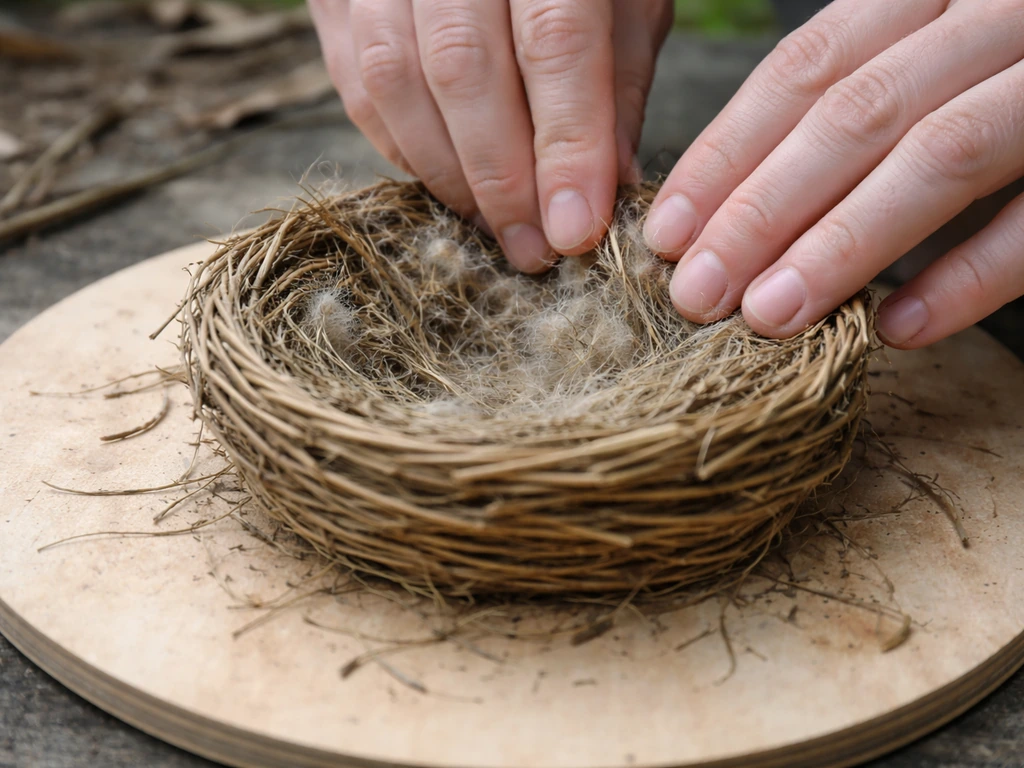
Don't put nesting material directly inside or on top of your built nest structure before birds arrive. This is a common mistake. Birds want to build the nest themselves. Pre-stuffed nests are often rejected or pulled apart and rebuilt from scratch. A light, loose layer of moss at the base of a cup nest is fine, but don't fill it.
Maintenance, checking in, and what to do when things go wrong
Once a nest is active, you want to check on it occasionally without disturbing the birds. Wait until both adult birds have left the area, approach quietly, look quickly, and leave. Frequent visits or hovering near an active nest can cause abandonment. One quick peek per week is plenty during the nesting season. If you’re specifically trying to figure out how to make weaver bird nest, plan for weaving materials and placement that matches how weaver species build and attach their nests.
End-of-season cleaning
After each brood fledges and the nest is clearly abandoned (no adults visiting, no sounds from inside), clean the structure out. Remove the old nest material completely. Old nests harbor parasites, mites, and bacteria that can harm the next set of chicks. Scrub the interior with a stiff brush and a diluted solution of one part bleach to nine parts water, rinse thoroughly, and let it dry completely in the sun before closing it up. This simple step dramatically improves the chances that birds will use the same structure again next season.
Predators: the biggest threat to nest success
Raccoons, snakes, and squirrels are the main predators hitting backyard nests. For enclosed nest boxes, a predator guard (a metal baffle below the box or a metal plate around the entrance hole) makes a real difference. The metal entrance plate keeps raccoons from enlarging the hole to reach inside. For cup nests and platforms in shrubs, the best protection is location: dense vegetation with multiple access routes so predators can't easily stake out the nest, and enough height that ground predators can't reach it. Avoid mounting any nest structure on a wood fence post or tree trunk without a baffle, since these are easy climbing surfaces.
If birds aren't using it
Give any new structure at least one full breeding season before you decide it's a failure. Birds are cautious. If you get to fall with no activity, try moving the structure to a different spot before next spring. The most common reasons birds skip a structure are: too much human activity nearby, not enough natural cover in the surrounding area, entrance hole is the wrong size for local birds, or the structure is mounted on a tree or post that predators visit regularly. Try one change at a time so you can figure out what actually made the difference.
Also check that your yard is actually attractive to nesting birds in general. Native plantings, a water source, and minimal pesticide use make a huge difference in whether birds consider your yard territory worth defending. A great mini nest in a yard with no food, no water, and sprayed grass is still going to sit empty. The structure is only part of the equation.
FAQ
Can I make a mini bird nest in a planter or raised container instead of mounting it on a tree or pole?
Yes, but only if it is a real nesting structure and you keep it predator-resistant. Use the same safe, untreated materials and avoid any cord or fabric that can tangle. For many backyard species, a cup or semi-open shelf with a rim will work better than an enclosed, hard-to-access compartment, since birds may be reluctant to commit if the entrance is hard to approach.
What happens if I accidentally put nesting material inside the nest before birds arrive?
If you pre-stuff it, some birds will still accept it, but rejection is common. Birds may ignore it, pull all the material out, or start a new nest elsewhere, which wastes time during breeding season. If you want guidance, provide a separate nearby material station (like a loose mesh bag) and leave the nest structure empty except for a very light, loose base layer if needed.
My nest has yarn or string in it, will birds still use it, and what should I do?
Check for tangling hazards first. If you used yarn, string, twine, long fabric pieces, or anything that can wrap, remove it immediately and replace with short, natural options like dry grass bits, moss, or feathers. Also confirm the structure has a natural-looking interior and that the entrance allows access without squeezing, since narrow or obstructed entrances can lead to repeated abandonment.
How much lining is okay for a DIY mini nest, and should I pre-pack the bottom?
Most birds will not need lining from you, they will line themselves from whatever you offer nearby. If you do add a base, keep it sparse and loose (for example, a thin layer of moss at the bottom of a cup), and never pack it down. Overstuffing can interfere with egg positioning and can also make it harder for birds to remove material they do not prefer.
If I do not know which bird species will visit, should I make one nest or multiple types?
It depends on species, but in general, you should not fully rely on a single nest type. A fast way to hedge is to build two different structures, one open or semi-open rimmed cup (for cup or shelf nesters) and one cup or cavity style for birds that prefer enclosure. Also place them in different microhabitats, for example one in denser shrub cover and one under a more sheltered eave.
How do I know if the entrance hole size is right for the local birds?
Start with the birds you want to attract and adjust entrance size and opening style accordingly. A common mistake is making the hole too large, which invites predators and reduces interest from cavity or tight cavity nesters. If you are unsure, use a build that is naturally “scaled” for small backyard birds (shallow cup with secure rim, or a compact cavity that is not oversized) and avoid any oversized openings.
What is the best way to prevent raccoons, squirrels, or snakes from getting to the nest?
Use position and predator barriers together. For pole-mounted structures, a smooth metal pole with a baffle is a major upgrade, because many climbers avoid slick surfaces. If your nest is in a shrub, prioritize placement with multiple escape and access routes and keep the nest high enough that ground predators cannot reach easily.
My nest is built correctly, but birds are ignoring it. What placement details matter most?
A structure that is too exposed can be ignored even if it is correctly built. Birds often prefer a protected approach (for example, not having the entrance directly facing constant foot traffic or open, unbroken visibility). Try placing it where birds can arrive from cover, and reduce disturbance around the location during the scouting window.
When should I clean out an old mini nest, and how do I tell it is safe to do so?
In most cases, yes, you should clean it between broods only after it is clearly abandoned. Wait until you see no adult activity and no sounds inside, then remove everything and scrub the interior. This reduces parasites and mite buildup, and it increases the chance the structure gets reused rather than becoming a recurring health risk.
How long should I wait before moving the mini nest to a new spot?
Give the birds time and then change one variable at a time. If there is no activity by late fall or early winter, relocation before next breeding season can help, since birds scout sites before committing. Also check for yard basics like nearby food sources, water access, native plants, and low pesticide use, because a perfect nest will still sit empty in an otherwise poor habitat.
Is it worth offering nesting material separately, and where should I place it?
Do not treat the built nest as the only attraction. Use a nearby material station and keep it loose, so birds can pull fibers out themselves. Avoid placing material directly inside the built structure before birds arrive, since pre-filled nests are often rejected or rebuilt from scratch.
Can I seal or glue the mini nest and still have it be safe for birds immediately?
For most DIY builds, you should not add glue or coatings that are still curing once you move the structure outdoors. Let all adhesives fully cure indoors or in open air, and only install once there is no strong odor. If you are sanding or using any wood treatment, ensure it is the non-toxic type intended for outdoor use and fully cured before exposure.
Next Articles
How to Make a Bird Nesting Ball Step by Step
Step-by-step DIY guide to make a safe bird nesting ball with size tips, secure assembly, hanging, and maintenance.
How to Make a Bird and Nest: DIY Birdhouse Guide
DIY guide to build a birdhouse or nest support: site, materials, safe dimensions, predator-proofing, and maintenance tip
How to Make a Bird Nest with Grass: Step-by-Step
Step-by-step guide to make a safe grass bird nest, choose the right grass, build a cupped bowl, and place it for local b