You can make a surprisingly effective bird scarer from a plastic bottle in about 20 minutes using scissors, some string or wire, and a few strips of reflective tape. Cut the bottle into spinning or fluttering strips, hang it where the wind catches it, and the combination of movement and light-flash is enough to unsettle most garden birds. The catch is that birds are smart and they habituate fast, so the build itself is only half the job. Moving and tweaking the thing regularly is what keeps it working.
How to Make a Bird Scarer From a Plastic Bottle

Marcus Thornton
1 Jun 2026
Why plastic-bottle bird deterrents work (and when they don't)
Birds rely heavily on vision to assess risk. Sudden movement, unexpected flashes of light, and unfamiliar shapes in their environment all trigger their threat-detection instincts. A spinning or fluttering plastic bottle hits two of those three buttons at once: movement and light reflection. That combination is enough to make most small garden birds think twice about landing on your vegetable patch or seedling tray.
The honest truth, though, is that the research on visual deterrents is mixed. The USDA notes that reflective ribbons and similar devices have variable effectiveness, and UC ANR's bird hazing research categorizes many visual tools as 'ineffective to marginally effective' for long-term control. The core problem is habituation. Birds are quick learners. Give them a week or two and they'll figure out that the spinning bottle hasn't actually hurt anyone. Once they're used to it, they ignore it entirely.
That doesn't mean it's not worth building. For short bursts of protection, like keeping birds off freshly seeded rows or away from ripening fruit for a few weeks, a plastic-bottle scarer works well. It's also a great first line of defense that you can rotate with other deterrents. Just don't expect to set it up once and walk away forever.
Where bottle scarers tend to fail: very still days with no wind (no movement means no deterrent effect), areas with persistent roosting birds like pigeons or starlings who need more pressure to shift, and any setup that stays in exactly the same spot and position for more than two weeks.
Materials and tools you'll need
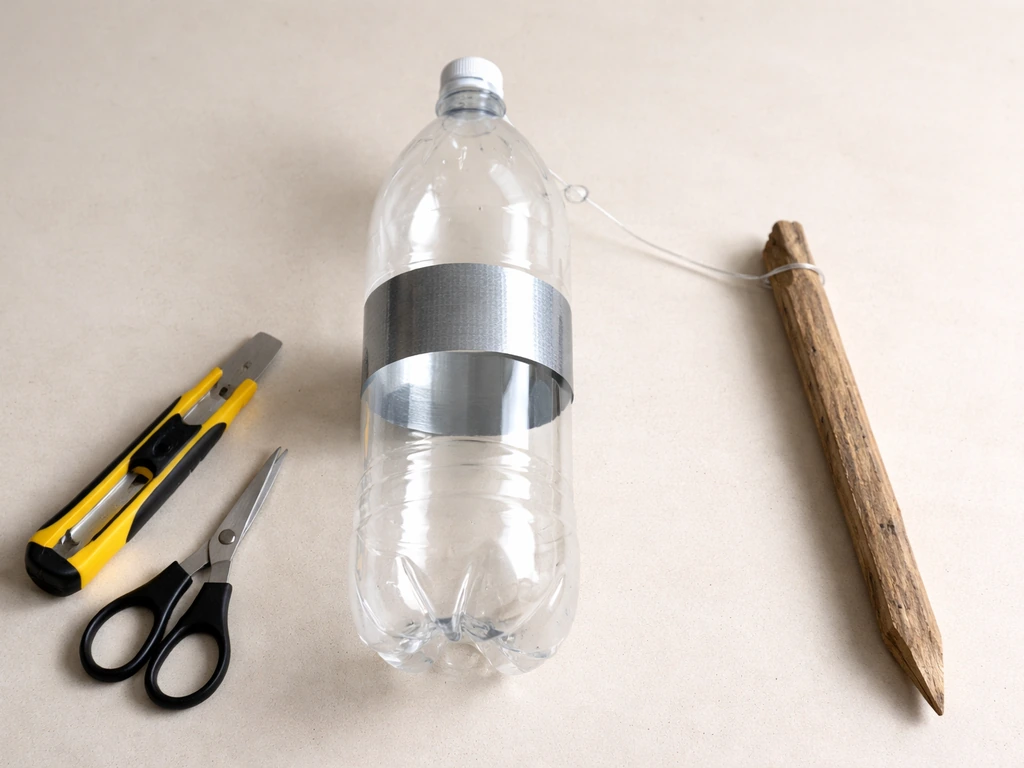
The whole point is to use what you already have. Here's what works well and what you can substitute if you're missing something.
| Item | Best Option | Budget Alternative |
|---|---|---|
| Plastic bottle | 2-litre clear or translucent bottle (more reflective) | Any size works; opaque bottles are less effective |
| Cutting tool | Utility knife or craft knife | Sharp scissors (harder to control but fine) |
| Hanging line | Nylon cord or garden twine | Fishing line (near invisible, birds don't see it coming) |
| Reflective element | Stick-on mylar tape or aluminium foil strips | Old CDs, crisp packet insides, or silver survival blanket scraps |
| Support rod/stake | Bamboo cane or garden stake (90-120cm) | Straightened wire coat hanger or a long stick |
| Securing tape | Waterproof outdoor tape or duct tape | Electrical tape (less weatherproof but passable) |
| Optional: swivel | Fishing line barrel swivel | Twisted loop of cord (reduces tangling) |
A clear or lightly tinted 2-litre bottle is ideal because the plastic itself picks up light and throws small flashes around even without added tape. If you only have opaque coloured bottles, add more reflective material to compensate. For tools, a utility knife gives you much cleaner cuts and better control over strip width than scissors, especially when cutting lengthwise down the bottle body.
Step-by-step build: the fluttering and spinning bottle design
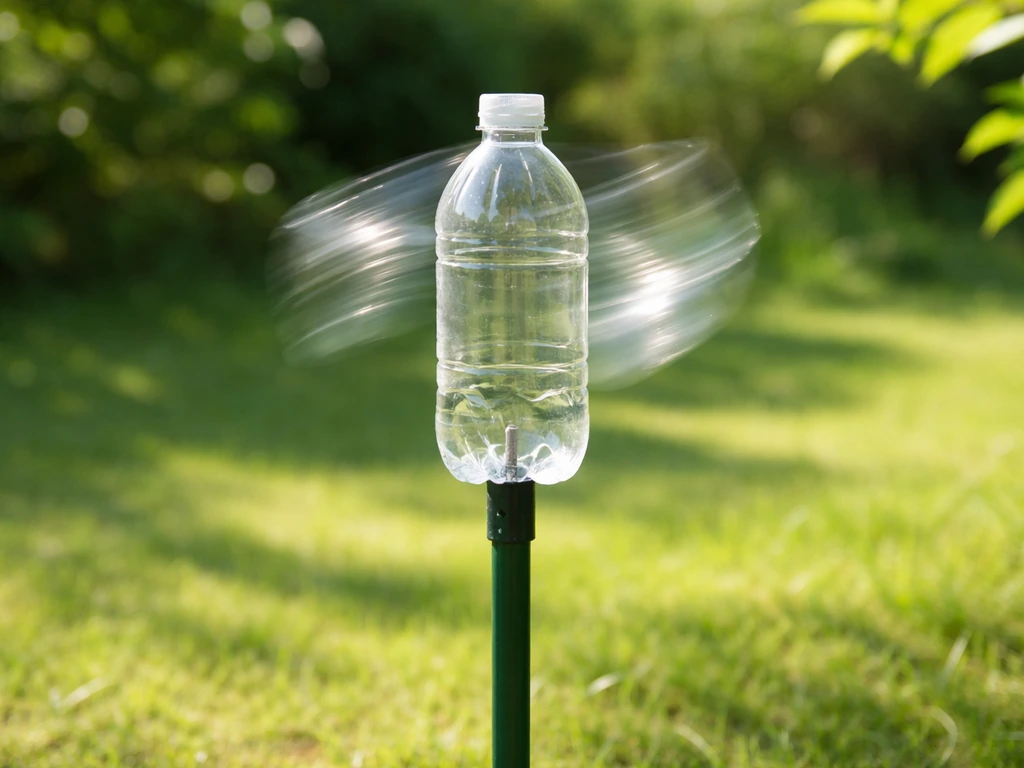
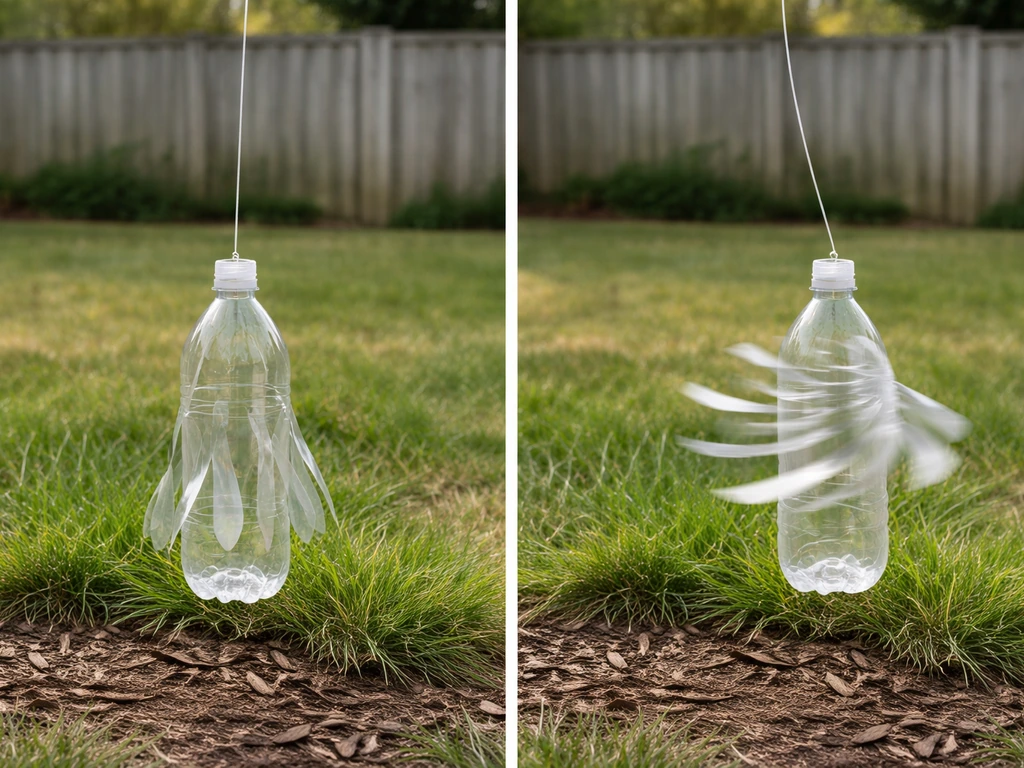
This design creates a bottle that spins in a breeze and throws off reflective flashes. The strips you cut act like little vanes catching the wind. I've tried a few versions of this and the one below is the most reliable for staying intact through rain and wind without falling apart after a week.
- Rinse and dry your bottle completely. Remove the label if it's paper, or score it off. A clean, unmarked surface reflects more light.
- Using your utility knife or scissors, cut off the very bottom of the bottle (about 1.5 cm up from the base). Set the base piece aside, you won't need it for this build.
- Starting from the cut bottom edge, make 6 to 8 vertical cuts upward toward the shoulder of the bottle, stopping about 3 to 4 cm below where the bottle starts to neck in toward the cap. Each cut should be roughly equal distance apart. These cuts create your wind-catching vanes or strips.
- Gently bend each strip outward from the bottle center, alternating one left, one right. This gives the bottle a pinwheel-like profile when viewed from above and dramatically improves how much it rotates in light wind.
- If you have reflective tape, cut it into strips about 1 cm wide and 8 to 10 cm long and stick one to the outer face of each vane. If using foil, cut similar-sized strips and tape them down with outdoor tape. Don't cover the whole strip or the vanes won't flex properly.
- Pierce a hole through the bottle cap using a skewer or the tip of your knife. Thread your nylon cord or fishing line through and tie a secure knot inside (a figure-eight knot works well here). This is your hanging point.
- If you have a fishing swivel, attach it between the bottle cap cord and your hanging line. This single addition makes a huge difference, it lets the bottle rotate freely without the line twisting and locking up.
- Tie the free end of the line to your bamboo cane or stake, leaving the bottle hanging about 20 to 30 cm below the top of the cane. The higher it hangs on the cane, the more movement it gets in light wind.
- Run a second shorter cord from the bottom of the bottle (through a small hole in the neck area below the cap) down to a light anchor point like a tent peg or a second short stick angled into the ground. This stops the bottle from spinning horizontally into your plants on very windy days without blocking its vertical spinning motion.
One thing I got wrong on my first attempt: I made the vane cuts too short, only going about halfway up the bottle. The vanes were too stiff and barely moved in anything less than a strong breeze. Going further up toward the shoulder, stopping just before the neck, gives you longer, more flexible strips that catch even light air movement. Aim for strips that are roughly 15 to 18 cm long on a standard 2-litre bottle.
Placement and setup: where to mount it for best coverage
Placement matters as much as the build itself. A bottle scarer sitting in a dead-air corner of the garden is basically doing nothing. You want it positioned where it gets reliable wind exposure and where the birds you're dealing with actually approach the problem area from.
- Mount the stake at the upwind edge of the area you're protecting, not the center. Birds typically fly in with the wind at their back, so having the deterrent in their flight path before they reach the target area is more effective.
- Height matters: for small songbirds raiding seed beds or vegetable rows, position the bottle at roughly 60 to 90 cm height, just above the crop canopy. For larger birds like pigeons or crows that tend to approach at a higher angle, raise the bottle to 120 to 150 cm.
- For a larger garden bed or fruit cage, use two or three bottle scarers spaced 3 to 4 metres apart rather than one in the middle. Coverage gaps are where the birds will find their way in.
- Avoid placing the bottle directly under tree branches or eaves where wind is blocked. Even partial shelter dramatically reduces rotation.
- If you're protecting a specific plant like a single fruit tree or raised bed, tie the bottle directly to a stake within the canopy edge so it's right in the landing zone, not several feet away.
For roosting deterrence (pigeons settling on ledges, fences, or flat roofs) the approach is slightly different. Mount the scarer directly at the roosting spot rather than at a perimeter, and prioritize the reflective element over the spinning action, since roosting birds are often stationary and less influenced by movement at a distance. In these cases, hanging several reflective strips from a cane directly above the roost works better than a single spinning bottle further away.
Make it effective longer: beating habituation and weatherproofing
Habituation is the real enemy here. UK government wildlife management guidance is explicit that scare devices must be regularly moved to prevent habituation, and both USDA and USFWS research backs that up. Bird Solutions Inc. also explains that DIY bird control loses effectiveness over time as birds become familiar with visual deterrents, a form of habituation scare devices must be regularly moved to prevent habituation. Once birds figure out that something isn't a genuine threat, they stop reacting to it almost entirely. Here's how to stay ahead of them.
Rotation schedule
- Move the scarer to a new position every 5 to 7 days, even if it's just a metre or two in a different direction.
- Change the height periodically. Birds that have assessed a threat at one height will be unsettled when it reappears at a different level.
- Swap out or rotate different scarers: alternate your bottle spinner with strips of reflective tape tied to bamboo, an old CD hanging from a branch, or a foil pinwheel. Each new shape and movement pattern resets the habituation clock.
- If you have multiple units, rotate which ones are 'active' by moving them rather than leaving all of them permanently fixed.
Weatherproofing the bottle
Plastic bottles hold up well outdoors but the attachments don't always. The most common failure point is the cord through the bottle cap working loose as the plastic fatigues from constant rotation. Every couple of weeks, check the knot inside the cap and re-tie it if it's showing any wear. Using a washer or a large button threaded on the cord before you tie the knot gives the cord a much wider contact surface and prevents pull-through.
Reflective tape on the vanes can peel at the edges after rain cycles. Press it down firmly on application and add a strip of outdoor tape over the top edge to lock it in place. Foil strips degrade faster than mylar tape and will need replacing monthly. If your bottle goes cloudy from UV exposure (this happens over a few months in strong sun), replace it with a fresh one as the reflective effect diminishes significantly once the plastic hazes over.
Safety, humane considerations, and common troubleshooting fixes
Plastic bottle scarers are one of the most bird-friendly deterrents you can make. No contact, no entanglement risk, no harm. But there are still a few things worth getting right, especially if you're on a site that also attracts birds you want to encourage, like a backyard with feeders or nest boxes.
Safe build practices
- After cutting, run your finger carefully along all cut edges and sand or tape down any sharp points. Thin plastic can have surprisingly sharp edges after cutting, especially on the vane tips.
- Make sure the stake or cane is driven firmly at least 20 to 25 cm into the ground, or tie it to a fixed structure. A tipping stake in high wind can become a projectile.
- Avoid using cord so long that the bottle can swing down and contact the ground or nearby plants. Keep the hanging length proportional to the stake height.
- If you're using wire instead of a cane, bend all exposed wire ends into a loop or tape them over. Bare wire ends at bird height are a genuine injury risk for any bird that gets close.
Keeping deterrents out of nesting and feeding zones
One thing to think about: if you have nest boxes or bird feeders in the garden, make sure your scarer placement doesn't inadvertently block access to those. The whole point of deterrents is to redirect birds away from problem areas, not to clear your entire garden of wildlife. Position the scarer with a clear gap, at least 4 to 5 metres, between it and any existing bird-friendly structures. The RSPCA makes the broader point that even well-intentioned deterrents can cause unintended harm through poor placement and lack of monitoring, which applies here too.
Troubleshooting when it stops working
| Problem | Likely cause | Fix |
|---|---|---|
| Birds ignoring it completely | Habituation after 1-2 weeks | Move to a new position and add a second deterrent type |
| Bottle not spinning | No wind, line is twisted and locked | Add a fishing swivel, check for obstructions overhead |
| Bottle collapsed or torn | Vane cuts too deep into the neck, UV degradation | Replace bottle, keep cuts 3-4 cm below the neck |
| Reflective tape peeling off | Moisture getting under tape edges | Seal edges with outdoor tape on installation |
| Works on small birds but not pigeons/crows | Larger birds habituate faster and are bolder | Move daily, add noise element (foil strips that rattle), place closer to landing zone |
| Stake falling over | Not deep enough or soil too loose | Drive deeper, use a heavier cane, or tie to a fixed structure |
If you find that even a well-maintained bottle scarer isn't keeping up with persistent birds, it's worth combining it with complementary deterrents rather than just making more bottle scarers. Simple DIY sound-making additions, like a set of bird bells or rattling foil strips hung nearby, add an auditory dimension that breaks up the visual monotony birds get used to. If you want a more natural sound, you can also learn how to make a bird call out of wood and add it to your deterrent setup. That multi-sensory approach is much harder for birds to habituate to than any single deterrent on its own.
The bottom line is that a plastic-bottle bird scarer is a genuinely useful tool when you treat it as something to actively manage, not a one-time fix. Build it in 20 minutes, move it every week, replace it every couple of months as the plastic weathers, and combine it with other low-effort deterrents when needed. If you want a different sound-based option, learn how to make a wooden bird whistle as another humane deterrent Build it in 20 minutes. That approach will keep it effective through a whole growing season without costing you anything beyond a bit of time and a bottle that would have gone in recycling anyway.
FAQ
How far apart should I place multiple plastic-bottle bird scarers in one garden area?
If you use more than one, spread them so each one gets its own wind pocket and overlapping reflections, not a tight cluster. As a starting point, aim for at least 6 to 10 metres between units in open plots, then adjust based on where the birds land and approach. If you see birds ignoring one zone, move that unit closer to the entry path rather than adding more bottles in the same spot.
What should I do if my area has almost no wind, so the bottle barely moves?
First, switch to a setup that boosts motion locally, hang the bottle lower or closer to the target rows so small breezes still move the vanes. If there is truly no breeze, add a simple wind driver, like a loose loop of string that tugs when air moves, or combine with a sound element (bells or rattling foil strips) so deterrence does not rely entirely on spinning.
Will a plastic-bottle scarer work on birds like pigeons or starlings that perch on fences or roofs?
Sometimes, but they often respond better to reflective-only placement right at the roost. Mount reflective strips directly at the landing site and keep the motion modest, since birds at roost height can habituate to distant spinning. Also expect you may need more frequent repositioning and pairing with another deterrent if the same individuals return.
How often do I need to move the scarer, and does “moving” mean changing position or just adjusting angle?
Move it in a way that changes the bird’s visual pattern, not just the angle. A practical rule is to relocate to a different nearby spot once a week, or at least shift several metres and rehang so the flashes land differently. If you only tilt or rotate the same hanging point, birds can learn the stable reference faster.
Can I leave the bottle scarer up year-round, or should I take it down after a few weeks?
You can leave it up, but only if you keep actively managing it by rotating placement and checking wear. For seasonal crops, it’s often more effective to run it in bursts aligned with the highest-risk period (fresh seedlings, ripening fruit), then remove it once the threat window passes to reduce habituation and protect bird-friendly areas.
What problems indicate the scarer has become ineffective?
Common signs are birds landing repeatedly in the same spot without hesitation, no longer reacting to the reflections, or fewer birds being unsettled even on breezy days. Also check for “silent failure” issues like vanes too stiff (cuts too short), reflective tape peeling, or the bottle becoming cloudy from sun, all of which reduce flashes and motion.
How do I prevent the cord or bottle cap attachment from failing if the scarer spins hard in storms?
Use a wider contact surface at the knot, like a washer or large button, and re-tie every couple of weeks or after heavy weather. Make sure the cord is not rubbing against the same edge each rotation, if needed add a small protective grommet or route the cord so it sits centered through the cap.
Do I need reflective tape if my bottle is clear or tinted?
Clear or lightly tinted bottles help because the plastic itself can catch and throw small flashes, but adding reflective strips usually improves performance. If you do add tape, concentrate it on the portion of the vanes that moves most, press edges firmly, and seal with an outdoor strip over the top edge to slow peeling after rain cycles.
Is there a safe way to use this near bird feeders or nest boxes?
Yes, but keep a clear gap so the scarer does not block access or force birds into a stressful path. Maintain several metres of separation from feeders and nest boxes, and verify that birds can still approach comfortably, if you notice birds avoiding the entire area, relocate the scarer farther from the bird-friendly structures and focus it on the actual crop damage zone.
What complementary deterrent works best with a bottle scarer if birds keep coming back?
Pair the bottle with an auditory component so deterrence is multi-sensory. Bird bells or short rattling strips placed nearby often break the “visual only” pattern that birds habituate to. Keep sound components distributed around the target so birds encounter both reflection and noise during approach, not just when they are already landing.
Next Articles
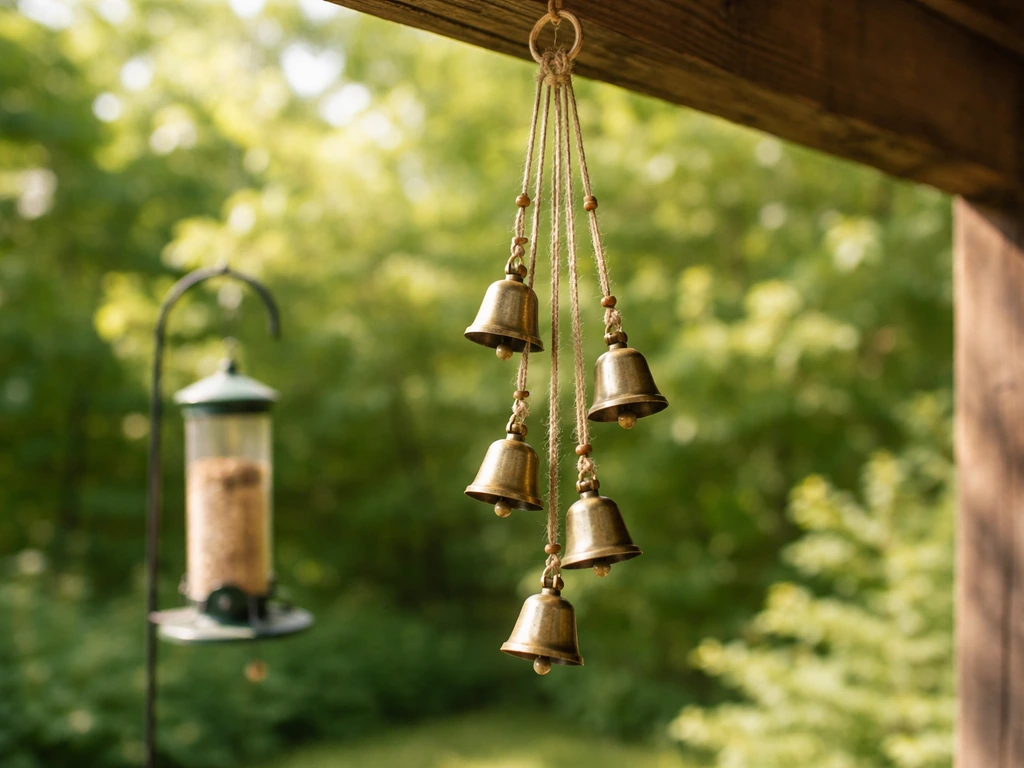
How to Make Bird Bells: DIY Safe Backyard Chimes
Step-by-step guide to make safe backyard bird bells with weatherproof parts, placement tips, and troubleshooting.
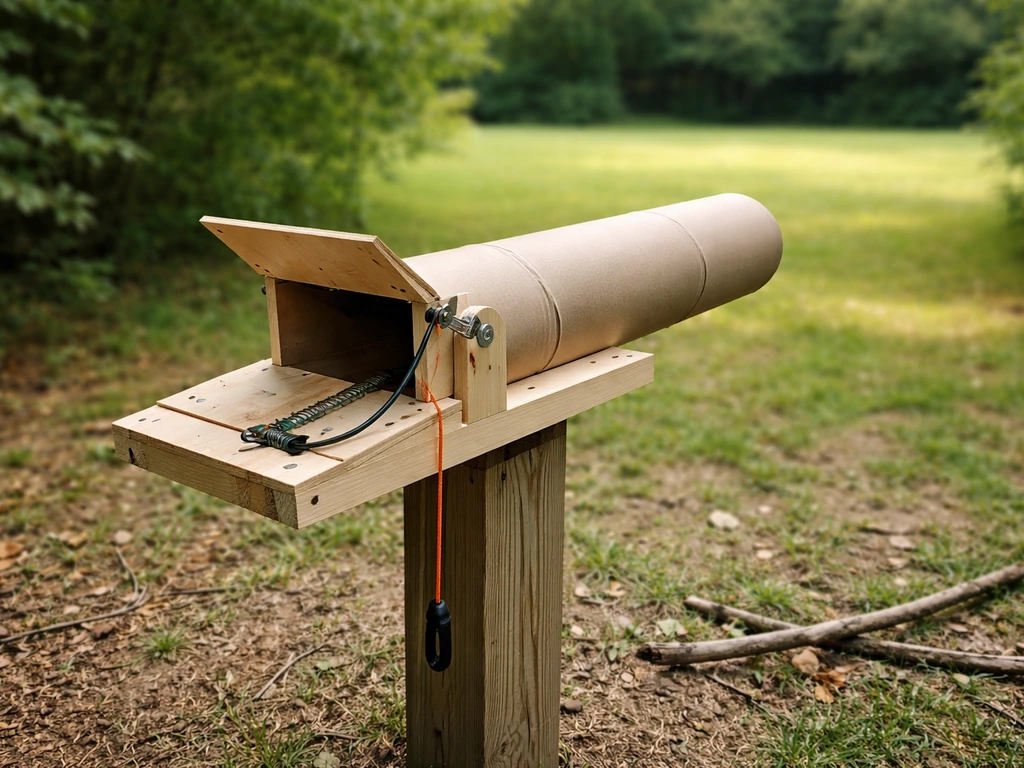
How to Make a Bird Launcher for Safe Backyard Enrichment
Step-by-step DIY guide to build a safe bird launcher, choose materials, set distance, and test for reliable enrichment.
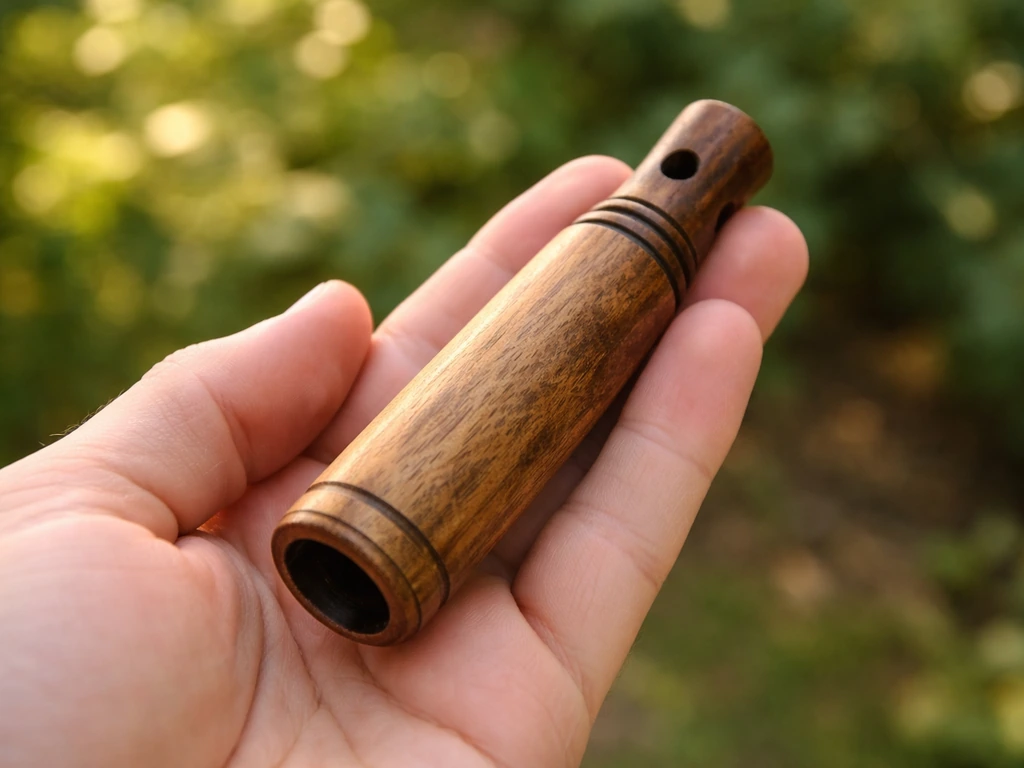
How to Make a Bird Call Out of Wood Step by Step
Step-by-step DIY guide to make a wooden bird call, from choosing wood to tuning airflow for clear birdlike sounds.