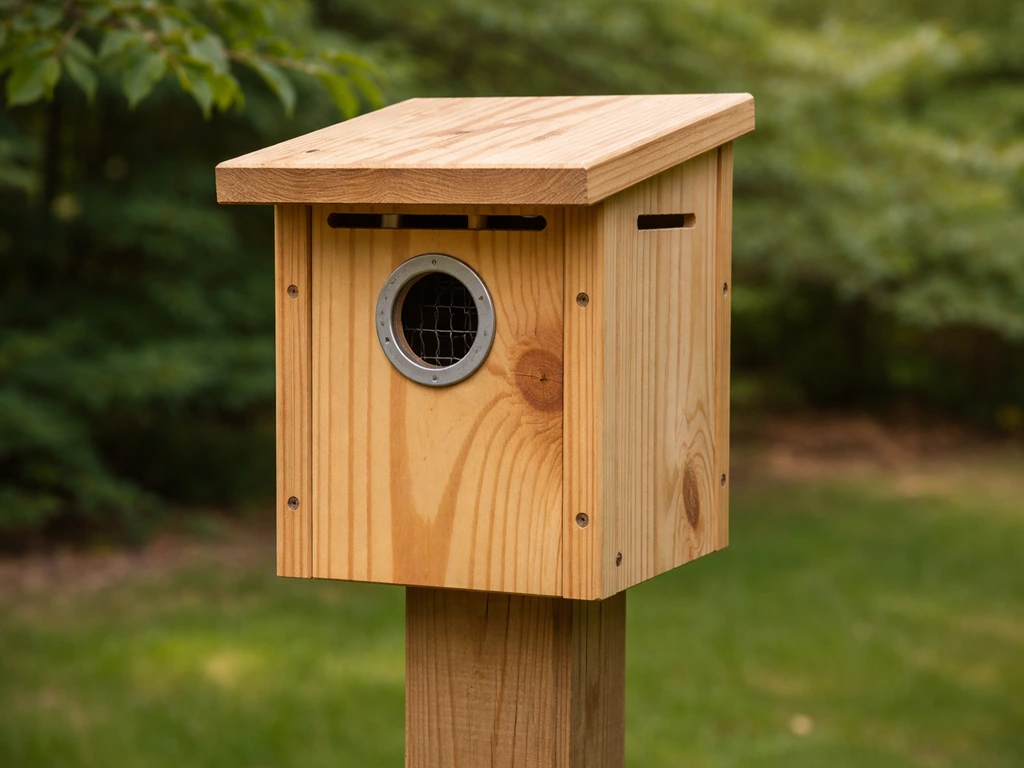
A bird roosting box is a simple wooden shelter birds use to stay warm and safe overnight or during cold weather, and you can build a solid one in an afternoon with basic tools, a few pieces of untreated lumber, and some hardware cloth. The key differences from a nesting box are smaller ventilation, a lower entrance hole (so warm air rises away from the birds rather than escaping immediately), and interior perch dowels so multiple birds can huddle together. Get those details right and you have something birds will actually use come winter.
How to Build a Bird Roosting Box Step by Step

Marcus Thornton
25 Apr 2026
Roosting boxes vs. nesting boxes: what's actually different
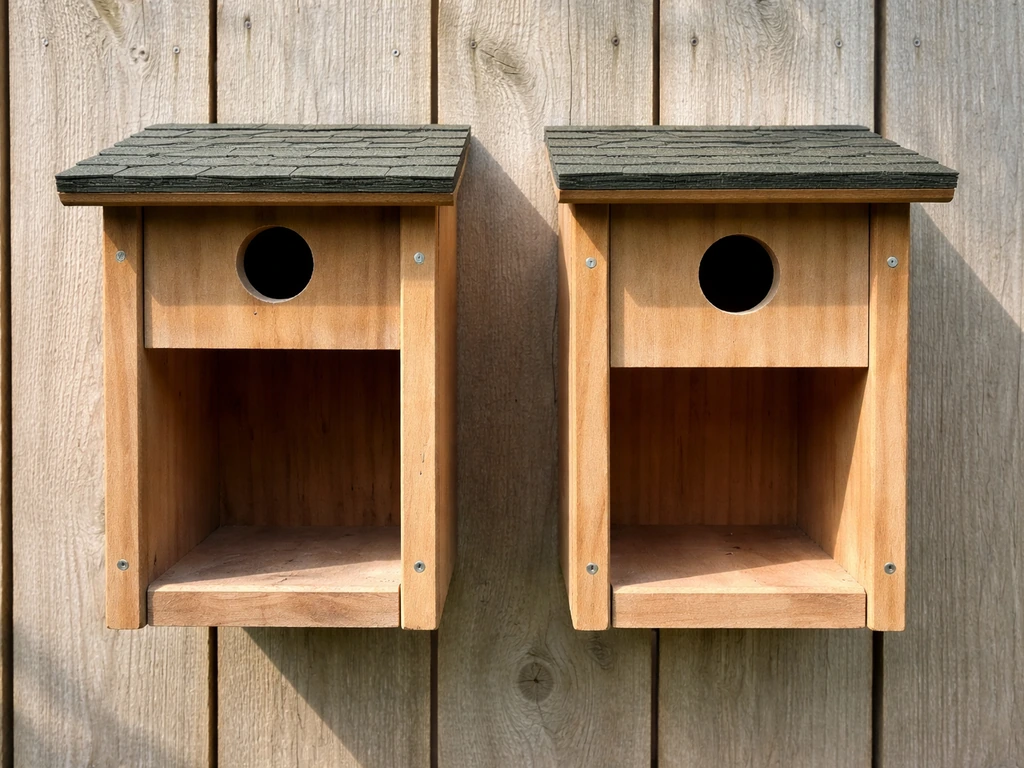
People mix these two up constantly, and it matters because a box designed for nesting can actually work against birds trying to roost. A nesting box puts the entrance hole near the top so heat generated by incubating eggs and chicks rises out quickly, keeping temperatures comfortable. A roosting box flips that logic: the entrance hole sits near the bottom of the front panel, so body heat from roosting birds rises and stays trapped inside the box. That single design change is the most important thing separating a roosting box from a nesting box.
Nesting boxes also need cleaner, more open interiors so parent birds can move around freely. A roosting box benefits from horizontal perch dowels at staggered heights inside, giving multiple small birds somewhere to grip while they sleep. If you already have a nesting box project in mind, that's a separate build worth doing alongside this one, but don't assume a nesting box will double as a winter roost without modifications.
One more distinction worth knowing: owls are a special case. Barn owls, screech owls, and barred owls will use what looks like a large nesting cavity as a winter roost months before they actually nest in it. So for owls specifically, a well-built nesting box with the right dimensions can serve both purposes. For smaller songbirds like bluebirds, wrens, chickadees, and nuthatches, a dedicated roosting box with a low entrance and interior perches is what you want.
Picking the right design for your target birds
Before you cut a single board, decide which birds you're building for. That determines internal floor dimensions, entrance hole size, and mounting height. A box sized for bluebirds won't comfortably roost a group of starlings, and a hole too large invites predators and unwanted species. Here's a practical reference for the birds most backyard builders are targeting:
| Target Bird(s) | Floor Dimensions | Entrance Hole Diameter | Mounting Height |
|---|---|---|---|
| Chickadees, Wrens, Nuthatches | 4" x 4" | 1" to 1.25" | 5 to 10 ft |
| Eastern Bluebirds | 5" x 5" | 1.5" | 4 to 6 ft |
| Tree Swallows | 5" x 5" | 1.5" | 5 to 8 ft |
| European Starlings (if desired) | 6" x 6" | 2" | 8 to 12 ft |
| Eastern Screech-Owls | 8" x 8" | 3" | 10 to 30 ft |
| Barred Owls | 13" x 11.5" | 7" x 7" (square) | 15 to 30 ft |
| Barn Owls (pole box) | 24" x 18" minimum | 5" x 7" or larger | 12 to 20 ft |
For most beginners, I'd recommend starting with a bluebird or chickadee-sized box. The dimensions are forgiving, the build is fast, and those species are genuinely common across most of North America. The instructions below use a 5" x 5" floor plan with a 1. Michigan Bluebirds recommends bluebird-box floor dimensions of about 4 in x 4 in up to 5 in x 5 in 5" x 5" floor plan. 5" entrance hole, which works for bluebirds and tree swallows. Scale up the floor and entrance hole if you're targeting screech-owls or larger birds.
Location matters just as much as design. Birds choose roost sites based on their habitat preferences and the surrounding vegetation. A roosting box mounted on an open pole near shrubby edge habitat will attract different species than one screwed to a tree in a dense woodland. Think about what birds you actually see in your yard in winter, then site the box in the habitat they already use.
Materials checklist: what to buy and what to skip
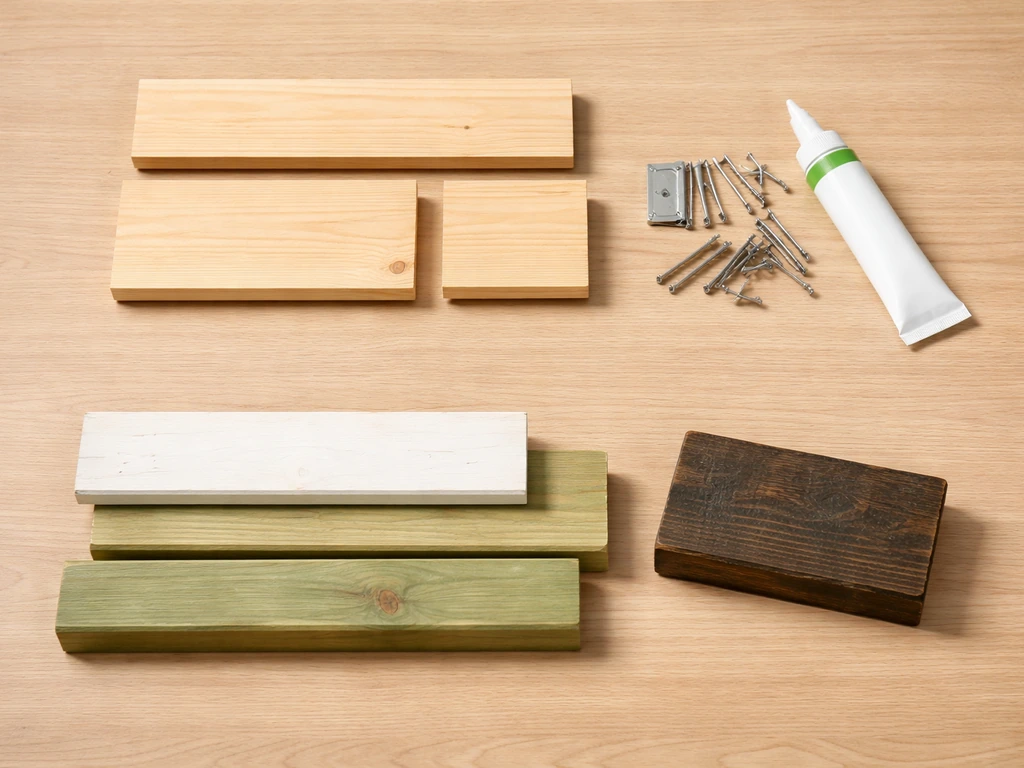
The single best material for a roosting box is plain, untreated wood. Cedar is the top choice because it's naturally rot-resistant, dimensionally stable in wet weather, and doesn't need any finish to last years outdoors. Pine and fir work too, especially if you seal the outside joints well. What you want to avoid is pressure-treated lumber: it's infused with pesticides and fungicides that can leach into the box interior, and that's not a risk worth taking when birds will be spending cold nights inside. Exterior-grade (ACX) plywood can work for larger owl boxes where panel rigidity matters, but solid lumber is easier for beginners.
- One 6-foot length of 1x6 untreated cedar or pine (covers front, back, sides, and floor for a small songbird box)
- One piece of 1x8 for the roof (slightly wider than the box sides to create overhang)
- 1.5" galvanized or stainless exterior screws (not regular drywall screws, which rust and weaken joints)
- Waterproof wood glue (non-toxic when dry, like Titebond III)
- Hardware cloth, 1/4" mesh, for a predator guard or entrance tunnel (optional but recommended)
- Three or four wooden dowels, 3/8" diameter, for interior perches
- A 1.5" hole saw or spade bit for the entrance hole
- Sandpaper (80 and 120 grit)
- Exterior water-based primer and paint, or raw linseed oil, for the outside surfaces only
- A small piano hinge or removable side panel screws for clean-out access
A note on paint: even low-VOC latex formulas can off-gas for months after application. If you paint your box, do it in the fall so fumes have all winter to dissipate before birds start using it. Never paint the inside of the box or around the entrance hole. The outside only, and stick to earth tones or natural wood colors that won't absorb excess heat in summer.
How to build it: cut list, assembly, and all the details
Cut list for a bluebird/swallow roosting box
| Part | Dimensions | Quantity | Notes |
|---|---|---|---|
| Front panel | 5" wide x 12" tall | 1 | Entrance hole drilled 2" from the bottom edge |
| Back panel | 5" wide x 14" tall | 1 | Extra height for mounting screws above roofline |
| Side panels | 5" wide x 11" tall | 2 | Bevel top edge at 10-15 degrees to match roof slope |
| Floor | 5" x 5" | 1 | Cut corners at 45 degrees for drainage gaps |
| Roof | 7" wide x 7" deep | 1 | Slopes front to back; overhangs front by at least 2" |
| Interior perch dowels | 4" long, 3/8" diameter | 3 to 4 | Staggered heights: 3", 6", 9" from floor |
Assembly, step by step
- Cut all panels to dimension. If you're new to this, a miter saw makes it fast, but a handsaw and a square work fine. Take your time on the side panels: the angled top edge is what lets the roof shed water away from the box.
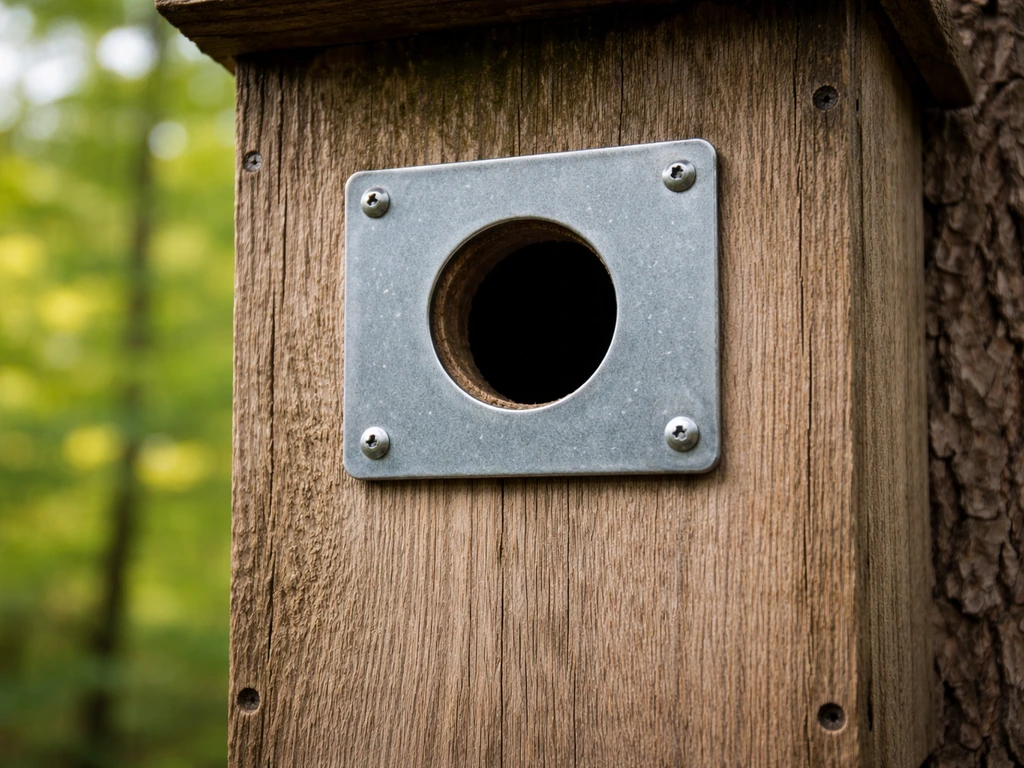
- Drill the entrance hole in the front panel first, before assembly. Position it 2 inches up from the bottom edge of the front panel. This low placement is the key difference from a nesting box. Use a sharp hole saw or spade bit and back the wood with scrap to prevent tear-out.
- Drill interior perch holes: three or four holes through the side panels at staggered heights (3", 6", 9" from the floor), sized to snugly accept your 3/8" dowels. Slide the dowels through so they span the interior width.
- Drill drainage gaps in the floor. Instead of drilling straight holes (which can clog), cut the four corners of the floor piece at a 45-degree angle, removing about 3/8" from each corner. This creates reliable drainage gaps that won't fill with debris.
- Drill ventilation holes near the top of each side panel: two or three 1/4" holes positioned just under the roofline on each side. These small holes let moisture and heat escape without creating drafts at roost level.
- Apply waterproof wood glue to all mating surfaces, then screw the joints together with 1.5" exterior screws. Drive screws at an angle (called toe-screwing) when face-screwing is awkward. Gluing and screwing together is stronger than either alone and dramatically extends the life of the box.
- Attach the floor so it sits recessed about 1/4" up from the bottom edges of the sides. This keeps the floor from sitting in standing water if the ground below ever splashes up.
- Mount the roof with a slight forward slope (use your beveled side panels as a guide) so rain runs toward the front overhang and away from the entrance. A 2-inch overhang in front is the minimum; more is better in rainy climates.
- Leave one side panel on a piano hinge or attach it with two removable screws so you can swing it open for cleaning. This is non-negotiable for long-term box health.
Entrance features, perches, and placement
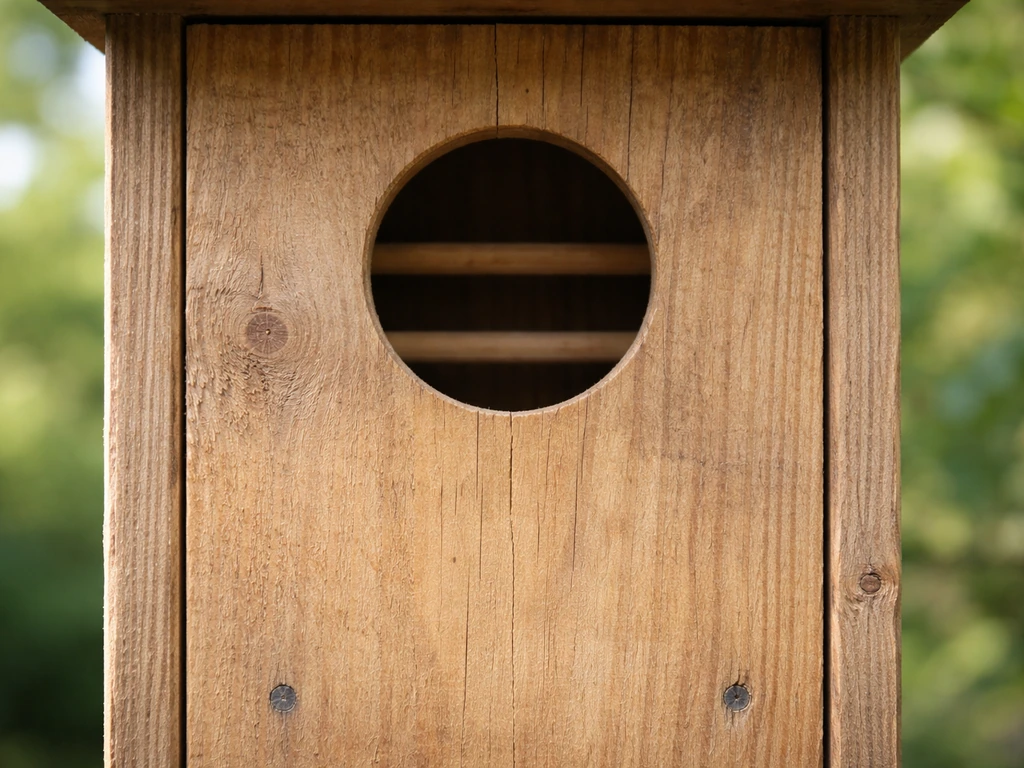
Skip the external perch peg. I know it looks welcoming, but an exterior perch below the entrance hole actually helps predators and aggressive species get a grip and investigate or harass roosting birds. Birds don't need a perch to enter a hole they've chosen. If anything, a smooth front panel with no external peg is the safer design.
The interior perch dowels are a different story. These are important for roosting boxes specifically because small birds like chickadees and nuthatches will communally roost, stacking multiple individuals on the dowels at different heights. Without them, the birds are just sitting on a flat floor, which is fine for nesting but suboptimal for efficient thermal sharing during a roost. Space the dowels so they don't directly overhang each other, since birds prefer not to be perched directly above another bird's waste.
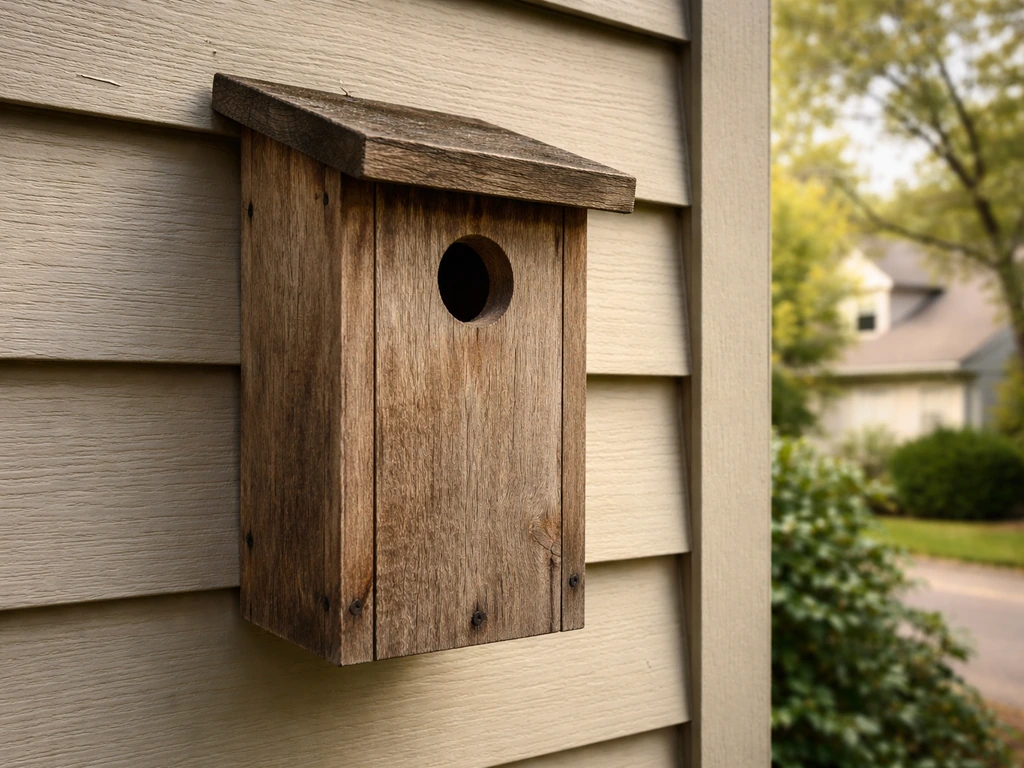
For placement, face the entrance hole away from prevailing winds (in most of North America, that means facing east or southeast) so driving rain doesn't blow directly into the box. The U. S. Fish & Wildlife Service guidance for building and placing birdhouses notes that [driving rain can be reduced by how the entrance and roof are oriented](https://digitalmedia.
fws. gov/digital/api/collection/document/id/1107/download), and it discusses design choices meant to protect cavity-nesting birds. Mount it on a smooth metal pole if you can, which is more predator-resistant than a tree or wooden post. Keep the box away from branches and fence rails within jumping distance, since predators will use those access points to reach the entrance even if you have a pole baffle.
A height of 4 to 6 feet works well for bluebird-sized boxes; screech-owl boxes should go higher, at least 10 feet.
Finishing, sealing, and keeping temperatures safe
The outside of the box can and should be sealed or finished for durability, but the inside must stay unfinished and unpainted. For the exterior, raw linseed oil is a traditional, low-toxicity option that soaks into the wood and protects against moisture without forming a film that can peel or crack. If you prefer paint, use a water-based exterior paint in a light or medium earth tone. Dark colors absorb heat, which can push interior temperatures dangerously high on sunny winter days, even in cold climates. Light colors reflect heat and give you more temperature control.
Seal the exterior joints with a bead of non-toxic exterior caulk before painting. Pay special attention to the roof-to-side panel joints and any gaps around the entrance hole perimeter. Water infiltration at joints is the main reason roosting boxes fail early. Your ventilation holes near the roofline do double duty here: they let trapped moisture vapor escape so condensation doesn't build up on the interior walls overnight, which would chill the birds roosting inside.
If you're building for a hot climate where summer temperatures could turn the box into an oven (even in the off-season), add a few extra 1/4" ventilation holes on the side panels partway up the box rather than just at the top. The goal is controlled airflow, not a draft. For winter roosting, you actually want the box to hold warmth efficiently, so don't over-ventilate. Two to four small holes per side near the top is the sweet spot for most temperate climates.
Predator protection: guards and hardware that actually work
A roosting box birds can't safely use is worse than no box at all. Predator protection comes down to two things: the mounting setup and a physical guard. For pole-mounted boxes, a cone or cylinder baffle mounted on the pole below the box is the most reliable defense against raccoons, cats, and snakes. The baffle should be at least 18 inches in diameter and mounted roughly 4 feet off the ground. Build or buy the baffle before you install the pole, because adding it afterward on an already-set pole is genuinely frustrating.
For tree-mounted boxes, a Noel guard works well: it's a rectangular tunnel of 1/2" hardware cloth attached around the entrance hole that extends outward about 3 to 4 inches, making it physically awkward for a predator to reach through and grab a bird at the entrance. Cut a piece of hardware cloth about 6" x 12", roll it into a tube, and staple or screw the flange to the front panel around the entrance hole. It looks a little industrial, but birds use it without hesitation.
Avoid placing boxes on fence posts, old wooden utility poles, or branches where a snake or raccoon can approach from above. Snakes are especially good at bypassing pole baffles by using nearby jump points: a branch or wire within a few feet of the box can let a snake bypass your baffle entirely. Clear the area around the mounting site before you commit to a location.
Installation, maintenance, and what to do if birds ignore the box
Getting it installed right
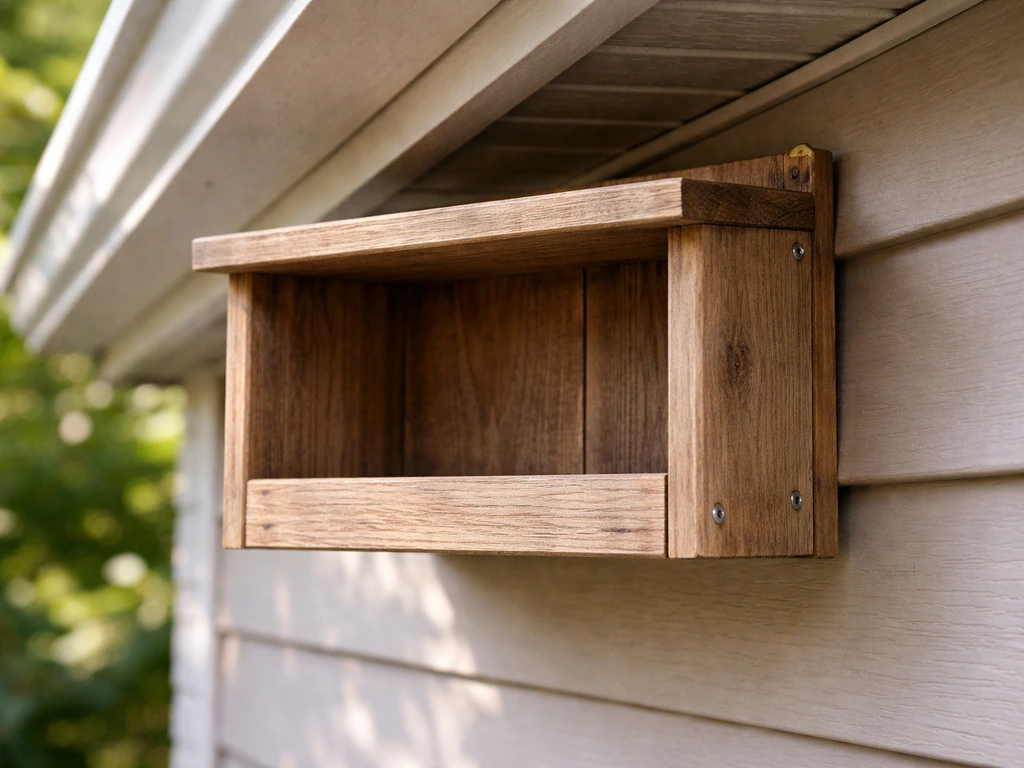
Mount the box so it's stable but with a very slight forward tilt, maybe 5 degrees toward the front, so any rain that does get inside drains out through the floor gaps rather than pooling. Use galvanized lag screws through the back panel for tree mounting, or a conduit clamp system for pole mounting. Check that the box doesn't wobble: movement spooks birds and can warp joints over time.
Cleaning schedule
Clean your roosting box once a year, in fall after the nesting season has clearly ended and before winter roosting begins. Open the access panel, scrape out old nesting material and debris with a putty knife or spatula, and let the box air out before closing it back up. If you're dealing with a large roost like a barn owl box, mid-winter is sometimes the best maintenance window when the birds are less actively using it. Never clean a box if there's any sign of active use: eggs, chicks, or regular nightly visits. If you're unsure, wait another week and check again.
If birds don't move in
Give it at least one full season before you start troubleshooting. Birds are cautious about new structures, and a freshly built box smells like cut wood, paint, and human handling. If a year passes with no use, run through this checklist:
- Is the entrance hole facing into prevailing wind? Rotate it to face east or southeast.
- Is the box too isolated from shrubs, trees, or cover that birds use for approach? Move it closer to edge habitat.
- Are there predator signs (scratch marks near the entrance, feathers below the box)? Add or improve your baffle and guard.
- Does the interior smell strongly of paint or linseed oil? Leave the access panel open for a few weeks to air it out.
- Is the box in full sun all day? Summer heat can make a box unattractive even for winter use. Dappled shade or a north-facing position helps.
- Is the entrance hole the right size? A hole even slightly too large invites dominant species that chase out the birds you're hoping to attract.
- Are there competing natural cavities nearby? Birds will almost always choose a natural hollow over a box. If so, wait it out or move the box to a location with fewer natural options.
Upgrades once the basics work
Once you've got one box successfully used, it's easy to iterate. Try adding a second box nearby: some species are territorial and will use one box while defending a buffer zone around it, but having two boxes 15 to 20 feet apart can attract a pair of different species. You can also experiment with different entrance hole sizes at different locations to see what moves in.
For owls specifically, adding a shallow layer of wood shavings (not sawdust, which compacts and holds moisture) to the floor gives them a concave roosting and nesting surface, since barn owls in particular don't bring in nesting material on their own. Building a roosting box is also a natural gateway to related projects like species-specific nesting boxes for robins, sparrows, or bluebirds, each of which has its own dimension and placement quirks worth exploring separately.
If you’re ready to go a step beyond a basic roosting box, the next step is learning how to build a bird blind so you can watch without spooking them. Once you understand roosting box basics, you can adapt the same measurements, materials, and placement tips to learn how to build a bird blind for easier, safer observing.
Once you have one roosting box running, the same careful approach can also guide how to build a bird blind for closer, safer watching, which is a related adjacent project to how to build a bird hide. If you want to build one for sparrows specifically, look for the entrance size and interior setup that matches their habits.
If you want robs to visit, you can also follow the same approach and learn how to make bird boxes for robins species-specific nesting boxes for robins. If you want to go further after building a roosting box, you can apply the same overall approach to learn how to make a bird nesting box for specific species related projects like species-specific nesting boxes.
You can use the same careful measurements and materials to plan how to build bird nesting boxes for specific species how to make a bird nesting box. You can use the same careful measurements and materials to learn how to make a bird house with box that fits your target species. Once you have the hang of roosting box basics, you can apply the same careful choices to learn how to make bird blocks too.
FAQ
What should I do if my bird roosting box gets ignored all winter?
If your box attracts no roosting birds after a season, first confirm the design match (low entrance, interior perch dowels, and correct ventilation). Then check mounting height and predator access, because an otherwise perfect box often fails when it is too low, faces the wrong direction for winter winds, or sits within a direct “jump” path from branches or fence rails.
Can I use the same box for both roosting and nesting?
Yes, a roosting box can be used in nesting context by some species, but it depends on what you built. If you used a low entrance and compact interior, you may discourage nesting species that need more open space and a higher entrance that helps eggs and chicks stay at comfortable temperatures.
Is pressure-treated wood ever acceptable for a roosting box?
Avoid pressure-treated lumber even if it is “green” or “dry,” since it can off-gas or leach chemicals over time. If you already own treated boards, the safer move is to switch to plain untreated cedar, pine, or fir, or build a new box so birds spend the entire roosting period only in untreated material.
How do I space the interior perch dowels for multiple birds?
For most songbirds, interior dowels should be set so birds can grip without sitting directly above another bird’s waste. A practical approach is staggered dowel heights with enough spacing that droppings fall to the floor below without creating a “stacking mess,” and keep dowels clear of the roof so birds are not forced into cramped gaps.
Which direction should the entrance face, and does it matter in my specific yard?
Don’t place roosting boxes where the entrance is likely to get blasted by driving rain or snow drift. In most regions, orienting the entrance toward east or southeast helps reduce wind-driven precipitation entering the box front, but adjust based on your yard’s actual winter wind patterns.
How should I modify a roosting box for very hot summers?
For hot climates, add ventilation holes on the side panels rather than relying only on roofline holes, but keep them small. Also consider shade placement, since dark painted or sun-facing boxes can overheat even when ventilation is present.
Can I paint the box, and what if I already painted it?
Never paint the inside, the entrance area, or the interior perch dowels. For the exterior, finish only after sealing exterior joints with non-toxic caulk, and choose light or medium earth tones to reduce heat absorption. If you paint, do it in the fall so odors dissipate before winter roosting begins.
My roosting box was painted, how long should I wait before installing it?
If you painted recently, give it extended air-out time and avoid putting it where birds can access it immediately. If the paint is inside the entrance zone or on interior surfaces, remove it or rebuild, because off-gassing can linger even with low-VOC products.
Should I add a landing perch below the entrance to make it easier for birds?
A common mistake is adding an exterior perch peg below the entrance, thinking it helps birds land. For roosting boxes, that external perch can make it easier for predators to grab birds at the entrance, so use a smooth front panel (no external peg) and rely on the internal dowels for roost comfort.
How do predators bypass my pole baffle, and how can I prevent that?
Pole baffles typically fail when there are nearby “bridges,” like branches, wires, or fence rails within a few feet that let predators bypass the barrier. Clear the area around the mounting site and verify there is no direct access path that reaches the entrance from above.
What predator guard should I use for a tree-mounted roosting box?
If the box is on a tree or post, use a guard that creates a physical barrier at the entrance. For tree mounting, a Noel guard type hardware cloth tunnel around the entrance works well, and the key is making it awkward for a predator to reach inside without blocking bird access.
How much ventilation is enough for a roosting box?
For winter roosting, aim for a stable, weather-tight structure with moisture management rather than aggressive airflow. Too many vents can chill the interior, while too few can increase condensation and dampness, so stick to small ventilation holes near the roofline as designed.
My box feels slightly loose on the mount, is that a problem?
If your box wobbles, birds may avoid it and joints can loosen over time. After mounting, check for movement at the entrance and roofline, then re-tighten hardware and ensure the back panel is secured firmly (conduit clamp systems and galvanized lag screws should be tightened to prevent rocking).
When is the safest time to clean out a roosting box?
Yes, maintenance timing matters. Clean in fall after nesting ends, but never if you see active nightly use or any signs like eggs or regular visits. If you suspect occupancy, wait and re-check rather than forcing the birds out mid-roost.
How can I attract multiple bird species without one dominating the roosting area?
If multiple species show up, you can fine-tune without rebuilding right away by adjusting spacing between boxes and entrance sizes for different locations. Some species are territorial, so putting boxes too close can cause one species to exclude another even when both would otherwise fit the habitat.
Next Articles
How to Make Bird Boxes for Robins Step by Step
Step-by-step DIY guide to build a robin nesting box with proper dimensions, entry, ventilation, placement, and cleaning.
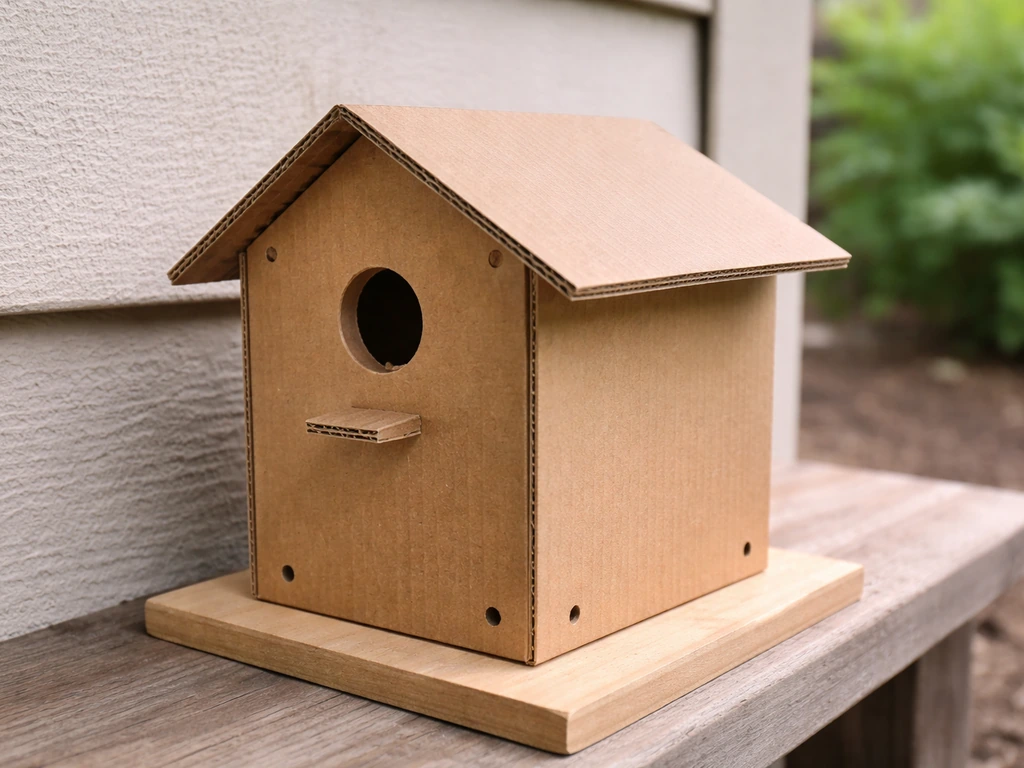
How to Make a Bird House With a Cardboard Box
Step-by-step cardboard bird house and bird enclosure build with safe holes, ventilation, drainage, and weather tips
How to Build a Bird Box: Step-by-Step DIY Guide
Step-by-step plans to build and mount a wildlife-safe bird box on a house, with framing, prep, and optional singing craf