You can build a functional, bird-ready wooden nesting box in a single afternoon with a few basic tools, a piece of untreated pine or cedar, and some exterior screws. The exact dimensions and entrance hole size are what really matter, because those two things determine which species moves in and whether any bird bothers at all. Everything else, from paint choices to predator guards, follows from getting those fundamentals right. This guide walks you through the whole process, start to finish.
How to Make a Bird Nesting Box: Step-by-Step DIY Guide

Marcus Thornton
4 Apr 2026
Choose the right nesting box for the bird species

The single biggest reason a nesting box sits empty is a mismatch between the entrance hole size and the target species. Birds are specific. A bluebird won't squeeze through a chickadee-sized hole, and a house sparrow will happily exploit a hole that's even a fraction too large. Before you cut a single board, decide which species you're building for.
Eastern bluebirds are the most popular target for backyard nest box projects in North America, and their specs are well-documented. They need a 1.5-inch round entrance hole and a floor of roughly 5.5 x 5.5 inches with a box depth of about 9 inches. Carolina chickadees do well with a slightly smaller 1.25-inch entrance hole and a similar depth. Purple martins are a different category entirely: they prefer colony housing with individual compartments of at least 6 x 6 inches (research from the Purple Martin Conservation Association suggests 7 x 12 inches performs even better), and an entrance opening of 2 1/8 inches.
| Species | Entrance Hole Diameter | Floor Size | Box Depth |
|---|---|---|---|
| Eastern Bluebird | 1.5 inches (round) | 5.5 x 5.5 inches | 9 inches |
| Carolina Chickadee | 1.25 inches (round) | 4 x 4 inches | 8–9 inches |
| House Wren | 1.125 inches (round) | 4 x 4 inches | 6–8 inches |
| Tree Swallow | 1.5 inches (round) | 5 x 5 inches | 6–8 inches |
| Purple Martin | 2.125 inches (round or crescent) | 6 x 6 inches (min) | 6 inches |
If you're building for robins, the design is quite different since robins are open-nesting birds and prefer a three-sided shelf rather than a fully enclosed box. If that's your goal, making bird boxes for robins involves its own set of design rules. For this guide, we'll focus on the fully enclosed cavity-nester style box, with Eastern bluebirds as our main example since their specs are widely supported by research and their dimensions translate well to other small songbird boxes.
It's also worth thinking about whether you want a single box or something more ambitious. A standard single-cavity wooden box is the right starting point for almost everyone. If you eventually want to build a sparrow-specific design, the specs shift slightly, and you can find those details in a guide focused on making a bird box for sparrows. For now, let's get the fundamentals right.
Materials, tools, and safe DIY setup
The best wood for a nesting box is untreated cedar, pine, or cypress. Cedar is naturally rot-resistant and holds up well outdoors without any coatings. Pine is cheaper and perfectly fine as long as you don't treat or paint the interior. Exterior-grade plywood works for larger owl boxes but is overkill for songbird nesting boxes.
The critical rule here is simple: never use pressure-treated or chemically treated lumber. One construction guide from the Southern Adirondack Audubon puts it in all caps, and for good reason: residual chemicals in treated wood can harm eggs and nestlings in an enclosed space. Similarly, do not paint or varnish the inside of the box. The outside can have a light exterior paint coat on the body (not the entrance hole area), but the interior must stay bare wood.
For a standard bluebird-style box, you'll need a single board that's roughly 1 x 6 inches (actual dimension: 0.75 x 5.5 inches) and about 5 feet long, or equivalent pieces. Here's everything you need:
- 1 x 6 untreated cedar or pine board, approximately 5 feet long
- Exterior wood screws (1.5- to 2-inch length, at least 20 screws)
- A 1.5-inch hole saw or spade bit for the entrance hole
- A drill with standard bits (1/4-inch bit for ventilation holes)
- A handsaw or circular saw for cutting boards to length
- Sandpaper (medium grit, 80–120)
- A pencil, tape measure, and square
- A predator baffle or smooth round mounting pipe (for installation)
- Optional: wood glue for reinforcing joints before screwing
Set up your workspace on a stable surface with good lighting. Clamp boards before cutting so they don't shift. If you're new to using a hole saw, practice on a scrap piece first. The entrance hole is the most visible part of your box and a rough edge can deter some birds, so take your time with it. Sand the interior smooth once all cuts are made.
Step-by-step build plans for a simple wooden nesting box
These plans produce an Eastern bluebird nesting box based on widely used dimensions: a 5.5 x 5.5-inch floor, 9-inch interior depth, and a 1.5-inch entrance hole centered about 7 inches above the floor. Audubon's bluebird plan specifies the top (roof) cut at 11.25 x 11 inches, which gives you the important overhang. Adjust the species-specific specs from the table above if you're building for a different bird.
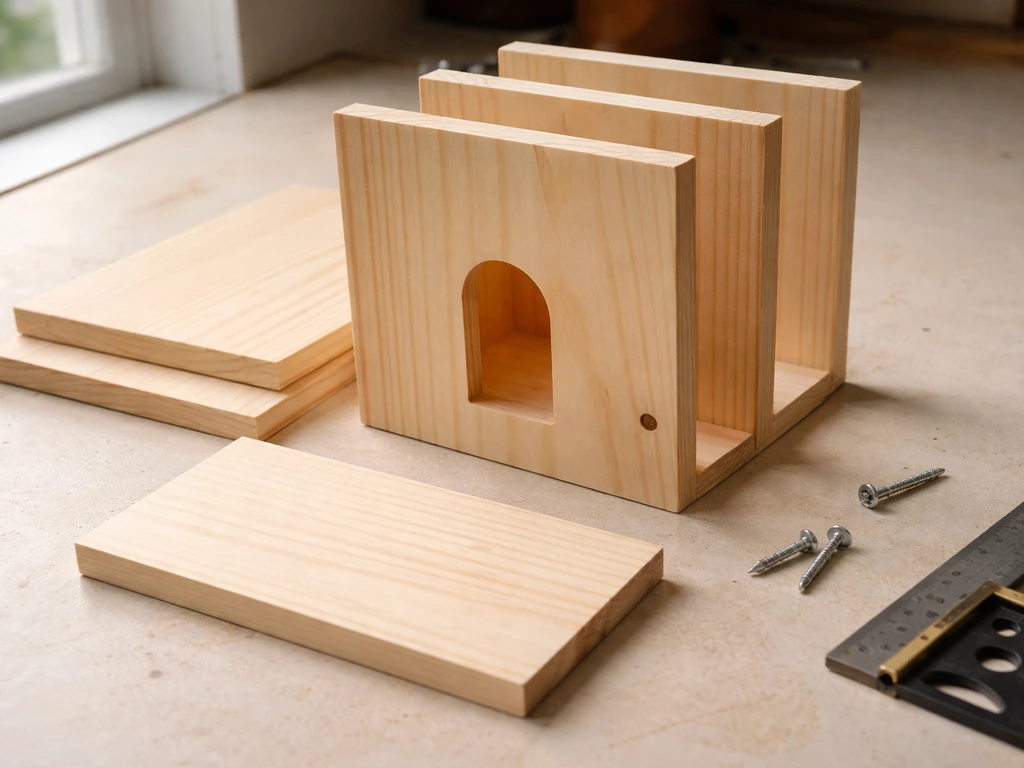
- Cut your boards to length: front (10 inches), back (14 inches, taller than front to support the angled roof), two sides (with a slight angle cut at the top to match the roof pitch), floor (5.5 x 5.5 inches), and roof (at least 11 x 11 inches for adequate overhang).
- Mark the entrance hole on the front board, centered left-to-right and positioned so the center is about 7–7.5 inches above the floor. Drill a pilot hole at the center mark, then use your 1.5-inch hole saw to cut the entrance hole. Sand the edges smooth inside and out.
- Drill ventilation holes in the upper sides of both side panels: several 1/4-inch holes work well. NC State Extension's building guide confirms this size gives adequate airflow without creating drafts that chill eggs.
- Prepare the floor for drainage. Either drill three or four 1/4-inch holes in the corners of the floor board, or cut the corners of the floor at a 45-degree angle (about 1/4 inch). Both approaches let water drain if any gets inside.
- Roughen the inside of the front panel below the entrance hole with a chisel or saw, making horizontal grooves. This gives nestlings grip to climb out when it's time to fledge.
- Assemble the box: attach the back board first, then attach the two side panels to the back with screws. Use exterior screws throughout, two per joint minimum. Attach the floor inside the side panels (raised about 1/4 inch from the bottom edge to help with drainage).
- Attach the front panel. For easy annual cleaning, make one side panel or the front panel hinged or on a pivot screw so you can swing it open. This is the most important design detail for long-term maintenance.
- Screw the roof on last, making sure it overhangs the front and sides by at least 2 inches. The roof overhang above the entrance hole is a key predator-deterrent feature recommended by the North American Bluebird Society.
- Do a final check: no interior paint, no treated wood, no sharp screw tips poking through, and drainage holes confirmed open.
If you want to dig deeper into the structural details of putting a box together, the bird box build process covers joinery approaches and some alternative panel configurations that work well for different wood thicknesses. And if you're thinking about combining a birdhouse and nesting box into one project, there's a useful crossover in how to make a bird house with a box design that suits multiple species.
Size, entrance hole, ventilation, drainage, and placement
Getting the specs exactly right
Interior dimensions matter almost as much as the entrance hole. Too small a floor space and the nest gets cramped, raising nestling mortality. Too large and the box loses heat quickly. For Eastern bluebirds, a 5.5 x 5.5-inch floor with 9 inches of interior depth is the standard supported by NC State Extension and multiple bluebird conservation organizations. A 1.5-inch round entrance hole is confirmed by both the North American Bluebird Society and the Texas Bluebird Society. Don't round up to 1.75 inches, because that invites house starlings, which are an aggressive invasive species that will evict bluebirds.
Ventilation keeps the box from turning into an oven in summer heat. Several 1/4-inch holes drilled in the upper portion of each side panel handle this well without creating rain-entry points. Drainage holes or clipped floor corners prevent pooled water from soaking the nest. These two features together are what separate a functional nest box from a box that looks nice on the outside but causes problems inside.
Where and how to mount it
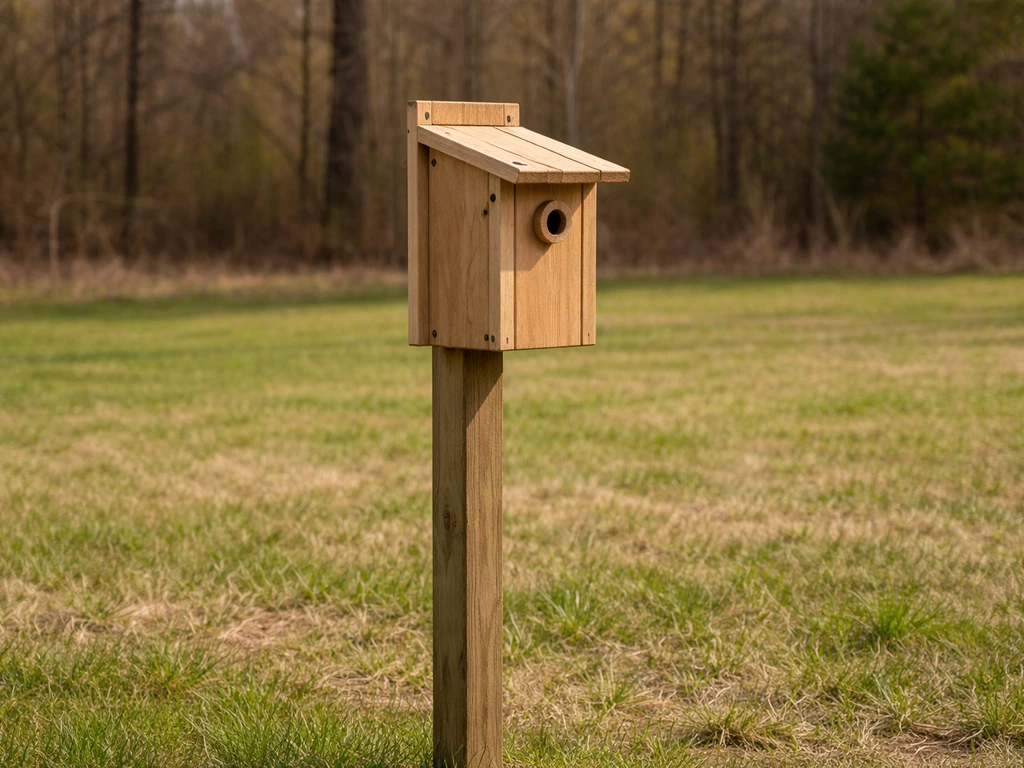
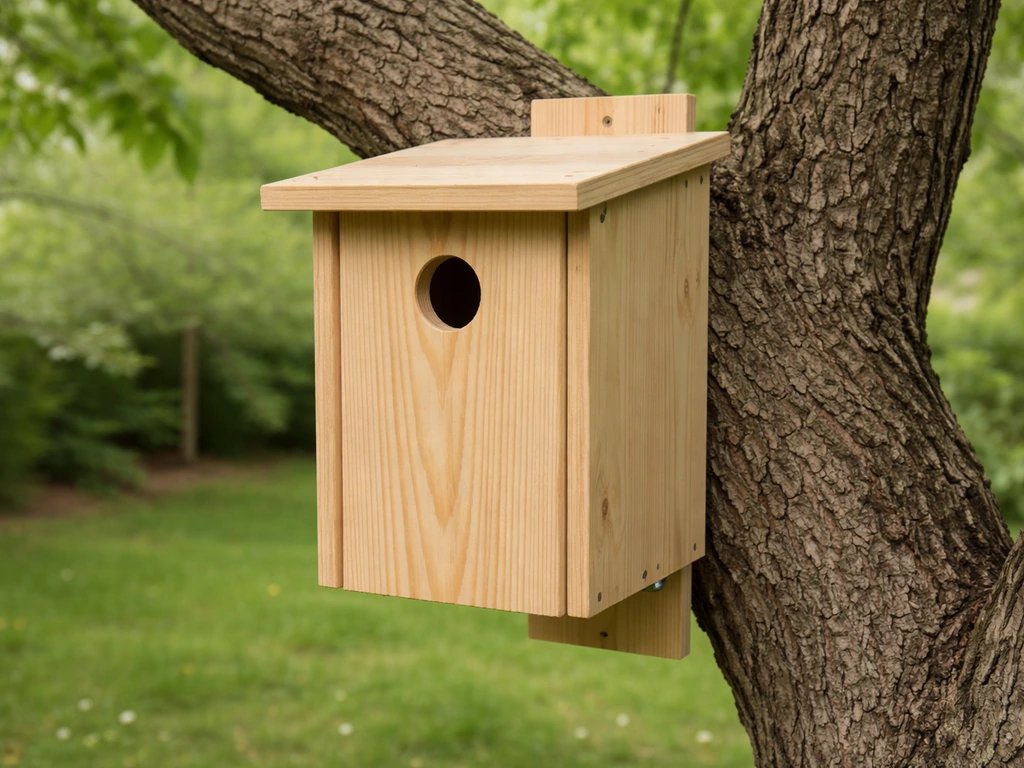
Height and location make a real difference in whether birds adopt a box. For bluebirds, mounting between 4 and 5 feet above ground is the standard recommendation from extension programs. The box should face away from prevailing winds and ideally toward open ground, since bluebirds hunt insects in short grass and need a clear sightline from the entrance hole. Don't mount boxes on trees if you can avoid it: trees give predators a highway to the box. A smooth round metal pipe is a much better choice.
If you're placing multiple bluebird boxes, space them at least 300 feet apart or out of each other's line of sight. Michigan Bluebird Society recommends placing bluebird nest boxes about 250, 300 feet apart, and also provides predator guard guidance including using a cylindrical metal stove-pipe-shaped baffle on the pole 250–300 feet apart. Audubon's bluebird build guidance specifically calls out 300 feet as the minimum spacing to prevent territorial conflicts between nesting pairs. For purple martins, the setup is a completely different system, with colony poles and multiple compartments elevated well above surrounding trees. The UMD Extension fact sheet on managing purple martins addresses those height and spacing considerations in detail.
Predator control comes down mostly to the mounting method. The New York State Bluebird Society is clear on this: mount your box on a smooth round pipe rather than a wooden post or fence, because climbing predators like raccoons and cats struggle to get traction on a smooth metal surface. Add a predator baffle below the box for even better protection. The roof overhang you built into the design also plays a role by making it harder for a reaching predator to get a hand into the entrance hole.
Installation, seasonal maintenance, and cleaning schedule
Install your box before nesting season starts. In most of North America, that means having it up by late February or early March at the latest for spring-nesting species. Mount the pipe securely in the ground (concrete footing helps in soft soil) and use a level to make sure the box sits plumb. A box that leans forward sheds rain better than one that tilts back, so a very slight forward tilt (a degree or two) is a practical touch.
Once a brood has fledged, remove the old nest material promptly. Old nests can harbor mites, blow flies, and bacteria that harm the next clutch. Many species, including bluebirds, will attempt a second or even third brood in the same season, so a clean box between broods genuinely increases your success rate. Once the nesting season is clearly over (September is a common benchmark cited by Mountain Bluebird Trails conservation groups), do a full clean-out: remove all material, check for damage, and make any repairs before winter.
The WCT Trust's monitoring and maintenance guidance suggests cleaning after each brood fledges and making a note of each nesting attempt. This record-keeping habit is more useful than it sounds: after a season or two, you'll know exactly which box locations perform well, which species used them, and whether any boxes have structural problems that need fixing. If you participate in NestWatch or a similar monitoring program, you can contribute that data to conservation research at the same time.
For winter, leave the box in place or store it somewhere dry if it's a lightweight design. Many cavity-roosting birds (nuthatches, chickadees, some wrens) will use an empty nest box as a roosting spot in cold weather. If you want to specifically encourage that, consider building a dedicated roosting structure: the design for a bird roosting box differs from a nesting box in a few key ways that make it better suited to winter use.
Common mistakes and how to fix them
The most common reason a box doesn't get used is an entrance hole that's the wrong size. If you drilled even slightly too large, house sparrows or starlings will take over. The fix is to add a wooden entrance hole reducer plate (a flat piece of wood with a correctly-sized hole drilled in it, screwed over the original opening). It's easier than rebuilding the front panel and works just as well.
The second most common problem is predator access. If you're seeing disturbed nests, broken eggs, or empty boxes after eggs were laid, predators are almost certainly the cause. Switch to a smooth metal pole if you haven't already, and add a cone or tube baffle below the box. The guidance from the New York State Bluebird Society on smooth-pipe mounting isn't optional advice: it's the single most effective predator deterrent available.
Wet nests are another red flag. If you open the box and find soaked nesting material, check your drainage holes first (they may be blocked) and check the roof overhang (it may not extend far enough). Sialis.org's monitoring guidance recommends replacing a seriously wet or parasite-infested nest immediately and repairing the box before the next nesting attempt. Don't wait until the end of the season to fix a drainage problem.
Location problems are trickier because birds can be unpredictable, but some patterns are clear. A box placed in full shade all day will often be ignored by bluebirds, which prefer open, sunny habitat. A box mounted on a wooden fence next to a shrub is practically an invitation for predators. And a box installed in April (after nesting has already started for many species) will likely sit unused until the following year. Early installation matters more than most people expect.
- Box unused: check entrance hole size, placement height, habitat type, and whether it went up before nesting season
- Predator activity: switch to smooth metal pipe mounting and add a baffle below the box
- Wet nests: clear drainage holes, extend roof overhang, replace the nest material immediately
- Wrong species using the box: reduce entrance hole size with a wooden reducer plate
- Nestlings not fledging: check for mite or blow fly infestations; replace infested nests promptly and monitor closely
Video resources and where to go from here
The written steps above give you everything you need to build a functional nesting box, but watching someone make the cuts and assemble the panels in real time can fill in gaps that words miss. Search YouTube for 'bluebird nest box build' or 'DIY songbird nesting box' and filter for videos from university extension programs, Audubon chapters, or bluebird conservation societies. These tend to be more accurate than general craft channels because they follow verified species-specific specs. Look for videos that show the entrance hole being drilled with a hole saw, the ventilation holes being added, and the hinged-side access being assembled: those three details are where most beginners have questions.
If you want to move beyond a single box, there are some genuinely interesting next projects to consider. Building a full observation setup around your box, like a bird hide positioned for a clear view without disturbing nesting birds, is something covered in detail in a guide to building a bird hide. For a quieter observation approach that doesn't involve a permanent structure, the techniques used in building a bird blind are worth exploring too.
If you want to add supplemental feeding to support the birds using your nesting box, a natural option is making your own bird food blocks. The process of making bird blocks is simple, budget-friendly, and pairs well with a nest box setup because it draws birds to the area during the period when they're scouting for nesting sites. The combination of a well-placed nesting box and a nearby food source can genuinely speed up how quickly a new box gets adopted.
Start with one box, get it right, and monitor it through a full season. You'll learn more from that single box than from reading every plan available. Once you've seen a pair of bluebirds carry nesting material through that 1.5-inch hole you drilled yourself, you'll want to build another one.
FAQ
Can I use treated lumber if I leave it to weather for a while?
No. Even if treated boards look dry or weathered, residual chemicals can leach over time and are most risky inside an enclosed cavity. Stick to untreated cedar, pine, or cypress, and keep the interior completely bare wood.
What if I drill the entrance hole slightly off-center or a bit too high?
Birds may still use the box if the hole size matches the species, but placement affects airflow and predator access. If the hole is off-center, patch the opening with wood plugs, then re-drill cleanly and sand smooth. If it is too high so the interior space changes materially, rebuild the front panel so the interior dimensions stay close to the plan.
How do I know the ventilation holes won’t let rain or predators in?
Place ventilation holes in the upper portion of the side panels and keep them small, typically around 1/4 inch as described in the build guidance. The roof overhang also helps, and you should test for water ingress by running a hose or pouring a controlled amount of water and checking the floor for moisture after 10 to 20 minutes.
Should I put mesh hardware cloth on the inside to stop pests?
Usually avoid it inside a nesting box because it can interfere with cleaning and may create sharp surfaces. If you need pest control, focus on correct drainage, safe materials, and thorough cleaning after each brood rather than adding internal barriers that can trap debris.
My nesting box has a slight wobble after assembly, is that a problem?
Yes, a loose box can shift during takeoffs and landings, and it can worsen predator reach. Before installation, check that screws bite fully and use exterior-grade hardware. If a panel is flexing, reinforce with an additional screw through the joint or add a small cleat at the corner, then re-sand any rough interior areas.
Is it okay to add insulation or a thicker wall to help with heat and cold?
For most small songbird nesting boxes, extra insulation is not typically needed and can overheat the box in summer if it traps heat. If you want better temperature stability, prioritize correct ventilation, drainage, and correct interior dimensions rather than adding insulating layers to the cavity walls.
What should I do if the nest box is used by non-target birds like house sparrows or starlings?
First verify the entrance hole diameter for your target species. If it is too large, install a wooden entrance hole reducer plate with the correct-sized hole to limit access. Also reassess placement and spacing, since territories and competition can keep the box occupied by the wrong species.
How soon after I install the box can I check it without hurting birds?
Open the box minimally once nesting begins. When you need to inspect, do it briefly and early in the day, and only if you are not disturbing active nesting. If eggs or nestlings are present, avoid repeated checks and focus on cleaning after fledging, not during active incubation.
What’s the right way to clean the box between broods or after the season?
Remove all old nest material promptly after fledging and clear debris from the corners. While cleaning, check the roof overhang, ventilation holes, and drainage openings, and replace damaged parts before the next attempt. If you find soaked or heavily infested material, replace or repair right away rather than postponing until winter.
Can I mount the box on a fence post or a tree if I don’t have a metal pipe?
You can, but it’s a common reason for predator problems. Climbing predators get traction on wood and shrubs, so switching to a smooth round metal pipe with a baffle is the most effective fix. If you must use a post temporarily, add a predator guard system and keep the box away from nearby cover.
How do I choose a location if my yard is mostly shade?
For bluebirds specifically, full shade often reduces adoption. Aim for a spot that gets morning sun and faces open ground rather than dense shrubs or walls. If your best mounting spot is shaded, try adjusting orientation and height, but consider relocating the box for the next season if usage stays low.
How much spacing do I need between multiple boxes, and does it vary by species?
For bluebirds, spacing at least 300 feet helps prevent territorial conflicts between pairs. For other species like purple martins, spacing and height requirements work under a different colony system, so you need a species-specific plan rather than applying the same distance rule.
Can I convert a nesting box into a roosting box for winter use?
Yes, but treat it as a separate design goal. Roosting boxes differ from nesting boxes in features like interior shape and how the opening and protection work for winter safety. If you want roosting birds, build or modify using dedicated roosting specifications rather than reusing a breeding-only setup.
What angle should the box have when installed?
A small forward tilt helps shedding rain, typically only a degree or two. Use a level during mounting and avoid a steep tilt, since it can shift nest placement and make the floor less stable for nest construction.
Next Articles

How to Build a Chimney Swift Bird House DIY Guide
Step-by-step DIY plans to build a chimney swift bird house, with correct dimensions, placement, and weatherproofing for

How to Build an Oriole Bird House: Step-by-Step DIY
Step-by-step DIY for building an oriole bird house with right dimensions, weatherproofing, predator-safe placement, and

How to Build a Chickadee Bird House Step by Step
Step-by-step DIY chickadee bird house with cut list, chickadee entry sizing, ventilation, drainage, and mounting tips.