Building bird blocks is very doable with basic tools, a few boards, and an afternoon. The term means different things depending on what you are after: a block-style nesting box (a compact, cube-shaped cavity house), a habitat block made from cinder blocks or stacked timber, or a solid feed/enrichment block packed with seeds and fat that you hang or mount for birds to peck at. All three are worth knowing about, and this guide covers each one practically so you can pick the version that fits your backyard and the birds you want to attract.
How to Make Bird Blocks: DIY Nesting and Feed Designs

Marcus Thornton
7 May 2026
What 'Bird Blocks' Actually Means
People searching for how to make bird blocks usually have one of three things in mind, and it is worth being clear about which you are building before you start cutting anything.
- Nesting blocks: compact, boxy cavity houses made from thick timber or cinder blocks, designed for cavity-nesting birds like bluebirds, wrens, chickadees, and swallows. These are essentially bird boxes in a blockier form factor, often with thicker walls for insulation.
- Habitat blocks: stacked or repurposed masonry (cinder blocks, clay tiles, bricks with pre-drilled holes) arranged to create shelter, nesting, or resting spots. Great for species like sparrows or even mason bees as a bonus.
- Feed and enrichment blocks: DIY compressed blocks made from suet, seeds, nuts, and a binder (gelatin or lard) that birds perch on and peck apart. These are the easiest to make and require zero woodworking.
The most common DIY version in a backyard bird context is the nesting block, so that gets the most detail here. But the feed block instructions are included too because they attract birds fast and are a great starter project if you are new to all of this.
Choose the Right Bird Species and Block Type
The single most important design decision you will make is the entrance-hole diameter, because that one measurement determines exactly which species can get in and which cannot. Wilco’s guide also provides species-specific entrance-hole diameter targets, noting how choosing the right size affects which birds will use the box.
All Seasons Wild Bird Store provides an “Entrance Hole Size” table by species, including Eastern Bluebird and other common backyard cavity nesters, which you can use to validate the entrance diameter for your DIY nest box entrance-hole diameter. Get it right and your target birds move in. Get it wrong and you end up housing house sparrows in a bluebird box, or nothing at all.
Because sparrows require a slightly different entrance size than bluebirds, it is important to measure carefully before you cut the opening how to make a bird box for sparrows. Entrance-hole size is not approximate; a difference of 1/16 of an inch genuinely matters.
| Species | Entrance Hole Diameter | Floor Size (interior) | Interior Depth | Height Above Ground |
|---|---|---|---|---|
| Eastern Bluebird | 1 1/2 inches | 5 x 5 inches | 8 inches | 4 to 6 feet |
| Western Bluebird | 1 1/2 inches | 5 x 5 inches | 8 inches | 4 to 6 feet |
| Mountain Bluebird | 1 9/16 inches | 5 x 5 inches | 8 inches | 4 to 6 feet |
| House Wren | 1 1/4 inches | 4 x 4 inches | 6 to 8 inches | 5 to 10 feet |
| Chickadee / Nuthatch | 1 1/4 inches | 4 x 4 inches | 8 to 10 inches | 5 to 15 feet |
| Tree Swallow | 1 1/2 inches | 5 x 5 inches | 6 inches | 4 to 8 feet |
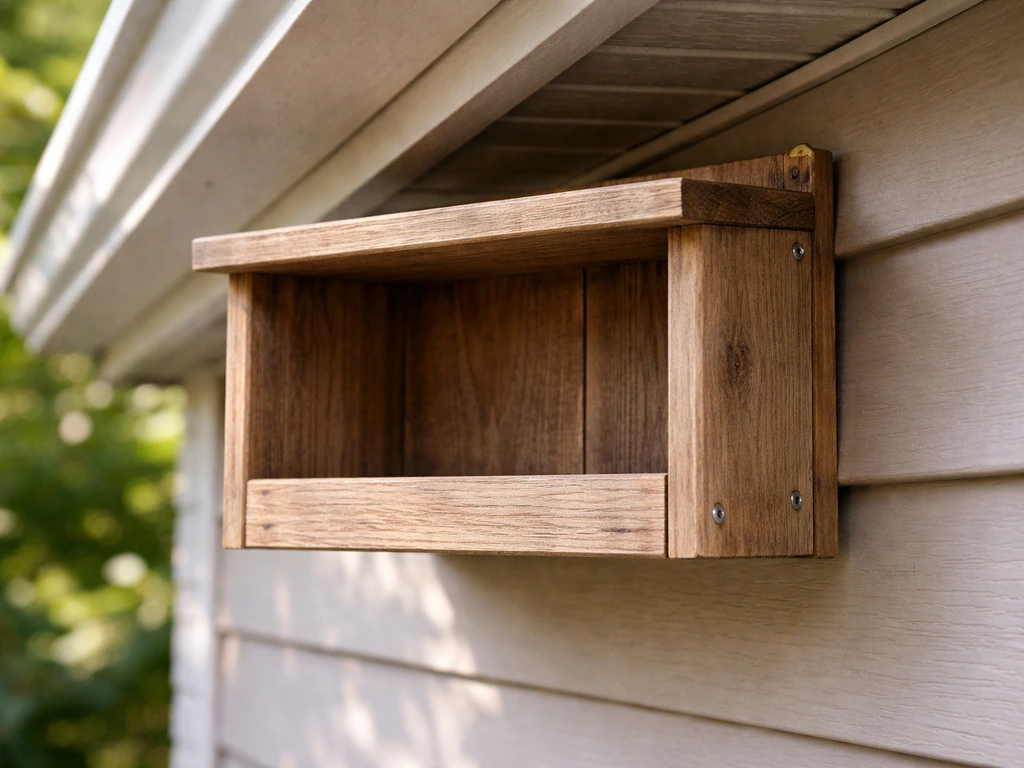
| American Robin (open ledge) | Open ledge / no hole | 6 x 8 inches | 8 inches | 6 to 15 feet |
Once you know your target species, pick the block type. If you have an open yard with fence posts or poles, a wood nesting block on a pole with a predator guard is your best bet for bluebirds and swallows. If you have a wall, shed, or fence near shrubs, a cinder-block or brick habitat setup works well for wrens and sparrows. If you just want to get birds visiting quickly without any carpentry, start with a feed block while you plan the nesting build.
Materials and Tools You Will Need
Wood choices for nesting blocks
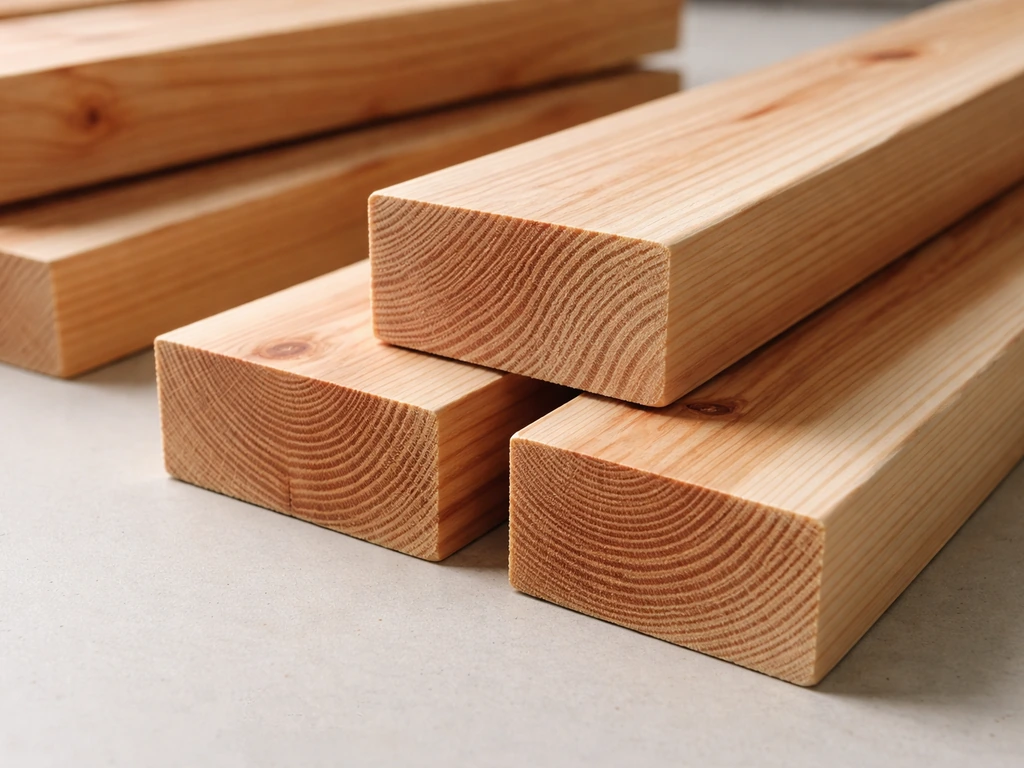
Untreated cedar is the gold standard. It resists rot naturally, handles temperature swings without warping badly, and does not contain the chemical preservatives found in pressure-treated lumber, which you should avoid entirely. Pressure-treated wood contains pesticide and fungicide compounds that have no business inside a cavity where birds are raising chicks. Pine works fine as a budget option if you give the exterior a safe finish. Rough-cut lumber or reclaimed pallet wood is perfectly usable as long as you know it has not been treated with anything. A 1-inch-thick board is the absolute minimum; 1.5 inches is better for insulation, and that thickness is what makes a real 'block' feel solid and chunky rather than flimsy.
Cinder blocks and masonry for habitat blocks
Standard 8 x 8 x 16-inch cinder blocks with two hollow cores are ready-made cavity homes. Stack them on a flat surface, orient holes facing outward, and you have instant multi-unit housing. Drill into solid clay bricks with a 1 1/4-inch or 1 1/2-inch masonry bit to create entrance holes of your chosen diameter. The thermal mass of masonry keeps the interior cooler in summer and warmer during cold snaps, which birds appreciate.
Feed block ingredients
For a basic seed block you need: rendered suet or lard (about 1 cup), a binder like plain gelatin or peanut butter (1/2 cup), and 2 to 3 cups of mixed seeds, cracked corn, dried berries, or chopped nuts. Avoid anything salted or artificially flavored. You will also need a mold, which can be a simple ice-cube tray, a loaf pan, or a small cardboard box lined with wax paper. If you are working from a simple box or scrap wood, you can adapt these nesting-box steps to learn how to make a bird house with box how to make bird house with box.
Tools
- Circular saw or handsaw for cutting wood panels
- Drill with a standard twist bit set and a spade bit or hole saw for entrance holes (a 1 1/4-inch and a 1 1/2-inch spade bit cover most common species needs)
- Sandpaper (80 and 120 grit) for smoothing the interior and entrance hole edges
- Exterior wood glue and 1.5-inch or 2-inch galvanized screws (not nails, which can split wood and loosen over time)
- Measuring tape, pencil, and a square
- Masonry bit if working with cinder blocks or bricks
- A saucepan and stirring spoon for feed blocks
Safe finishes
Leave the interior raw. Smooth it if needed but do not paint or stain inside the box. For the exterior, water-based latex paint in a neutral or earth tone (tan, gray, green) is safe once fully cured. Avoid oil-based paints, creosote stains, and any product with fungicide additives. If you prefer a natural look, a thin coat of linseed oil on the outside only works well. Never use gloss paint on the interior because it makes it harder for fledglings to grip the walls on the way out.
Step-by-Step Build Instructions
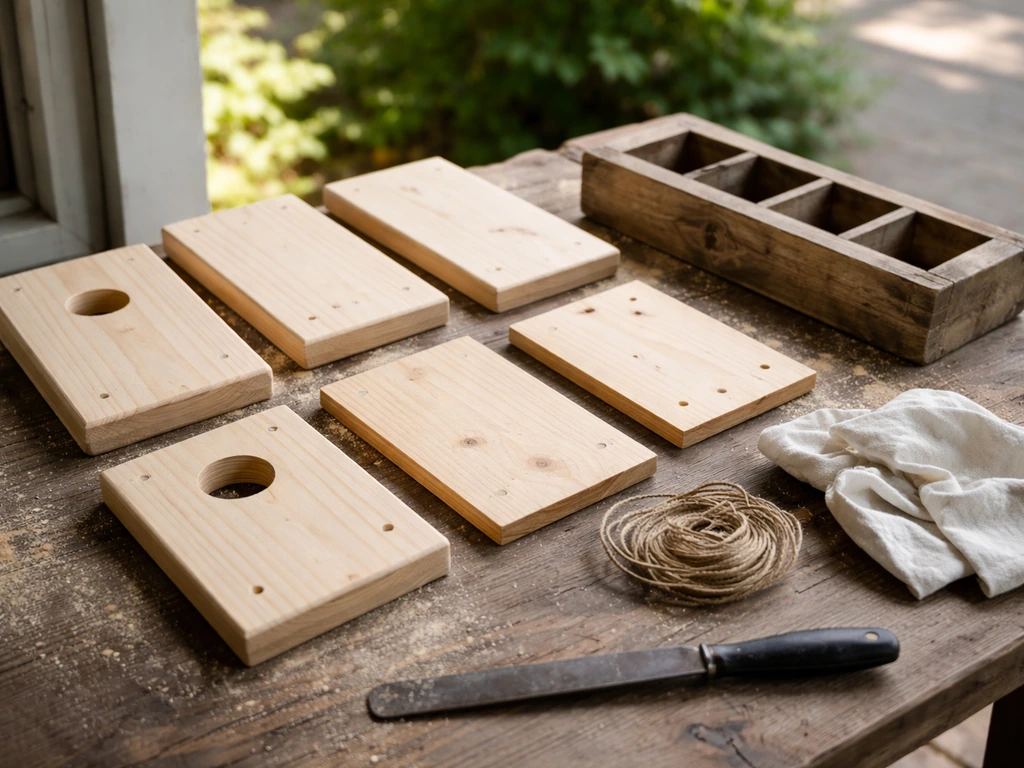
Building a wood nesting block
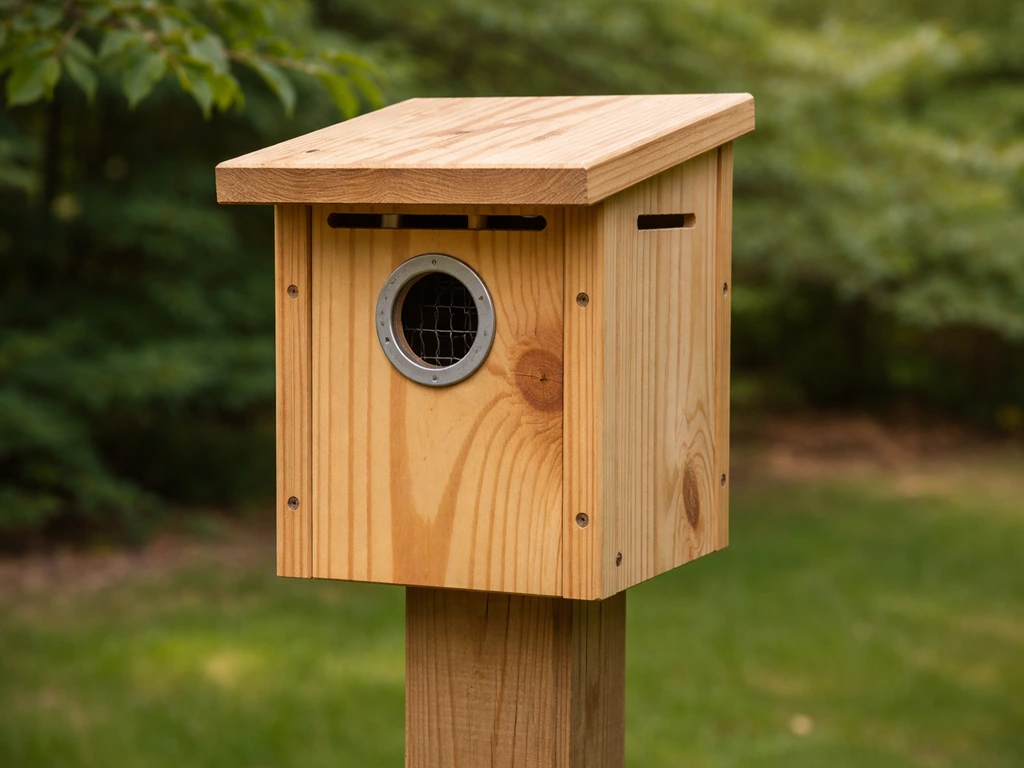
- Cut your panels: For a bluebird nesting block you need a 5 x 5-inch floor, a front and back panel at 5 inches wide and about 10 to 12 inches tall, two side panels (account for the thickness of your wood so the interior floor stays 5 x 5), and a roof panel that overhangs the front by at least 2 inches to shed rain. Write the dimensions on each piece before you cut.
- Drill the entrance hole: Measure down from the top of the front panel to position the entrance hole so the distance from hole center to the floor interior is about 6 to 7 inches for bluebirds. Use the species table above for your chosen bird. Clamp the panel securely, start the hole saw or spade bit slowly to avoid tear-out, and clean up the edge with sandpaper until smooth. A rough edge can injure birds entering and exiting.
- Add ventilation: Drill two or three 1/4-inch holes near the top of each side panel, just under the roof overhang. These let heat escape in summer. They are small enough that predators cannot use them but large enough to matter on a hot day.
- Add drainage: Drill four 1/4-inch holes in the corners of the floor panel, or cut the corners at a 45-degree angle before assembly. Moisture inside a box causes mold and kills chicks.
- Rough up the interior: If your wood is smooth, score the inside of the front panel with a chisel or coarse sandpaper in horizontal lines below the entrance hole. This gives fledglings grip when they climb up to exit. This is one of those details easy to skip and regret later.
- Assemble with glue and screws: Apply exterior wood glue to each joint before fastening with galvanized screws. The glue step is the one most beginners skip, and skipping it cuts the box's lifespan in half. Glue joints resist moisture intrusion even when the screw holes start to loosen after a few seasons.
- Make one side panel or the front panel removable: Attach it with a single pivot screw at the top and a twist latch at the bottom. This allows you to open the box for monitoring and cleaning without dismantling the whole thing.
- Finish the exterior: Sand the outside smooth, apply your chosen exterior finish, and let it cure completely, at least 48 to 72 hours, before placing it outdoors. Never rush this step if birds are not yet present.
Building a cinder-block habitat stack
- Choose a stable flat surface (a fence top, a wide post, or a wooden platform on a pole) that can bear the weight of several blocks.
- Stack two to four standard cinder blocks with their hollow cores facing outward toward open space. Each core becomes one nesting cavity.
- If the cores are too large for your target birds (standard cinder-block cores are roughly 3 x 5 inches, which is on the large side), cut a piece of 1/4-inch plywood to fit across the front of each core and drill a precisely sized entrance hole through the plywood before attaching it with masonry adhesive.
- Add a drainage slope: tilt the whole stack very slightly forward (just a degree or two) so any rain that blows in drains out rather than pooling at the back.
- Cap the top with a flat board or roofing tile to keep rain out of the top cores.
Making a DIY feed block

- Melt your fat base (suet or lard) in a saucepan on low heat. Do not boil it.
- Stir in peanut butter if using, then remove from heat.
- Mix in seeds, chopped nuts, dried fruit, or cracked corn until fully coated.
- Pour into your mold and let it set in the refrigerator for at least 3 to 4 hours, or overnight for a firm block.
- Unmold and hang in a mesh suet cage, a wire feeder, or a homemade wood-framed feeder with a wire front. The block should be secure enough that it does not fall when a larger bird lands on it.
- Only put feed blocks out from late fall through early spring. Suet and fat-based feed blocks go rancid in warm weather and can melt onto and mat bird feathers, which is genuinely harmful.
Safety and Bird-Proofing
Predator guards
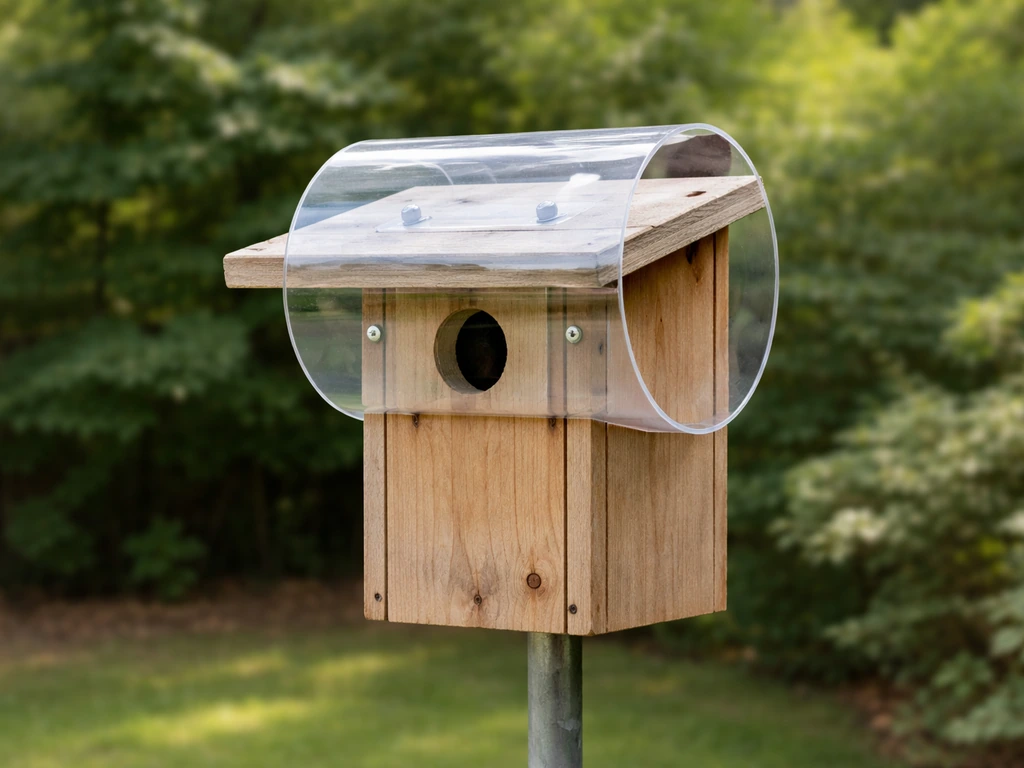
A nest box without a predator guard is essentially a dinner table for raccoons and cats. The most effective guard for a pole-mounted box is a stovepipe or PVC wobble baffle: a large cylinder mounted on the pole below the box that spins or tips when a climbing animal puts weight on it. Place the baffle so its top edge sits a few inches below the floor of the box. A collar-style guard that rests on a bracket works on square posts. Install the guard before you put the box up, not as an afterthought. Once a raccoon has successfully raided a box once, it will come back repeatedly.
A 'Bird Guardian' entrance tube (a short cylinder of PVC or metal extending out from the entrance hole by about 1.5 inches) is another useful addition. It makes it much harder for a predator to reach in and hook eggs or chicks with a paw, though it works best combined with a pole baffle rather than instead of one.
Hardware and metal fittings
Use galvanized or stainless steel screws, hinges, and latches. Zinc-plated hardware corrodes faster than you expect and can leave rust stains that indicate the wood underneath is also degrading. Avoid staples for anything structural; they pull out too easily. If you are mounting to a metal post, a stainless hose clamp to hold a mounting bracket is more reliable long-term than a single screw through the post.
Non-toxic materials checklist
- No pressure-treated or chemically preserved lumber inside or outside the box
- No oil-based paint or stain on any surface birds will contact
- No gloss interior surfaces (use matte or leave raw)
- No zinc or lead-containing hardware inside the box
- No scented or antibacterial cleaners during maintenance
- No salted, sweetened, or artificially flavored ingredients in feed blocks
Placement, Mounting, and Seasonal Timing
Where you put the block matters as much as how you build it. A perfectly constructed bluebird nesting block mounted on a shady, north-facing fence post surrounded by trees will sit empty while the identical box in an open meadow on a smooth metal pole fills up in weeks. Bluebirds want clear sight lines, open low grass nearby for foraging, and a south or southeast-facing entrance to catch morning sun and avoid prevailing winds. Wrens are less fussy and will happily nest in a box tucked near shrubs or along a garden edge.
| Species | Ideal Habitat | Entrance Faces | Distance from Other Boxes |
|---|---|---|---|
| Eastern/Western Bluebird | Open field, meadow, orchard edge | South or southeast | At least 100 yards |
| Tree Swallow | Open field near water | Any direction | Can pair with bluebird box 5 to 10 feet away |
| House Wren | Garden edges, shrubs, wooded borders | Any direction | 50 to 100 feet from other boxes |
| Chickadee | Wooded edges, near deciduous trees | North or east preferred | At least 150 feet |
Mount nesting blocks on smooth metal poles (electrical conduit is cheap and effective) between 4 and 6 feet high for most cavity nesters. Avoid attaching them directly to trees, wooden fence posts, or walls where possible: these surfaces are highways for climbing predators. If a wall or fence mount is your only option, a baffle arm bracket that holds the box away from the surface at least 18 inches gives you somewhere to attach a guard.
Put nesting blocks up in late winter, ideally February or early March in most of North America, before early migrants start scouting. A lot of people also like to know how to build a bird blind for quieter backyard viewing. Arriving birds often check potential cavities for weeks before committing, so earlier is better. Feed blocks can go up any time in the cooler months (fall through early spring) but take them down once daytime temperatures consistently reach the mid-60s Fahrenheit to prevent them going rancid.
Maintenance, Cleaning, and When to Replace
Cleaning nesting blocks
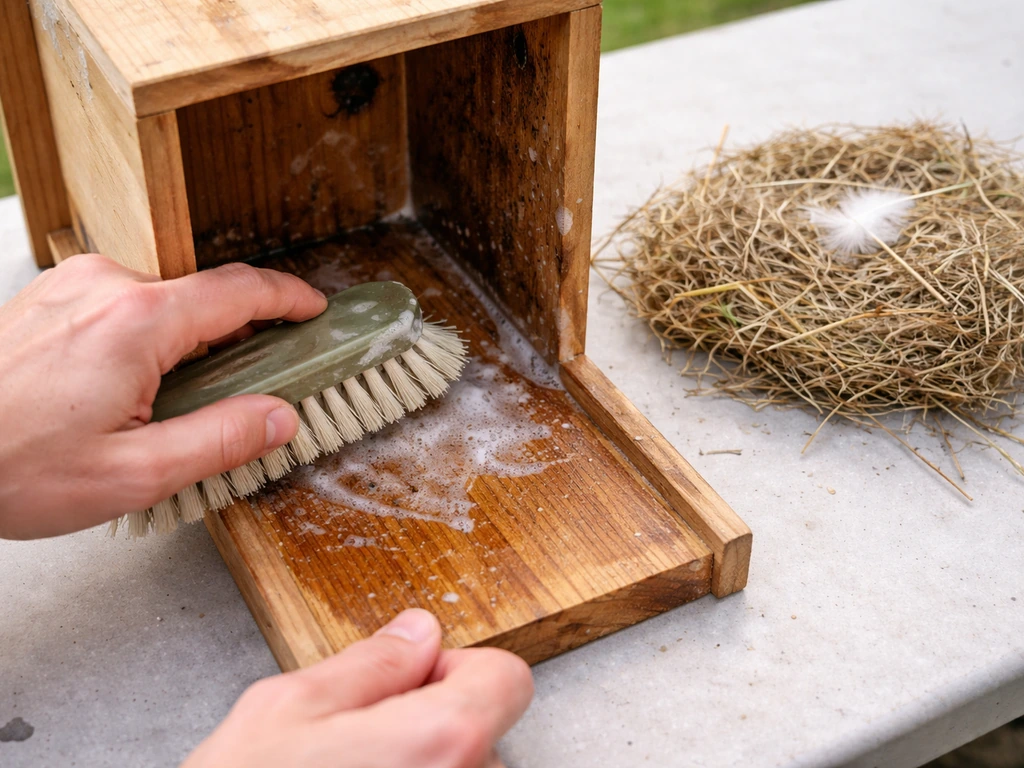
Clean out nesting material at the end of each breeding season, after you are certain all fledglings have left. For most species in North America this means late August through October is a safe window. Wait until you are sure no second or third broods are active before opening the box. Old nesting material harbors mites, blow fly larvae, and other parasites that will affect the next occupants if left in place.
- Remove all old nesting material completely.
- Scrub the interior with a stiff brush and mild dish soap in warm water.
- If there is fecal staining or parasite evidence, disinfect with a bleach solution of 1 part bleach to 10 parts water. Let it sit for a few minutes then rinse thoroughly.
- Alternatively, pour boiling water over the interior surfaces (as recommended by some UK wildlife trusts) to kill parasites without chemical residue.
- Allow the box to dry completely, with the clean-out door or panel open, for at least 24 hours before closing it back up.
- Do not use general household cleaners or anything with fragrance, antibacterial agents, or pine oil: these are toxic to birds.
Cleaning feed blocks and feeders
The cage or frame that holds your feed block needs cleaning between refills. Scrub with warm soapy water, rinse well, then disinfect by soaking for 10 to 15 minutes in a warm 9:1 water-to-bleach solution. Rinse again thoroughly and let it air dry before adding a new block. A moldy or slimy feeder defeats the whole purpose and can make birds sick.
Annual inspection and when to replace
Each year before the breeding season (late winter) do a full inspection. Check that the roof still sheds water, the floor drainage holes are clear, all screws and hinges are solid, and the entrance hole has not been enlarged by woodpeckers or splintered at the edges (which can injure birds and makes the size specification meaningless). Tighten or replace any loose hardware. If the wood has rotted more than a quarter of an inch deep in any panel, replace that panel. A well-built cedar block can last 10 to 15 years with annual care. Pallet-wood or pine builds typically need replacing or major repairs after 4 to 6 seasons.
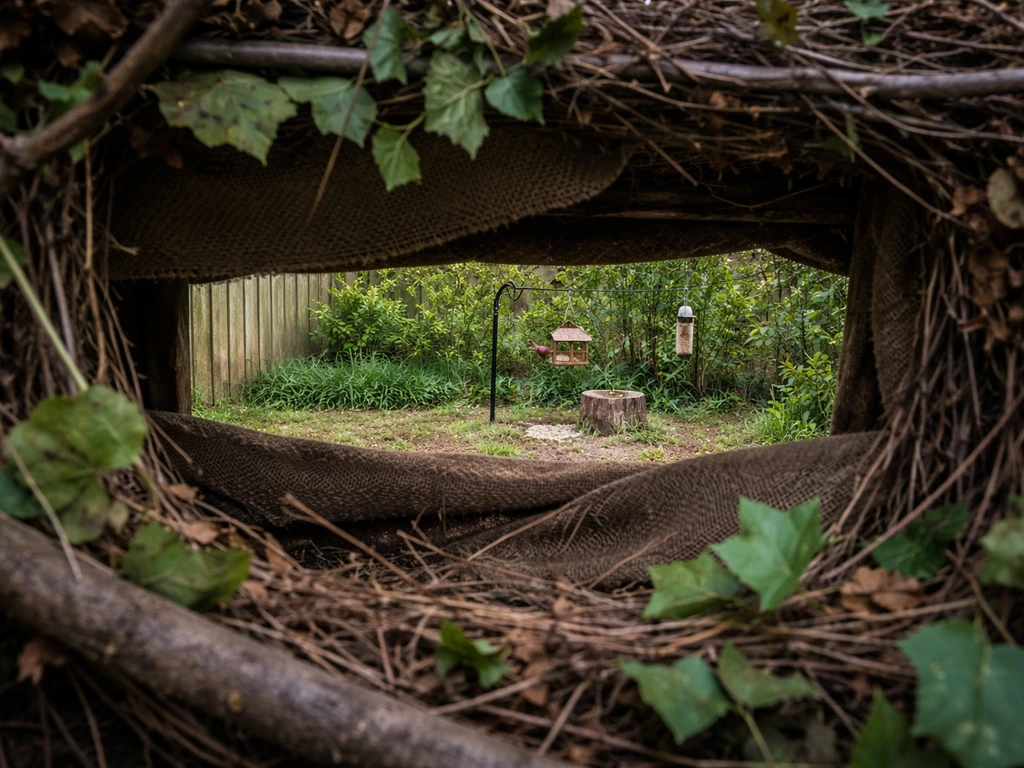
If you want to go deeper on related builds, nesting box designs for specific species (including open-fronted robin and swallow ledge styles), roosting boxes for winter shelter, and more enclosed habitat structures all follow the same core principles covered here but with species-specific dimension tweaks. If your goal is more about concealment than just a nesting cavity, you can also look at how to build a bird hide for better viewing while keeping disturbance low related builds.
If you are specifically aiming for seasonal roosting, the steps for building a bird roosting box follow these same safety and material principles, but with an emphasis on insulation and weather protection roosting boxes for winter shelter. If you are aiming for robins, look for robin-specific dimensions like the open-fronted style so the entrance fits their behavior and nesting needs open-fronted robin.
The skills you pick up building your first bird block transfer directly to every one of those projects. If you are specifically trying to figure out how to make a bird nesting box, this same checklist will help you choose the right design and build it safely.
FAQ
Can I use mixed wood scraps or reclaimed lumber of unknown origin to make bird blocks?
Yes, but only if you can confirm it was not pressure-treated, chemically preserved, or stained with anything containing fungicides or oils. If you cannot confirm, replace it, because even a small treated section inside a cavity can expose chicks. Also check for rot, mold, or loose splinters, since weak areas can enlarge the entrance and create safety issues.
How do I measure entrance-hole size accurately before cutting?
Use a caliper or a set of hole-saw sizes, then test-fit against a scrap piece first. Because 1/16 inch can change which species uses the box, avoid “rounding” to the nearest common bit size. After drilling, lightly sand only sharp edges, do not enlarge the opening to smooth it.
Should I provide ventilation holes or drilled drainage holes for nesting blocks?
Drainage is more critical than extra venting. If your design includes a floor, add small drainage openings (and keep them clear during inspections), but avoid large side holes that effectively create extra entry points for predators. Make sure airflow is achieved through the natural gaps and the entrance rather than cutting many additional openings.
What is the safest way to mount a bird block on a fence or wall if I cannot use a pole?
Mount the box with a baffle arm bracket that holds it at least 18 inches off the mounting surface, and install the guard system designed for that placement. This creates separation so climbing predators cannot reach directly and scrape or hook through the entrance. If the fence is near dense shrubs, prioritize open sight lines in front of the entrance.
Do I need to add a bird guardian entrance tube, and when is it worth skipping?
It is worth adding if you have frequent predator pressure, especially raccoons. However, it works best as a supplement, not a replacement for a pole baffle, because predators can still reach by different angles. If your setup already uses a well-positioned baffle, you can skip the tube until you see signs of repeated raids.
How do I know which birds are actually using my nesting block?
Track evidence rather than guessing by appearance: look for fresh fecal deposits near the entrance, carry-in nesting material, and adult birds repeatedly visiting at consistent times. If the box sits unused after installation, first confirm orientation and entrance diameter, then check placement height and predator guards, because either one can prevent occupancy even with correct dimensions.
What should I put on a seed or fat feed block, and what ingredients are common mistakes?
Use unsalted, unflavored fat or suet, then a binder like plain gelatin or peanut butter, and mix seeds without added salt. Avoid anything artificial, salted, or heavily seasoned, and do not include bread or sugary coatings. If the mix seems too loose to hold, increase binder slightly rather than adding water, because extra moisture can spoil faster.
How often should I refresh or replace a feed block to prevent spoilage?
In cooler months you can refill regularly, but still remove any block that looks greasy, crumbly, or moldy. If temperatures approach the mid-60s Fahrenheit consistently, take the blocks down because fats can go rancid even if they look intact. Store extra molds in a way that keeps them dry so they do not trap moisture.
Is it safe to paint the entire bird block, including inside corners?
No, keep the interior raw, with only smoothing if needed. Painting or staining inside can create slick surfaces that make fledglings slip and can trap residues that irritate nesting birds. If you paint externally, use fully cured water-based latex and confirm no fumes remain before putting the block out.
How do I clean and inspect without disturbing active nests?
Never open a box while eggs or nestlings are present. Wait until you are confident fledglings have left, then remove old material and check for damage. During the rest of the season, do only a distance check of the entrance and roof condition, because repeated handling can cause abandonment.
What signs mean the block needs repairs or replacement?
Replace or repair if wood has rotted deeper than about a quarter inch in any panel, if screws or hinges loosen, if edges around the entrance are splintered, or if predators enlarge the opening. Also replace blocks that show persistent moisture problems, since repeated dampness can lead to parasites even if the box seems clean.
Next Articles
How to Build a Bird Blind: Step-by-Step DIY Guide
Step-by-step DIY guide to build a concealed bird blind, choose location, assemble safely, and set it up for better bird
How to Build a Bird Roosting Box Step by Step
Step-by-step DIY plan to build a roosting box with correct size, ventilation, predator protection, safe materials, and m
How to Make Bird Boxes for Robins Step by Step
Step-by-step DIY guide to build a robin nesting box with proper dimensions, entry, ventilation, placement, and cleaning.