You can build a functional DIY bird blind in a weekend using basic lumber, burlap, and a handful of hardware store screws. The core idea is simple: create a structure that breaks your silhouette, gives you a clear but narrow sightline, and blends into the surrounding vegetation so birds ignore it and go about their business. Get the location right, keep the openings small, and weatherproof the frame, and you will have a blind that works season after season. To finish your bird blind project, confirm the measurements, build the basic frame, and then add camouflage and a viewing slit so it is effective how to make bird blocks.
How to Build a Bird Blind: Step-by-Step DIY Guide

Marcus Thornton
29 Apr 2026
Choosing the right type and location
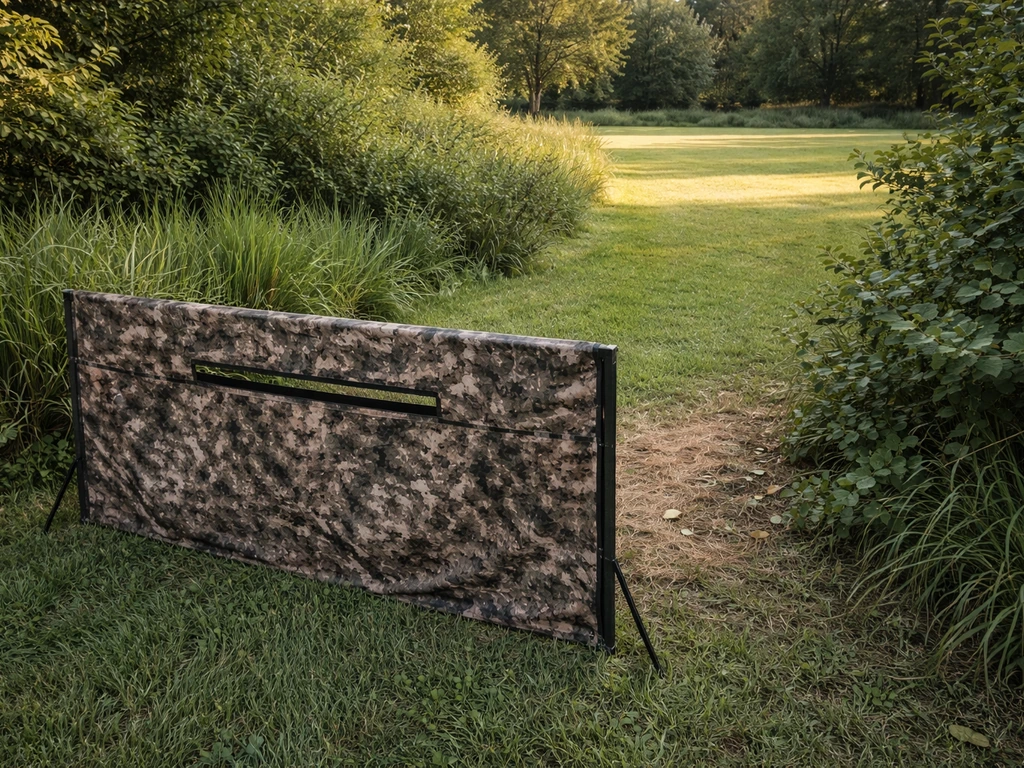
Before you cut a single board, decide which type of blind suits your yard. A ground-level panel blind (basically a freestanding screen with a viewing slit) is the fastest to build and works brilliantly in flat gardens or along a shrub border. An elevated box blind, sometimes called a bird hide in UK birding circles, sits on a low platform or stilts and gives you a better sightline over tall vegetation, though it takes more lumber and anchoring. For most backyard birders starting out, a three-panel ground blind is the sweet spot: fast to build, easy to move, and effective.
Location is where most first-timers go wrong. You want to be downwind of where birds are feeding, because birds check for predator scent even if you think they can not smell you. Position the blind so the sun is behind you or to your side in the morning, not in your face. Glare straight into a viewing slit will kill your visibility and make you squint for hours. Aim for a spot within 10 to 20 feet of a feeder, birdbath, or known perching branch. Closer than 10 feet and your own movement will spook birds; further than 30 feet and you lose photo-worthy detail.
On feeders and baths near the blind: place them either within 3 feet of any solid wall or fence behind the blind, or more than 30 feet away from any glass window. That two-zone rule, endorsed by Audubon and the U.S. Fish and Wildlife Service, keeps birds from building up enough speed to collide fatally with window glass. Since you are deliberately concentrating bird activity in one area, this step is worth taking seriously before you hammer the first stake.
Look for natural screening already in place: dense hedgerows, overgrown fence lines, berry-laden shrubs. Building your blind in front of existing cover means you need less artificial camouflage. The blind should have its back to a solid visual barrier (a fence, thick hedge, or garden wall) so birds approaching the feeding area never see movement behind the screen.
Tools and materials list
Nothing here requires specialist tools. If you have built a raised garden bed or a simple fence panel, you already have the skill set. The list below is for a three-panel ground blind roughly 6 feet wide and 5 feet tall, which is tall enough to stand or sit on a camp stool and wide enough to swing a camera lens without your elbow poking out.
- 6x timber stakes or 2x2 fence posts at 5.5 feet long (6 for a three-panel design)
- 12x horizontal rails cut from 1x3 or 1x4 pine or recycled pallet wood (each around 24 inches)
- Burlap fabric or hessian sacking, roughly 7 feet wide by 5.5 feet tall per panel (repurposed coffee or grain sacks work perfectly)
- Staple gun with 10mm or 12mm staples, or roofing tacks
- Galvanized exterior screws, 2.5 inch and 1.5 inch
- A hand saw or circular saw
- A cordless drill or screwdriver
- Mallet or sledgehammer for driving stakes
- Measuring tape and pencil
- Green or brown exterior wood stain or spray paint (optional but useful)
- Natural vegetation: cut branches of pine, holly, ivy, or dried grass to weave into the burlap
- Zip ties or garden wire for attaching vegetation
- Tarpaulin or waterproof roof panel cut to fit, if you want a permanent covered version
- Ground anchoring pegs or tent pegs (four minimum per panel)
Pallet wood deserves special mention here. Dismantled pallets give you free horizontal rails and sometimes full panel boards. Check them for nails, sand rough edges, and treat with an outdoor wood preservative. I have built several panel frames entirely from pallets and they have held up through hard winters with zero issues. The rough texture also grips burlap better than smooth-planed timber.
Step-by-step construction planning and layout
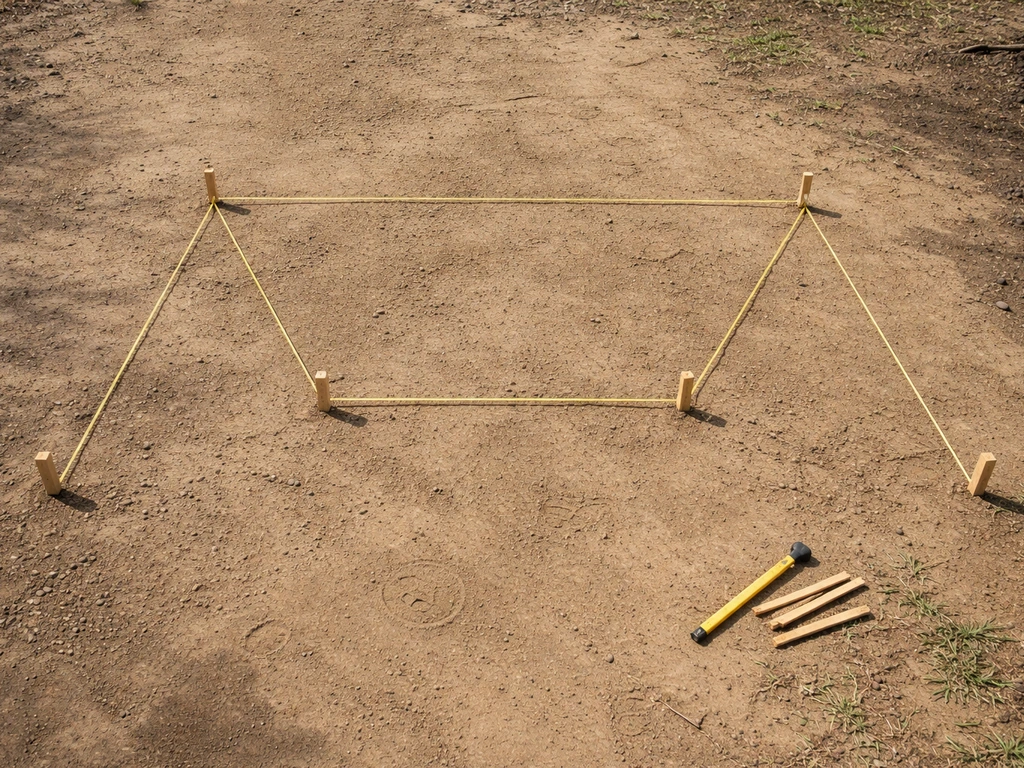
Sketch the layout before you start cutting. A three-panel blind forms a gentle U or V shape, with the center panel facing the feeding area and the two side panels angled back at roughly 30 to 45 degrees. This shape blocks your side silhouette, funnels your sightline forward, and is far more stable than a single flat screen. Lay it out on the ground with stakes before you drive anything in, and stand behind it to check the sightline angles.
- Mark stake positions on the ground using a string line. Space each pair of stakes 24 to 28 inches apart for each panel, and angle the side panels back from the center.
- Drive the stakes 12 to 18 inches into the ground using a mallet. Soft soil needs 18 inches minimum for stability; hard or stony ground can use just 12 inches if you add guy-rope anchors.
- Cut horizontal rails to span between each stake pair. You need at least three rails per panel: one near the top, one in the middle (at your seated eye level), and one near the bottom to keep the burlap taut.
- Screw the horizontal rails to the stakes using 2.5-inch screws. Pre-drill through the rail into the stake to stop the wood splitting. Check each panel is roughly vertical with a quick eye test or spirit level.
- Cut burlap to size with a few inches of overlap top and bottom. Wrap the top edge around the top rail twice before stapling to create a stronger anchor point.
- Staple the burlap tightly across each panel, working from the center outward to avoid wrinkles. Pull it snug but not so tight it tears around the staples.
- Cut the viewing slit now (see the next section for exact sizing) before attaching vegetation, so you can reposition it if the angle feels off.
- Weave cut branches, dried grasses, or ivy stems through the burlap mesh. Start at the bottom and work upward so upper layers overlap lower ones like roof tiles, which helps shed rain.
- Step back 20 feet and assess the silhouette against the background. Fill any obvious gaps with more vegetation or an extra burlap patch.
Building details for concealment and comfort
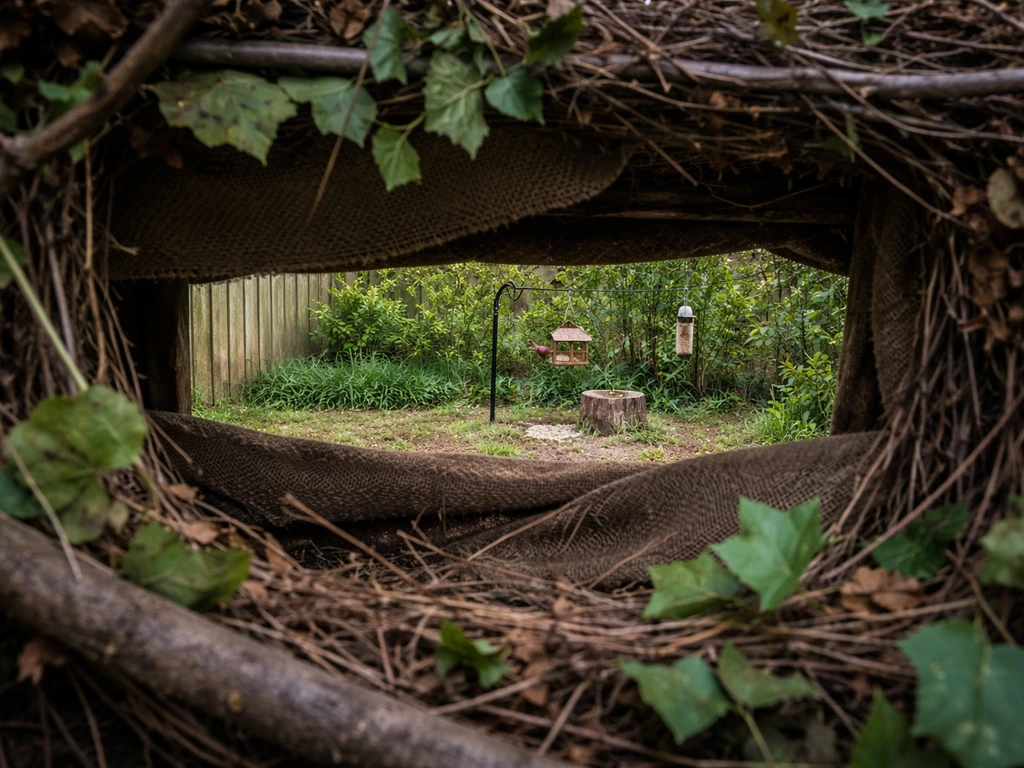
Getting the viewing slit right
The viewing slit is the most critical feature of the whole blind. Too wide and birds spot the movement of your face or lens; too narrow and you miss half the action. A slit of 3 to 4 inches tall and 12 to 18 inches wide per panel works for naked-eye watching. If you are shooting with a telephoto lens, extend the width to 24 inches but keep the height at 4 to 5 inches.
Cut the slit at exactly seated eye level (typically 36 to 40 inches from the ground when you are on a camp stool) or standing eye level (about 60 inches) if you prefer to stand. I always cut mine 2 inches lower than I think I need, then trim upward, because it is much easier to enlarge a slit than patch one that is too big.
Add a flap over the slit using a strip of burlap or dark green canvas attached along the top edge only. When you are not watching, the flap hangs down and the slit disappears. When you are inside, you lift the flap or hold it back with a small clip. This single detail dramatically reduces the number of times birds freeze or flush when you first settle in.
Interior size and comfort
For a one-person blind, the U-shaped three-panel design gives you roughly 24 to 30 inches of depth behind the center panel. That is enough to sit on a folding stool with your elbows resting on the center panel rail, which steadies binoculars or a camera nicely. If you want two people side by side, extend the center panel to 48 inches wide and drive an extra stake in the middle for support. A small garden kneeling mat or folding chair inside makes a huge difference on longer sessions. Do not underestimate comfort: the longer you stay still, the more birds you will see.
Access, stability, camouflage, and weatherproofing
Getting in and out quietly
Access is something people forget until the first time they knock a whole panel over trying to squeeze in through the back. For a ground blind, leave a 24-inch gap at the rear center, covered by a loose burlap flap that you push aside. If the blind is against a hedge, cut an entry gap into the side panel instead so you approach from an angle birds are not watching. Move slowly when entering, especially in the first few weeks when birds are still learning to ignore the structure.
Keeping it stable
A blind that rocks in the wind will clear your garden of birds faster than a cat. The V or U shape helps a lot, but also add two diagonal guy ropes per side panel, tied to tent pegs at 45-degree angles from the top of the outer stakes. In exposed locations or where you cannot drive stakes deep (clay soil, paving edges), fill two 5-litre water bottles with sand and hang them from the lower rail of each panel. The weight keeps the panels from swaying and costs almost nothing.
Camouflage that actually works
The burlap base color matters. Raw cream-colored burlap sticks out badly. Dip it in cold tea or use a diluted green or brown exterior wood stain before attaching it to the frame. After that initial toning, the woven vegetation you add will do most of the work. Replace dead or dried-out vegetation every couple of months in spring and summer when birds are most active. In winter, dried grass and pine boughs hold their color well and need less frequent replacement.
Weatherproofing the frame
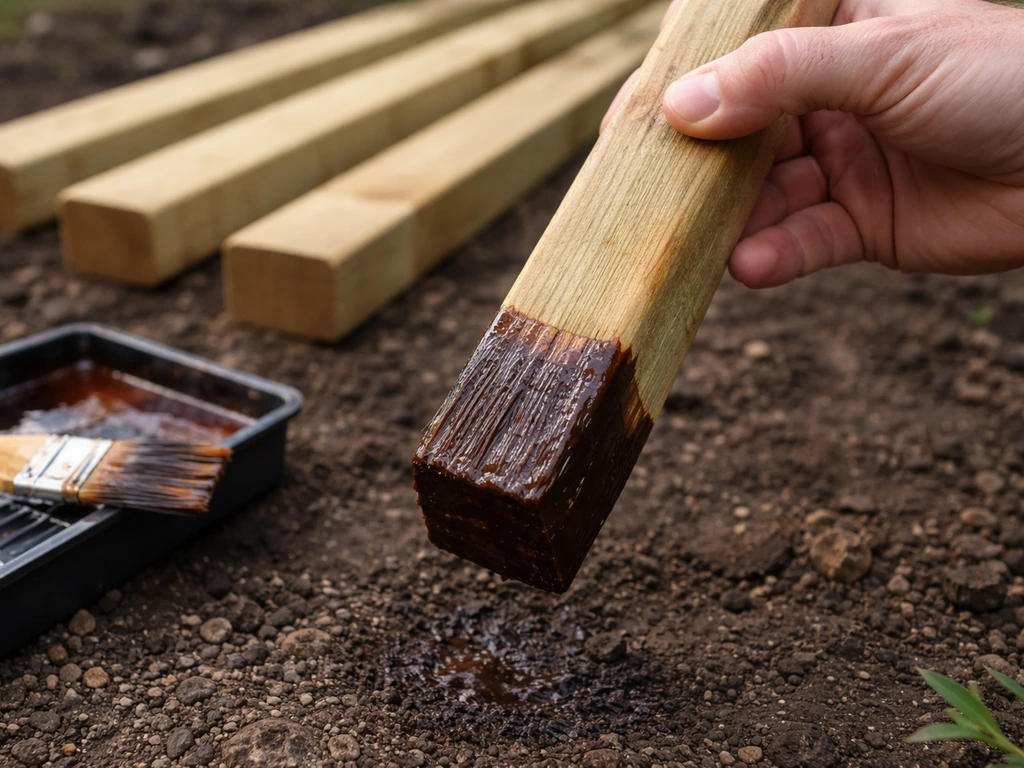
Treat all timber stakes and rails with an exterior wood preservative before assembly. This is especially important at the soil contact point on stakes, which rots fastest. If you want a roof, stretch a piece of green polyethylene tarpaulin or corrugated bitumen sheet across the top rails and slope it slightly backward to shed water away from the viewing side. Screw a thin wooden batten along the front and back edges of the roof to stop wind getting underneath. Burlap itself handles light rain fine, but will eventually rot if it stays wet for weeks on end, so the roof matters for a permanent blind.
Using the blind effectively for bird watching and adjusting for species
Building the blind is only half the job. After you finish building, focus on how to build a bird roosting box so you can support roosting behavior, not just feeding and viewing. Setting up the area in front of it is what actually brings birds. Place a feeder, birdbath, or natural brush pile within 10 to 15 feet of the center viewing slit. A shallow water dish (no more than 2 inches deep) is often more attractive to more species than a feeder, because even birds that ignore seeds will visit for a bath. If you add a small dripper or recirculating pump to the bath, the sound of moving water pulls birds in from much farther away.
Give the blind at least one week before you use it. Most garden birds treat new structures with suspicion for the first few days, then habituate completely. After the first week, enter the blind at least 20 minutes before first light or before you expect activity. Birds that arrive while you are already still and quiet inside the blind are far less likely to flush than birds that see you walking up and ducking inside.
Tweaking the setup based on what shows up
Pay attention to where birds land before they approach the feeder or bath. Most will pause on a nearby branch or post first. If you see a consistent landing spot, add a natural-looking perch (a rough branch propped at an angle) right in front of your best sightline. This is the single biggest improvement you can make after the initial build. For warblers and smaller species that hug the ground, lower the slit slightly and add low brush cover between the blind and the feeding area. For larger birds like jays, woodpeckers, or doves, keep the area in front more open.
If you are getting good activity from a specific species, adjust feeder placement and cover to suit them specifically. Robins, for example, prefer low feeders or ground feeding areas and will not approach a hanging feeder surrounded by open space as readily as a dish set at the base of a shrub. To make bird boxes for robins, follow a similar approach: provide the right entrance orientation, use weatherproof materials, and keep the opening suited to their preferred behavior.
Sparrows like dense cover within a few feet of the feeding spot. Sparrow-friendly setup also includes offering dense, nearby cover and keeping the entrance area calm and uncluttered Sparrows like dense cover within a few feet of the feeding spot. . Thrushes and blackbirds prefer open ground with good escape sightlines.
The blind itself stays the same; it is the setup in front of it that you tune.
If you are interested in providing nesting habitat near the blind, projects like building a bird box, a nesting box, or even a roosting box for winter warmth can all be positioned within your blind's viewing zone to double the activity you can observe. If you are also trying to encourage breeding, learn how to make a bird nesting box and place it within a suitable viewing zone. If you want to take it a step further, learn how to build bird box plans so you can support nesting as well as observation building a bird box. Just keep any nest boxes facing away from your blind slightly (to avoid direct human-shaped silhouette in the birds' entrance-hole sightline) and at appropriate species-specific heights.
Safety, legality, and maintenance checklist
On your own private property, you can build a bird blind without any permits in virtually all jurisdictions. If you are starting from scratch, these steps will help you understand how to build a bird hide that blends in and stays practical for long sessions bird blind. The one exception is if you are in a conservation area, national park, or designated wildlife reserve, where any structure may require permission or may be prohibited entirely. If you are building on shared land, allotment space, or near a public footpath, check with your local council or landowner first. A structure that blocks a sightline or access route can become a dispute issue even if birding intent is entirely benign.
On personal safety: if you build an elevated blind on a platform, any platform over 30 inches off the ground needs a secure railing on three sides and a non-slip step or ladder. Check the platform supports annually for rot. Ground-level blinds carry essentially no safety risk, but do let someone know you are in the garden if you are planning an early-morning session in low light.
Run through this maintenance checklist every season to keep the blind functional and safe:
- Inspect all stake and post bases for rot or loosening, especially after winter frost-heave. Re-drive or replace any loose stakes.
- Check burlap for tears, mold, or areas that have gone thin. Patch with offcuts or replace the panel entirely if more than a quarter of the fabric is degraded.
- Re-treat exposed timber with exterior wood preservative each spring.
- Replace woven vegetation cover once or twice a year to maintain natural color and texture.
- Clear any accumulated leaf litter or debris from inside the blind that could harbor moisture and speed rot.
- Check guy ropes and tent pegs for tension and corrosion; replace galvanized pegs every two to three years in wet soils.
- Test the roof (if fitted) for leaks after the first heavy rain of autumn. Reseal or replace tarpaulin edges as needed.
- Reassess the viewing slit height and position as seasonal plant growth changes the sightlines in front of the blind.
A well-built blind genuinely lasts five to ten years with minimal upkeep. The first time you sit inside it on a still morning and watch a bird land two meters away with no idea you are there, you will understand exactly why the extra care on stability and camouflage was worth every minute.
FAQ
How can I stop birds from pecking or investigating the burlap flap and slit area?
Keep the flap texture mostly hidden when closed (attach it along the top edge only) and avoid any bright fasteners on the flap. If birds repeatedly “test” the slit, narrow the flap opening overlap by adding a second inner layer of dark canvas so they see fabric, not the gap, and give it 3 to 7 days before changing anything else.
What should I do if the blind faces the sun at a different angle in winter than it does in summer?
Re-check visibility at the time of day you plan to watch, not when you build it. Morning and late afternoon can shift the glare dramatically, so do a quick mock session by standing where you’ll sit and looking through the slit with the sun behind you. If glare appears, rotate or reposition the blind, or use a simple shade panel behind the slit that blocks direct rays.
Is it okay to build the blind out of pressure-treated lumber or treated wood?
Pressure-treated boards are fine structurally, but some products can off-gas or leave chemical residue early on. For bird safety and to keep the blind blending, use exterior-rated wood preservative on stakes at soil contact, and allow treated wood to weather for a few weeks before installing burlap and lining it with vegetation.
How deep should I drive stakes, and how do I stabilize the blind in soft soil?
For soft or sandy ground, drive stakes deeper than you think, usually 12 to 18 inches, and add a wider stake bearing if possible (for example, a scrap board under each stake head) to prevent pull-out. After your first windy day or after heavy rain, re-check that panels remain tight and the slit edges are not shifting.
Can I mount the blind to a fence or shed instead of freestanding?
Yes, but only if you still meet the main sightline rules: small openings and minimal movement. When attaching, leave no gaps where you can be seen behind the structure, and avoid mounting in a way that forces the slit to look out past nearby vegetation. A partially attached design often works better along hedges because the back barrier is already strong.
What if I want better photos but I do not want to enlarge the viewing slit?
Use a wider camera orientation strategy instead of widening the slit, for example sit slightly farther back inside the blind and angle your lens through the same fixed opening. If you need more framing, adjust feeder or perch placement by a foot or two so the bird arrives in the center of the slit’s sightline rather than expanding the opening.
How do I handle wind without making the blind too heavy or difficult to move?
Use guy ropes first, then add ballast only to the lower rail level. Water bottles filled with sand work well because you can remove them for repositioning. If you weigh down too much, you may struggle to adjust placement, and birds may habituate to the current spot slower if you constantly move it.
How long should I leave the blind unused before a big birding trip or event?
If the blind has been sitting quietly for weeks, birds will usually treat it as normal once it’s been there at least a full week. If you do have to stop and restart, enter still and quiet before first light again, and plan a few days of gradual habituation rather than expecting peak activity immediately.
What’s the best way to choose feeder and bath positions if I have multiple feeders in the yard?
Concentrate your “bird traffic” into one viewing zone. Place the feeder and/or bath within the distances described in the article relative to windows and solid barriers, then temporarily remove other nearby attractants within about 10 to 15 feet of the blind so birds focus on one approach path. Once you have consistent activity, you can add a second station if it does not force birds to approach from multiple angles.
Can I build an elevated blind, and what extra steps prevent vibration and rocking?
Yes, but treat stability as non-negotiable. Use three-side railings for safety, ensure all platform joints are tight, and add diagonal bracing or extra stakes so the structure does not flex when you sit down. If you feel movement when you step onto the platform, fix it before letting birds habituate.
What maintenance should I do specifically for camouflage vegetation so it stays realistic all season?
Replace vegetation in small batches so the blind does not “reset” all at once. When replacing, match the current height and color of what’s already growing nearby, and avoid adding bright new greenery overnight, which can look unnatural. After rain storms, check burlap edges and any tied-on stems to ensure they are still tight and not flapping.
Do I need permission to place a ground blind if it is removable and temporary?
Even temporary structures can trigger rules depending on jurisdiction and land ownership. The article covers private property generally, but if you’re near shared land, common areas, or conservation-managed habitat, confirm with the managing authority before installing because restrictions can apply to obstruction of trails, sightlines, or protected habitats.
How can I reduce disturbances from my own sound and movement?
Plan your route so you do not walk or talk directly in line with the slit, and avoid adjusting gear inside the blind until you are settled. If you use a camera, keep movements slow and predictable, many birds tolerate still silhouettes far better than repeated head and lens repositioning.
Next Articles
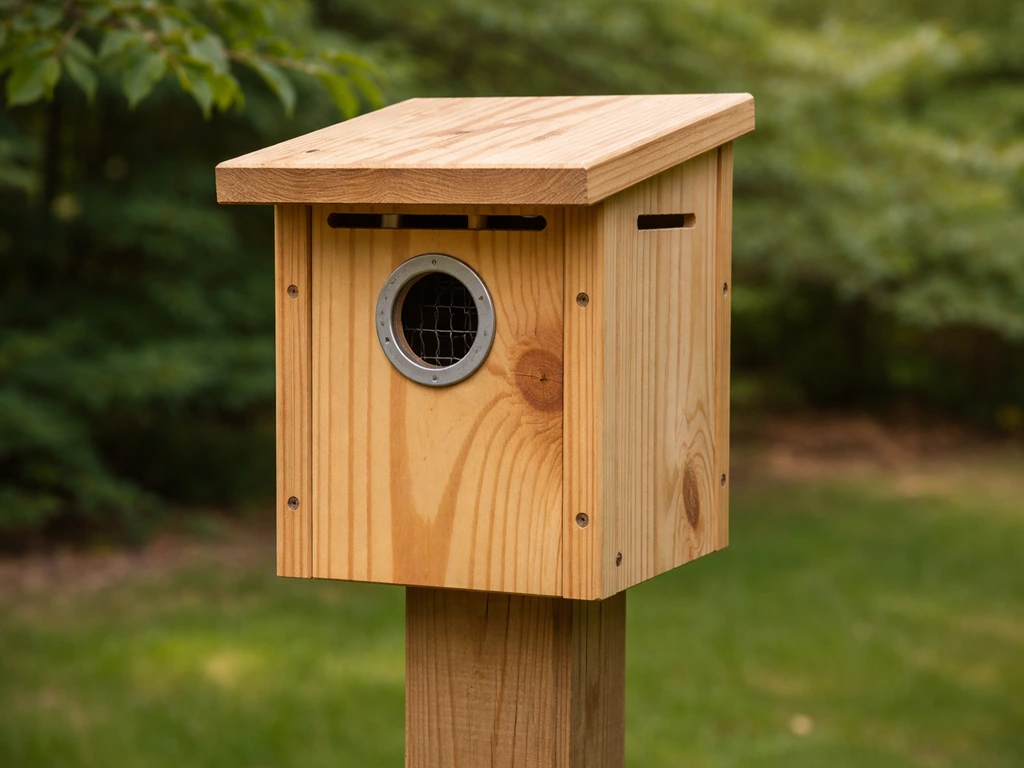
How to Build a Bird Roosting Box Step by Step
Step-by-step DIY plan to build a roosting box with correct size, ventilation, predator protection, safe materials, and m
How to Make Bird Boxes for Robins Step by Step
Step-by-step DIY guide to build a robin nesting box with proper dimensions, entry, ventilation, placement, and cleaning.
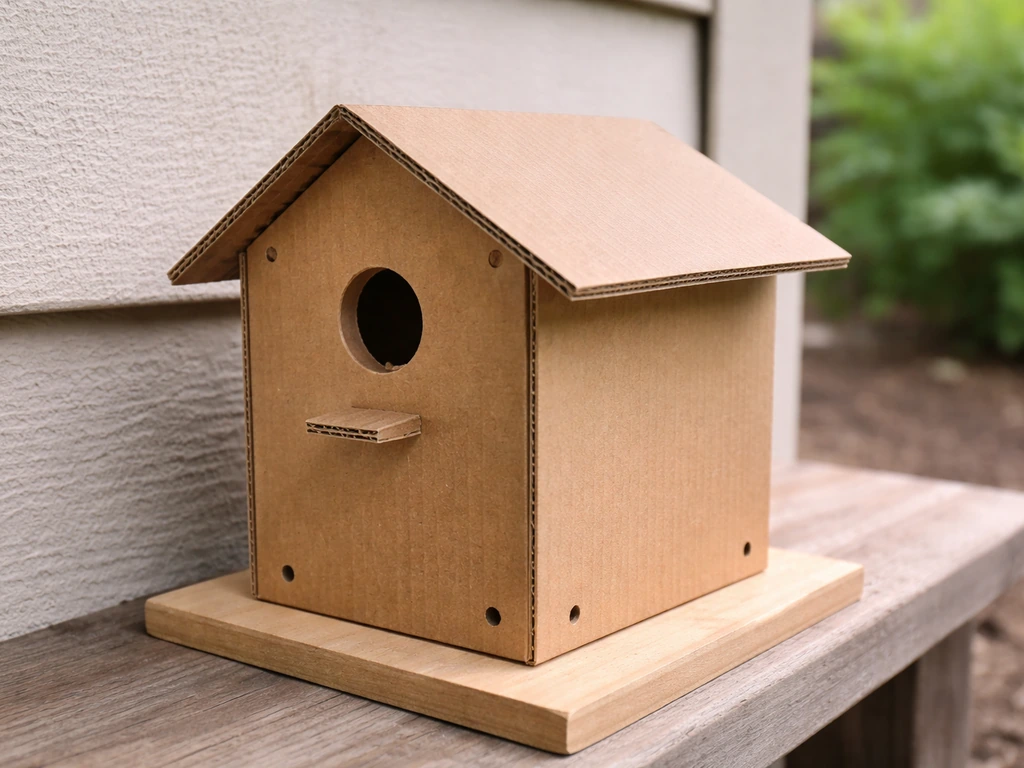
How to Make a Bird House With a Cardboard Box
Step-by-step cardboard bird house and bird enclosure build with safe holes, ventilation, drainage, and weather tips