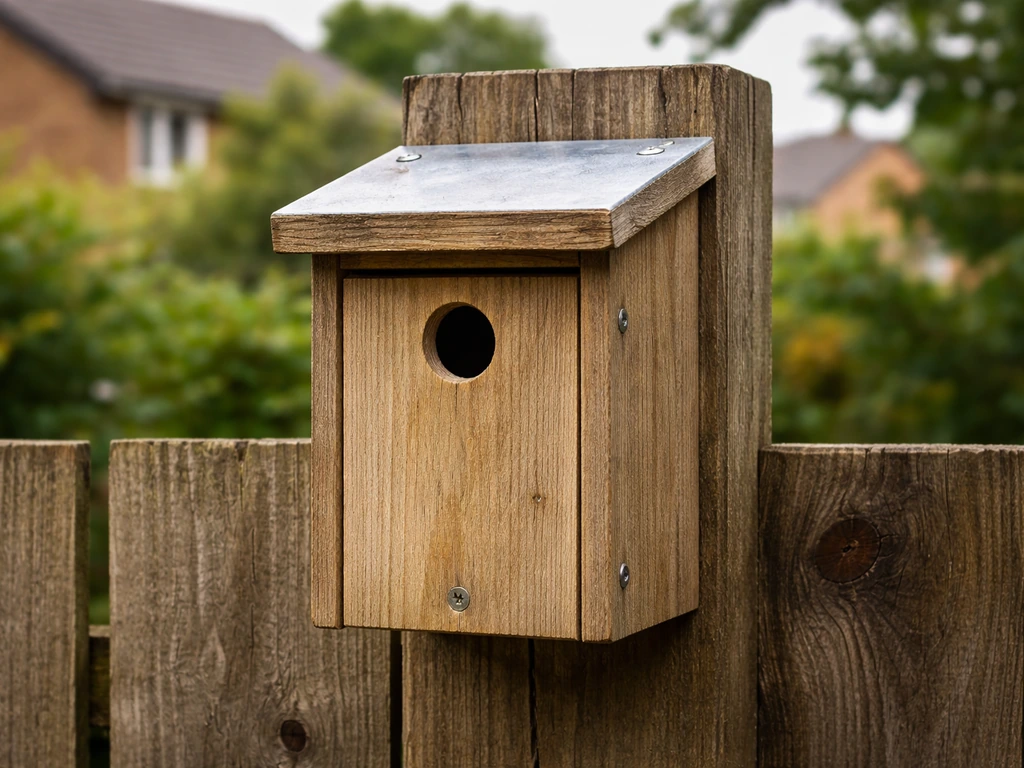
To make a bird box that house sparrows will actually use, you need a small cavity-style box with internal floor dimensions of roughly 100 x 150 mm (4 x 6 inches), a blank" rel="noopener noreferrer">front entrance hole drilled to 32 mm (about 1.25 inches) in diameter, and the whole thing mounted at least 2 metres (6–7 feet) off the ground on a wall or post near buildings. That combination of hole size, internal space, and urban-adjacent placement lines up exactly with how house sparrows naturally nest. Cut those panels, drill that hole, screw it together with corrosion-resistant fasteners, and you have a box sparrows genuinely want to move into.
How to Make a Bird Box for Sparrows: DIY Specs

Marcus Thornton
16 May 2026
Which sparrow are we building for, and does the box type matter?
There are quite a few birds called 'sparrow,' but if you're in a suburban or urban backyard in the UK, North America, or much of Europe, the species most likely to actually move into a nest box is the house sparrow (Passer domesticus). House sparrows are classic cavity nesters: in the wild they wedge themselves into gaps in roof eaves, wall crevices, and crumbling mortar. A wooden nest box is just a tidier version of that.
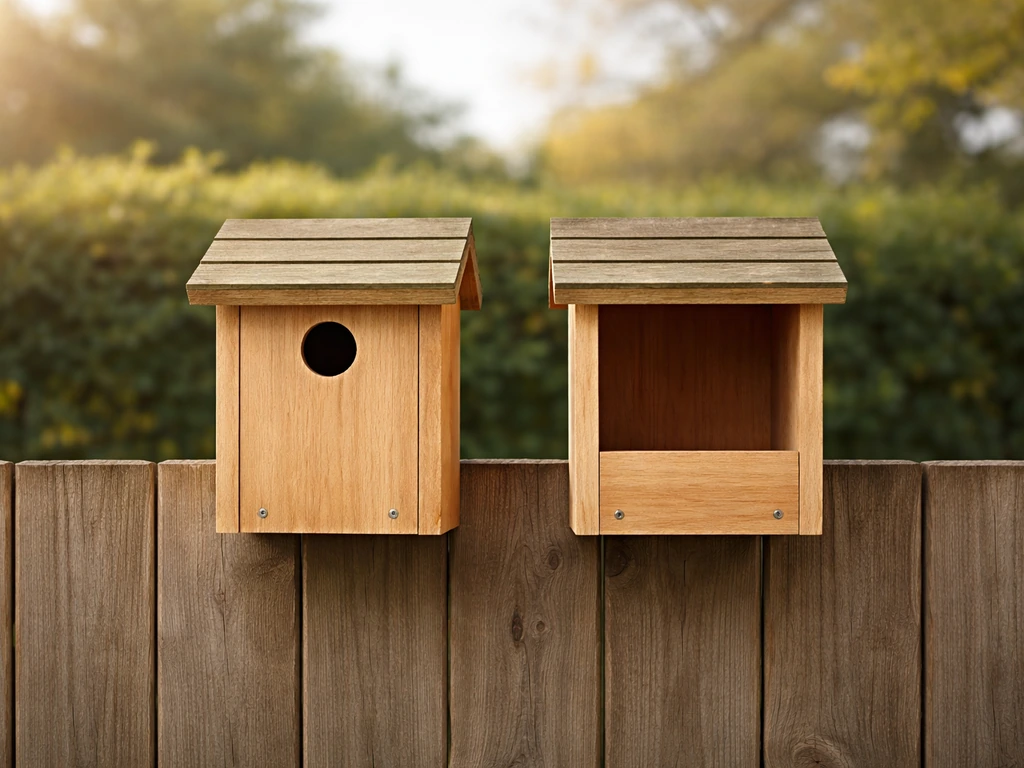
Song sparrows, chipping sparrows, and most other New World sparrow species are open-cup nesters and won't touch a box at all, so targeting them with a cavity box won't work. This guide is focused on house sparrows specifically. If you're after robins (another common backyard species people want to attract), those need an open-fronted design rather than a closed cavity box, which is a different build entirely.
If you want to attract robins too, you’ll need to build an open-front style robin house instead of a closed cavity sparrow box.
The box type you want is a simple closed-front box with a round entrance hole. No open front, no large slot. House sparrows are comfortable living close to human activity, which means your garden fence, shed wall, or house exterior is genuinely ideal habitat for them. That's a big advantage: you don't need a remote woodland plot or a perfectly 'wild' garden. The closer to buildings, the better.
Dimensions and entrance hole size for house sparrows
Getting these numbers right makes the difference between a box that sits empty for years and one that's occupied by spring. OSU Extension’s birdhouse guidance also directs you to species-specific nest box placement advice in its The Wildlife Garden resource. Here are the key measurements, based on plans from the BTO and Essex Wildlife Trust, which are the most reliable species-specific sources for house sparrow boxes.
| Dimension | Measurement | Why it matters |
|---|---|---|
| Internal floor | 100 x 150 mm (approx. 4 x 6 in) | Enough room for a nest cup without wasted space that invites drafts |
| Internal height | 150–200 mm (6–8 in) | Keeps the nest well below the entrance hole, making it harder for predators to reach in |
| Entrance hole diameter | 32 mm (1.25 in) | The BTO's recommended size; Essex Wildlife Trust specifies 30–35 mm as the acceptable range |
| Hole position (from floor) | 125 mm (5 in) up from the floor of the box | Puts the hole high enough to protect eggs and chicks from reaching hands or paws |
| Wood thickness | 15–18 mm (about 5/8–3/4 in) | Provides insulation and structural strength; anything thinner warps quickly outdoors |
The 32 mm entrance hole is a number worth respecting. It's large enough to let house sparrows slip in and out comfortably, but not so large that common starlings can take over. Starlings generally need a hole of around 45 mm, so sizing your entrance at 32–35 mm keeps them out. If you go much bigger you'll get starlings; if you go much smaller than 30 mm you'll block sparrows too. Stick in that 30–35 mm window and you're golden. One more thing: do not add a perch below the entrance hole. It feels decorative and natural, but it actually helps predator birds get footing to reach inside. Leave it off completely.
What to build with: materials, tools, and what to avoid
Wood and board choices
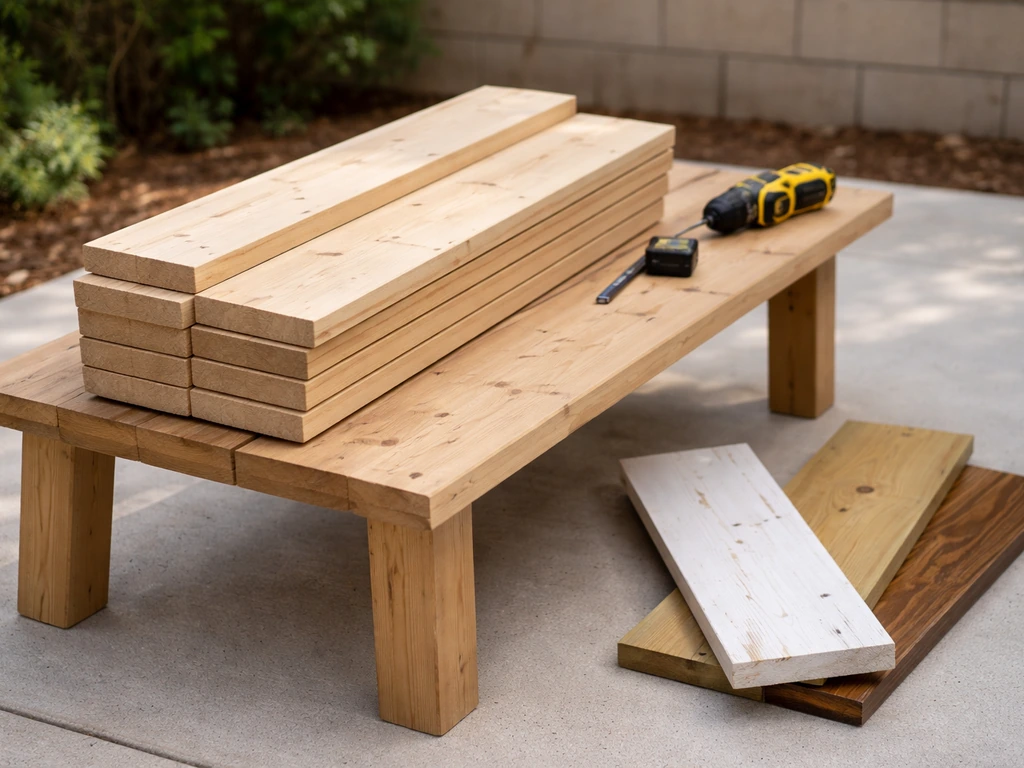
Plain, untreated softwood is your best friend here. FSC-certified pine, cedar, or rough-sawn timber all work well, and rough-sawn is slightly better because the textured surface gives chicks something to grip when they're climbing toward the exit hole. Avoid any wood that has been pre-treated with preservatives, as these chemicals can off-gas inside a sealed box and harm eggs and chicks. Plywood is a fine option if it's exterior-grade (WBP-bonded), but avoid interior or MDF plywood, which delaminates when wet within a season or two and falls apart. Ideally use 15–18 mm thick boards throughout for insulation and stability. Thinner than 15 mm and the box turns into an oven in summer and a freezer in early spring.
If you have reclaimed timber from old pallets, shelving, or furniture, that works perfectly as long as you can confirm it wasn't treated with industrial chemicals or paint containing lead. Sanded smooth on the inside surfaces (especially near the entrance hole where the birds brush past repeatedly) and left rough on the outside is the ideal finish. For any external sealant, use a water-based, non-toxic wood preserver or exterior PVA. Apply it only to the outside surfaces, let it cure completely for several days before assembly or mounting, and never coat the inside of the box.
Fasteners and fittings
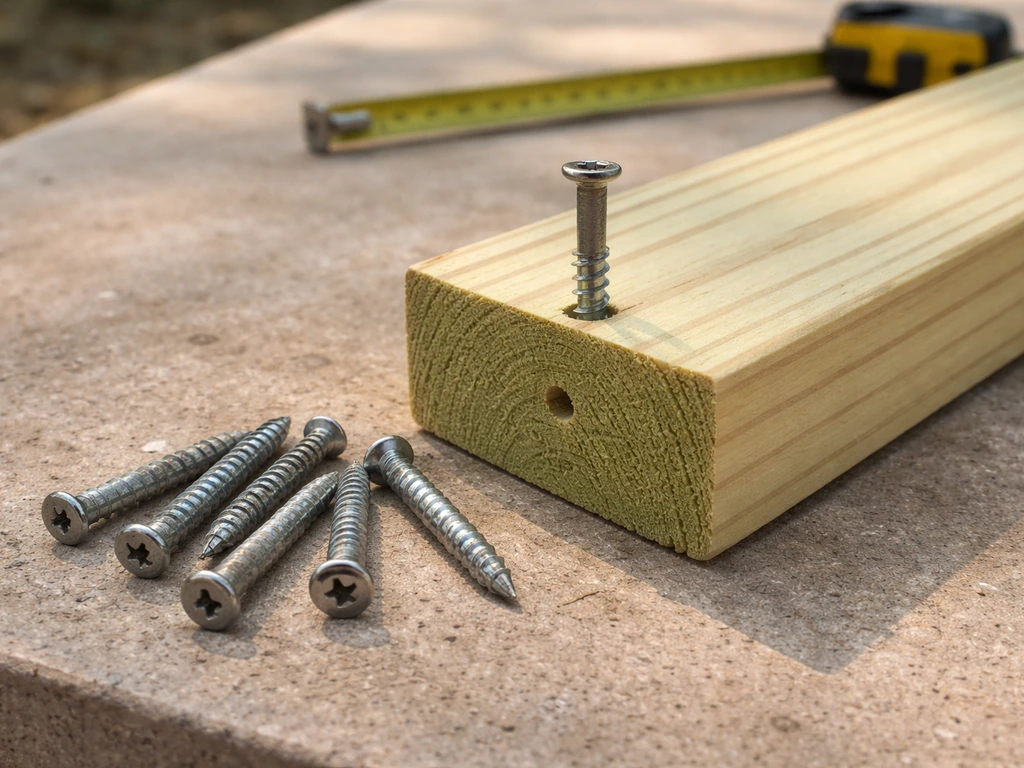
Use stainless steel or galvanized screws rather than plain steel. Plain steel rusts within a season in outdoor conditions, which can split the wood and, more importantly, leave sharp edges inside the box. For a standard sparrow box, 35–40 mm (1.5 inch) screws are the right length through 15–18 mm panels. Pre-drill pilot holes before screwing to avoid splitting the wood, particularly near corners and along the thin edges of panels. A small brass hinge or a pivot screw on the roof or side panel is useful for making the box openable for cleaning.
Tool list
- Tape measure and pencil
- Hand saw or circular saw (a hand saw is completely fine for this project)
- Drill with a 32 mm spade bit or hole saw (for the entrance hole)
- Drill bits: 3–4 mm for pilot holes and drainage holes
- Sandpaper (80–120 grit) for smoothing the entrance hole edges
- Screwdriver or drill driver for assembly
- Square (try square or speed square) to keep panels at 90 degrees
- Clamps (optional but helpful when you're working alone)
- Pencil and ruler for marking cut lines
You really don't need power tools beyond the drill. A hand saw, a 32 mm spade bit, and a box of screws is the full kit. I've built perfectly functional sparrow boxes using reclaimed shelf timber and nothing fancier than that.
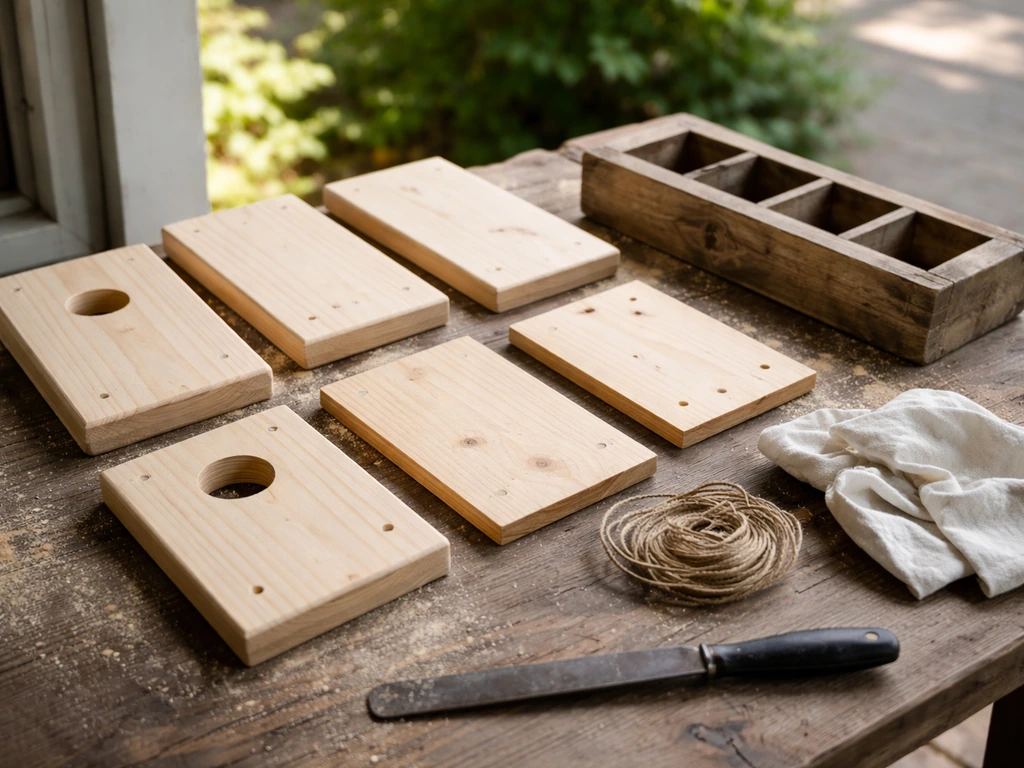
Cut list and step-by-step build
Cut list (all measurements for 15–18 mm timber)
| Panel | Width | Length | Qty | Notes |
|---|---|---|---|---|
| Base (floor) | 100 mm (4 in) | 150 mm (6 in) | 1 | Drill 4 x 6 mm drainage holes in corners |
| Front | 100 mm (4 in) | 200 mm (8 in) | 1 | 32 mm entrance hole centered, 125 mm from bottom edge |
| Back | 100 mm (4 in) | 250 mm (10 in) | 1 | Extra length for mounting screw slots at top and bottom |
| Side panels (x2) | 150 mm (6 in) | 200 mm (8 in) | 2 | Taper one side panel top by 10–15 mm for roof slope (optional) |
| Roof | 120 mm (4.75 in) | 160 mm (6.25 in) | 1 | Overhang of 10 mm front and sides keeps rain off the entrance |
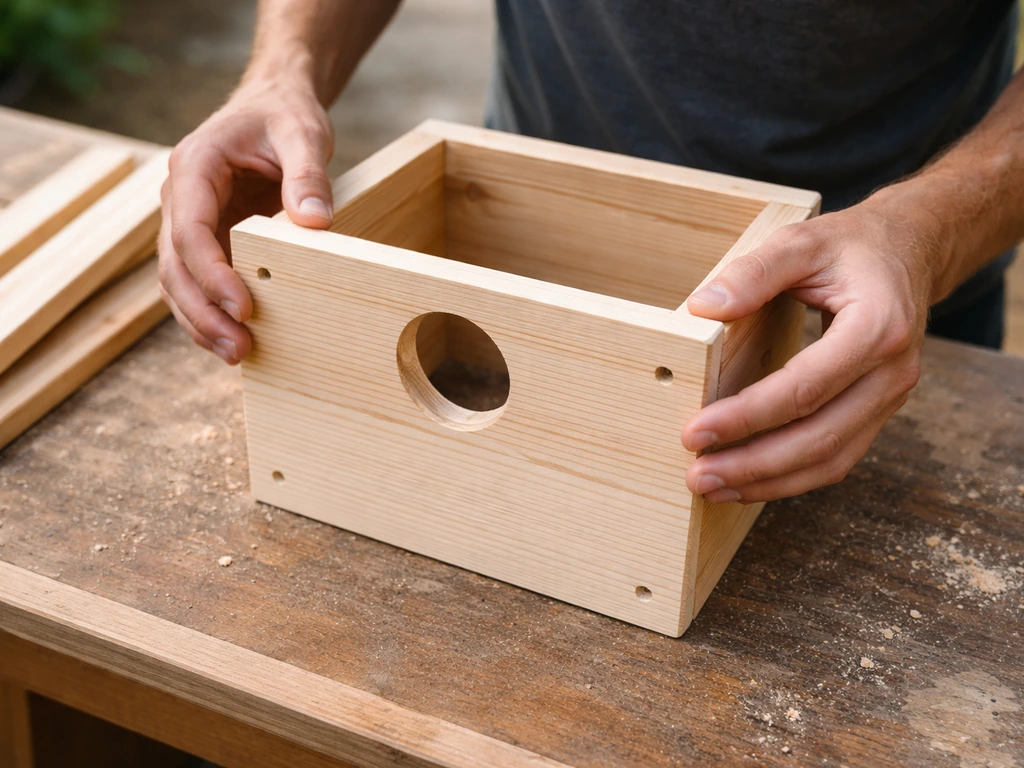
Assembly order
- Cut all panels to the dimensions above. Mark them clearly with a pencil so you don't mix them up during assembly.
- Drill the entrance hole in the front panel first, before assembly, while the panel is flat and easy to clamp. Use a 32 mm spade bit or hole saw, centered horizontally, positioned 125 mm up from the bottom edge of the front panel. Sand the inside edge of the hole smooth so sparrows don't snag their feathers.
- Drill four small drainage holes (4–6 mm each) in the four corners of the base panel. These stop water pooling inside if rain gets in. Also drill two small ventilation holes (4–5 mm) near the top of each side panel, just below where the roof will sit. Ventilation is genuinely important: without it the box overheats in summer and kills eggs.
- Attach the base to the back panel first. Pre-drill pilot holes and screw through the back panel into the edge of the base. Check it's square with your try square.
- Attach the two side panels to the base and back. Again, pre-drill and screw. You should now have a U-shaped assembly.
- Attach the front panel. This can be screwed permanently, or you can fix it with a single screw near the top as a pivot point so it swings open for cleaning. The pivot-front method is the most common and easiest approach for beginners.
- Attach the roof last. Screw through the roof into the top edges of the side panels and back panel. A slight overhang on all sides (10 mm is enough) keeps rain from running straight down the front over the entrance hole. If you want to be able to remove the roof for cleaning, attach it with one or two screws that are easy to back out.
- Optional but useful: apply a thin coat of water-based exterior wood preserver to all external surfaces. Let it cure for at least 48–72 hours before mounting or putting near birds. Leave all internal surfaces completely bare.
That's genuinely it. The whole build takes about an hour once you have your panels cut. Once your panels are cut, you can assemble the bird house with a simple order of steps that keeps it sturdy and ready for nesting how to make bird house with box. If you want a complete starting-to-finish walkthrough, follow the steps below to cut, assemble, mount, and then prepare the box for the season how to make a bird nesting box. If you've never built anything like this before, the most common mistake I see is skipping the pilot holes and splitting the wood near the edges. Just pre-drill every screw hole and you'll be fine.
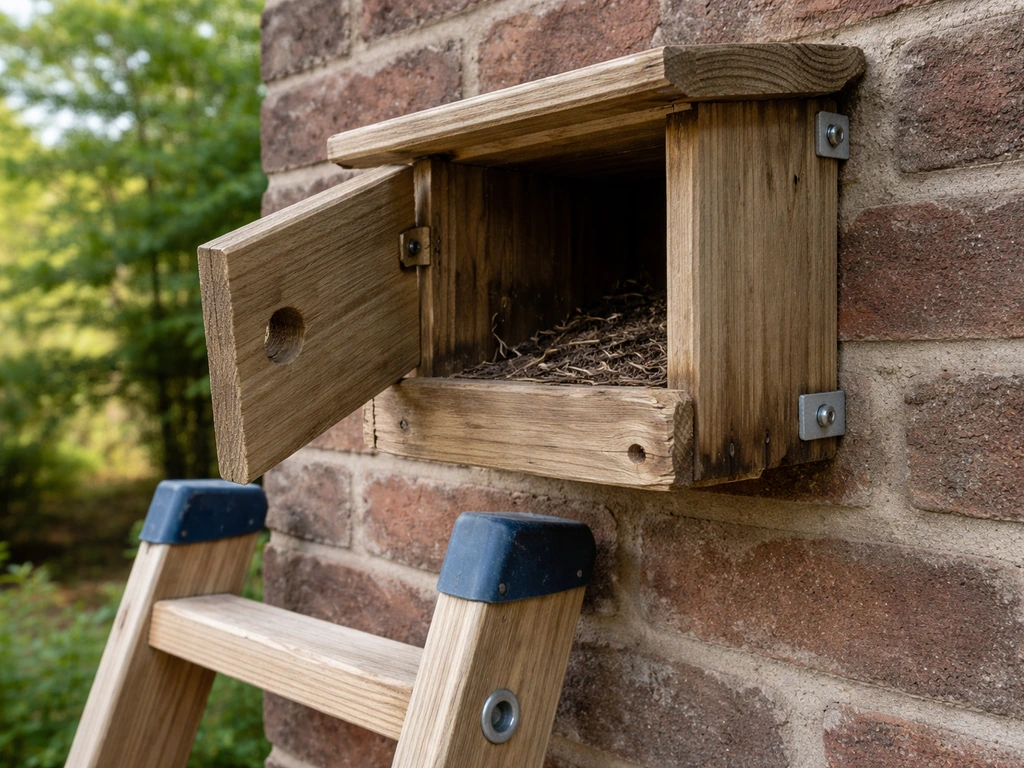
Where to mount it and how high to go
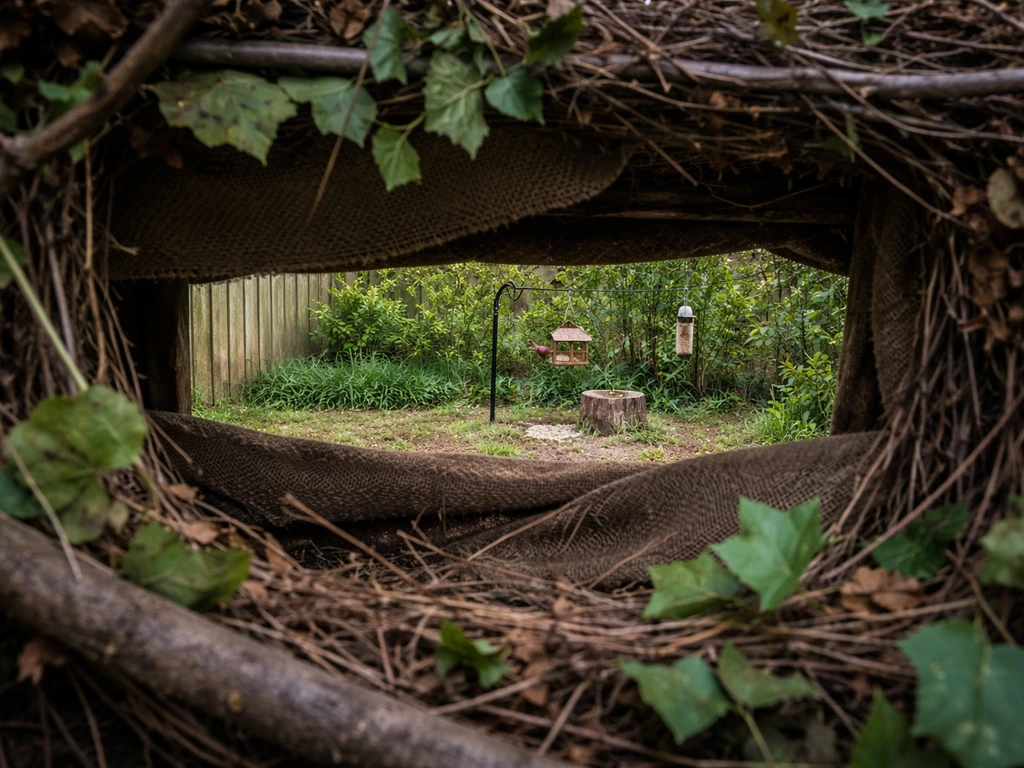
House sparrows are urban and suburban birds through and through. Unlike most native cavity-nesting species that prefer rural woodland edges, house sparrows actively prefer spots near buildings and human activity. That means your shed wall, the side of your house, a garage exterior, or a garden fence post are all legitimate and genuinely good mounting sites. If you want to observe them without disturbing the nest, you can also learn how to build a bird blind near the mounting site. A bird hide is built to give you close, calm viewing while keeping birds undisturbed, so it makes sense to plan your hide location before you start construction mounting sites.
- Height: Mount between 2–4 metres (6–13 feet) off the ground. Around 2–2.5 metres is the practical sweet spot for a garden setting: high enough to deter cats, low enough to reach with a stepladder for cleaning.
- Orientation: Face the entrance hole between north and east if possible. This protects the box from direct afternoon sun (which causes overheating) and from the prevailing southwesterly rain in the UK and much of North America. Southeast-facing is the classic recommendation from BTO.
- Nearby cover: A position where sparrows can approach through some shrub or hedge cover is ideal, but they're bold birds and will use an open wall too. Avoid positions directly over frequently used paths or doors where there's constant foot traffic immediately below.
- Predator guard: Mount on a smooth metal post or conduit if a wall isn't available, and fit a baffle-style predator guard below the box. The TWRA guidance is clear that a box placed where you can't fit a predator guard is a bad placement. Cats and squirrels are the main threats at typical garden heights.
- Distance from feeders: Sparrows don't mind proximity to feeders (they're social birds), but mounting directly above a busy feeder can attract too much competition and stress. A couple of metres away is fine.
- One box per wall section: If you want to put up multiple boxes for sparrows, space them at least 1.5 metres apart. Sparrows tolerate close neighbours more than many species, but they still defend a small immediate territory around their nest hole.
Use two screws through the extended back panel (which is why the back panel is cut longer than the other panels) directly into a wall or post. Wall plugs and masonry screws are the right approach for brick or render. The box should be stable with zero wobble: a rattling box during wind will put sparrows off using it.
Cleaning, maintenance, and what to do if the box stays empty
When and how to clean
Clean the box once a year, ideally in late autumn after the last brood has fledged and before birds start scouting for winter roost sites. In the UK, most house sparrows finish their last brood by late August or September, so October is a good window. Remove the old nest material entirely: it harbours parasites like mites and blowfly larvae that can harm the next brood.
Use a stiff brush, rinse with boiling water if you can (it kills parasites without chemicals), and let it dry completely before closing it back up. Don't use chemical disinfectants inside the box. After cleaning, you can leave a small handful of dry straw or hay loosely inside as a starter material, though sparrows will rearrange it entirely to their liking anyway.
One important rule: don't open the box during the breeding season unless there's a clear problem. Disturbing the nest when eggs or young chicks are present can cause abandonment. If you're unsure whether a brood has fledged, watch the entrance hole for 20–30 minutes. No adult coming and going and no chick noise means the nest is likely empty or done.
Why the box might stay empty and what to fix
If the box has been up for a full spring and summer with no occupants, run through this checklist before building a new one. If you want to build a bird roosting box instead, use a larger, more weatherproof design and place it in a sheltered spot away from direct wind.
- Check the entrance hole size. If you drilled smaller than 30 mm, the birds may physically struggle to get in. Enlarge to 32 mm with a file or larger bit.
- Check the orientation. A box facing due west or south in full sun can get hot enough to deter nesting. Reposition or add a simple roof overhang extension to shade the front.
- Check the height. Below 1.5 metres is often too low for sparrows in a garden with cats or foot traffic. Raise it.
- Check for a perch. If you added one, remove it. It does more harm than good.
- Check the location. A box on an isolated fence post in an open garden with no nearby shrubs or buildings may feel too exposed for sparrows. Move it closer to a wall or hedge.
- Check for competition. Starlings or great tits in the box mean your hole may be too large (for starlings) or too small (allowing great tits). Re-drill to exactly 32 mm.
- Be patient. Sparrows often scout boxes in late winter (February–March in the UK and northern US) before committing. A box put up in April may not be used until the following spring.
Sparrows are social and will often investigate a box more readily if there's already sparrow activity nearby. If you have sparrows visiting a feeder in your garden, they're already aware of the space and a well-placed box has a very good chance of being used. Give it at least one full season before making changes.
Ongoing maintenance to keep the box in good shape
Inspect the box each autumn for wood rot, loose screws, and any gaps that have opened up between panels. A gap larger than a few millimetres in the body of the box (not the entrance hole) creates drafts and lets rain in, both of which are hard on nesting birds. Fill small gaps with exterior wood filler or add a thin batten over the joint. Reapply wood preserver to external surfaces every two or three years to prevent weathering. A well-built box from 15–18 mm exterior-grade timber should last 10 years or more with this level of care.
FAQ
Can I paint or varnish the inside of a sparrow box to make it more durable?
Yes, but use it only as exterior-grade shelter and keep the interior free of coatings. If you want to use a weatherproof finish, apply it to the outside only and confirm it is fully cured and non-toxic before birds can access the box. Avoid varnish or paint on the inside because fumes can linger inside a closed cavity.
What if my wood is very smooth, will chicks still be able to climb out?
To help sparrows grip the sides during fledging, keep the interior surfaces free of splinters and apply no smooth coating. If your timber is very smooth (planed), lightly roughen the inside with sandpaper, especially around the entrance hole area. Also remove any sharp edges from the entrance hole and internal corners so chicks can climb without scraping.
Should I add a cover over the entrance to keep rain and predators out?
Covering the entrance is only appropriate temporarily if you are preventing non-breeding use (for example, after cleaning) and you remove it well before nesting begins. In practice, sparrows do best when the box is left open and accessible year-round, but you should not put a removable cover on the outside that can be forgotten during spring.
Is there a correct way to angle the roof when mounting the box?
It helps to mount at a slight downward tilt (a few degrees) so rain runs out rather than pooling on the roof. Don’t over-tilt it, if the roof slopes too steeply it can increase drafts around the entrance and reduce insulation performance during cool nights.
How do I stop starlings from taking over the sparrow box if they keep showing up?
If starlings are present, staying at 32 to 35 mm for the entrance hole is your main control. However, also check for larger gaps between panels and ensure there is no open front or side entry that gives competitors an alternative route. If you regularly see starlings using the box, the most reliable fix is adjusting future boxes rather than trying to retrofit during the breeding period.
After I clean the box, should I add nesting material or leave it empty?
House sparrows can reuse nesting material and bring in fresh grass, straw, and feathers. If the box is used repeatedly, you can leave a small amount of dry, loose straw after annual cleaning, but avoid adding thick clumps. Thick nesting material can hold moisture, increase parasite load, and make it harder for adults to move chicks.
What should I do if the nest looks wet or messy during breeding season?
If a nest is still active, the safe approach is to wait until chicks have fledged, then clean. If you must manage a clear problem (for example, severe wetting), do it outside the breeding season, or only intervene if you can confirm the nest is empty. For uncertain cases, watch for adult activity and chick sounds for 20 to 30 minutes as you would during regular checks.
How can I ensure the mounted box is stable enough, especially on a fence post?
Use a snug, solid mounting so there is no movement when birds land. When mounting to a post, use two screws through the extended back into solid wood and pre-drill to avoid splitting. When mounting to brick or render, use proper wall plugs and masonry screws, then check with your hand for any wobble before allowing birds access.
How do I know when the box is starting to fail and needs rebuilding?
The easiest improvement for longevity is to use thick exterior-grade timber and keep moisture out at joints. Check annually for separating seams, water staining, or soft wood, and treat only the outside with water-based, non-toxic preservative every two to three years. If the inside smells strongly of chemicals or is tacky, remove it from service until odor fades completely.
If no sparrows use the box in the first year, should I move it immediately?
Yes, but give it time. If sparrows already use your garden area, they may investigate quickly, yet many boxes are occupied the second year. Avoid opening or relocating frequently, keep the same mounting site for at least one full breeding season, and ensure the box is close to buildings and not in constant direct wind.
Next Articles
How to Make Bird Blocks: DIY Nesting and Feed Designs
Step-by-step DIY bird blocks for nesting boxes and feed/enrichment designs, with safe materials, specs, and placement ti
How to Build a Bird Blind: Step-by-Step DIY Guide
Step-by-step DIY guide to build a concealed bird blind, choose location, assemble safely, and set it up for better bird
How to Build a Bird Roosting Box Step by Step
Step-by-step DIY plan to build a roosting box with correct size, ventilation, predator protection, safe materials, and m