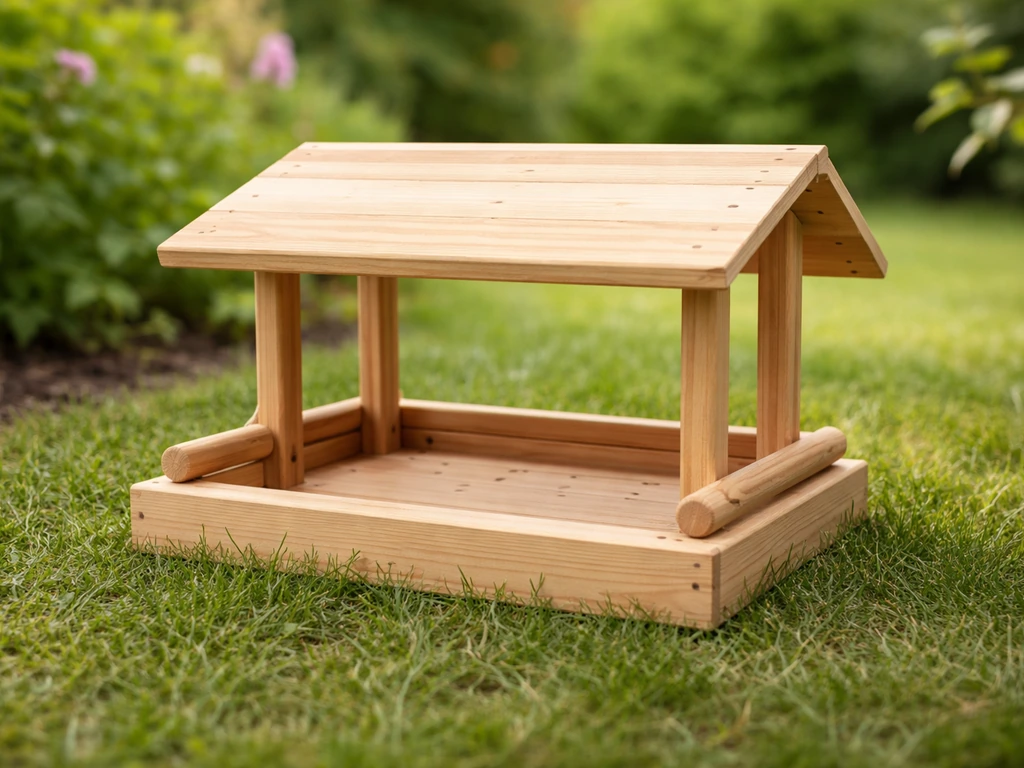
You can build a small-bird-friendly bird table in an afternoon with basic tools, a piece of exterior-grade plywood or cedar, and a handful of screws. The key differences from a generic platform feeder are size (a feeding surface around 12 by 16 inches works well), shallow edges that small birds can hop over easily, short perch rails that exclude bigger birds, and good drainage so food doesn't rot. Get those four things right and you'll have sparrows, finches, wrens, chickadees, and titmice showing up within days.
How to Make a Bird Table for Small Birds DIY Guide

Marcus Thornton
18 May 2026
What a bird table for small birds actually needs to do
A bird table is essentially a raised, flat platform where you spread food. That sounds simple, but designing it specifically for small birds changes a few things. A big open platform with no edge height limit is an open invitation for grackles, pigeons, and starlings to take over. If you want it to be pigeon proof, keep the edges low, shorten the perch rails, and design the tray so larger birds cannot land comfortably grackles, pigeons, and starlings.
A tiny platform causes birds to crowd and fight instead of feed. The sweet spot for small species is a [surface around 3 to 4 square feet](https://www. birdspot. co.
uk/bird-tables/how-to-choose-a-bird-table) (so roughly 18 by 24 inches maximum, 12 by 16 inches as a practical minimum), with low edges of about half an inch that small beaks can reach over easily but that keep seeds from rolling off. Short perch rails, not long ones, are the design lever that physically discourages larger birds from settling in comfortably.
The other design goals are less about size and more about safety and hygiene. Flat feeders and bird tables carry the highest disease transmission risk of any feeder type, because infected birds can regurgitate contaminated food back onto the surface where healthy birds then pick it up. That means your table needs drainage holes so water doesn't pool, a roof if you want to go one step further, and a tray you can remove and scrub without drama. If you nail the design on those fronts, the table works well and stays safe for the birds using it.
Mounted, hanging, or tabletop: pick the style that fits your space
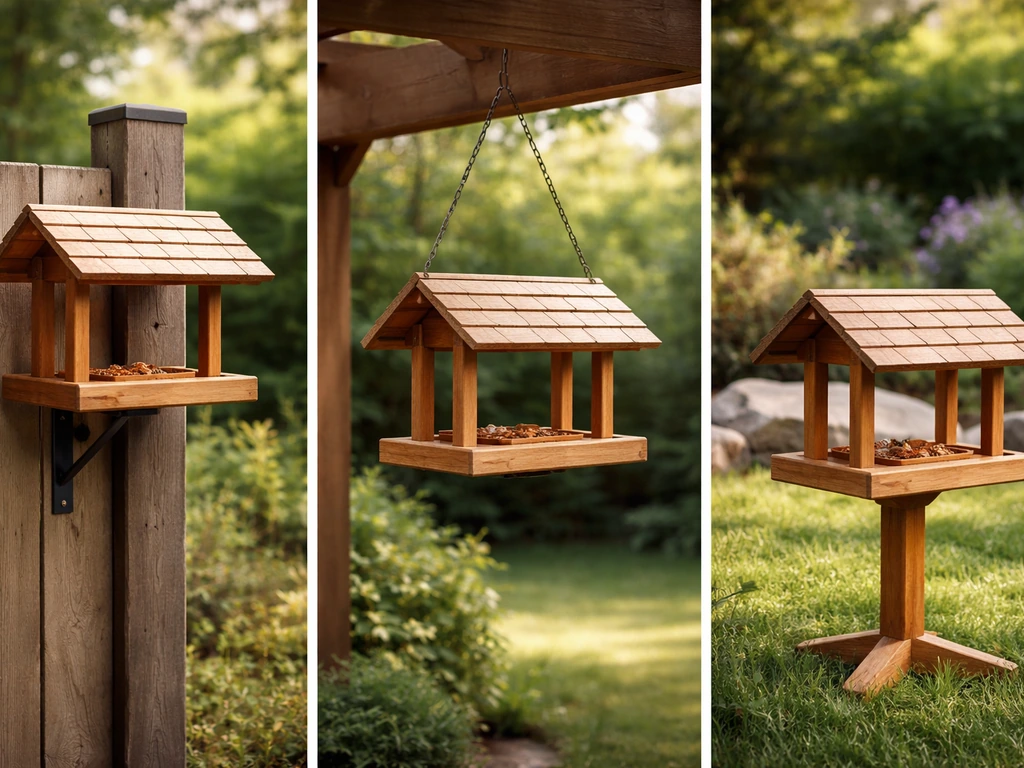
Before you cut anything, decide how the table will be supported. Each style has a different build and a different set of practical trade-offs.
| Style | Best for | Height/placement | Squirrel risk | Stability |
|---|---|---|---|---|
| Post-mounted | Most gardens, long-term use | About 5 feet off the ground | High without a baffle | Excellent |
| Hanging (suspended) | Decks, patios, branches | 4–6 feet off the ground | Moderate with correct placement | Moves in wind — add weight below |
| Wall-mounted bracket | Small spaces, fences | 4–5 feet from ground | Lower if away from surfaces | Good if bracket is solid |
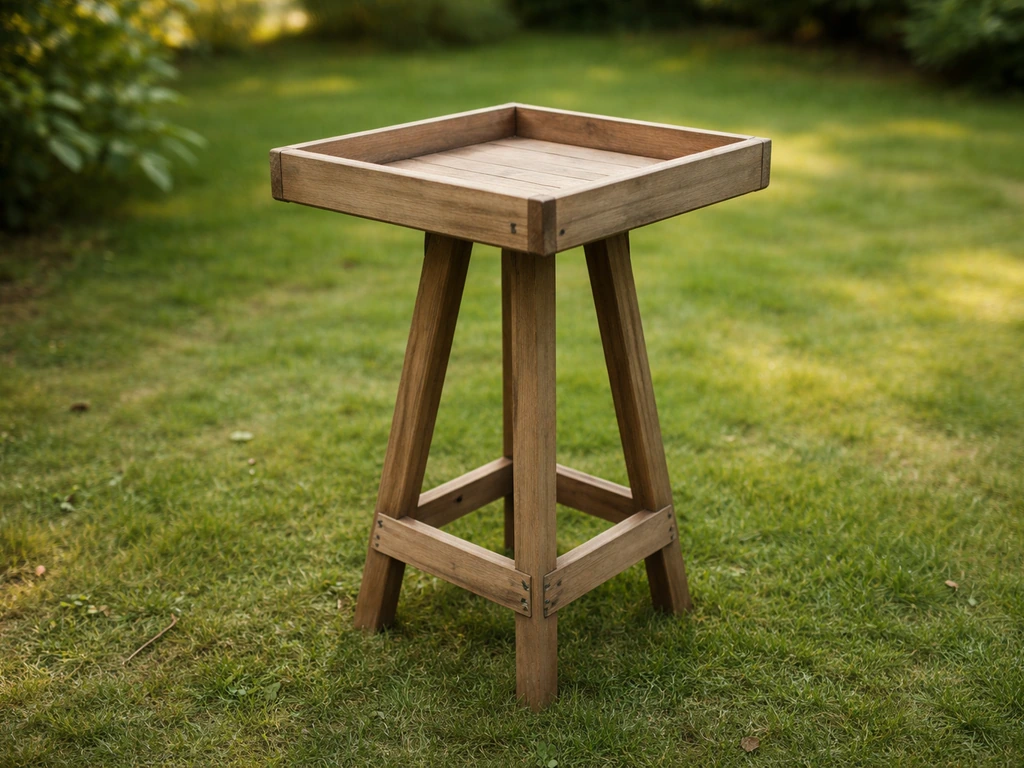
| Tabletop (weighted base) | Temporary, easy to move | Table height plus base | High | Fair — tip risk in wind |
Post-mounting is the most stable option and the one I'd recommend to anyone building their first table. A 4x4 timber post set 18 inches into the ground gives you a solid, weatherproof base you can add a cone-shaped squirrel baffle to. Hanging works well if you have a suitable branch or beam, but keep in mind the table will swing in the wind, which can scatter food and unsettle smaller, shyer birds.
If you want to go the hanging route, the approach is very similar to building a hanging bird table, just with slightly smaller dimensions. If you specifically want a hanging setup, you can follow the same principles and scale the dimensions to suit the branch or beam you’re using hanging bird table. Wall-mounted brackets are a great option if space is tight. Avoid a tabletop base unless you're okay with frequent repositioning and higher squirrel traffic.
Materials to use and things you should definitely avoid
Cedar and untreated exterior pine are your best bets for the platform and frame. Cedar is naturally rot-resistant and holds up well through winters and wet summers without needing treatment. Rough-sawn cedar is even better because the slightly textured surface gives small birds better grip than smooth planed wood. Exterior-grade plywood (at least 12mm / half-inch thick) works fine for the tray floor as long as you seal the edges.
If you're working with scrap wood, that's absolutely fine too, just avoid anything that has been pressure-treated with modern preservatives or older CCA (chromated copper arsenate) compounds, because the chemicals leach out and are toxic to birds. If you are building your bird table out of scrap wood, stick to untreated pieces and skip any pressure-treated or CCA-treated timber how to make a bird table out of scrap wood.
For finishes, the safest approach is no finish at all on surfaces that touch food, and a water-based exterior paint or linseed oil only on the underside and structural parts once they're fully cured. Never use creosote, solvent-based wood stains, or any oil paint on surfaces birds will stand on or near. For hardware, go with stainless steel or galvanized screws and nails, they won't rust and contaminate the wood. If you're sourcing new timber, look for FSC-certified wood as a baseline standard for responsibly sourced material.
Safe material checklist
- Cedar, untreated pine, or rough-sawn hardwood for the platform
- Exterior plywood (12mm minimum) for the tray floor if not using solid wood
- Galvanized or stainless steel screws and nails throughout
- Water-based exterior paint or raw linseed oil for structural parts only (not food surfaces)
- Mesh or hardware cloth (galvanized) for drainage inserts if desired
- FSC-certified timber where possible
- Pressure-treated lumber (any kind) near food surfaces
- Creosote or solvent-based wood stains anywhere on the table
- Copper, lead, or zinc flashing in contact with food areas
- Smooth, glossy paint on the tray floor (birds slip)
- Plastic trays with no drainage — they pool water fast
Step-by-step build plan with measurements
This plan builds a post-mounted small-bird table with a removable tray, a simple roof, and short perch rails. You don't need a workshop. A drill, a handsaw or jigsaw, sandpaper, and a square will get you through it.
What you need
- 1 piece of cedar or exterior pine, 16 inches x 20 inches x 3/4 inch (tray floor)
- 4 pieces of 3/4-inch x 3/4-inch square dowel or strip, 14 inches long (edge rails / mini perches)
- 2 pieces of the same strip, 20 inches long (side edge rails)
- 1 piece of exterior plywood or cedar, 20 inches x 24 inches (roof panel)
- 2 roof support pieces, 10 inches tall x 3/4 inch wide x 3/4 inch thick (gable supports)
- 1 x 4x4 post, at least 7 feet long (for a finished height of about 5 feet above ground)
- 1 mounting bracket or 2 x 3/4-inch carriage bolts with washers and nuts (to attach tray frame to post)
- Galvanized 1.5-inch screws throughout
- Sandpaper (80 and 120 grit)
- Drill with 3/8-inch bit for drainage holes
- Wood glue (exterior PVA)
Assembly steps
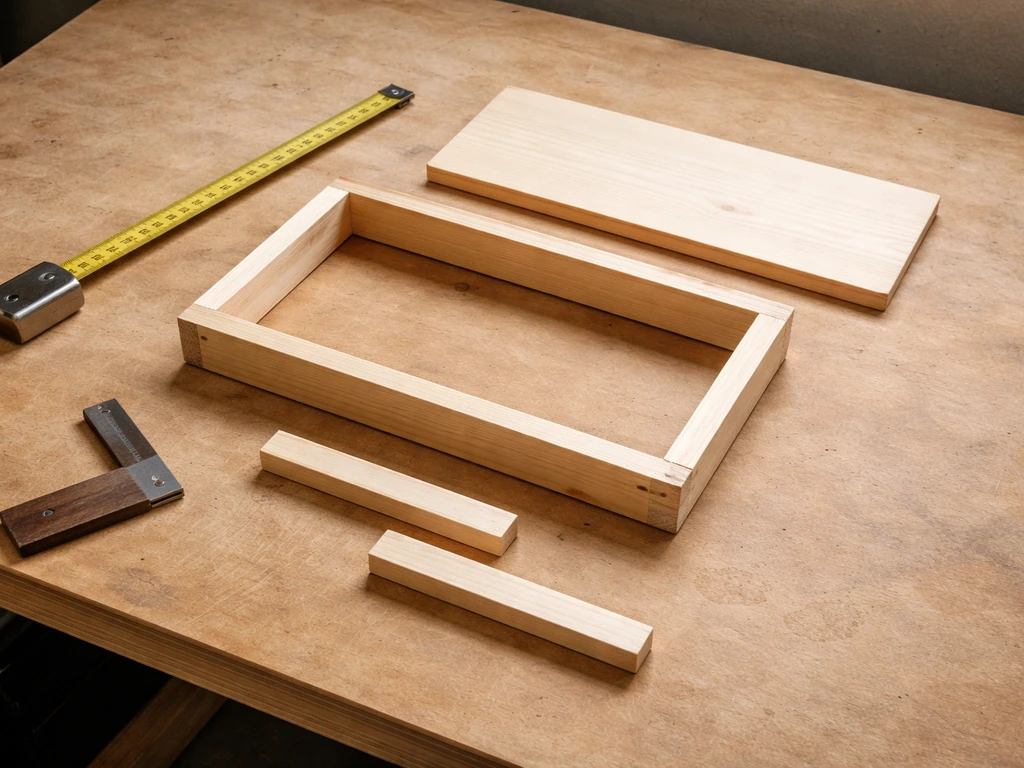
- Cut and sand the tray floor to 16 x 20 inches. Round all four corners slightly with sandpaper so there are no sharp edges for birds to catch on.
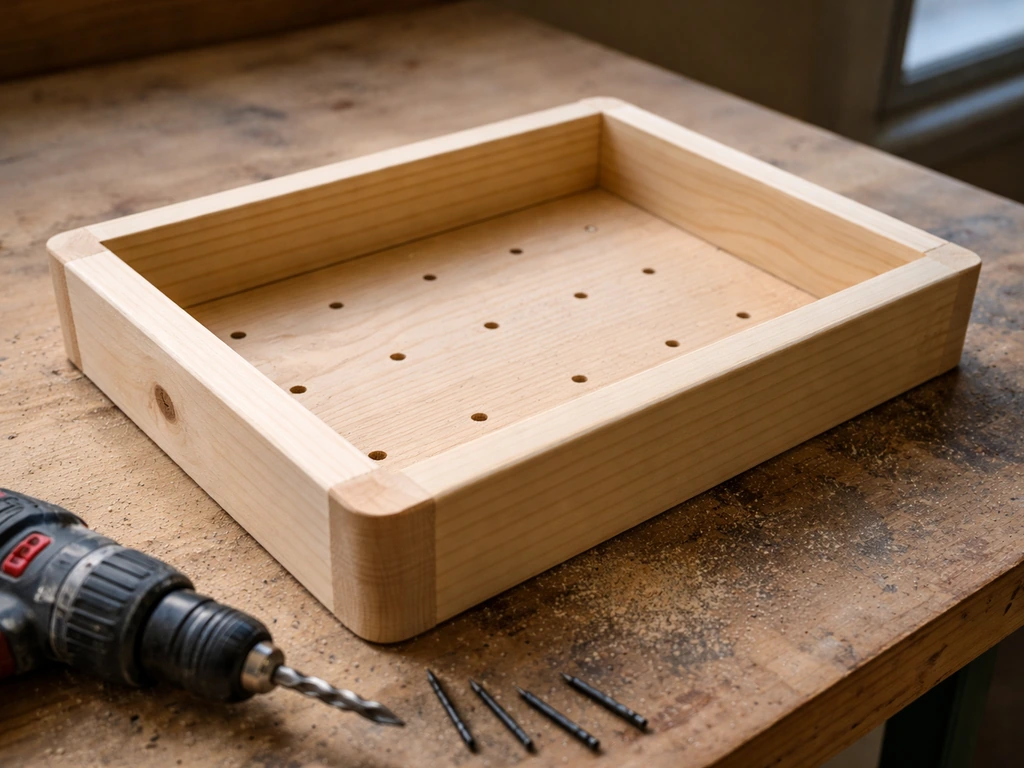
- Drill drainage holes across the tray floor in a grid pattern, using a 3/8-inch bit, spacing holes about 3 inches apart. You want water to drain freely even when the table is loaded with seed. I usually do at least 12 holes on a tray this size.
- Attach the four edge rails around the perimeter of the tray floor using wood glue and 1.5-inch screws from underneath. The rails should sit only 1/2 inch above the tray surface — just enough to keep seed from rolling off, low enough for a wren or finch to hop over easily. Keep rail length short (no more than 14 inches on the short sides) so larger birds can't perch and settle comfortably.
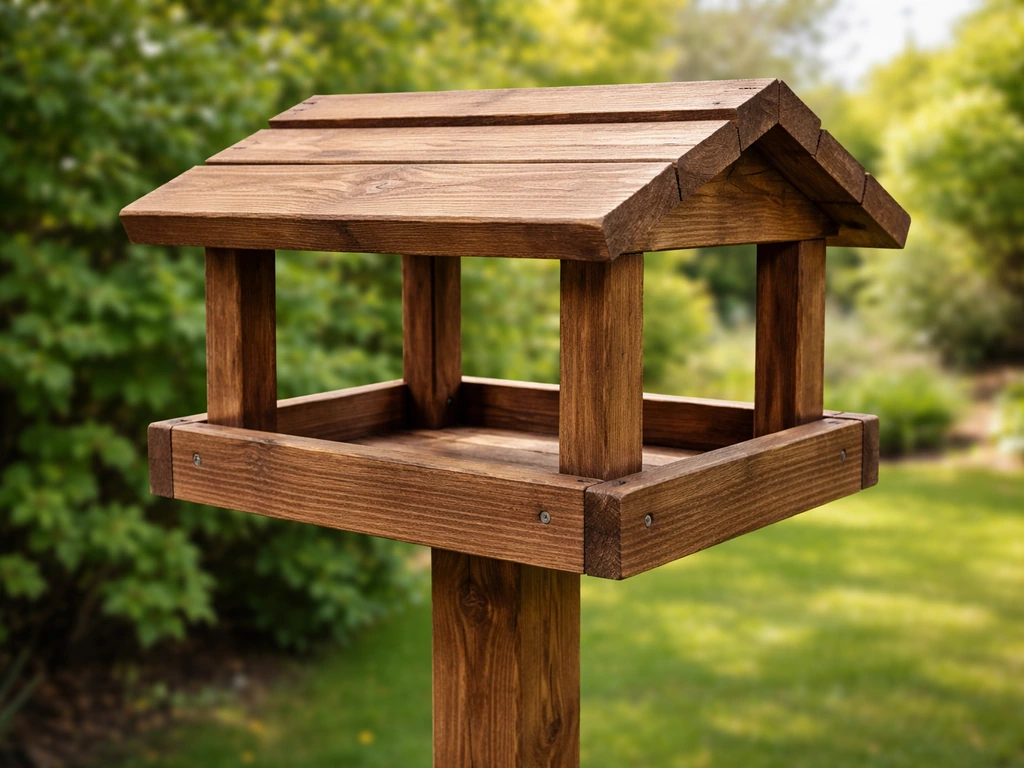
- Build the roof panel. Cut your roof piece to 20 x 24 inches so it overhangs the tray by about 2 inches on each side. Attach the two gable supports (10 inches tall) underneath the short ends of the roof panel so the roof can be positioned about 8 to 10 inches above the tray surface — enough clearance for birds to stand and feed without feeling boxed in.
- Attach the roof assembly to the tray frame using two angled corner brackets or by screwing the gable supports directly to the inside corners of the tray rails. Make the roof removable (use wingnuts rather than screws at the top if you can) — this makes cleaning much easier.
- Set your post. For a 5-foot finished height, you need the post at least 18 inches in the ground, so start with a post at least 7 feet long. Use quick-set concrete or a post spike for stability. Check it's plumb with a level before the concrete sets.
- Attach the tray assembly to the post top using a flat bracket or two carriage bolts through the tray floor center into a notch cut in the post top. Make sure the tray is level before tightening.
- Sand everything once more and leave it unsealed on food-contact surfaces. Apply water-based exterior paint or linseed oil to the post and roof underside only if you want, then let it cure for at least 48 hours before use.
Perches, drainage, weather protection, and keeping birds safe
Short perch rails are one of the most underrated design features in a small-bird table. You can further improve results by securing the table against squirrels and larger birds so only the small species you want can feed safely how to secure a bird table. Research consistently shows that feeders with short perches accommodate small birds like finches while making it genuinely uncomfortable for larger birds like grackles and jays to plant themselves and stay.
Keep your rail sections under 14 inches and no taller than half an inch above the tray floor. If you want, you can add a thin dowel (about 1/4 inch diameter) across one end of the tray at tray height, small birds will use it naturally as a landing point.
Drainage is non-negotiable. Even with a roof, wind-driven rain and dew will wet the seed. Your 3/8-inch drainage holes will handle most of it, but tilt the tray very slightly (1 to 2 degrees) toward one end when you mount it so water actively runs toward the holes instead of pooling in the middle. This is a small detail that makes a real difference in keeping seed fresh and preventing the mold that can make birds sick.
The roof helps a lot with keeping food dry but don't over-engineer it. A simple flat or slightly pitched panel that overhangs the tray by 2 inches on all sides is enough. If you want the same weather protection but with different small-bird priorities, you can also think through how to build a bird table with roof alongside your drainage and perch choices. Avoid adding a nest box to the roof structure, this is a mistake I've seen people make thinking it's a nice bonus feature, but feeding activity right next to an active nest causes unnecessary stress for nesting birds and isn't good for either activity.
For wind stability, make sure the post is genuinely solid and the tray is bolted rather than just balanced. A post that wobbles in a gust will scatter food and train birds to avoid the table. If you're in a particularly exposed spot, a lower mounting height (4 feet instead of 5) reduces leverage on the post.
Where to put the table, what to feed, and how to attract small birds
Placement is where a lot of people get it wrong, and it's just as important as the build itself. Place the table 10 to 12 feet from low shrubs, a bush, or a small tree.
This gives birds a place to wait and queue between feeding visits and, critically, a dash-to spot if a hawk or cat appears. To keep birds safe from cats while they feed, position the table so they have quick cover nearby dash-to spot if a hawk or cat appears. A small bush about 2 meters (6 to 7 feet) away is ideal.
Too close to cover and predators can ambush; too far away and smaller, shyer birds won't risk crossing open ground to reach the table.
Height matters for squirrel management. A post height of around 5 feet off the ground is the practical standard. Add a cone-shaped baffle at least 17 inches in diameter on the post below the tray, position it about 4 to 5 feet off the ground so squirrels can't shimmy past it. Keep the table at least 10 feet away from fences, walls, or overhanging branches that squirrels could use as launchpads. If larger birds are still dominating despite your short perch rails, try switching to safflower seed, most grackles and starlings ignore it, while titmice, chickadees, and cardinals are happy to eat it.
For food, small birds like finches, sparrows, wrens, and chickadees are well served by a mix of black oil sunflower seed (the thin-shelled type small beaks crack easily), nyjer (thistle) seed for finches, and suet for insect-eating birds like wrens and chickadees in colder months. Striped sunflower is also popular with chickadees and titmice. Avoid putting out more food than will be eaten in a day, this reduces waste, deters vermin, and keeps the surface cleaner. A shallow scatter of seed, not a deep pile, is what you want.
If birds are slow to discover a new table, be patient but also check the basics: is it visible from nearby perching spots? Is there any human or pet activity close by that would spook them? Try sprinkling a small amount of seed on the ground directly below the table for the first few days, it acts as a visual cue that draws birds in, and once they spot the table above, they'll figure it out.
Cleaning, maintenance, and dealing with pests
Because flat-surface bird tables carry the highest disease risk of any feeder type, cleaning is not optional, it's the most important thing you do after building the table. The basic routine is cleaning every two weeks as a minimum, with more frequent scrubs during wet or humid weather, heavy use periods, or if you spot any sick-looking birds in your garden.
Cleaning routine
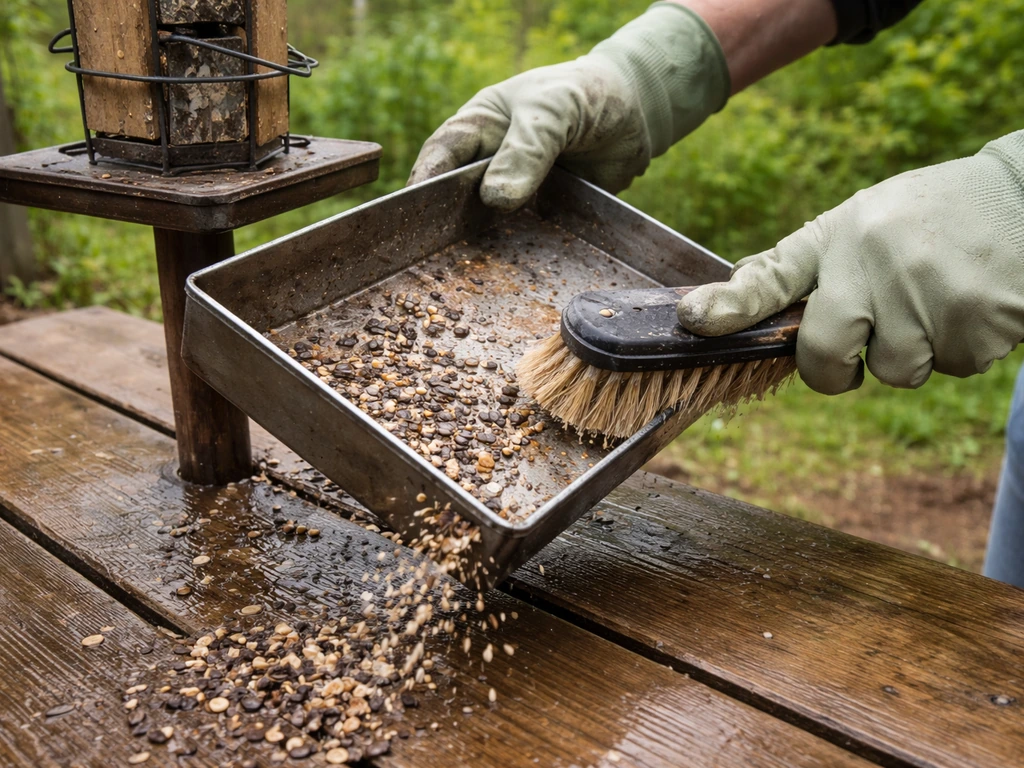
- Remove the tray (this is why a removable design is worth the extra effort at build time) and tip out any leftover seed and debris.
- Scrub the tray surface with a stiff brush and hot soapy water. A bottle brush works well for clearing drainage holes.
- Disinfect with a dilute bleach solution — 9 parts water to 1 part bleach is the standard ratio. Apply, let sit for a minute or two, then rinse thoroughly.
- Rinse with clean water at least twice and let the tray dry completely before refilling. Never refill a wet tray — damp seed goes moldy fast.
- Wear gloves while cleaning and avoid breathing in dust from old seed debris. Wash your hands after even with gloves.
For the post and roof, a monthly wipe-down with soapy water is enough. Check the post base yearly for rot, and inspect screws and joints at the start of each season. Cedar will grey naturally over time, that's fine and doesn't affect performance. If you used pine, check the edges of the tray floor each spring for delamination if you're using plywood, and replace the tray board before it starts to splinter.
Troubleshooting common problems
- Squirrels raiding the table: Add or reposition your cone baffle, check that no fence or branch is within 10 feet, and consider switching to safflower or nyjer which squirrels tend to ignore.
- Larger birds dominating: Shorten your perch rails further, reduce the tray size, or switch food types. Safflower and nyjer both deter feeder hogs like grackles and starlings.
- Food getting wet and spoiling quickly: Check that your drainage holes are clear and the tray tilts slightly. Only put out what birds eat in a day. A roof that overhangs more generously (up to 4 inches) helps.
- Birds not visiting: Be patient — new feeders can take 1 to 3 weeks to be discovered. Check placement isn't too exposed, too close to foot traffic, or too far from cover. Try scattering a little seed on the ground below as a visual attractant.
- Mold on seed: You're putting out too much food or cleaning too infrequently. Reduce portion size, clean every week during wet weather, and always let the tray dry before refilling.
- Pigeons or collared doves taking over: If pigeon-proofing is a serious concern, the design approach for that is a separate project in itself — a covered, cage-style feeder is the most effective solution for keeping larger birds completely out while still serving small species.
The whole point of building this yourself rather than buying something off the shelf is that you can tune it as you go. If the perch rails are too high, cut them down. If the tray is too big and attracting pigeons, build a smaller replacement tray. Wood is forgiving like that. Start simple, watch who's visiting, and adjust from there, that's genuinely the most effective approach, and it's a lot more satisfying than reading the instructions on a flat-pack feeder.
FAQ
How much of a roof do I need if I’m already using a removable tray and drainage holes?
Even with perfect drainage, wind-driven rain and heavy dew will still wet seed. A roof that overhangs the tray by about 2 inches on every side is usually enough, but if your table is in a rain shadow where water blasts in from one direction, extend the cover more on that side (or add a small vertical skirt) so the tray front stays drier.
Should I use mesh, slats, or a solid plywood floor for better hygiene?
For small birds, a solid surface with drainage and a removable tray is typically easier to keep sanitary and safer for beaks. Mesh or widely spaced slats can trap wet seed and debris under the table, making it harder to scrub, and they may also let feet slip for smaller species. If you want airflow, keep it to a solid tray with drilled drainage holes and regular cleaning.
What’s the best way to prevent mold when seed gets damp?
Tilt helps, but also control how much you add. Use shallow refills (enough for a day), avoid mixing wet or clumped seed back into the tray, and empty and scrub promptly after extended rain. If you see any blackened or sour-smelling seed or birds coughing or acting lethargic, stop feeding from that surface until you’ve cleaned it thoroughly and let it dry completely.
How do I know if my perch rails are working, or if they’re still inviting bigger birds?
Watch landing behavior. If larger birds can perch comfortably and shield themselves from the weather, your rails are likely too tall or too long. Keep rails under 14 inches and no higher than about half an inch above the tray, and consider shortening the usable rail length further (for example, removing rail sections at the ends) so only small birds can get stable access.
Can I use the table for suet year-round, or should I switch foods seasonally?
You can offer suet longer, but heat and humidity increase spoilage risk. In warm weather, use smaller suet portions and refresh more often, and consider switching to dry seeds if you notice grease or condensation collecting on the tray. In winter, suet is a strong option for insect-eating species, but you still need the same cleaning frequency because disease risk remains high with flat feeding surfaces.
What seed mix should I use if I keep getting grackles or starlings taking over?
If larger birds dominate, try safflower as a primary or a majority component, since many grackles and starlings largely ignore it. Keep black oil sunflower in smaller proportions so finches and chickadees still get what they need, and avoid overfilling the tray, because excess seed increases the time larger birds can spend defending the spot.
How can I safely attract birds if they don’t find the new table quickly?
Use a gradual cue strategy: for the first few days, place a small amount of seed directly under the table so birds learn the food source location, then reduce that ground amount once they start feeding from the tray. Also check visibility from natural perches, if nearby branches or shrubs block line of sight, birds may be hesitant even if they’re in the area.
How do I clean it without making the surface hard to maintain or damaging the wood finish choices?
For the tray and food-contact surfaces, remove the tray and scrub using hot water and a brush, then rinse and fully dry before refilling. Avoid leaving standing cleaner or detergent residue. Since the safest approach is no finish on food-touching areas, focus on thorough drying and regular inspection rather than trying to seal the top, which can crack and create hard-to-clean gaps.
What’s the safest way to deter squirrels if baffles and height aren’t fully stopping them?
First confirm the baffle size and placement are correct, at least about 17 inches diameter and positioned around 4 to 5 feet off the ground. Next, check that the tray is truly bolted and not slightly loose, even a minor wobble helps squirrels exploit gaps. If you still get access, reduce mounting height (for example, closer to 4 feet) and remove nearby launch routes like overhanging branches or stacked objects within reach.
Is it okay to put the table close to a fence for convenience, or does that increase risk?
It increases risk. Squirrels and larger birds can use fences, walls, and overhanging branches as launchpads or vantage points. A safer rule is to keep the table at least 10 feet from fences, walls, and overhanging limbs, then use nearby shrubs at the recommended distance to give small birds dash-to cover without creating ambush lanes.
Next Articles
How to Make a Bird Table Out of Scrap Wood
Step-by-step DIY bird table from scrap wood: cut list, assembly, weatherproofing, safety checks, and easy upgrades
How to Make a Simple Bird Table: Plans, Dimensions, Build
Step-by-step plans for a stable outdoor bird table: dimensions, frame build, weatherproofing, setup tips, and wobble fix
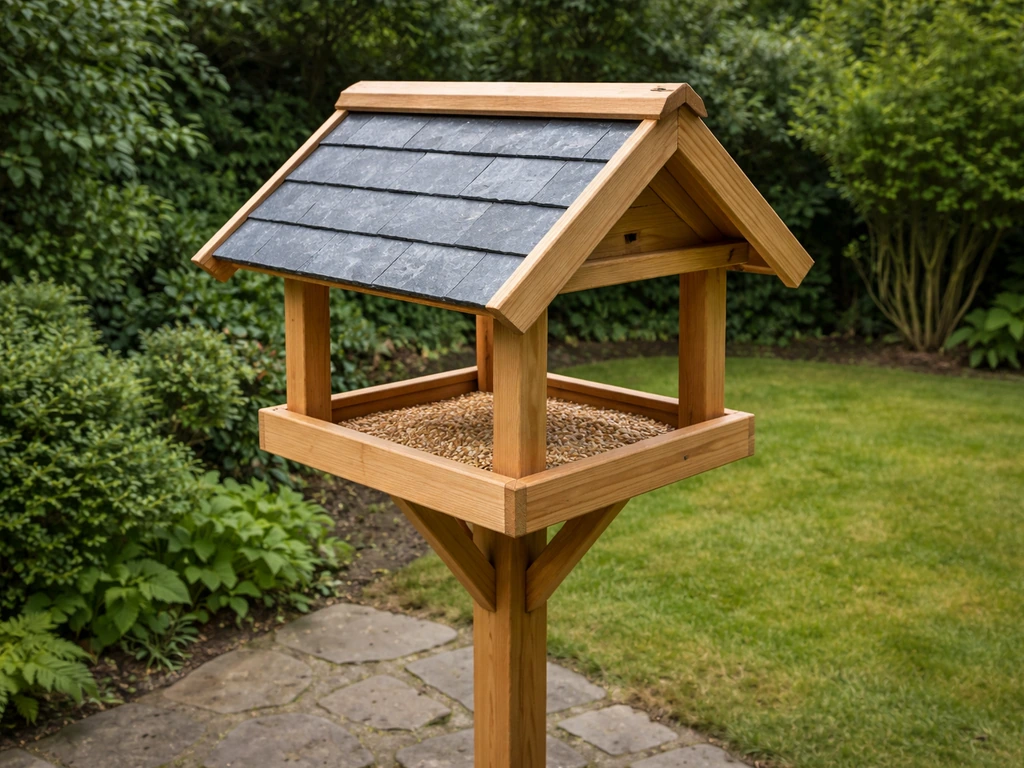
How to Build a Bird Table With Roof: DIY Guide
Step-by-step DIY build for a roofed bird table, including slate roof fitting, waterproofing, drainage, and safe backyard