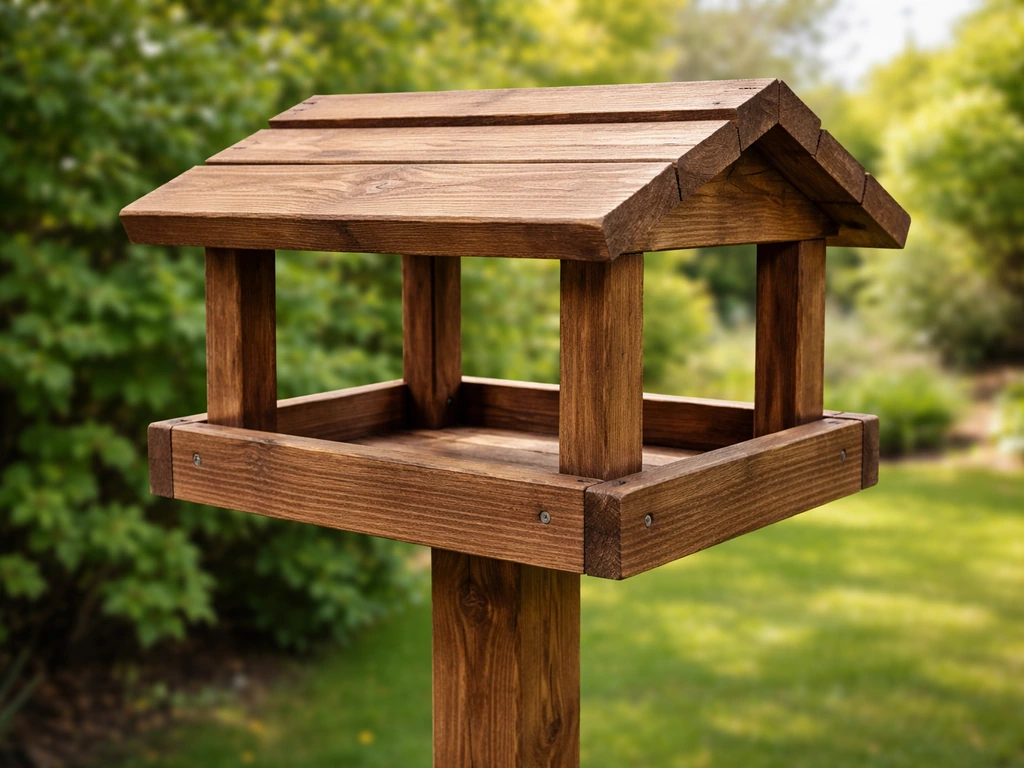
You can build a solid, weatherproof bird table from scrap wood in an afternoon using nothing more than basic hand tools. A simple flat platform on a post, standing about 5 feet off the ground, with drainage holes drilled in the tray and a lick of bird-safe finish is genuinely all it takes. The build covered here uses a cut list you can adapt to whatever lengths you have lying around, so nothing goes to waste and the whole project can cost you next to nothing.
How to Make a Bird Table Out of Scrap Wood

Marcus Thornton
27 Apr 2026
Choosing the right scrap wood and supplies
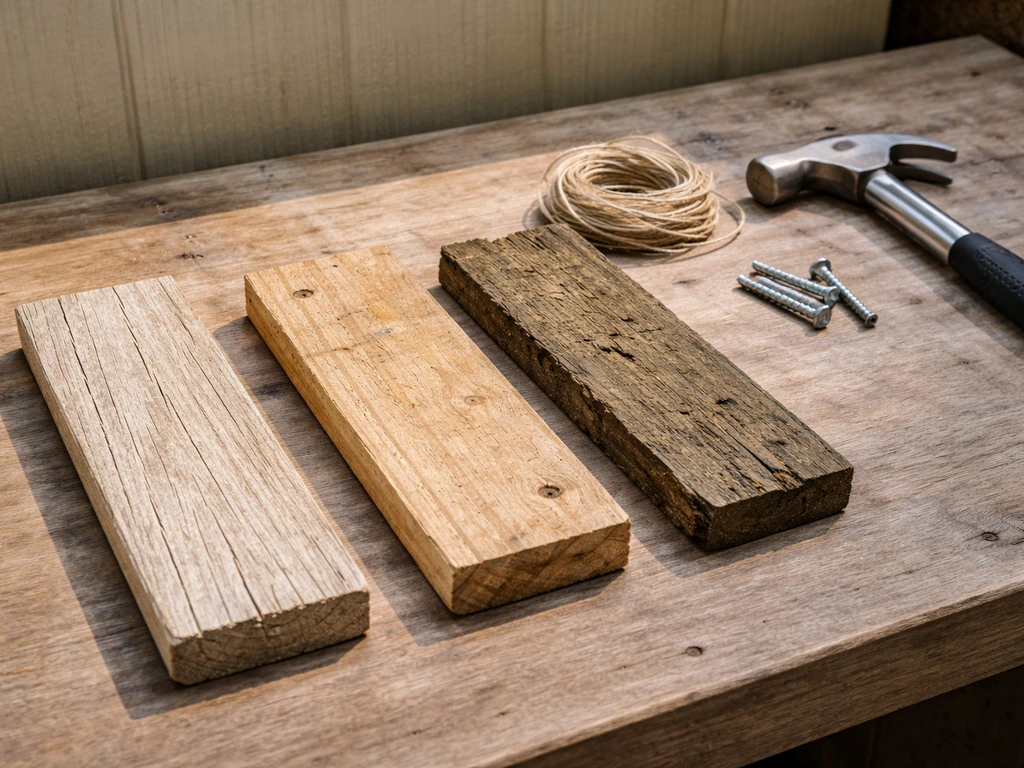
Not all scrap wood is created equal when birds are involved. The single most important rule: avoid pressure-treated lumber entirely. It's infused with chemical preservatives under pressure, and older stock can contain chromated copper arsenate (CCA). Even newer formulations aren't something you want birds pecking around on or standing in rain puddles that have pooled on. The North American Bluebird Society puts it plainly: don't use pressure-treated wood for any wildlife structure. Similarly, skip anything that smells of creosote or has been painted with old lead-based paint. Untreated wood is the safe choice, full stop.
The best scrap sources are old fence boards, pallet wood (make sure it's heat-treated, marked HT, not chemically treated), leftover decking planks, or offcuts from previous projects. Softwoods like pine and cedar work perfectly. Cedar is ideal because it naturally resists rot, but pine with a good finish will last just as well. Aim for pieces that are at least 3/4 inch thick for the tray and post components so the structure has real rigidity. Avoid anything warped beyond use or with deep splits running through the grain.
For supplies beyond the wood itself, you'll need exterior-grade screws (stainless steel or galvanized, 1.5 inch and 2.5 inch lengths), waterproof wood glue, a drill with a 1/4 inch bit for drainage holes, sandpaper (80 grit and 120 grit), and a bird-safe outdoor finish. That's genuinely the whole supply list for a basic build.
Designing your bird table: size, placement, and stability
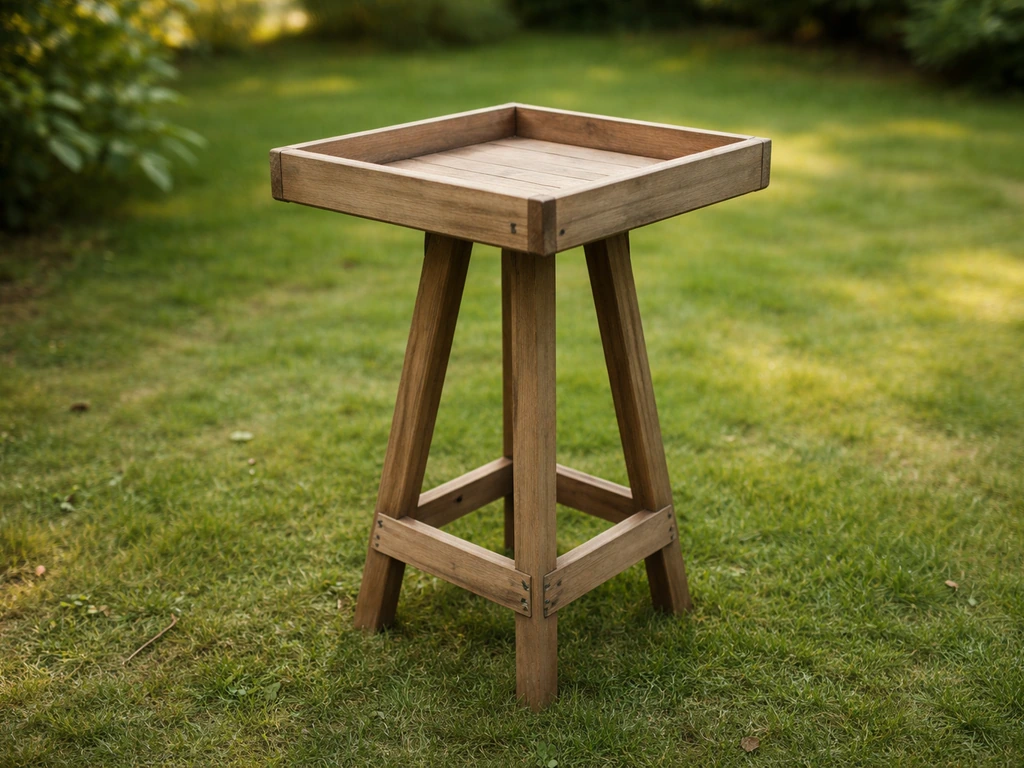
A workable bird table tray is around 12 by 18 inches at minimum, and 16 by 24 inches if you want to attract a wider range of species and give birds enough personal space to feed without squabbling too much. To make a bird table for small birds, size the tray and openings so small species can feed comfortably and safely. The tray sits on top of a post, and that post needs to put the feeding platform roughly 5 feet off the ground. The Michigan DNR recommends at least 5 feet, and most sources agree that 5 to 6 feet is the sweet spot: high enough to deter cats and make squirrels work harder, low enough that you can actually reach in to clean and refill it. To make it truly cat proof, raise the feeding tray to the recommended height and place it away from climbable cover so cats cannot ambush birds.
For the post itself, a 4x4 fence post or a thick offcut of 3x3 lumber works well. If you're freestanding it in the garden, sink roughly 18 to 24 inches into the ground and concrete it in for stability, which means your above-ground post length needs to be about 6.5 to 7 feet total. If you'd rather not dig, a heavy timber base (a crossed-board footing) works on patios or hard surfaces, though it won't survive a strong wind as confidently as a dug post will.
Placement matters more than most people expect. Position the table in a spot that's visible from a window so you can actually enjoy it, at least 10 feet from dense shrubs where cats can hide and launch from, but close enough to a tree or hedge that nervous birds have a perch to scout from before dropping down to feed. Avoid positioning it directly under a large tree if squirrels are a concern, since they'll use overhanging branches as a launch pad.
Step-by-step build process for a wooden bird table
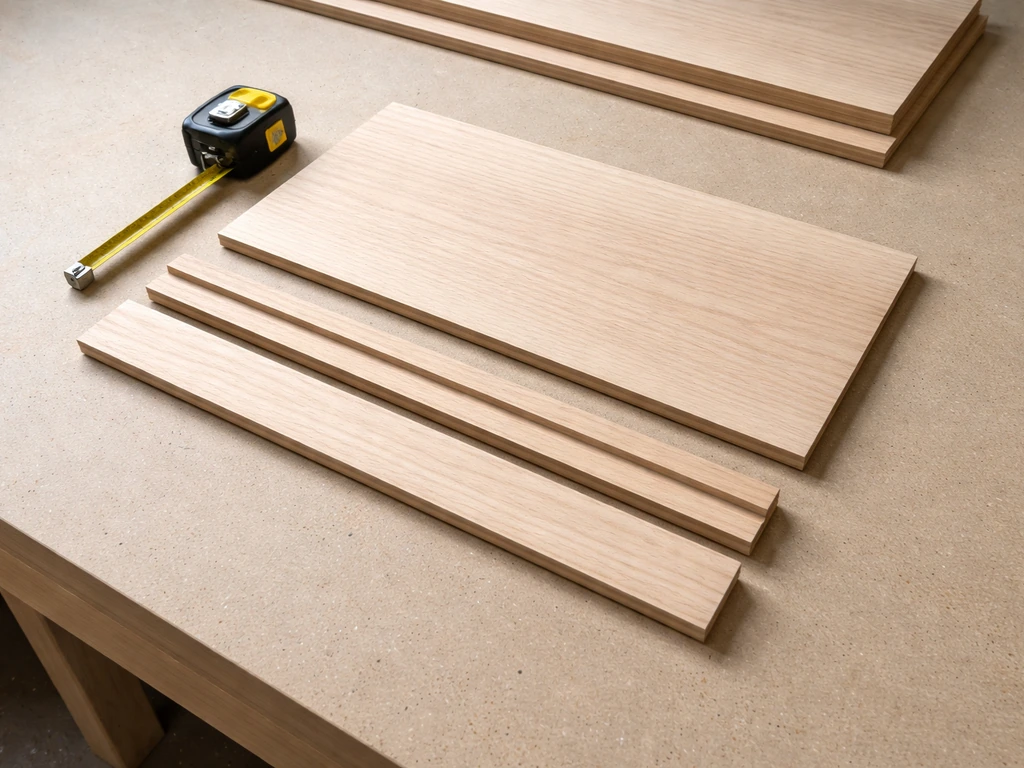
Your cut list
| Part | Dimensions | Quantity | Notes |
|---|---|---|---|
| Tray base | 16" x 24" x 3/4" | 1 | Can be a single board or two narrower boards glued/screwed edge-to-edge |
| Tray lip (long sides) | 24" x 1.5" x 3/4" | 2 | Retains seed without blocking drainage |
| Tray lip (short sides) | 13.5" x 1.5" x 3/4" | 2 | Fits between long side lips |
| Post | 4x4 or 3x3 x 84" (7 ft) | 1 | Adjust for sinking depth and desired height |
| Post-to-tray support bracket | 6" x 6" x 3/4" | 1 | Mounts atop post to spread load under tray |
| Cross-base feet (if no dig) | 24" x 3.5" x 1.5" | 2 | Crossed and bolted for freestanding option |
Assembly, step by step
- Cut all pieces to length and sand every face and edge to 120 grit. Sharp splinters on a feeding tray can injure birds' feet, so this step matters for safety, not just aesthetics.
- If you're edge-joining boards to make the tray base wide enough, run a bead of waterproof wood glue along the mating edges, clamp them together, and let them cure fully before moving on (usually a couple of hours minimum).
- Drill 1/4 inch drainage holes across the tray base, spacing them roughly every 3 to 4 inches in a grid pattern. Project FeederWatch is specific about this: platform feeders need plenty of drainage to stop water pooling, which leads to mold in seed and bacteria in standing water. Don't skip this.
- Screw the tray lips onto the edges of the tray base using 1.5 inch exterior screws, pre-drilling to avoid splitting. Leave a small gap at each corner rather than running lips fully corner-to-corner. These gaps let water run off the edges of the tray rather than pooling in the corners.
- Attach the 6x6 bracket square to the flat top of the post using two 2.5 inch screws driven up from underneath (or use a metal post cap if you have one in the scrap pile). This spreads the load and stops the post top from splitting over time.
- Flip the tray assembly upside down, centre the post (with its bracket) on the tray base, and drive four 2.5 inch screws down through the tray into the bracket from above. Check it's square before fully tightening.
- If you're using the cross-base option, notch the two base boards at their midpoints so they sit flush when crossed, and bolt them together with a 3/8 inch carriage bolt through the centre. Screw the post to the centre of the cross from two sides using metal angle brackets.
- If you're sinking the post into the ground, do your finishing and weatherproofing before installation (next section), then dig your hole, drop the post in, check it's plumb with a spirit level, and backfill with postcrete mixed to a thick consistency.
Finishing and weatherproofing for outdoor birds
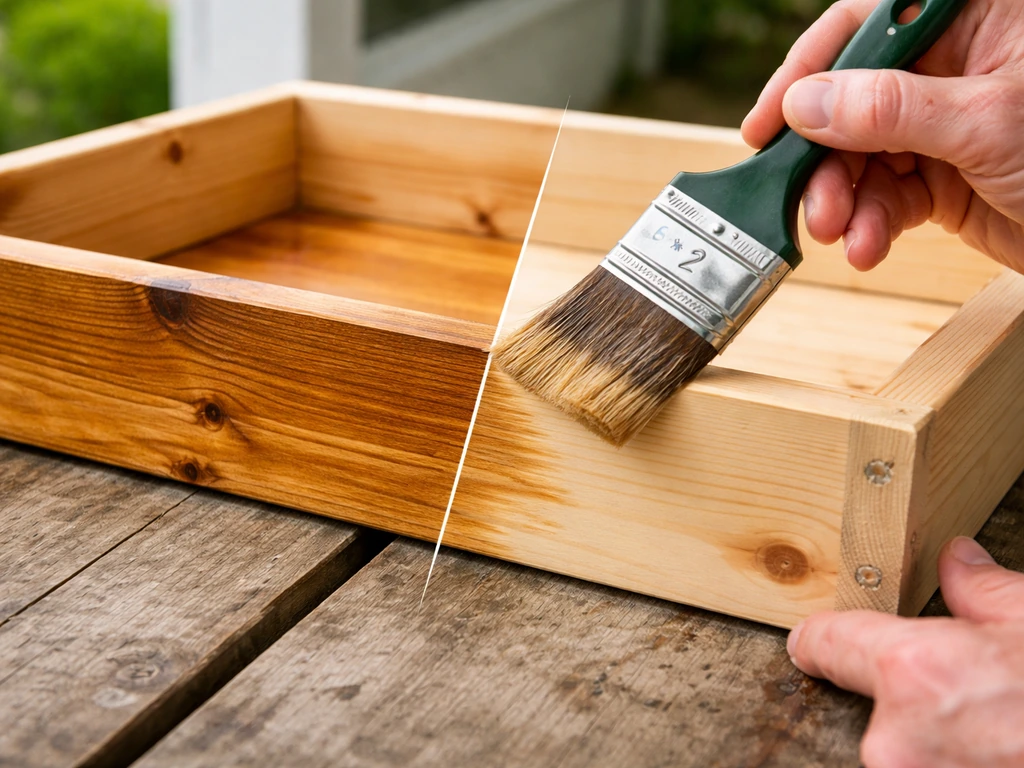
This is the step people rush and then regret. A bare pine tray will start to degrade within one season in most climates. The good news is that bird-safe finishing options are easy to find and apply. Add a simple roof over the tray to keep seed drier and reduce rain-splash on birds and their food bird-safe finishing options are easy to find and apply. Your two best choices are linseed oil (boiled linseed oil dries faster than raw) and pure tung oil. Both are non-toxic once cured, penetrate the wood rather than sitting on the surface, and handle outdoor exposure well. Tung oil takes longer to fully cure, around 3 to 4 weeks for a complete hardened finish, so factor that in before you put it into service. Apply two to three coats, letting each one soak in and dry fully before the next.
If you'd rather use a wood stain or exterior paint on the post and underside of the tray (avoiding the feeding surface itself), use a water-based exterior product and let it cure completely before birds come near it. Don't apply any finish in rain or when rain is expected within 12 hours: moisture trapped under a coating promotes exactly the mold and mildew you're trying to prevent.
One honest lesson from early builds: it's tempting to oil just the tray and leave the post bare because it seems like extra work. The post base, especially the section just above ground level, takes the worst weather punishment of the whole structure. Give it as much attention as the tray and it'll last years longer.
Optional add-ons: tray types, seed choices, clean-out, and pest-proofing
Removable tray insert
The single most useful upgrade is making the tray removable rather than permanently fixed to the post. You can also improve how to secure a bird table by adding a removable tray for easier cleaning and pest control. Instead of screwing the tray down permanently, rest it on the bracket and secure it with two wing-bolts. This means you can lift it off, take it inside to clean, and put it back in minutes. If you are also looking for beginner simple bird house plans, you can use the same approach and adapt the removable tray style to a small nesting box design. You'll actually clean it properly if it's easy to remove, and that makes a real difference to bird health.
What seeds to use
Platform feeders attract a wide range of birds depending on what you put out. Black oil sunflower seed is the best all-round choice: high fat content, thin shells, and almost every seed-eating bird species will take it. Millet attracts ground-feeding birds like sparrows and juncos. Safflower is particularly good if you want to quietly deter starlings and blackbirds (they tend to avoid it). Avoid cheap mixed seed bags that are padded out with milo and red millet, since most desirable birds will throw it all on the ground looking for the good bits.
Squirrel and pest deterrence
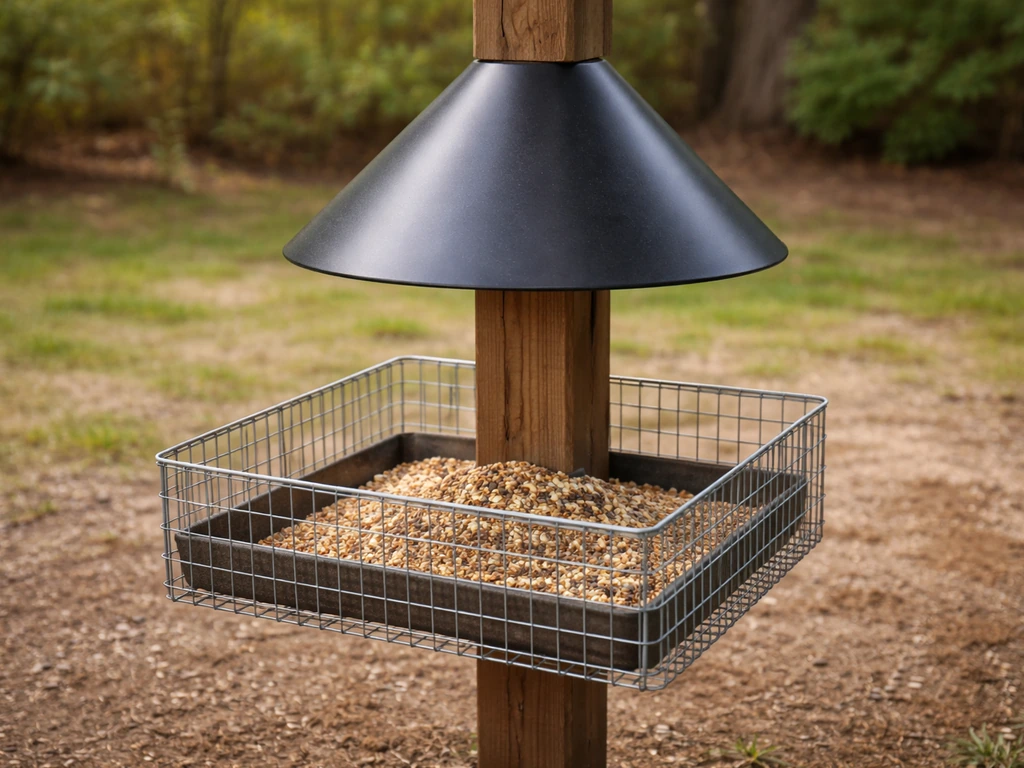
If squirrels are a problem in your yard, a pole-mounted baffle is the most effective solution by a significant margin. Mount a cone-shaped or cylindrical baffle on the post at least 4 feet off the ground and below the tray. The U.S. Fish and Wildlife Service agrees: a pole with a properly positioned baffle is the least aggravating long-term solution to squirrel management. The positioning detail matters, though. The baffle needs to be high enough that squirrels can't jump above it from the ground (hence 4 feet minimum), and the table itself needs to be far enough from fences, sheds, and overhanging branches that they can't bypass the baffle entirely by launching from the side.
If pigeons are a recurring issue, a cage or mesh frame around the tray sides (with gaps around 2 inches wide) lets smaller birds in while excluding larger ones. If pigeons are a recurring issue in your yard, you can also make the bird table pigeon proof with a cage or mesh frame around the tray. This is a more involved modification but genuinely effective. There's more detail on approaches like this if you're specifically dealing with a pigeon problem at your feeding station.
Safety checks and ongoing maintenance
Before you put seed out for the first time
- Run your hand over every edge and corner of the tray, feeling for splinters or rough spots. Birds spend a lot of time walking on the tray surface, and a sharp edge can cut a foot. Sand anything you find.
- Wiggle the post firmly in all directions. It should have zero movement. If you're using a cross-base on a hard surface, check that all bolts and screws are tight and that it doesn't rock.
- Confirm your finish is fully cured and that there are no tacky or solvent-smelling patches remaining on the tray surface.
- Check that drainage holes are clear and unobstructed.
Cleaning routine
Audubon's guidance on bird feeders is blunt: keep them scrupulously clean. In practice that means scrubbing the tray with warm soapy water every couple of weeks to remove old seed husks, droppings, and debris, and doing a proper disinfection once a month. In practice that means scrubbing the tray with warm soapy water every couple of weeks to remove old seed husks, droppings, and debris, and doing a proper disinfection once a month blank" rel="noopener noreferrer">using a 1:9 bleach-to-water solution. For disinfection, a solution of blank" rel="noopener noreferrer">1 part bleach to 9 parts water (a 10% bleach solution) is the standard recommendation from Cornell Lab of Ornithology, Iowa DNR, and Mississippi State University Extension. Audubon also cites the National Wildlife Health Center recommendation to clean feeders and birdbaths with a 9-to-1 water-to-bleach solution Three Easy but Important Ways to Keep Your Bird Feeder Disease. Soak the tray for 10 minutes, scrub, rinse thoroughly, and let it air dry completely before refilling. A damp tray with fresh seed is a fast track to mold, and moldy seed is genuinely harmful to birds.
Seasonal maintenance
Once a year, ideally in early spring before peak feeding season, inspect the whole structure. Check the post at ground level for rot (probe the wood with a screwdriver: if it sinks in easily, the wood is compromised). Re-oil or re-coat any areas where the finish has worn through, especially the top face of the tray. Tighten any screws that have worked loose over the freeze-thaw cycles of winter. A bird table built from decent scrap wood and maintained properly will outlast one bought flat-packed from a garden centre by years. This project is genuinely one of the most satisfying builds you can do in an afternoon, and birds start showing up faster than you'd expect. If you follow these steps for a simple bird table build, you will end up with a setup birds can use right away.
FAQ
What type of scrap wood should I avoid if I am not sure where it came from?
If you cannot confirm the lumber is untreated (for example, pallet boards without a clear HT marking), skip it. Don’t rely on color or age alone, since some older painted boards may contain lead and some “reclaimed” boards may have been treated even if they look weathered.
Can I use pressure-treated wood if I seal it completely?
It is best not to. Sealing can reduce exposure, but it does not make treated chemicals safe for birds that peck and stand in wet areas, and a seal can wear off at joints and edges where birds spend time.
How do I make sure drainage holes do not turn into water routes or weak spots?
Drill a small number of holes (spaced across the tray bottom) and keep them well away from board edges so you do not crack the wood. If the tray is made from multiple planks, drill each section so water can escape from all areas, not just one side.
Is it okay to use a drill bit larger than 1/4 inch for drainage holes?
Avoid going much larger. Oversized holes reduce tray strength and can trap debris that blocks drainage. If you need bigger holes for a specific design, add more holes instead of fewer larger ones.
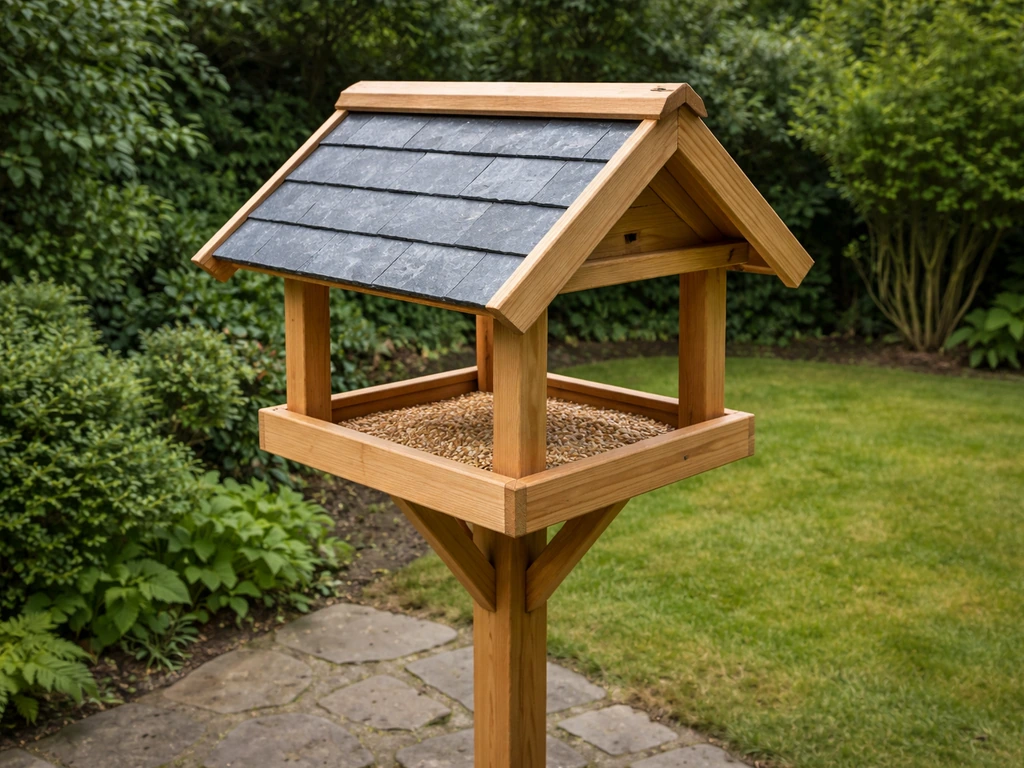
Do I need a roof, or will the tray stay fine without one?
A roof helps most in rainy or snowy regions, mainly by keeping seed from staying damp and reducing rain splash onto birds. If you skip the roof, increase how often you clean and replace seed, and plan to inspect for faster finish wear after wet spells.
What should I do if tung oil or linseed oil finishes still feel tacky after a few weeks?
Let it cure longer before refilling. Tacky finish can attract dirt and moisture and may be less safe for birds. If you are in humid weather, cure time can stretch beyond 3 to 4 weeks for tung oil.
Can I put the bird table closer to my house than 10 feet from shrubs?
Yes, but only if you can maintain visibility and reduce cat ambush cover. The key is avoiding dense, concealment-friendly vegetation within a short approach distance of the feeder, even if it is not a full 10 feet.
How far from trees and hedges should the feeder be if I am worried about squirrels?
Keep it far enough that squirrels cannot simply launch from a reachable overhanging limb to the tray. As a practical rule, do not place it under branches that touch or nearly touch the feeder height, and reposition rather than relying only on a baffle if a “jump line” exists.
What is the best way to stop mold if I keep getting damp seed?
Use a dry-seed approach and reduce trapped moisture, keep the tray fully drained, and do not apply any finish in wet or soon-to-rain conditions. Also consider smaller seed quantities and more frequent refills so the seed does not sit long enough to mold.
How often should I change food even if I clean the tray regularly?
In humid weather, replace seed more frequently than you would in dry weather. If the seed clumps or smells stale, dump it, rinse, and dry the tray before refilling, since old damp husks can seed mold.
What is the safest way to disinfect when temperatures are cold?
Do the monthly disinfection during a warm window so the tray can air dry completely. If it stays damp after the rinse, mold risk increases, so avoid refilling until the tray is fully dry.
How can I tell whether a fixable finish problem is “wear” or “water damage”?
If you see peeling, soft or darkened wood at the ground line or tray edges, treat it as water damage and re-coat after drying thoroughly. If finish is only dull or slightly worn on the surface, light sanding and an additional coat is usually enough.
How do I reduce pests besides adding squirrel baffles?
Improve the cleaning routine and avoid overfilling. Removing husks frequently and keeping spilled seed off the ground near the legs reduces attractants, even when you have a baffle.
Next Articles
How to Make a Simple Bird Table: Plans, Dimensions, Build
Step-by-step plans for a stable outdoor bird table: dimensions, frame build, weatherproofing, setup tips, and wobble fix
How to Build a Bird Table With Roof: DIY Guide
Step-by-step DIY build for a roofed bird table, including slate roof fitting, waterproofing, drainage, and safe backyard

How to Make a Bird Table Pigeon Proof: DIY Fixes
Retrofit and build tips to stop pigeons landing and feeding on a bird table with baffles, guards, and clearances.